


No matter whether you’ve already worked with jewelry-casting resins or you always wanted to try them but never got the chance, we have great news for you! We’ve just added a fantastic new resin to our e-shop. BlueCast X-One offers excellent printability with the finest detail and offers an unusual possibility of chemical curing with no need for a curing station. To prove that this resin is something truly special, we asked the Clear Mind Jewellery casting studio to run extensive testing for us. Don’t forget to watch the video!
How does casting resin work?
If you’re a beginner or just a 3D printing enthusiast who’s interested in the principles of jewelry casting resins, we’ll try to sum up the process for you – experienced jewelers may find the following paragraph to be pretty much a recap of what they already know. 🙂
The principle is quite simple: print the jewelry model from SLA resin, add sprues to it, pour a liquid gypsum investment around it, remove air bubbles and let it dry. Then, the investment goes into the kiln for burnout, where resin and sprues melt (or burn) away, leaving hollow behind. Then, the hollow is filled with molten metal, cooled down and the rough product is ready for some final processing. Generally speaking, there are many resins that can be used for jewelry casting, even the simplest – tough resins. However, if it would be that easy, there wouldn’t be any casting resins in the market. There are certain conditions that should be taken into account. The first is maximum print detail – for printing filigree – this varies between different resin types, brands and even printers. Next, there’s burning temperature – various resins have different full burnout temperatures. And finally, there’s remaining ash after the burnout. Ash is one of the most problematic elements: tough resins are pretty much useless for fine casting since there is a huge amount of ash remaining after the burnout. Jewelry casting resins, on the other hand, are mixed in a way to get the finest details and practically zero ash after the burnout. This way it’s possible to make professional jewelry without much trouble.
What makes X-One so special?
The BlueCast X-One is a professional resin compatible with monochromatic SLA 3D printers, such as our SL1S SPEED. Part of the resin mixture is wax which gives the resin its unique properties: the resin melts when heated and then burns like paraffin. This helps the perfect burnout without leaving ash in the hollowed areas. The manufacturer claims that the X-One doesn’t contain any carcinogens and emits negligible odor and fumes. Liquid resin has low viscosity and solidifies at 18 °C (64 °F), that’s why it’s necessary to work with it at temperatures ranging from 20 to 30 °C (68 to 86 °F). A temperature-sensitive strip showing orientational temperature helps if you don’t have a thermometer around. The manufacturer recommends mixing the X-One with Filigranizer when printing fine (filigree) structures.
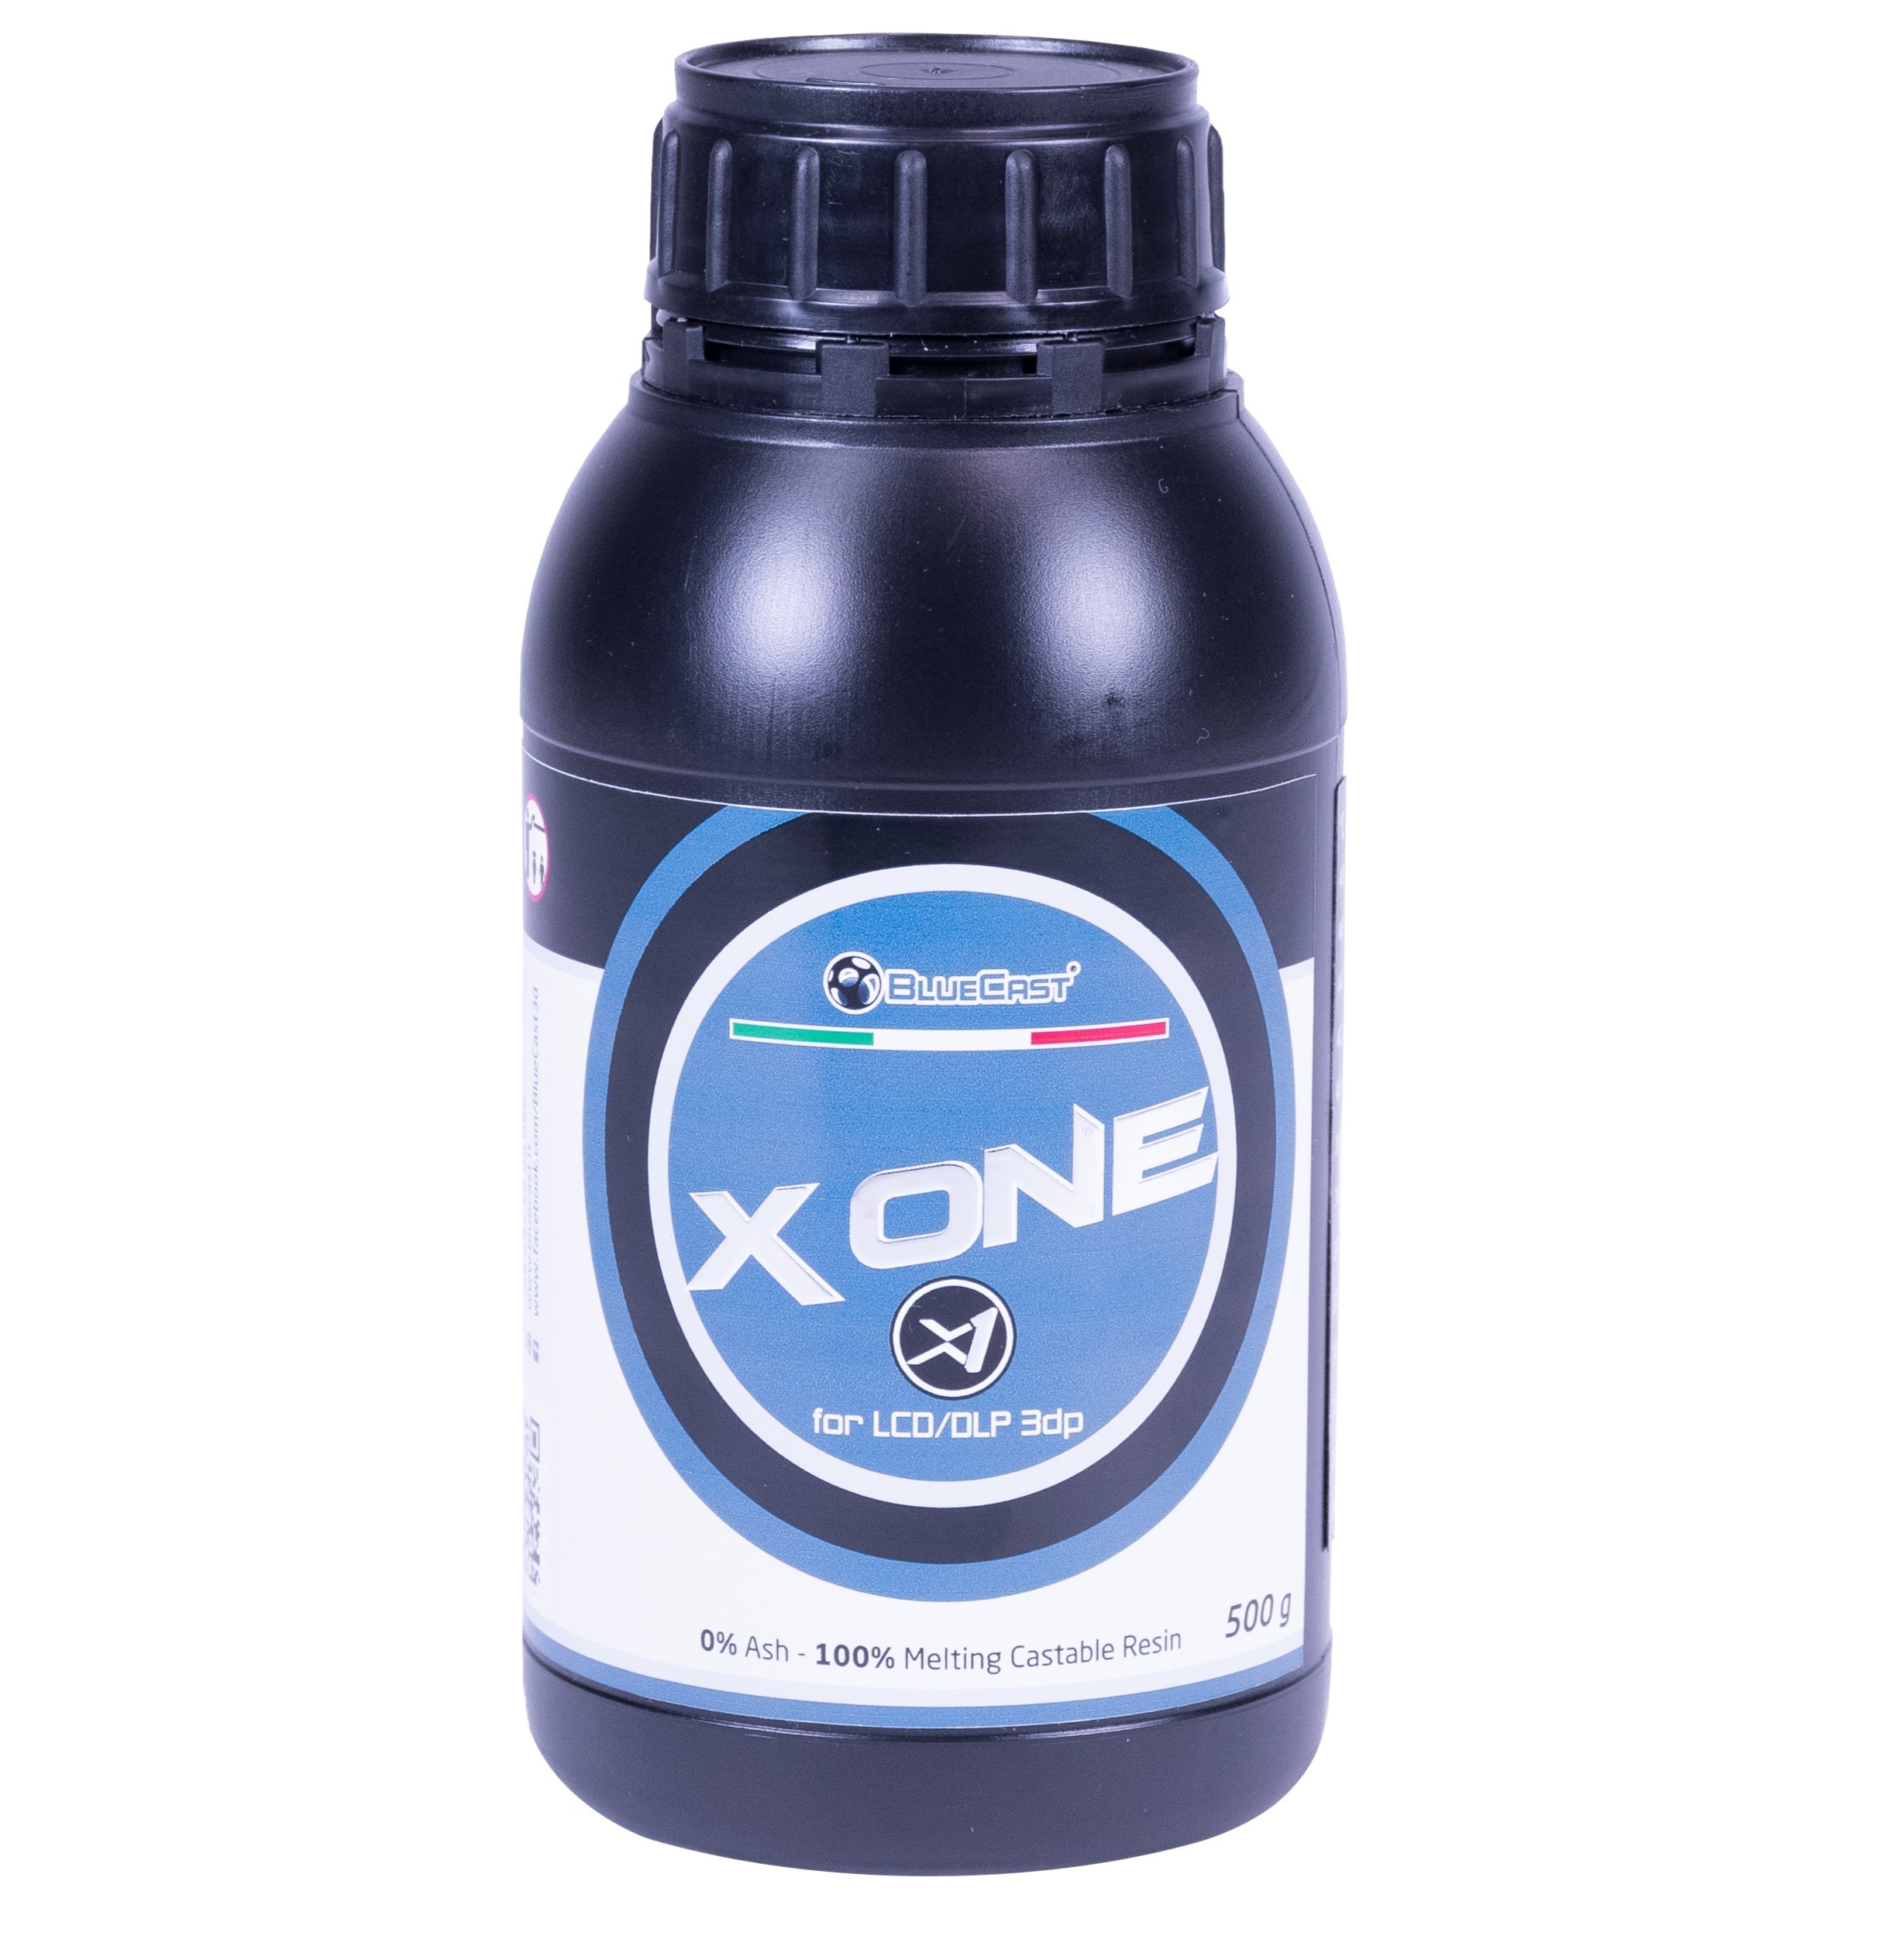
The BlueCast X-One is now available in our e-shop for $119 / € 143.99 (incl. VAT) per 0.5 kg bottle.
Step-by-step printing and curing instructions
The resin and printed models have a dark green color and are relatively soft due to the wax inside. It’s necessary to print with a slow print profile for the lowest chance of print failure. The BlueCast X-One comes with a non-traditional option of chemical curing instead of the standard UV curing method. A properly cured model should have a light grey matt surface.
For the best results, we recommend the following procedure:
- Preheat the bottled resin to 30 °C (86 °F, with CW1S, warm water, or microwave).
- Shake well before use, the manufacturer recommends at least 1-minute shaking.
- Let the resin rest for 5 minutes after pouring it into the vat. This helps eliminate bubbles. You can also use a vacuum pump to eliminate the bubbles.
- Print with following print settings: 0.05 mm – 7/25 s slow profile, 0.025 mm – 6/25 s slow profile, 0.1 mm – 8.5/25 s – slow profile. All print profiles for SL1S SPEED are already in PrusaSlicer.
- Uncured models have a dark greenish color. The best casting properties will be achieved after a successful curing process, which is indicated by a grey matt surface. This can be done by chemical postprocessing which provides the best casting and mechanical properties. Alternatively, a UV curing with CW1S can be done (1 min. washing and at least 15 min. curing) but with non-consistent results.
Chemical postprocessing
The chemical postprocessing is done with proper washing and drying. BlueCast recommends washing the models in 91 % or 99 % ethyl alcohol but we found out that isopropyl alcohol (99.9 %) works as well, with one small difference – it’s necessary to wash models approx. 5 minutes longer. The real washing time depends on the size and shape of the model. Tiny structures may get washed well enough after 10 minutes, while larger models might need longer washing times. For specific parts, you’ll have to do your own research.
The next critical step is drying. If this and the previous step were done properly, drying should result in a grey matt surface all over the 3D-printed model. In case the process wasn’t successful, the model will remain partly dark green and the process needs to be repeated. Small dark spots usually don’t cause much trouble and can be left as they are without repeating the curing process. The best way of proper drying is direct exposure to hot air (hairdryer, CW1S, heat gun) right after removing the model from the alcohol bath, while it’s still wet. Larger models react best to a heat gun preheated at 150 °C (302 °F) but high temperatures may damage tiny (filigree) structures and may cause warping of larger structures (supports and similar parts). The ideal compromise is 15 min. drying in CW1S preheated to 60 °C (140 °F).

Uncured (left) and properly cured print (right)
Mixing the investment and burnout
Once the post-processing is done, the model needs to be put into the flask with gypsum investment, burned in the oven and the cavity filled with molten metal. The manufacturer recommends burning the resin at 750 °C (1382 °F) but guarantees full burnout at 680 °C (1256 °F). We haven’t had the chance to try burning or casting the models ourselves due to a lack of equipment and necessary skills. That’s why we asked the Clear Mind Jewellery casting studio to try the whole process and document every step. The values may differ for various flask sizes and investment types but this is the procedure they used in the video linked above:
- Water removal at 150 °C (300 °F) for 1-3h
- Thermal transition stage 150-370 °C (300-700 °F) for 1-2h
- Hold 370 °C (700 °F) for 1-2h
- Pattern removal stage 370-730 °C (700-1350 °F) for 2-3h
- Hold 730 °C (1350 °F) for 2-3h
- Reduce to casting temperature over 1-2h
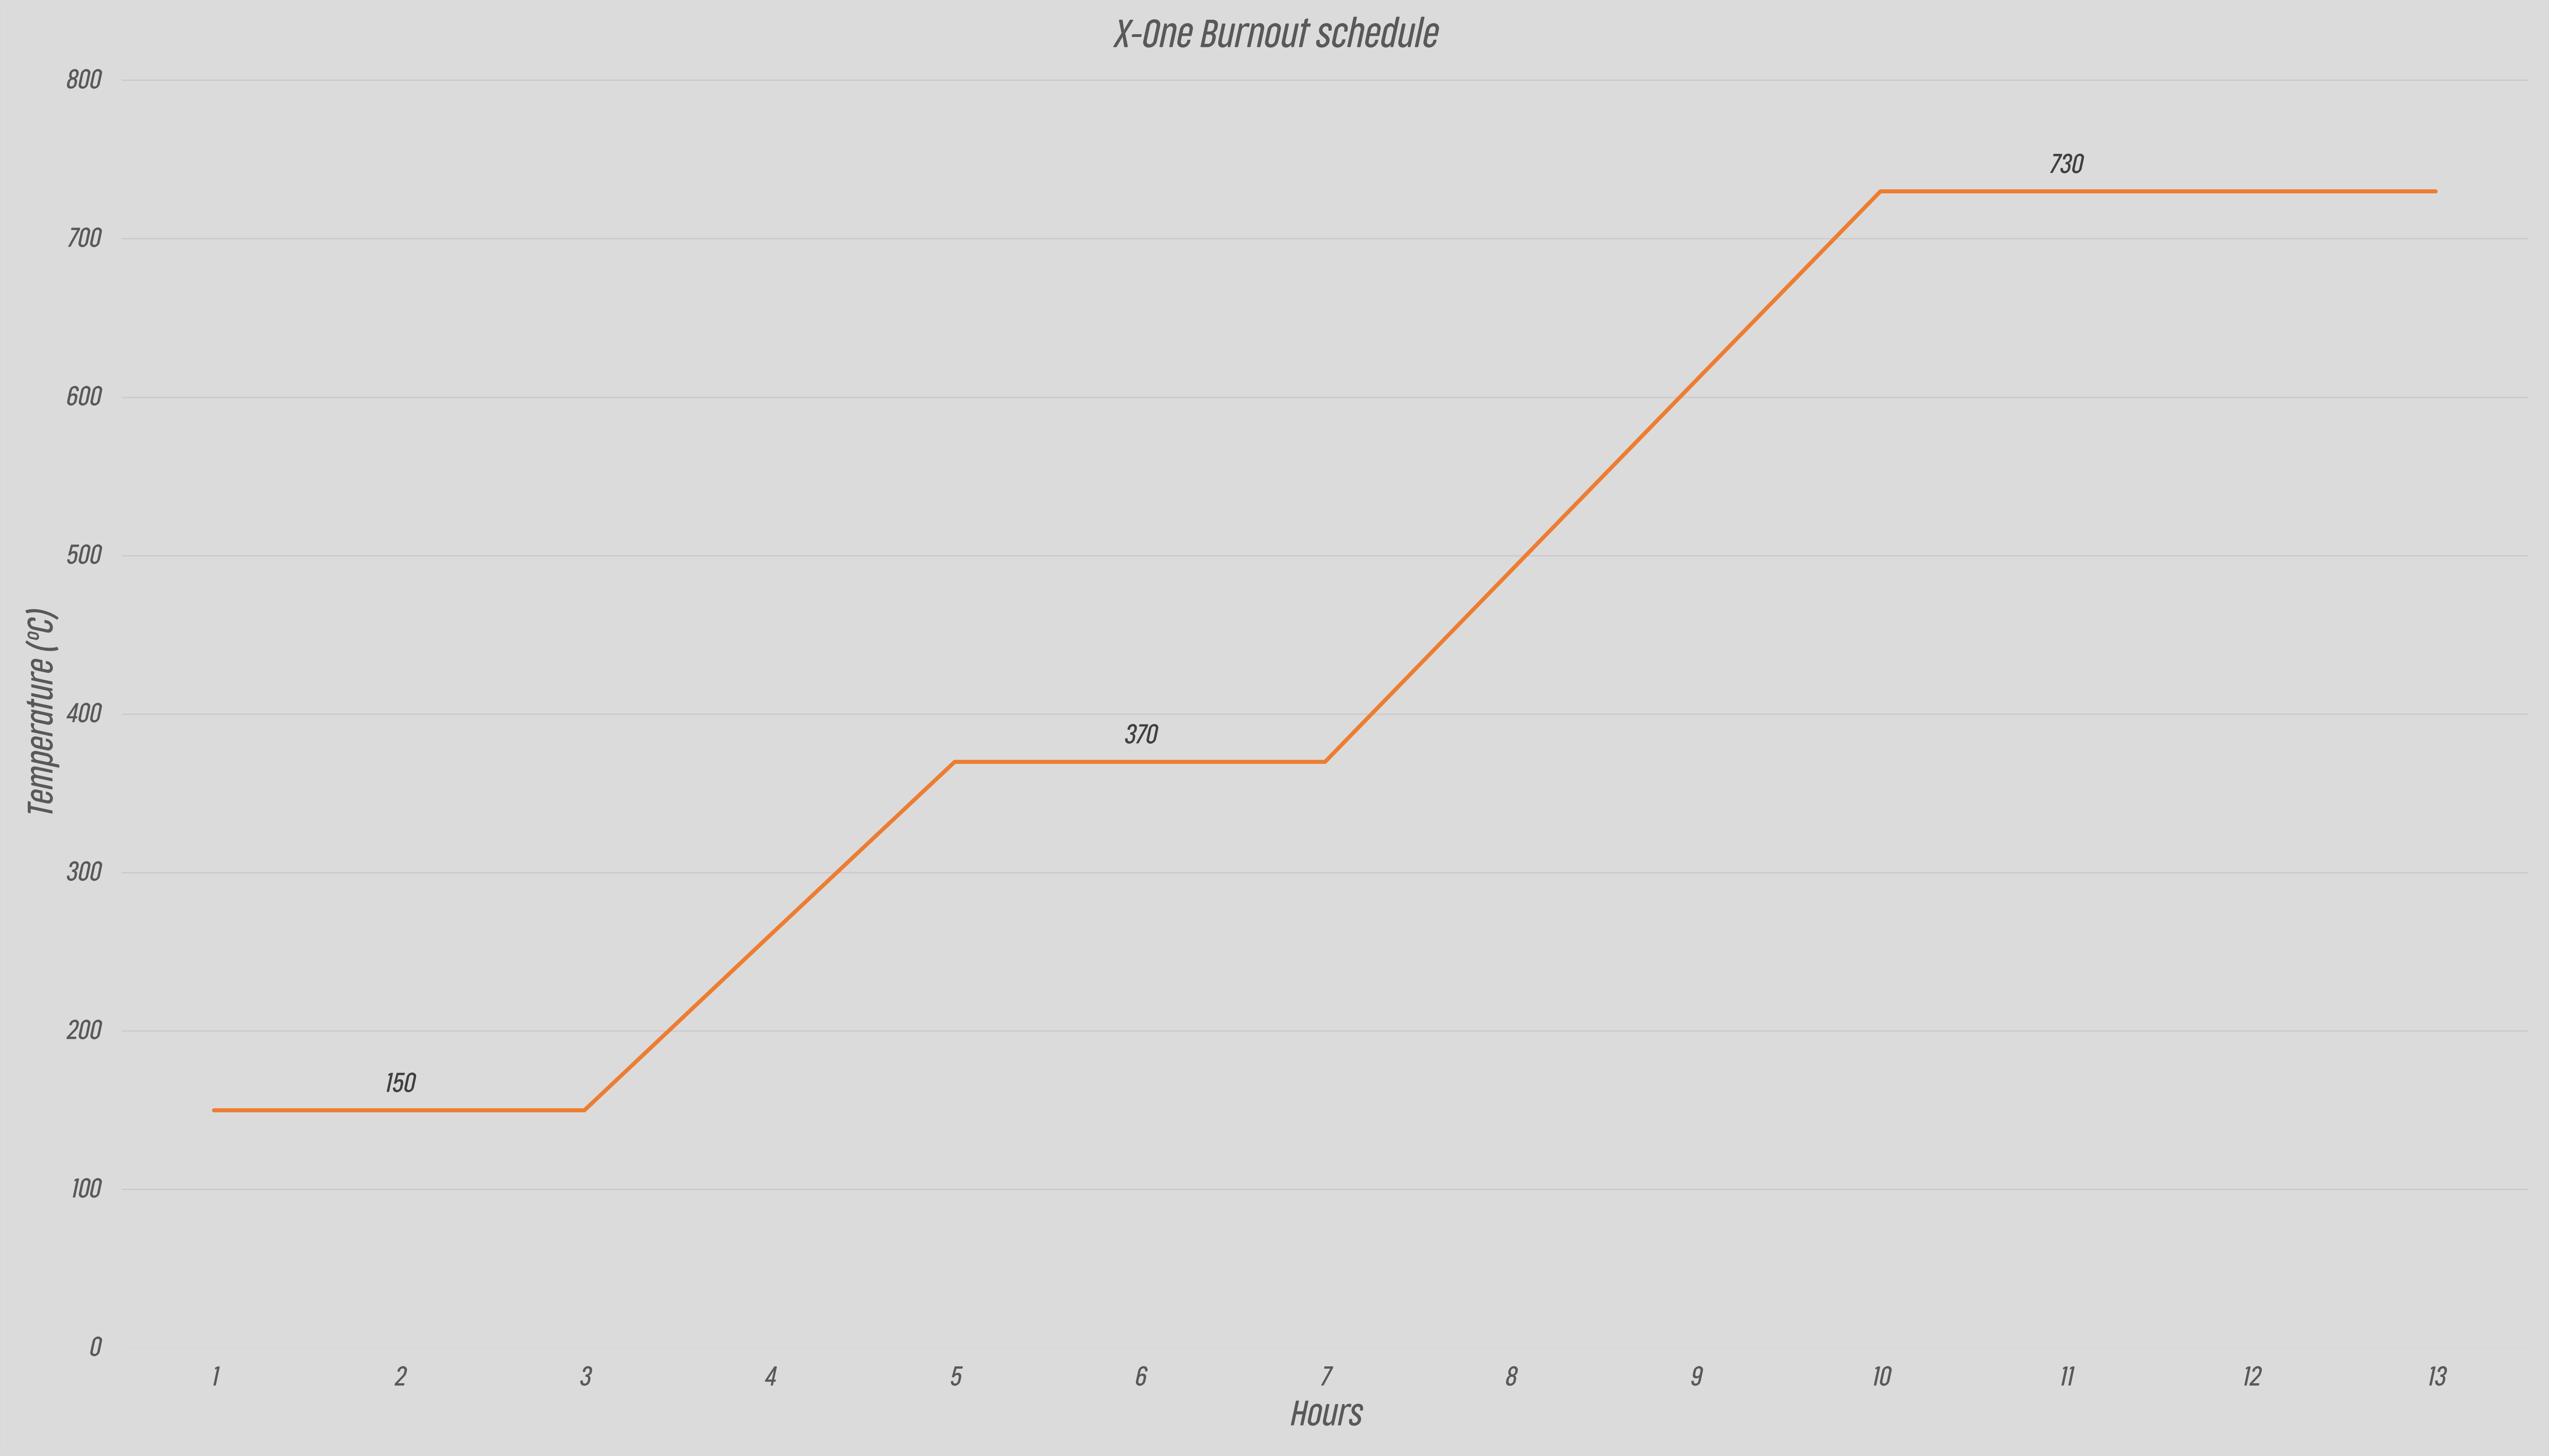
The graph depicts burnout temperatures over the time
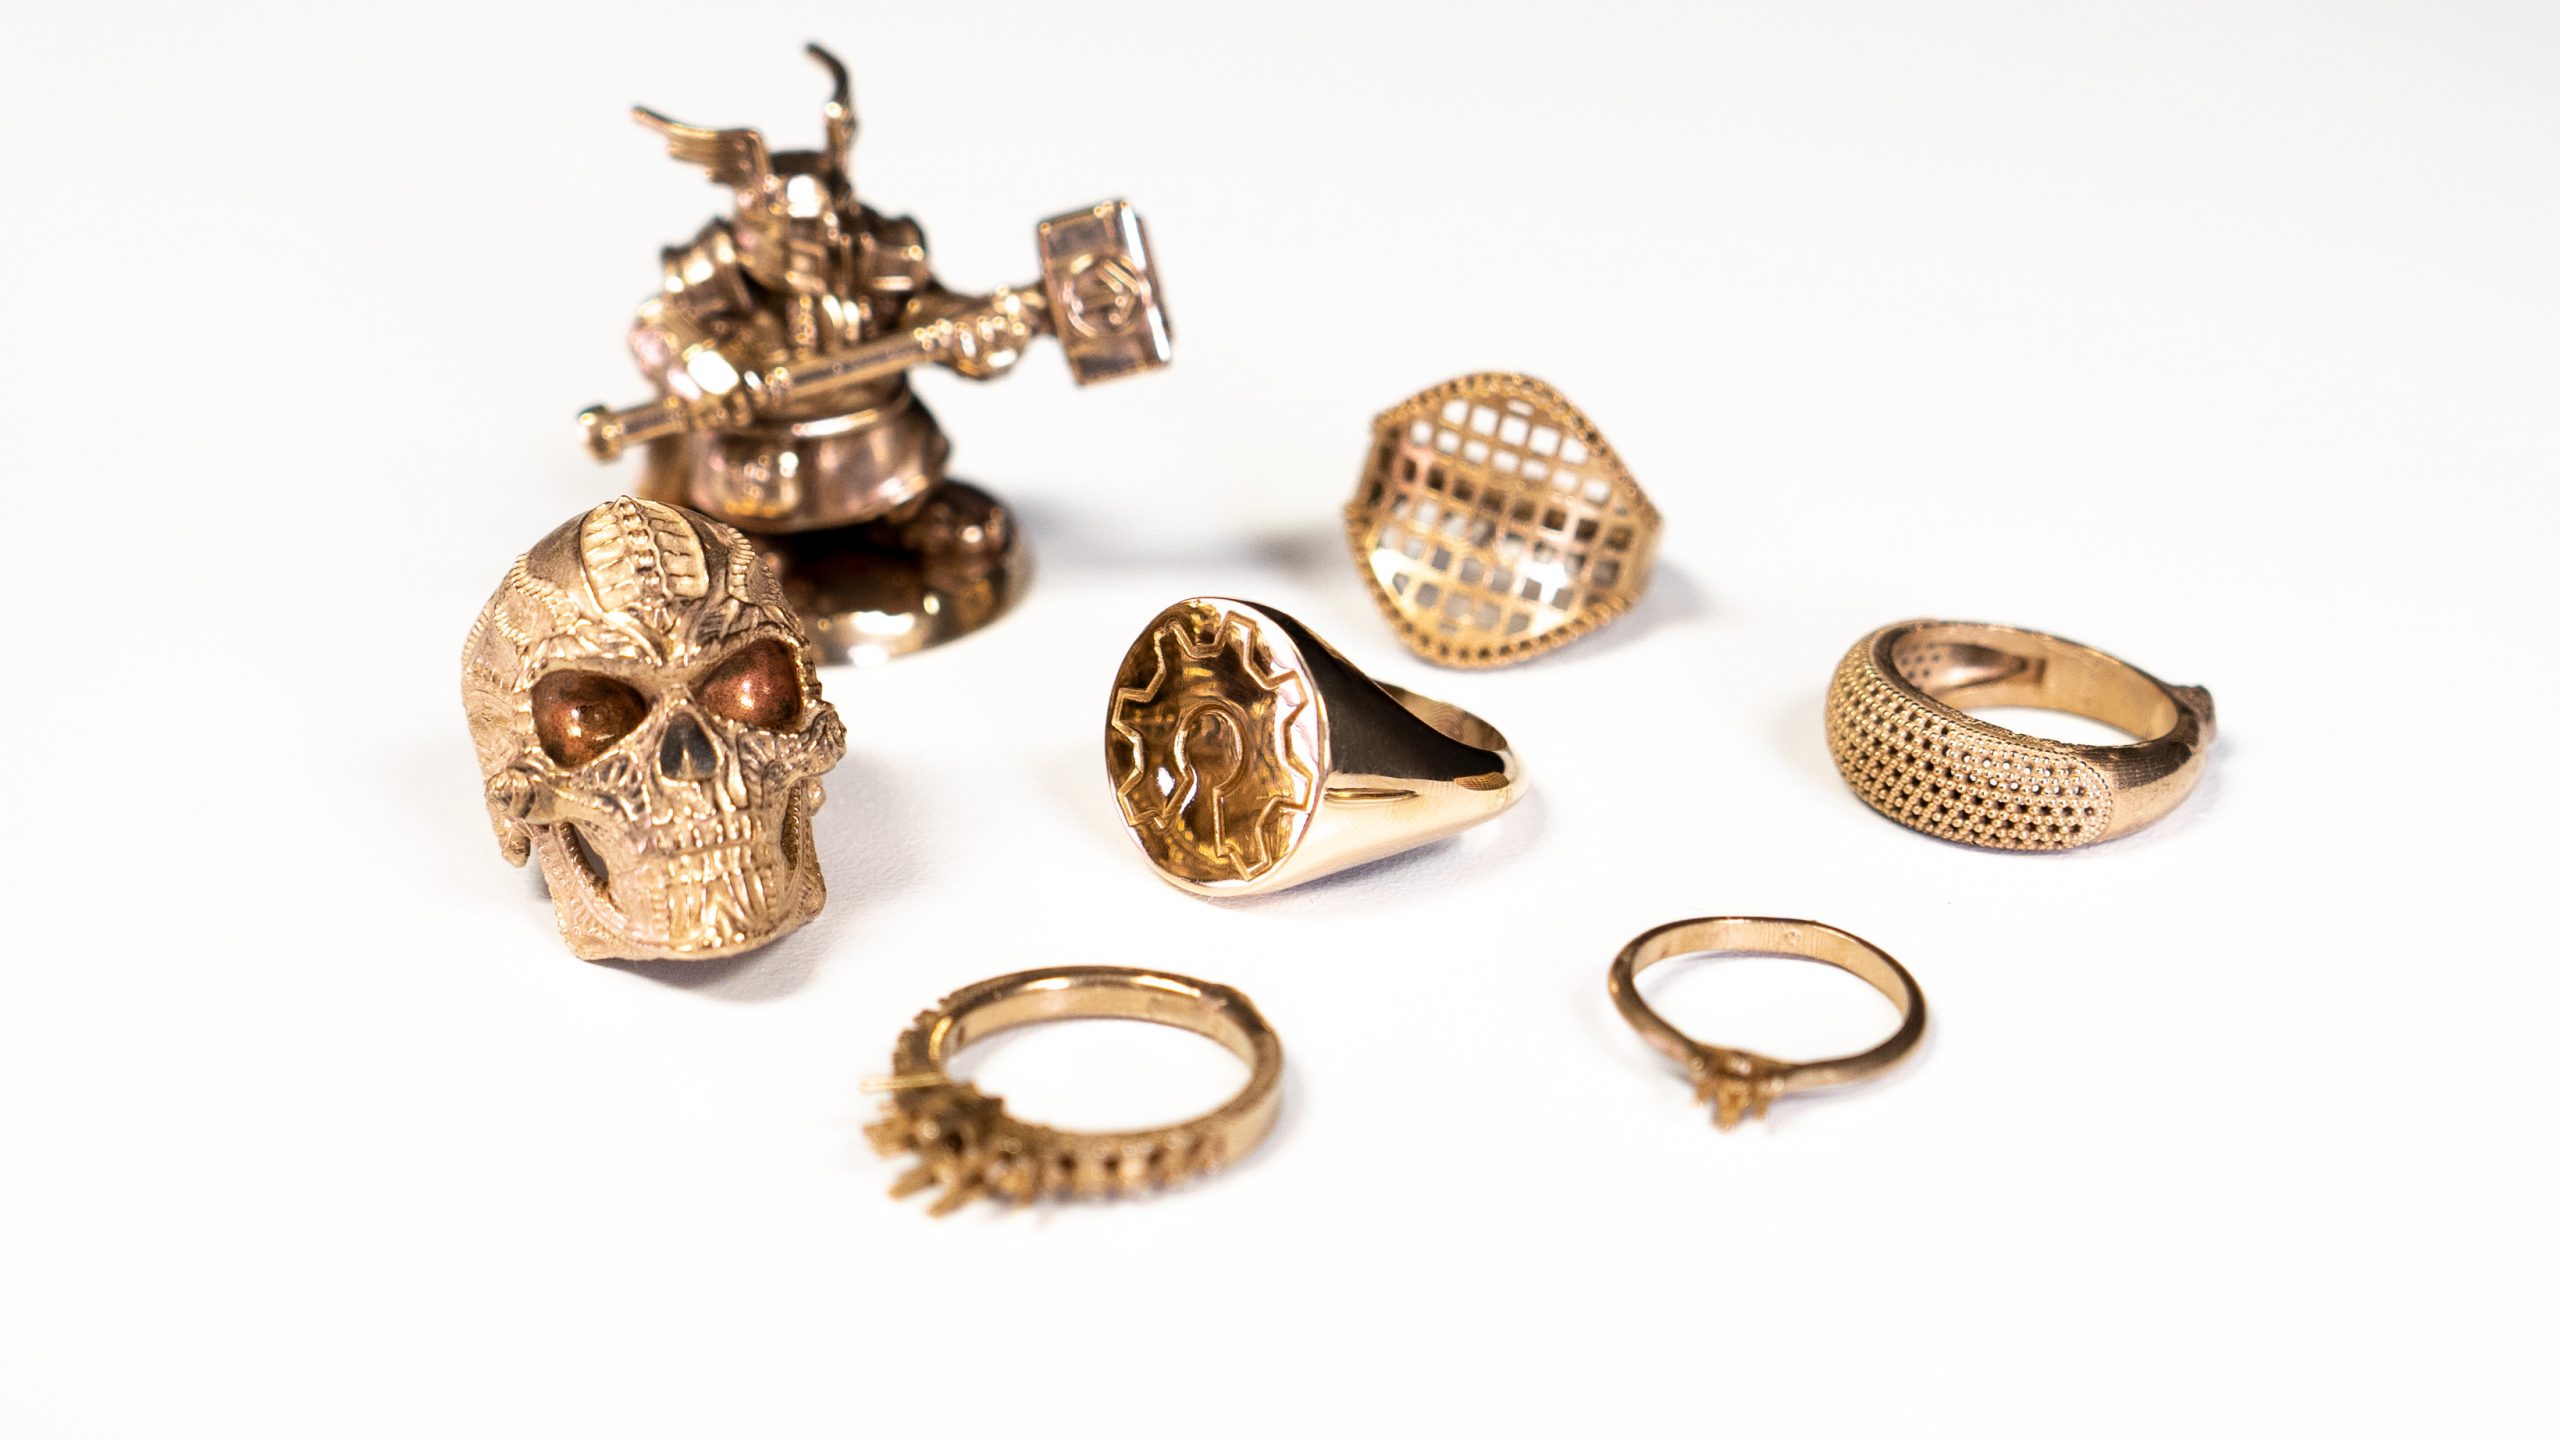
Jewelry created by Clear Mind Jewellery, using the X-One resin. Download the OpenSource Signet Ring here.
Now, the models look pretty good after the casting and some polishing, don’t they? And the Opensource gear ring model is available at printables.com. Don’t forget to watch the video from the testing! We hope you’ll like the X-One and can’t wait to see your amazing creations.
Happy printing!
“tough resins are pretty much useless for fine casting since there is a huge amount of ash remaining after the burnout.” – to be exactly (as example), Prusa Orange Tough resin leaves 1.22% of ash after finishing burning till 690 °C (further temperature increase is pretty useless, nothing happens). But this is quite a lot for jewellery applications.
If you want, I can run a test for this resin, in exchange for couple assembled (!) tanks for SL1S 🙂
I’ve invested with PLA and have had good results with bronze casting in the past. The ash defects are less of a problem with larger prints.
Wanting to make some finer pieces with my SL1S, I tried investing some Prusa Tough Grey prints just to see how far I could get. I had poor results, the ash deposits were far more noticeable and I had a lot of cracking in the plaster investment that caused flashing on the models.
I was excited to try out the Blucast Xone but the price is 4x normal Prusa Resin and the page has zero reviews so it’s a bit of an intimidating investment to make for a test.
If Prusa would like some real user results and reviews can we work out a deal?