


Last week, we introduced the Prusa ColorMix, a tool for combining existing filaments into new colors. Today, we’ll show you how to use our new free web app to add realistic ColorMix shading to any model!

I was very excited to contribute to testing and implementing Prusa ColorMix into EasyPrint and PrusaSlicer. I was primarily responsible for showcase prints, which mostly consisted of applying colors to existing models from Printables.
During this process, a few things quickly became obvious:
- Extremely colorful objects are rare: It’s tough to find a model that meaningfully uses dozens of combinations available with ColorMix printing (a chameleon is an exception).
- Less is more: Using just a few shades of the same color often looks much more pleasing and realistic than randomly combining a rainbow of colors.
- Hand-painting is hard: I realized I’m not really good at painting colors with a virtual brush in PrusaSlicer or EasyPrint!
So I thought: there has to be an easier way to utilize the ColorMix.
Zenithal priming as an inspiration
Luckily, I remembered a technique called zenithal priming, mentioned in the Prusa Academy course on 3D Print Postprocessing. By just using white and black spray from different directions, you immediately give the model a sense of depth.

This dragon was printed in black and white paint was applied from the top using an airbrush, as a simple form of zenithal priming. Note the interesting shading effects it created on the scales.
As mentioned in the ColorMix introduction video, I was inspired to recreate this technique in Blender. Instead of spray painting, I used a virtual light source in the scene to create a natural shading effect. The results were very exciting, and even when printed in just black and white, the model suddenly became much more interesting and life-like.

The Shady Fish: This model combines the automatic digital shading with a cute eye painted directly in PrusaSlicer (shoutout to my talented colleague for drawing it!).
Introducing the ColorMix Shading app
While the results in Blender were great, the software itself can be pretty intimidating for beginners. Plus, you have to install it, set it up, and use a community plugin just to export a 3MF file.
To make this technique more accessible to everyone, I teamed up with Ondrej Bartas (the main author of the ColorMix implementation) and created a simple web application that takes a 3D model and applies the zenithal shading effect with just a few clicks – completely within your browser, running locally on your computer.

You can try it out here. Its code is open-source under the MIT license and available on GitHub.
Step-by-step guide
Getting started is very simple. Here’s how to shade your first model:
Import your file. Click the button at the top of the screen to load any STL, OBJ, or 3MF file.
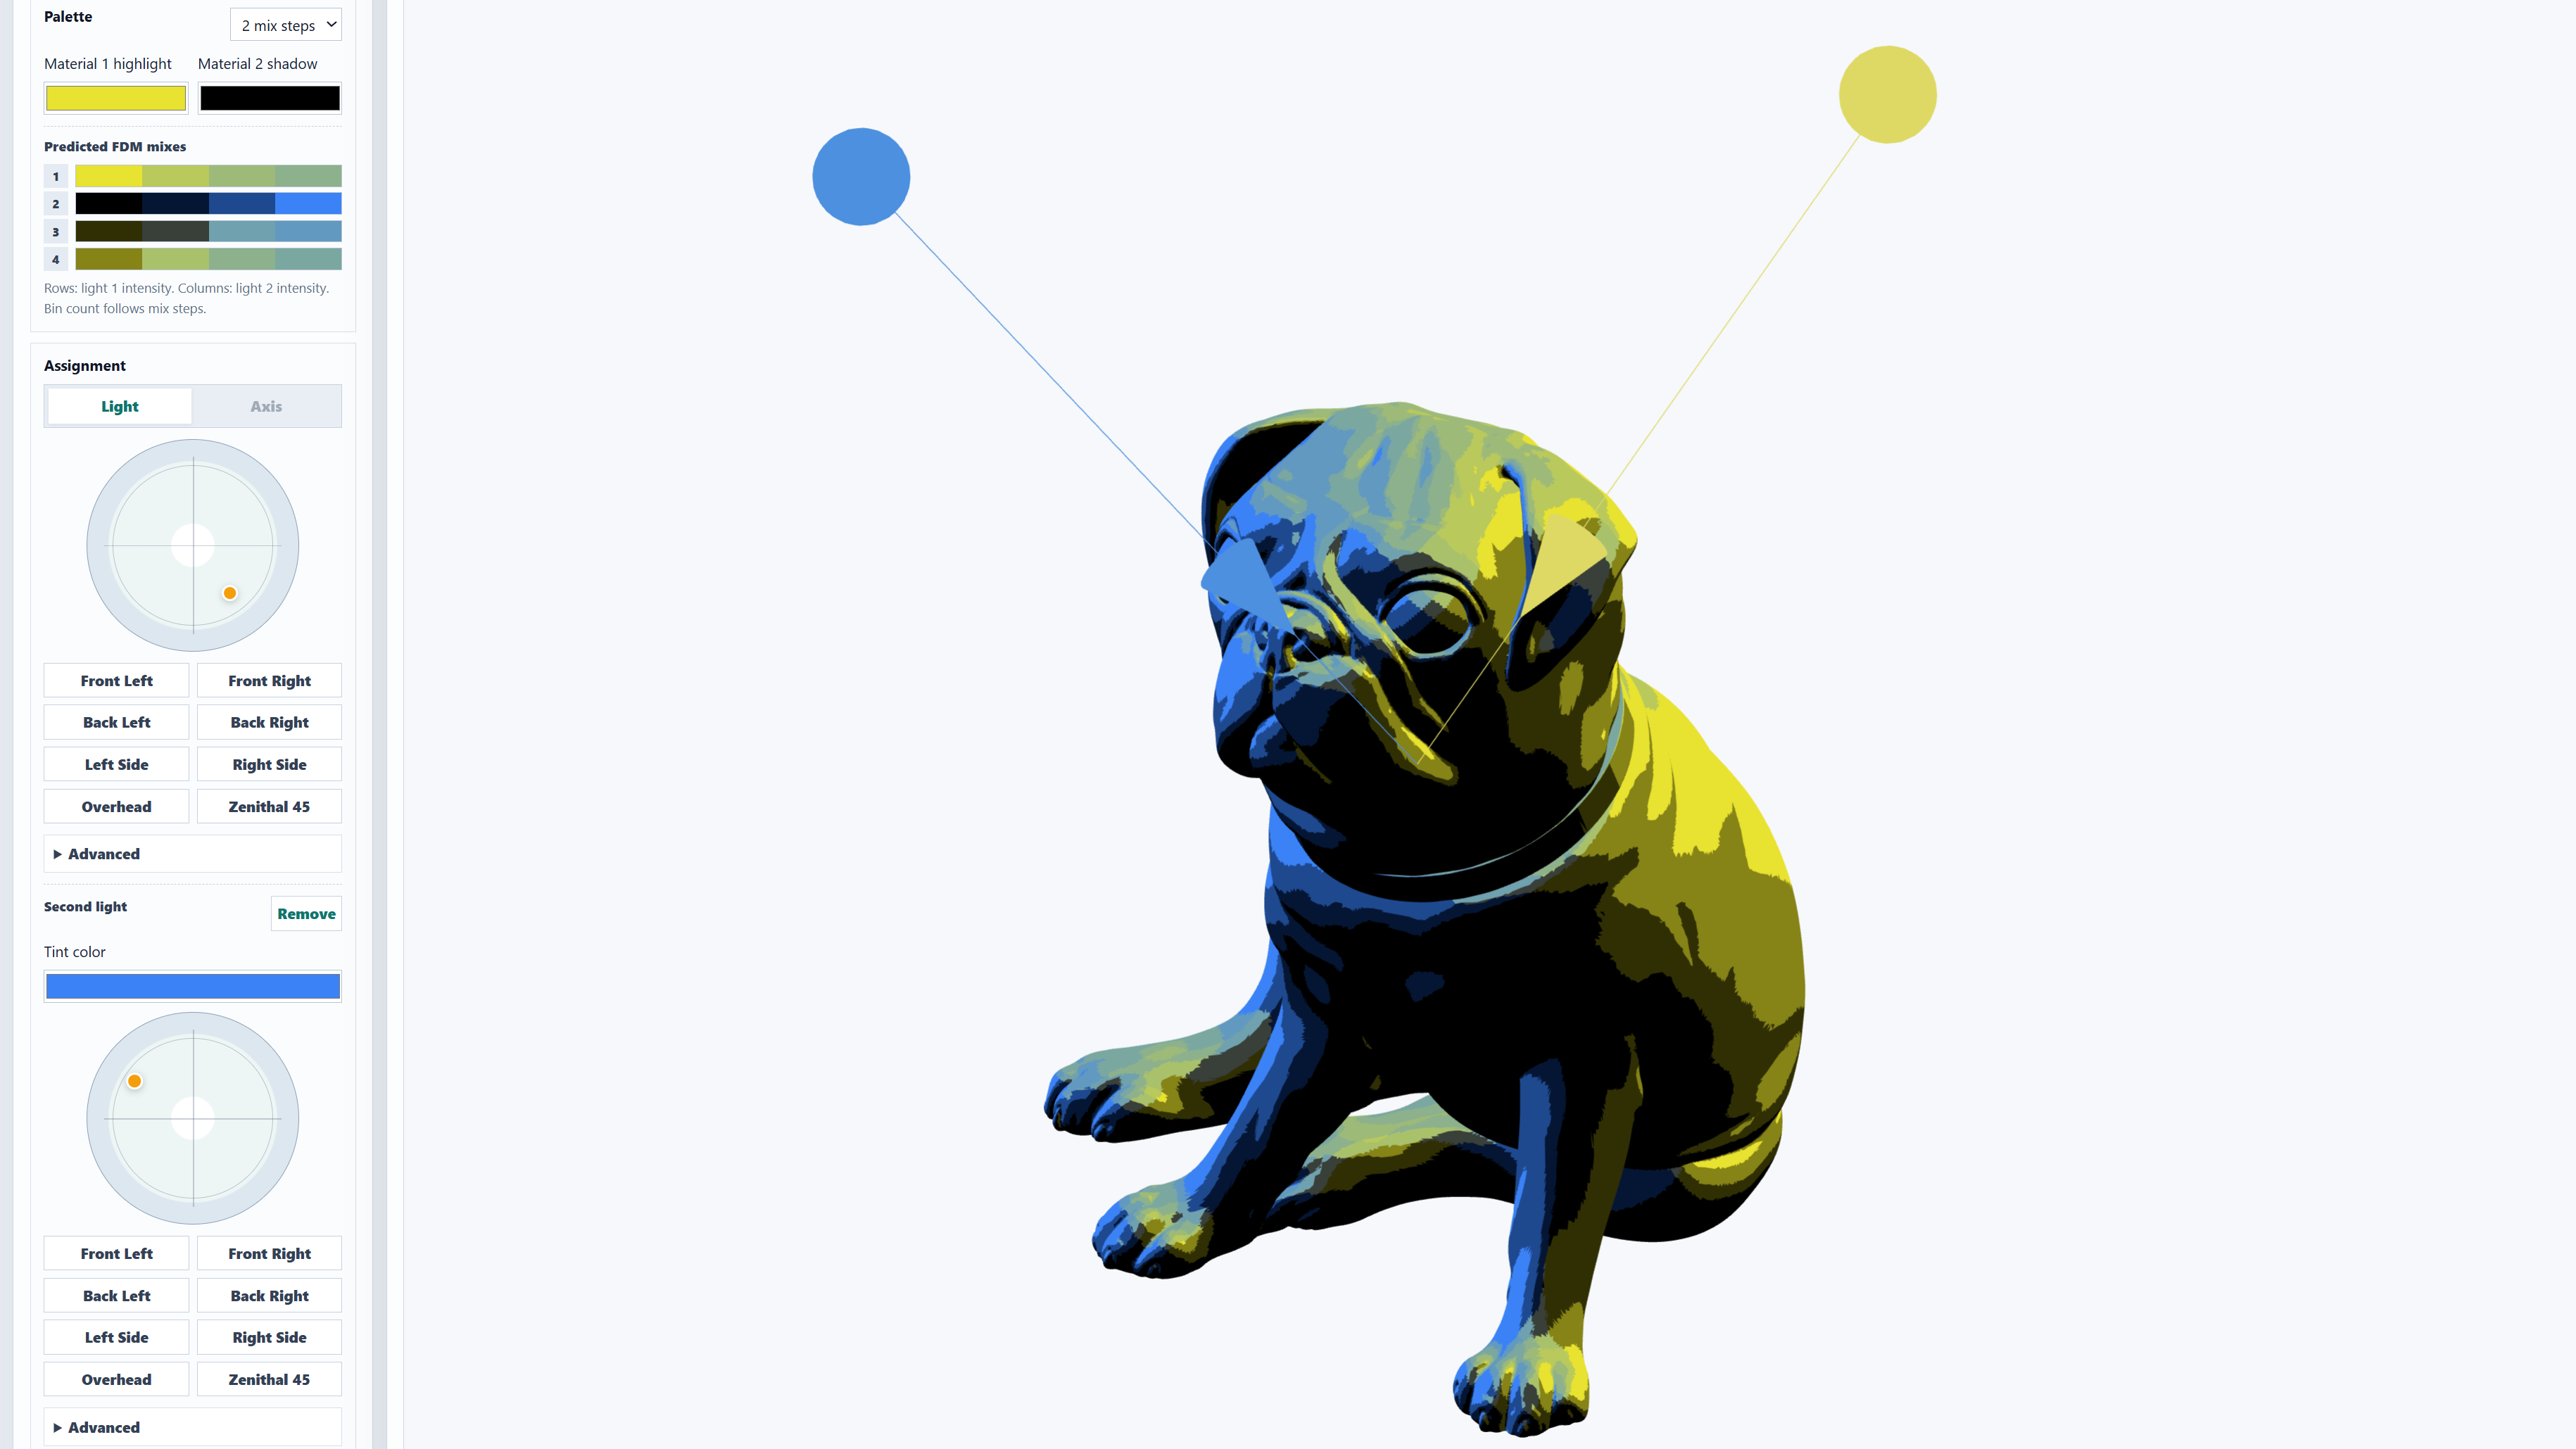
Choose your colors. In the Palette section, select your two base colors: one for the highlights (where the light hits) and one for the shadows. Then, adjust the mix steps. Setting this to 0 means you’ll only get the two pure base colors. Each additional “mix step” creates intermediate shades between them. We recommend using 1–3 steps to achieve meaningfully distinct shades in the final print.
Position the Light. Use the circular gizmo to move the virtual light source around. There are also some quick presets to choose from. As in PrusaSlicer, you can also use your mouse to pan and rotate the 3D preview.

Open the Advanced tab and slide the Z-axis to negative values to lower the light below the model. Ideal for a spooky effect!

Export and slice. Once you’re happy with the results, export the 3MF. You can also directly open the 3MF in EasyPrint or PrusaSlicer. I’m very excited about this integration – you can seamlessly export your shaded model into either of these programs, and the colors (including the ColorMix virtual extruders) will be preserved and automatically applied.
Make sure to register your local PrusaSlicer installation with ColorMix integration (such as the 2.9.6 beta) for quick downloads to enable this one-click import. Go to Preferences → Other and enable “Allow downloads from supported websites”.

I recommend slicing for a 0.15mm or even 0.10mm layer height for the best color results. Most of the models in the gallery below were printed at 0.15mm layer height on the Prusa XL, but the technique also works with the MMU3 unit for the CORE One+, or even the MK4S. All of these were printed with PLA, which is the safest choice for multicolor printing.
Extra tip: You can also add an independent second light with a separate color and its own control gizmo. This creates a bunch of new color combinations, displayed at the top of the palette.
The results
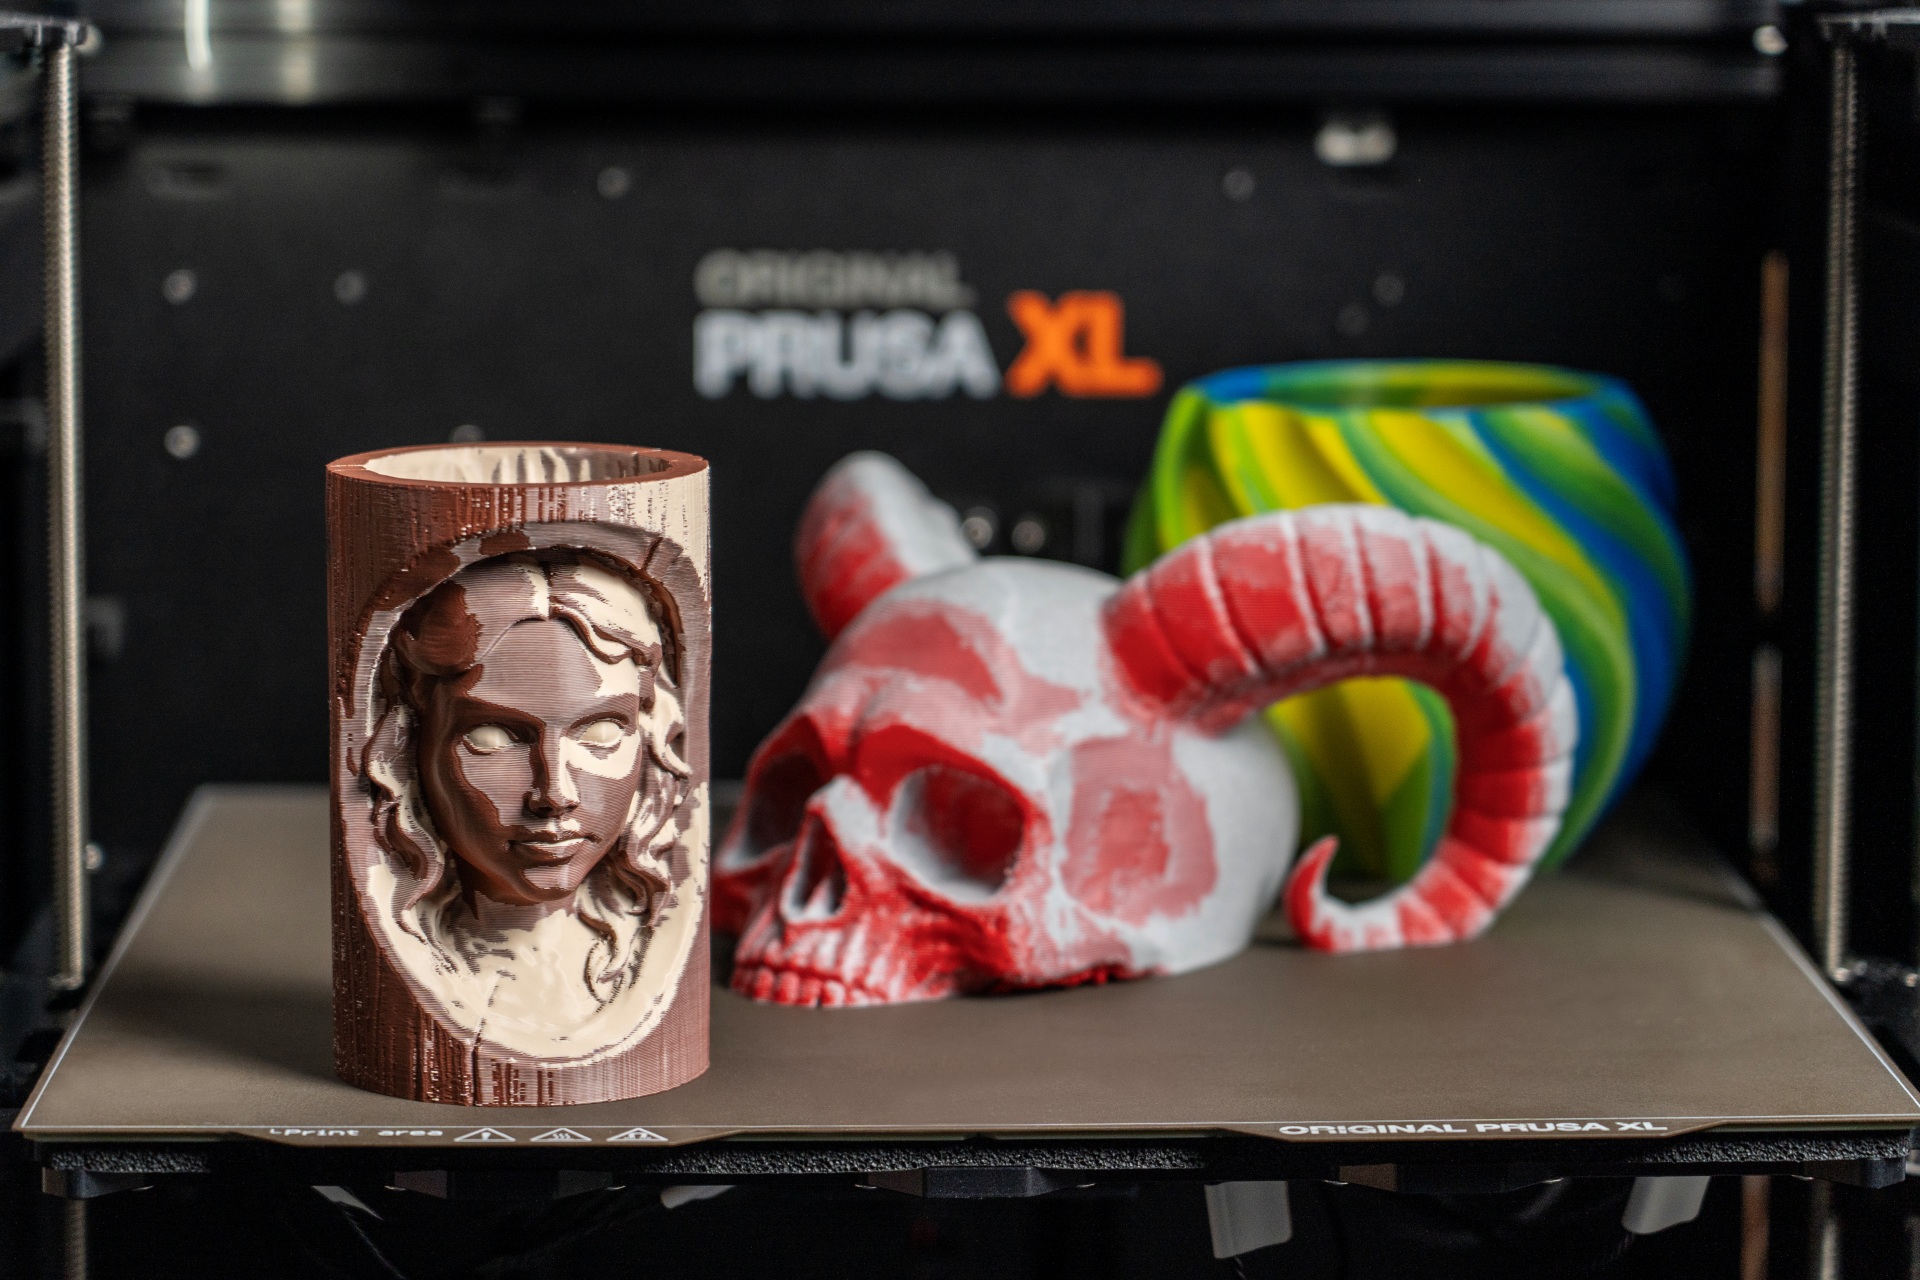
Here are some of my favorite models so far for your inspiration. And remember: all of these photos were taken under the same neutral white lights. The color shading is all part of the print.
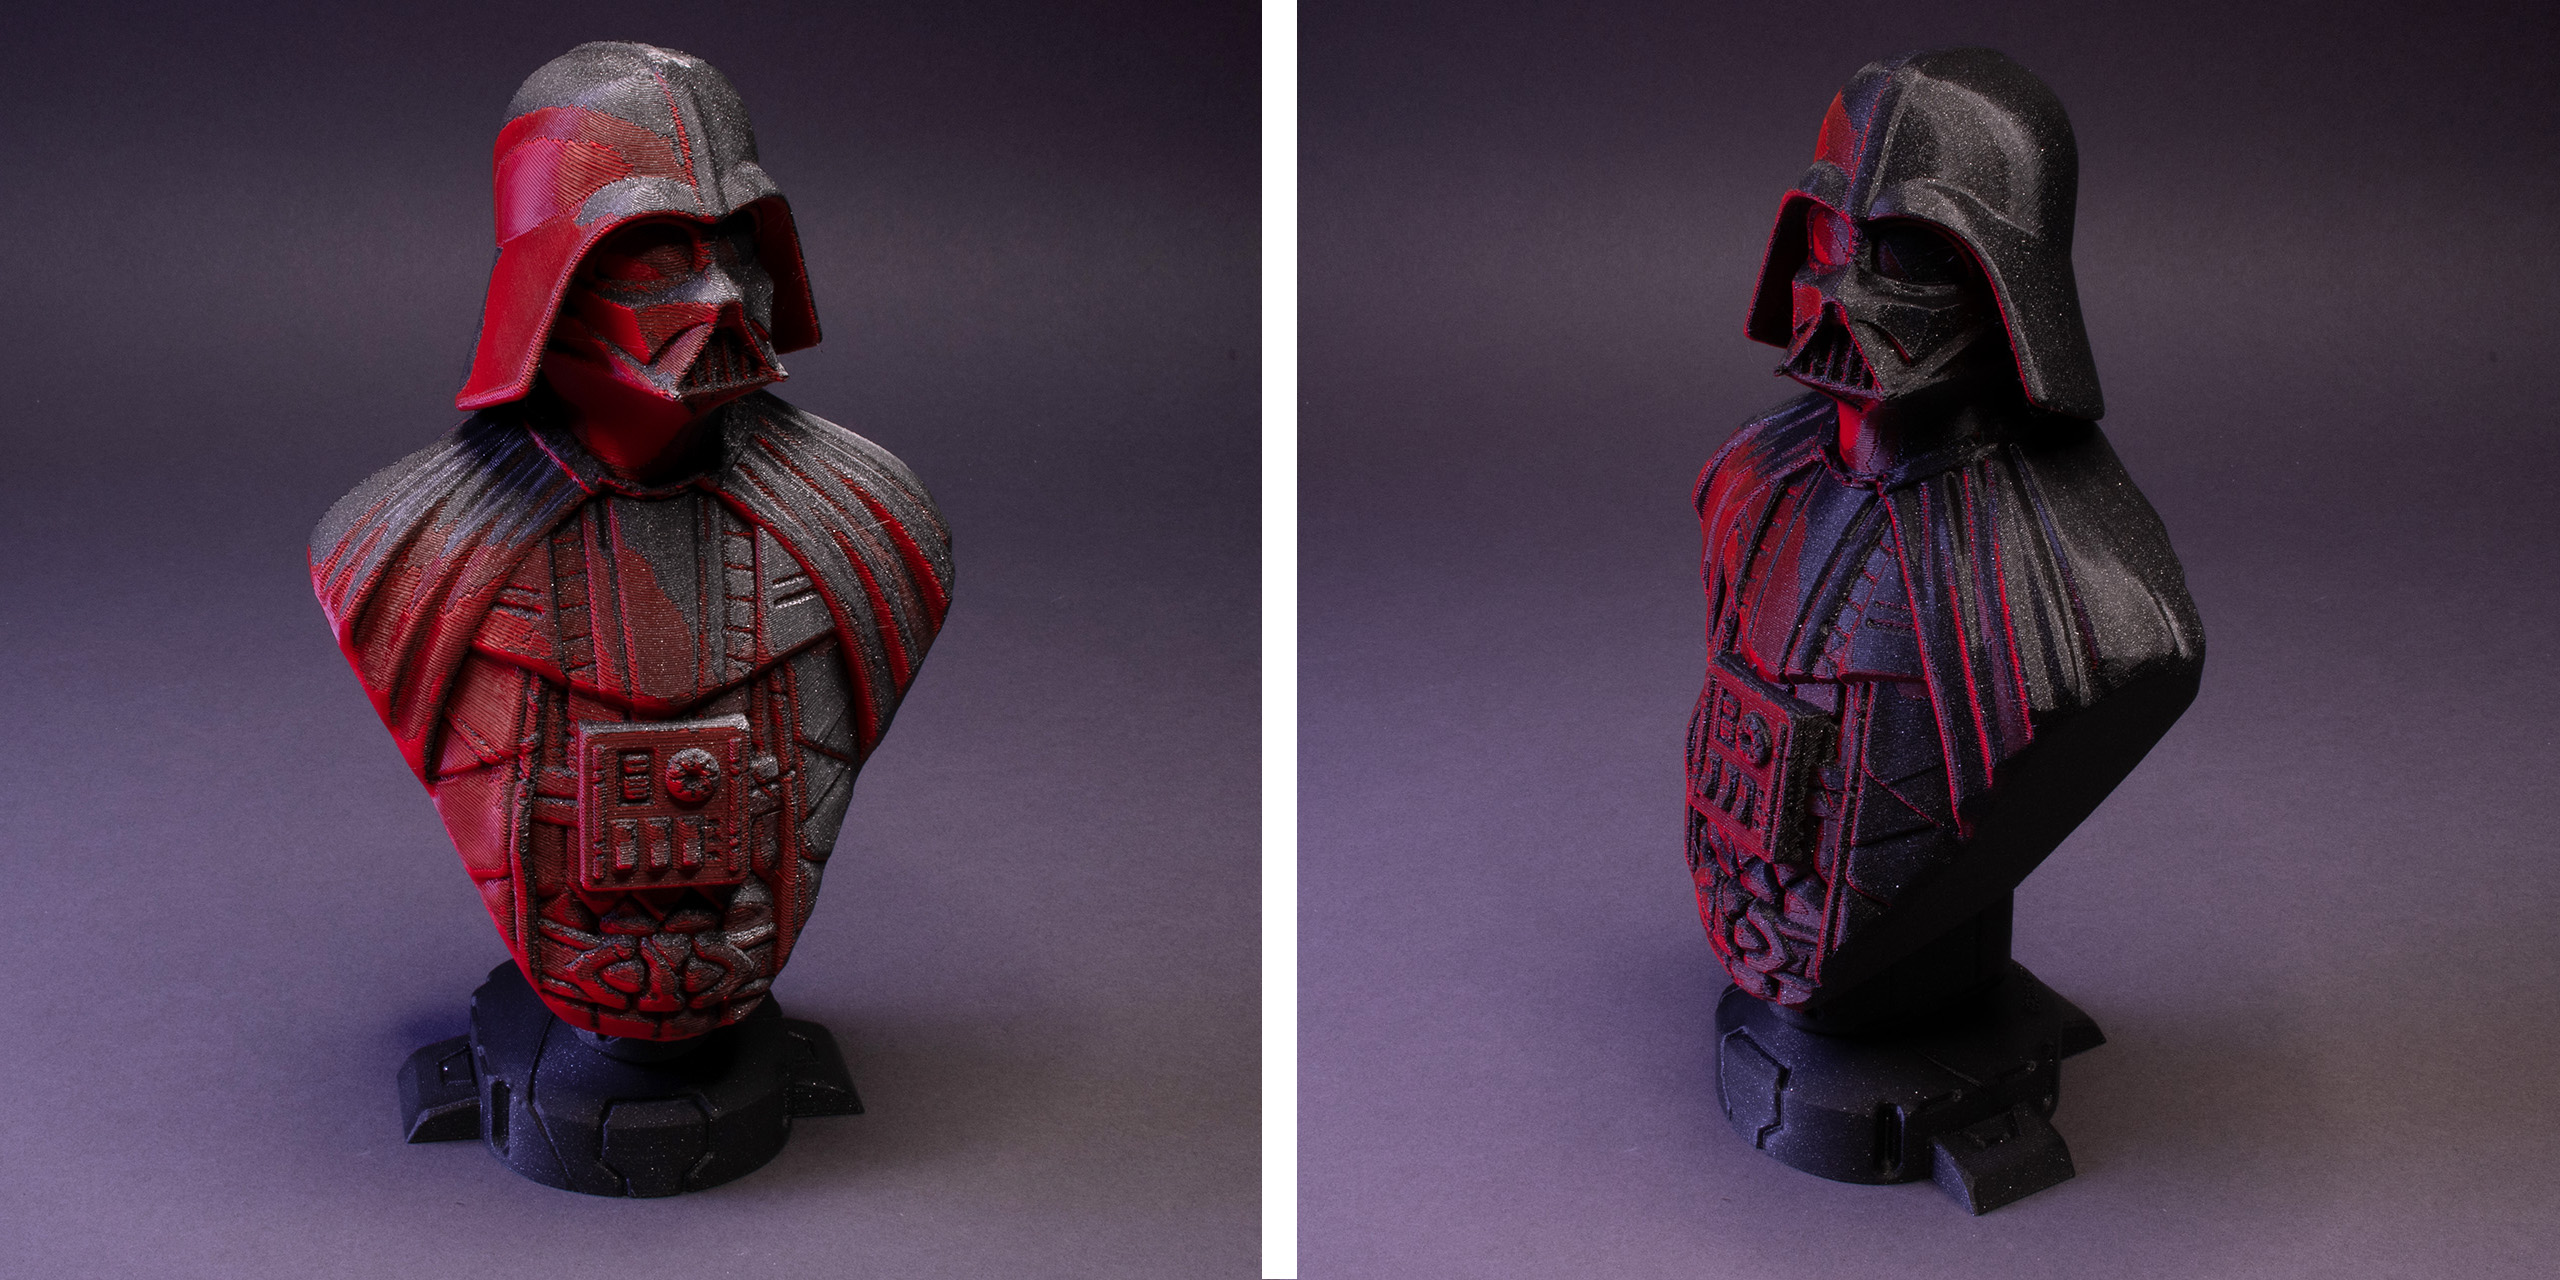
Darth Vader Bust. The red lighting was definitely inspired by the hallway scene from Rogue One: A Star Wars Story. (Printed with Prusament Galaxy Black and Lipstick Red)

Batman 89/92 bust. My favorite example of using two lights. (Prusament Galaxy Black, Lipstick Red, Azure Blue)

Demon skull. An example of a reverse effect where the “shadows” are actually a lighter shade than the red highlights. (Prusament Marble Grey and Lipstick Red)

These Moon surface and Mount Fuji models are good examples of adding shading to realistic terrain. Notice the brim on the Moon model – it had to be printed in this orientation, because ColorMix works best on vertical walls. (Moon: Prusament Marble Grey and Galaxy Black; Mt. Fuji: Galaxy Black and Oh My Gold)
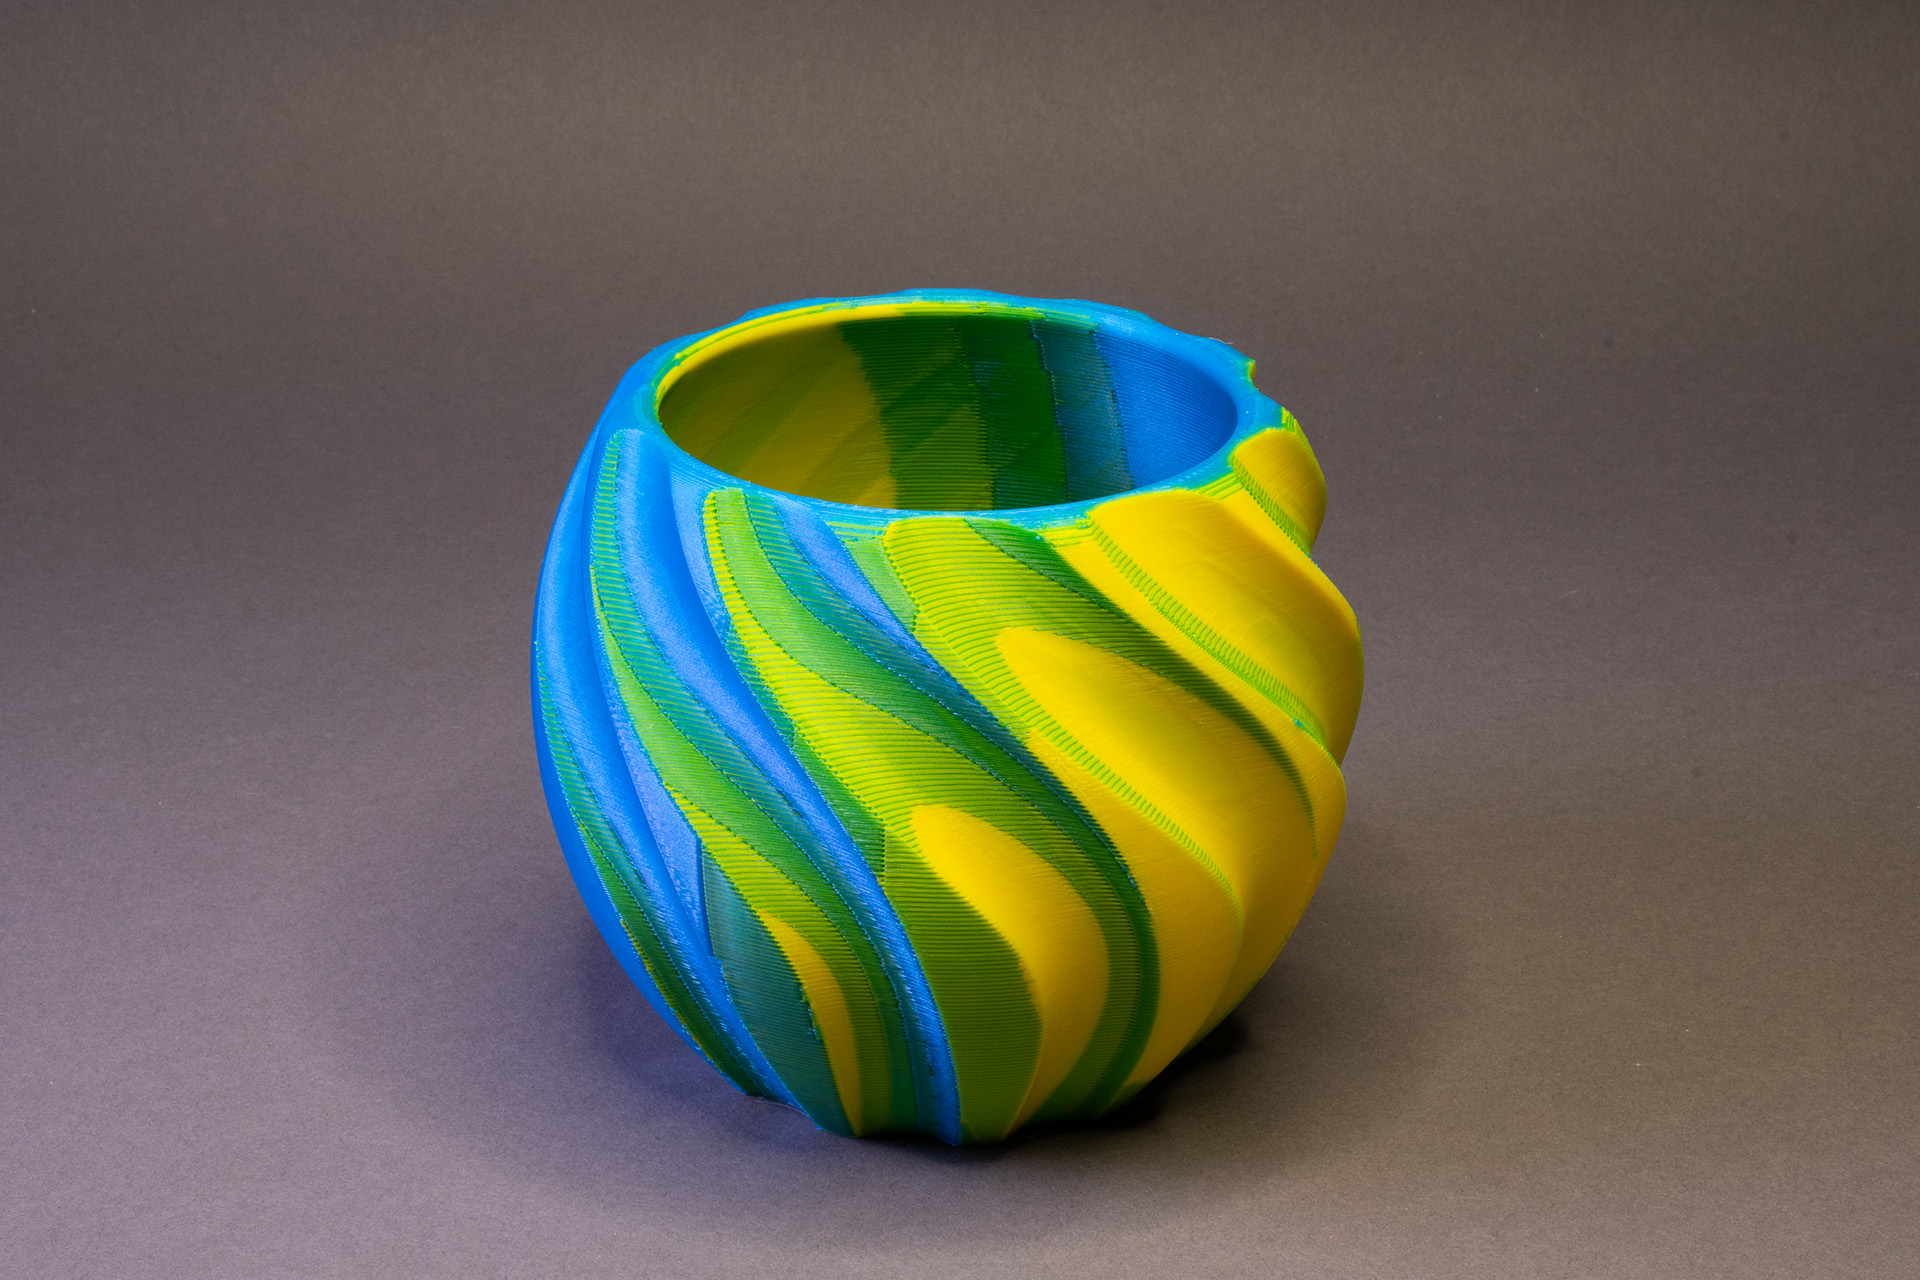
As you can see from the models above, this technique works beautifully on organic models with lots of nooks, crannies, and fine details that naturally catch the light. However, it’s fun to experiment on geometric shapes too, like this spiral pot printed in contrasting yellow and blue! (Prusament Azure Blue and Pineapple Yellow)
What to Keep in Mind
While the app is quite powerful, there are a few technical limitations to keep in mind.
The app applies color to whole triangles of the STL mesh. Because of this, it won’t look right on models with massive, flat faces (like functional CAD parts). If you want to shade a flat object, you’ll need to remesh or subdivide it first in a program like Blender to give the app more triangles to color.
The ColorMix technique doesn’t work at all on flat, horizontal surfaces. On very low, shallow slopes, you might see some distinct “stair-stepping” where individual colors become too prominent, rather than blending smoothly together.

The tops of the mushrooms and the base of the dragon have prominent layer lines of different colors.
If you try to slice a larger ColorMix model with default settings, you might be shocked by a long estimated print time and higher filament use. The longer print time is partly inevitable due to the hundreds or even thousands of filament changes that create the shading effect. That’s why it’s recommended to print with an efficient tool changer, such as the Prusa XL or the upcoming INDX upgrade for CORE One+ (which also greatly reduces filament waste on each color change).

Abnormally large filament usage can also be caused by the default slicing profile. It treats every tiny color change as an individual segment with its own perimeter, which protrudes all the way to the center of the print. This is great for tiny surface details, but with thousands of ColorMix transitions, it creates way too many extra perimeters. The fix is simple. In PrusaSlicer, make sure you are using the Advanced mode. Go to Print Settings → Multiple Extruders → Advanced and change the Maximum width of a segmented region from 0 (unlimited) to 5 mm. Our testing shows that this drastically reduces print time and filament usage while keeping surface quality identical. If you want to speed things up even more, you can decrease the value as low as 0.86 mm (two extrusions wide), though you might see slightly reduced overall surface quality. We have recently rolled out a printing profile update for the Prusa XL and MMU that includes this setting. If you restart PrusaSlicer, you should be prompted to download it automatically.
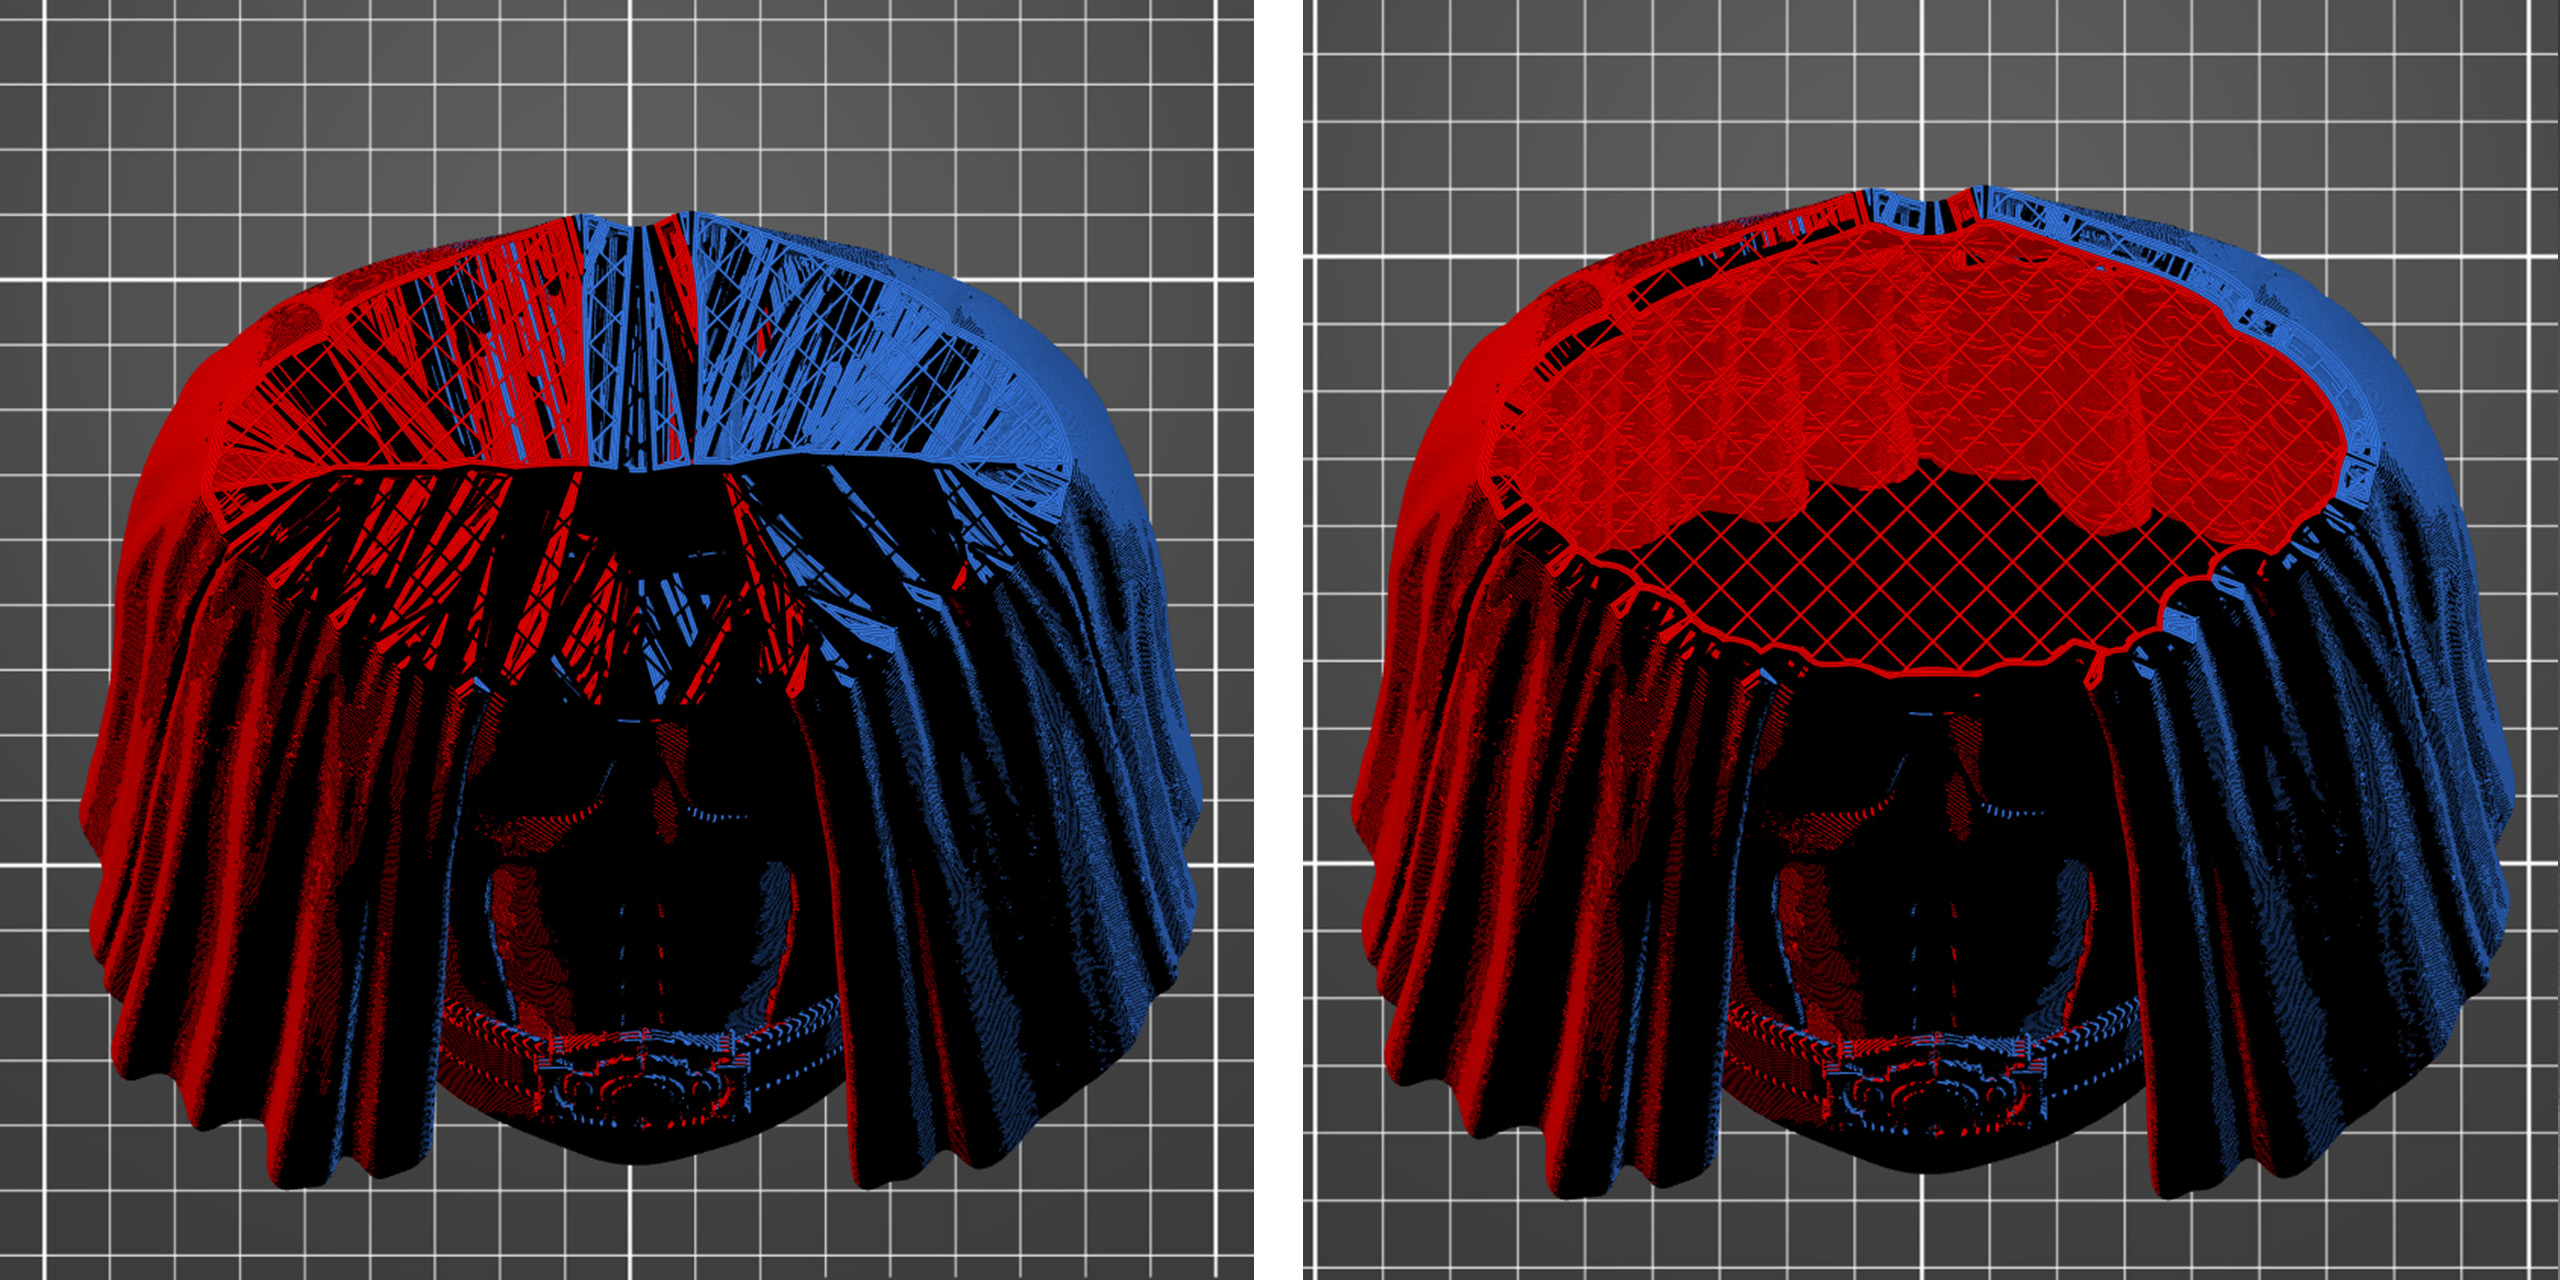
Comparison of the same model sliced with “Maximum width of a segmented region” set to 0 (left), and set to 5 mm (right).
I can’t wait to see what you create with this new tool. Head over to the app and try it out! Also, make sure to share your cool models (and Remixes of existing models) on Printables with the ColorMix tag. I created a Printables collection with my shaded models that are easy to print without supports.
Happy shading!
OMG, I want to cry… I have been wanting to do color mixing and add color effects since I bought my first MMU2.
I will be trying this as soon as I get the INDX! Thank you!
I have to disagree a bit with the statement that there aren't many models with a lot of colors. Every scanned 3D object with a texture has a lot of colors, and you can print them, too! Take a look here: https://github.com/michaelhq/color-mix-lab