


This article was updated on 05.01.2024: We’ve added a video showing the real use and struggle of watertight 3D printing. Also, we’ve added a few images of our recent makes.
In the first part of the watertightness series, we’ve shown you how to print waterproof vases, bowls, flowerpots, cups, etc. Today, we will go one step further and try to make truly watertight (airtight) models – and we’ll go, ahem, really deep today. So brace yourselves! We have a long journey full of prototyping and testing ahead. After all, printing a truly watertight model takes much more than just pushing a button on the machine. But, on the other hand, if you’re willing to undertake this adventure with us, you’ll learn plenty of helpful information. So let’s dive right in!
First, we need to define all properties our watertight model should have. For example, do we need only a simple hollow model (box) that remains permanently closed? While these may be useful for specific applications, you’ll probably want to have something that can be repeatedly opened and closed. But there’s more: do you need a container that can withstand higher water pressure? Or is mere splash protection enough? How about some transparent parts?
This already sounds like a lot of questions. And that’s not all – there are more of them. Because every question comes with its own set of additional challenges to solve: What slicer settings should be used? Is post-processing necessary? And if so, what methods should you choose? What mechanisms should you choose to make a container that can be closed and opened? And how to deal with rubber sealings? Don’t worry, though! While it may look a bit daunting, to say the least, we went through all these situations ourselves and summarized our findings in this article to save you valuable time!
The Theory
If you’re not that much interested in the theory and principles of construction of watertight models, you can skip this part and have fun with the “When the reality kicks in” section. But if you plan to work on your own amazing project involving 3D prints submerged in water, we suggest going through the entire article.
Our Research
When you start a more extensive project (and this one definitely is), you should begin with proper research. The good news is that we spent quite a lot of time looking for people dealing with similar projects and sharing their results online. The bad news is that not many people try to use their 3D printers to make something watertight. One thing somewhat fitting into this area are RC submarine projects. The main catch here is that there are only several small parts inside 3D printed submarines that really require being watertight – and these are usually made with other methods rather than with 3D printing.
We found a couple of projects that use 3D printed parts, yet they are still very uncommon and often highly specific. Main components are usually made using other methods, such as injection molded plastics, etc. 3D printed watertight models are scarce in the community. Therefore we had to study different ways that don’t include using a 3D printer. We tried to use and slightly adjust these methods to see if we can replicate them using 3D printing. Probably the most resourceful was this article covering watertight sealing in general.
Choosing a proper model
First, we would like to remind you that 3D printing watertight models requires a certain amount of skill, and you probably won’t get far without post-processing. The main problem is that 3D printed models requiring perfect watertightness are usually special and tailored for a specific use since you can buy a Lock&Lock box at any supermarket.
The real benefit of using 3D printing comes from the possibility to create custom electronic housing for divers, custom parts of RC submarines, boxes for various measuring equipment, etc. This means, above anything else, that you will have to do more than download a random G-code, print it and use it immediately. Therefore, although we prepared a few parts for our experiments, we’d like to encourage you to design something for yourselves! But before you do, let us give you several useful tips.
Generally speaking, the best watertight model will be a hollow round container with no openings or moving parts, printed in one piece – you can imagine some sort of a balloon or bubble. However, as you probably guessed, such a model won’t be very practical. So most of us will instead be interested in a sealable container. In this case, you should keep in mind two rules when designing your model:
- Make the walls thick enough. 2-3 mm is usually a good start. However, you want to make sure that the water will not leak inside under higher pressure. For instance: If you submerge a closed model (inside pressure = air pressure at the water surface) to 20 m depth / 65 feet, which is a usual diving depth, its walls will need to resist the pressure of 2kg/cm2 (28 psi). And this pressure will increase by 1 kg (14 psi) every 10 meters (32 feet).
- Design the model as simple as possible. If you plan to make a box with eight openings with various plugs and parts screwed in or clipped on, we wish you good luck. Every opening, every moving part, and every printing error can cause leakage! Even professional camera housings have warnings about leakage caused by grains of sand or human hair – just imagine what can be caused by a bad print.
Material choice
Here, we’d like to highlight one of our previous articles about 3D printed vases and other simple open models – the choice of material is actually less important than the print settings. Plus, if you plan to make a model that should resist high pressure (2 bar and more), you will probably use some form of post-processing anyway – for example, sealing the model using an epoxy resin. But if you need to make things resisting lower pressure (less than 2 bar), the basic 3D print might be good enough too. You can find a more detailed material comparison in the article mentioned above. In short, the best results can usually be achieved with filaments that have the best layer-to-layer adhesion properties, such as PolyPropylene. Interestingly, we also had great results in 20m depth with Prusament PLA and SLA resins.
Print settings and infill
Suppose you need to create models that resist only a small amount of pressure in shallow waters (for snorkeling or similar activities). In that case, there is no need to bother with different print settings and post-processing. Here, you should simply follow our advice from the previous article (in layman’s terms: more perimeters = better waterproofness). The only extra thing we can recommend: pay attention to how smooth the surface is. Those parts that get in direct contact with rubber sealing should be as smooth as possible. The best way to achieve this is to print these parts facing down on the smooth sheet or use the ironing function in PrusaSlicer.
It gets slightly more complicated with greater depths (pressure). To withstand high pressure, the models need to have walls as solid and compact as possible. If you are confident that your model is watertight at 1-meter (3 feet) depth with three perimeters and 15% infill, it will most likely be different in a 30m (99 feet) depth. Due to the higher pressure, small crevices and other imperfections might cause a lot of trouble. Plus, some deformations might occur with compressing air pockets inside the model.
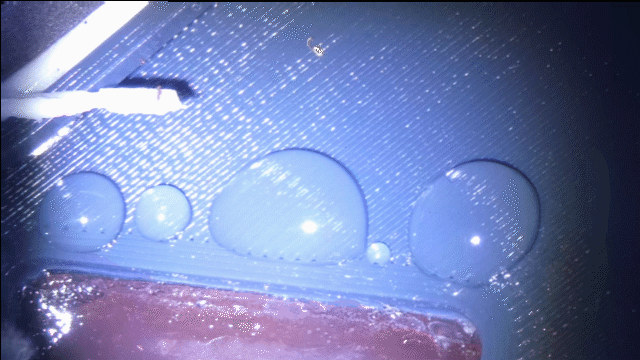
To protect against deformation that would cause leakage, we offer a simple method: increasing the number of perimeters and infill. The ideal state is when the model wall is 100% filled with material or has a high number of perimeters. Unfortunately, it’s pretty much impossible to give an exact number due to a high number of variables. We recommend starting testing with four perimeters and 60% infill. Still, keep in mind that there might be numerous air pockets and crevices allowing the water to leak inside the model. Just have a look at this untreated PETG print:
Treating models with epoxy resin
The second way to achieve watertightness is by sealing the model with epoxy resin. Of course, the best way to do this is a vacuum impregnation, but you probably won’t be able to do it at home. Luckily, using a brush or sinking a model inside the resin works just as well. The result is a model that resists water leakage and comes with better mechanical resistance and dimensional stability. Just don’t forget that it’s useless to apply epoxy resin on a hollow model. To be specific: The walls must keep their shape. If they’re too thin (1-2 perimeters), the epoxy coating will most likely crack under higher pressure, and the walls will deform anyway. So it’s best to treat walls with four perimeters and 60% infill or higher.
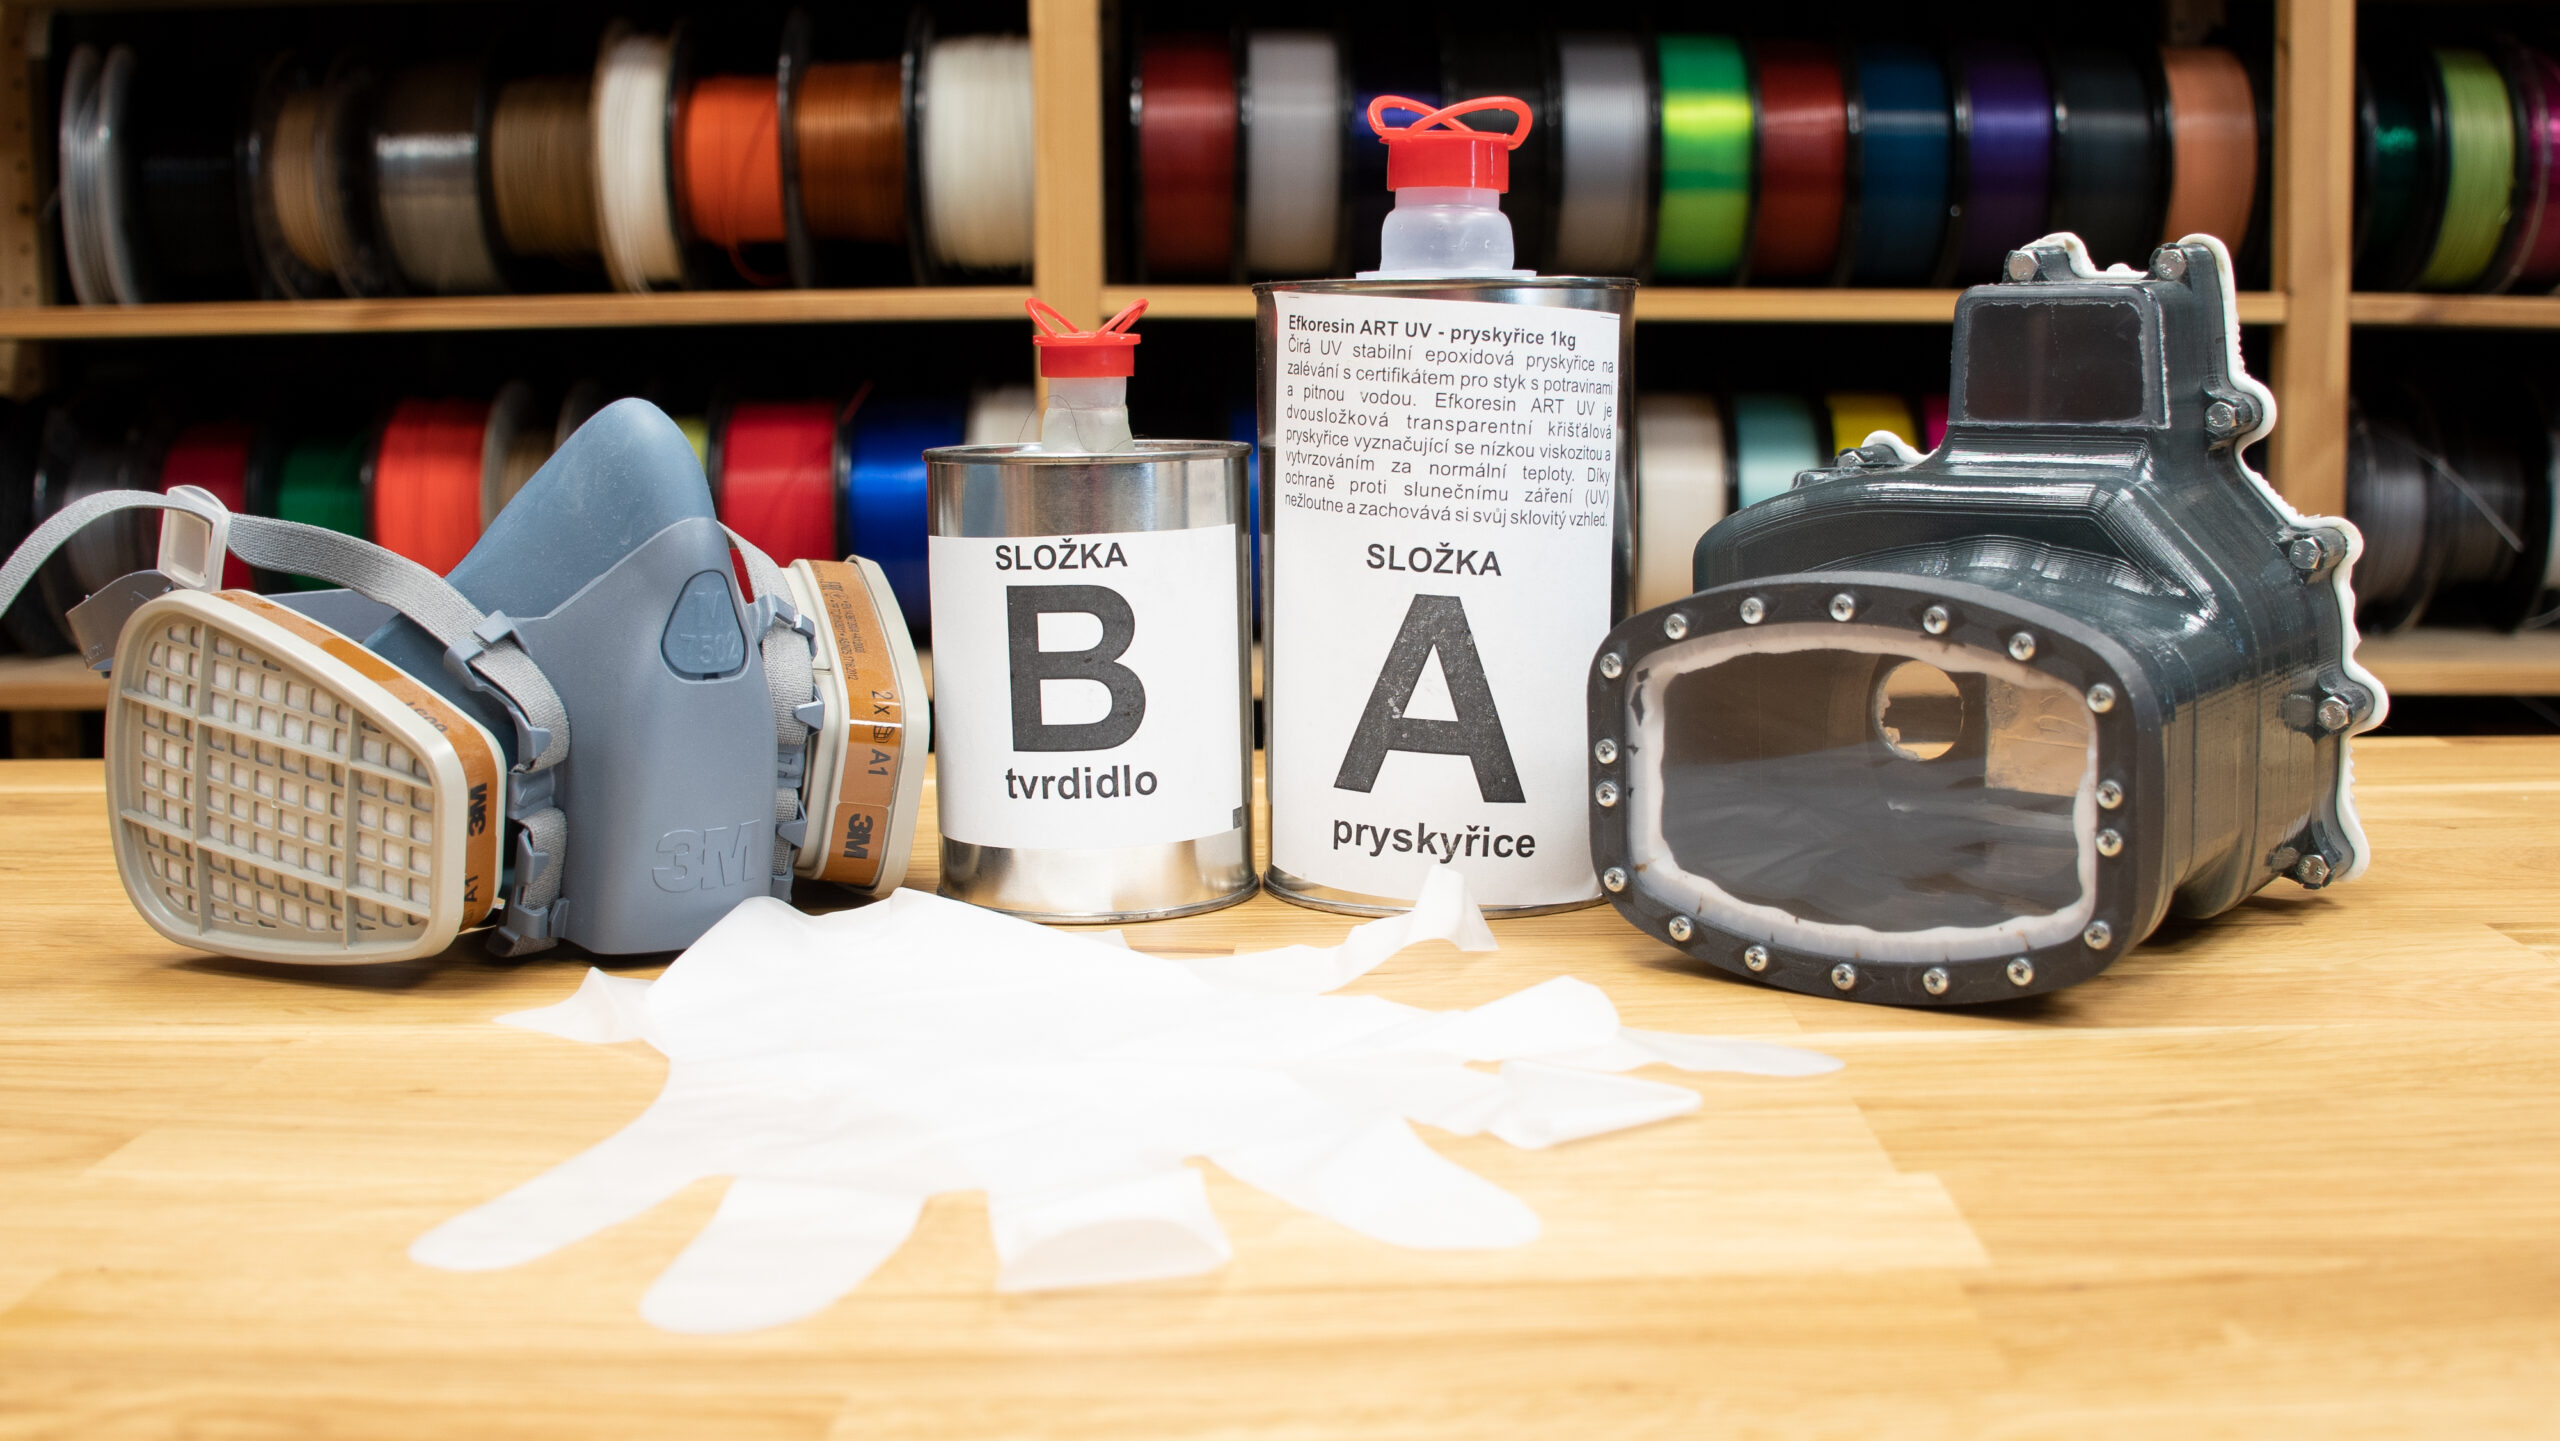
Working with epoxy resin may be a bit messy process. Plus, it is accompanied by an unpleasant odor. Don’t forget to use respiratory protection, such as a half-mask (respirator) and gloves!
Sealing
Sealing is undoubtedly the most challenging part of any watertight model. In other words: printing watertight models that don’t need to be opened is relatively simple. But when it comes to lids, covers and moving parts, there is a high chance of failure. This is because every closable box usually comes with plenty of imperfections that cause leakage.
This great article explains sealing functionality in detail. We went through several designs and then came up with three basic variants that we tested with 3D printed parts. We definitely recommend reading the entire article to find out more about making things watertight in general.
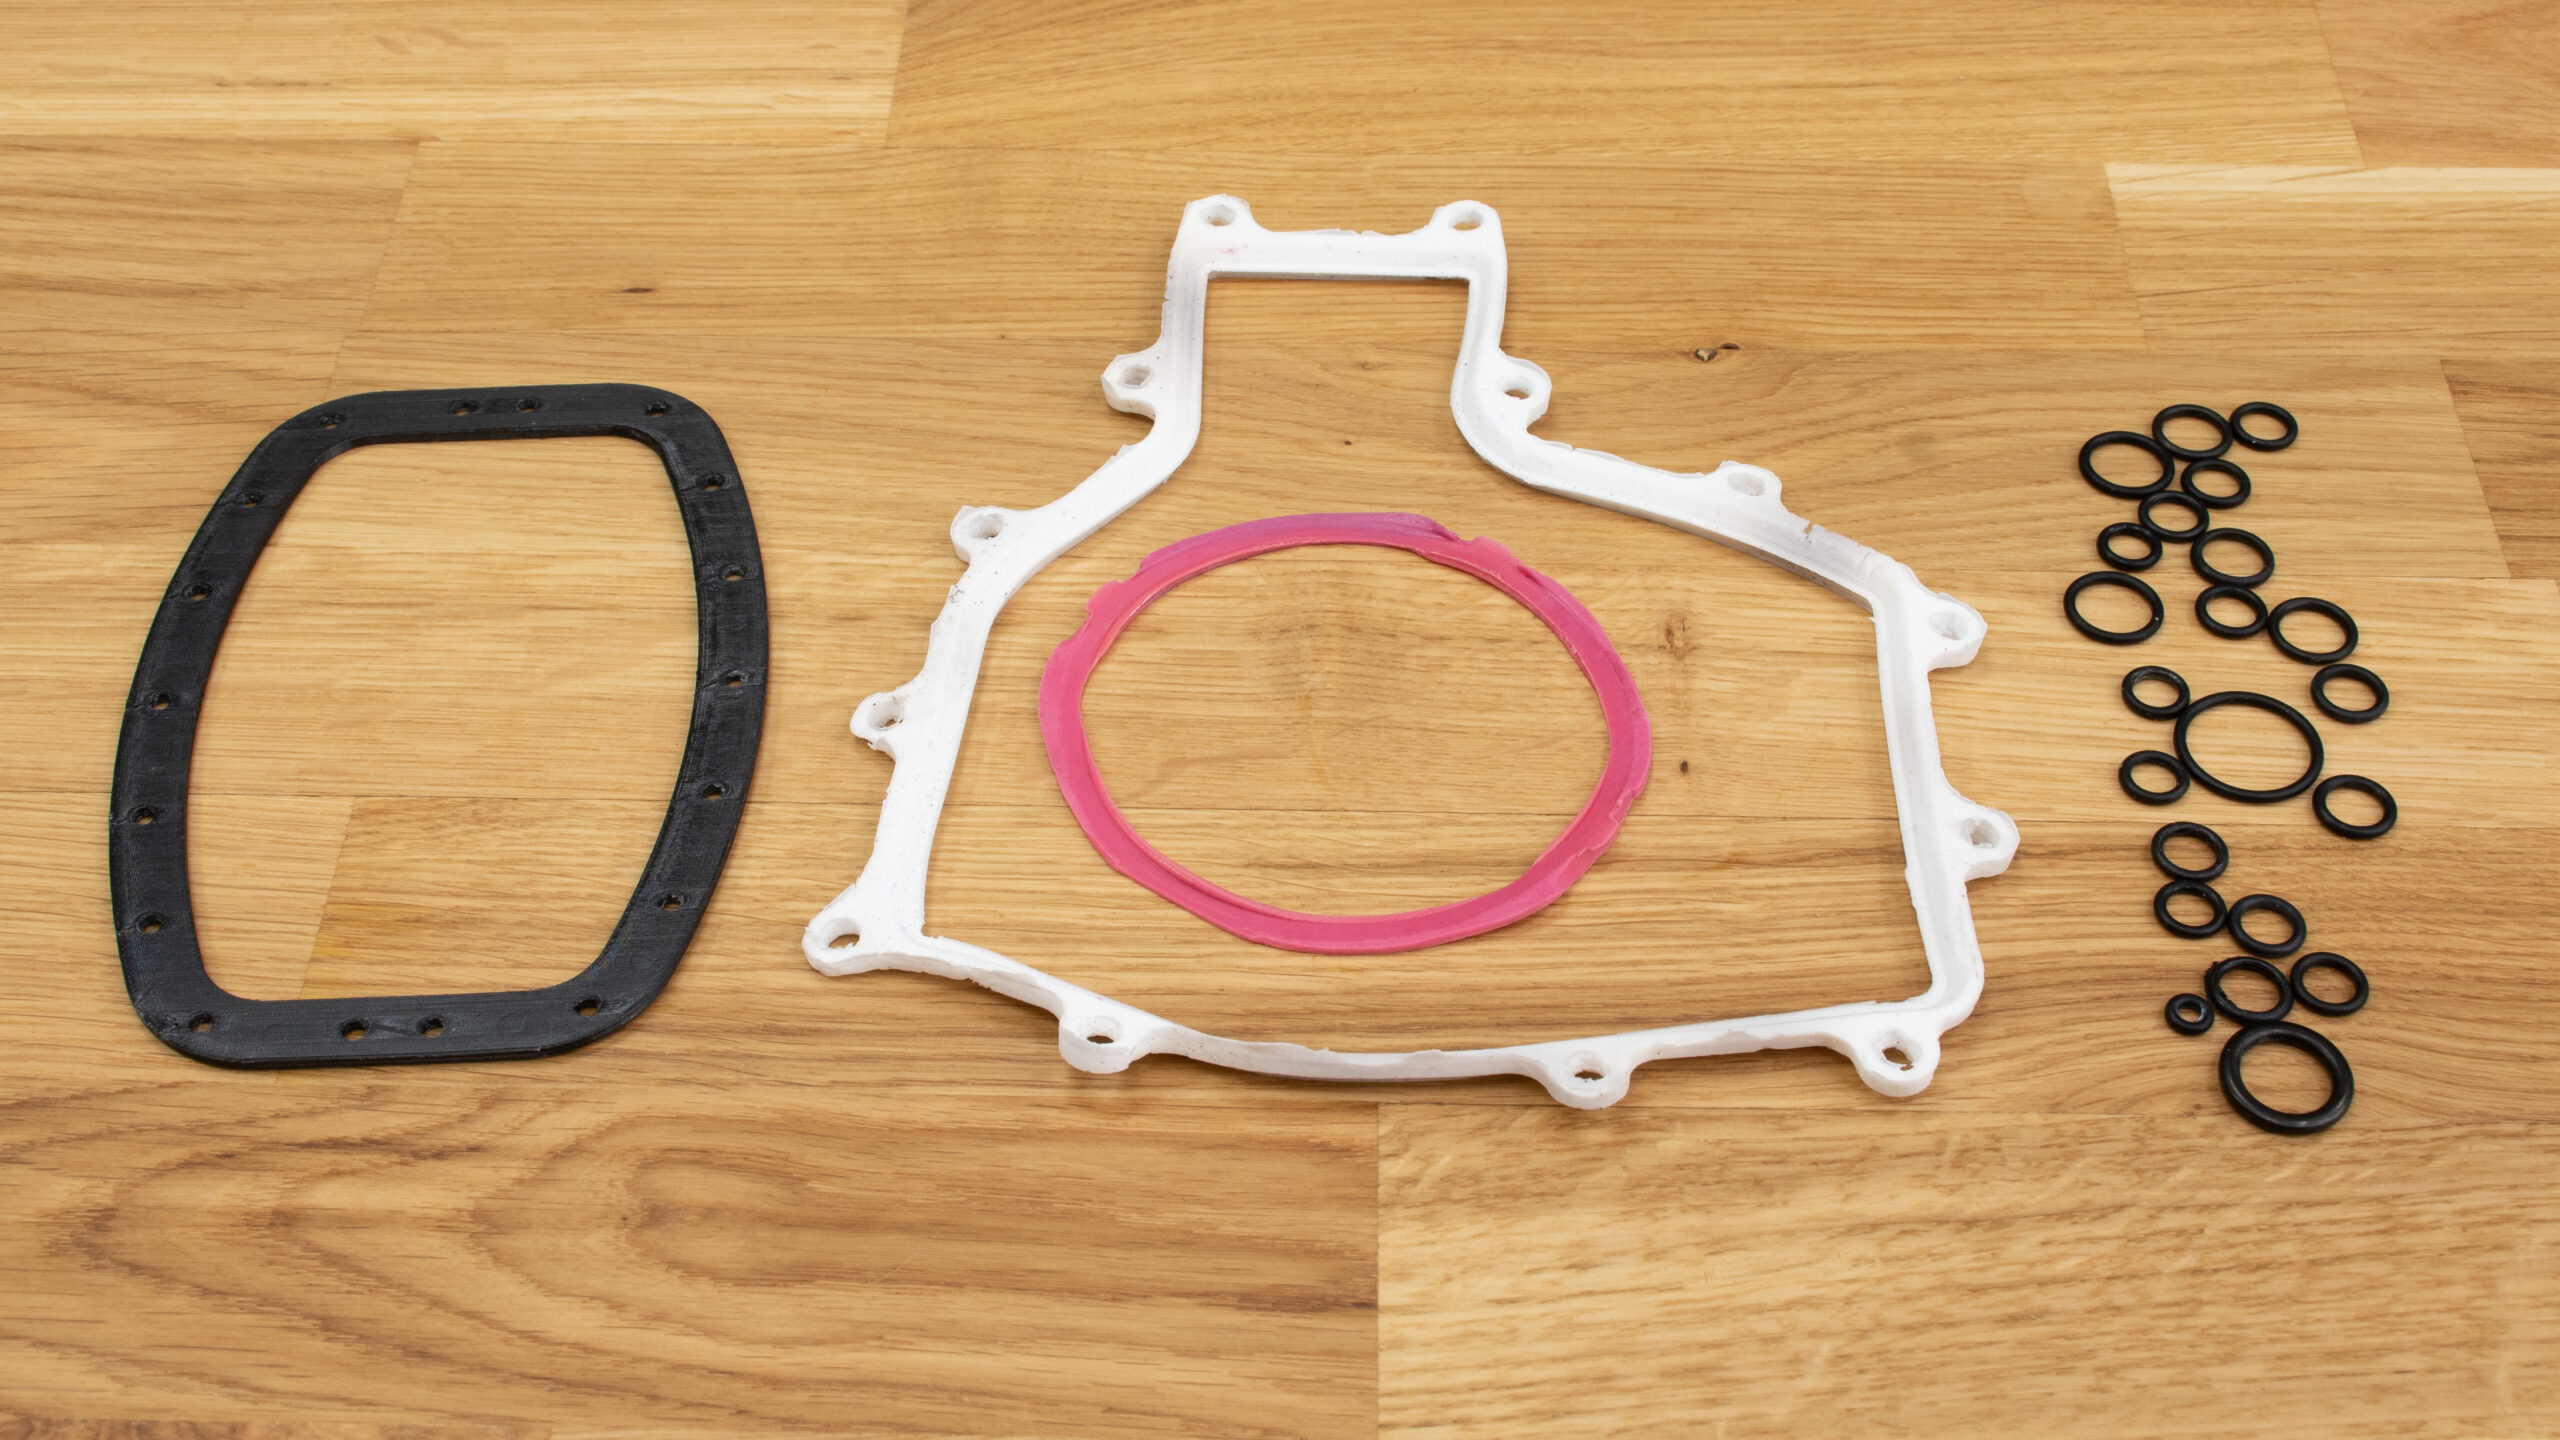
Gaskets
Do you have flexible filaments at home? If so, the idea of 3D-printed gaskets might have crossed your mind. And if you have actually tried it, you probably know that it’s a dead end. It’s much better to print a two-piece mold, fill it with silicone caulk and carefully remove it after drying. Some sources claim that it’s best to use Ooogoo (or modified proto-putty) made from mixed silicone caulk, water, and cornstarch.
Atypical shapes
If you’ve ever used a GoPro camera, you probably noticed that the back door sealing has an atypical trapezoid cross-section. It’s quite an unusual shape, but it provides perfect waterproofness up to 40m depth. The question is: where can you buy such sealing? The short and honest answer is: we don’t know. Probably some specialized stores might help. However, if you need such an atypical sealing, it’s perhaps easier to craft it yourself, again, with mold and silicone caulk.
O-Rings
No doubt, the best, easiest, and most proven method is using simple O-rings. After all, there is no point in making it complicated. The only thing to take care of is the correct dimensions of used O-rings and modeled parts. In addition, we recommend treating the O-ring (or any other sealing) surface with silicone grease before every use. Detailed information about the correct usage of O-rings can be found in this article again.
Transparent parts
Let’s assume that most of the watertight parts will require at least one transparent part. Is it wise to print it or to use another method? Now it’s an excellent opportunity to revisit our older article about printing transparent models. And yes, you can use it for watertight prints, as long as you don’t need it to be crystal clear. All you have to do is stick to our directions and polish them properly.
Moving parts (switches etc.)
Sometimes you may need to print some moving parts, for example, to use various buttons and switches when printing electronics covers. The easiest way to do it is using a flexible filament (at least for a part of the model) – this way, you can press the buttons through the wall with no need to open the model or design anything complicated. But it might be problematic in greater depths, where the flexible part is compressed and constantly applies pressure onto the button.
Another option is to use a stainless steel pin with an O-ring, the same way GoPro cases do it. However, this method might end as a disaster because any minor imperfection will cause water leakage. So instead, it’s much better to use a magnetic switch that is commonly implemented into diving lights. We suggest these two ways:
- A magnet attracts a small metal part (a spring, for example) that will touch the other end of the circuit.
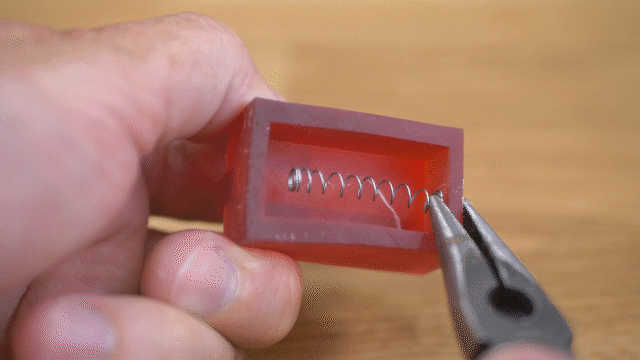
- Two magnets are placed on opposite sides of the wall. As they are moved from one side to another, they work as a mechanical switch (even a simple copper wire glued to the magnet might work).

When the reality kicks in
Ok, that was the theory. But how does it all work in reality? And does it even work? As always, we prepared several testing models to try everything mentioned above. The results are sometimes good, sometimes bad. So let’s have a look:
Choosing the model
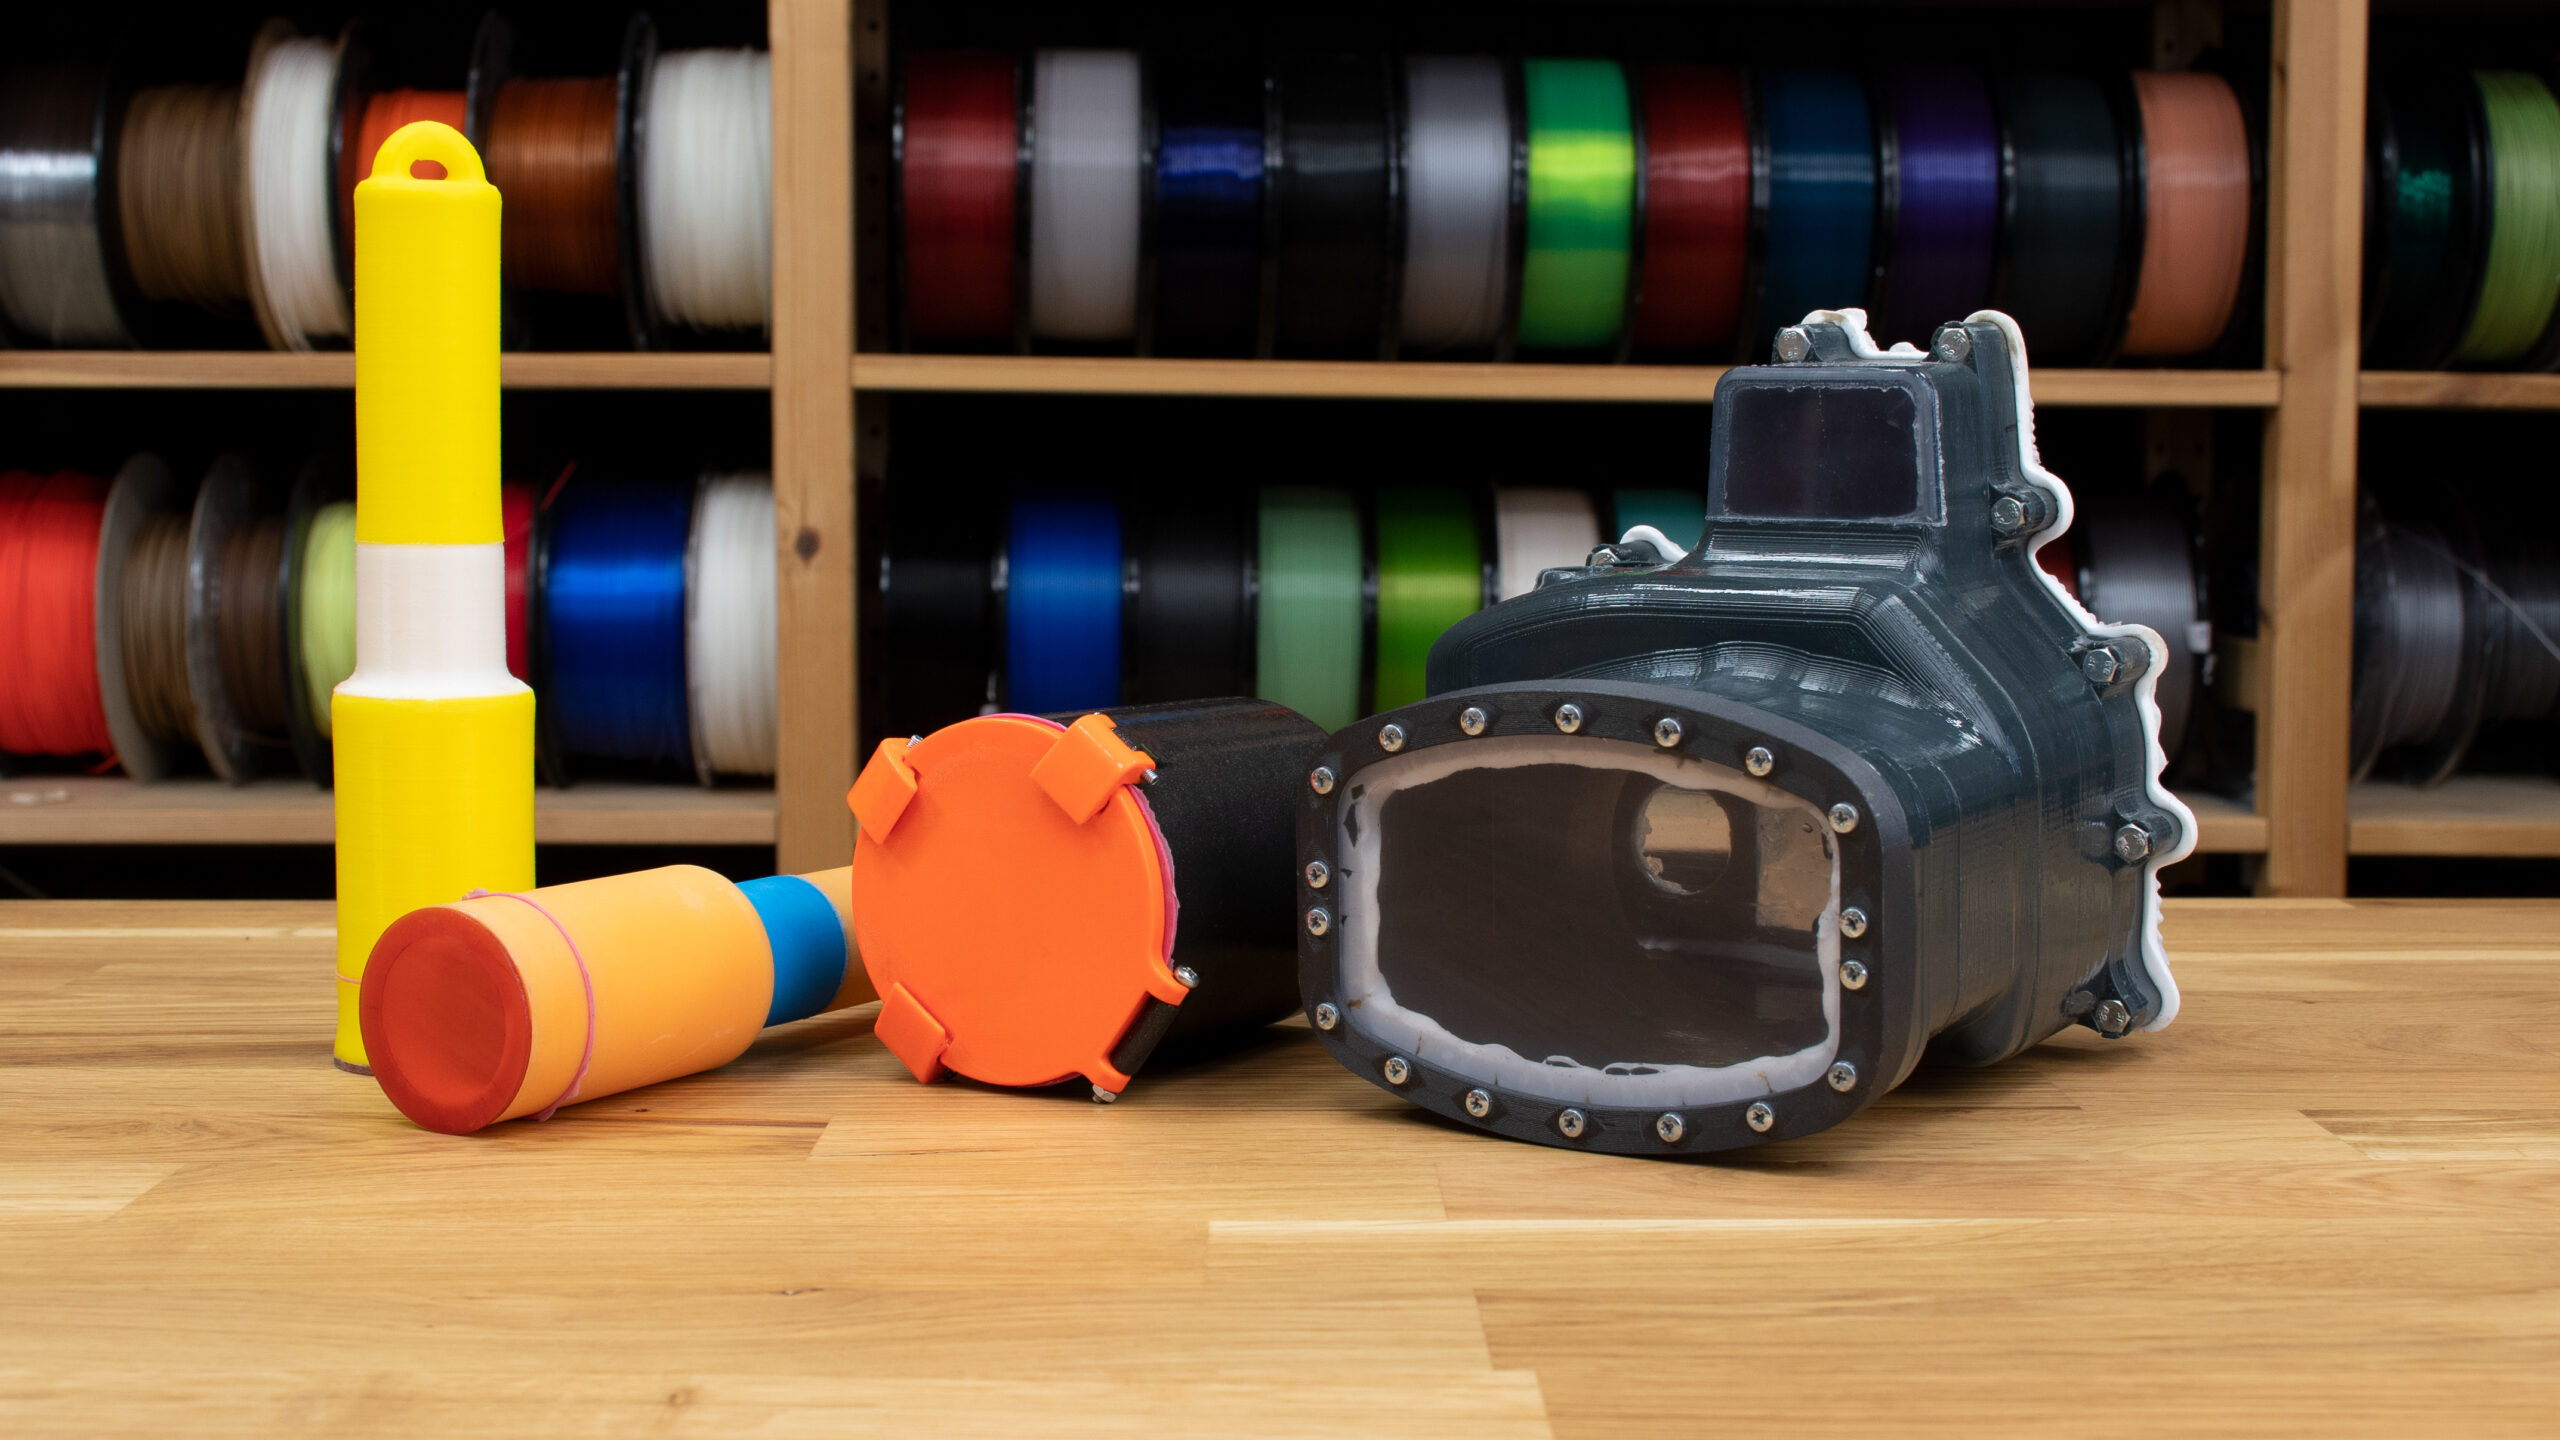
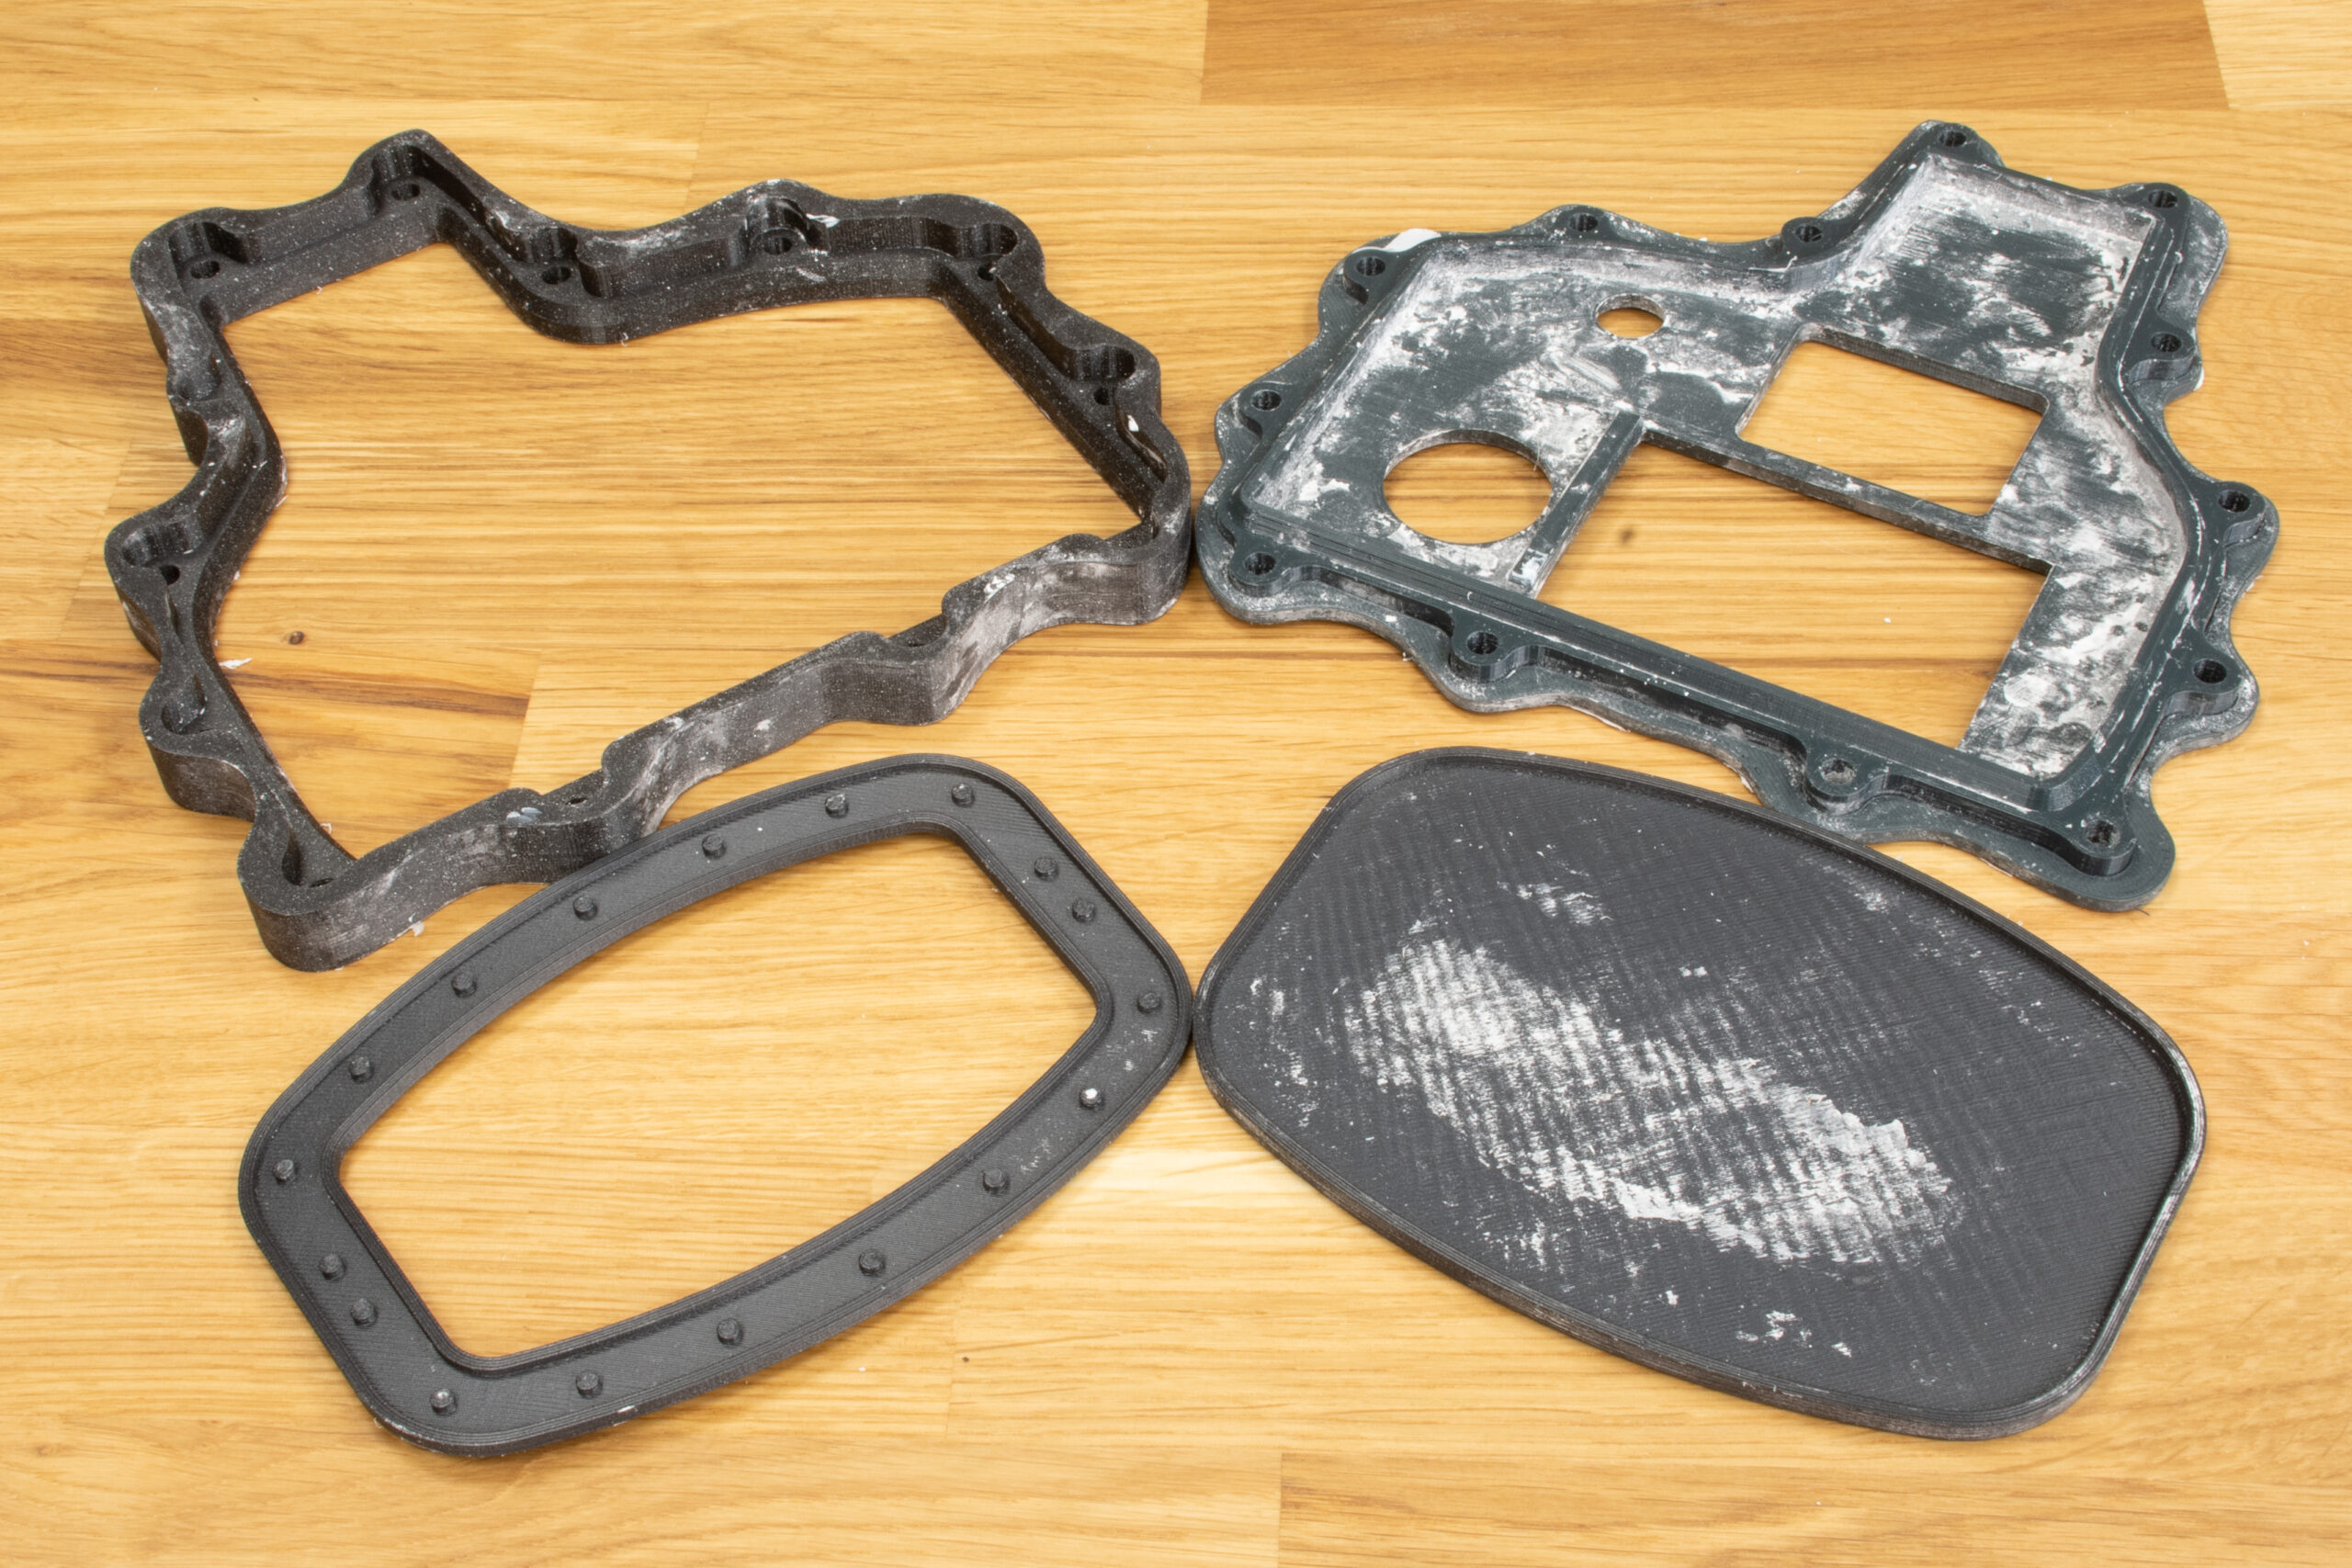
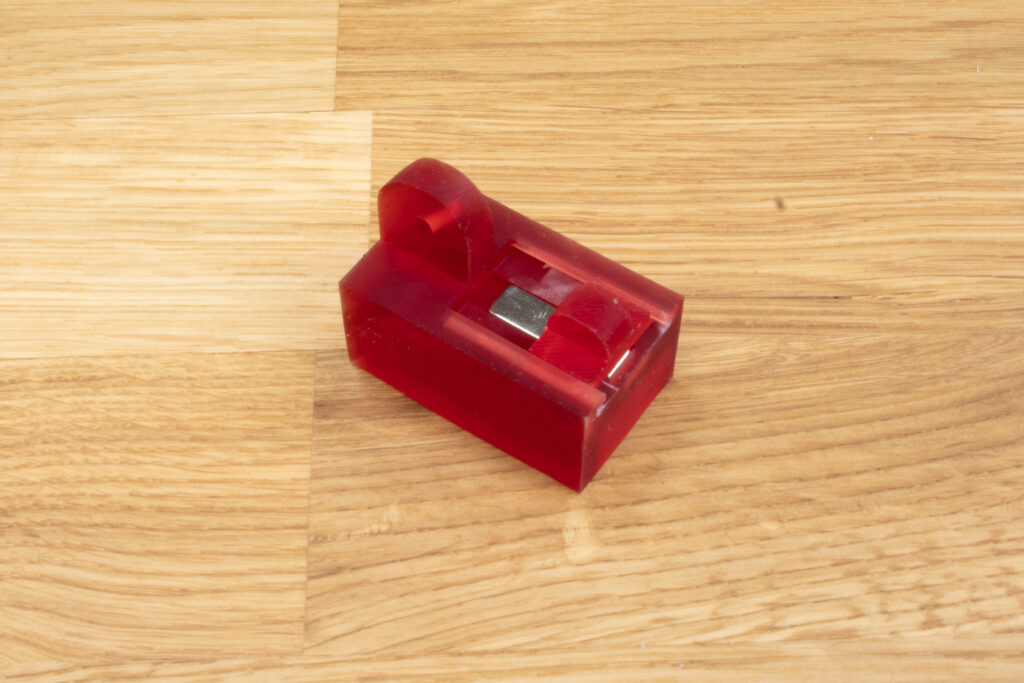
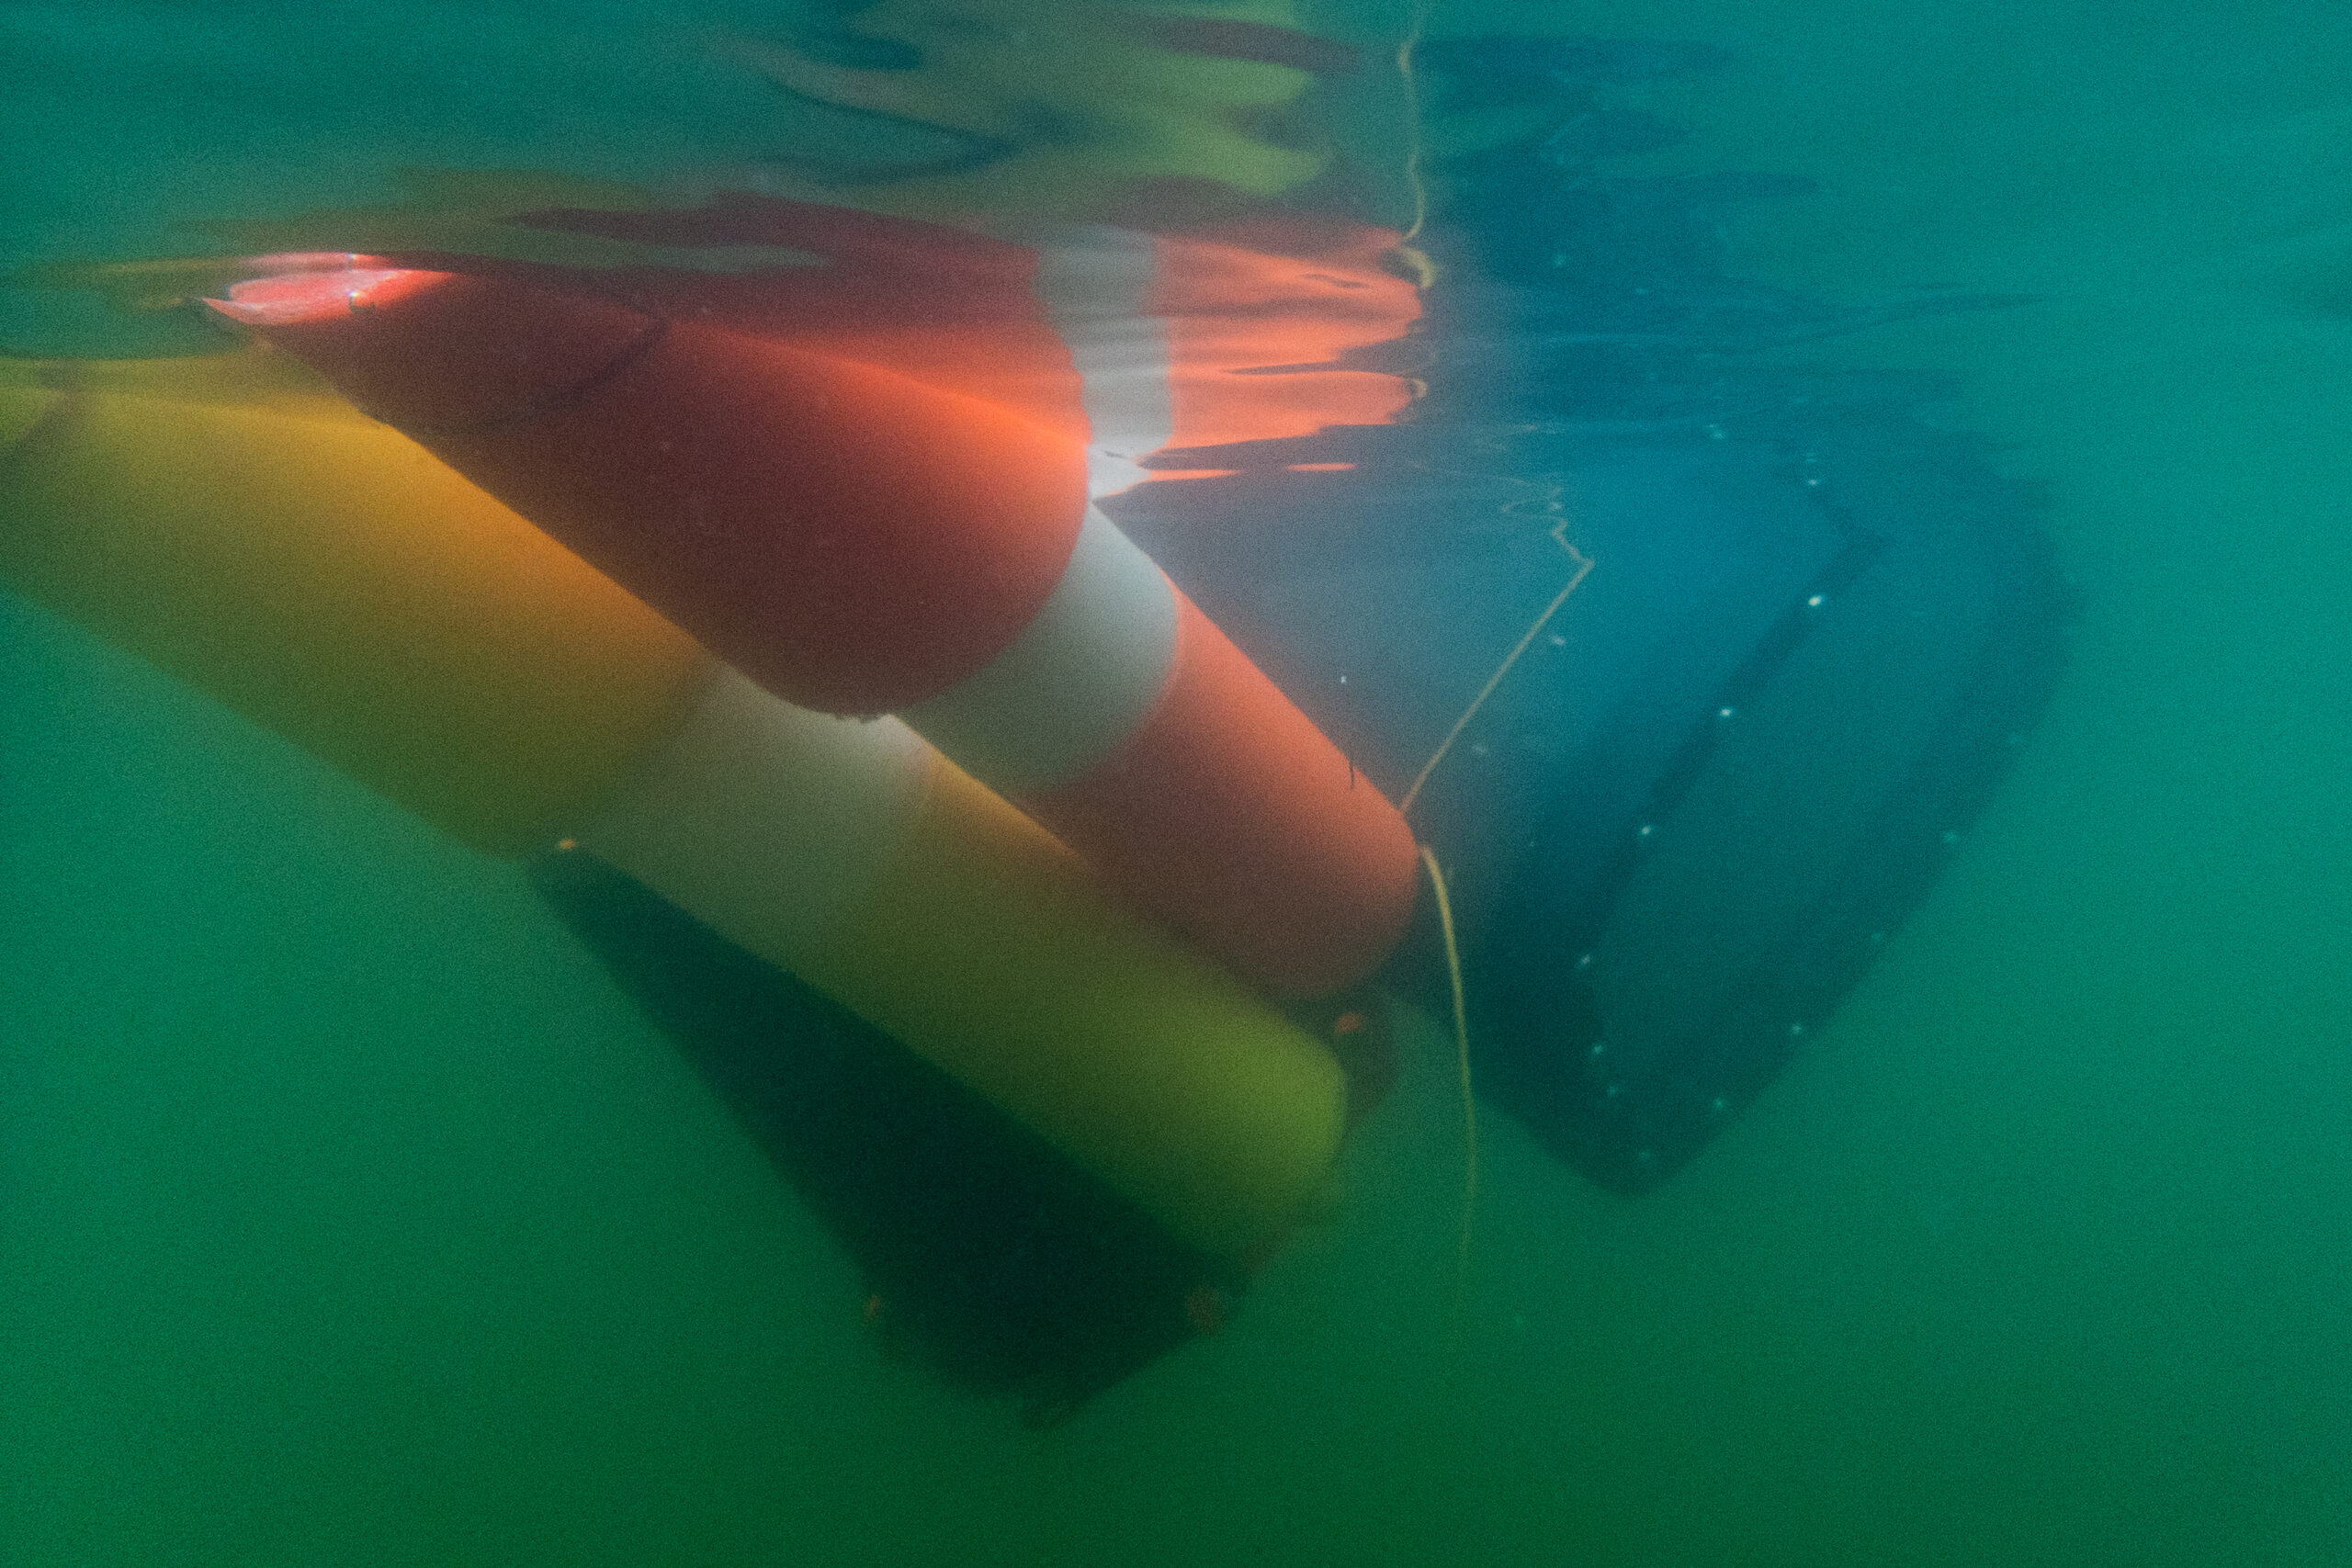
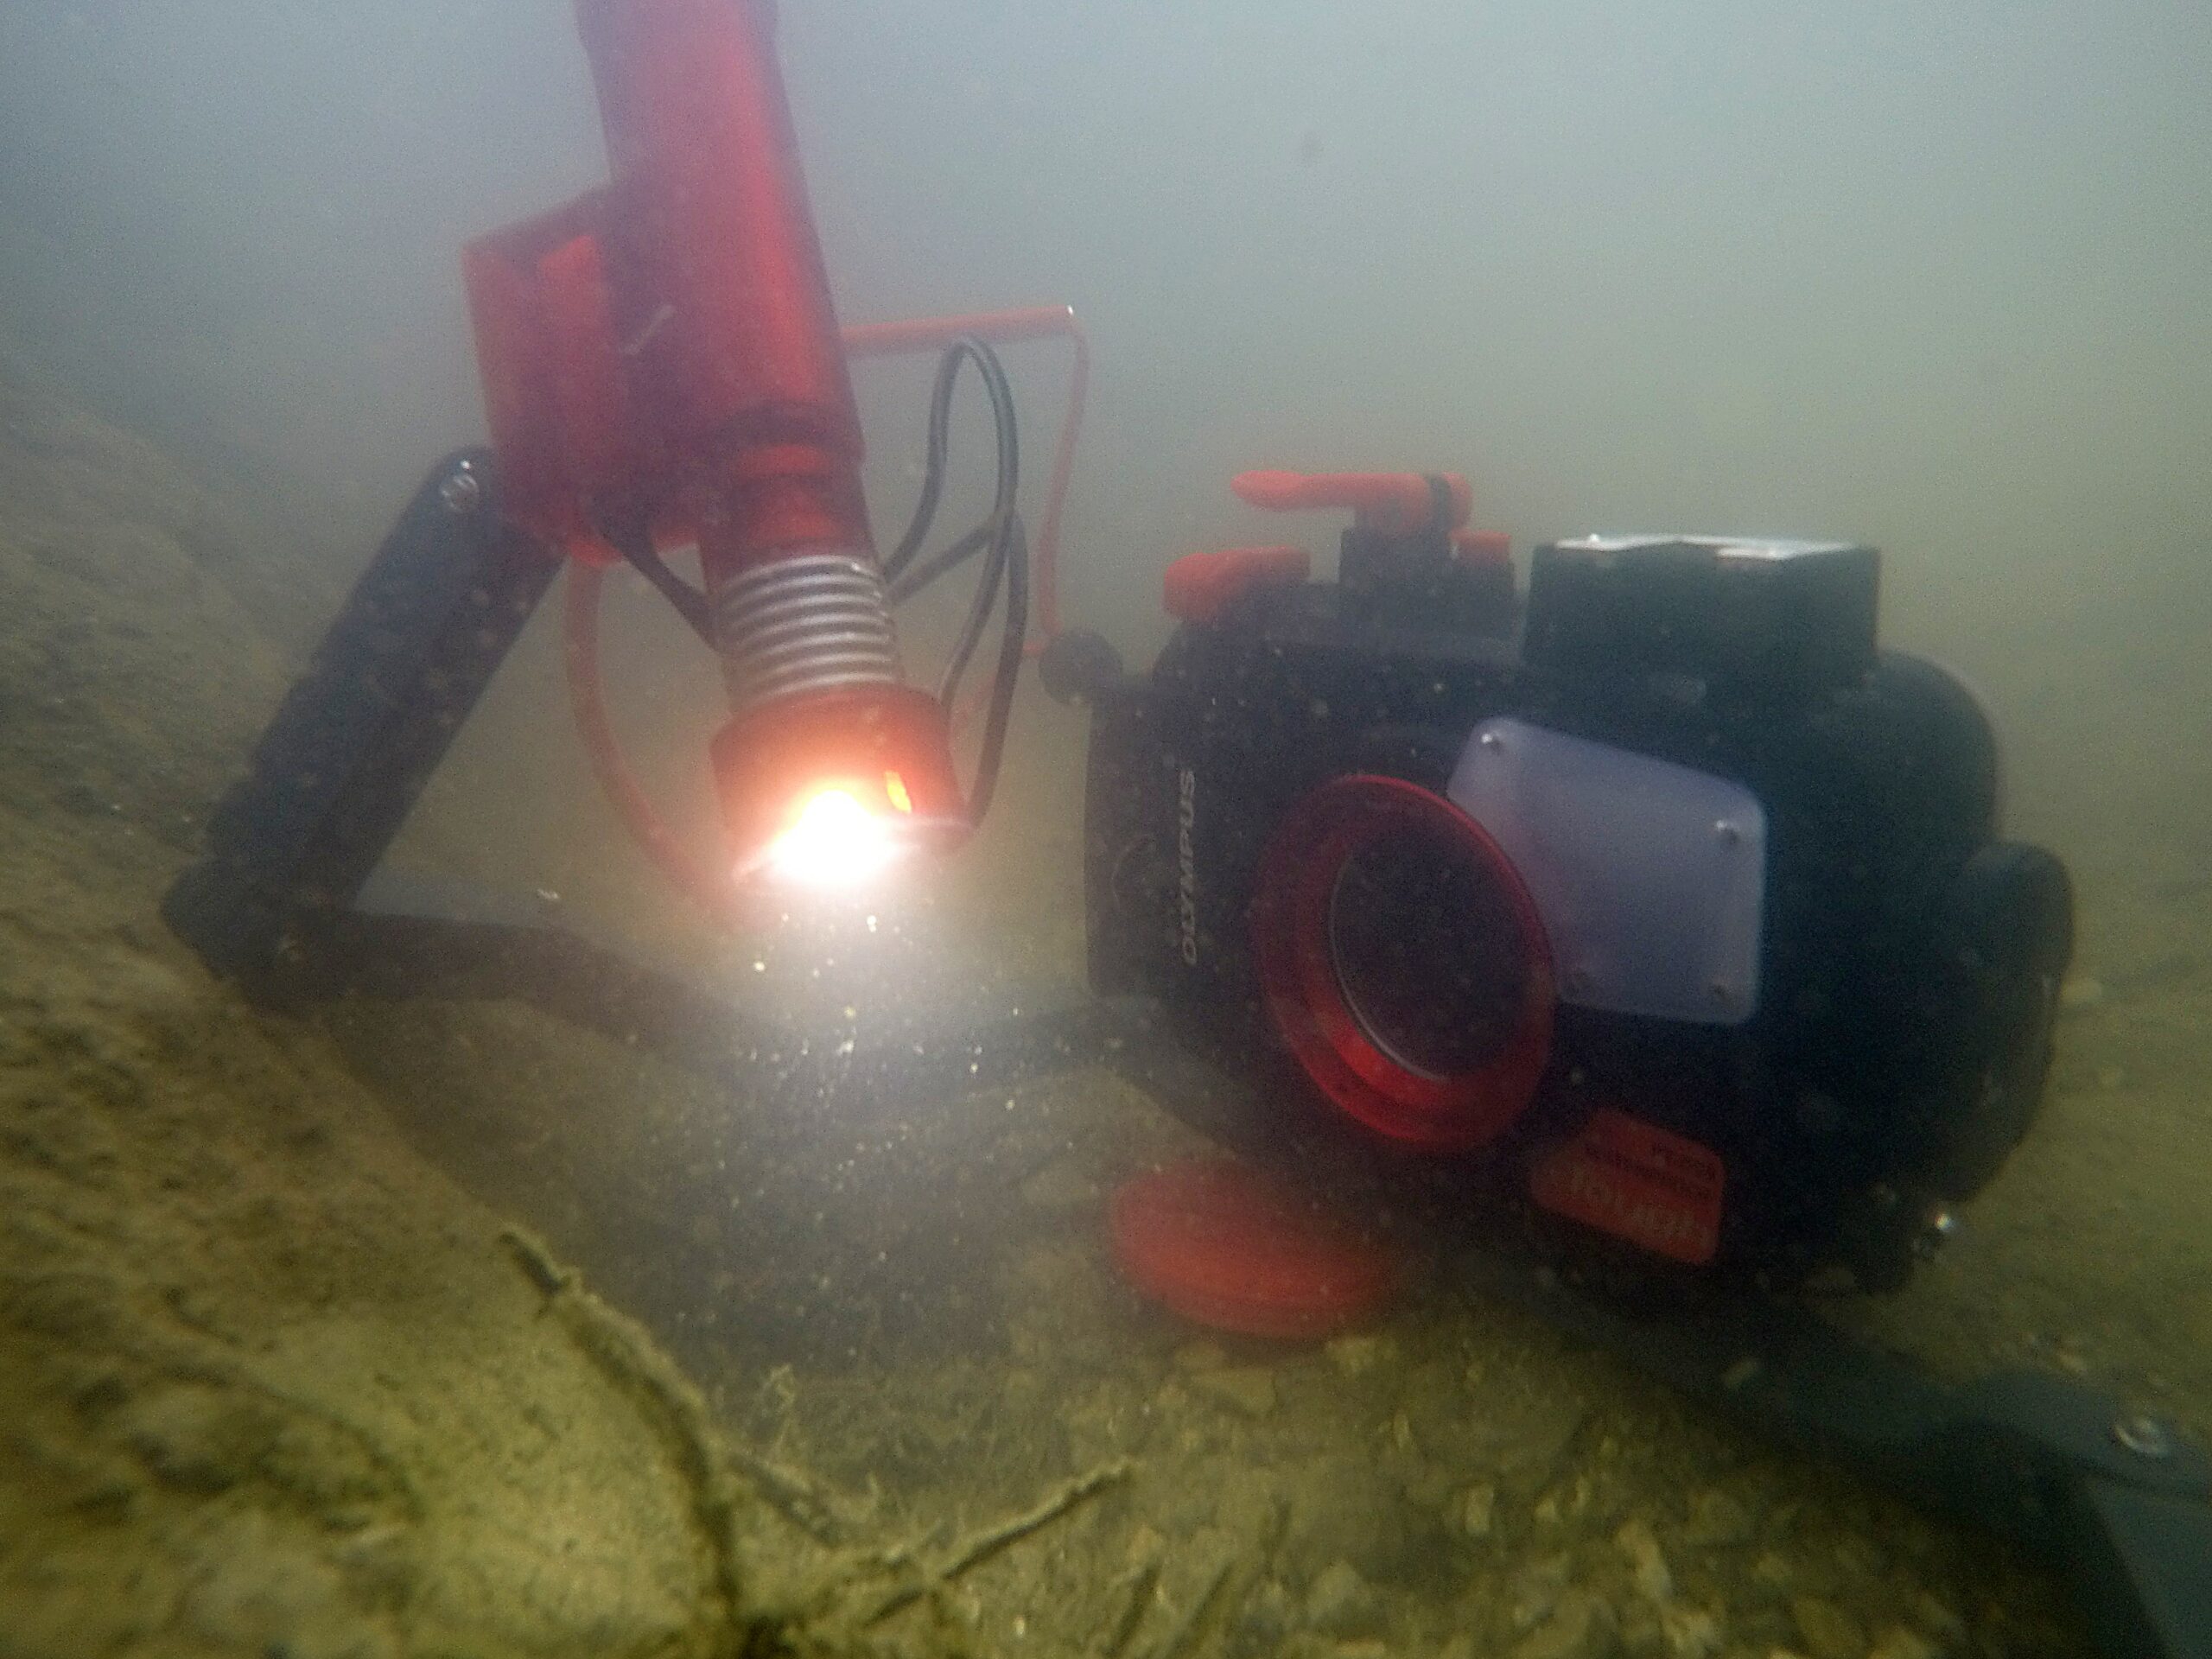
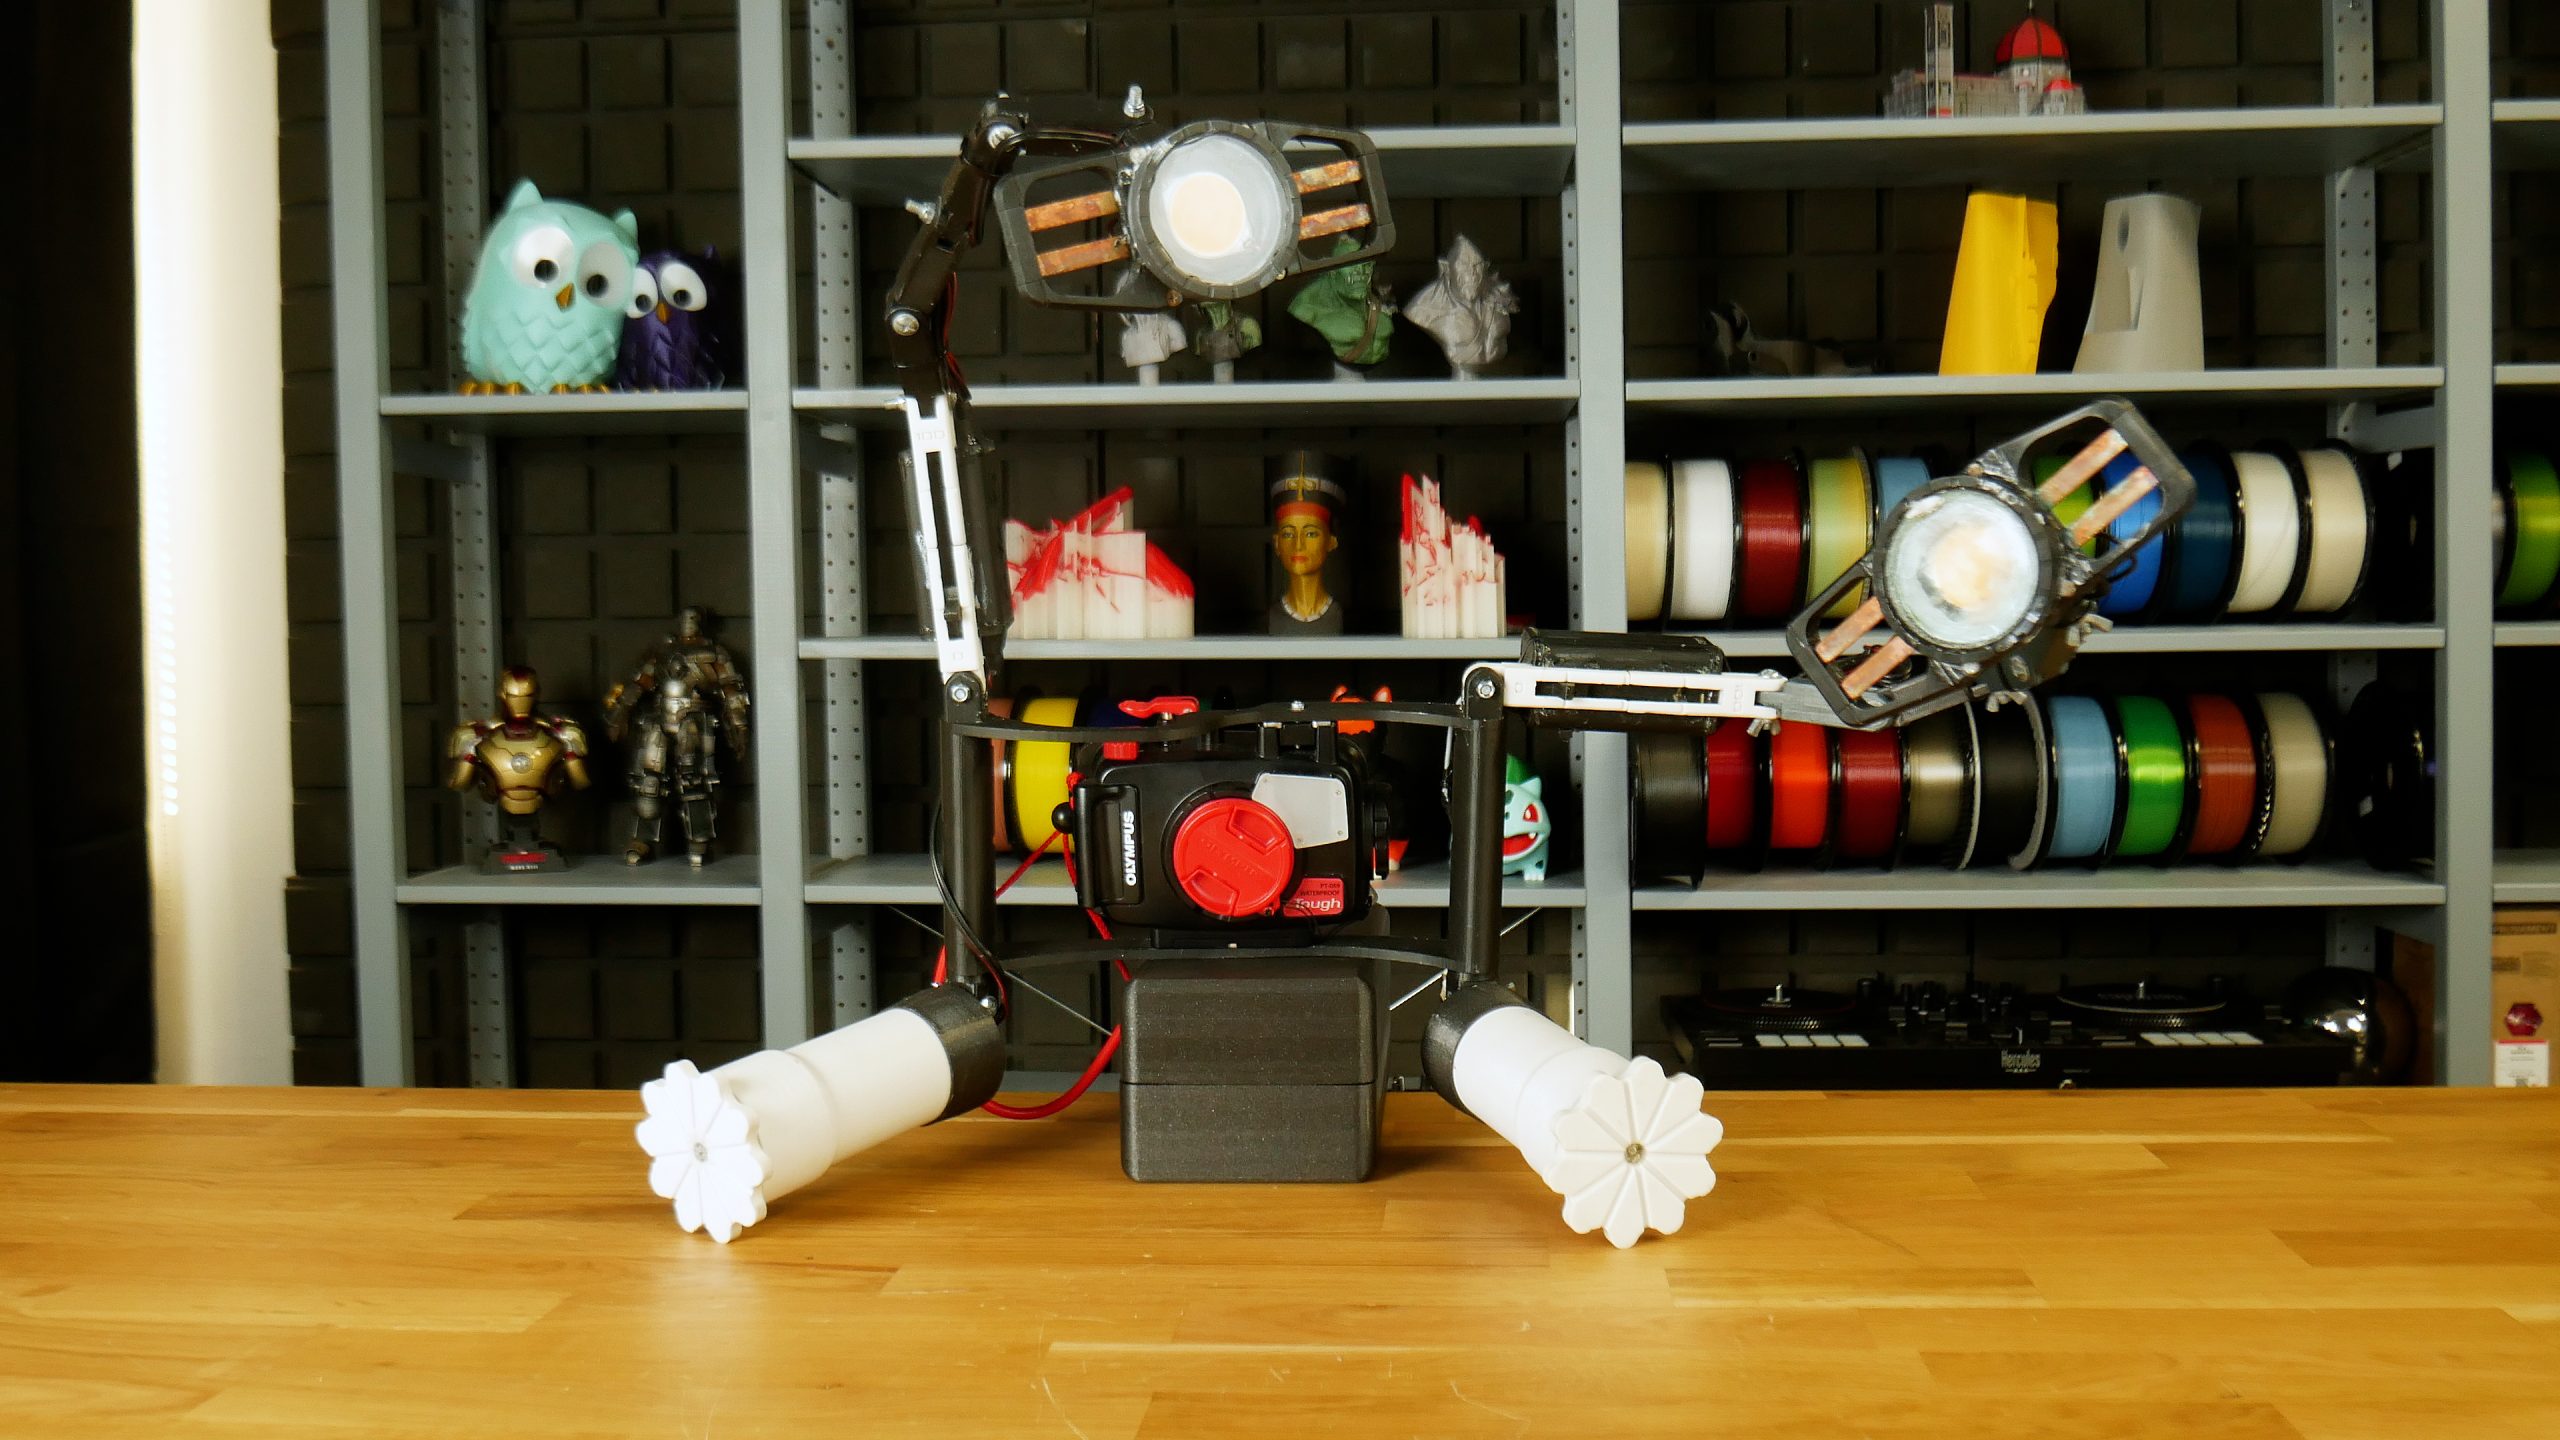
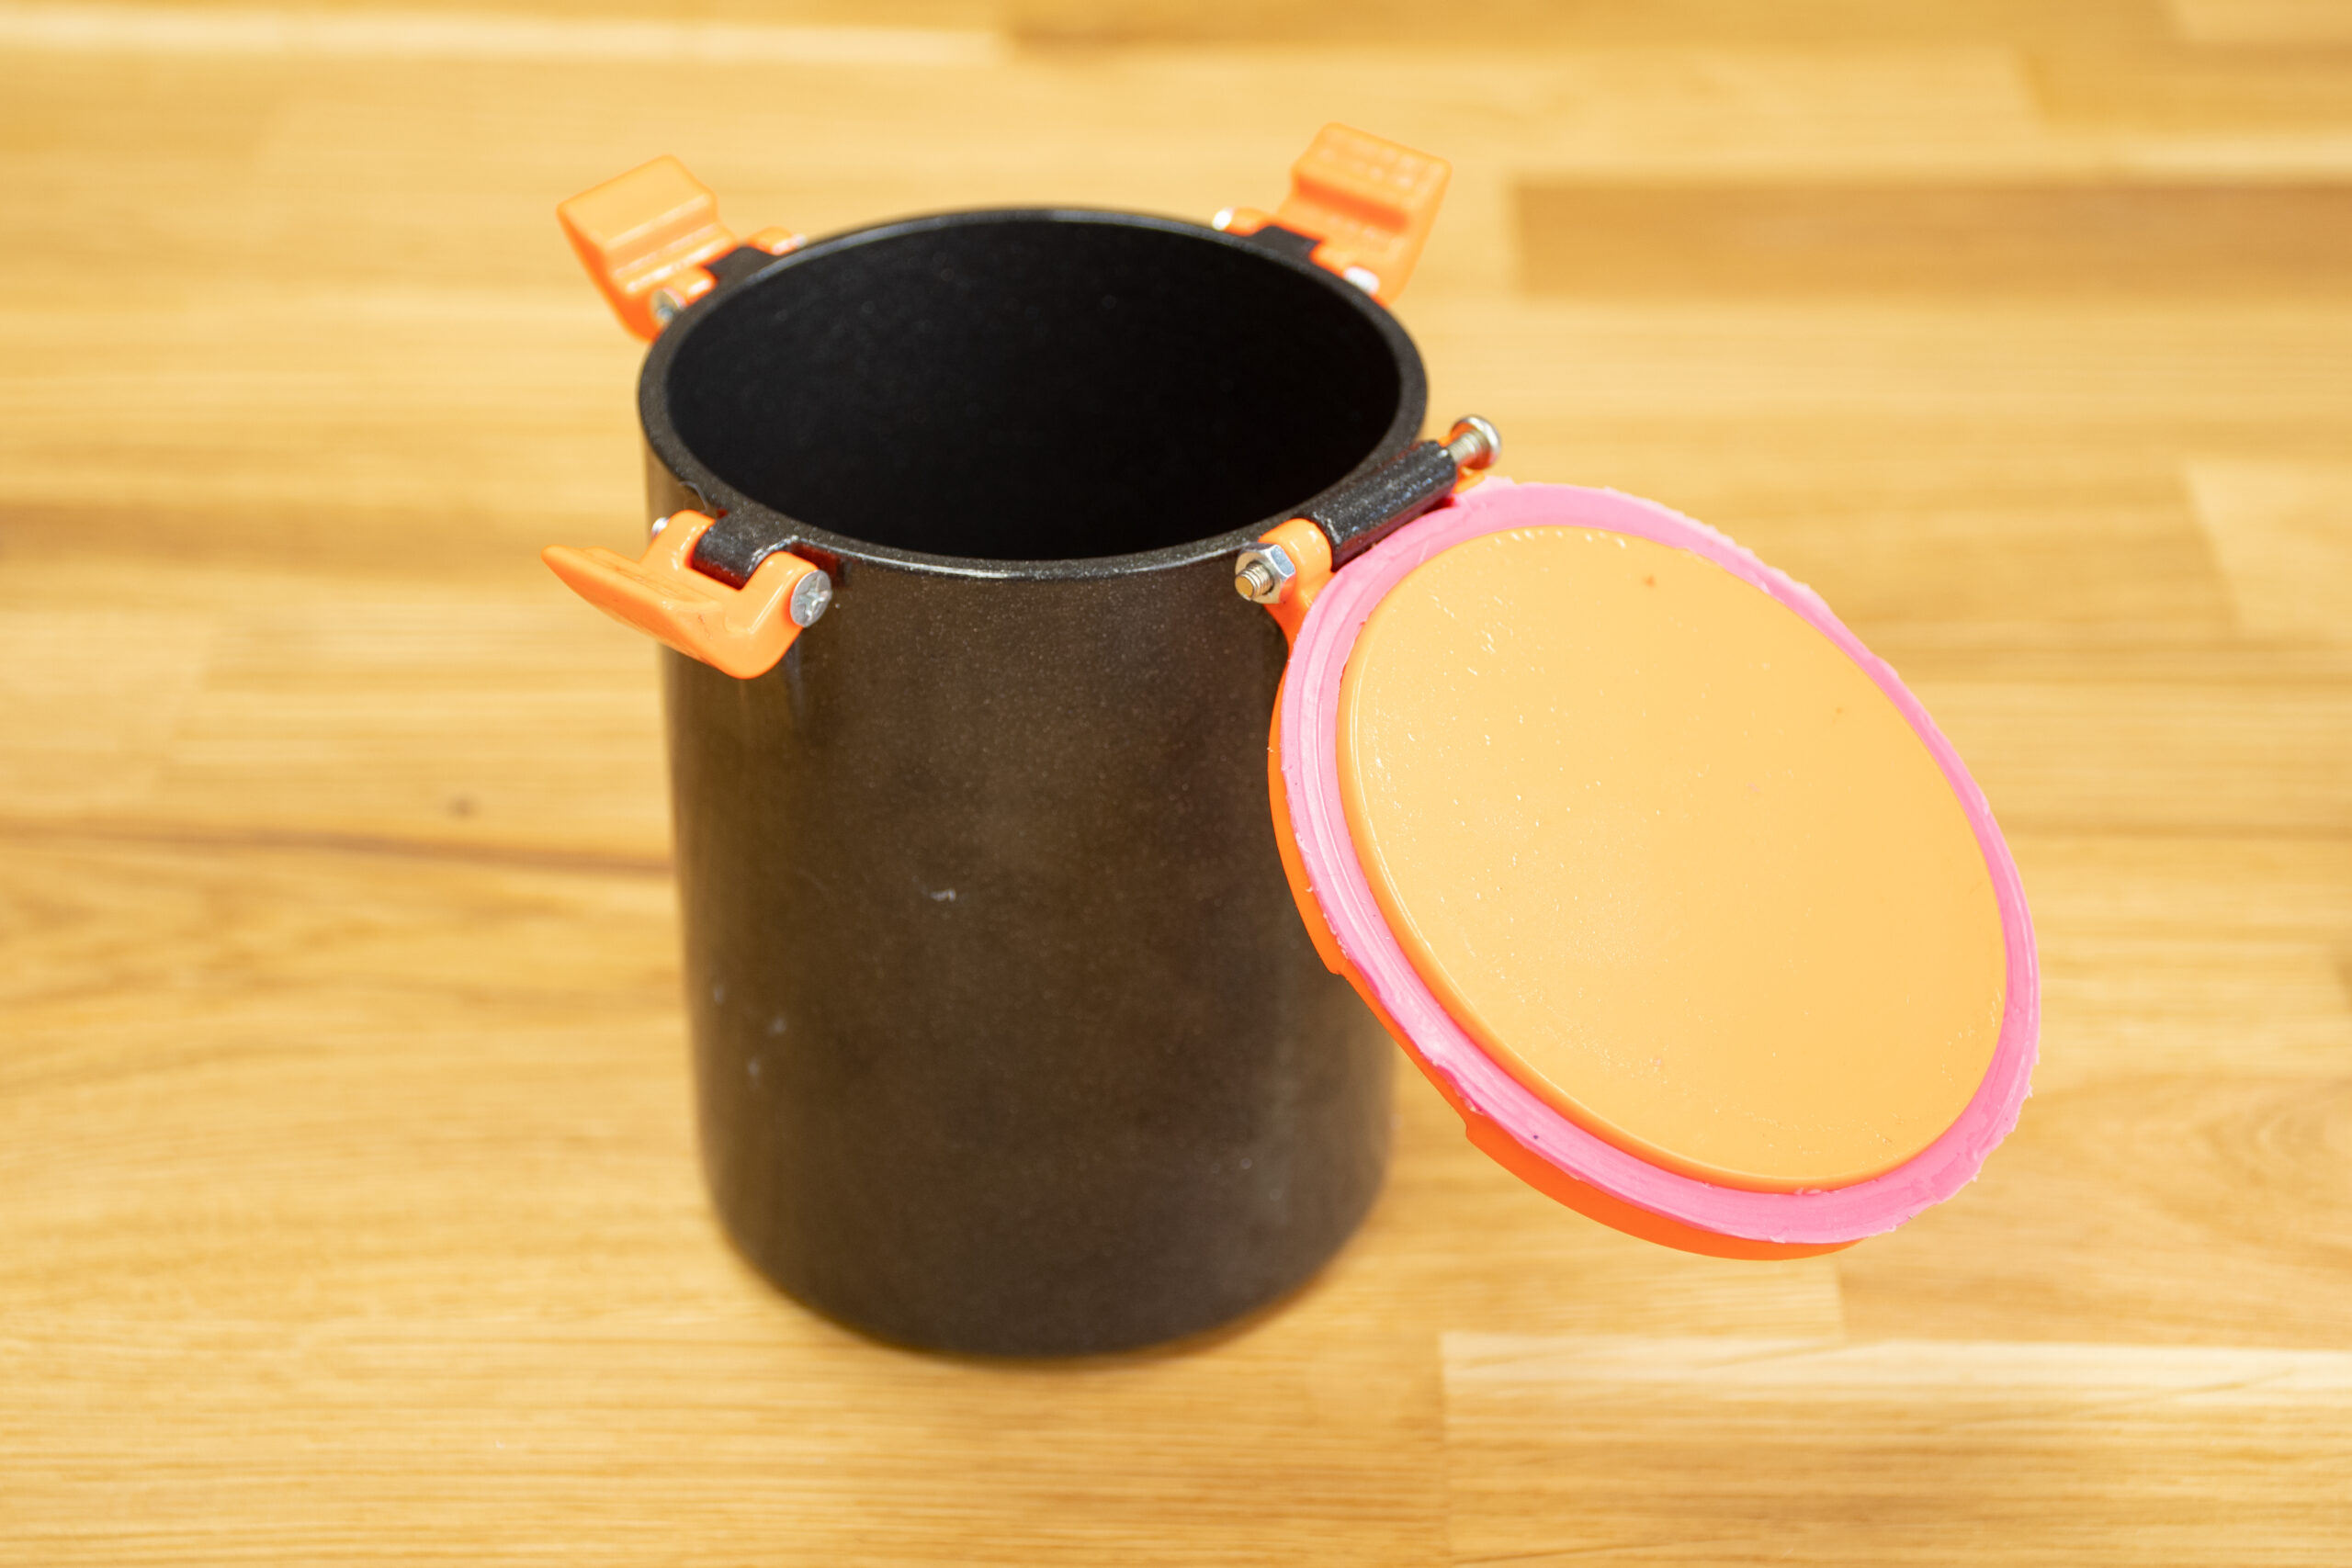
In the beginning, we chose four basic models: A simple variant of a Lock&Lock box with a gasket, a threaded flashlight housing, a custom external light for underwater macro photography, and a camera housing.
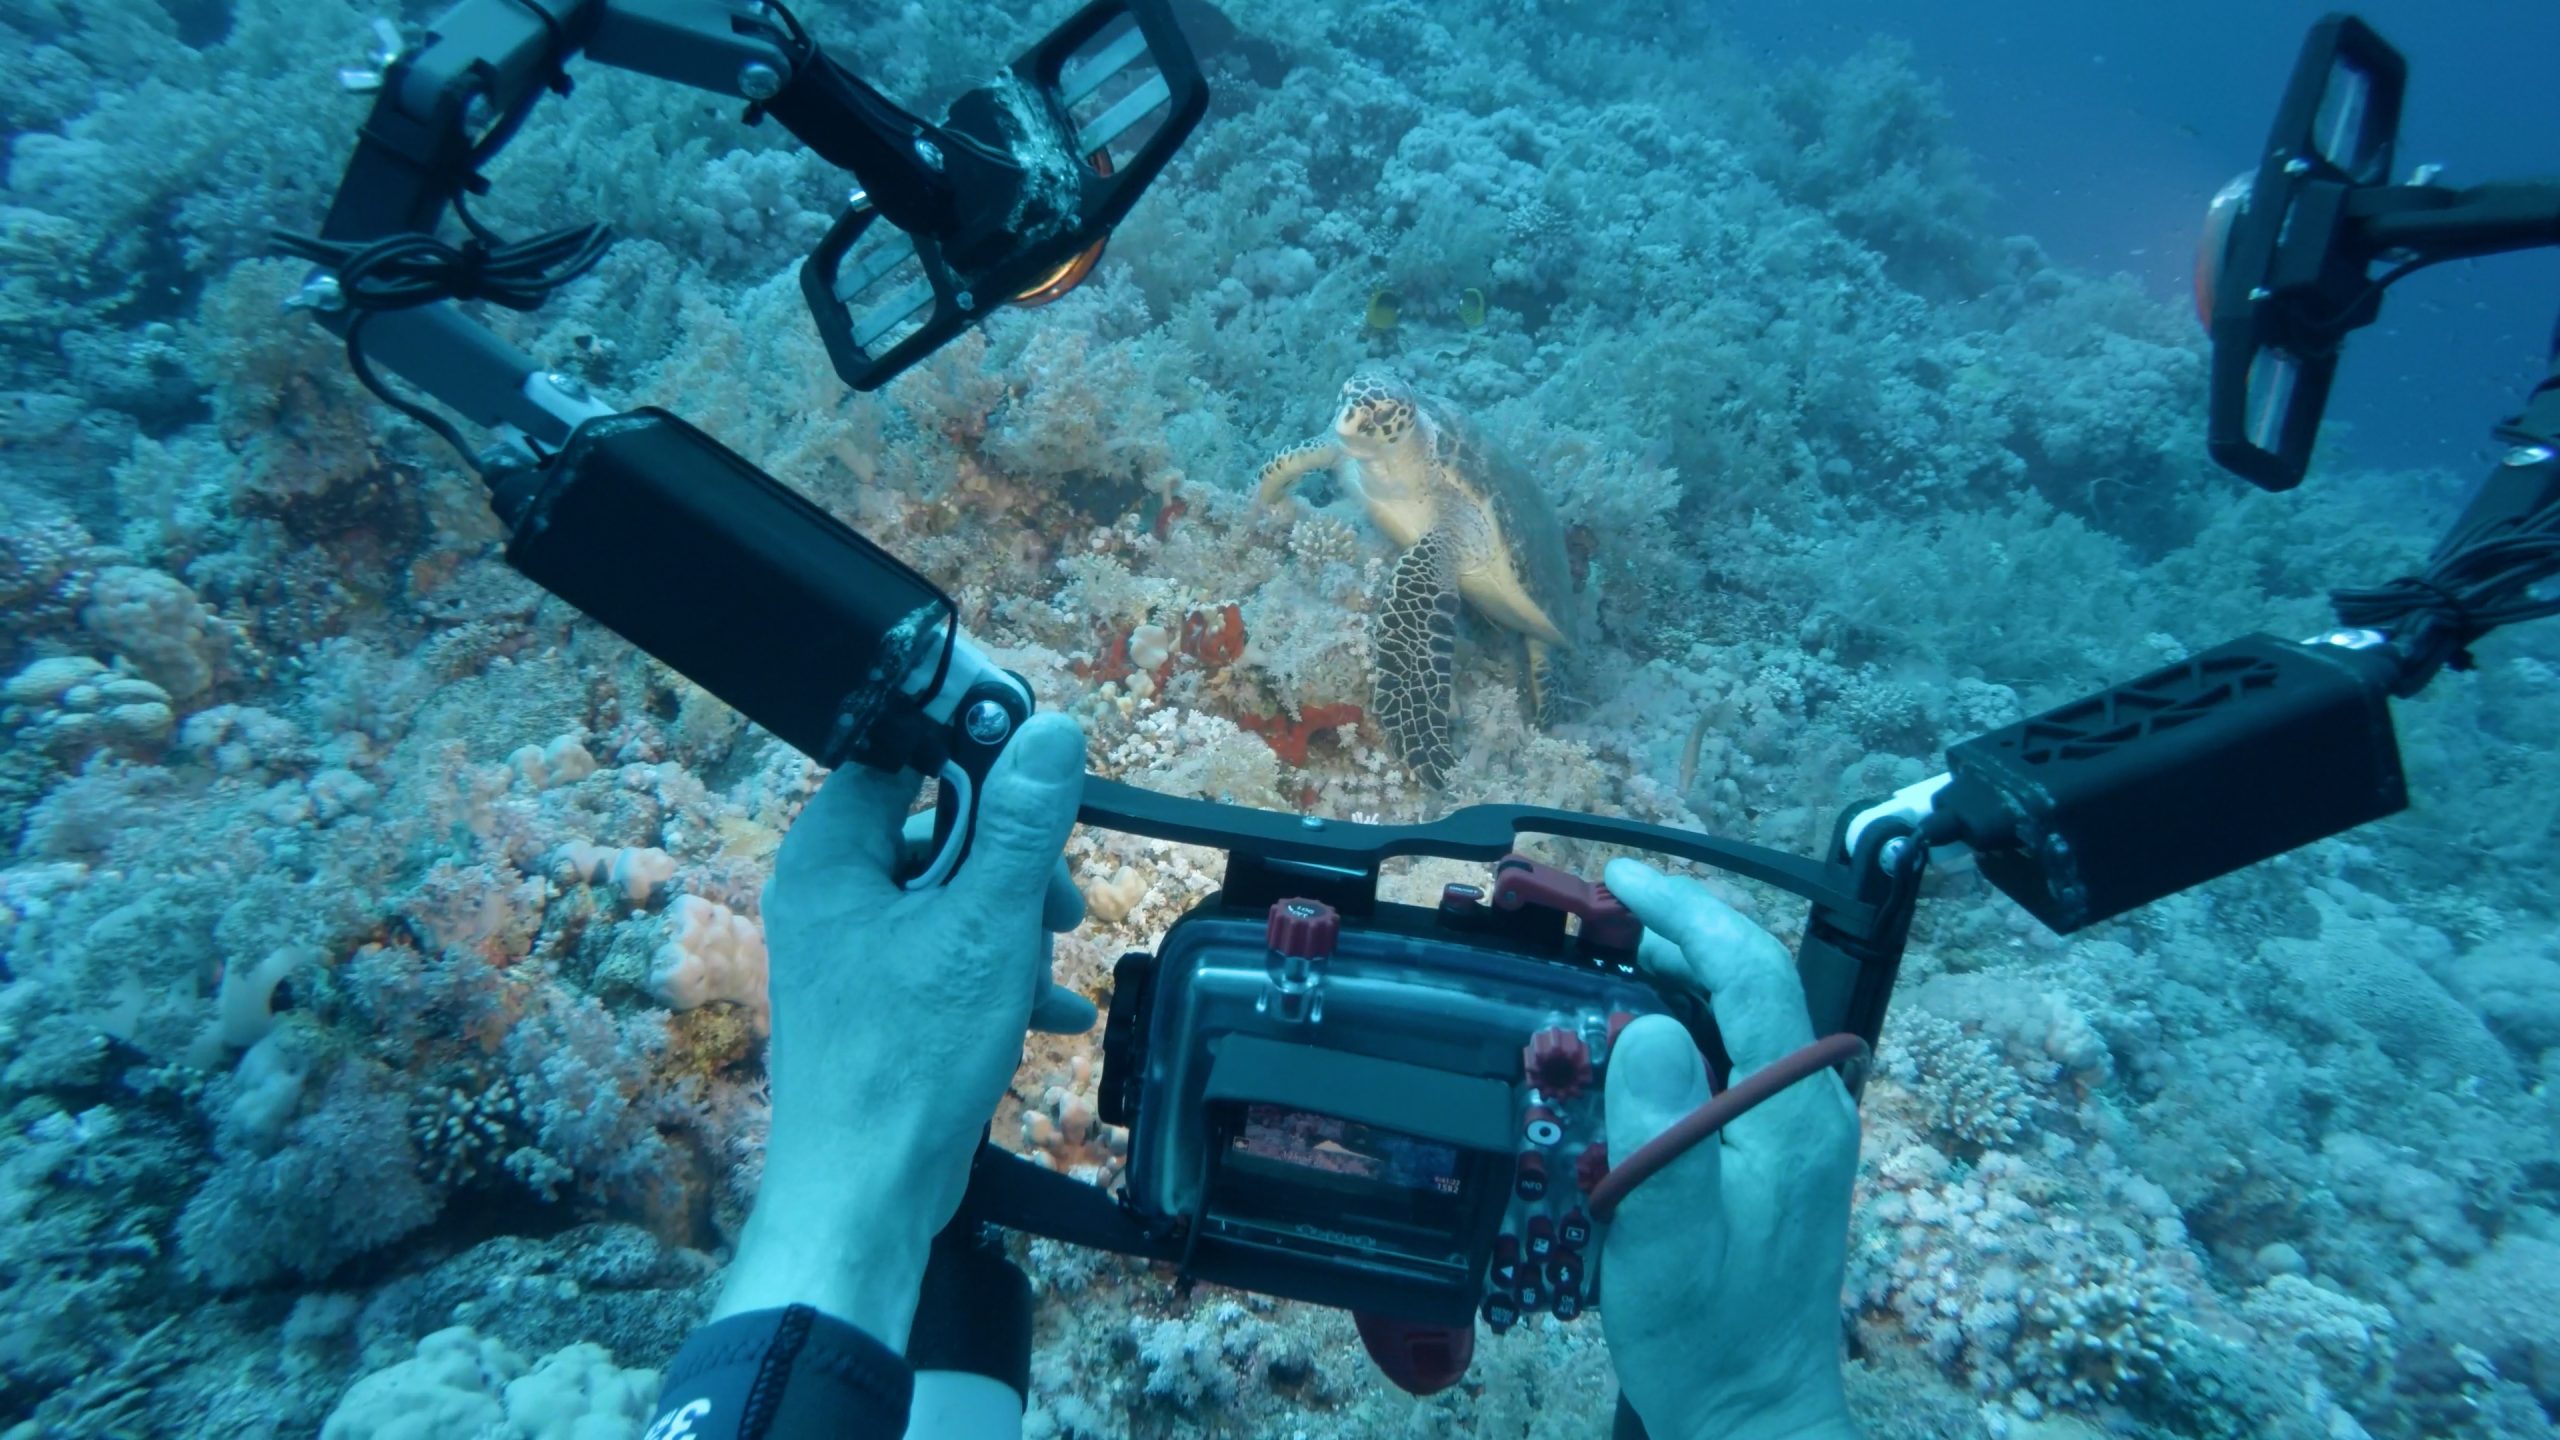
We present the camera housing as possible use of a complex 3D printed part. But keep in mind that it might be uneconomical or even useless due to the time consumption and high failure rate.
Material and print settings
We’ve pretty much summed up most of the print and material settings in our previous article. However, we still think it’s good to pinpoint some of the essential aspects, especially when you’re planning to use such an object in a high-pressure environment.
The first and the most important thing you may notice during the printing process (with more perimeters) is the unattractive appearance of some materials. Bad aesthetics might not be such a big deal for functional models, but if you need it to be as precise as possible to fit electronics inside, you might struggle with doing so due to the excess material on the surface. This means that you should double-check what material you plan to use and what print settings you choose. To be more specific: when we printed PCCF (or PETG) with 100% infill and no extra settings, excess material prevented us from putting any electronics inside.

The second problem that appeared even under low pressure (in a bucket with water) was the permeability of visually compact prints. Specifically, we tested five materials we thought might be suitable for watertightness, and they should still be easy to print: PLA, PETG, PCCF, ASA, and SLA resin (Prusa tough). Surprisingly, the worst results came with untreated PETG and acetone smoothed ASA. PETG leaked really quickly through the seams and contact points between perimeters and solid infill. Smoothed ASA leaked slowly, probably through the surface imperfections around sealing or bubbles inside material since it slightly expanded during the smoothing process. Surprisingly, PLA, PCCF, and SLA prints worked great without post-processing – even 20 meters (66 feet) underwater.

We used various materials to print this model – This model is a flashlight housing with threaded closing and middle part printed with flexible filament/resin. We attempted to print it with various materials.
Our first thought was to give PETG one more chance. This time, we treated it with epoxy resin. Why? Well, it’s pretty simple: carbon fiber filled filaments are usually expensive, and printing it with 100% infill might cost you a lot. The print area size may limit SLA prints, and PLA is prone to heat deformation. See the yellow PLA print above that got deformed in a car on a summer day.
On the other hand, PETG is a cheap material suitable for mechanical use and has a good temperature resistance. By treating it with an epoxy resin, we achieved perfect watertightness and even improved its mechanical properties. The main downside is that liquid two-part epoxy resin is a toxic material that requires respiratory and skin protection. Working with it is messy and time-consuming, but the result is satisfactory.
Printing transparent parts
You won’t go far without making a flashlight or camera housing without using any transparent parts. We’ve already shown you that it’s possible to print glass-like transparent models. This works especially well with transparent SLA resins. However, it is essential to spend enough time sanding and polishing the surface. Every scratch, fog, or bubble will affect transparency and can cause unwanted refraction.
And of course, we also came up with a slightly wild idea: Can you print and polish a protective see-through glass that goes in front of a camera lens? We tried to do it, just for fun. We used the Original Prusa SL1S 3D printer with 3DM tough clear resin. However, we encountered two main issues. The first problem: there are bubbles inside the print, which are caused by platform movement and resin stirring. The other problem is the internal structure of the solidified material. Although the print might look clear at first, you will soon notice that the print structure creates a refraction effect that looks like a blurred cross. Therefore it’s useless as a glass-like see-through print. While this may be ok for things like a semi-transparent LED indicator, it’s simply not suitable as a camera cover. Instead, we suggest cutting a plexiglass sheet with a laser plotter.

Sealing
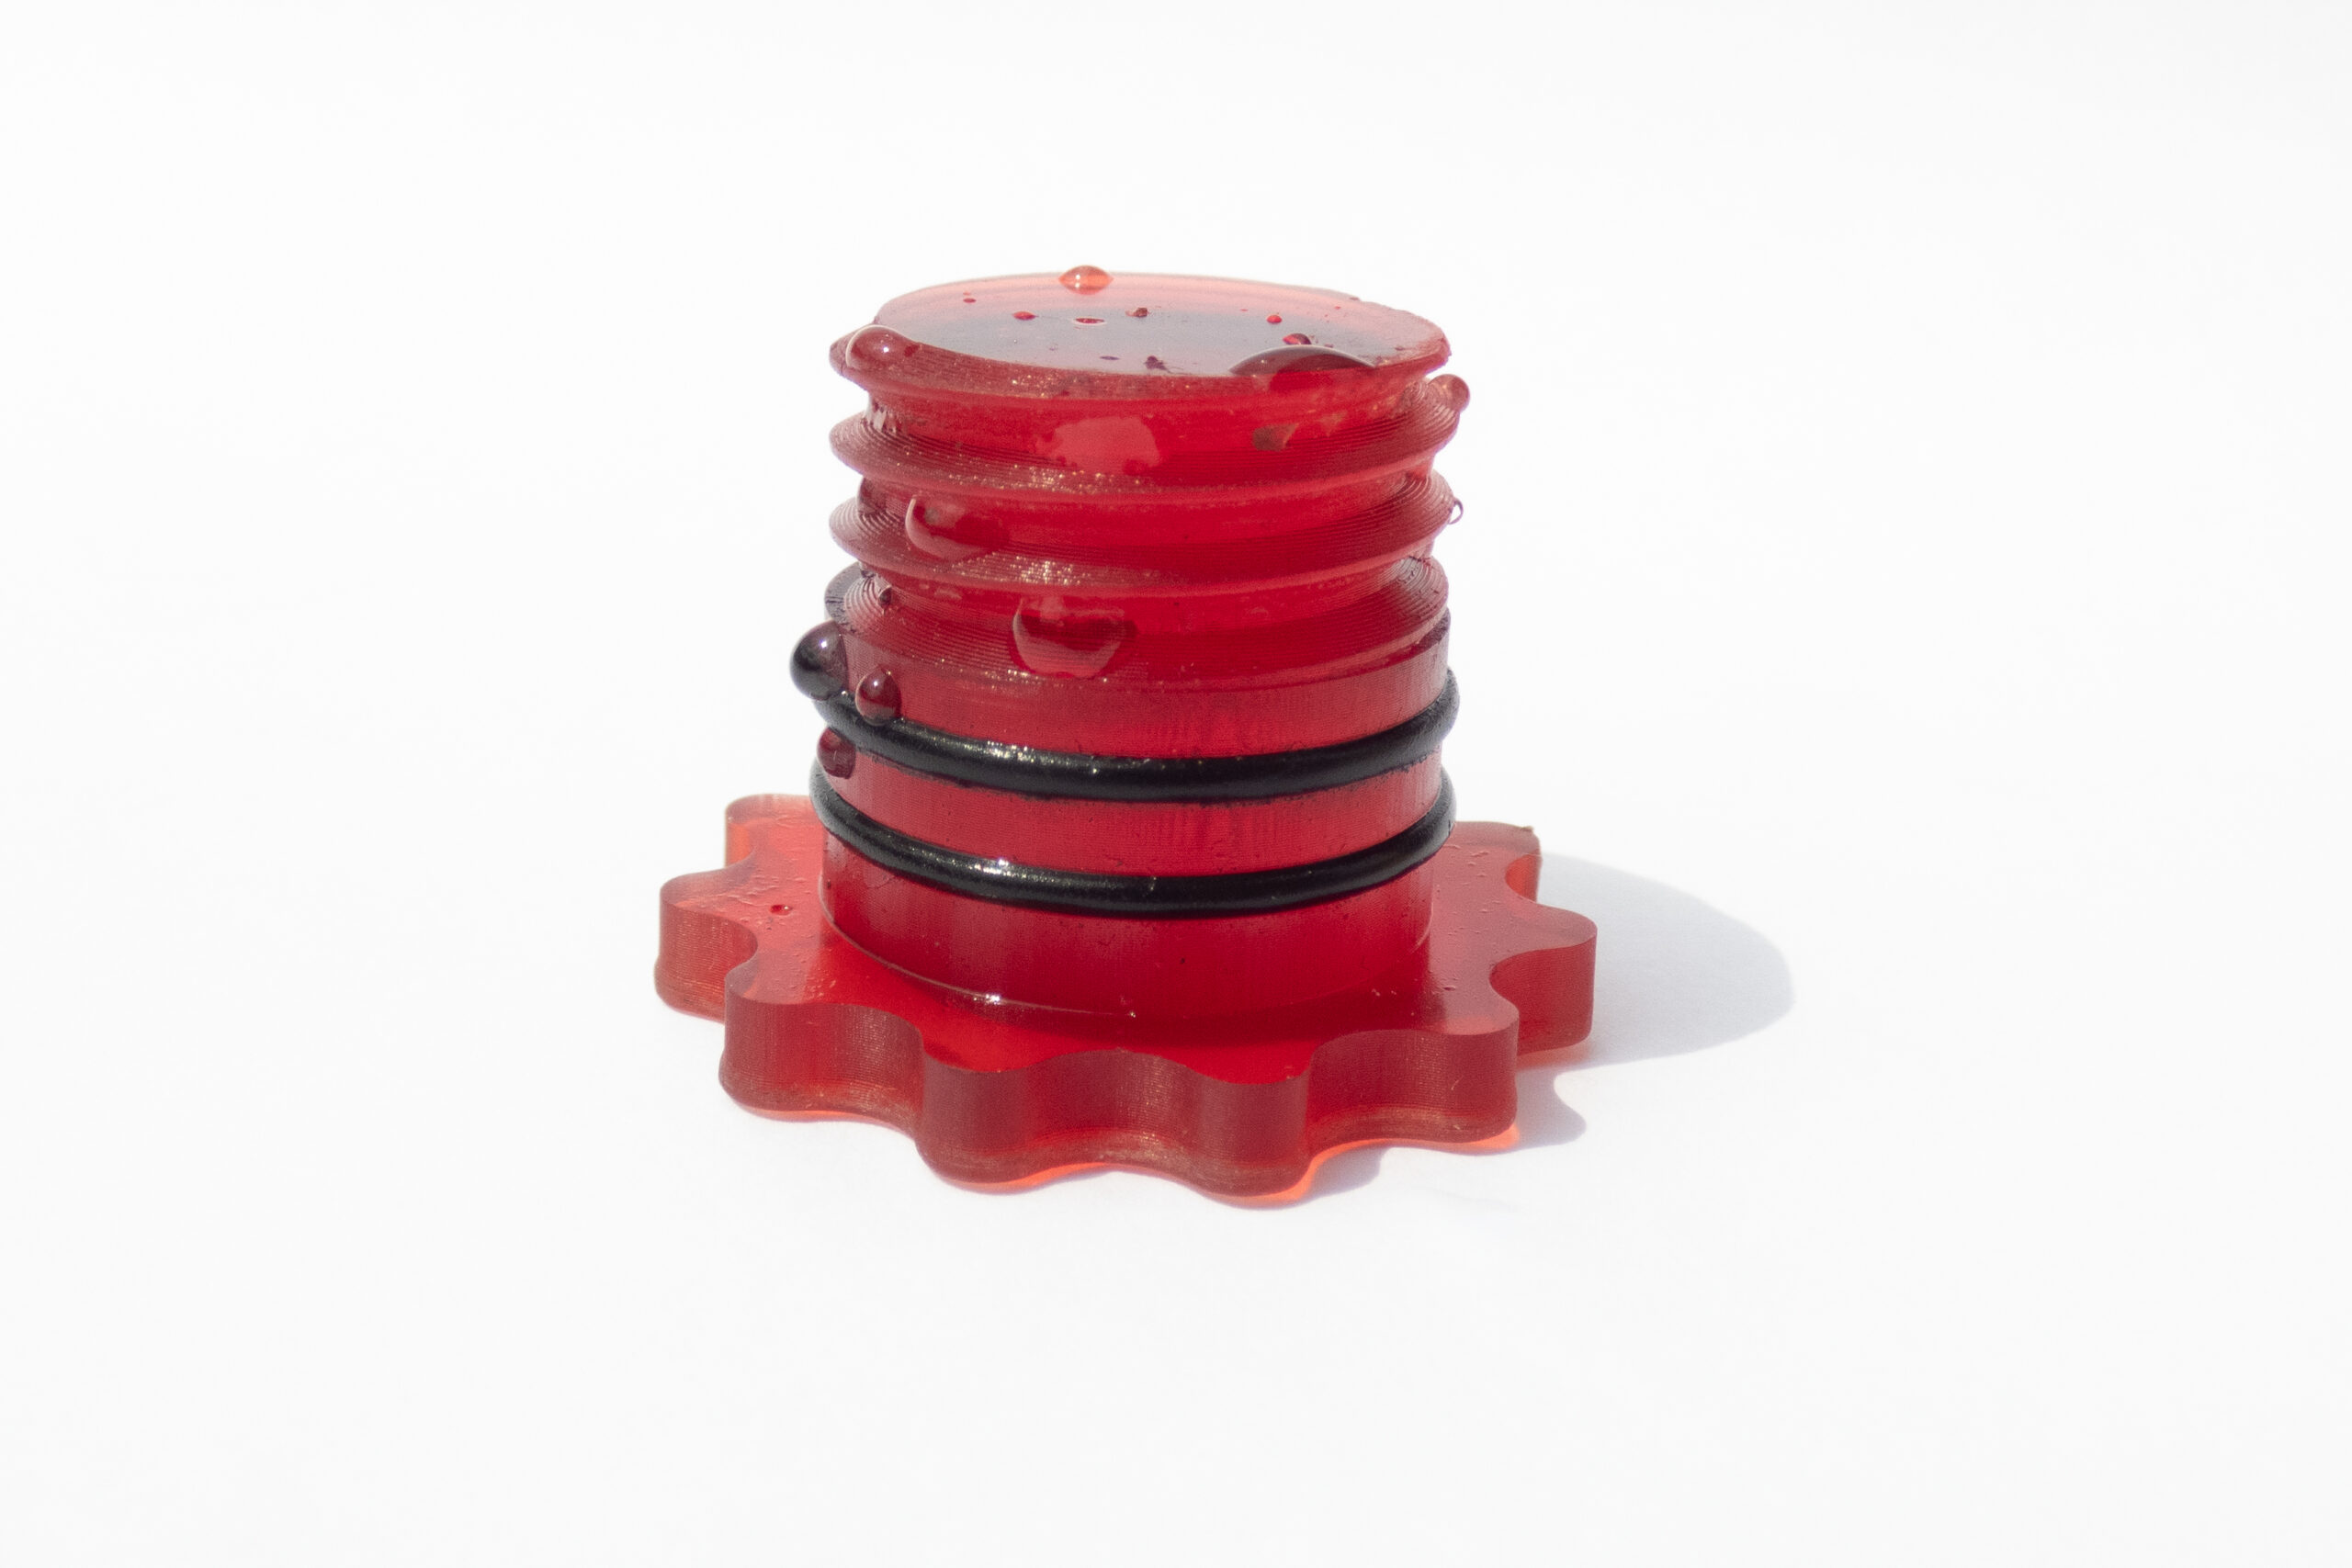
The most difficult part that in all our test objects is sealing. We’ve tested 3D-printed variants, sealing made from a mold, and simple O-rings.
First, we printed gaskets with Flexfill 98a, then with Flexfill 92a, FilaFlex40 and flexible SLA resin. The first FFF batch was printed without ironing (maximum number of perimeters, random seam position), the second batch with ironing turned on.
Second, we printed molds for silicone sealing in two variants: the first was a simple gasket, the second was an atypical sealing similar to the one used at GoPro cameras. The molds in the first batch were filled with silicone caulk, while in the second batch, we used a proto-putty. We can safely say that making this sealing gets quite messy and requires a certain amount of skill. Especially mixing silicone with cornstarch (proto-putty) may end up pretty badly – most of the material sticks everywhere except the places where it should go in the first place. Plus, proto-putty is much softer, porous, and prone to break rather than pure silicone caulk.
Finally, we also tested O-rings from scuba diving hoses. However, many more O-rings can be used in the same way. Using O-rings with correctly modeled printed parts is, without a doubt, the best and most reliable method.
Testing under normal (low) pressure
Let’s start with the bad news: 3D-printed gaskets don’t work. None of our printed creations held water, not even when we tried to seal the gaskets between two parts using screws. And we even tightened them with a force that damaged the threads. We did not manage to find a material printable on standard FDM/FFF 3D printers that would be soft enough to work as a proper seal between two 3D-printed surfaces. In theory, 3D-printed gaskets might work for some heavy machinery made of steel parts, which can be pressed together with a considerable amount of force.
The good news is that other variants worked pretty well under normal pressure. After several attempts, we made every type of sealing watertight enough to keep the insides of tested models dry overnight when sunk in the bucket with water.
Testing under high pressure (deep underwater)
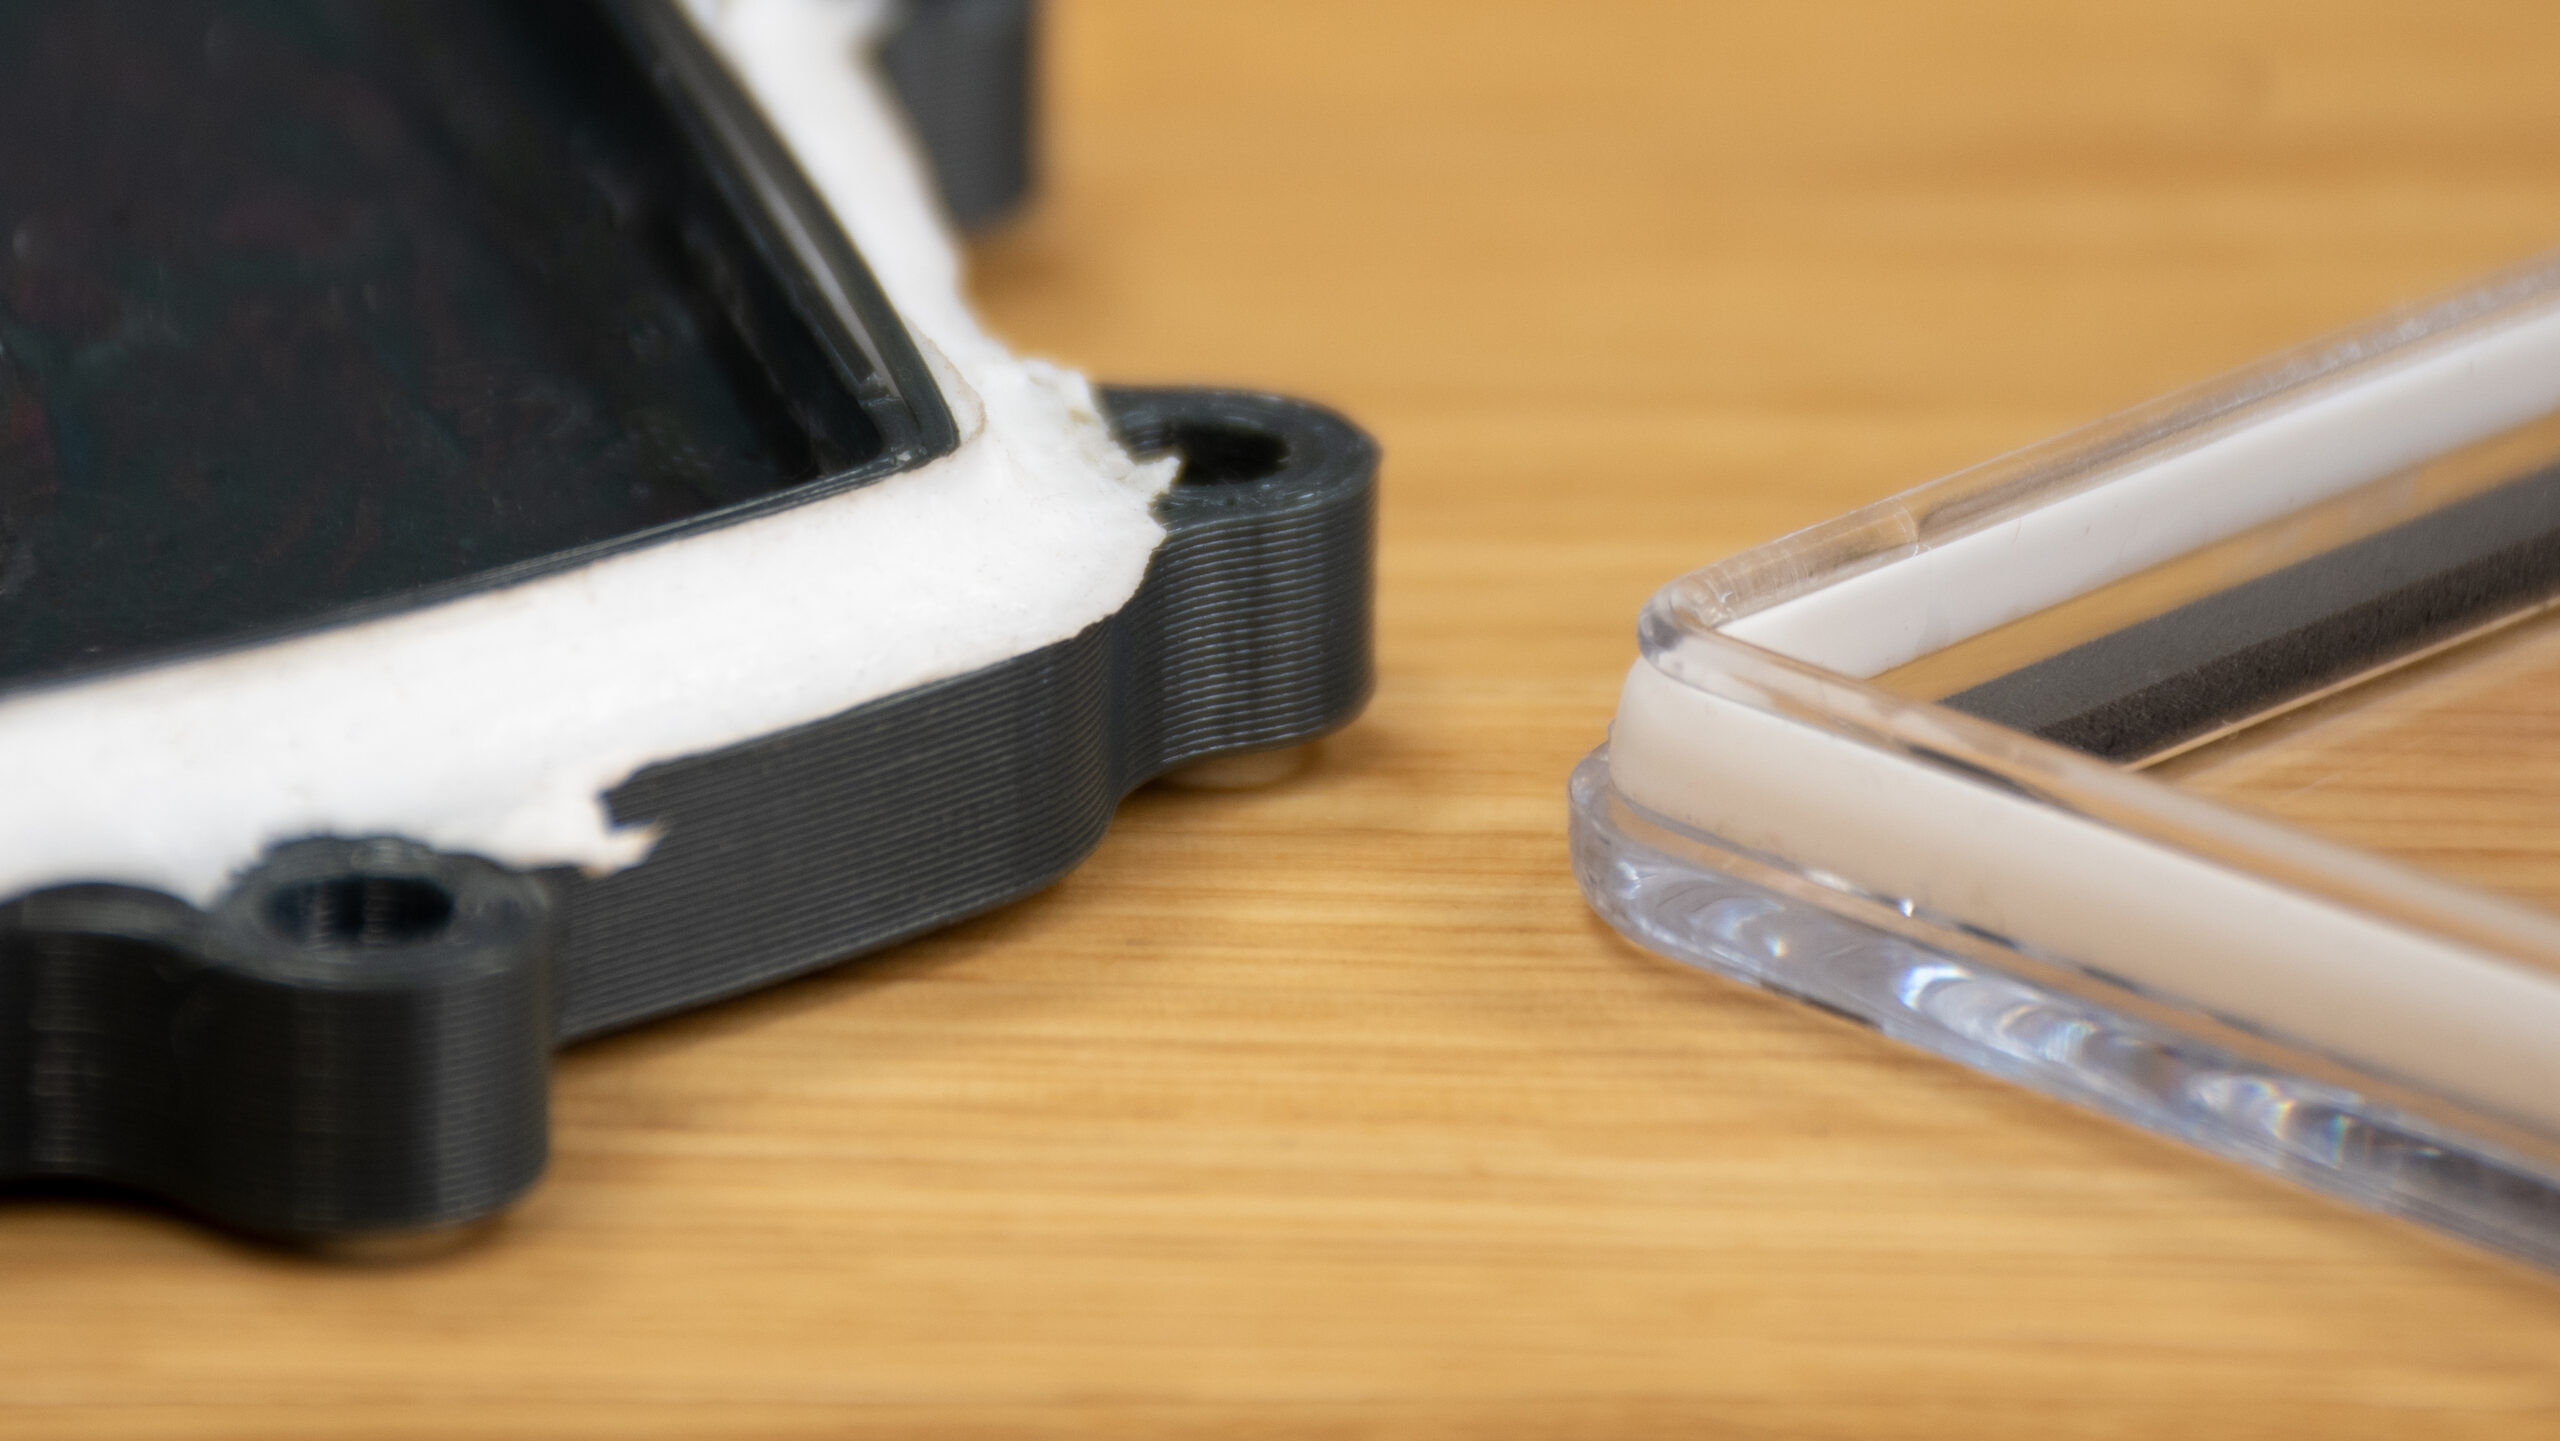
It always gets more complicated deeper underwater. Here, we stumbled across problems with chosen types of locking devices (door, lids, etc.) and various sealing types. The Lock&Lock box had the worst results: it started leaking just a few meters under the surface. This was caused by insufficient pressure between the lid and body and by generally problematic gaskets. They didn’t do their job here – and neither did they with the camera housing glass and door.
Sometimes it helped to squeeze the gaskets between the two parts with a bit more force. But, unfortunately, it’s not possible to increase the pressure on the gaskets forever. For example, the silicone gasket at the camera housing always leaked no matter how much it was squeezed. At one point, it eventually gave in as it didn’t withstand the pressure. The damage was done, and the gasket started leaking even more.

As it turned out, proper atypical sealing and simple O-rings are by far the most reliable options if you manage to design the model correctly.
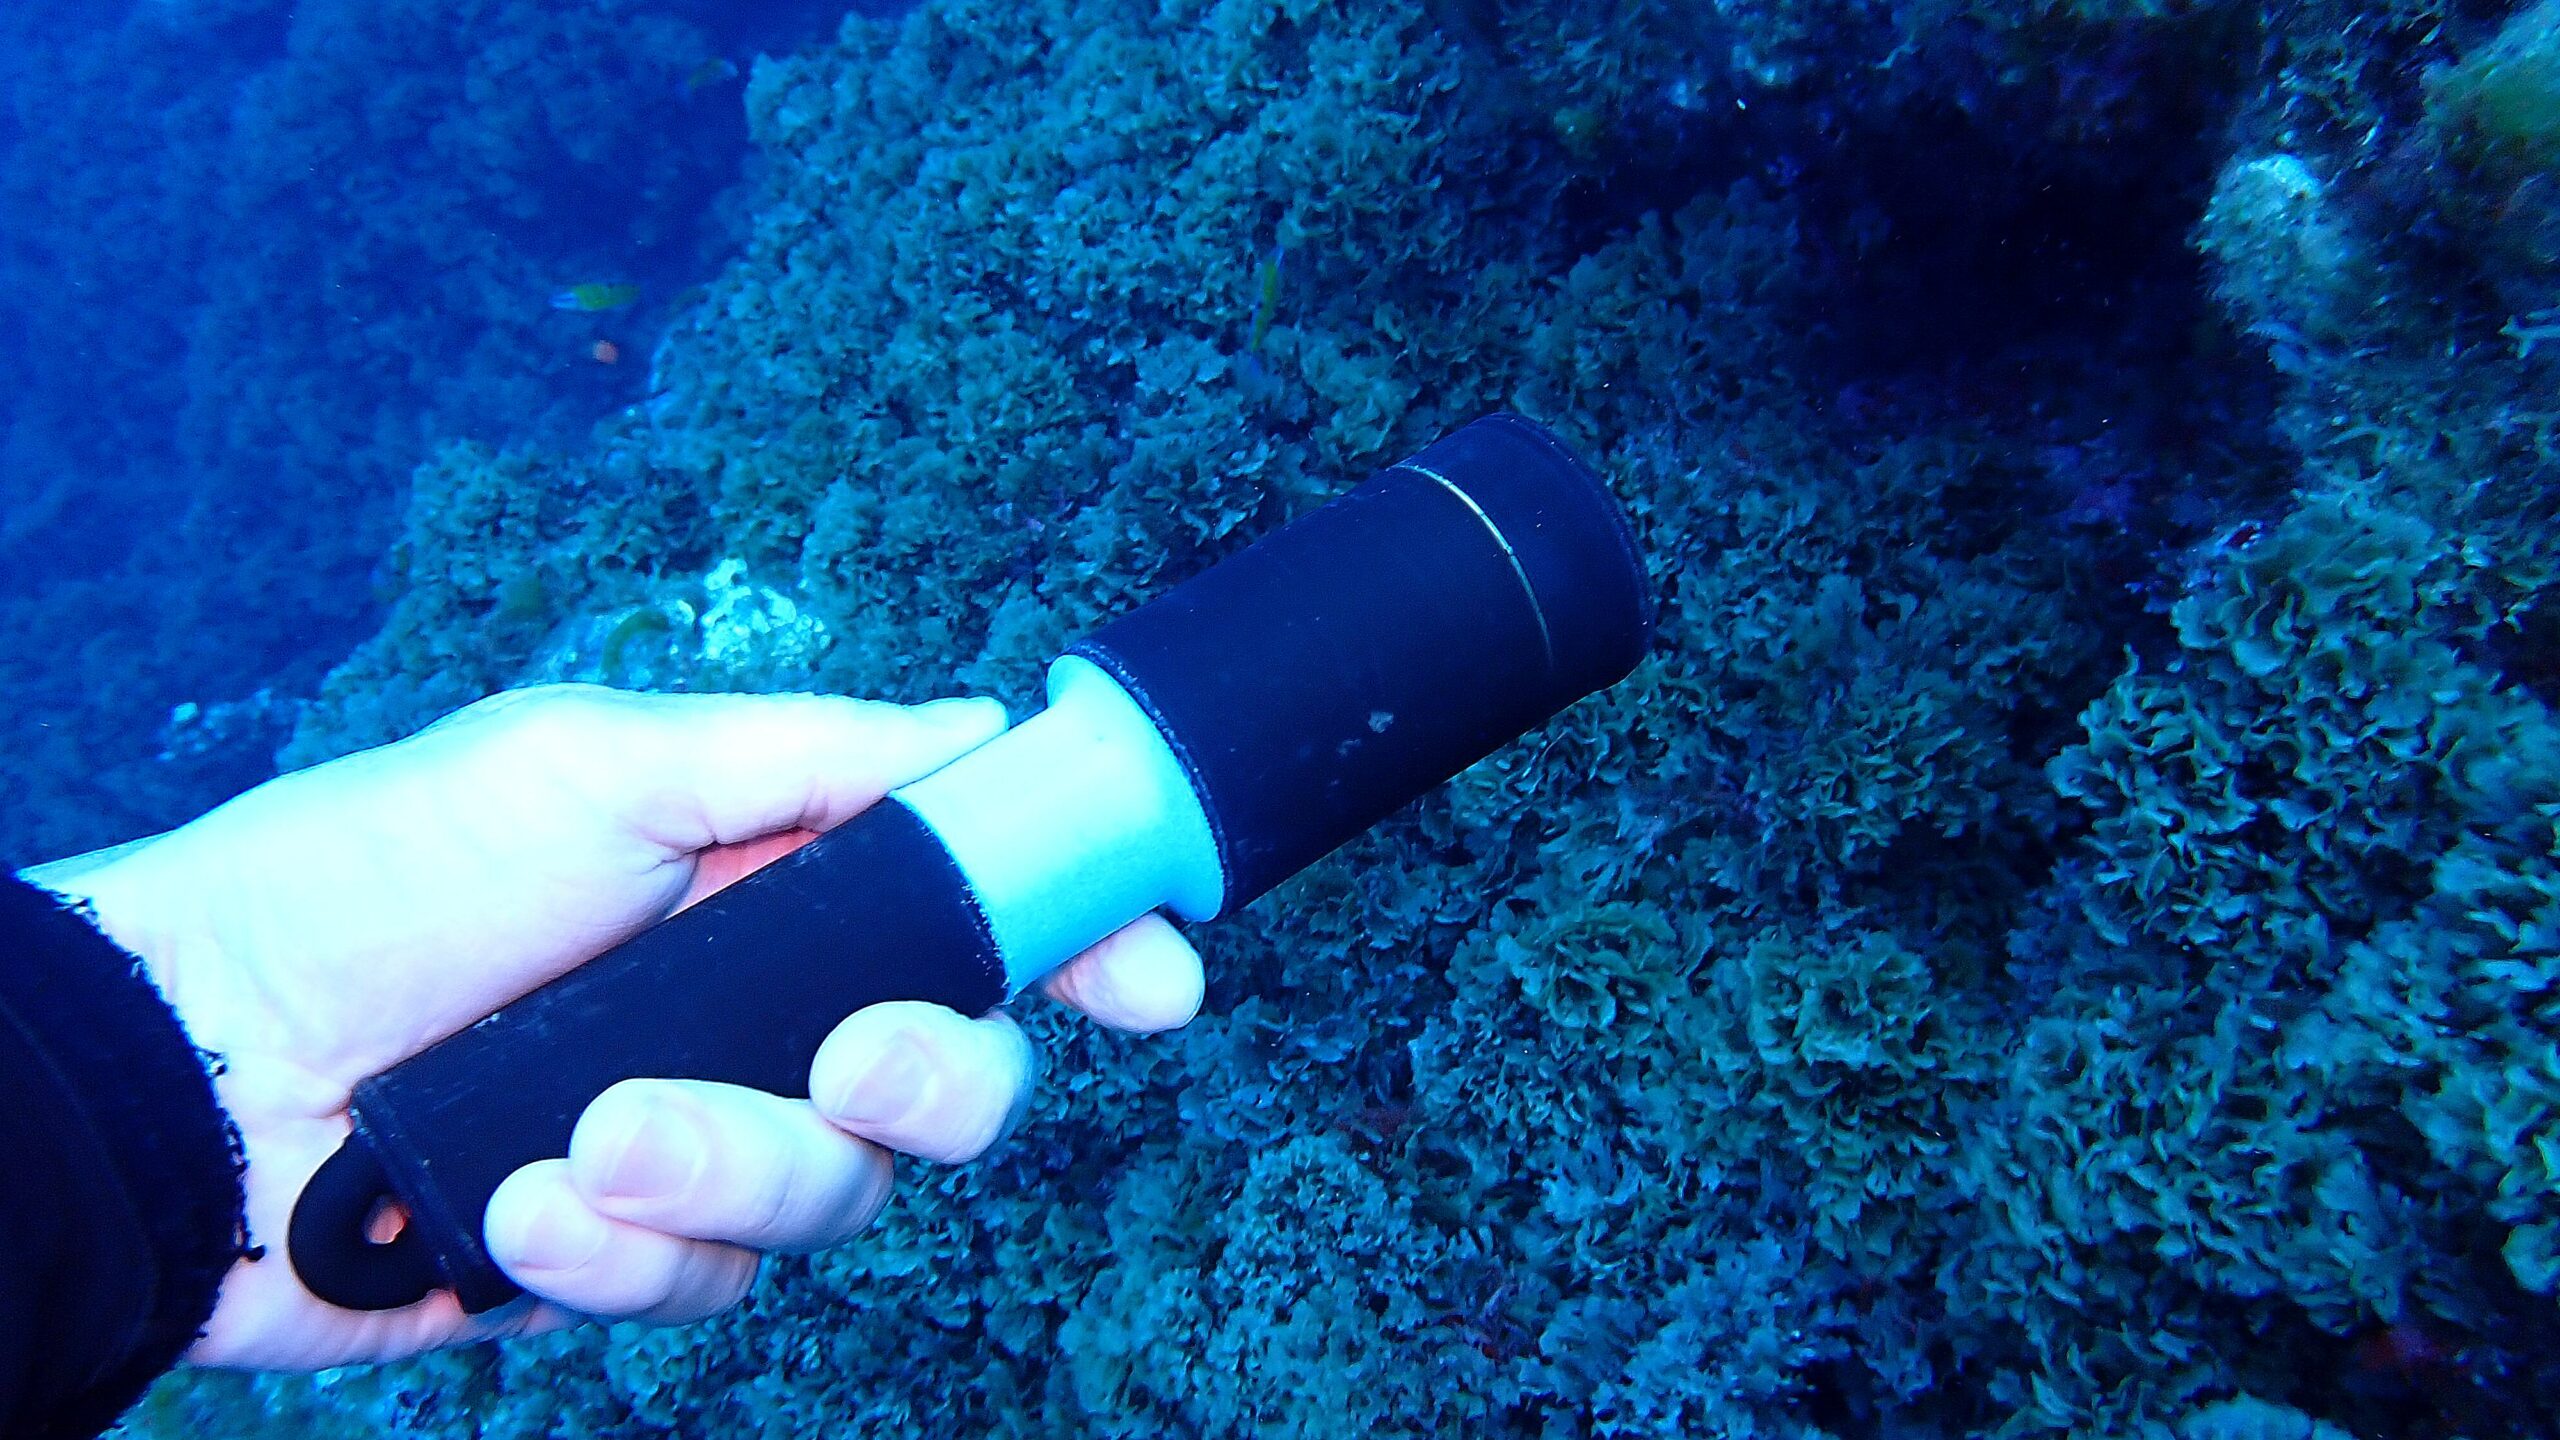
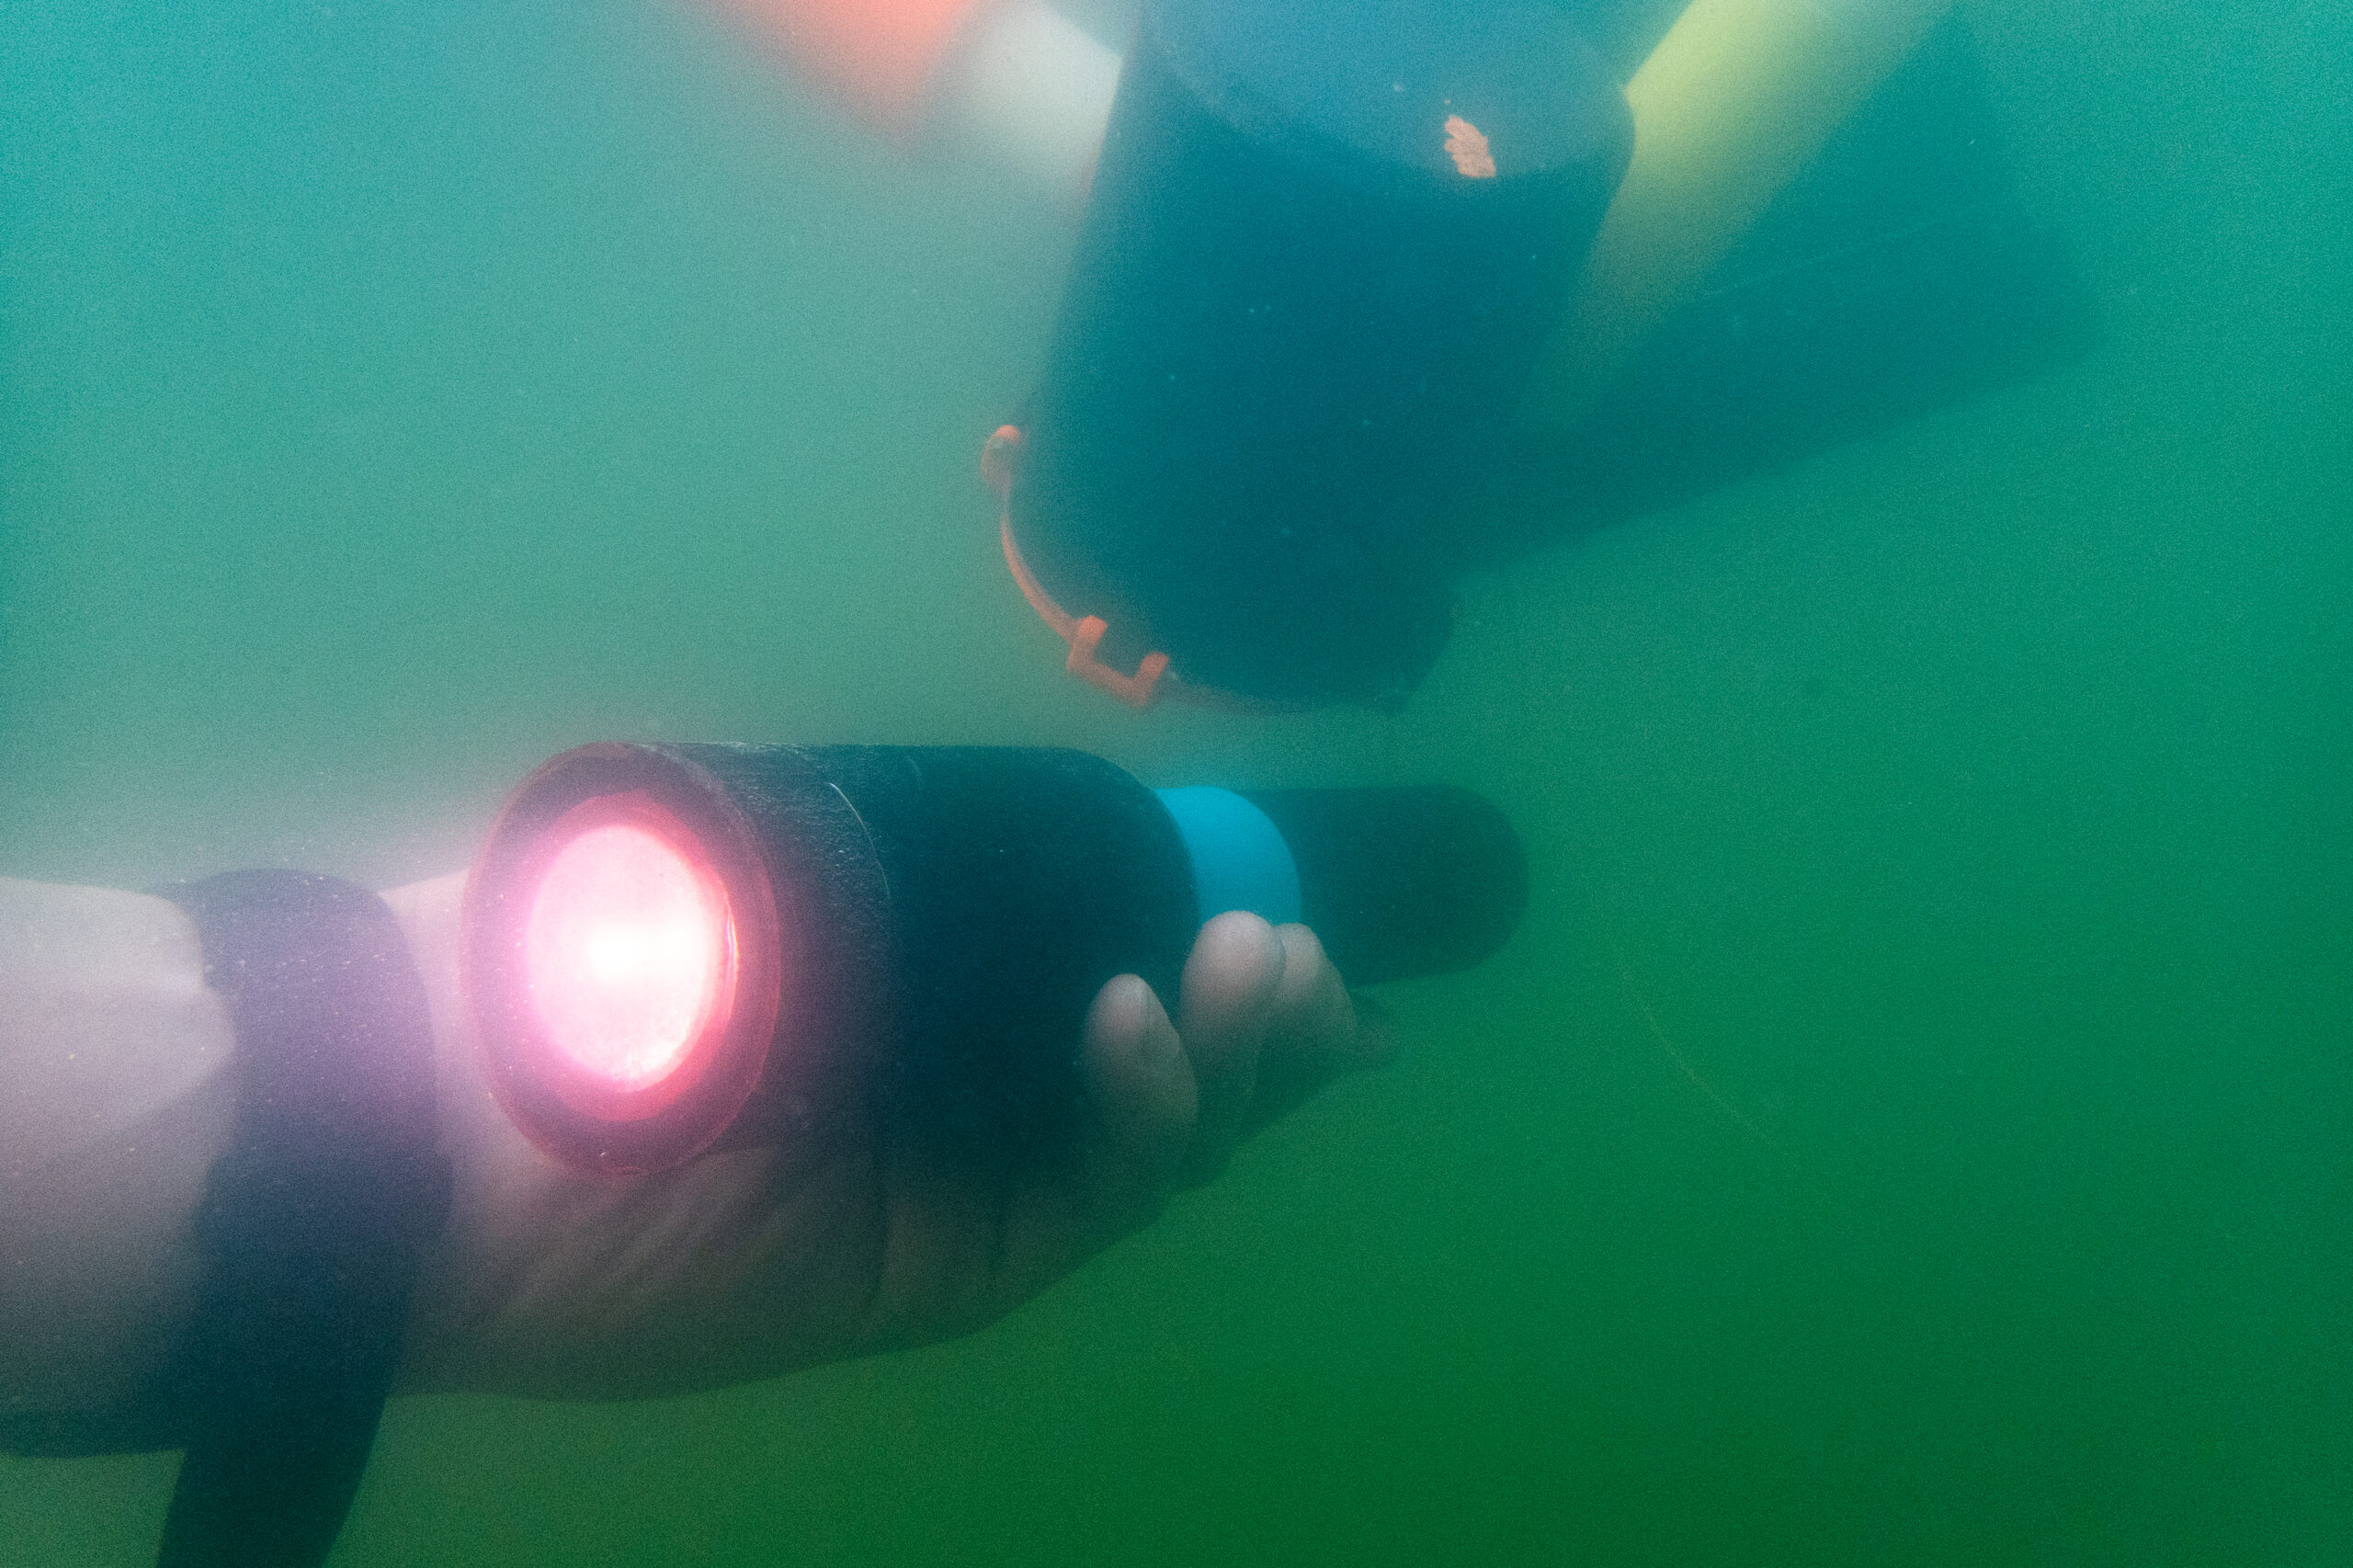
Interestingly, a flashlight housing with a threaded lock worked perfectly even in 30m depth with both types of silicone gaskets, O-rings, and even with a simple rubber band!
Tip: We applied silicone grease to every type of sealing before every use, and we suggest you do the same.
Moving parts
Most of the watertight housings don’t make much sense without buttons, switches, and other moving parts. For example, a camera housing needs some kind of element to control the device. At first, we tested a part made from a flexible filament (and resin) – this way, you can produce soft walls, through which you can press a button. A great advantage is that flexible materials are waterproof even at 30 m (99 feet) depth. However, flexible materials shrink a lot under pressure, so even in mere 10 meters (33 feet), the pressure causes the button to be constantly pressed – rendering such a solution rather useless. Rubber housings are therefore suitable for shallow waters (snorkeling) only.
A more reliable method is using magnetic switches that you can find in various diving flashlights. We have tested two variants: the first is attracting a metal wire (or spring) to a magnet, the second is using two magnets as a mechanical lever that moves the switch. Attracting the wire to the magnet didn’t work well since it caused unwanted flashing and occasional turning off and on. On the other hand, using two magnets attracted across the wall worked almost at 100%, even with a simple tweak – we glued the wire to the magnet.

What is it all good for?
Do you feel that there’s too much information? Well – there is. 🙂 So let’s try to sum it all up.
As we previously mentioned, it’s best to make watertight models as simple as possible. Even a simple box with a threaded lid and an O-ring may withstand great pressure. Together with magnetic switches, it’s possible to make various external lights for underwater photography. This is probably the best and most reliable 3D printed watertight gadget.
Simple Lock&Lock boxes can be printed, too. However, compared to the injection-molded ones, they’re desperately unreliable, too expensive, and producing them is rather time-consuming.
Complex models such as camera housing aren’t worth it too. They are challenging to design, and then there is the time consumption and material cost. They’re just too much hassle to make. Plus, it’s necessary to make several moving parts, which increases the chances of leaking.
Rubber parts printed with flexible filaments and resins work only in shallow waters, making them pretty suitable for snorkeling, but if you plan to use them in greater depths, you will find out that the material compresses under pressure and prevents any buttons from working correctly. It is better to make moving parts with magnets, alternatively with metal pins and O-rings (just like GoPro does it).
Transparent parts can be made with FFF or SLA methods, but we recommend using thick plexiglass (4 mm or thicker). Achieving a perfectly transparent and clear 3D printed component as a part of a watertight model is no easy task.
The most reliable type of sealing is the O-ring. O-rings can be bought in various specialized stores with diving gear, car shops, potentially even in hobby markets. Just don’t forget to treat the seals with silicone grease every time you use it.
Finally, we’d like to mention that even though we do our best to cover most of the problems around this topic, this article should only give you advice on how to do it yourself and not serve as a step-by-step guide. If you try to print something watertight yourself, keep in mind that you will have to go through a lot of prototyping, testing in shallow waters and greater depths, etc. Don’t forget to test everything properly before putting electronics inside! It’s good to test everything several times in various depths before using it for the purpose it was designed. This is pretty much everything from us – now it’s up to you! Good luck with your projects!
Happy printing!
Great overview!
What worked really well for my use case (outdoor camera housings) are 3mm grooves in between mating surfaces filled 3mm EPDM rubber tubing. The EPDM is super soft (Shore A15) and can be cut to length to fit the groove perfectly. On the other half of the enclosure I just print a 1mm tall nudge to compress the foam tube in the groove and it seals.
That’s a great idea! I’ll have to try it, thanks!
Hi,
I recently was able to print water “tight” sealings.
I used Colorfabb Varioshore at 240°.
The model I used it for is the selaing of the top of an RC boat.
I modeled it as a snap in-sealing – not sure how to explain is better…
Just ask, if you dont understand 😉
The nice thing about varioshore is, that your pprint can get softer than the filmant is in its original state.
Worked for me… Play with perimeters and infill to further adjust softness.
Boat itself and top-cover was printed with PETG and epoxy.
I also tried just spraying it with clear paint… Not sure if this works or if I made something wrong. Did you try this?
Hello, thank you for your advice. Colorfabb Varioshore has shore hardness 92A – this is even harder than Filatech FilaFlex40 (40D). But I see that it can become softer (porous) with higher temperatures. I guess that it is worth the try. But I would test it on something made for deeper diving to see if there are any slow leaks. Though it might work great for the top of an RC boat, it might be worse deep underwater.
About a clear coat: I used an acrylic clear coat several times when printing vases and it worked just fine. I think that it might work for making anything watertight too but I would apply several layers to make it thick enough.
Stefan (CNC kitchen) did test this material with shore measurements.
He measured 65 Shore A // 16 Shore D.
However, you can still adjust the behaviour with perimeter number, nozzle diameter and infill shape and density.
I am not affiliate with Colorfabb, but their LW-PLA and Varioshore TPU are very innovative and useful for various models.
Would be nice, if PrusaSlicer will allow more modifiers such as flow-rate in the future 😉
https://www.cnckitchen.com/blog/testing-colorfabb-varioshore-tpu-foaming-3d-printing-filament
Do you have more advice to the acryl coat? I wasnt very successfull also using several layers with PETG. Always looked like, the PETG just drinks it and it was gone 😉
I’m afraid I don’t have any more advice here. Maybe using a clear coat with a brush instead of using a spray might work. I have a similar experience using an epoxy resin, where PETG seemed to partially “drink” it and partially just let it slide on the surface without sticking to it. I had to apply two layers to work properly. Perhaps, it would be good to use another material that doesn’t have such hydrophobic tendencies.
About the porosity of Colorfabb filament: I hear you and I think it might work just great. I’m not worried about it leaking due to its porous properties. I will have to try it one day! 🙂
…and dont worry about the poriosity. Foam seems to be closed cell… or a least the single cells (if open) are not connected.
I tried blowing through the material without succes..
Very helpful overview. Thanks!
I have found that, especially for printing vases and other containers that are low pressure and non-food containing, filling with a mixture of “Bar’s Leaks 1186 Liquid Aluminum Stop Leak” and water and letting sit with a few stirs over a couple days completely stopped any leaks. “Bar’s Leaks” is an automotive radiator leak stopper composed of what appears to be colloidal aluminum. I purchased it at https://www.amazon.com/gp/product/B002696FA2.
This was super inspiring and interesting! thank you!
I'm shocked there's still no discussion about 'staggered inner seams.' It's an advanced setting in PrusaSlicer that offsets the seam position of all the perimeters within the same layer. In other words, even if the seam position is set to 'random,' all the perimeter seams on each layer will still be aligned unless 'staggered inner seams' is enabled.
None of the website help articles discuss this feature, which is also disappointing.
>I'm shocked there's still no discussion about 'staggered inner seams.'
Well, maybe you should have a look at more recent post discussions to find out what is "still not" discussed. This one is from 2021…
Besides, I don't see what you want to see discussed. We didn't have staggered inner seams in 2021. That was bad. We have them now. This is fine. Period. Or did I miss something?
Why are you so defensive? Did I offend you personally by my comment?
Water proofing printed parts has a lot do to with the seams. Staggered inner seams is a new capability we have to improve the the water holding quality of printed parts, but it wasn't discussed despite being an updated article.
Nice article, although it did dash my hopes of attempting waterproof projects anytime soon =]
I remember when using a waterproof enclosure that I bought that it's not recommended to use too much silicone grease since it would weaken the seal. The silicone grease is more for ensuring that the o-ring/gasket doesn't dry out.
For the dive light, how are you able to dissipate the heat? High-lumen lights put out a lot of heat. Cheap Chinese dive lights are almost always aluminum. US manufacturer Underwater Kinetics uses injection molded plastics for most of there items but came up with a special way to mount the LED using aluminum in the lens cap.
We're using flat heat pipes to dissipate the heat. You can watch the video to find out more. 😉
I wish you wouldn't encourage this. It's a wonderful idea but unless your printing solid objects (objects that don't have hollow insides) your going to have people putting their gear at serious risk and by extension depending on the type of diving their lives. Make camera mounts, light bars, lobster fishes, compass holders (not sealed enclosure, but something to mount a proper sealed enclosure to), hose keepers, line makers, but nothing that could put your life or equipment at risk. As a tech diver that spend most of my time in caves and at depths greater than 40m (the max depth for a deep certified recreational diver) it's absolutely not worth the risk.
Could you specify how using printed UW light could potentially endanger a diver's life?
Yeah I think any person diving would have common sense not to rely on 3D printed parts or waste the time to do all this with the intent to use it for their primary gear on a dive. It’s typically a pretty widespread rule of thumb in the diving community (especially cave diving community) to have a robust primary light as well as a backup light (using lights as an example). I think this is mostly to show proof of concept and some potential utility and certainly not to encourage 3D printing usage for life critical equipment. I would hope anyone who even thinks of doing this would do thorough testing like they mentioned before even thinking about putting something like a camera or other electronics in there.