


We could 3D print many different things, and not all of them have to be final products. Instead, we could make various tools, templates, containers…or casting molds. This particular option is the topic of our current article. We will show you how to cast materials such as wax or soap, in household conditions using easily available tools.
Our goal is to prove that casting from silicone molds is much easier than it might seem at a first glance. My own attempts included some trial and error before I learned the right methods. Therefore, I hope I can now help others save some material, time and effort.
Note: The pictures below show that I used an old PEI print sheet as a work pad. This has no special purpose, use just about anything else instead – don’t risk damaging your perfectly usable print sheet 🙂
Material for mold making
To create the mold, we will use a two-part, condensation cure silicone rubber. In our case, it’s a local Czech made product called Lukopren N Super, but there are many similar products you could probably find available worldwide, for example, Smooth-on, ACC Silicones, RTV, etc.
Lukopren consists of part A (silicone itself) and part B (hardener/activator) and it cures at room temperature, in about 24 hours. Curing time is affected by the amount of hardener and ambient temperature.
Resulting mold has a stable shape and is both chemically and thermally resistant. You can use it to cast many materials including polyurethane, epoxide, polyester, plaster, concrete, cement, wax, low melting alloys or soap. This mold material is suitable both for small, detailed casts and large objects (i.e statues). No vacuum pump is needed because of excellent flowability and low viscosity. Silicone rubber can be both poured or brushed on (with a thickener added into the mix), although there are better options for brushing like for example Smooth-on mentioned above.
Metal casting will be described in detail in our forthcoming article, focused on jewelry making and dental applications.
The model
To get a quality cast, first of all, we need a quality master model to create the mold.
Designing such a model could be tedious and require quite some patience and attention to detail, especially if we are new to 3D modeling apps. You could skip this part altogether by simply downloading a ready-made model from an internet database, such as www.prusaprinters.org.
Be careful about so-called overhangs – model outlines that have sharper than a right angle (90°) against the mold parting plane. In other words, if you look into a mold straight from above, you should be able to see the whole inner surface, with nothing hidden “behind a corner”. These overhangs could later cause the master model or final cast to become stuck in the mold. Fortunately, one of the big advantages of silicone rubber is its elasticity – it will yield a little when we bend and twist it to take the finished cast out. This means we could afford a certain level of overhangs. The properly cast model should pop out almost spontaneously, after just a gentle pressing on the mold.
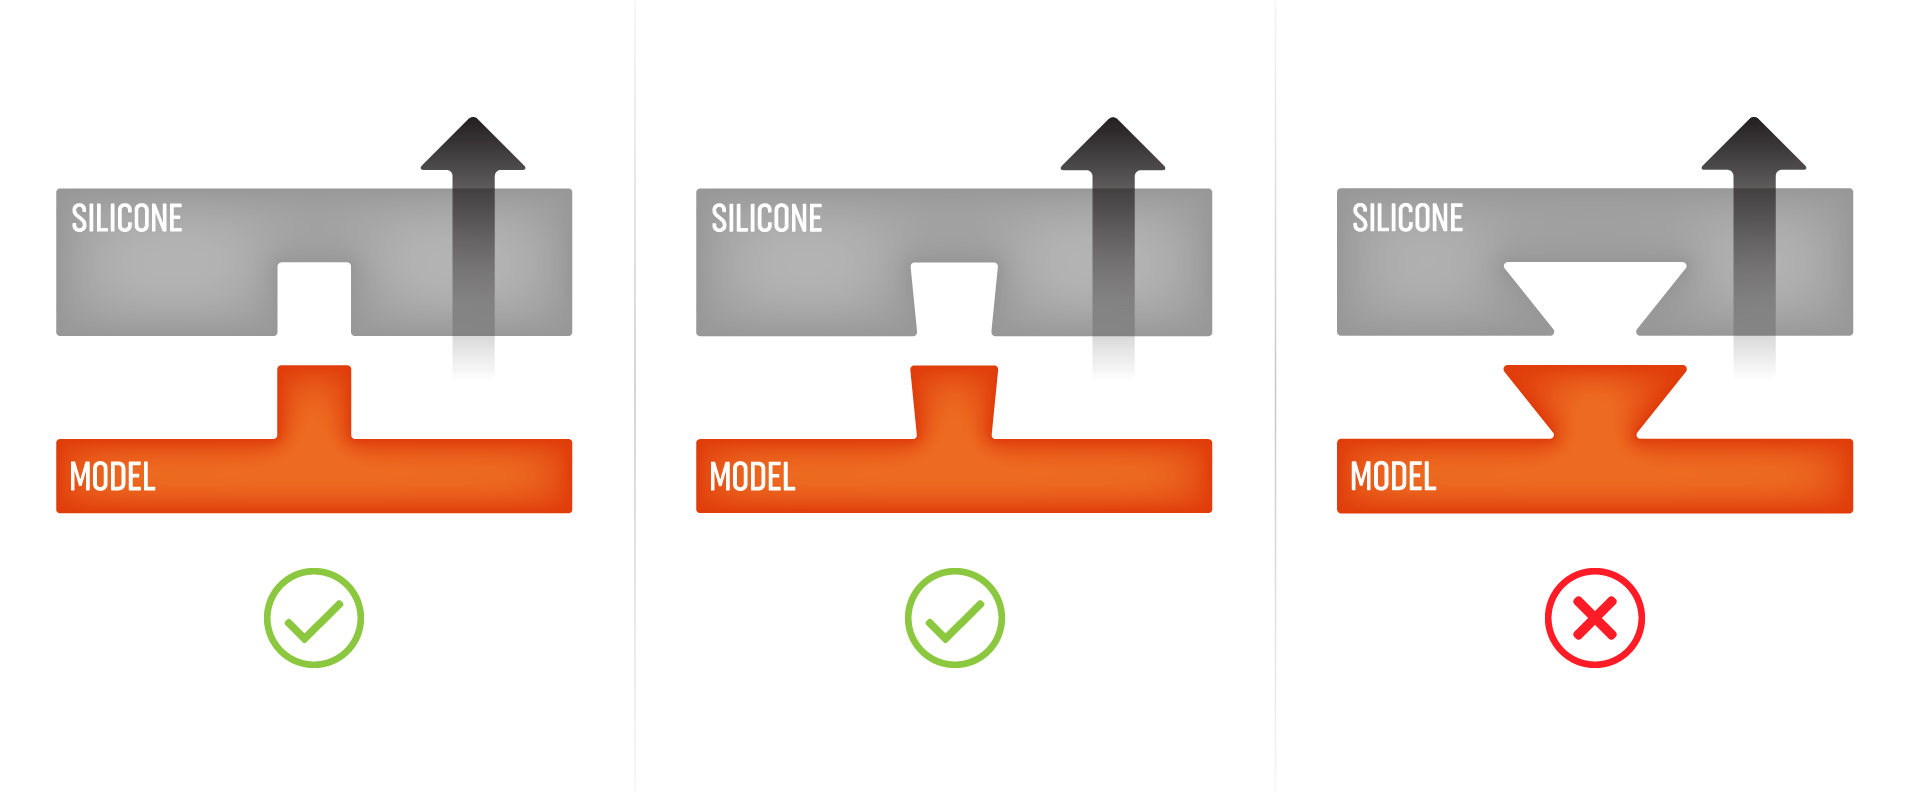
If we use a method of so-called lost-wax resin casting, we don’t have to worry about overhangs at all, of course, because we don’t take the model out, it is destroyed inside the mold.
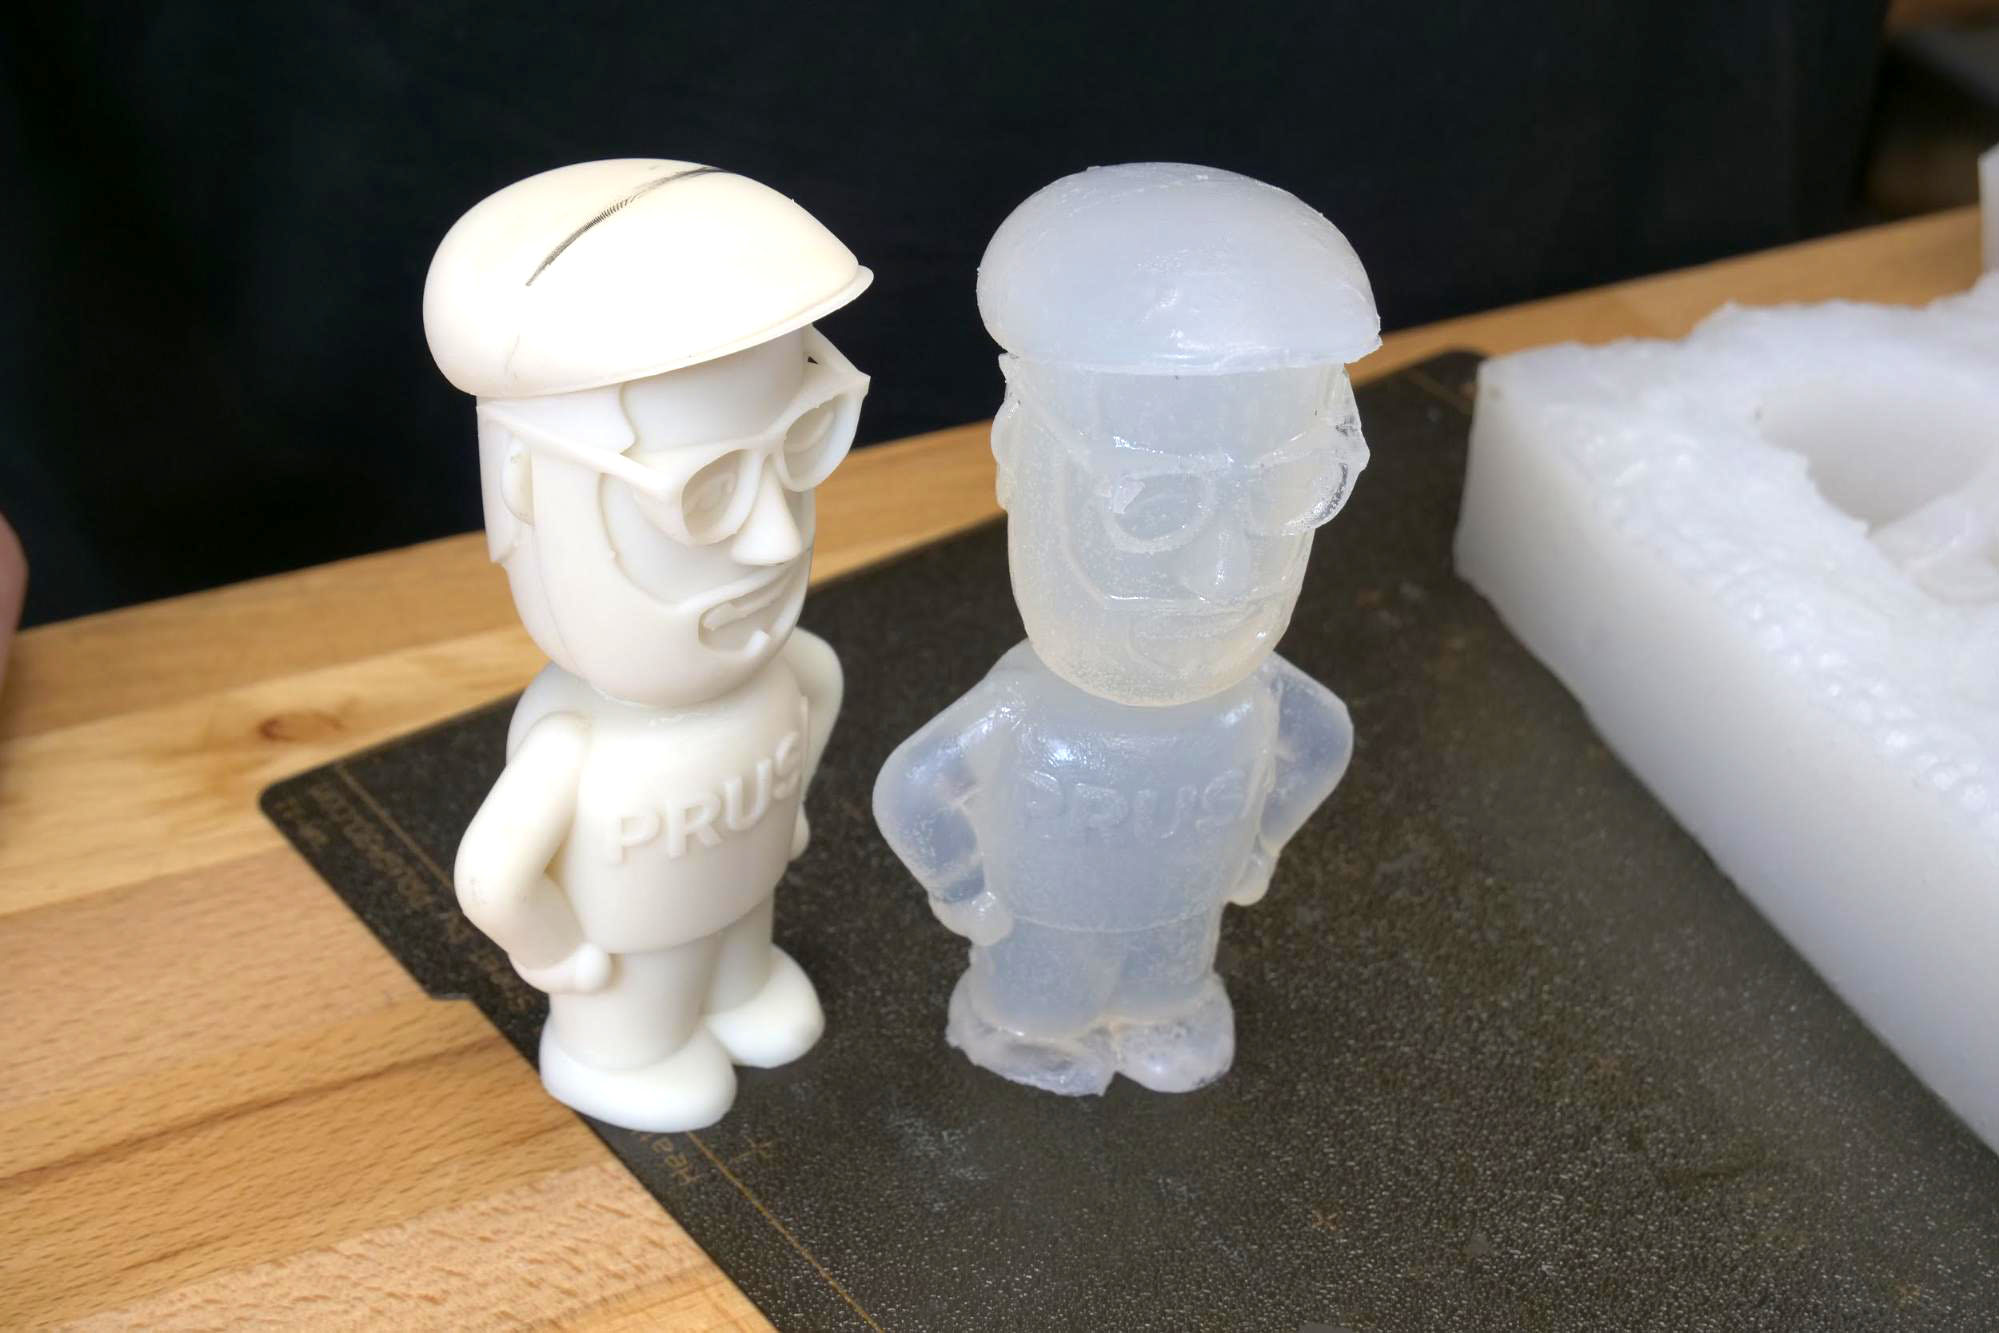
For silicone rubber mold making, any non-porous material is suitable for a master model. This means you could use 3D prints from either filament or resin. Print layers are not a problem (in terms of removing from the mold), but they will be visible on the final cast, of course. That means printing from resin is more suitable – I used the Original Prusa SL1 printer.
For lost-wax casting, there are special casting resins available, which can be completely melted or burned out of the mold. More information on this method will be in the forthcoming article as well.
3D printed master is much more expendable than a hand-made one. In the worst case, if we damage it somehow during our first mold making attempt, we could always print it anew.
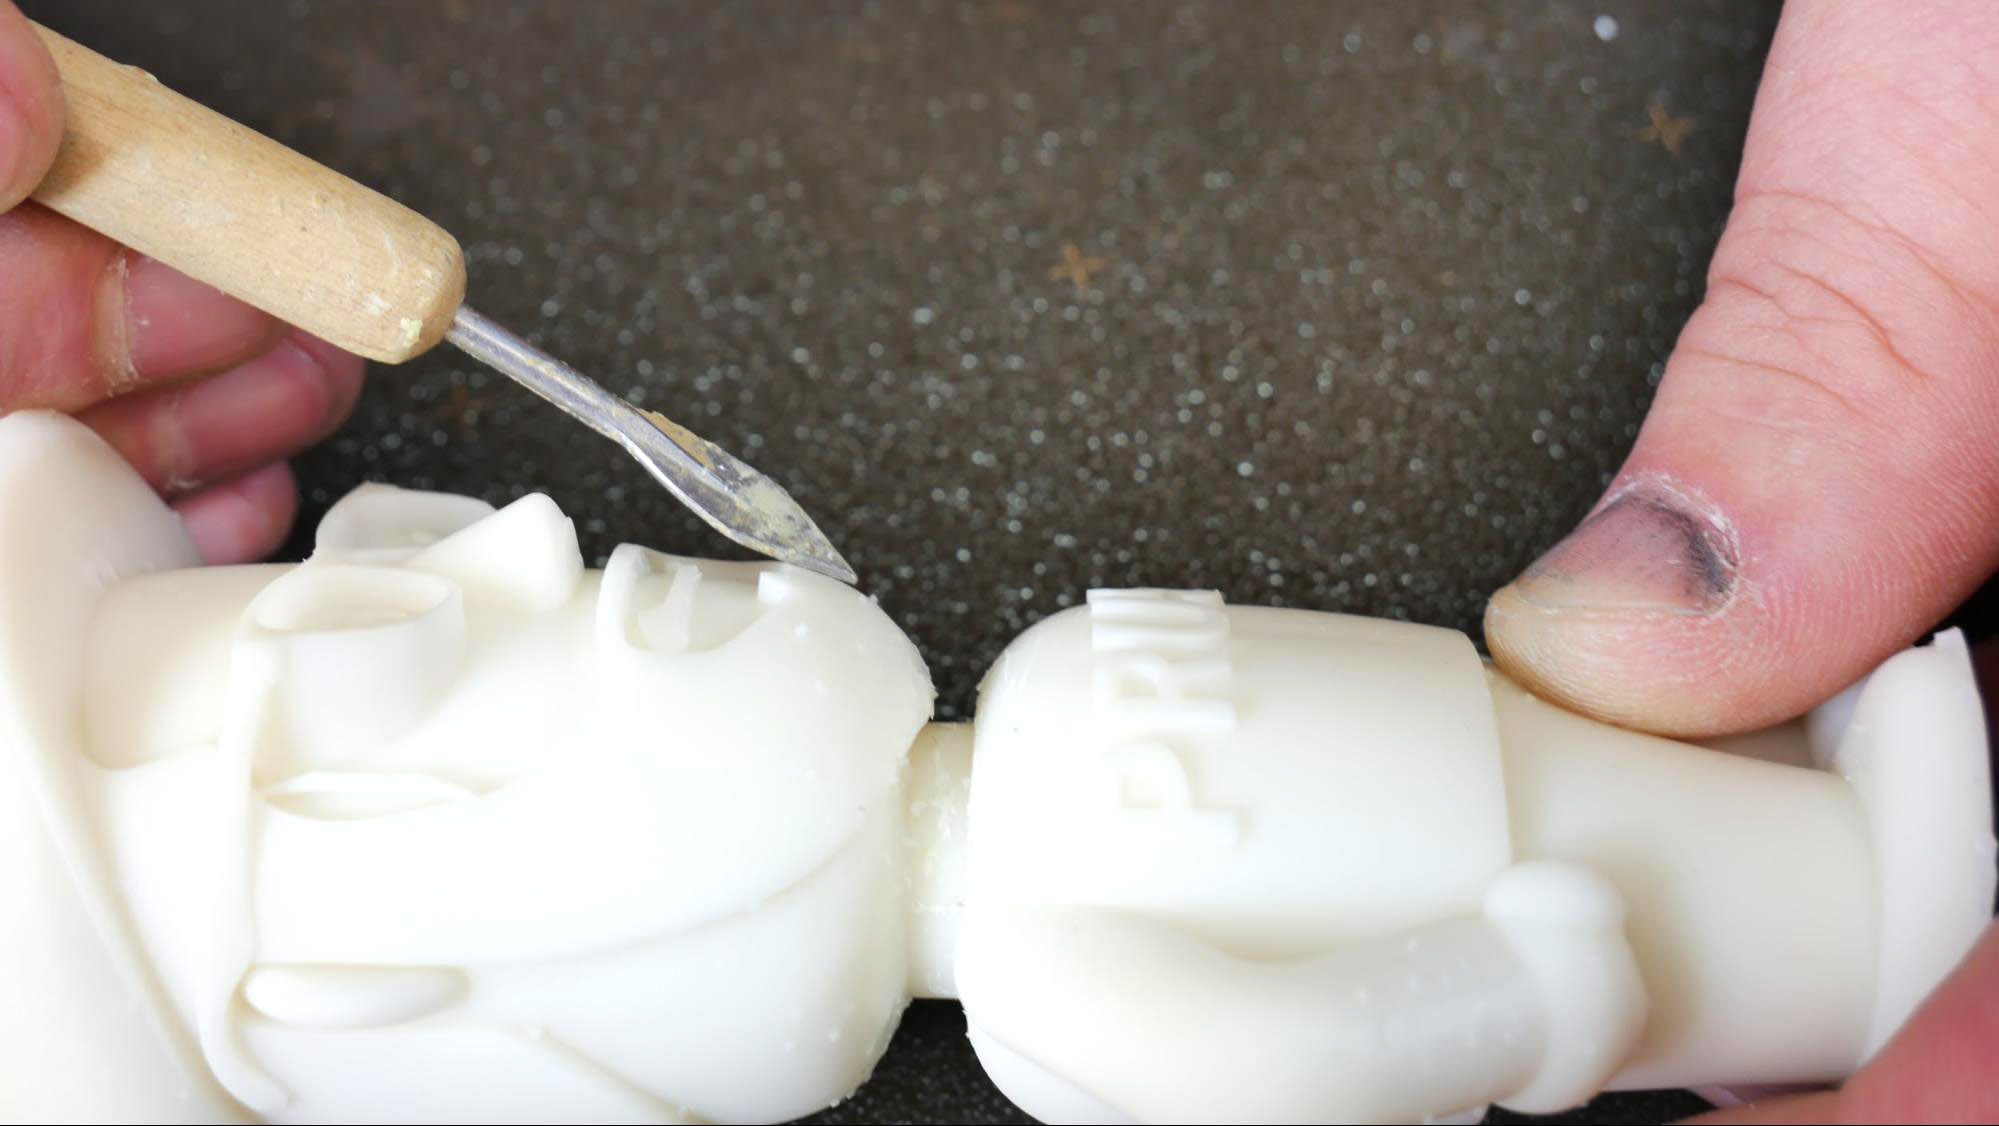
Inspect the master model surface thoroughly before using it for mold making. Deal with any little blemishes, scuffs, support stubs, or even fingerprints! Otherwise, all of these surface defects will be copied to the final cast!
Final preparation for the mold making
Before making the actual two-part mold, we need to lay out its dividing plane. We will cut the pouring channel and air vents into the mold later before the casting itself.
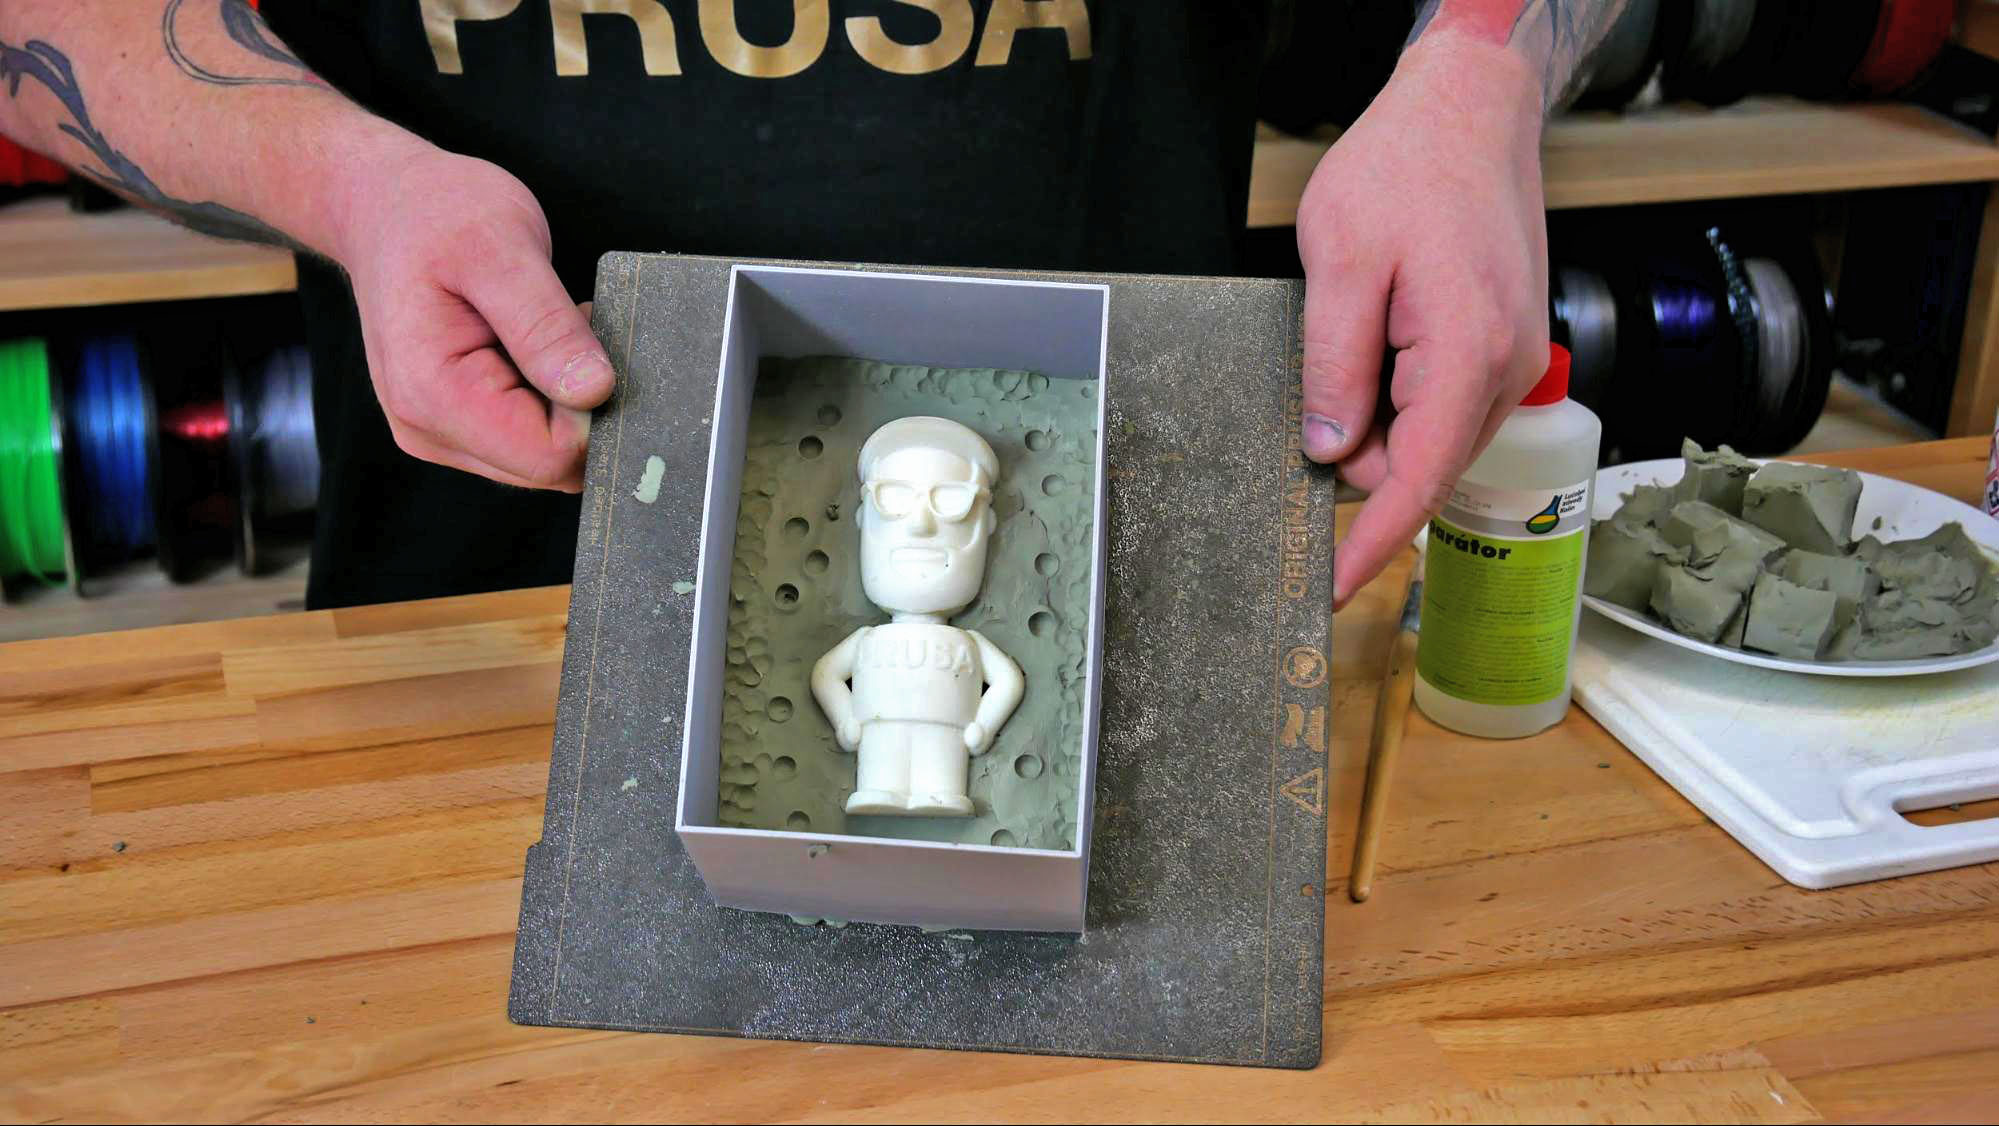
The dividing plane will be created as follows: push the master model into the modeling clay up to the intended dividing plane level (it doesn’t have to be strictly horizontal of course).

To be able to properly align both mold halves later, create so-called registration keys.
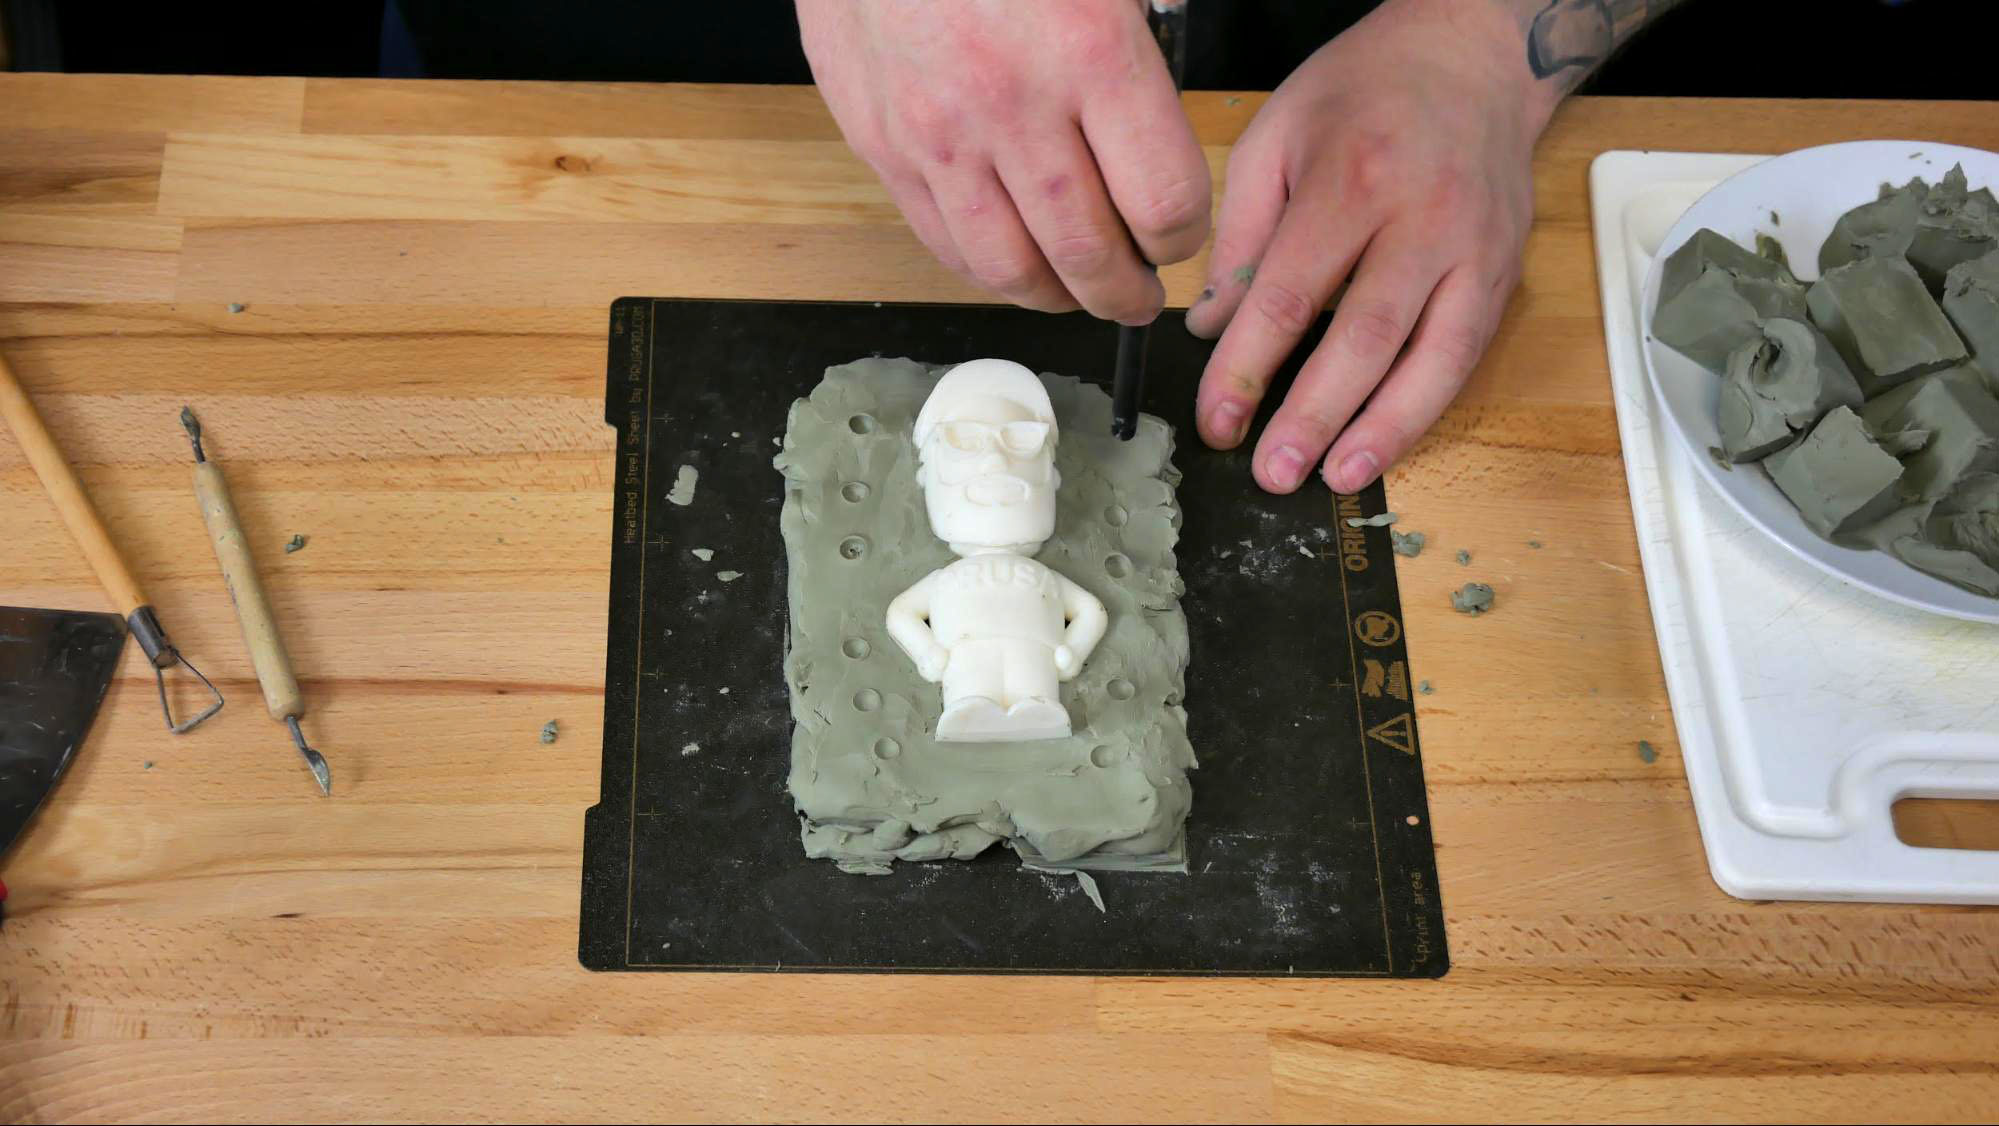
These could be simple holes made using a brush handle, carved grooves – anything to disrupt the smooth surface, which could cause the mold halves to slip.
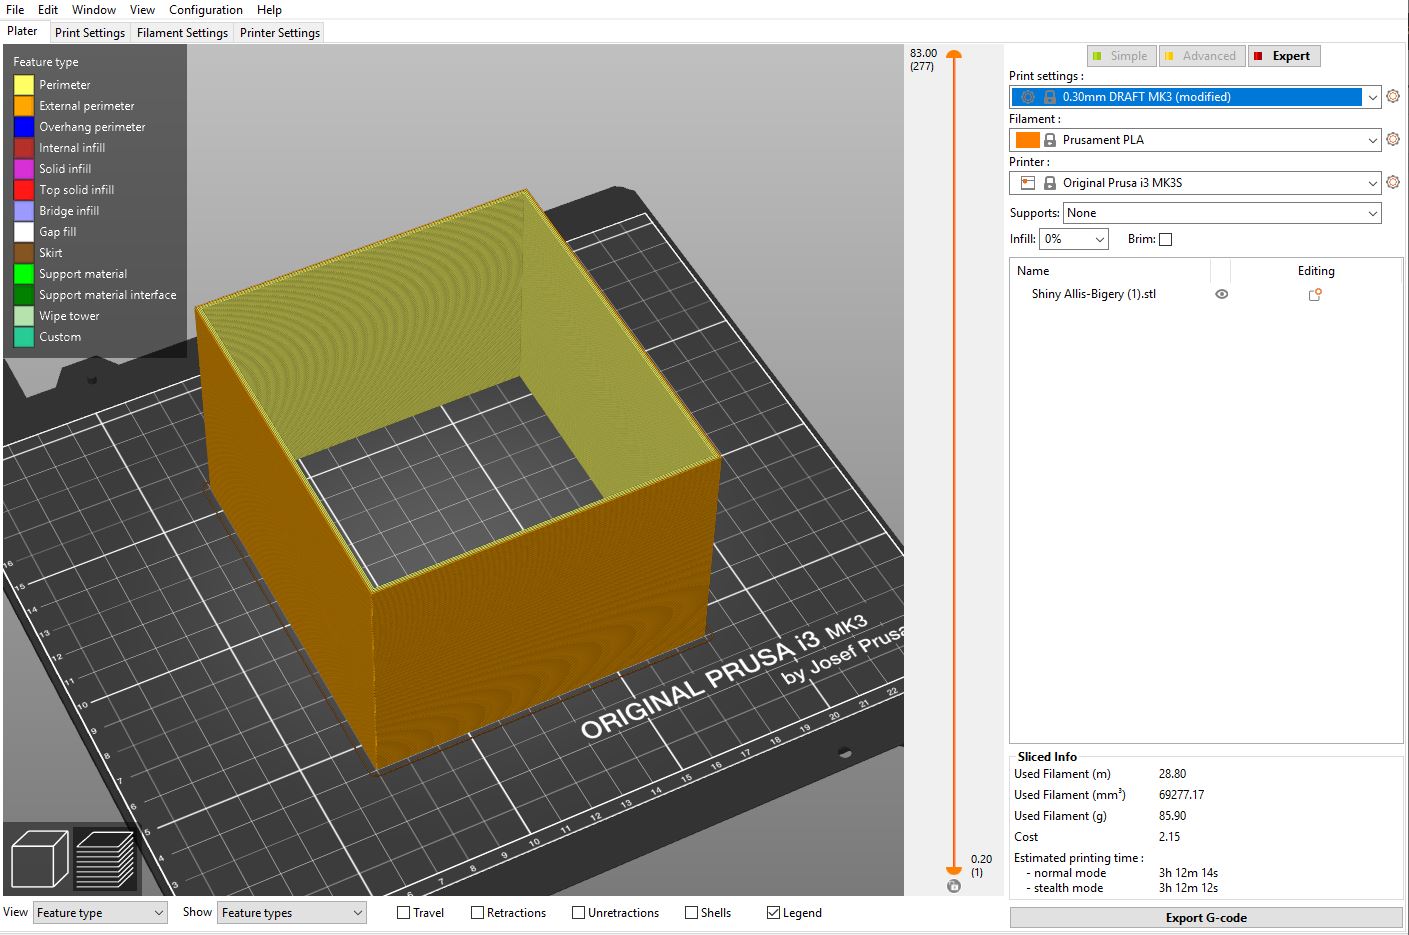
We also have to create an outer shell, which will hold the liquid silicone inside and prevent it from pouring over the whole table. After exploring a few dead ends using Lego bricks or various blocks put together with a glue gun, we found a simple, clean, but the not-so-obvious (hmm…) solution – we 3D printed it on the Original Prusa i3 MK3S :). 4 perimeter walls made the shell sturdy enough.
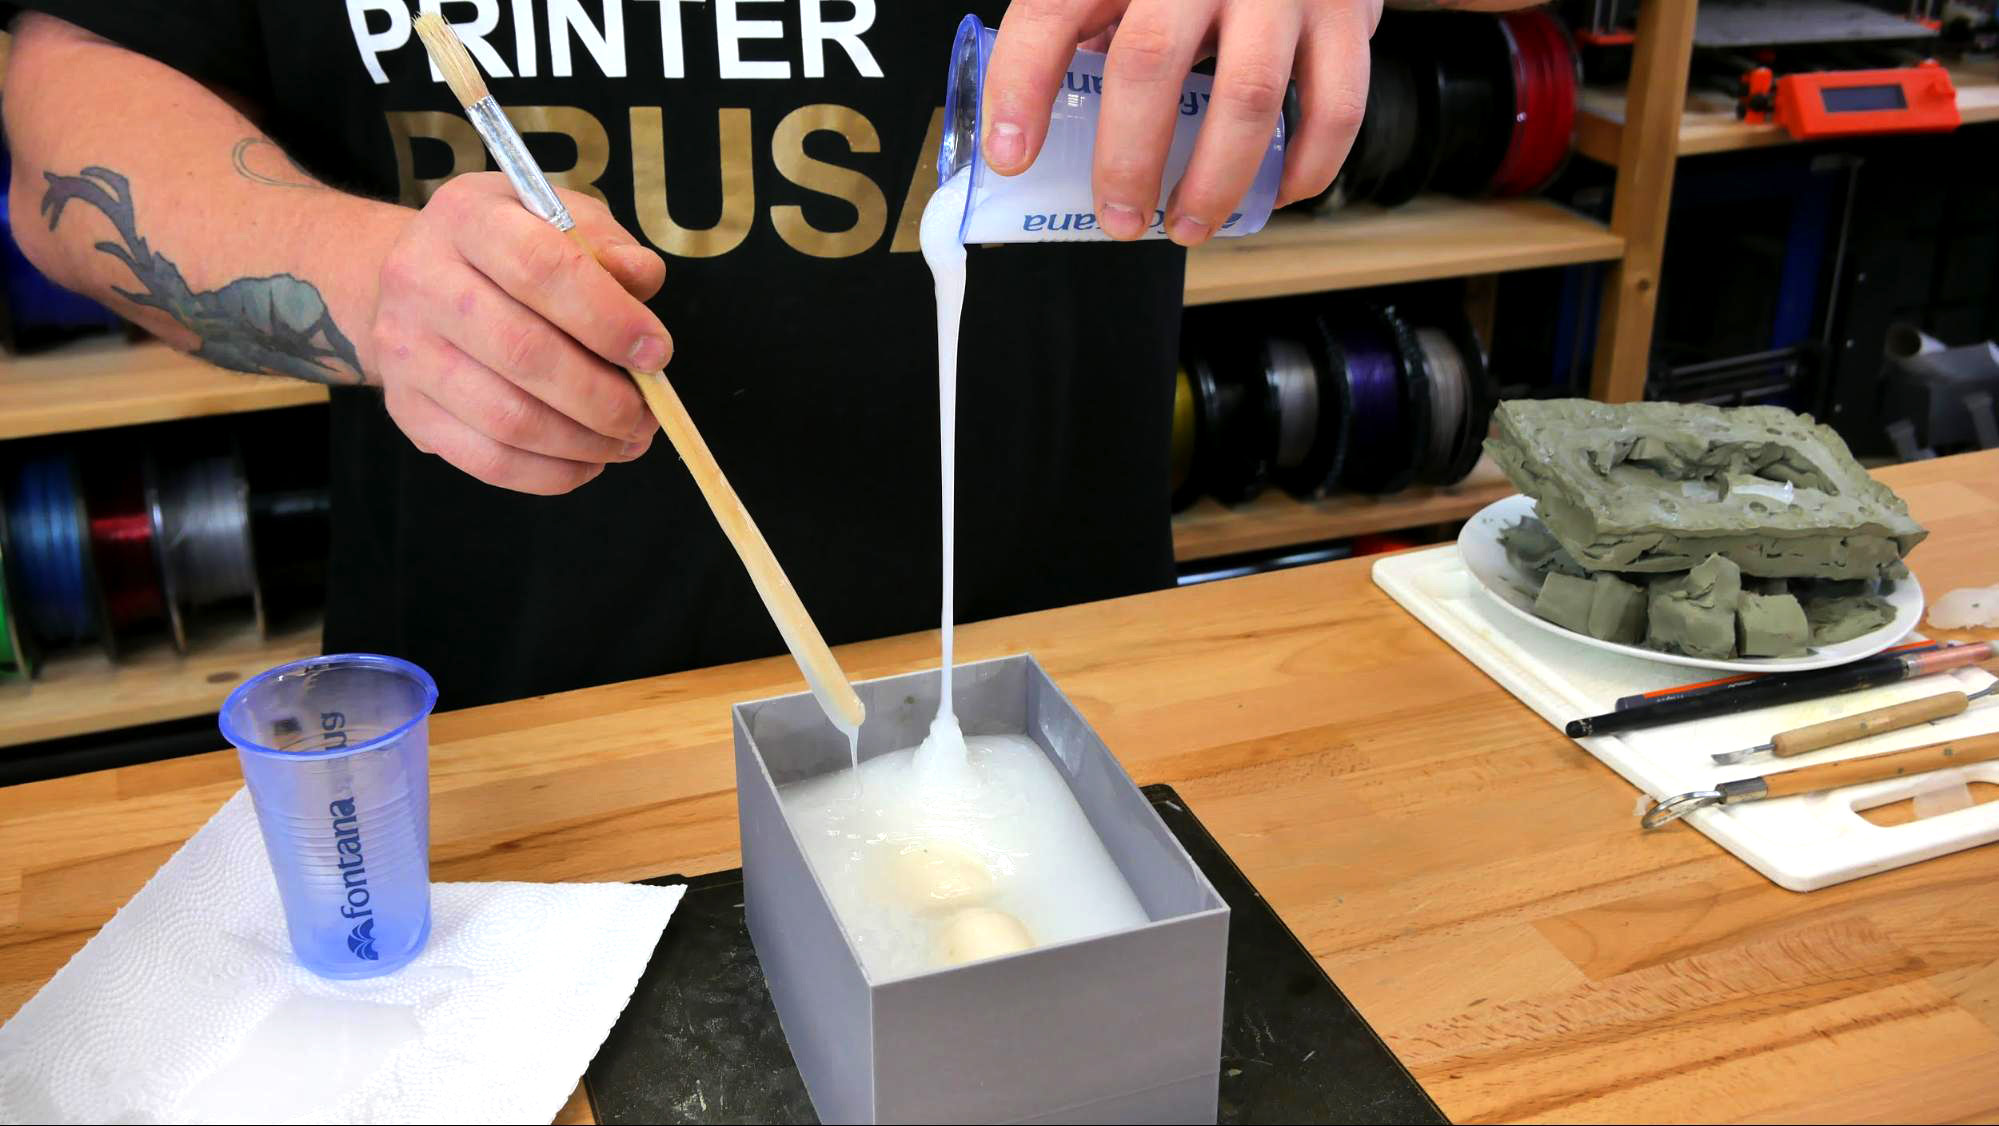
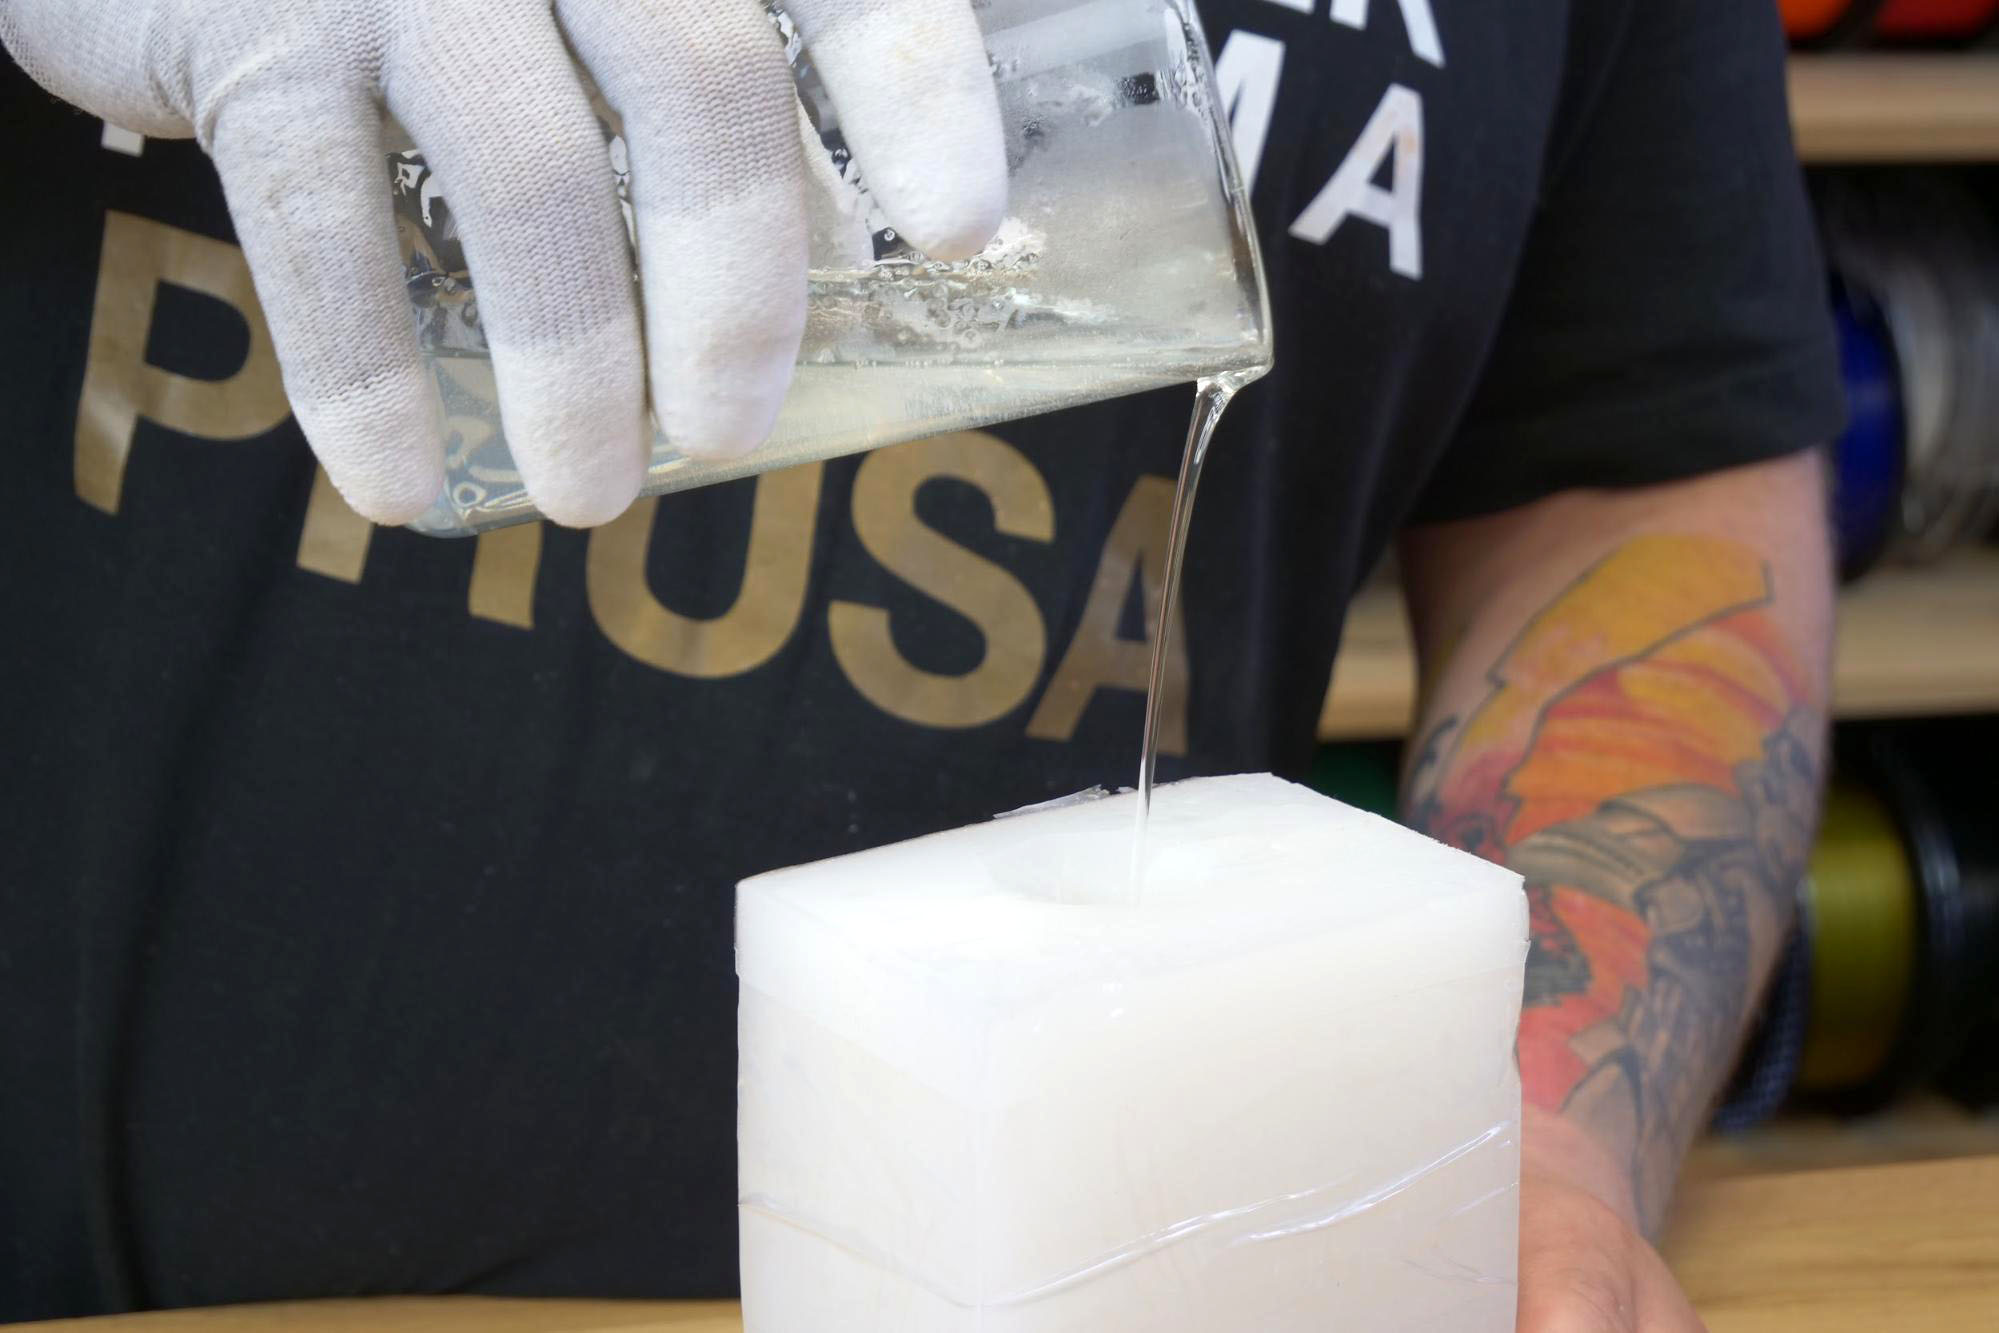
Now, let’s create the lower mold half. Pour the silicone mix with added hardener/activator (according to instructions) into the shell corner from a sufficient height (at least 10 cm / 4”). Let the silicone spread and fill all the nooks and crannies on its own.
Let the silicone properly cure, then remove the lower mold half from the shell and carefully clean off all the modeling clay.
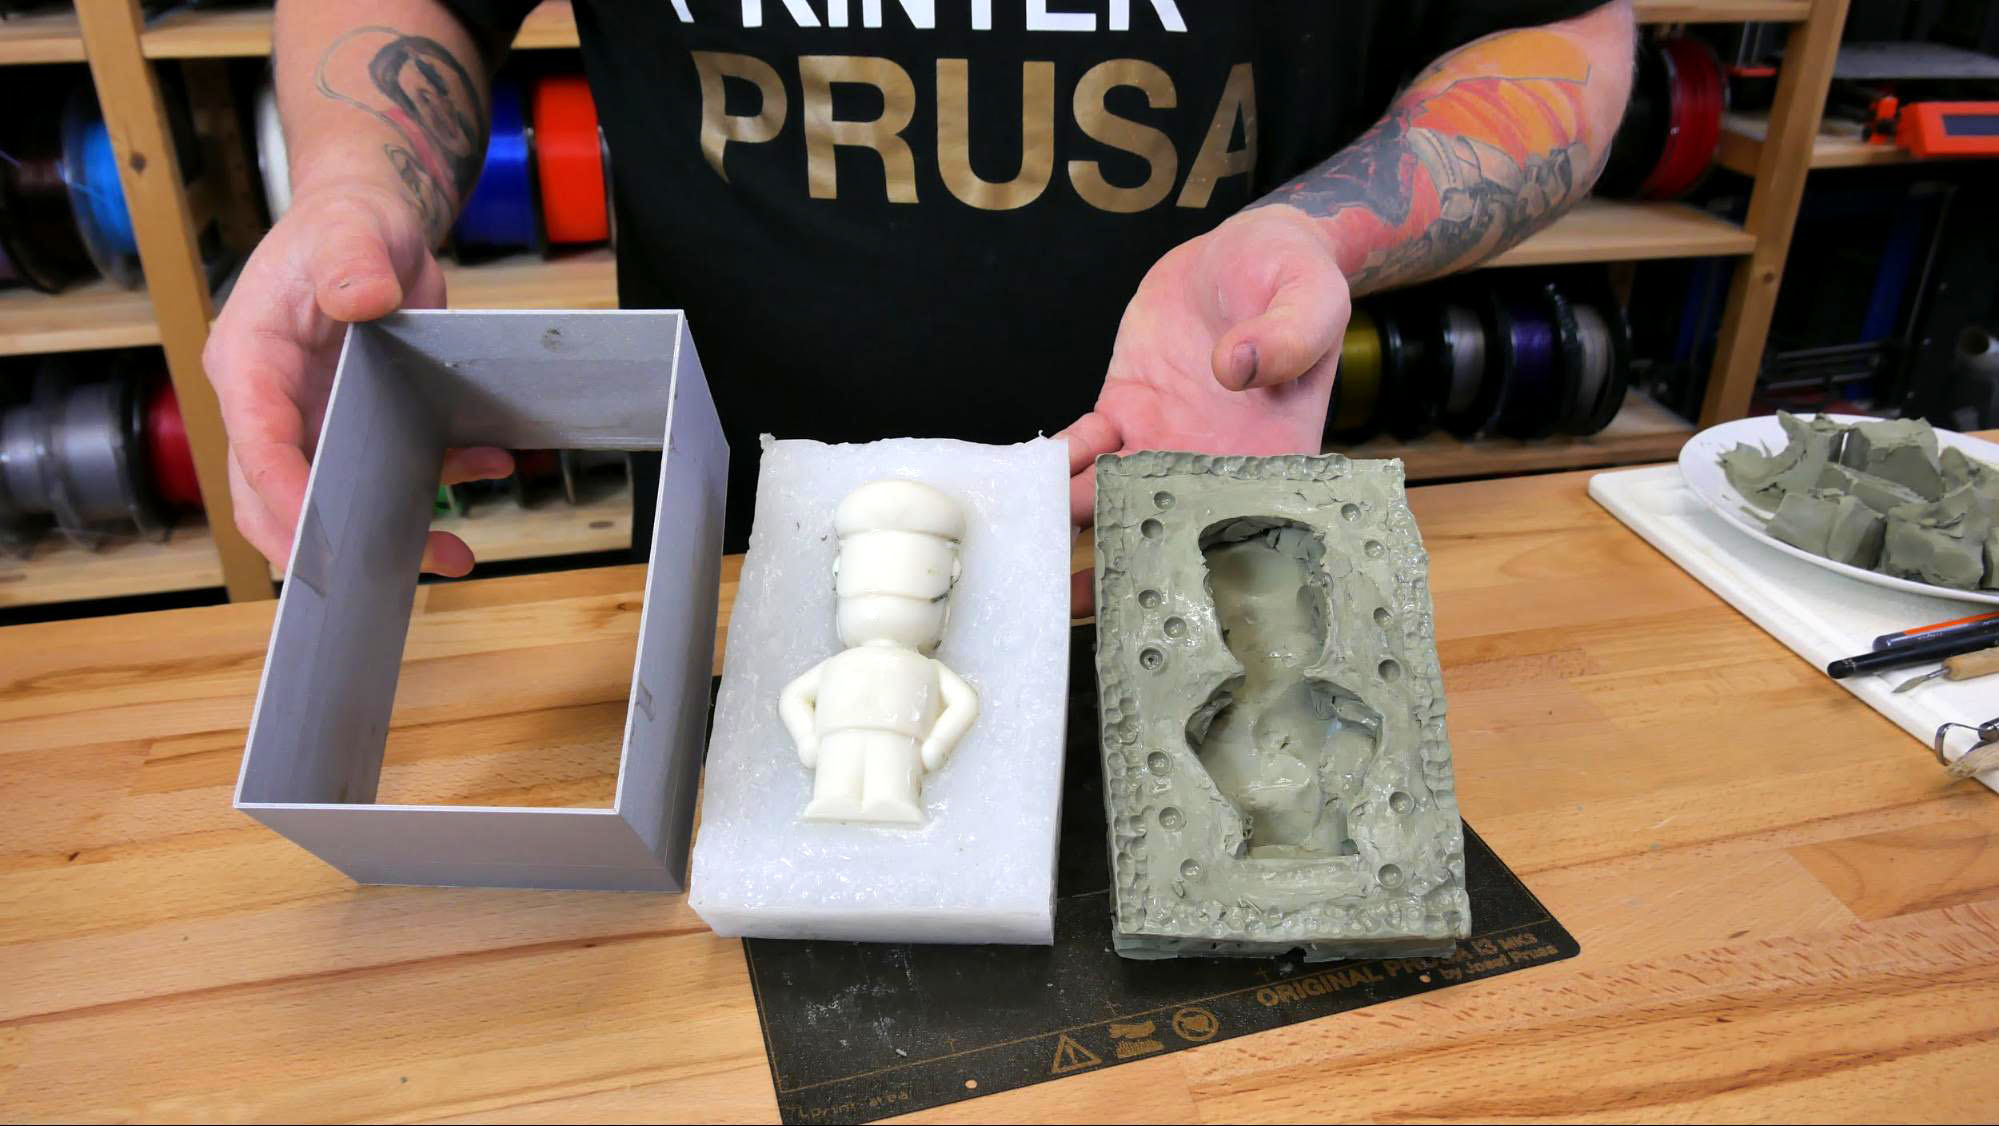
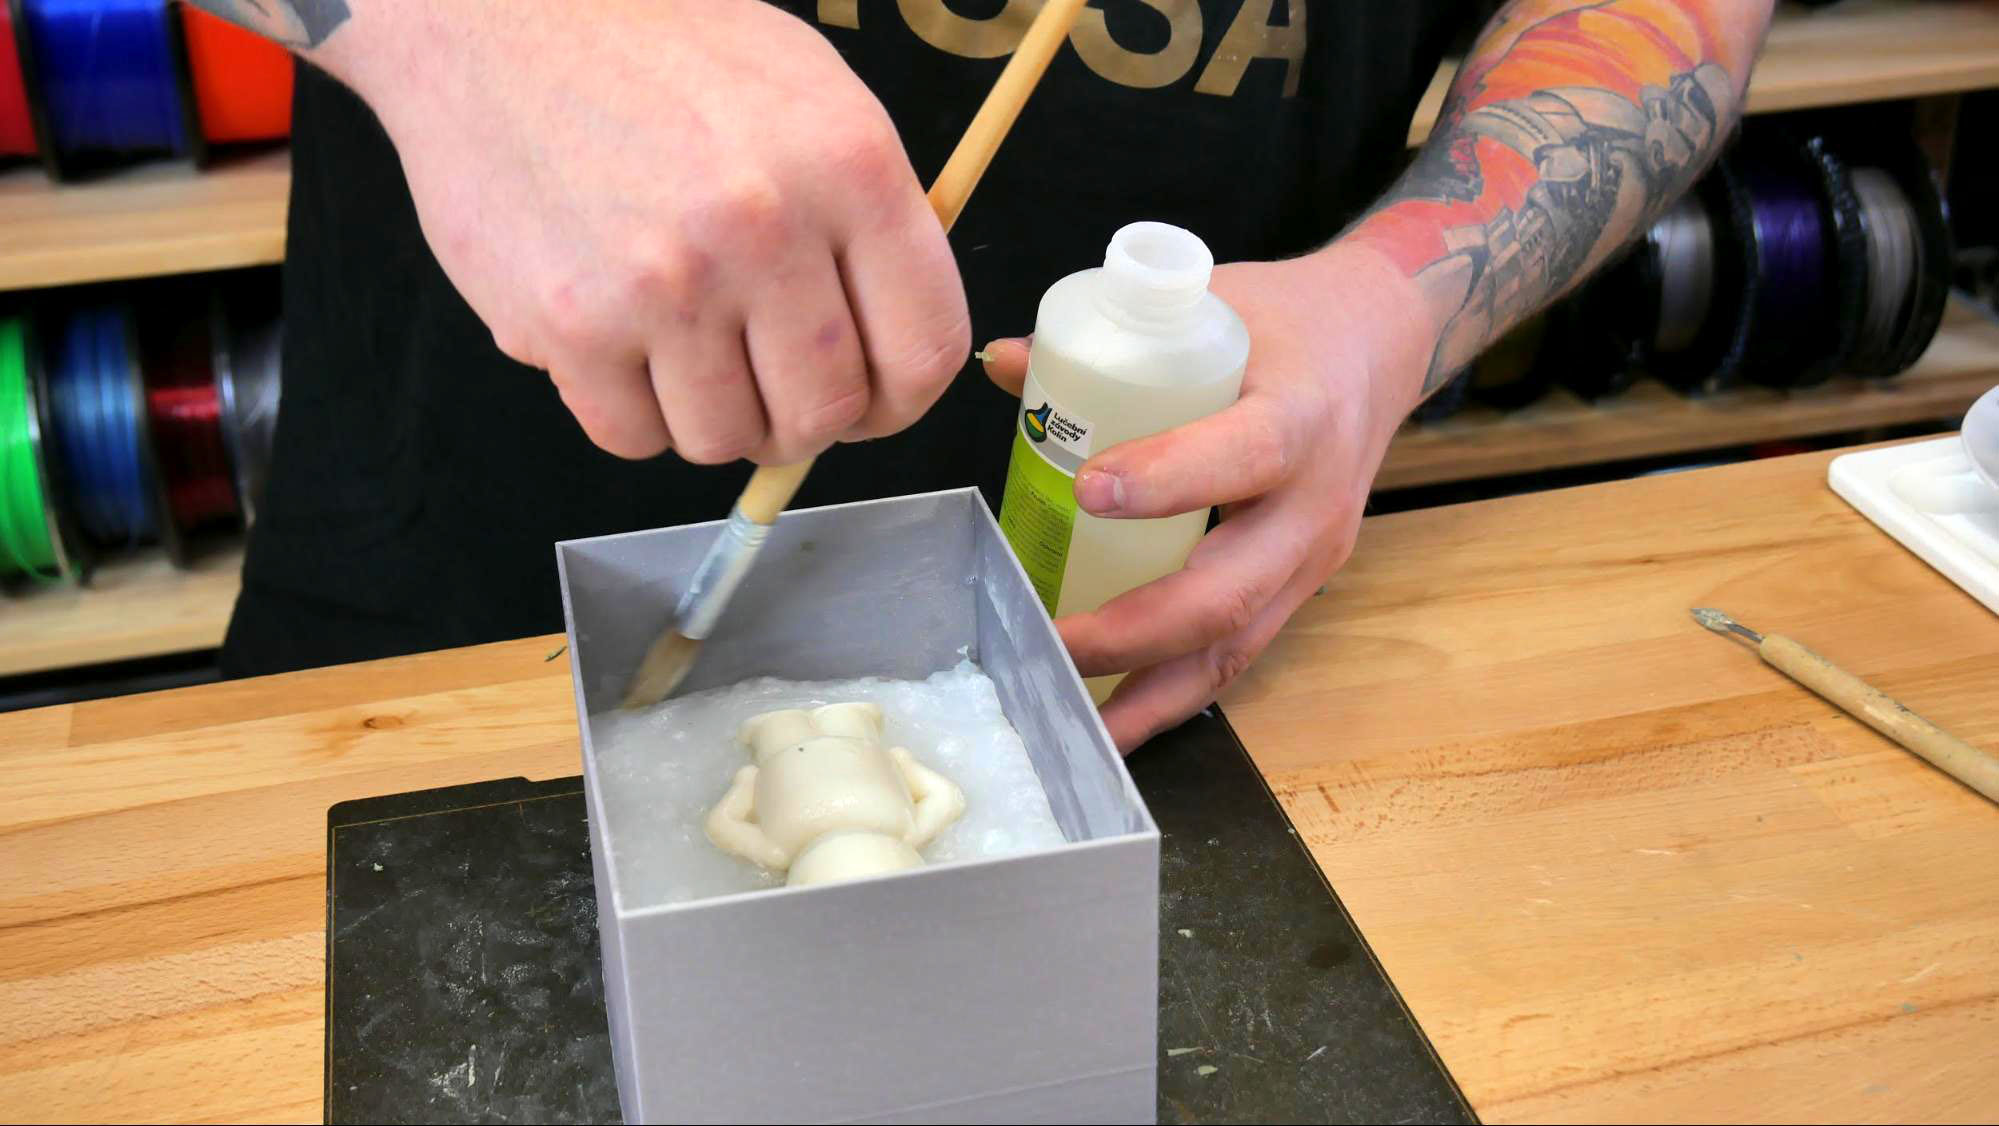
When the mold and master model are completely clean, cover them with a release agent again, so the upper mold half doesn’t stick to the lower one. Once more, pour in the silicone mix and create the rest of the mold.
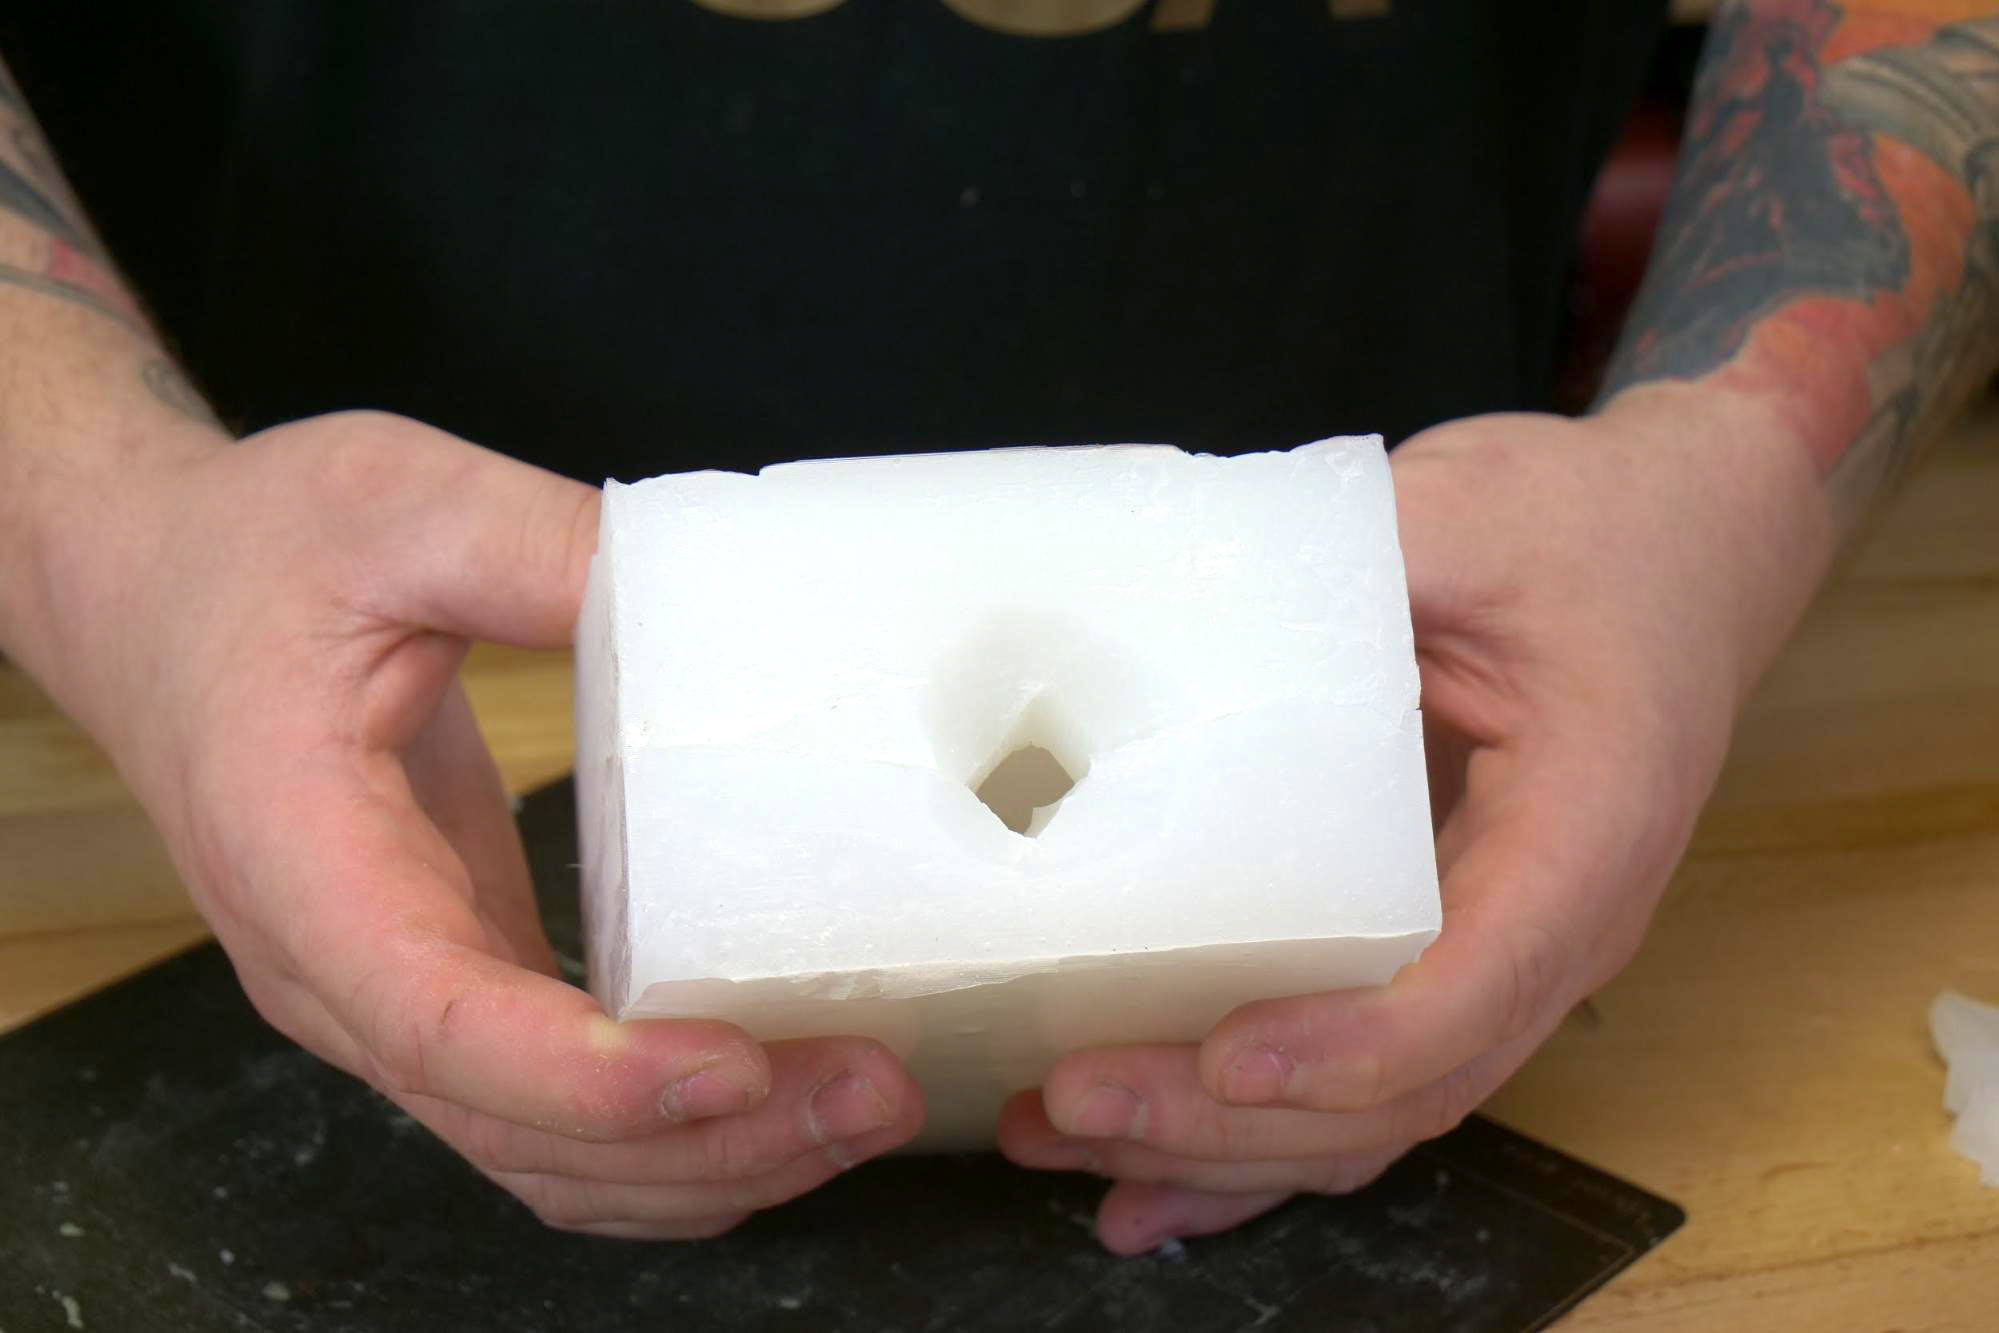
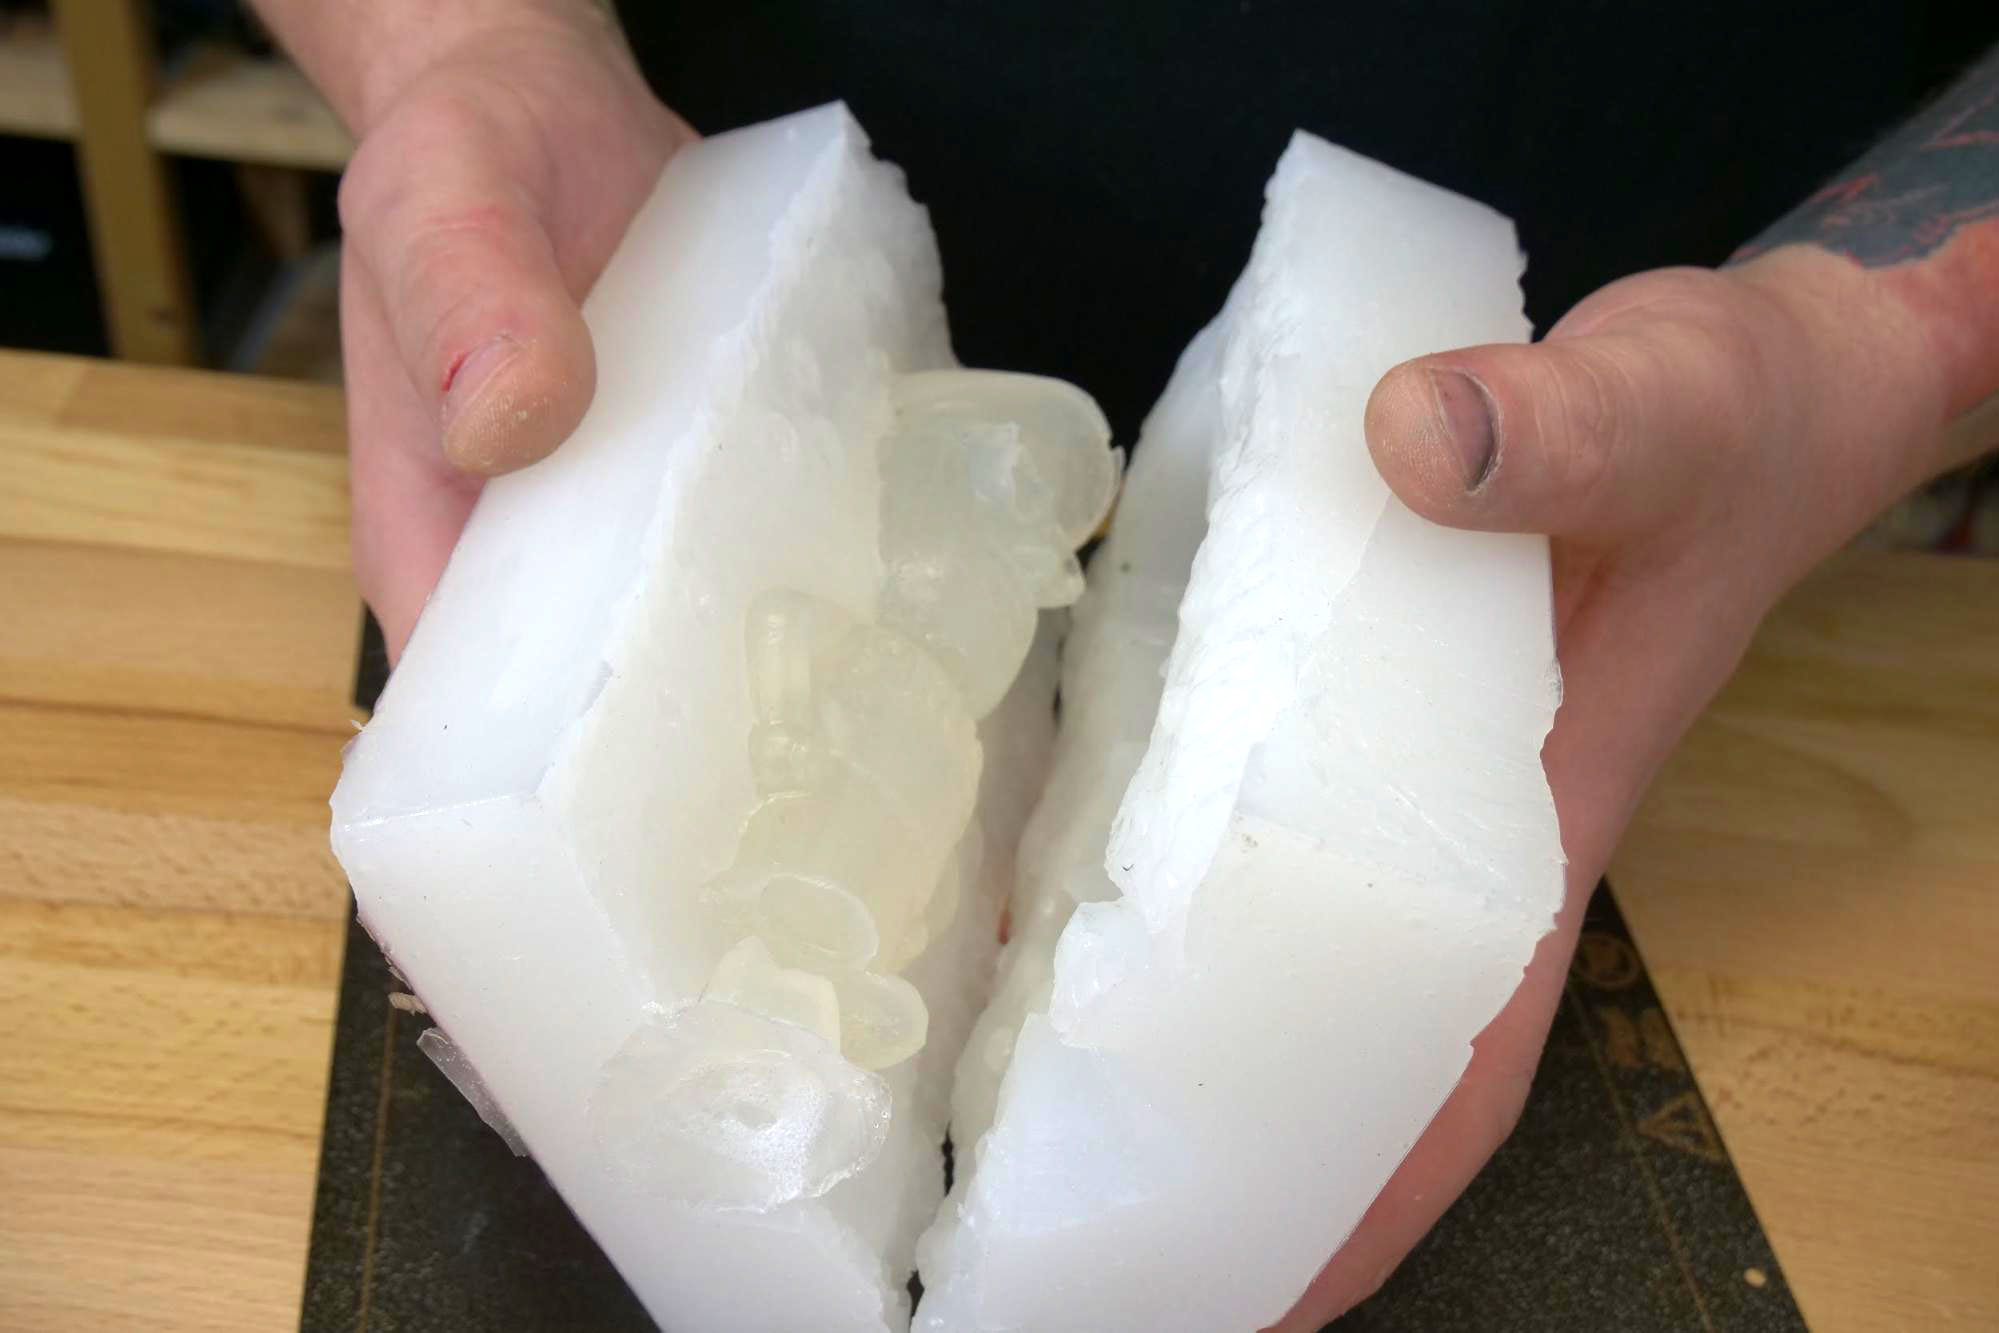
Now the mold is complete and we can remove the master model and put it aside.
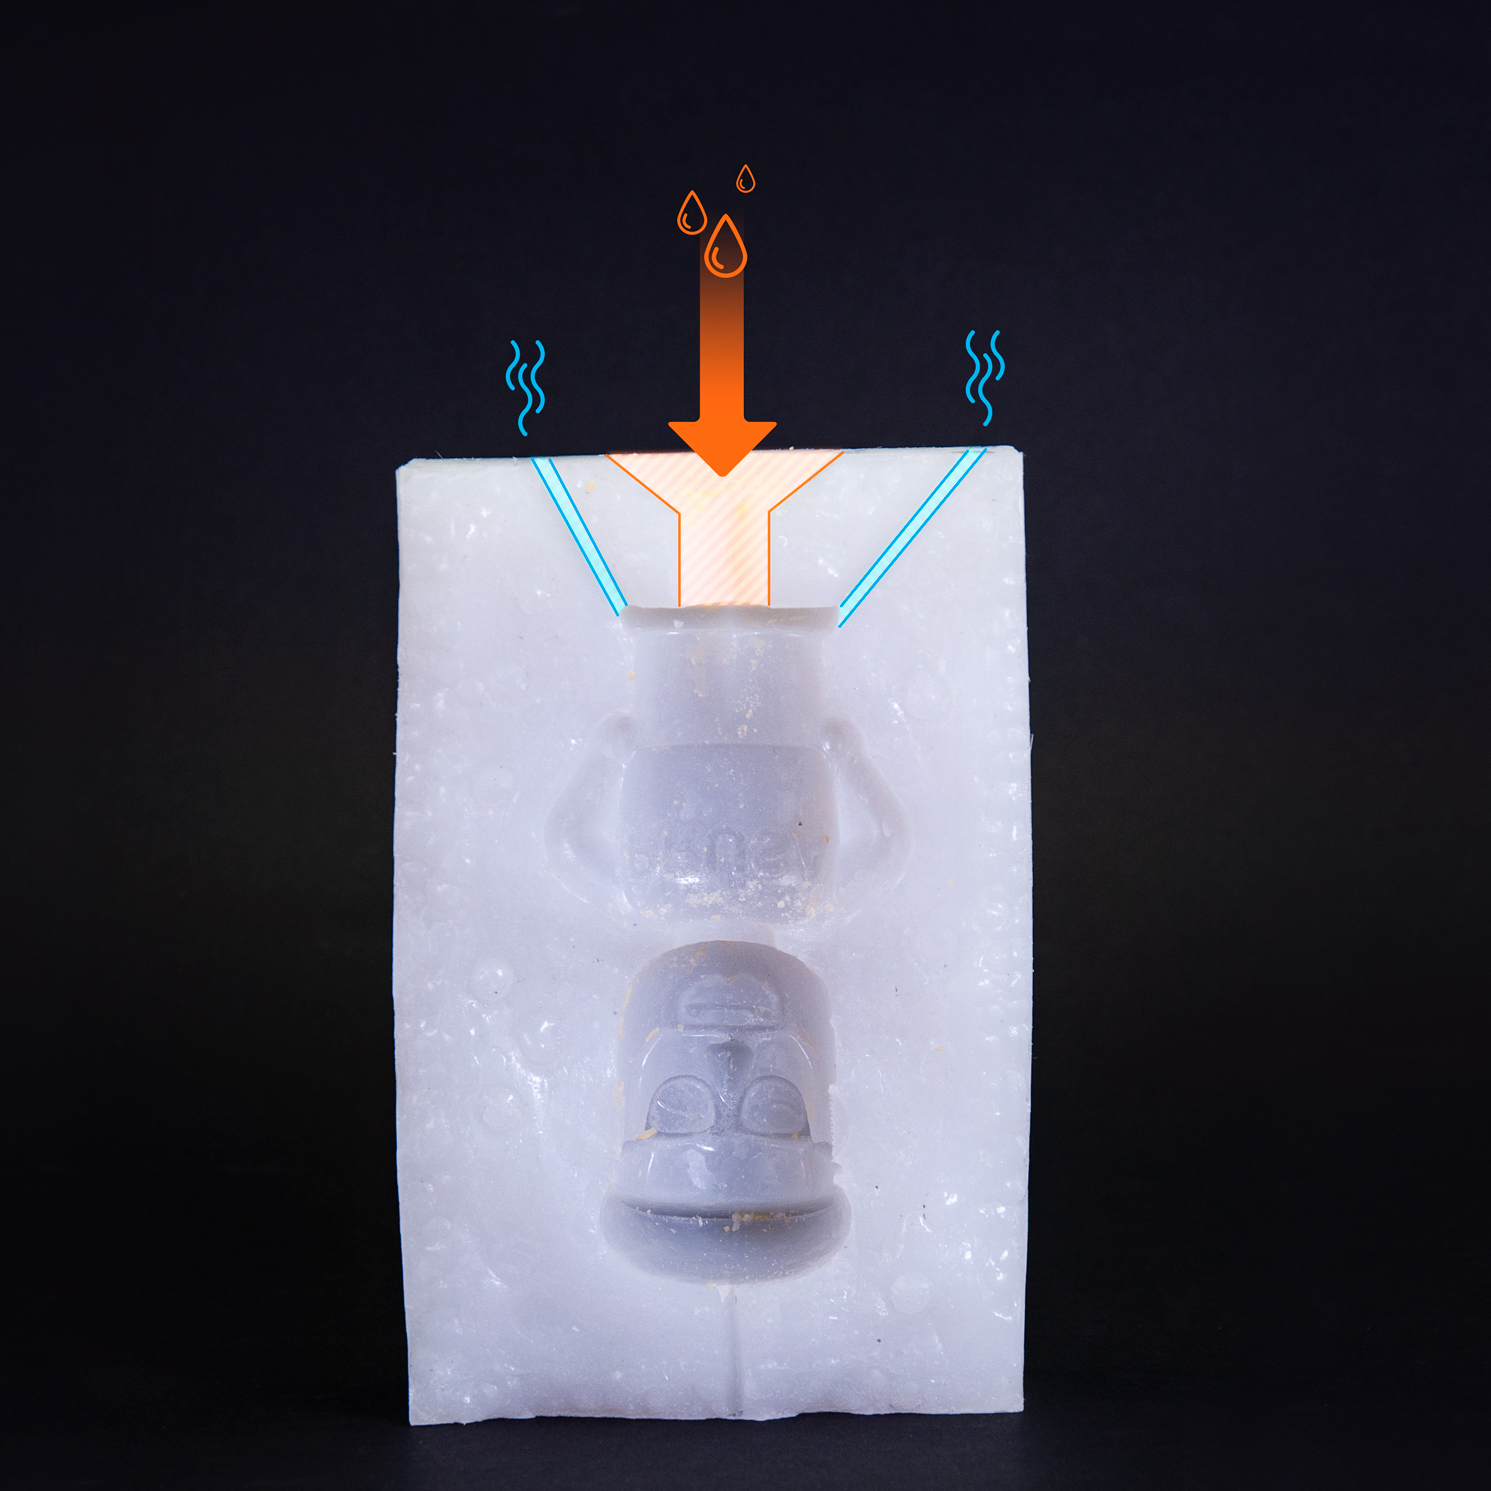
The casting material is poured into the mold via a pouring channel. Its size is crucial for the casting quality (unless we use a centrifugal casting method). For most materials except metal, it should be at least 3-5 cm (2”) long. For materials with worse flowability, such as plaster, concrete or wax, the channel has to be at least 3 cm (1.2”) wide, otherwise, 1 cm (0.5”) width should be sufficient.
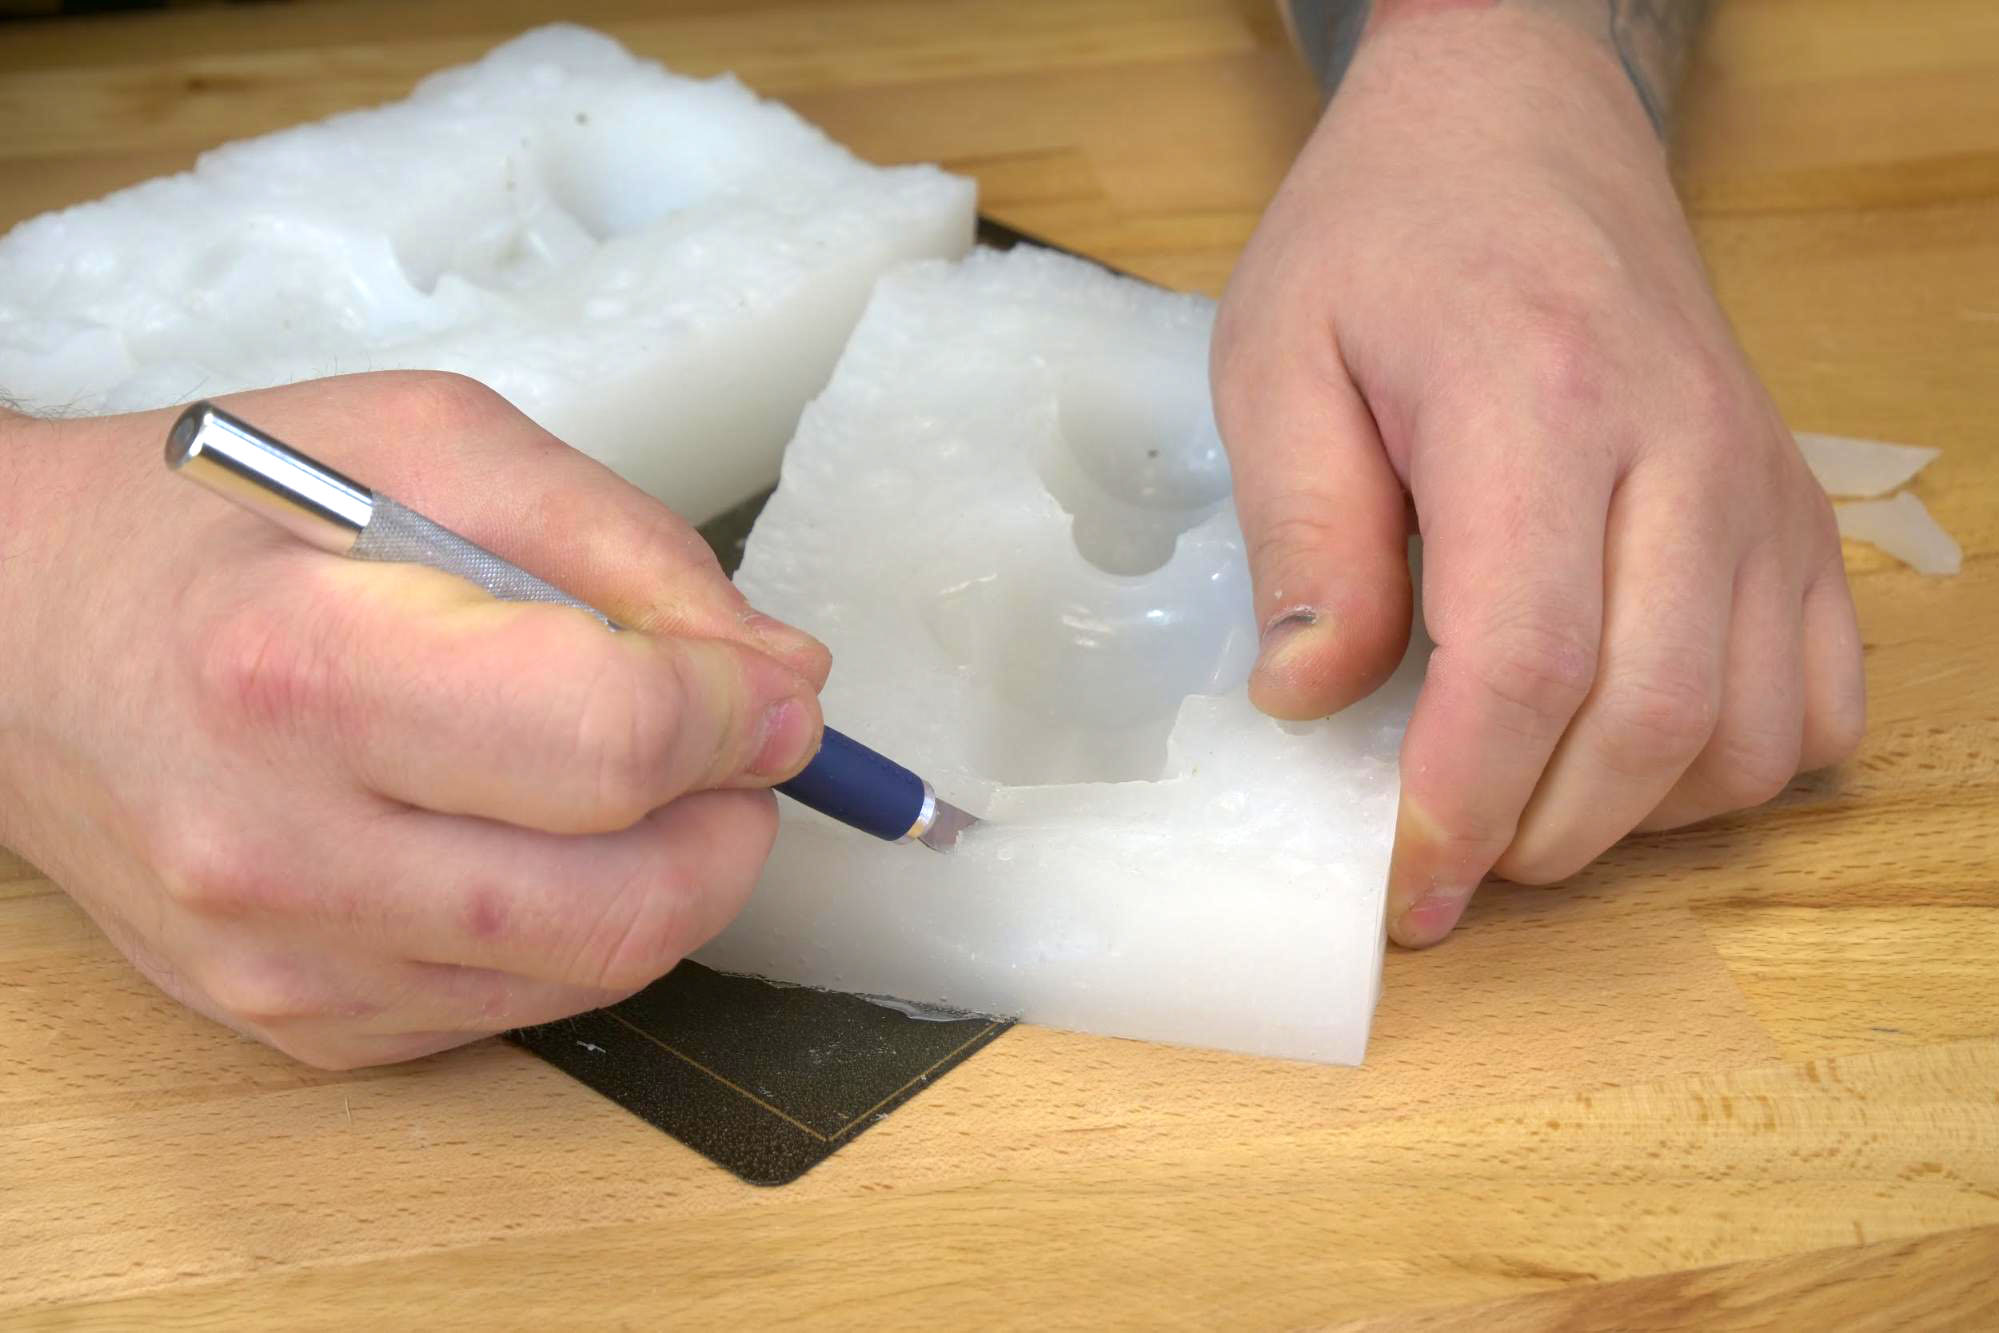
You also have to cut at least one air vent to let the air escape the mold quicker. Such vents should be always placed above the point where the pouring channel meets the model cavity, and also in every place where any air pockets could form. It is characteristic of a correct casting procedure, that all air vents are also completely cast (full of cast material).
Casting process
We have a complete mold including pouring channel and air vents. Note that the mold could be reused several times, you could get as much as 30-50 casts, depending on how much detailed the outlines are.
Now it’s time for the casting itself. Again, we use the release agent to cover the mold inner surfaces – make sure you are really thorough, otherwise, the cast could stick to the mold.
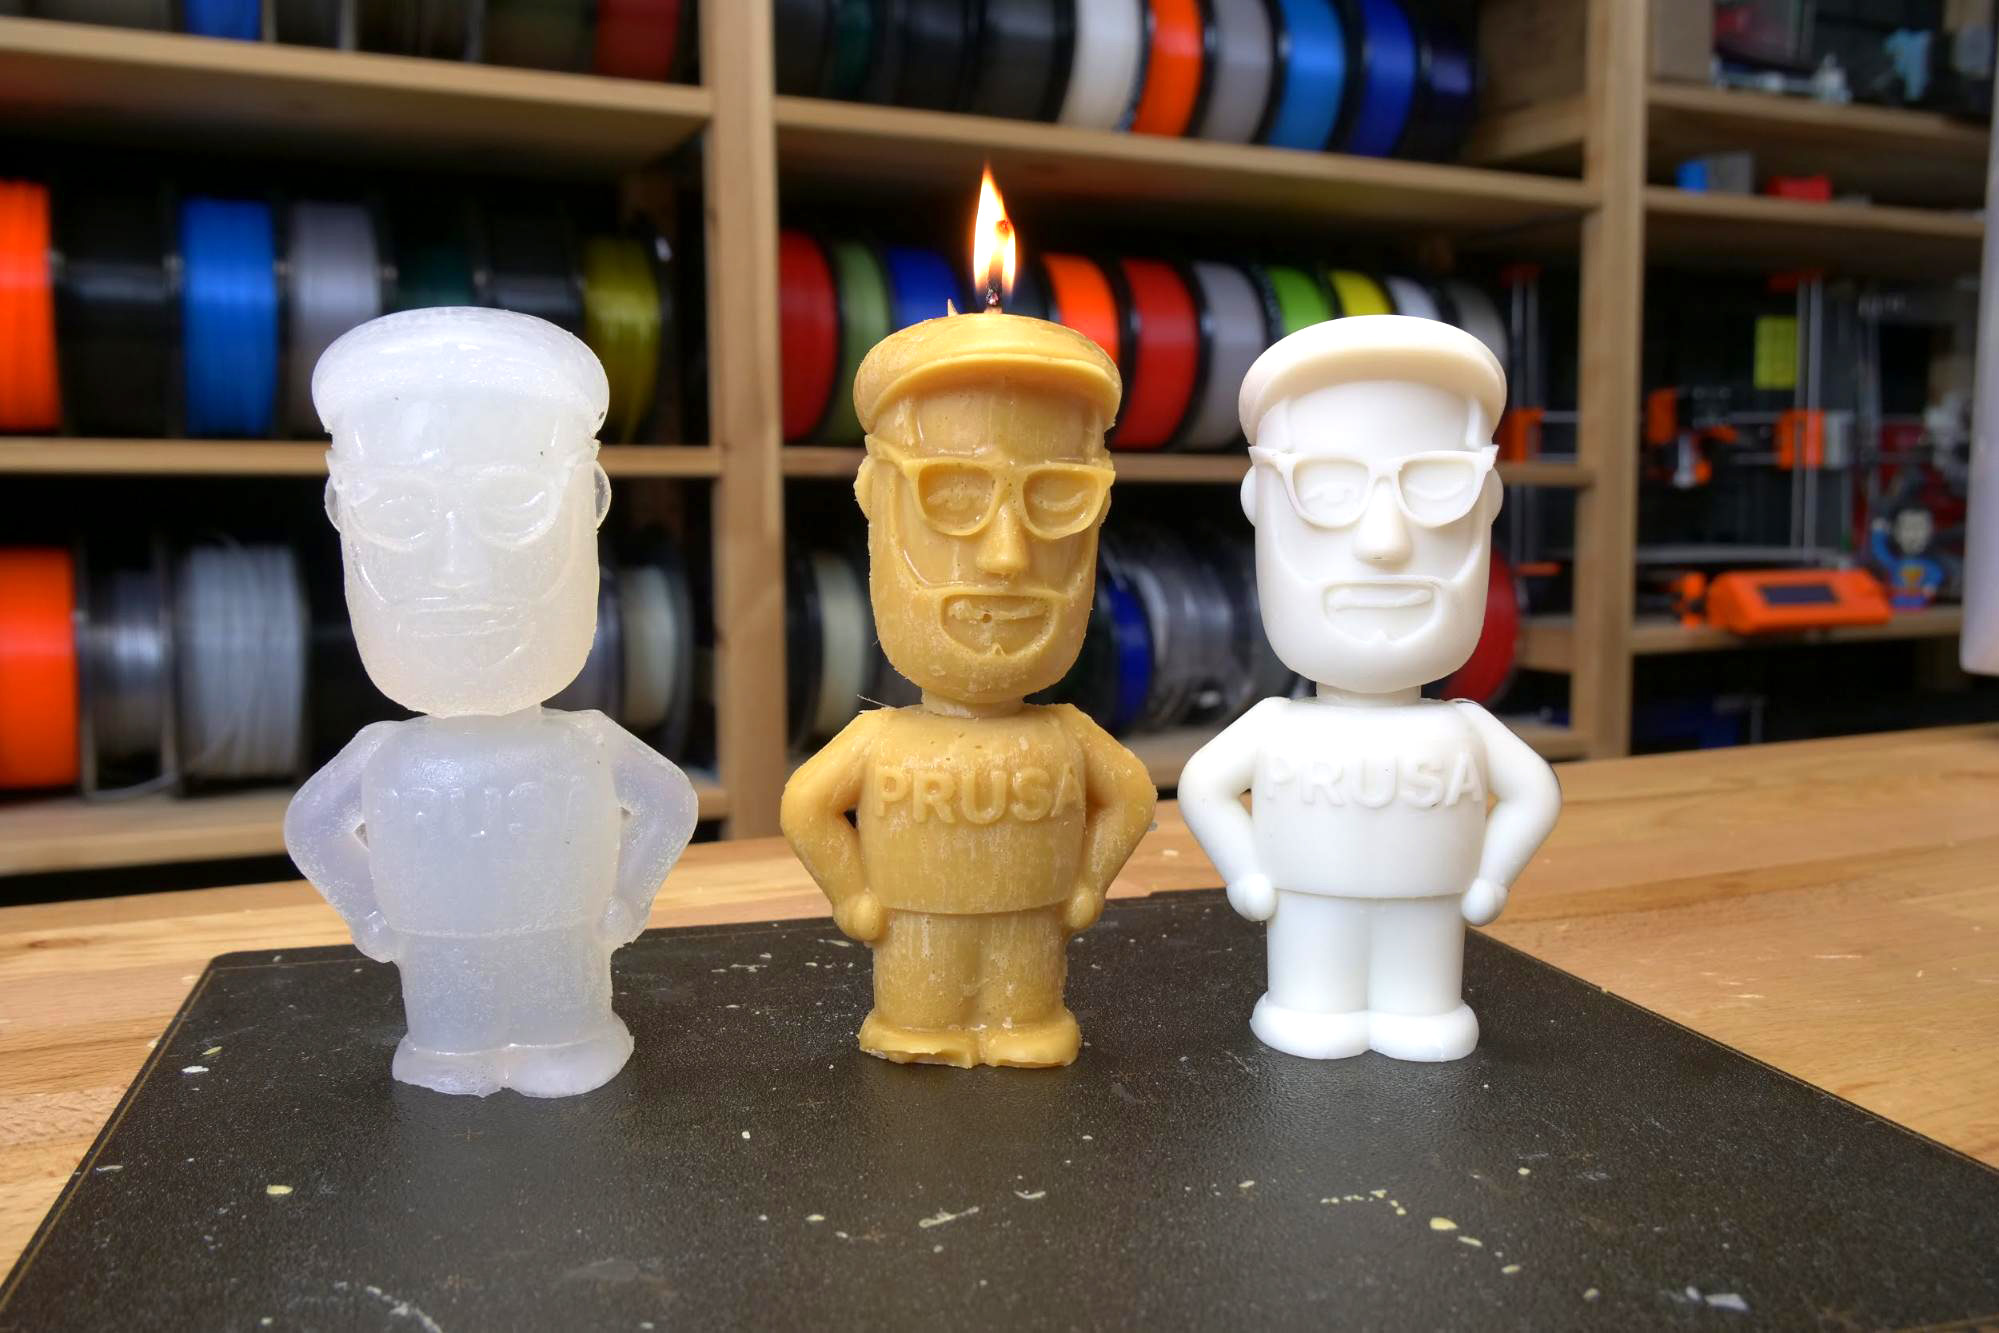
We will be casting soap and wax.
For soap casting, we need to liquefy the material first by heating it up. You can use a regular microwave with maximum settings, for about one minute (depends on the microwave output and which exact soap material you use). To be on the safe side, we recommend checking the situation every 30 seconds.
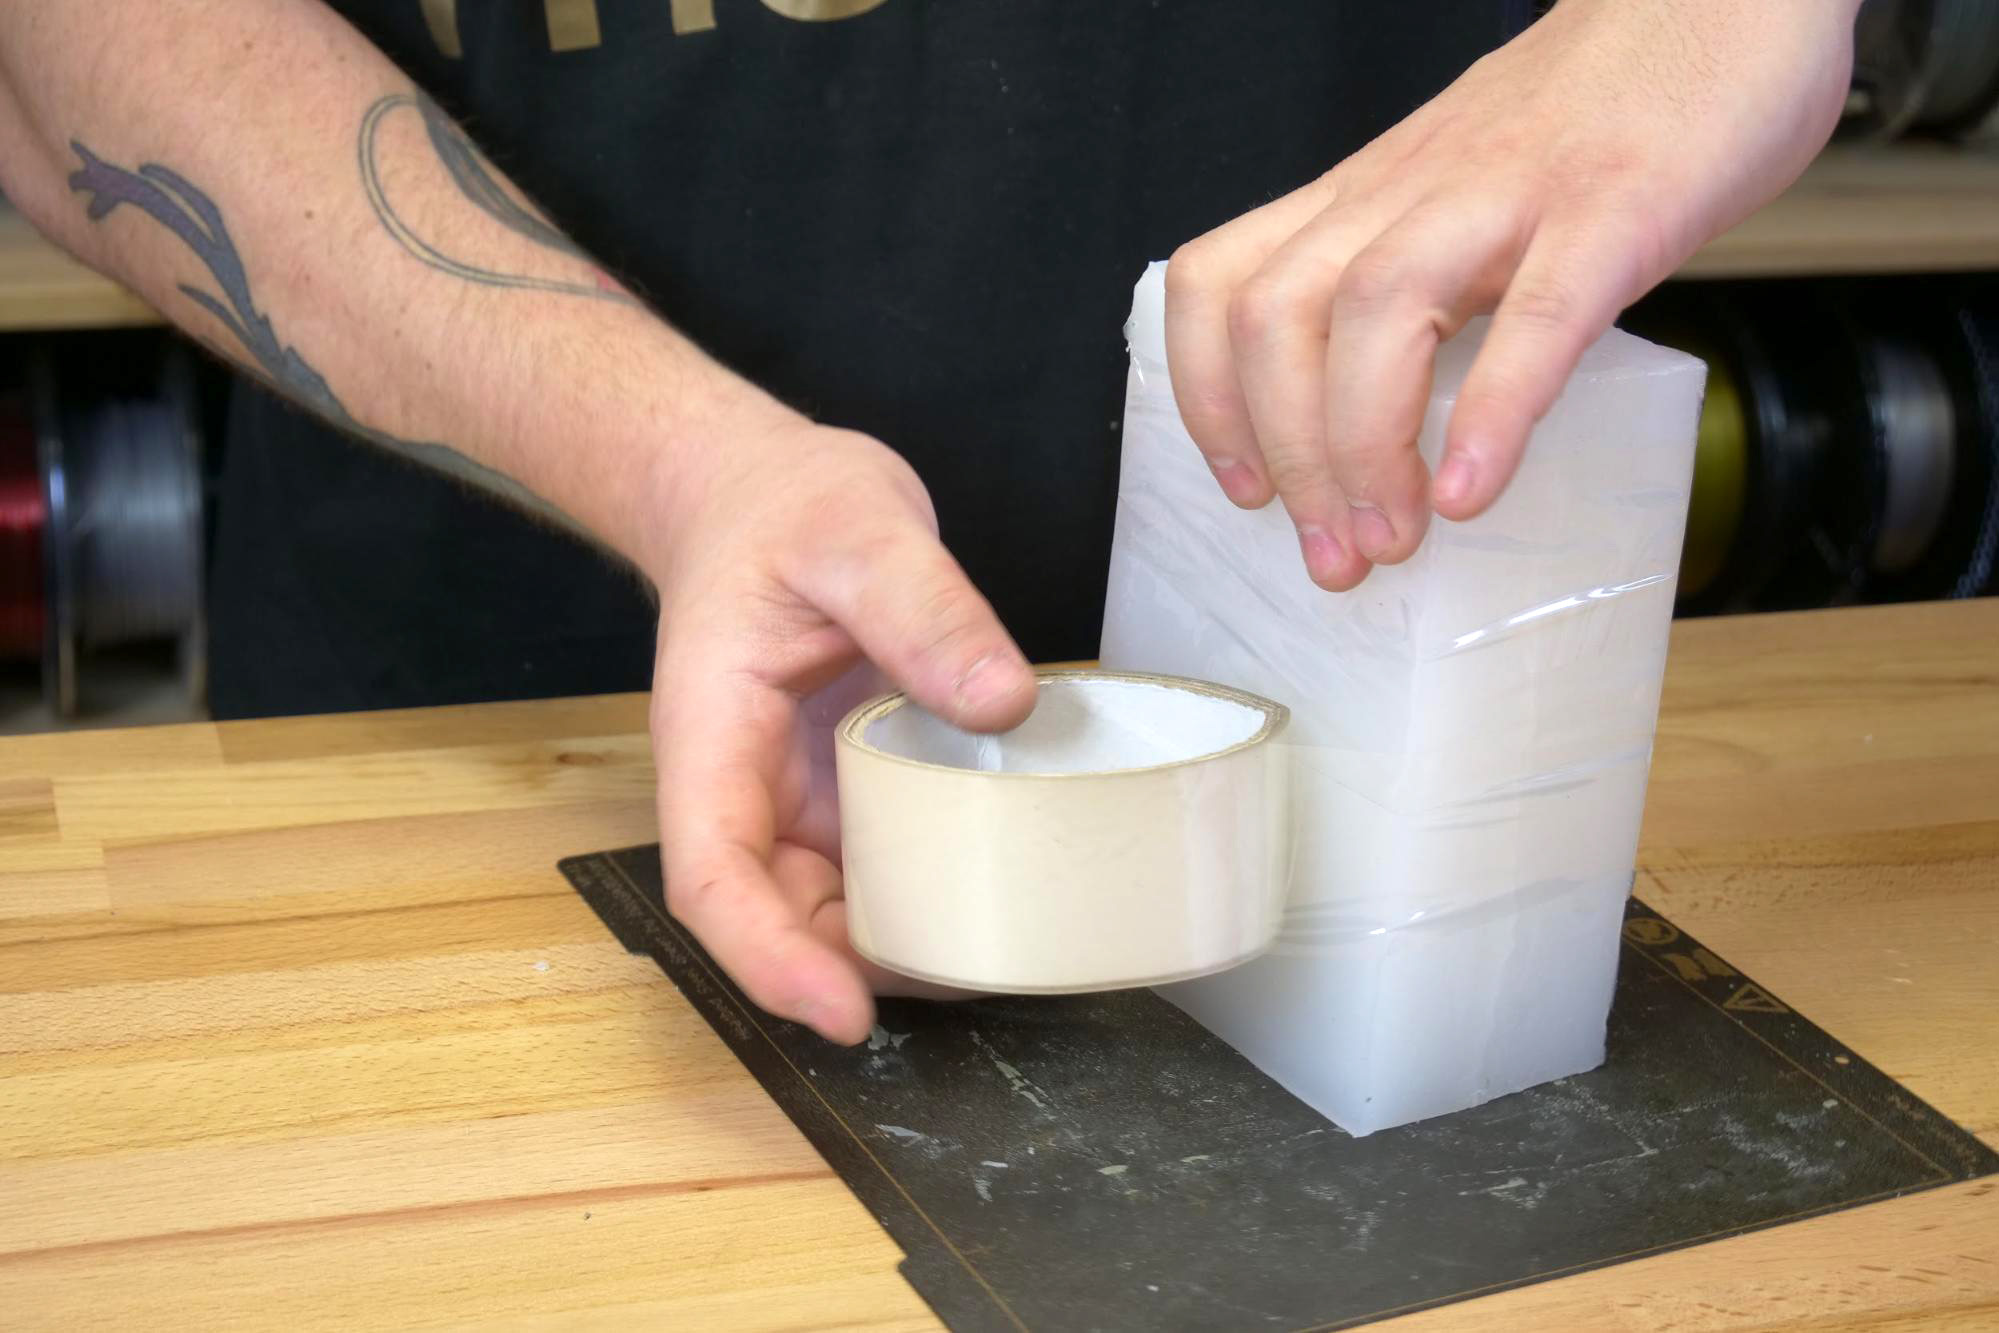
Tape both mold halves tightly together. Pour the hot material slowly into the mold.
It will solidify in about 1-3 hours, depending on the ambient temperature (you could put it into a fridge to speed things up).
The same process could be used to cast candle wax, the only added step is cutting out a groove for the candle wick, on the opposite end from the pouring channel.

Insert the wick and pour the wax (again, melted using microwave) into the mold.
Wax solidifies quicker than soap and is ready to be pulled out of the mold in about 30-60 minutes (again, depending on the ambient temperature). Make sure you fill-up the pouring channel completely, as the wax tends to shrink while cooling out.
Conclusion
Mold making is not a difficult process, it lets you multiply your 3D prints easily, using various materials. You could even start a short-run production line!
So, good luck with your hobby and as always, happy printing!
A very interesting and informative article. The experience of creating and describing the process itself is very exciting. You have a talent.
When it comes to manufacturing parts from metal, then you should only turn to those who already have a name in the industry and the necessary experience not to make a mistake. Because it often happens that a bad part, especially a component part of a mechanism, can be made badly because of poor quality casting and the mechanism will stop working right away. That is why a painstaking approach is needed here. That’s why I went to someone who specializes in metal parts fabrication https://magnet.com.ua/en/izdeliya-na-zakaz/izgotovlenie-detalej-iz-metalla/ and they helped me. That’s why I also recommend to look at them, they are experienced people and do it to the best of their knowledge.
Was an article/video on doing lost wax casting for metal with the SL1/SL1Speed ever made? This blog post said that one would be forthcoming, but I haven’t been able to find it. I am interested in using the SL1 for metal casting, but I have found very few resources online and am wondering how well it works. I also see references to Prusa Green Castable Wax resin in videos, but it doesn’t seem like Prusa still sells it?