


The combination of 3D printing and RC models is a perfect match! We haven’t heard of anyone who printed his own RC car and then got bored of it. On the contrary, people love the possibilities! With a 3D printer, it’s possible to create plenty of original pieces and take your RC models to the next level. In this article, we’ll give you several useful tips and tricks to demonstrate that printing RC cars is easy and fun. Plus we have a small surprise for you at the end of this article. And we are working on a video showing how these cool cars work, so stay tuned!
We consulted resources for this article with Jiří Lorenčík, co-founder of the 3D Sets project. If you don’t know what it’s about, you should definitely go ahead and browse their webpage. It’s an amazing company offering detailed files for 3D printable RC cars with complete assembly manuals. And it’s a perfect match with the Original Prusa printers and Prusaments! One of their models can be downloaded from Printables.com, others can be bought directly on their website. We really love their cars because they’re nice, functional and easy to assemble – just like our printers. 🙂
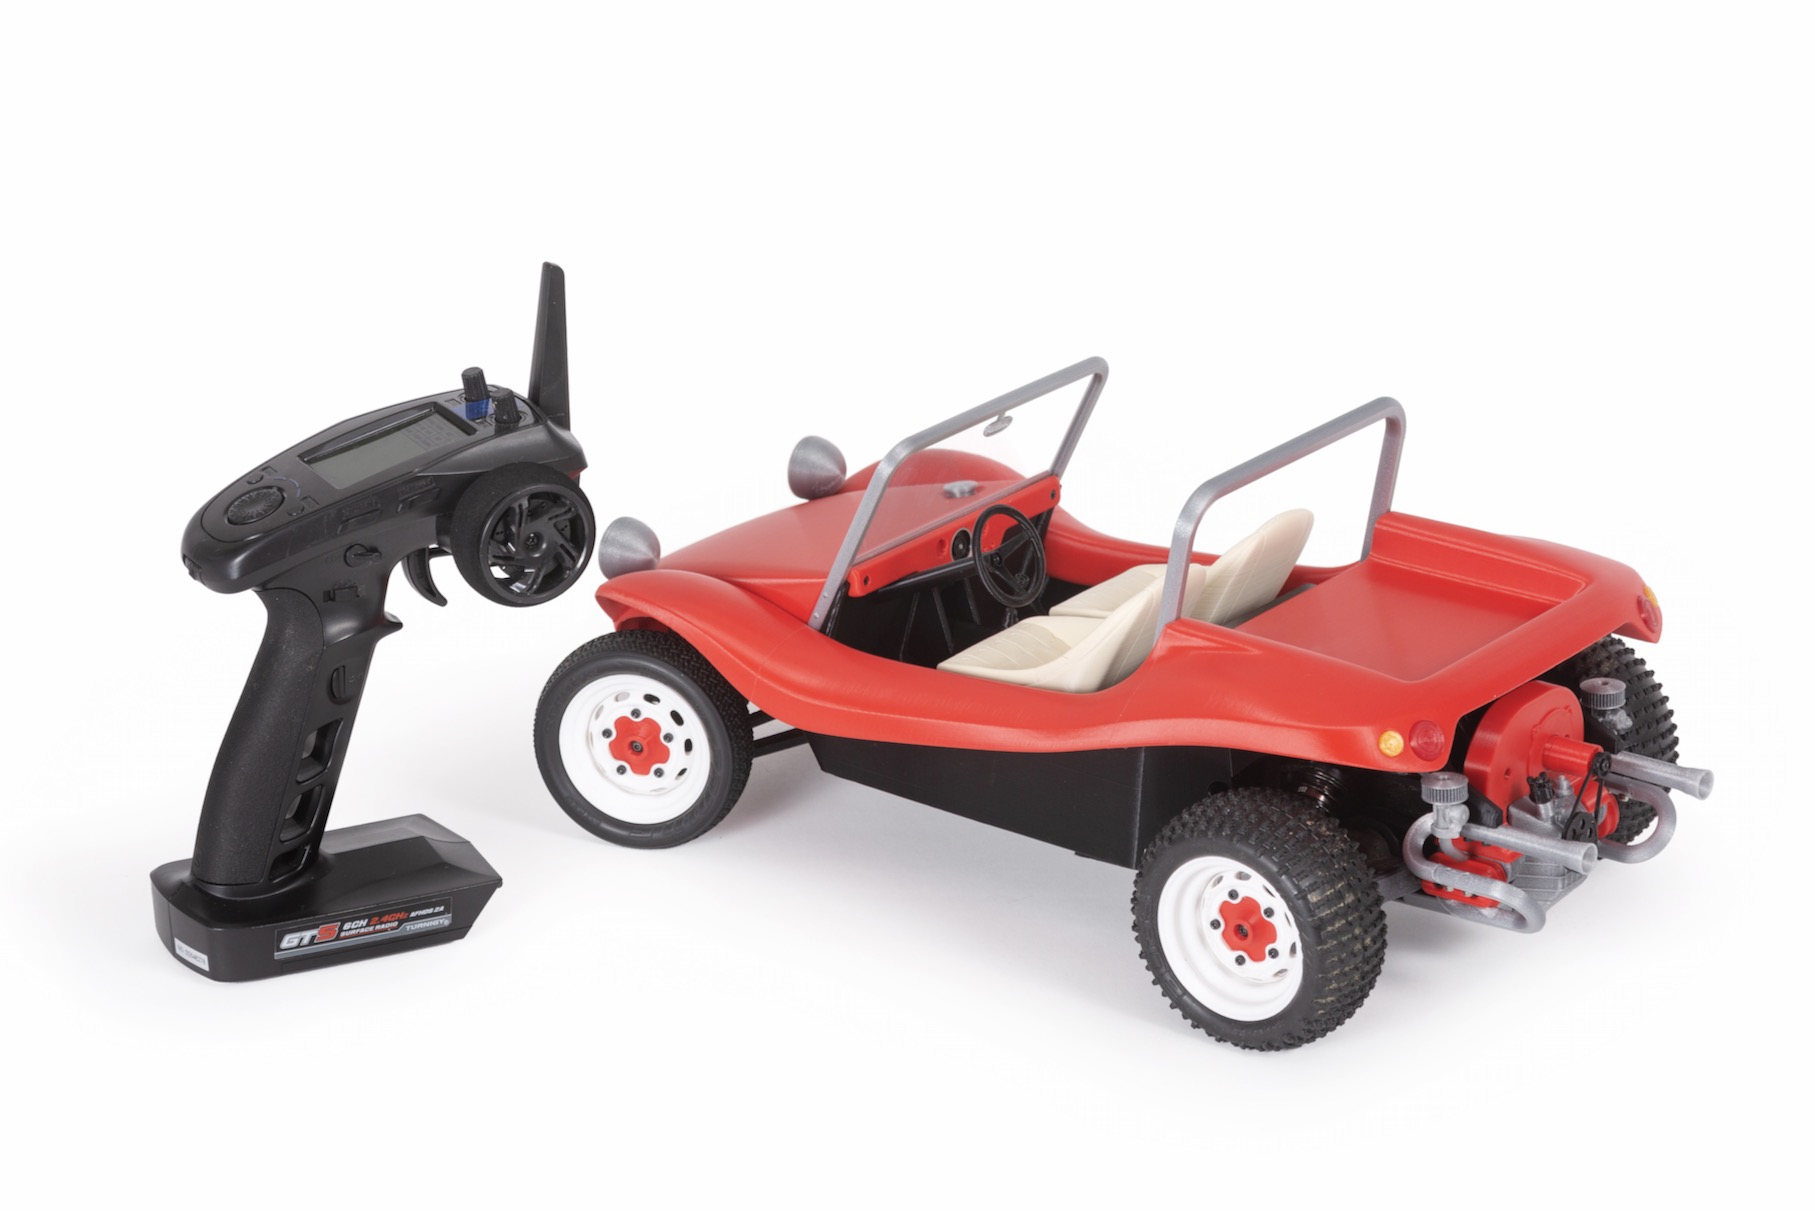
Model Sandy, recently published by 3D Sets. You can get it on their website.
Model looks
Let’s start with the most exposed parts of the model. The overall look of the model is the most important part for pretty much everybody. There are even people who buy preassembled chassis and print only the visual parts. Others like to print RC models just to be static, without the electronics inside.
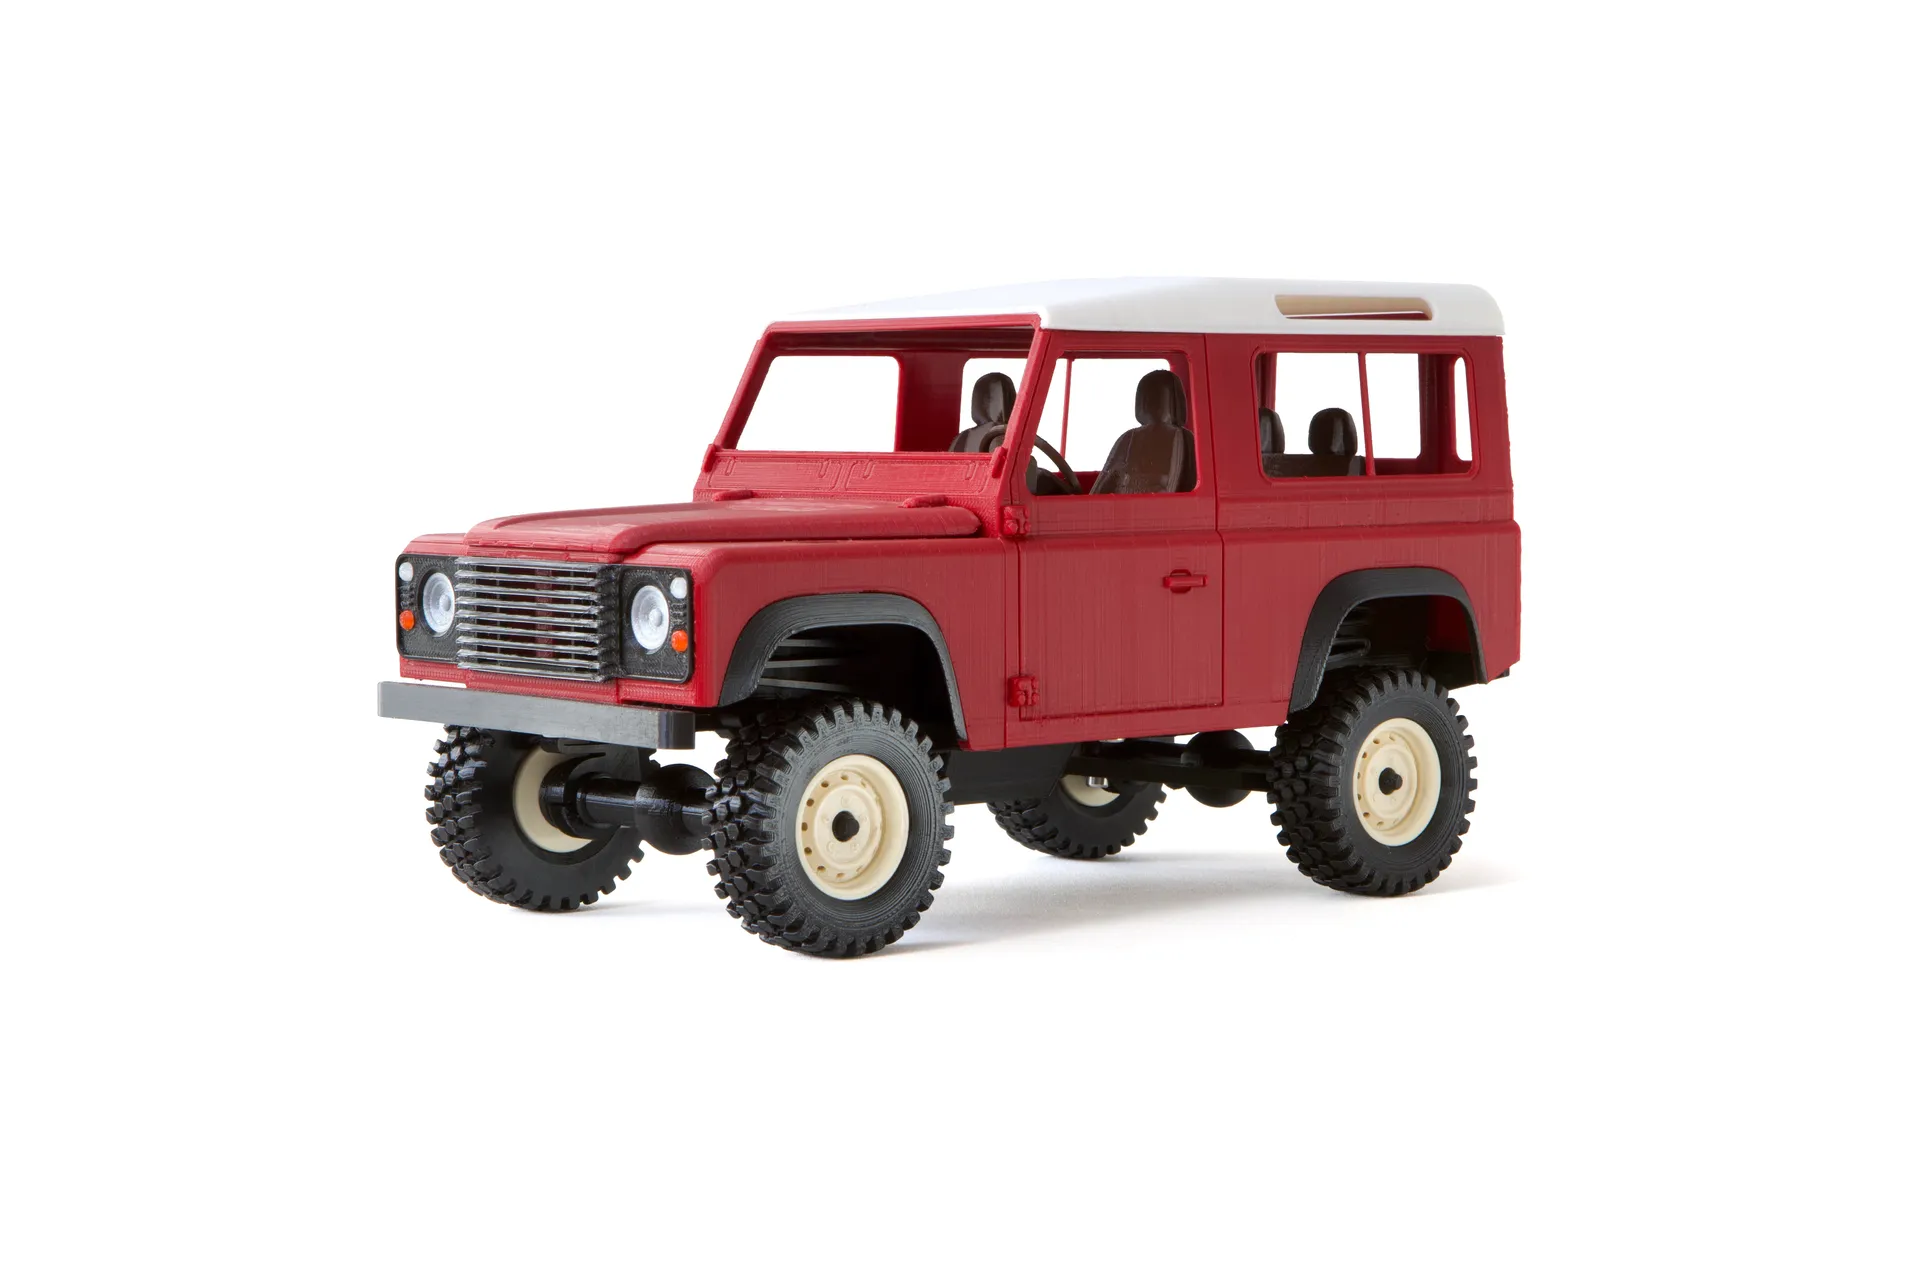
Landy by 3D Sets
Print with PLA
The first piece of advice we’ll give you is a simple one: print it with PLA. PLA in general is the best-looking and most easy to print material. It’s made in many color variants and comes with a nice matt surface, therefore it’s perfect for printing visual parts. PETG, on the other hand, is often printed with small visual defects, such as stringing and oozing and needs some level of postprocessing. PETG also comes with a glossy surface that might not look as good as you’d expect (but it is still good for certain situations). PC Blend, ASA and ABS tend to warp at room temperature and tend to be a bit more of a challenge, at least for beginners. They are also more expensive than PLA and PETG. These materials are therefore suitable for printing mechanical parts.
We recommend printing detailed parts with the Original Prusa SL1S SPEED. We’re talking about small-scale car bodywork, interiors (dashboards, etc.), or transparent parts like headlights.
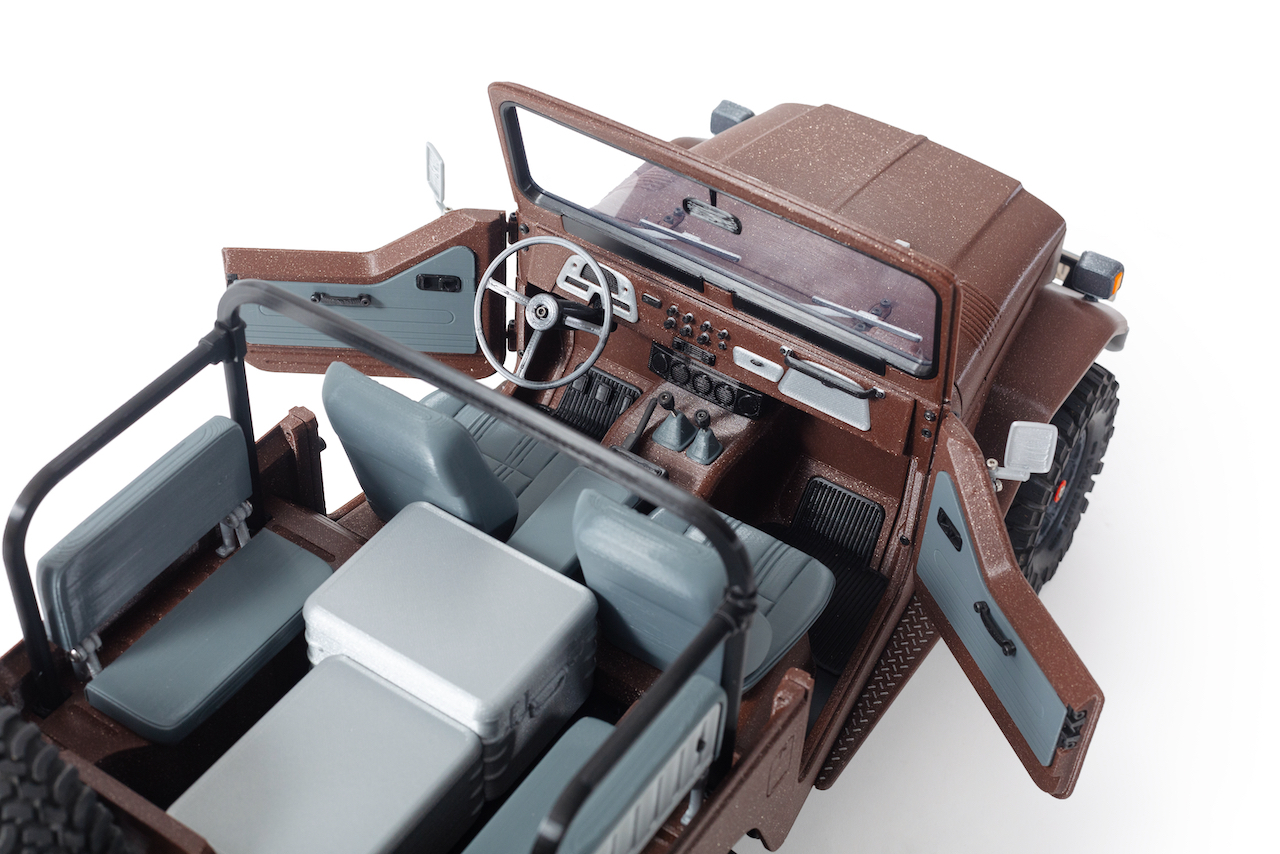
You can still use PLA for printing surprisingly small details, though. Check out the interior of Bamboo 4×4 by 3D Sets.
3D printed part orientation
The surface orientation of a 3D printed model affects the aesthetics a lot. Sometimes you’ll have to print the part seemingly illogically oriented just to make it nice. For example, thin parts of the bodywork are better to be printed perpendicular to the print surface.
3D printed transparent parts
Some time ago, we published an article about printing glass-like models. So you might be wondering whether the same steps can be used to produce parts for RC cars. The answer is yes and no. Printing large thin transparent parts, such as windows, doesn’t make much sense. Postprocessing them is really difficult and time-consuming and even the smallest mistake will be visible on the model. It’s better to cut the windows from a transparent foil or film. Just keep in mind that superglues (cyanoacrylate) tend to leave ugly white maps on the foil. It’s better to squeeze the foil between two parts instead of gluing it there. And if it’s not possible, we suggest using a different type of glue (epoxy for example).
But there are certain applications where 3D printing comes in handy. The headlights, for example, are a good example of possible transparent material postprocessing, especially if you own an SLA printer. Another option is to print a mold, so you can make transparent parts with epoxy resin. And if you’re a perfectionist, you can even make the car with working lights. Newer models by 3D sets come with openings for wires, LEDs, etc.
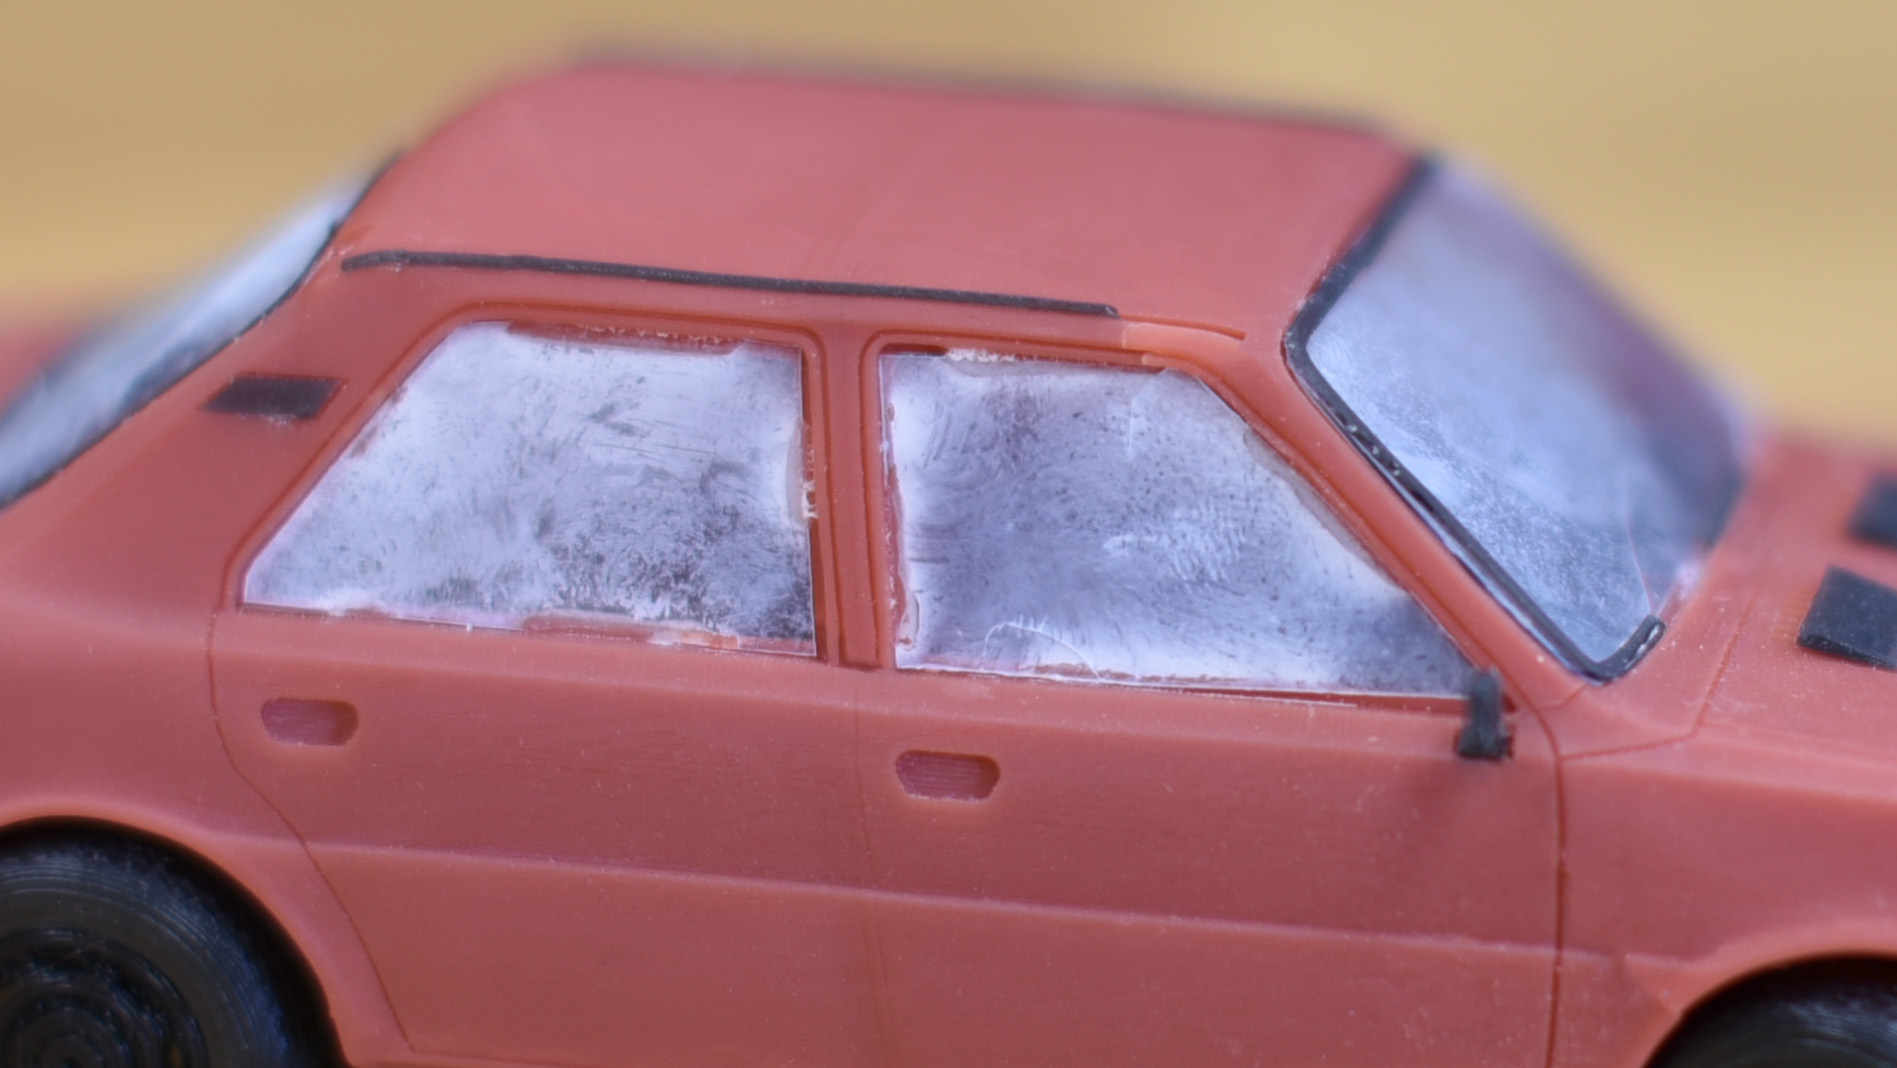
The foil fogged up with superglue on a recently crushed model Sova 120 by Tomáš Hubík.
PLA heat resistance
We asked 3D Sets whether people struggle with high summer temperatures, direct sunlight, etc. The answer is obvious: yes, they do. PLA tends to get soft and warps at relatively low temperatures (see our annealing article). If you put your RC car in a heated car trunk during a hot summer day, it will most likely get deformed in just a few moments. Similarly, the model will have a hard time surviving on asphalt heated by the sun. That’s just a downside of printing with PLA that you need to take into account. If you need better temperature resistance, a good idea is to print the model with another material even when it requires more demanding postprocessing. Printing with light colors might help a little too – dark filaments absorb heat much easier than light ones.
Filament shrinkage
Jiří Lorenčík also emphasized that certain materials tend to shrink more than others. If you decide to use PETG to print parts designed for PLA, you may quickly find out that they don’t fit precisely. Something similar can happen with ASA and ABS – these materials shrink a lot more than PLA and PETG. We suggest printing small parts first to see if everything fits before you print the whole car. This will help you save a lot of filament.
You crush it, you print it!
One of the main advantages of printing your own car is the fact that you can fix almost everything. Did you break your bumper? Never mind, reprint it! The whole concept of 3D Sets (and 3D printing in general) stands on easy prototyping and repairing. We destroyed a few cars during our testing but instead of spending money and waiting days or weeks for new parts, we simply reprinted them and we can ride again.
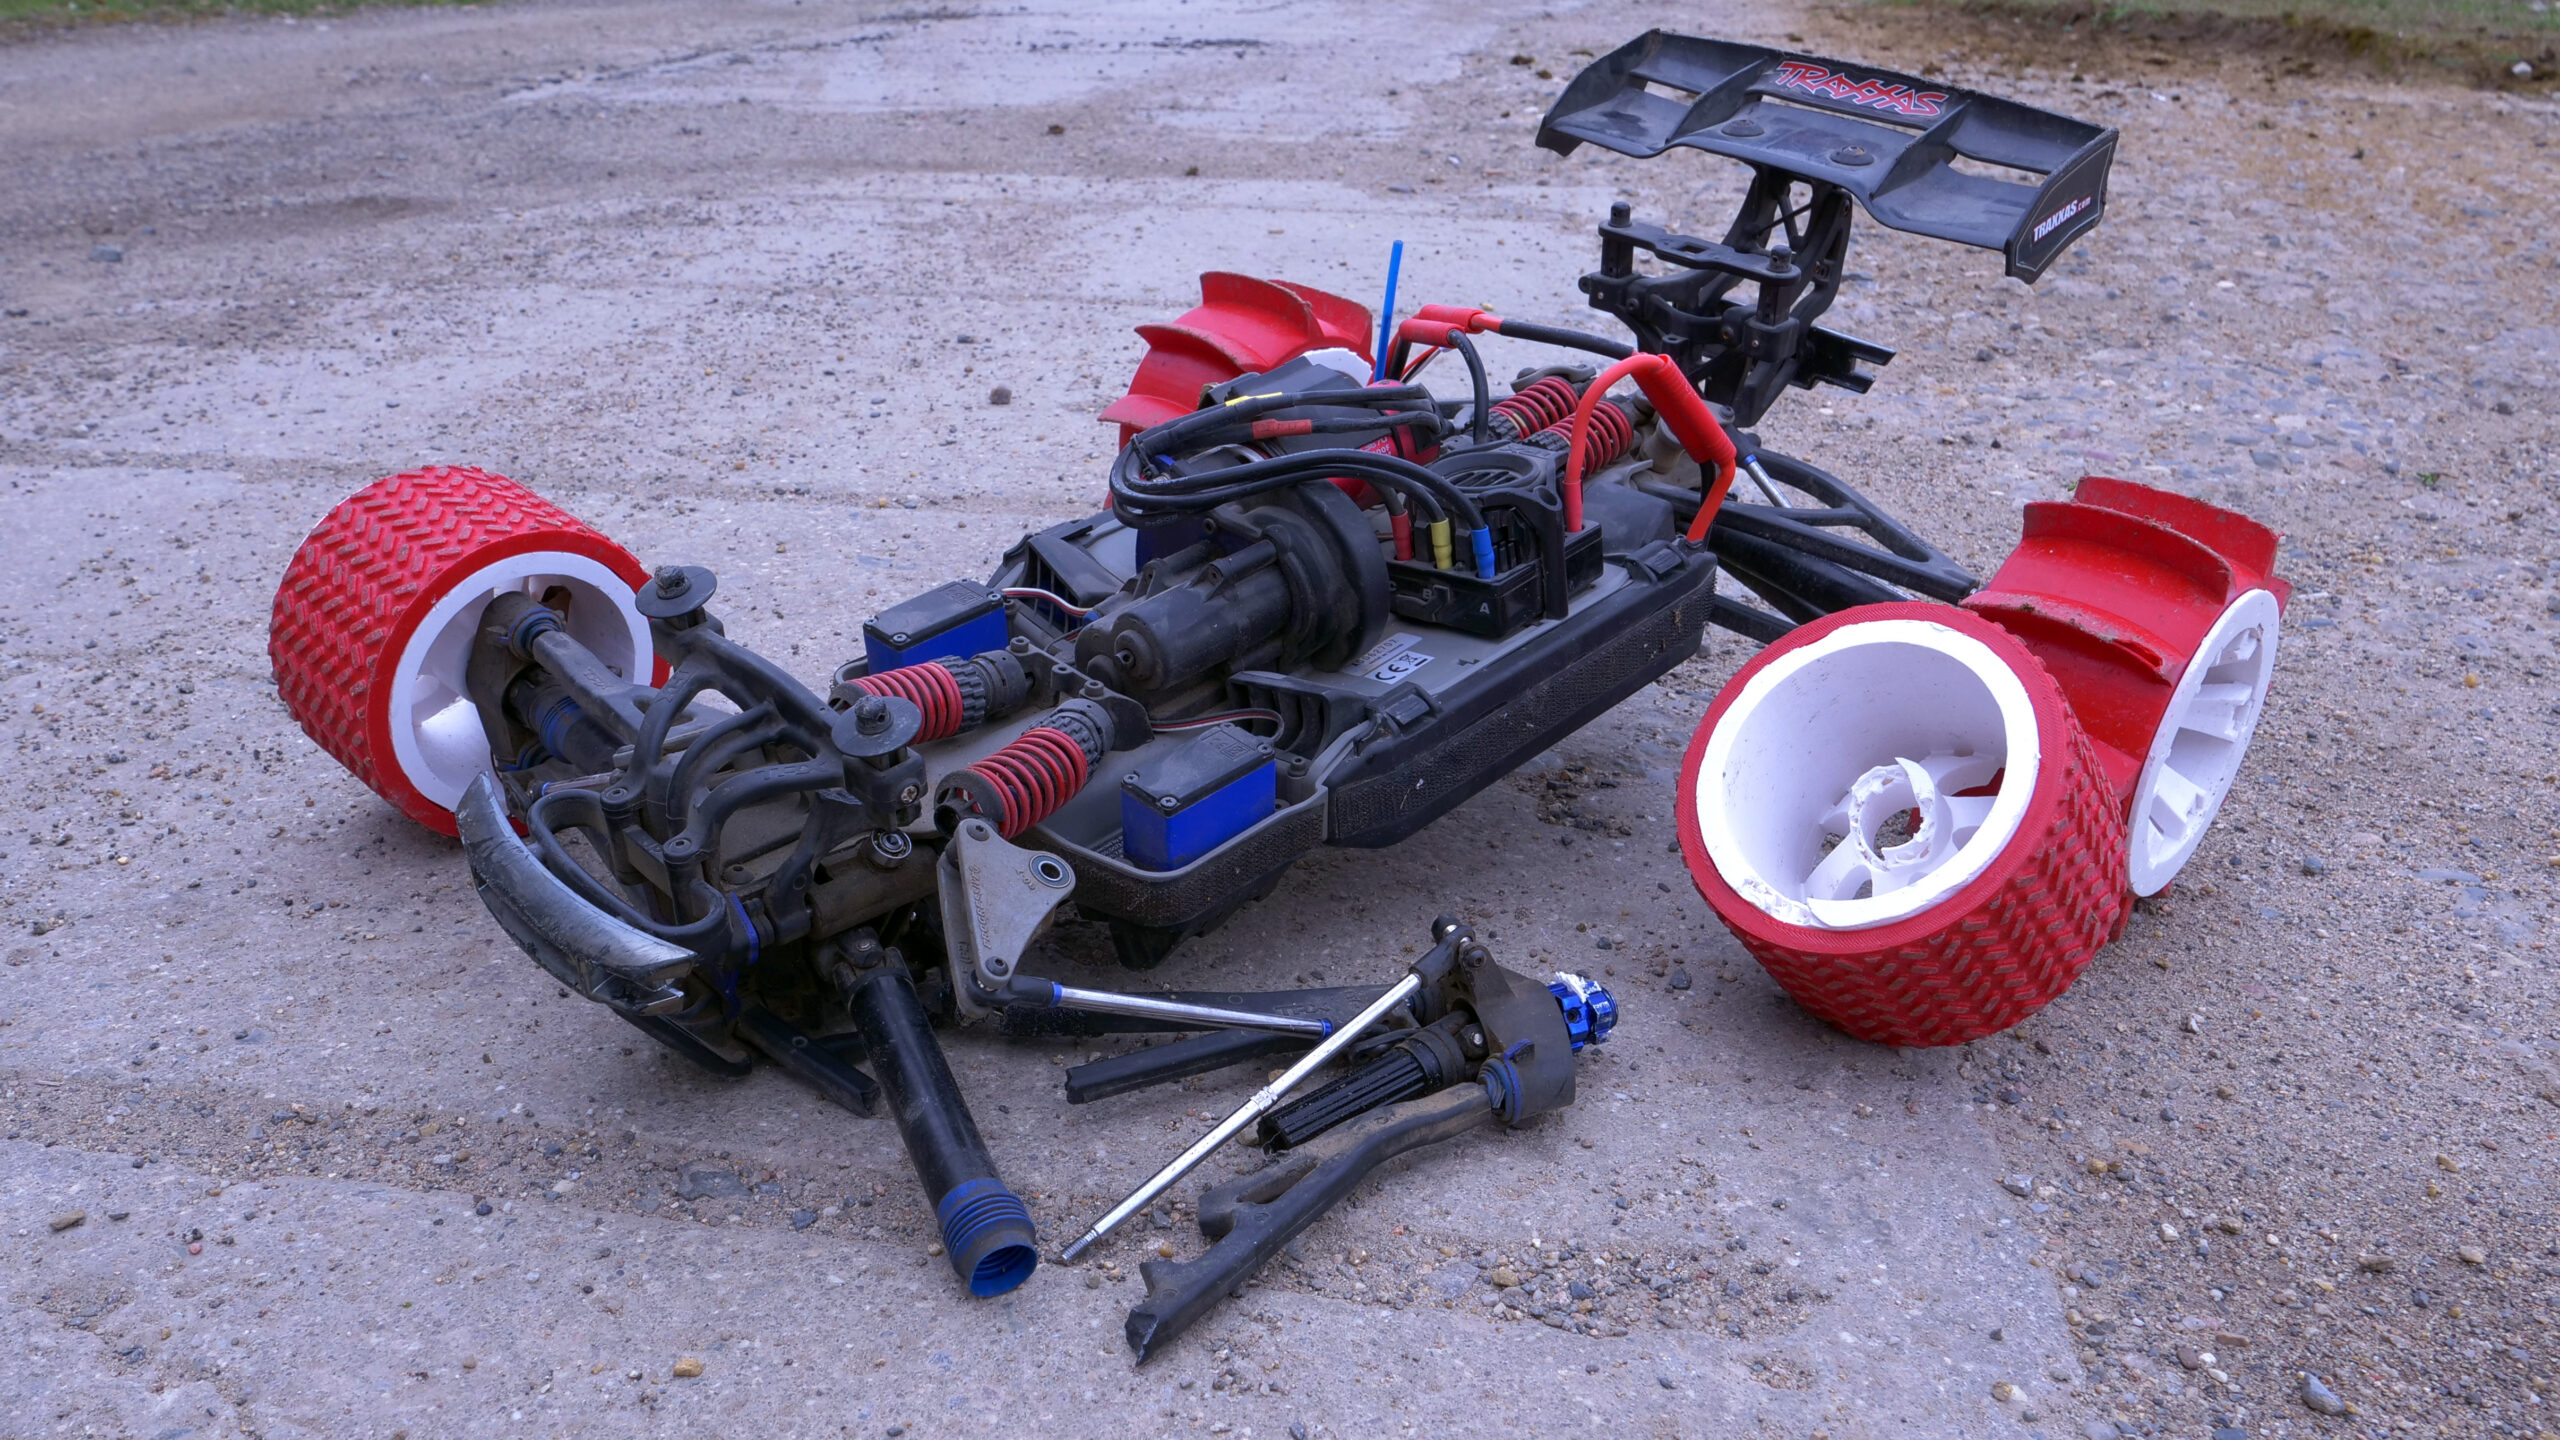
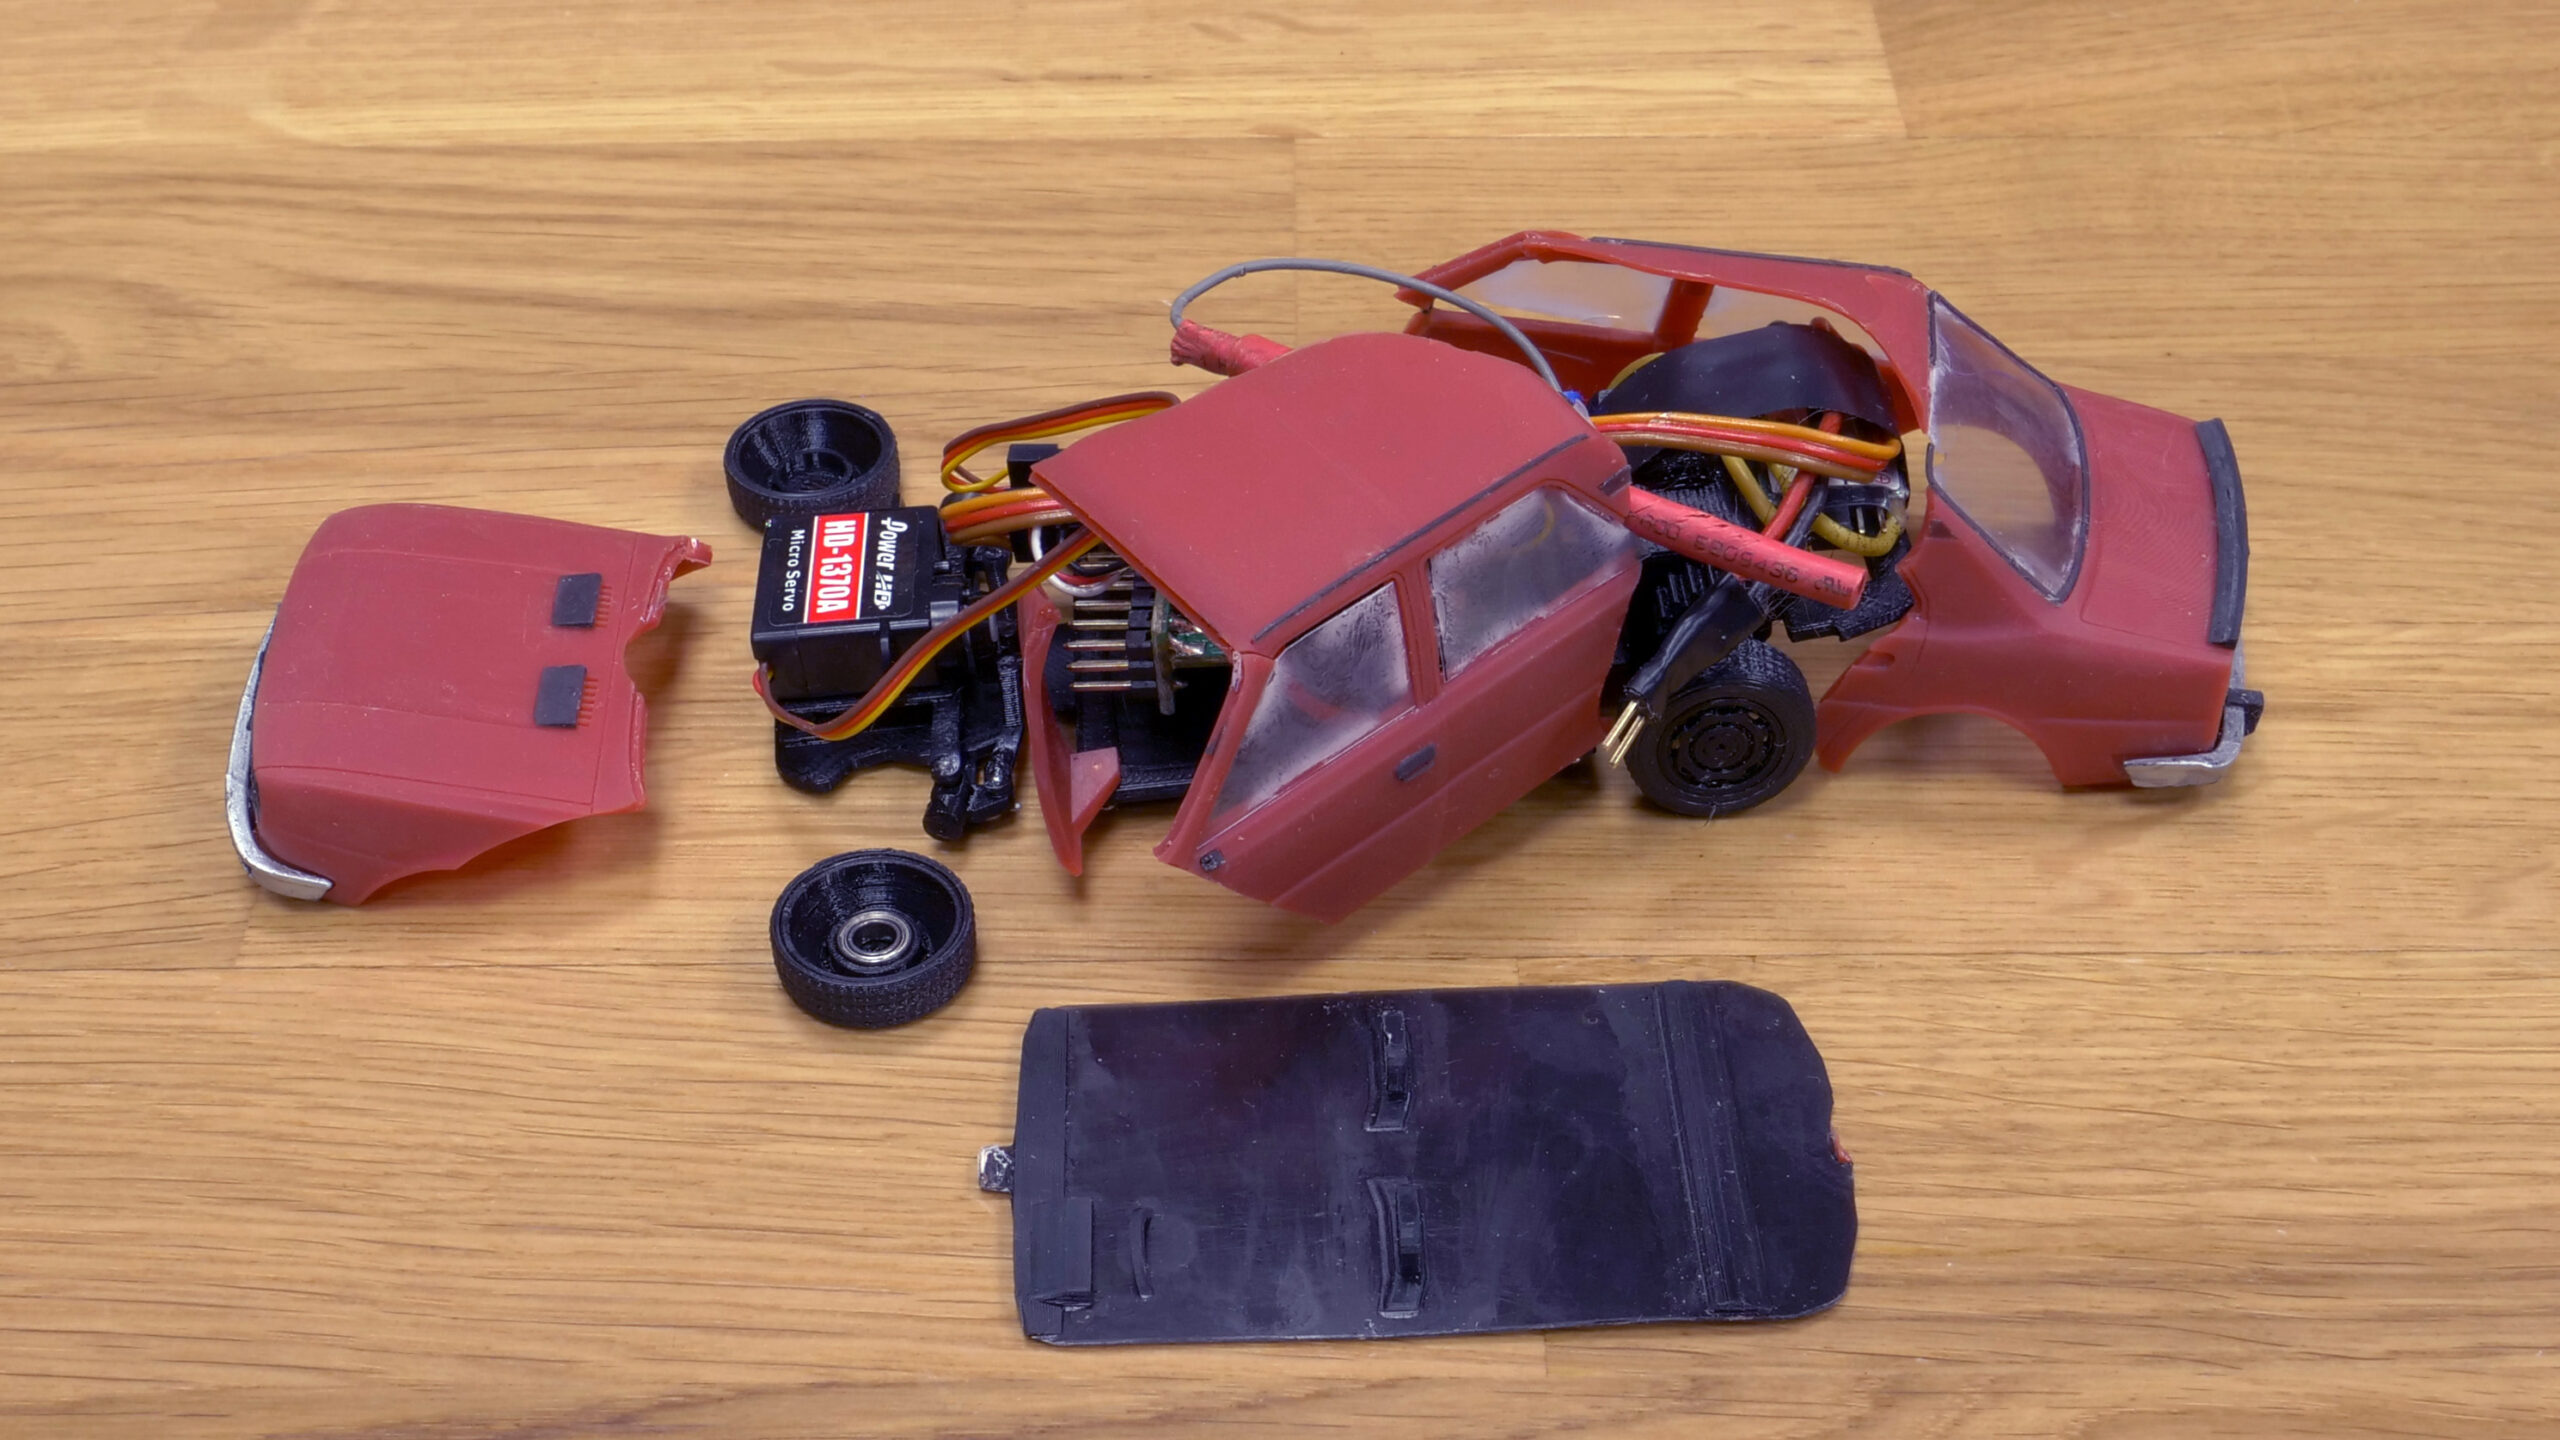
Crushed models waiting for reprinting…
Printing mechanical parts
Some parts are suitable for 3D printing, others not so much. And sometimes you need to pick specific materials for their advantages. Can you tell which material is suitable for what purpose?
Choosing the material
According to 3D Sets, the best material for most of the parts (including the technical ones) is Prusament PLA. But you still need to know various material properties to decide what to choose. You can get a good overview by looking at our material table but we’ll sum up the most common materials and their use here.
PLA – mechanical parts for cars by 3D Sets are almost entirely printed with Prusament PLA, even gears, driveshafts, etc. PLA works surprisingly well for slow cars, even with large clearances between the gears. However, it’s not suitable for printing parts requiring some heat resistance (motor pinion) and small gears.
PETG – thanks to the higher flexibility it’s good for exterior parts exposed to impacts, such as bumpers, wheel discs, etc. It’s not suitable for printing gears – it will wear out quickly and stop working.
PC Blend – ideal material for mechanical parts, 3D Sets recommend this for printing differentials, small gears and heated parts (around motor).
PC Blend Carbon Fiber – this material is better than PC Blend in temperature resistance and dimensional stability. It’s suitable for most mechanical parts with no need for elasticity and high impact resistance. Due to the low coefficient of friction, it might be useful for some moving parts (gears for example). The main disadvantages are the high price and the necessity of using the hardened steel nozzle.
ASA / ABS – cheap materials with higher heat resistance than PLA and PETG. If you don’t have a PC Blend, these work great for printing heat-resistant parts. Don’t forget that these materials warp a lot during printing at room temperatures. We suggest printing it in an enclosure.
Polyamide (Nylon) – this is by far the best material for printing gears and bumpers but it’s also the hardest to print. Usually, you won’t be able to print detailed shapes, the material warps a lot and absorbs moisture rapidly.
Flexible filaments – these materials come with great mechanical resistance and layer-to-layer adhesion. It’s good for bumpers, special tires and other parts exposed to impacts. The main disadvantage is the higher print difficulty which makes it suitable for experienced users only.
Keep in mind that it’s recommended to print mechanical parts with a higher number of perimeters. 3D Sets print several parts with a 100% infill but there’s a general rule that tells you to increase the number of perimeters to make it stronger.
Printing a chassis
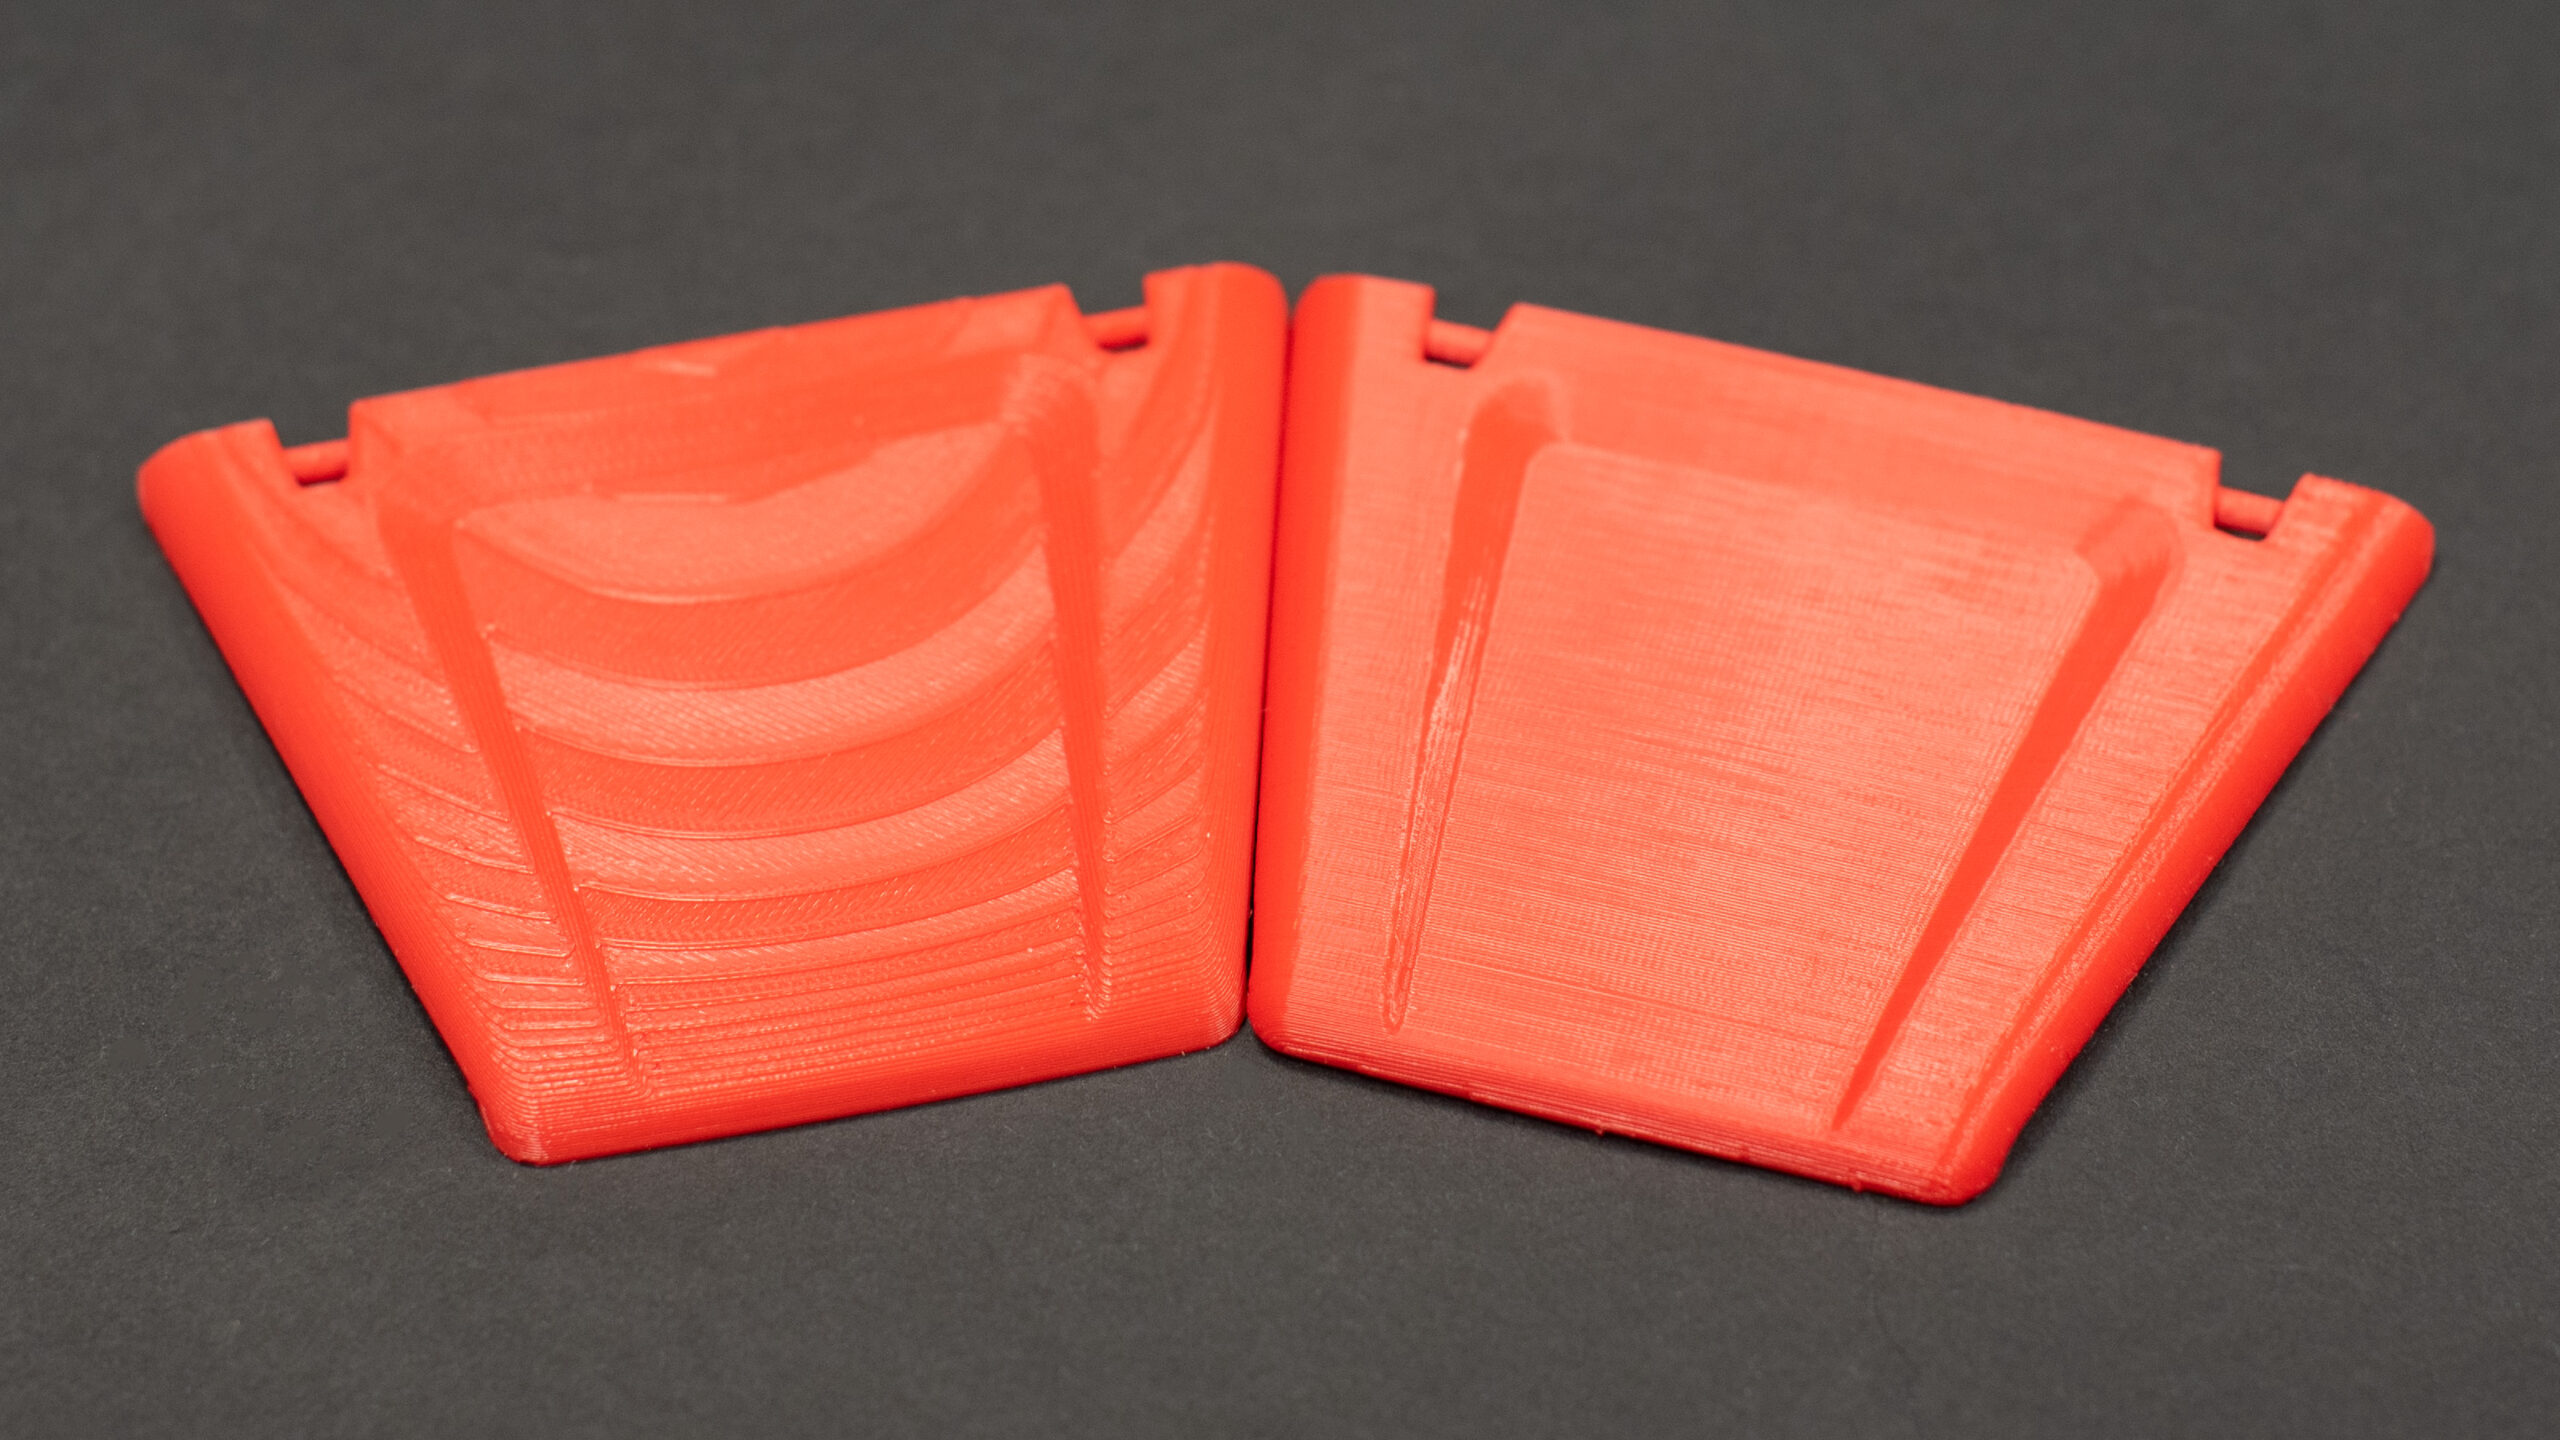
You may have already asked a question about whether flexible filaments can be used to produce RC car tires. In short: it’s usable but there are limits.

It makes sense to 3D print special tires instead of regular ones. For example, wheels made for driving in the sand (seen above) or really hard tires for drifting are great ways to use flexible filament. 3D printed tires have much lower adhesion to the surface compared to regular ones, due to the greater hardness of the material. Also, flexible filaments are usually a bit more difficult to print. Strong layer-to-layer adhesion and poor bridging make it difficult to print supports and detailed structures. It’s not easy to give a definitive answer here. The best option is to test 3D-printed tires on your own and see if you’re happier with 3D printed or injection-molded tires.
Some tires need to be attached to wheels to prevent slipping. You can either glue them or squeeze them between two discs printed with tougher materials. Slower cars (crawlers) usually don’t need gluing – they won’t slip unless you drive in the water.
The discs for crawlers can be printed with basically anything. They won’t get damaged unless the car falls from a high spot. But fast cars are prone to sustain more damage, so we suggest printing the discs with PETG or Prusament PC Blend.
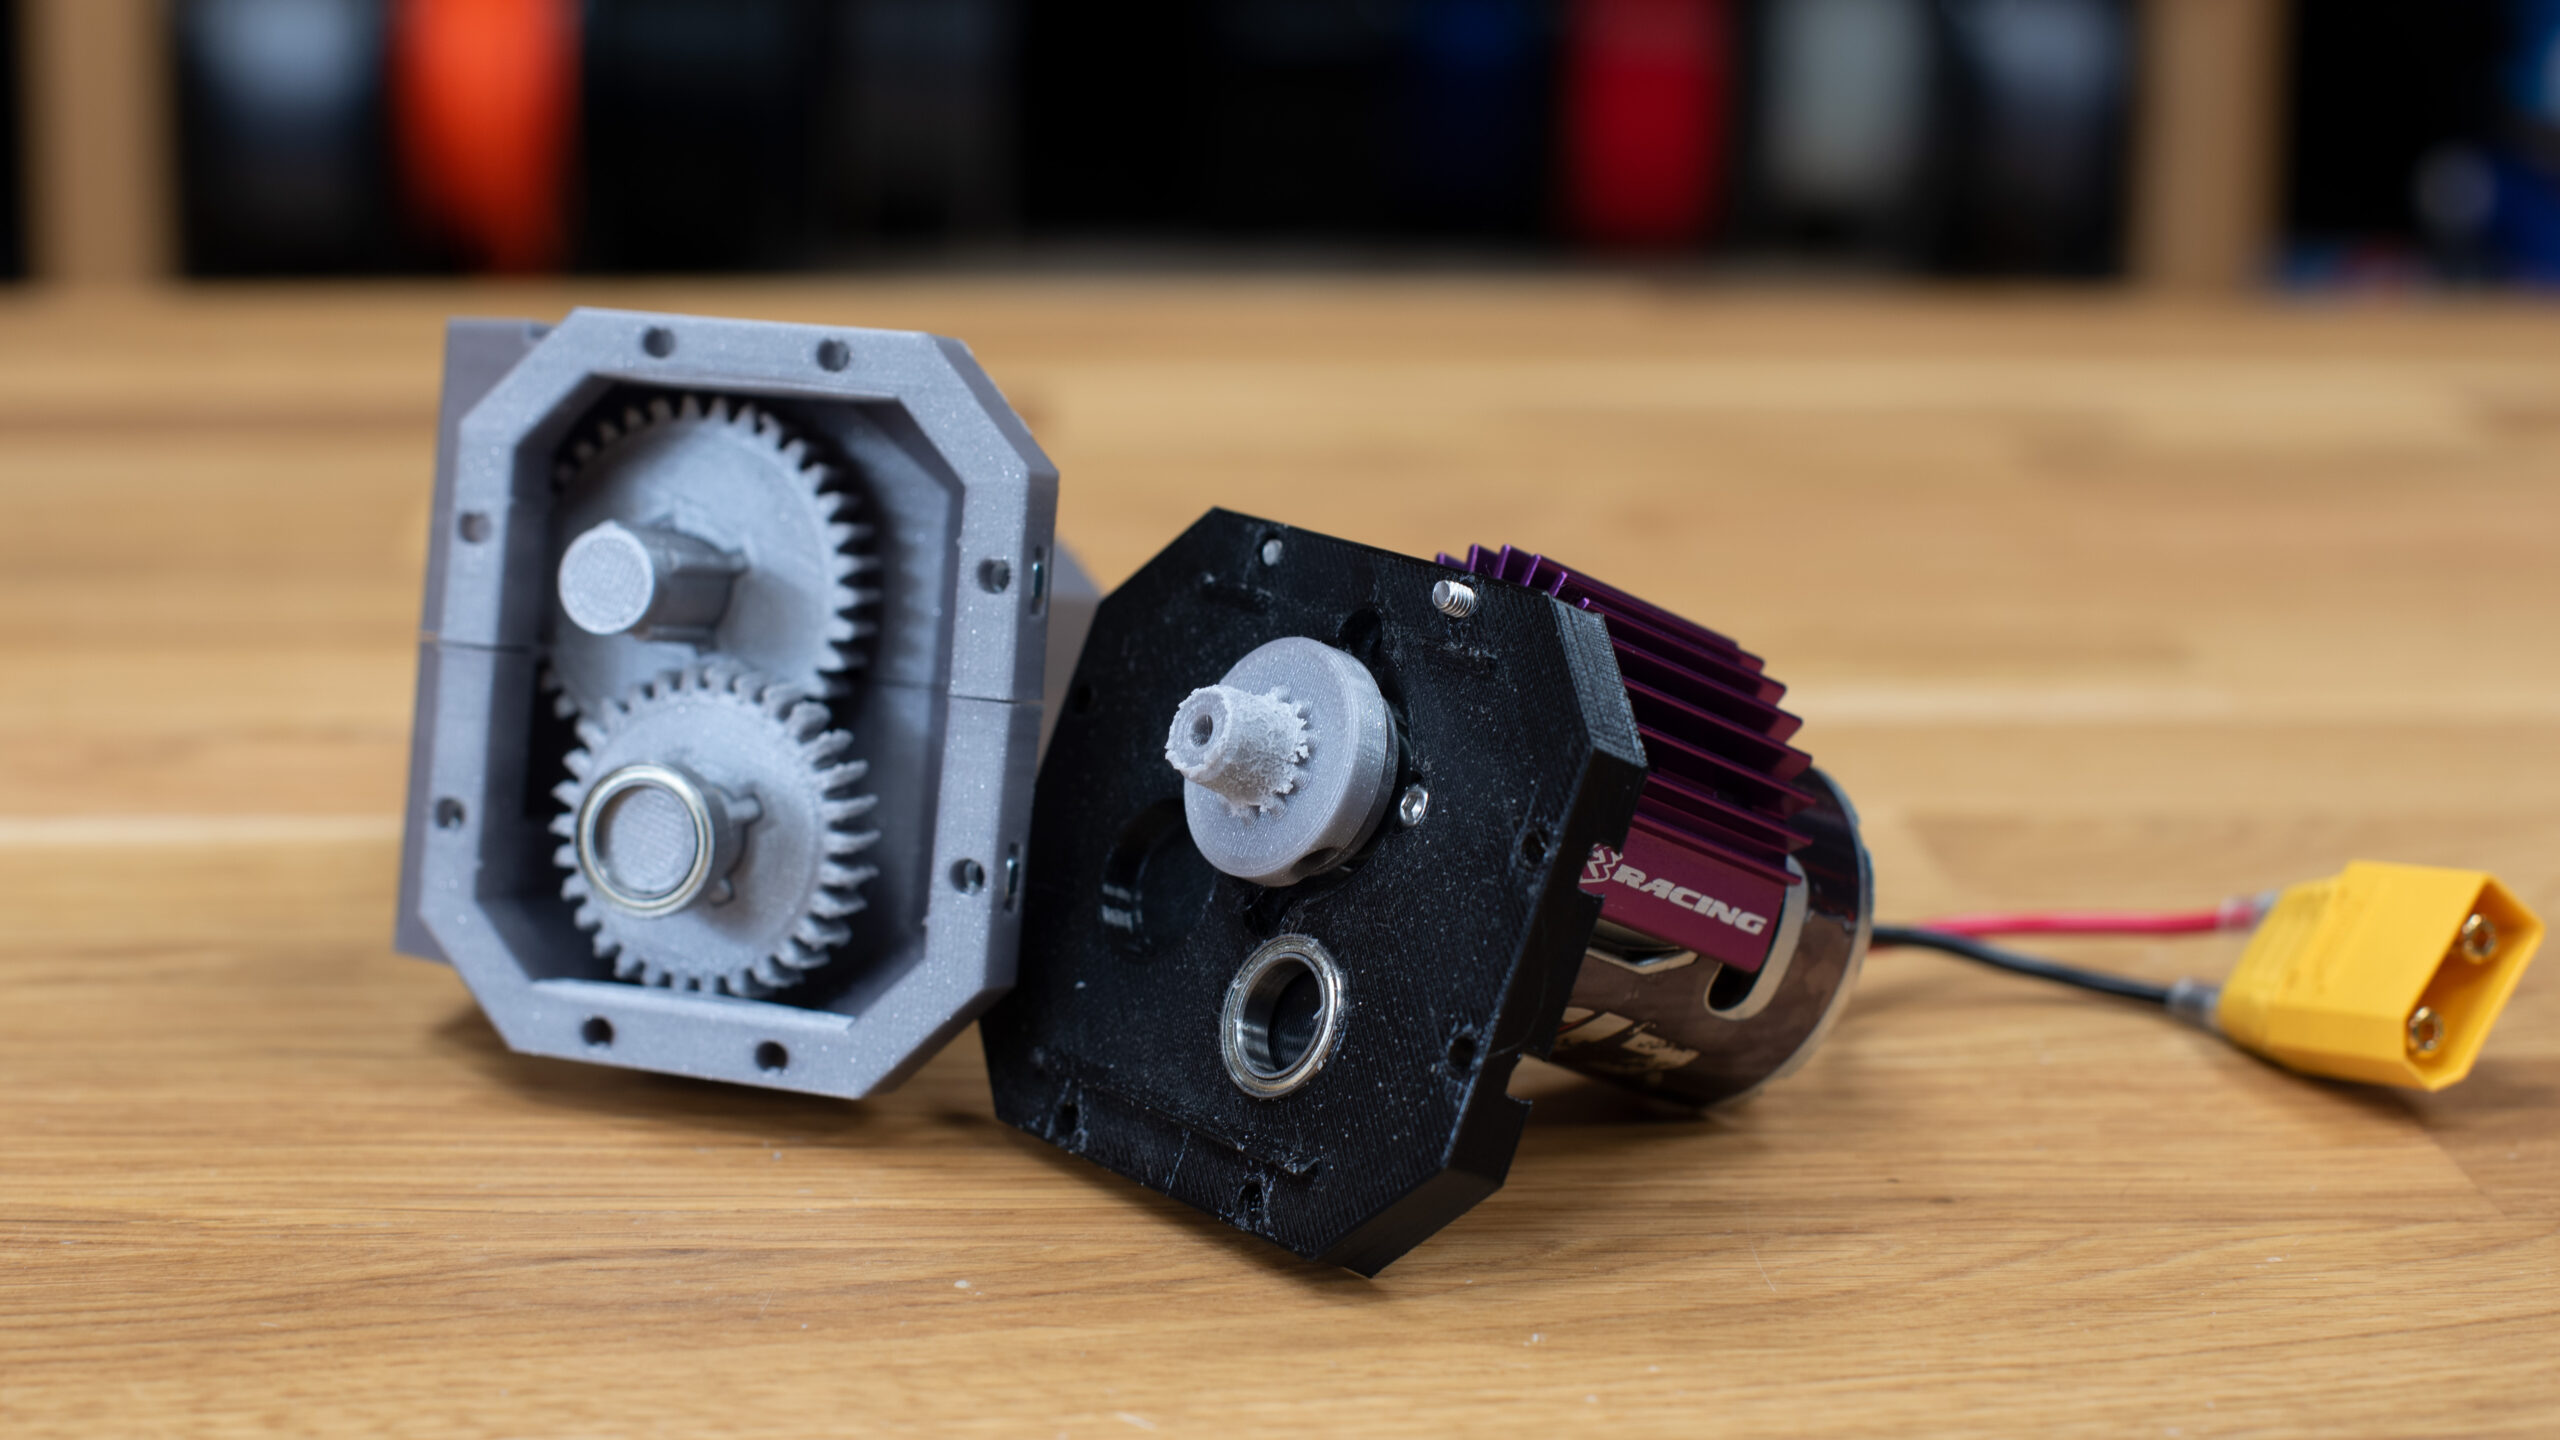
Choosing and printing a gearbox is surprisingly easy: cars with a 4×4 drive need a gearbox with a dual-side output. A simpler gearbox with 4×2 drive is not suitable for terrain vehicles but it’s definitely great for fast cars and for drifting. Just don’t forget to use some grease, especially if it’s PLA. To be completely honest, we forgot to do that and regretted it shortly after. The grease not only helps smooth out the movement but also conducts heat away.
Parts unsuitable for 3D printing
Some hobbyists print shock absorbers. If it’s for a static model or if you drive on a smooth and flat surface, it might actually work. But if you want to have fun in rougher terrain, you need to use stronger parts.
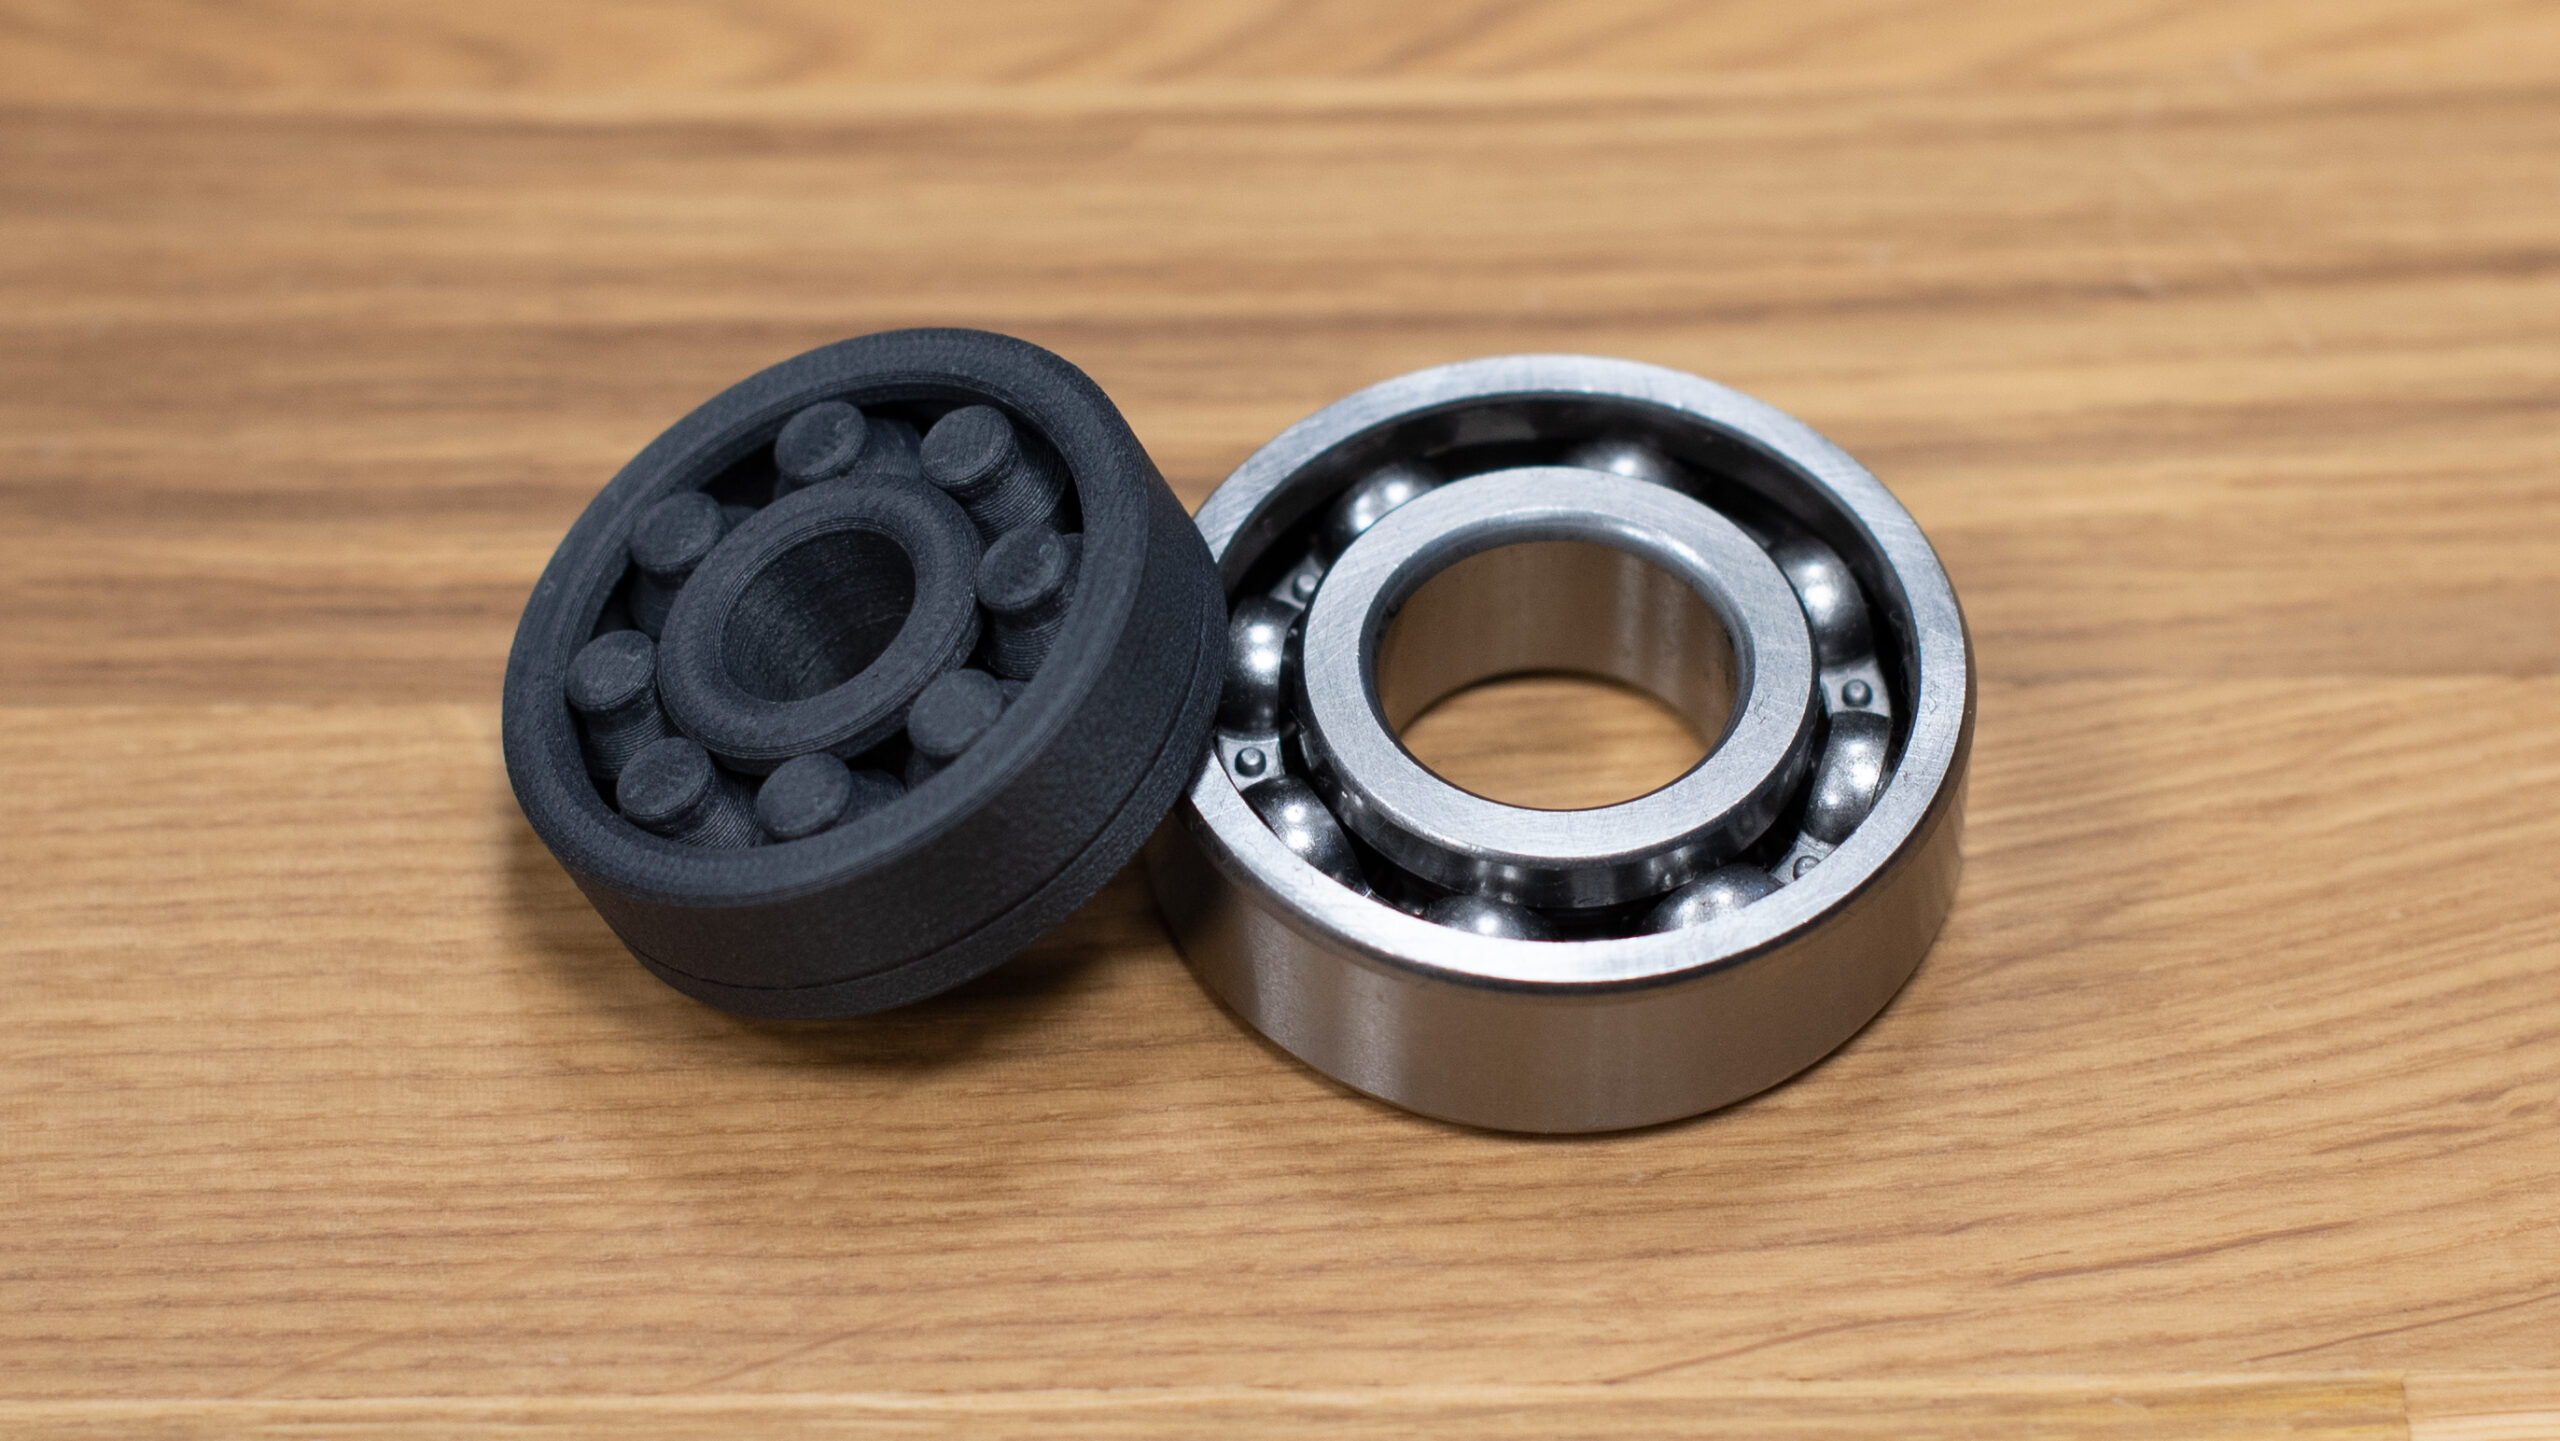
A similar rule applies to bearings: there are 3D printed models but their lifespan and reliability are debatable. Metal bearings can be really cheap nowadays and can withstand a lot of stress.
Choosing the right electronics
Every RC car needs electronics. Unfortunately, every model needs something a little different. You will definitely need to study it on your own but we will at least give you a few tips. Luckily, many people enjoy this great hobby so all you need is to look at hobby forums (for example Instructables, Facebook, etc.) or video channels on youtube, etc.
One of the most important parts is the servo for controlling front wheels. When the car is moving, there is no need to use excessive force for steering. But when the car is standing next to an obstacle, it is quite necessary to be able to steer anyway. That’s why 3D Sets use 20 kg/cm torque servos for their 3-4 kg cars. We suggest that you start with these values when designing your own project.
It gets a little more complicated when choosing a motor. Again, you need some basic knowledge of RC models. You need to consider car size and gearbox design when choosing a proper motor. Some cars by 3D Sets use size 540 DC motors but some cars can use AC motors, too. The “Sandy” uses a DC aircraft motor, for example. Slower cars often use so-called sensor motors where the ESC can accelerate slowly and smoothly. You also need to pick proper rotations per Volt when picking a DC motor. These motors are weaker than AC ones and it really doesn’t make sense to choose a motor with 4000 rounds per Volt. Finally, don’t forget to choose a fitting ESC for your motor.
The batteries used in cars are Li-Po because of their versatility. They’re light, have a large capacity, work with strong currents and charge fast (1 hour for example). But they can be damaged by undercharging, mechanical impacts, water, etc. Improper handling can lead even to an explosion (see the aircraft catastrophe caused by a Li-Po battery). There are hard case batteries made for RC cars to make them safer.
The transmitters for cars are usually equipped with the steering wheel but you will be most likely interested in their price. It all depends on how often you drive and how many cars you own. With more models, it’s good to invest in a better transmitter and buy more receivers. But this way you will most likely end up with a joystick transmitter, like Frsky X12 (recommended by 3D Sets).
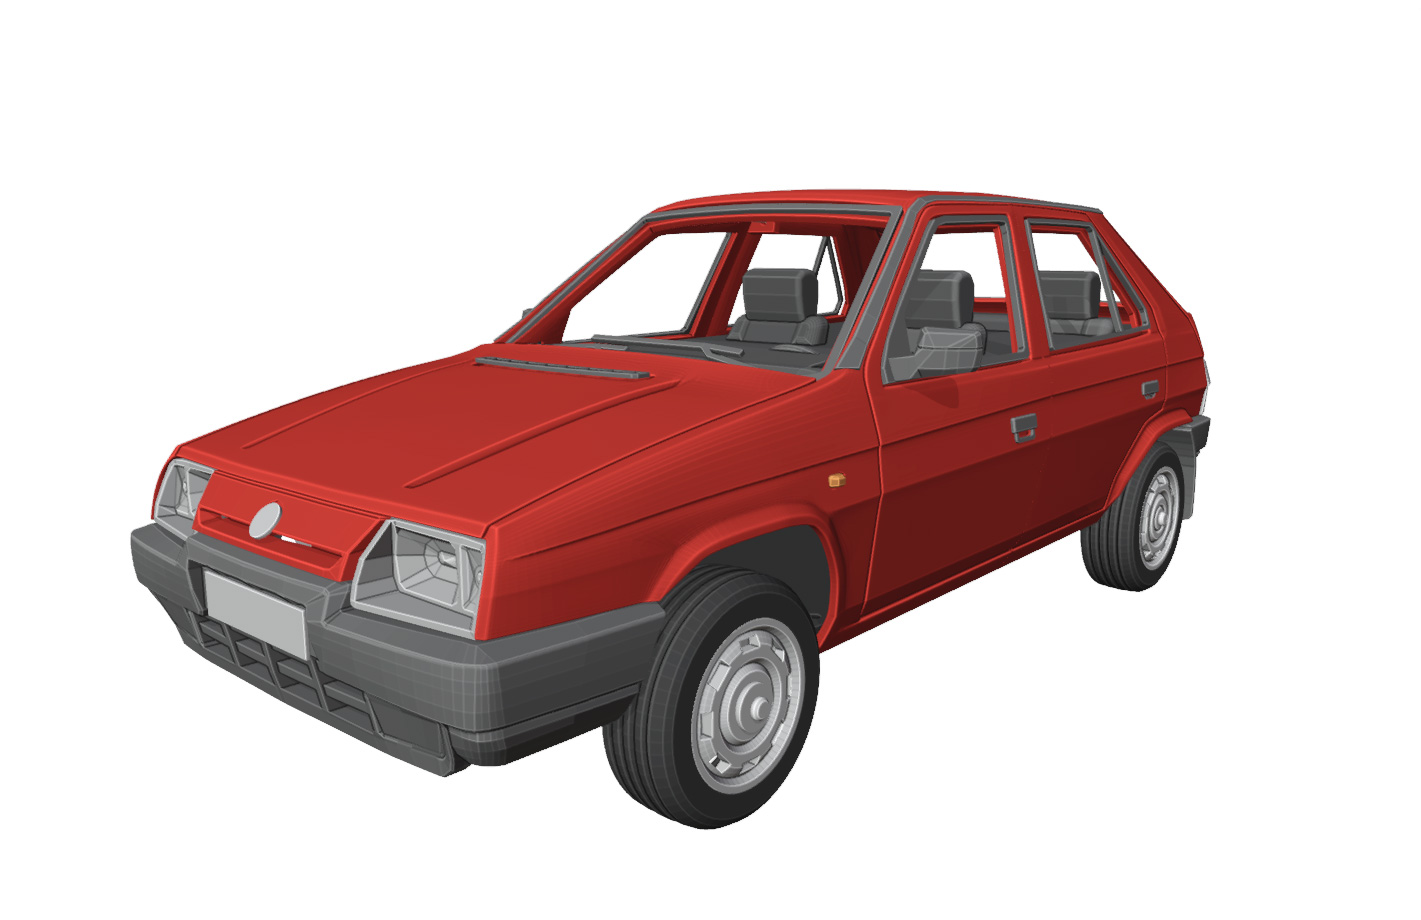
Print the legendary Skoda Favorit!
As we promised in the beginning, here’s the little gift. We asked Mr. Tomáš Hubík, author of the 3drcmodely.cz page, whether he could share one of his models – and he did! Check out this great model of Skoda Favorit. If you like Mr. Hubík’s (and other designers’’) work, don’t forget to support him by buying models on his page or by donating at Printables.com. If you’ve ever designed something, you know that it takes a lot of time. Many authors share their models out of their goodwill but they will surely be grateful for any tips. When a user has his PayPal account paired with Printables.com, all you need to do is press „Donate“ on the left side of his profile.
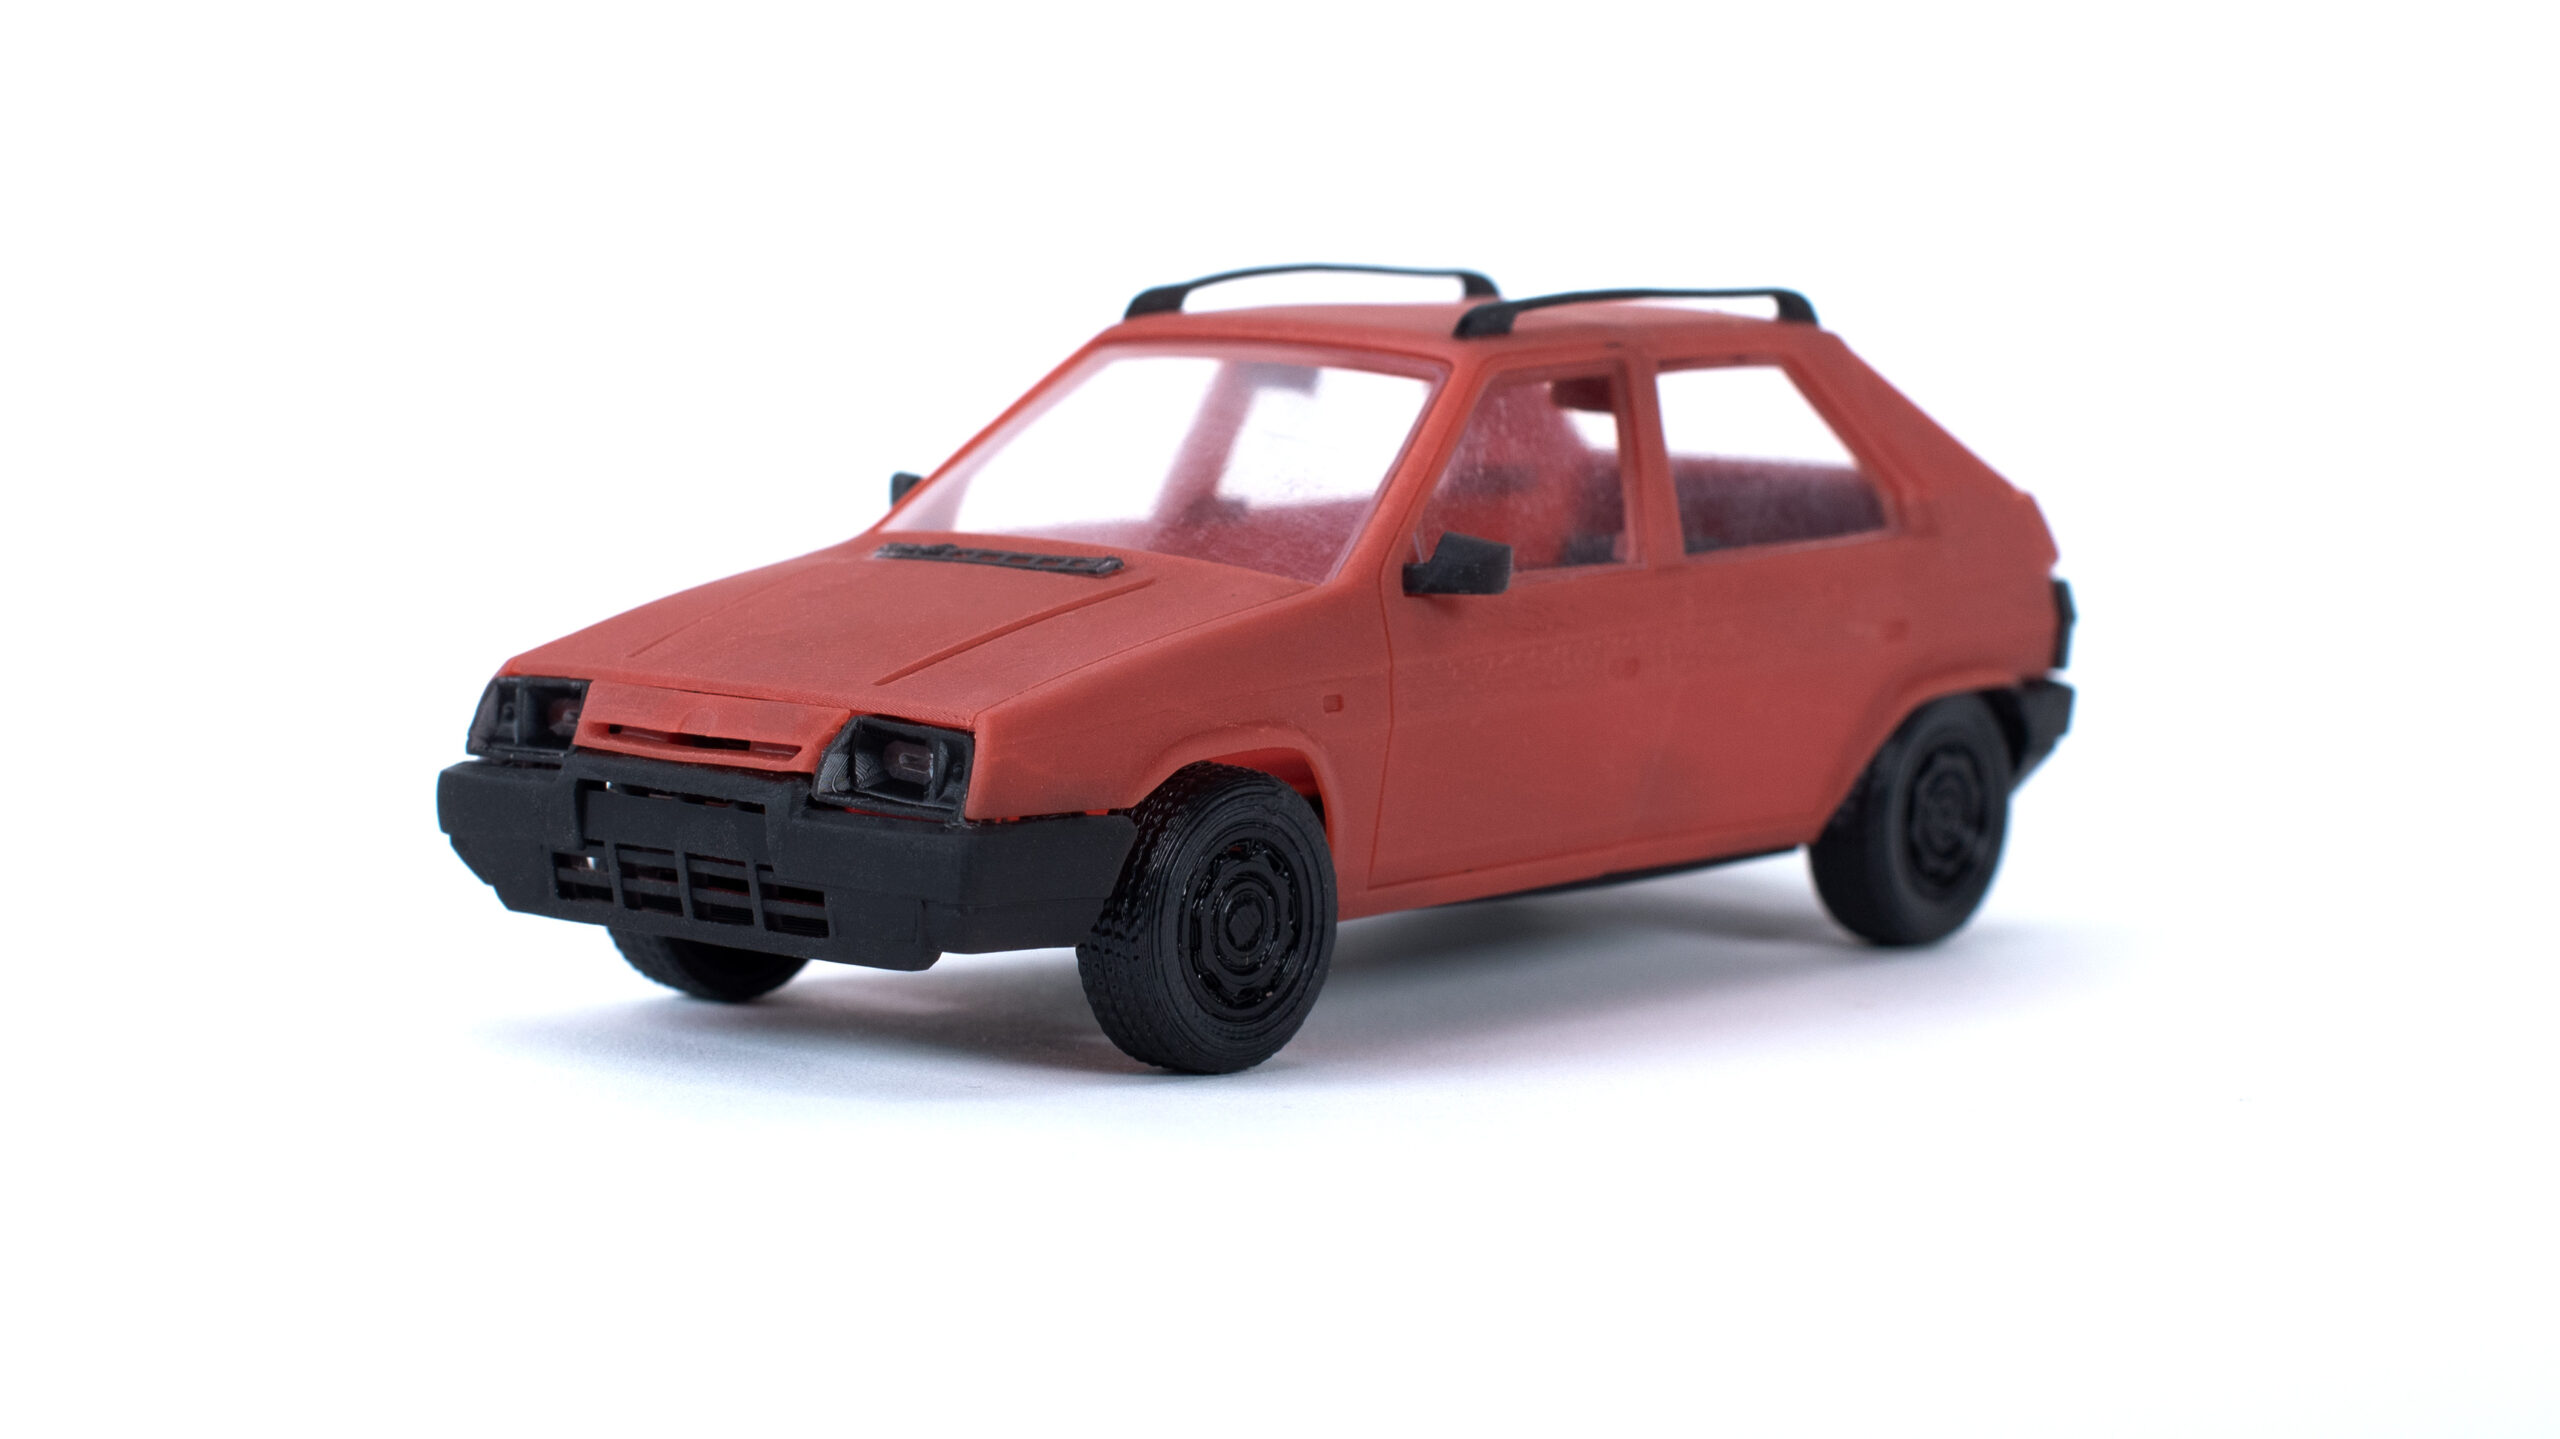
We used the Original Prusa SL1S SPEED to maintain the detail but you can also print it with FFF/FDM printers.
Finally, you can browse our collection of cool prints related to RC cars. We believe that you will like it. And if you’re working on some project of yours, don’t forget to share it with others!
Happy printing!
There is a growing collection of user-made add-ons for 3d printed RC cars, compatible with 3D Sets models on Printables: https://www.printables.com/social/520-3d-sets/collections/36390
Funny thing that this came out just as I “finished” (these projects are never really finished) my 3D printed 1/10 competitive rally chassis. 😀
Hello. I want to ask a question about 3D printer. I have a tevo tornado printer, I am printing a pinion on it with 0.4 nozzle, PLA plastic. The printer printed the pinion well, but when I print a bigger part (washer for air hockey with the same plastic), then I get a “grid” print, even though the filling is 100%. I change the filament feed in the slicer Cura from 150% (when printing a gear) to 45% (to print the washer) and everything goes fine. Here’s the question: with each new part I have to constantly change the feed rate (in %) of the plastic, or can I somehow synchronize this whole system? While the speed of the print itself (axes) does not change and stays the same – 50mm. The printer came to me about two weeks ago, I am new to this, I have not found much information on the Internet, can you advise something?
Content Manager https://riewes.de/ – The best products for your car.