Many people, who begin with 3D printing, often limit themselves to printing models downloaded from PrusaPrinters and other sites like Thingiverse or MyMiniFactory. There is nothing wrong with that, of course, but the 3D printing options are way wider than that. Once you get into the secrets of creating your own models, you will discover a whole new world.
Before you start exploring advanced 3D modeling programs (we recommend, for example, Fusion 360, Blender, SketchUp or Rhinoceros), you can also enjoy making your own models in an easier way. How about printing a pendant using your favorite sports team’s logo, print an image drawn by your child or turning your family photo into a lithophane? There are several ways to accomplish these task and I will show you two basic ones. Both use applications that are free to use.
3D model from a 2D image
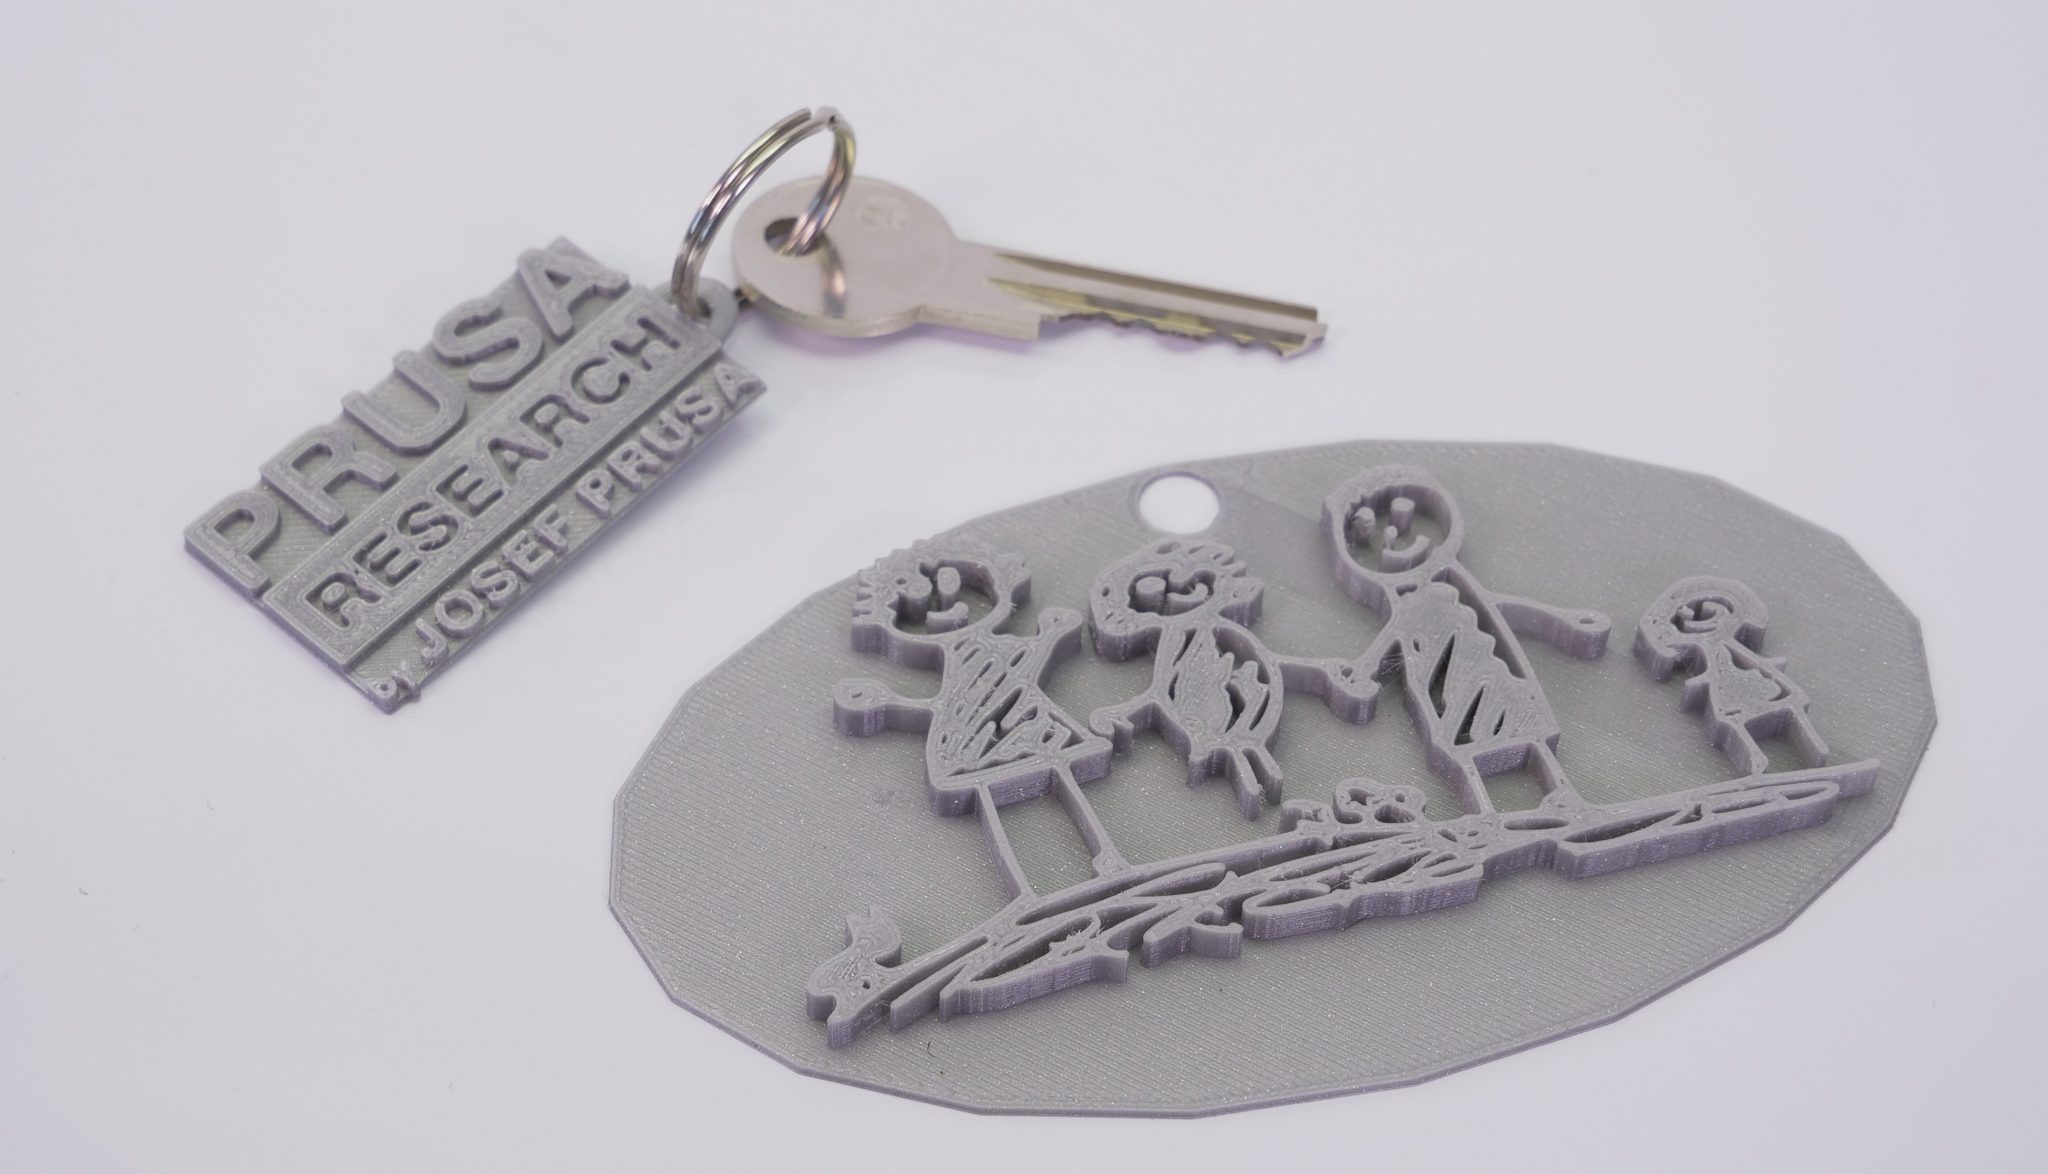
Not every picture makes a nice 3D print, but if you choose well, you can be pleasantly surprised. In general, the less complex a picture is, the better is the resulting model. It is important that the source image has clearly separated colors, and that the transition between them is clearly defined and not gradual. If the image contains tiny details, you can improve the print quality by using a smaller 0.25mm diameter nozzle. You can read everything about nozzles with a different diameter in our previous article. Here are two examples of images we’ve been converting for 3D printing.
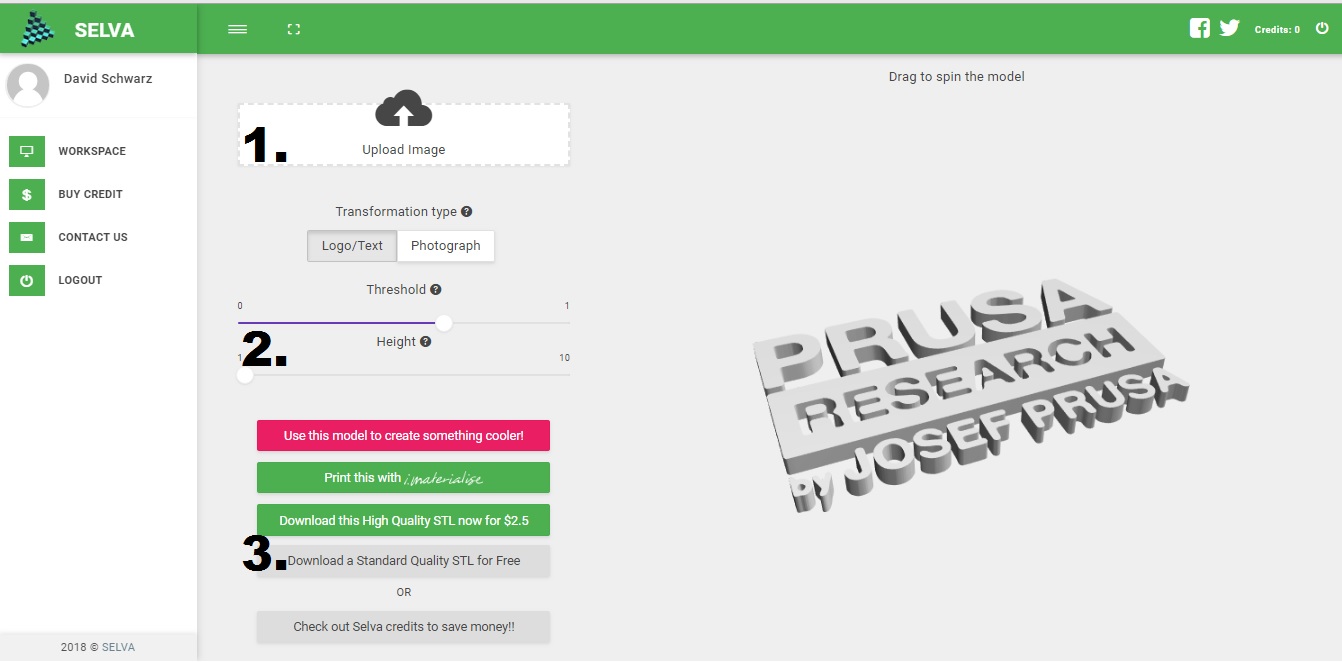
First, we scan the image. I guess there is no need to mention that higher DPI is better. For best results, “clean” the scanned image in any graphics editor – focus on cleaning the backgrounds and achieving clear color transitions. And then just open the Selva tool in the browser.
- In the program window, click Upload image and upload the image you want to work with.
- The image has been uploaded, and you can modify it using the two sliders called Threshold (Edit Layer Width) and Height. Tweak these values to achieve the desired look.
- Then save the image, so it can be further edited, using the Download a Standard Quality STL for free button. Of course, you can also use the paid version and download a file in “High quality” at $ 2.5. The paid version allows you to export the file at a higher resolution – this can be useful if your picture has fine lines. However, for the vast majority of objects, standard quality will be sufficient.
We will open the saved file in Tinkercad online app. You also need to sign up for free here in order to edit the objects.
- After logging into Tinkercad, we can start uploading a file by creating a new project, using the “Create new design”
- Then, on the desktop, use the “Import” button to select the file to be edited and confirm the selection by pressing “Choose file”.
- Once we have the file you selected, we check its size. Size can be further tweaked by changing the number in the “Scale” field. We will change the scale to 500 for our logo.
- Once you have an object imported, you can immediately export it as a .stl file and then print it, or use the various Tinkercad features to modify the file to meet your requirements. For example, we added a pad under the object and a loop to create a key tag.
- To make a keychain from a logo, add objects from the right side menu, specifically the square and the hoop, to the workspace. These objects can be edited using white markings on the edges. We stretched the square across the logo area and shrunk it to make the logo visible. Then we created the key strap by moving a resized hoop to the pendant so that only the half of the object is visible.
- Then, we converted the modified file into the .stl format ready for slicing using the “Export” button.
The model is almost ready for 3D printing. We will open this file in PrusaSlicer and then just adjust its size (or add a brim and support if needed). You can also try to use Colorprint to prepare multi-color object. Then you can finally print the model.
Photos and lithophane
Another possibility to convert 2D images to 3D printing is lithophane, sometimes called 3D Photo Print. Lithophane (from French: lithophanie) is an etched or shaped work of art made of a very thin translucent porcelain. The actual image can only be seen clearly when it is illuminated by a backlight. Lithophane represents a three-dimensional image – completely different from two-dimensional engravings and daguerreotypes that are “flat”. Images change their characteristics depending on the light source behind them.
What do you need to do? Just grab a photo or any other picture! Knowledge of 3D software is not needed at all. Creating an STL file can be done with an online app available at http://3dp.rocks/lithophane/.
- In the top bar, click on “Images” and drag the selected photo into the window. We recommend uploading photos with a lower resolution – for example, 500×500. This resolution is sufficient to create a good looking model and the calculation takes much less time.
- After uploading an image, a 3D model should be automatically generated. The last button in the top bar is “Settings” where you can change the model generation settings. To explain the very basics: Under “Settings / Image settings”, is the source image editing. The first slider is also the most important one – Positive Image / Negative Image. Generating a 3D model is based on the principle that each point/pixel is assigned a height coordinate according to the black color amount (black color = 0, white color = 1). In order for the resulting 3D photo to match the original template, we need to convert the image into a negative – you can do that with the first slider.
- We also recommend setting “THINNEST LAYER (MM)” in “Settings / Model settings” to 0.4. Leave the other settings untouched.
- As soon as we have this model ready, download it using the “Download” button.
- Then, open the file in PrusaSlicer. After opening the file, we recommend switching the layer height to 0.10mm. From our experience, it is better to print the object flat on the print bed to prevent any kind of wobble that could happen if you printed the object vertically. You can also use a 0.05mm setting with a 0.25mm nozzle to achieve the best possible print quality.
- Then go to “Print settings” and set “Layers and perimeters” values as follows: Perimeters: 1; Solid layers Top: 1; Solid layers Bottom: 1
- Next step is going to “Infill” where we set the value to 95% Rectilinear
- It is important not to resize the object in PrusaSlicer because that would increase its height on the Z axis and the flow of light through the image would no longer work. You can only change the Y and X axes.
This is our tried and tested setup. For the best print results, we recommend selecting a light material color, ideally white, creamy but also silver or even purple. However, the quality of the printed object will always depend on the filament manufacturer, since not every filament will be translucent and not every filament will give you the perfect lithophane result, but feel free to experiment… 🙂
If you already have experience with lithophane printing, you can improve it further by coloring it. Just add colors (e.g. with common markers) to the back and the picture will shine with nice new colors. We are working on a separate article about this topic, so stay tuned. 🙂


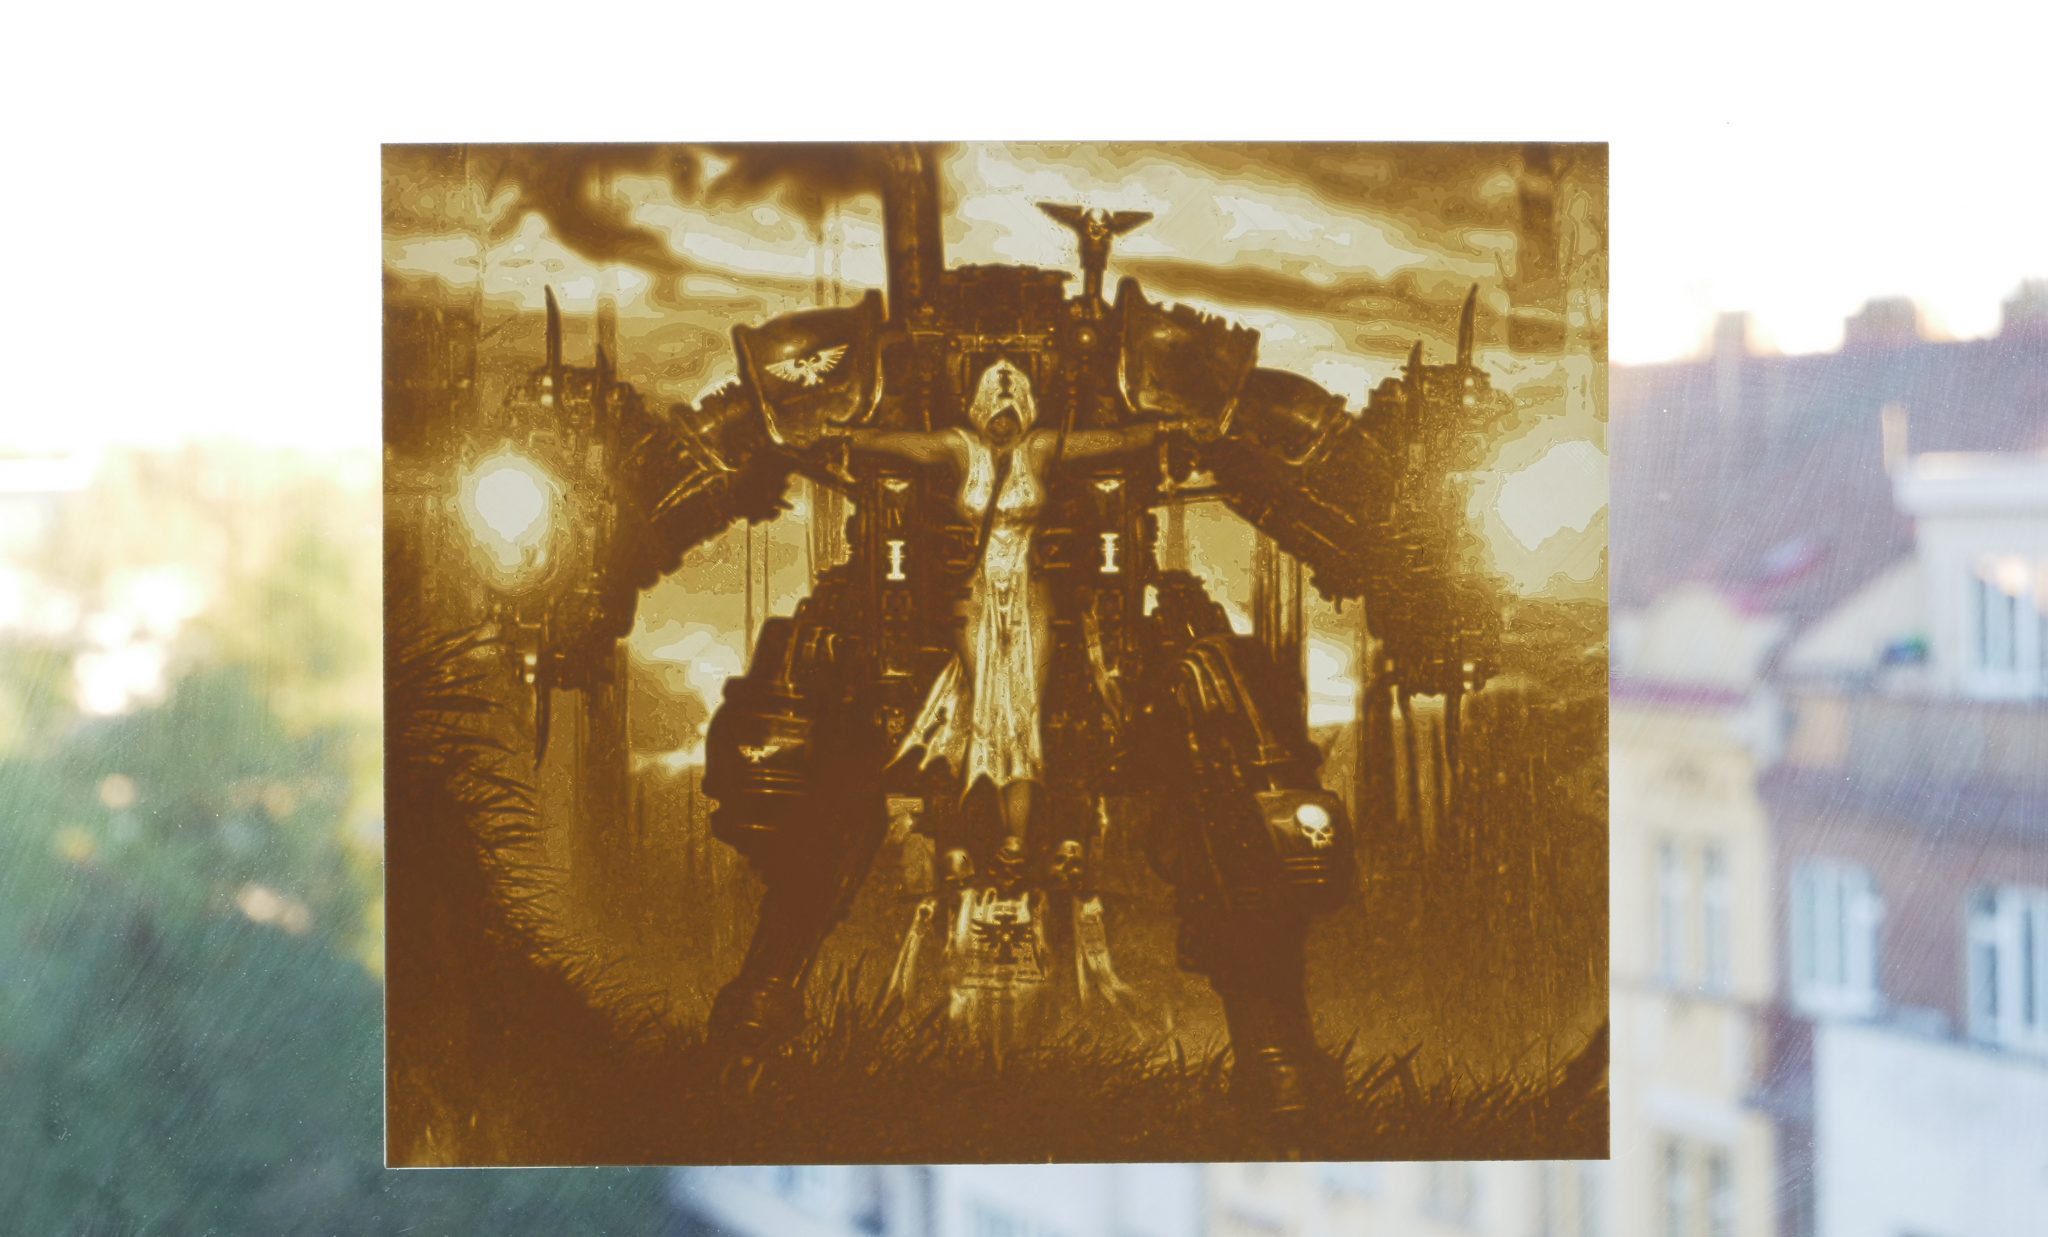
Great source of inspiration for beginners. I like how lithopanes encourage to get creative with the technology and potentially help to demystify CAD, however every time I hear someone announcing their plan to sell similar as ‘luxurious personalised gifts’, I can’t help but having a good laugh! 🙂
I don’t think Selva has a free conversion anymore. But I did use Online-Convert
https://www.online-convert.com/result/74fc766b-2cb2-4506-9921-969eca346b4c
Some of the letters in this pendant like A’s and e’s had openings filled in so I used tinkercad to create holes. When I loaded to Prusa Slicer it looked ok initially but after slicing some letter features disappeared. So I scaled it up by 1.5 and every thing printed.
Items for improvement: 1) After slicing is there a way the Slicer could notify you that some elements were too fine to print, and therefore missing??
2) The algorithm that chose what to print would operate on one letter, then skip 2 or 3 and print a layer on another letter, then skip back to a new location. Later letters seem to proceed more efficiently.
Possible to post a file here? These are the words on the pendant
Trust in the Lord!
God’s Plans Are Good
I just tried selva and I can’t get a confirmation email to any address I have tried 🙁
Yes I have the same problem. No email response to verify
Helpful instruction. Take it now and do it.https://hgh-therapy-rx.com/
This is the useful information shared here. One who is searching for this may get help to the maximum extent. If someone is looking for an online website where they can find the graphic designs for their t-shirt printing styles then visiting this website https://masterbundles.com/graphics/t-shirts/church/ will prove to be a wonder for you. I must say you may try their services for once.
Thanks a lot!
Too bad Selva’s registration form doesn’t work since forever, get your sources straight maybe
There are various educational assignments that you have to turn in from time to time. You must submit assignments, research papers, writing services, and dissertations. These tasks require in-depth research and analysis of relevant materials.
more
I recently discovered a website that offered stock footage of a strip-club. The website strip club video https://depositphotos.com/stock-footage/strip-club.html had a great selection of high-quality footage that captured the vibrant atmosphere of a club. There were clips of people dancing, enjoying drinks, and socializing in different parts of the club. I was impressed with the variety of options available and the quality of the footage. It was easy to find clips that suited my needs, and I was able to download them quickly and easily. The footage looked great in my project and helped to create the desired ambiance.
not quite sure how these recent posts are relevant…
Adobe offers a free online tool at https://www.adobe.com/express/feature/image/convert/jpg-to-svg to convert JPG images to SVG format which Tinkercad can also read. You do have to create an account.
This is a fascinating guide on turning 2D images into 3D models – it really sparks creative possibilities! I also recommend checking out the amazing wallpapers at <a href="https://fondospantallahd.com/">FondosPantallaHD.com</a> for even more inspiration when choosing pictures to transform.