


We are here to provide you with a complete overview and all the latest updates from Prusa Connect, our network solution for remote control of 3D printers. You may be surprised by the number of features already available. And we will also share our plans for the future. So, let’s get started!
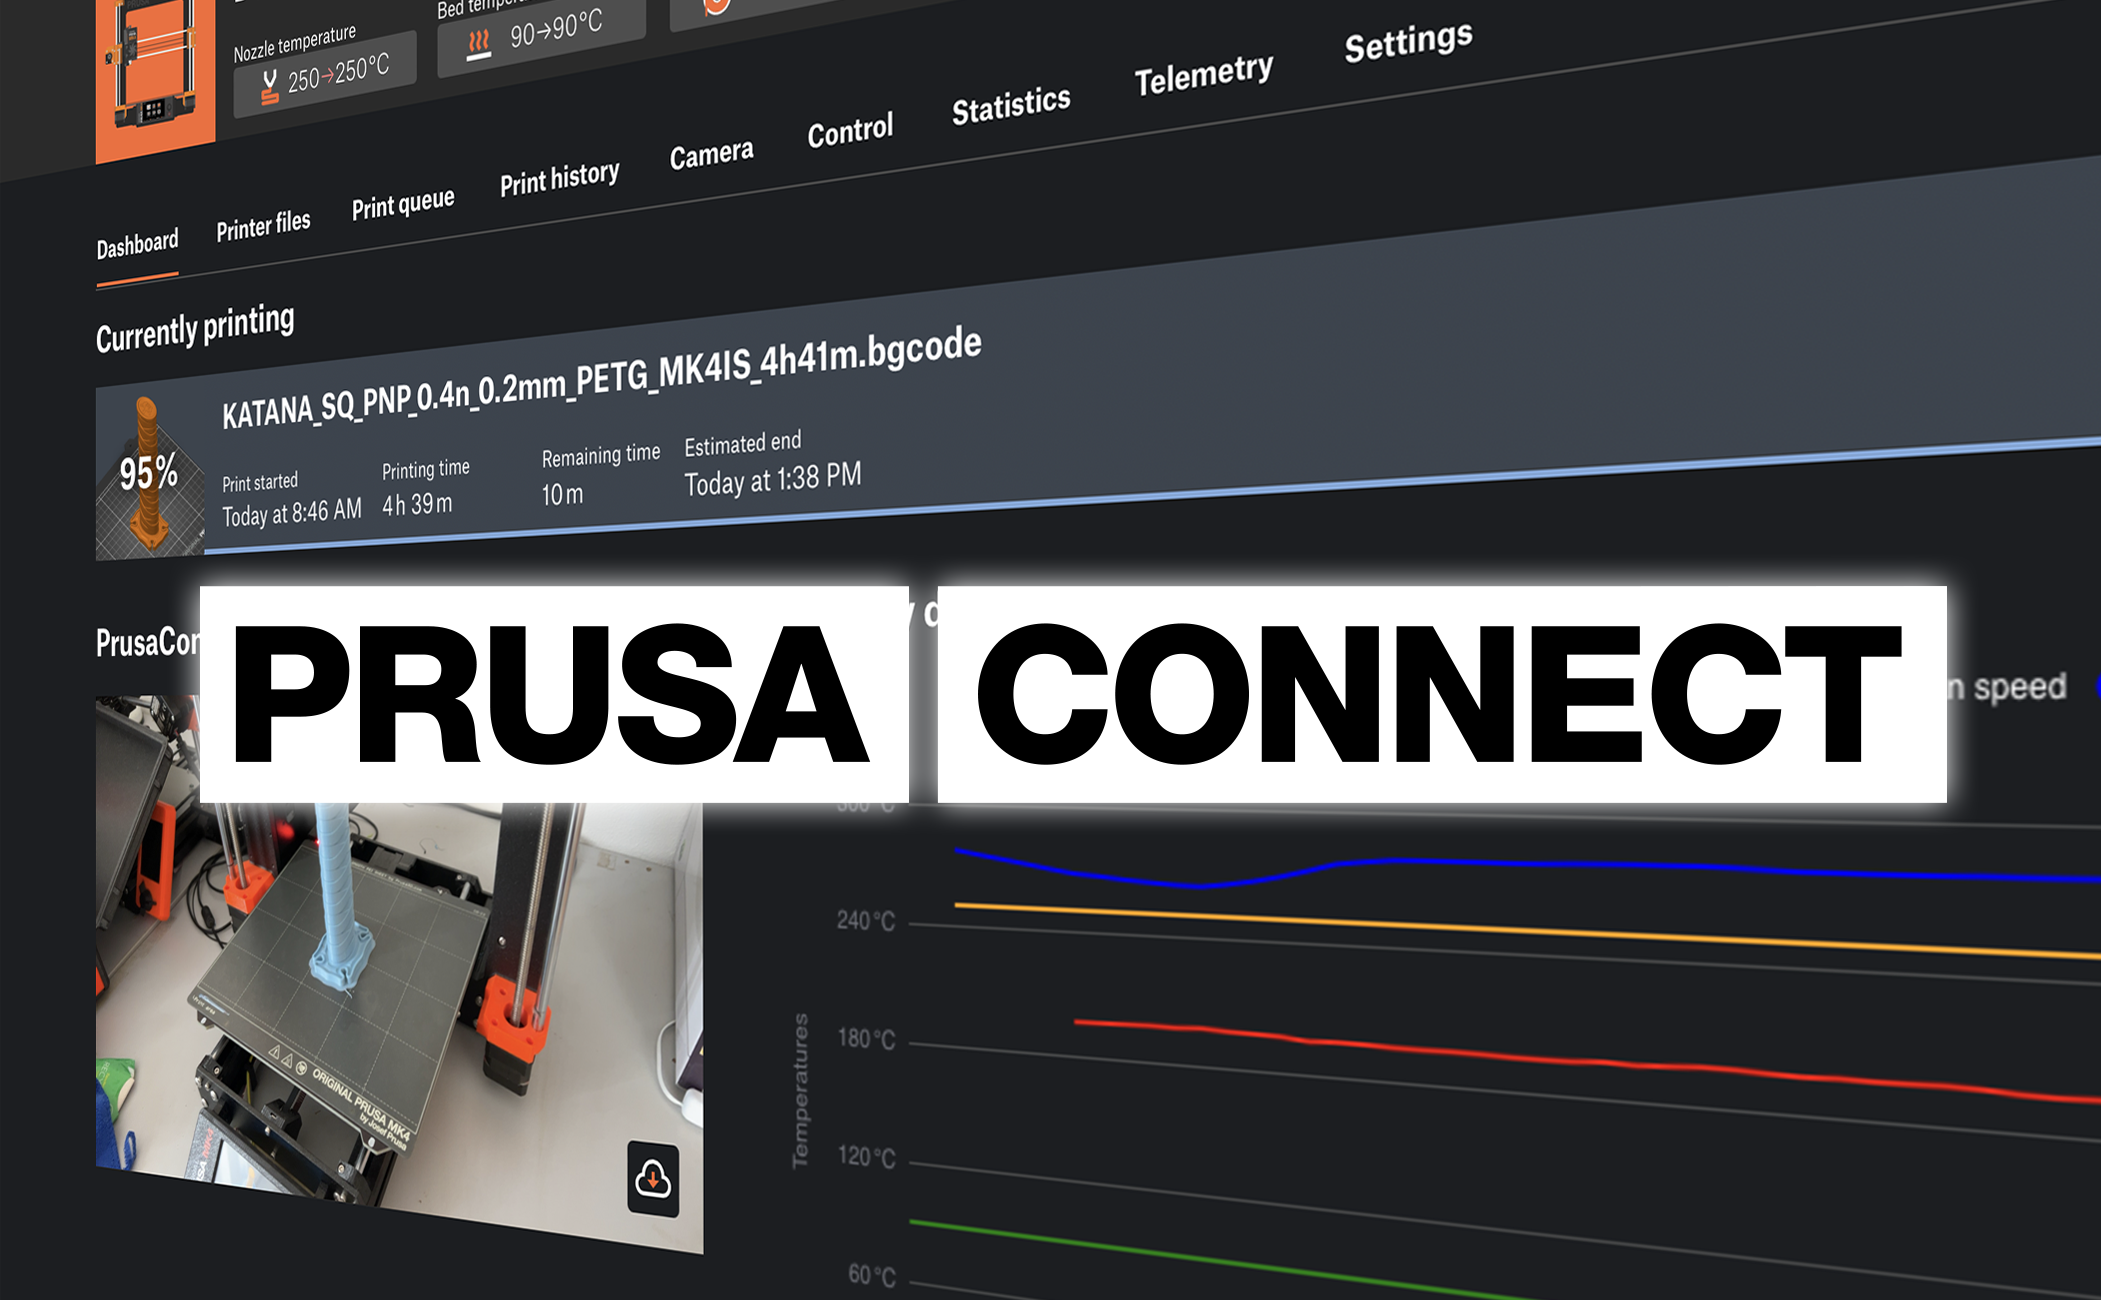
Print from anywhere!
Just in case you’ve never heard of Prusa Connect – it’s our web service, that allows you to manage your 3D printers from anywhere. This includes uploading print files, controlling and monitoring multiple printers at once, monitoring the status of a print job using cameras, or tracking the printing history and detailed printer statistics, including filament usage. There is a bunch of things already implemented and many more that we have in our pipeline! 🙂
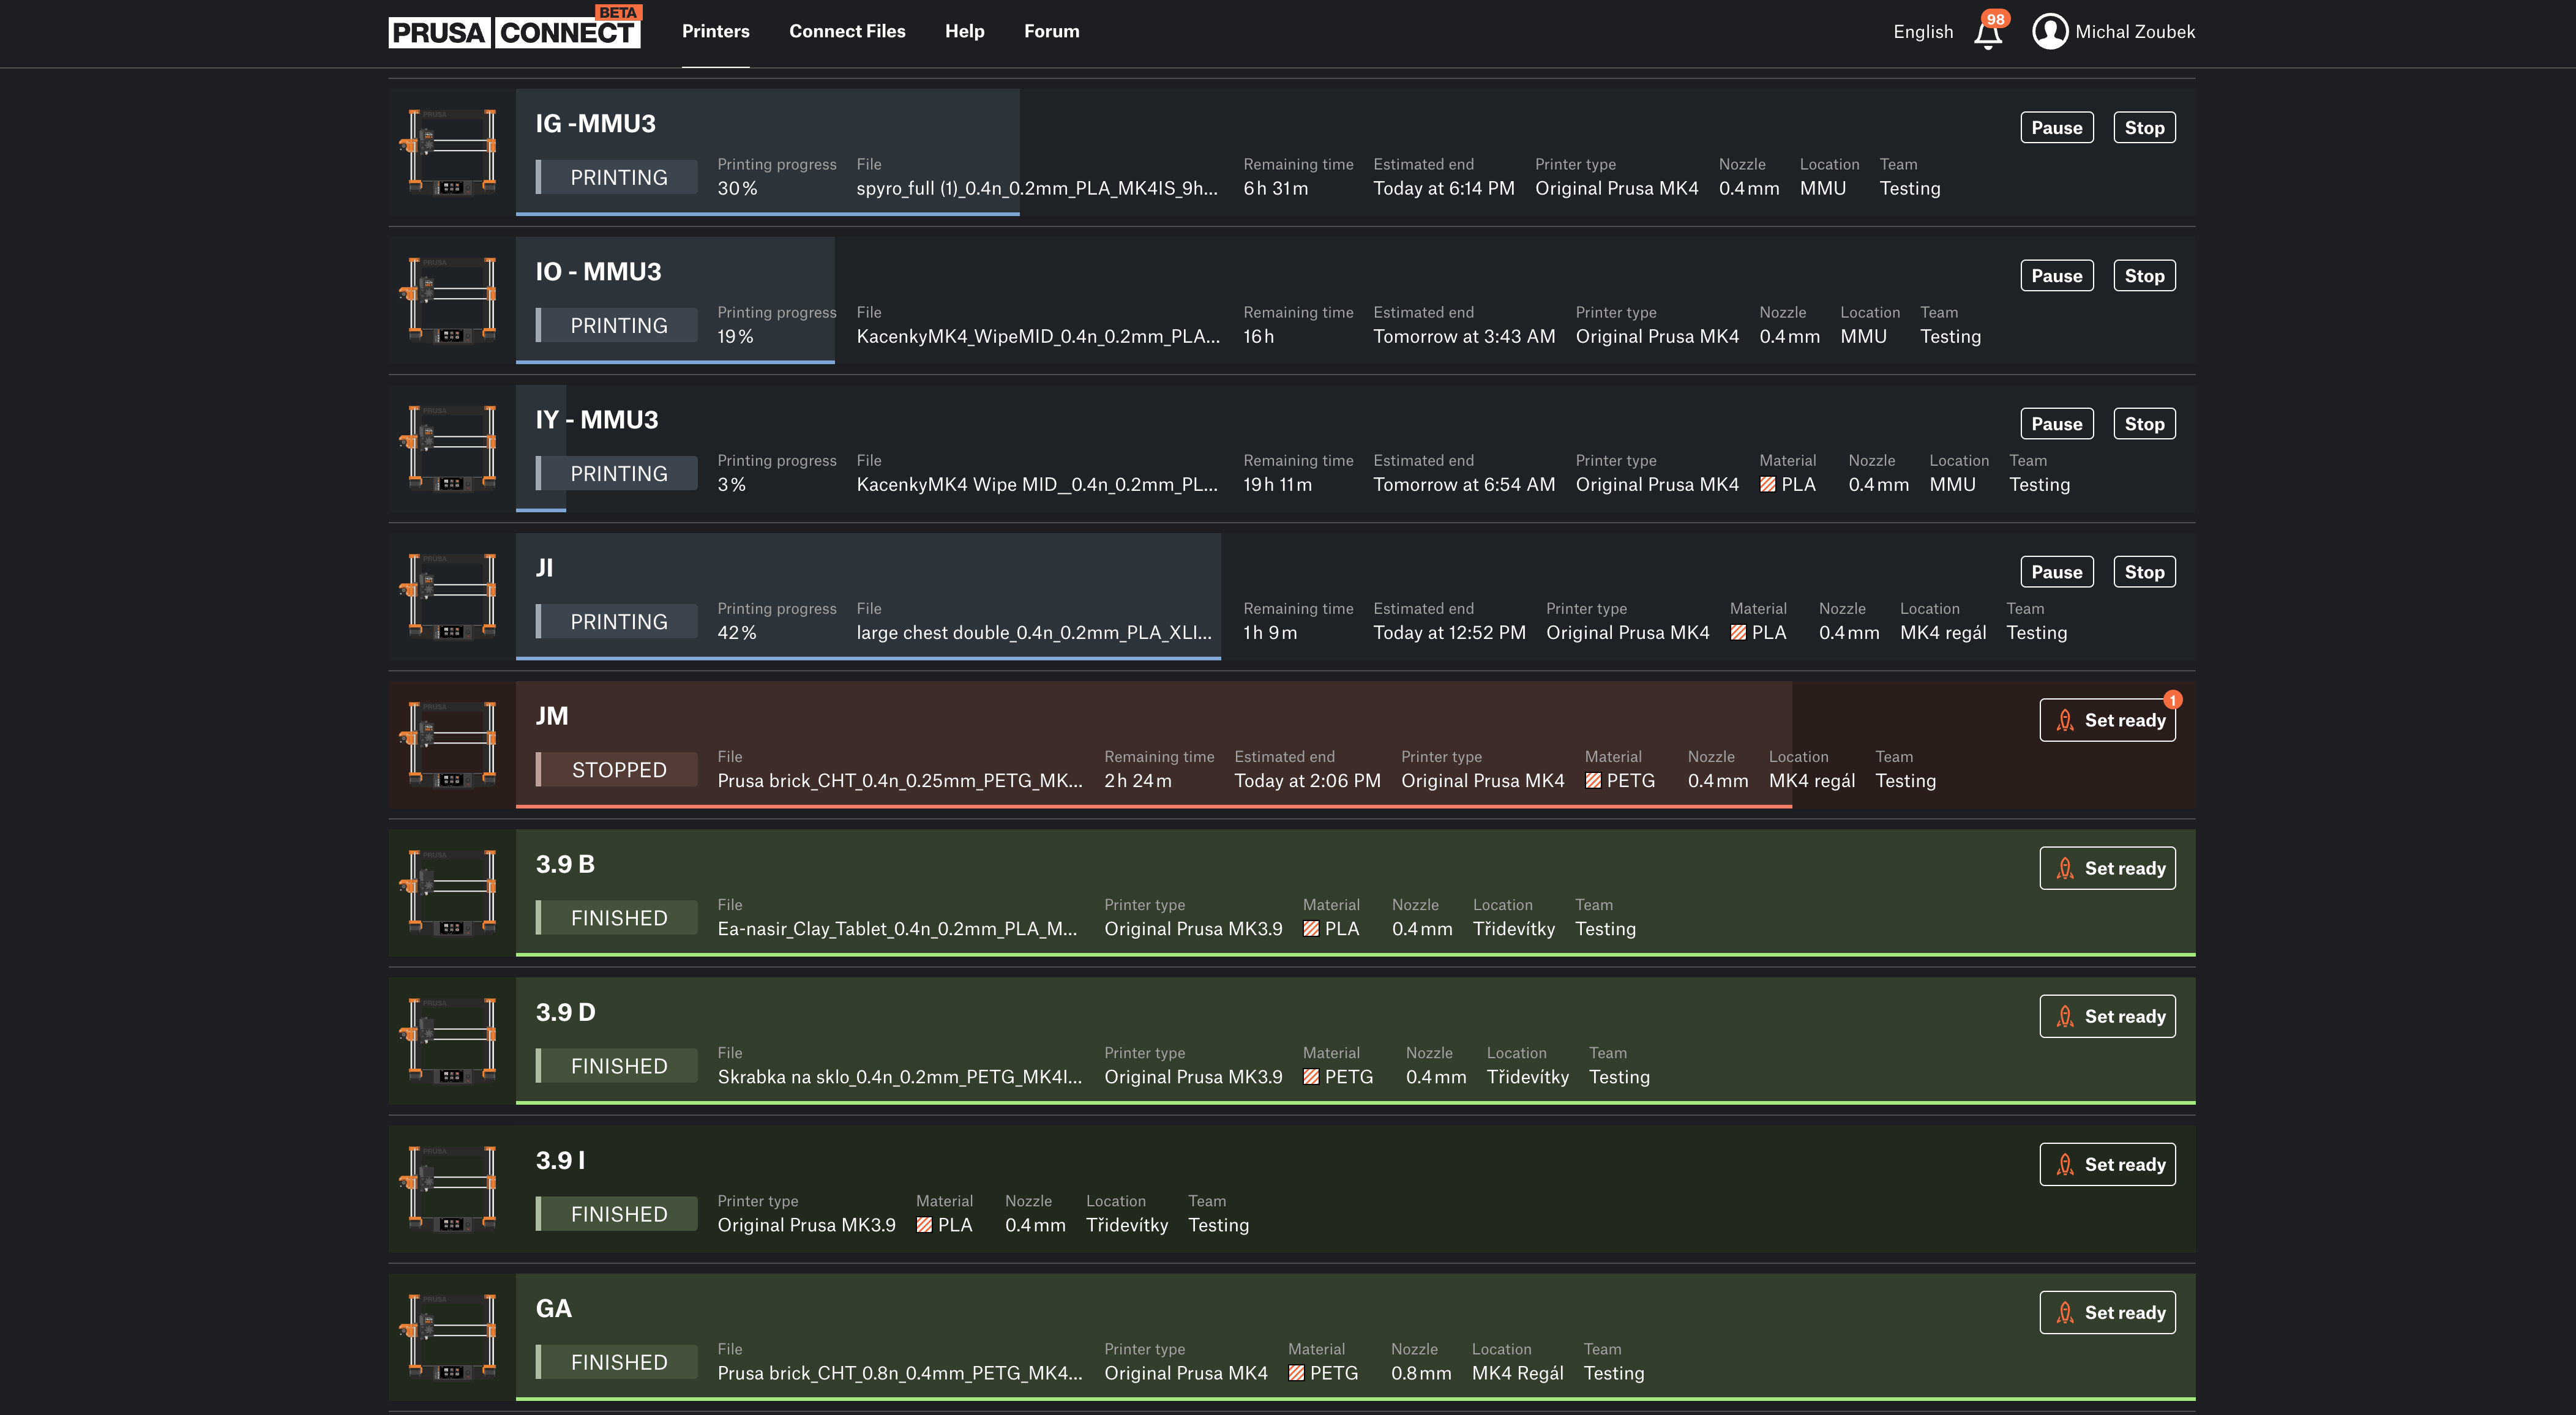
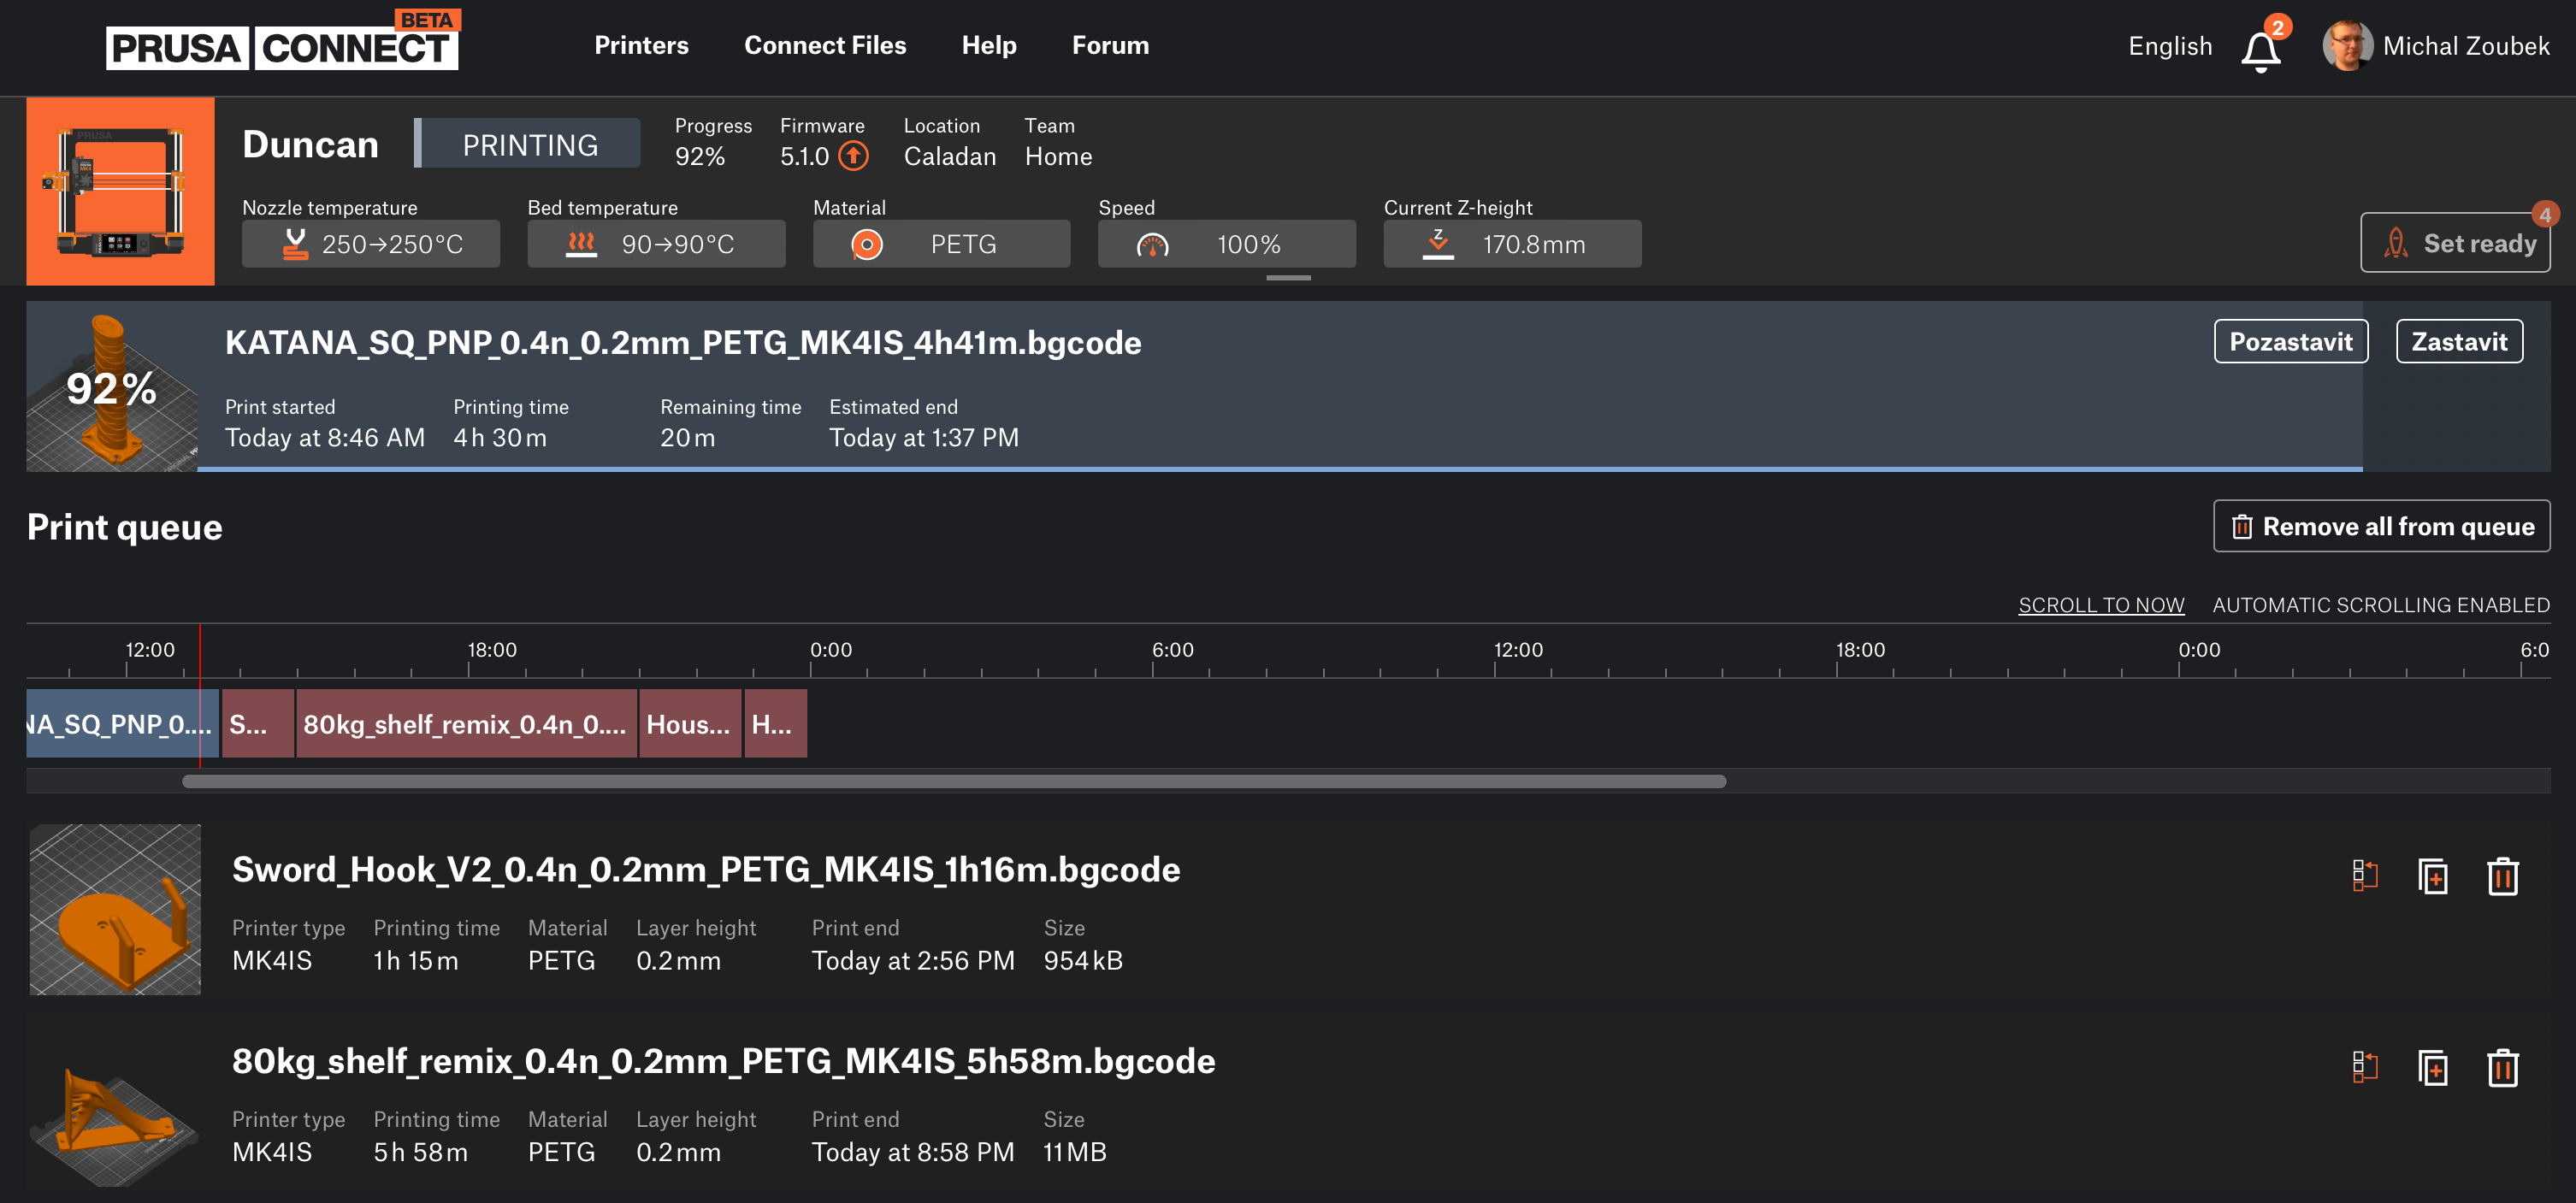 Each printer has its own print queue that you can use to schedule print jobs
Prusa Connect can be used with any number of printers, from a single machine to a whole print farm. Each one of your registered printers has a print queue available, which can be filled with your desired print files. This means that if you’re printing a larger project, you can prepare and send all the G-codes to the printer at once. When a print job is finished, you just harvest the finished model and confirm the printer is ready for the next job in the queue. The print queue has a timeline to visualize when each print job finishes to easily keep track of your printing status on all printers at once!
You can also remotely control your 3D printer and adjust its settings. This includes starting the homing procedure, adjusting any temperatures and speeds, moving with any axis, including the extruder, disabling the motors, or even restarting the whole printer.
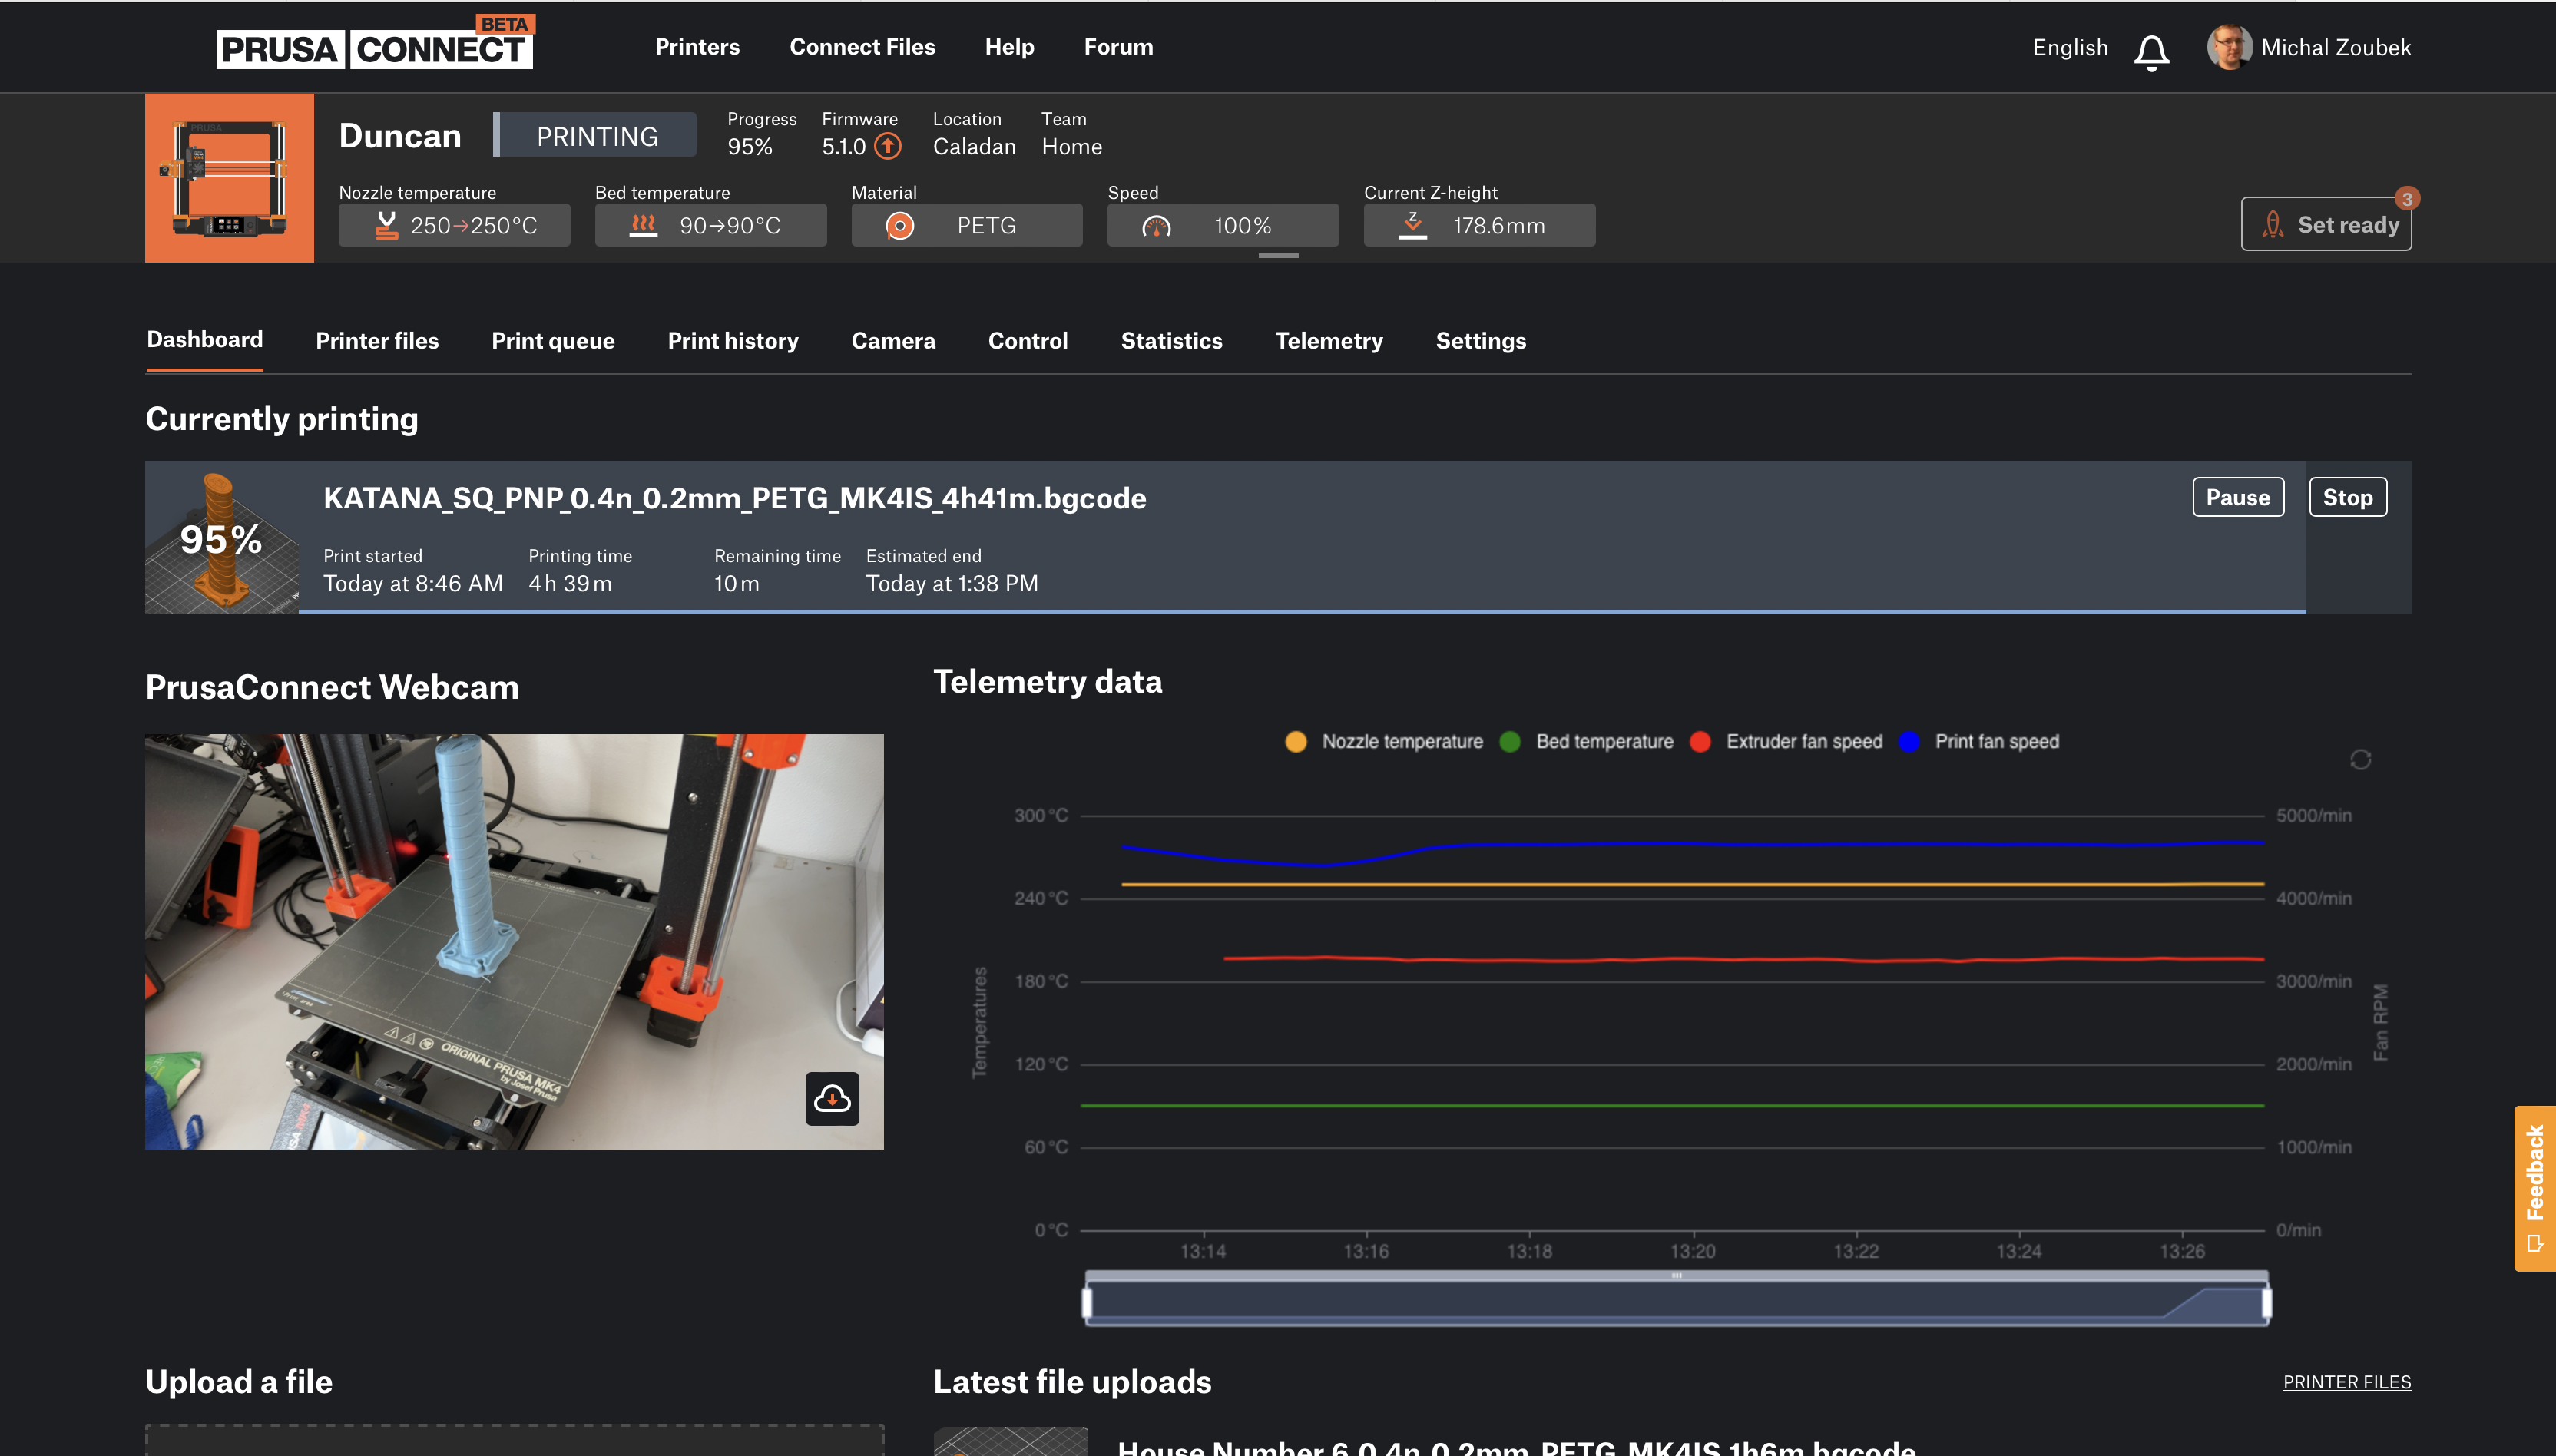 In the printer’s dashboard, you’ll find all the important data, including the latest snapshot from the camera
 You can click the buttons in the printer’s header to quickly set temperatures, change the filament, etc.
Working with files
New print files can be uploaded from your computer into Prusa Connect using drag and drop, or directly from the PrusaSlicer application, both with options to start the print right after upload, add the file to the print queue, or simply store it in the cloud storage for later.
Thanks to the implementation of ArcWelder, G-code streaming, and a brand-new G-code binary format in firmware and PrusaSlicer, the print can be started much faster, and you don’t even have to wait for the upload to finish! Prusa Connect enables you to start the print within a few seconds from the upload start. This is especially useful for large files, where you no longer have to wait a long time for the file upload to check the start of the printing process. You can find more info about these amazing features and other updates in our Prusa Autumn Summary Article.
 There are several view modes to monitor your entire print farm
All files stored in Prusa Connect cloud storage can be handled just like in a regular file manager and also be shared among all your registered printers. Files stored on the printer’s SD card or USB flash drive can be printed from the web interface as well.
 You can inspect the print queue for all your printers at the same time
Security
We take the security of your files and data very seriously. When you upload a file to Prusa Connect, you are uploading just a G-code file, without any model source file, so nobody can access the original 3D model. Also, your print files are shared only with the members of your team, with their assigned roles and rights.
For the telemetry and command communication between the printer and Prusa Connect, we use TLS1.2 security protocol with elliptic-curve cryptography (ECC). This method offers great cryptography strength compared to RSA encryption, while it’s much faster and memory-efficient (The ECC 256-bit key offers the same strength as the RSA 3072-bit key), so it’s a commonly used standard, especially in embedded systems.
In a login procedure in your browser, we also support Two-Factor Authentication (2FA) to achieve the best security of your account. If you haven’t yet enabled 2FA, we strongly suggest turning it on.
If you still have any concerns about storing your data in the cloud, regardless of security features in Prusa Connect, you are free to use just the PrusaLink web interface itself. As it runs locally on your printer, your files and data will never leave your local network, and Prusa Connect can be used just for remote monitoring or not used at all.
User teams
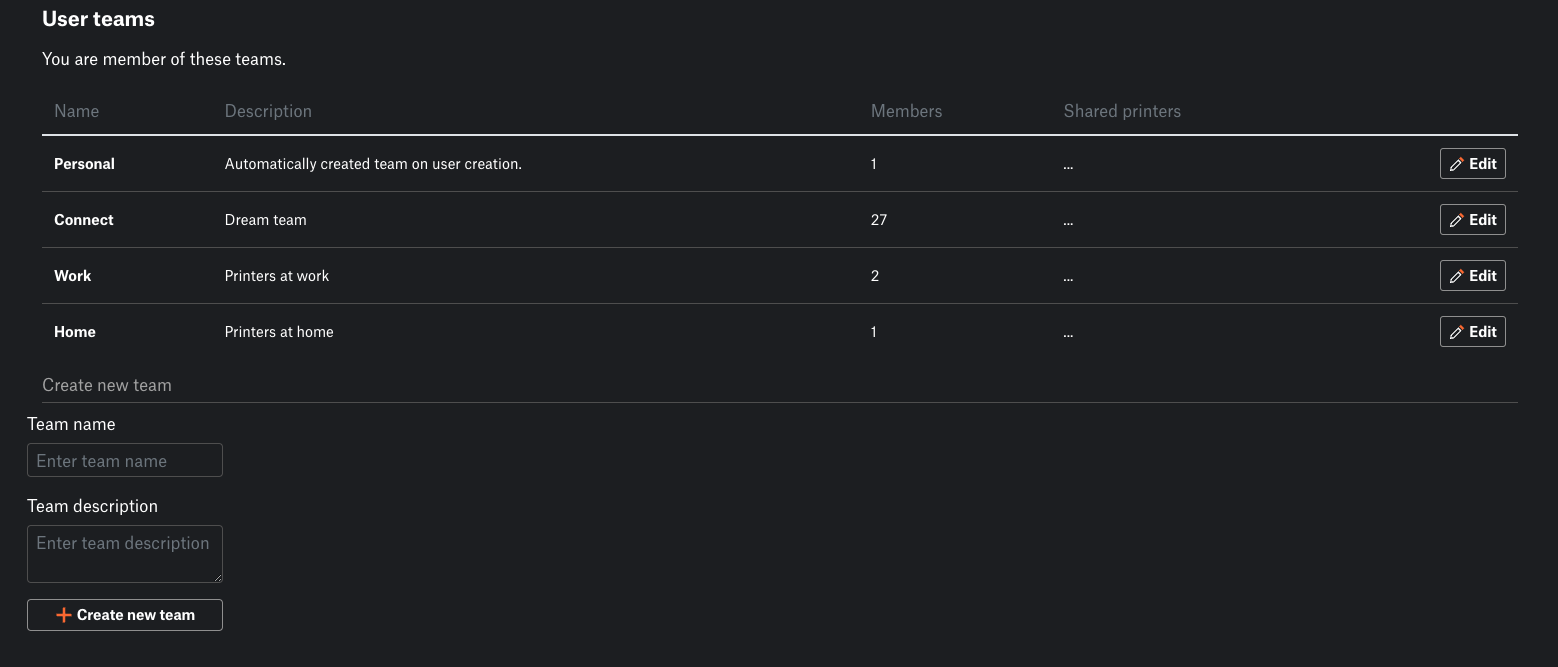
Prusa Connect allows you to easily manage the roles of your work team or school classroom members. You can create different teams, invite new people, and set their access rights. So, for example, if you have a classroom of students and you want them to be able only to check the status of the printer without the ability to control it, it’s a matter of just a few mouse clicks.
 You can create and join as many teams as you want
You can have as many teams as you want, so don’t hesitate to use their potential and create, for example, one team for your family and another for your work or school.
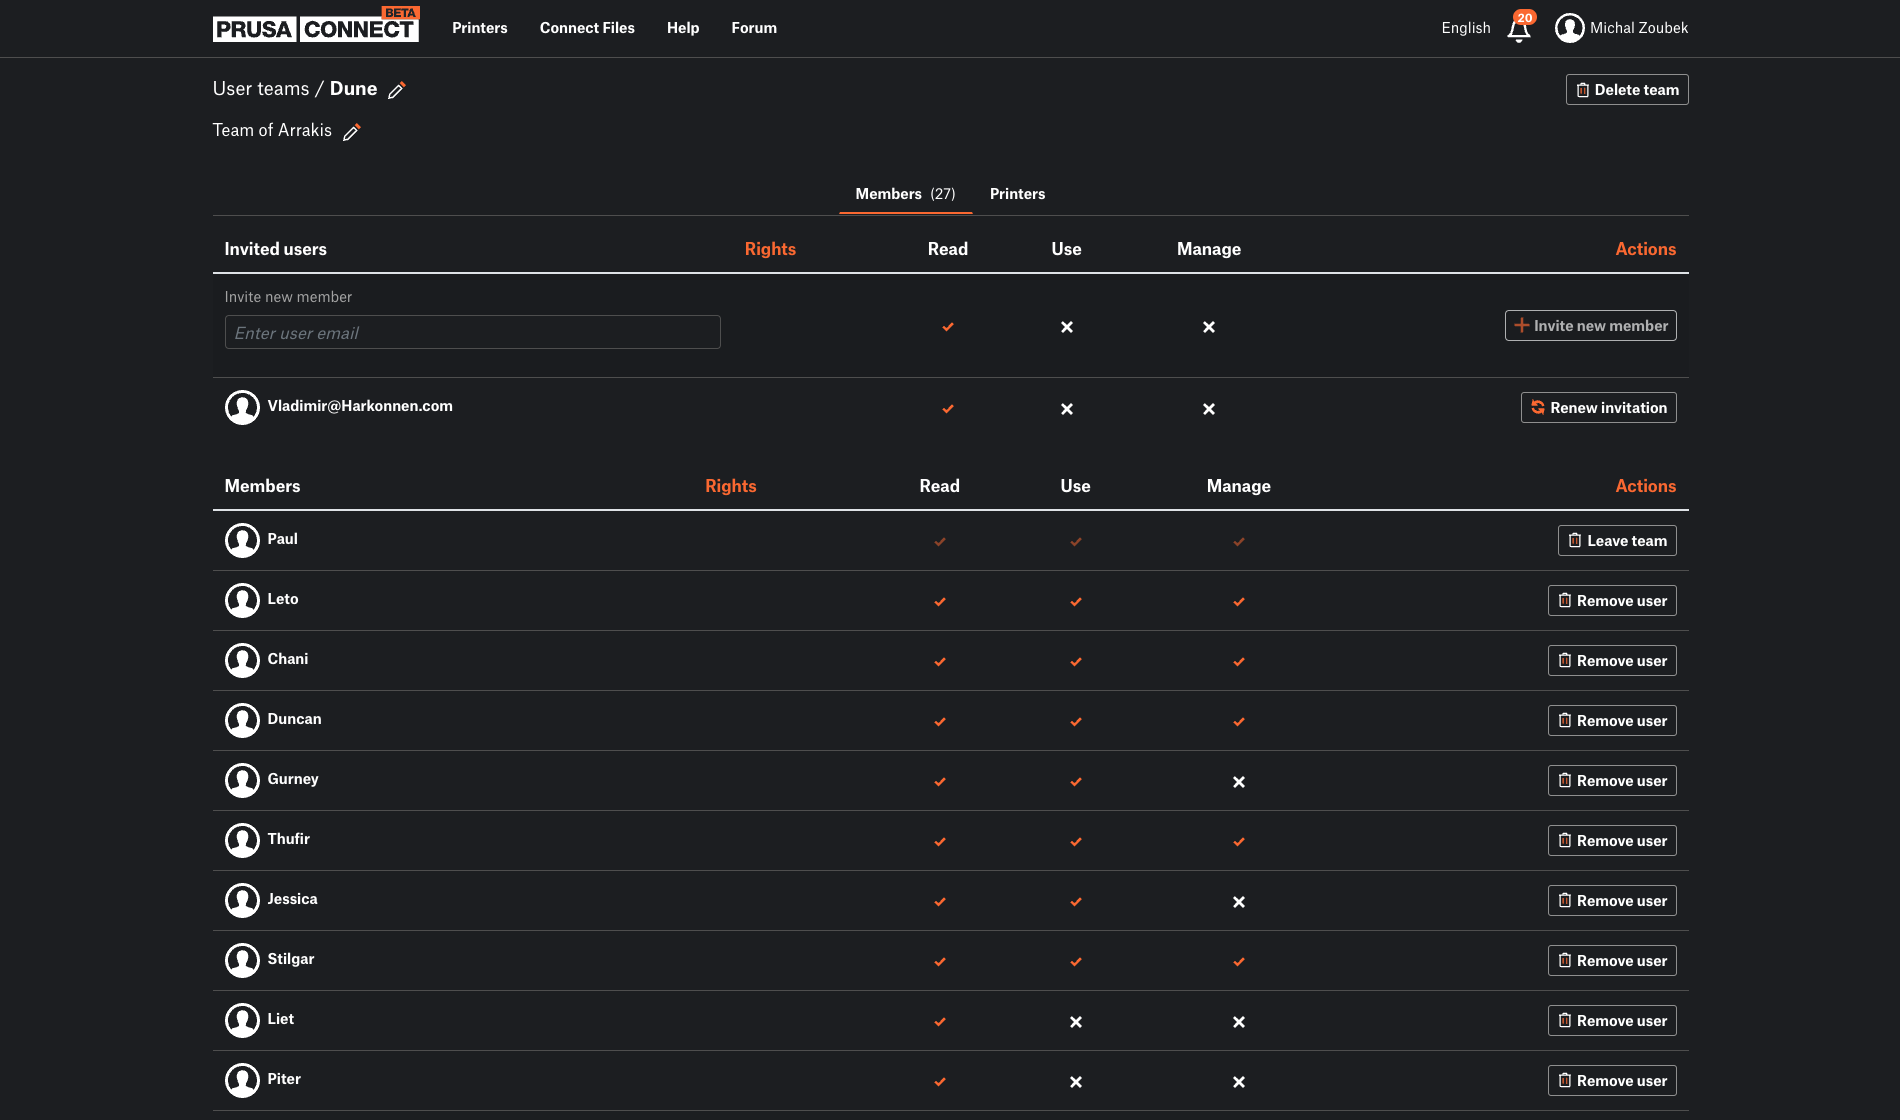 Invite new team members and manage their access rights to shared printers
OTA (Over-The-Air) firmware update
Prusa Connect checks the printer’s firmware version and offers you an option to remotely update it if a newer version is available. It’s a handy feature, which helps you keep your printer up to date. 🙂 It is also possible to flash different firmware versions, or even upload any firmware file using drag and drop. Support for the OTA firmware updates was our often-requested feature, so here it is! You can use it on all our printers that are using native PrusaLink, i.e. the MINI/MINI+, MK4, and the XL.
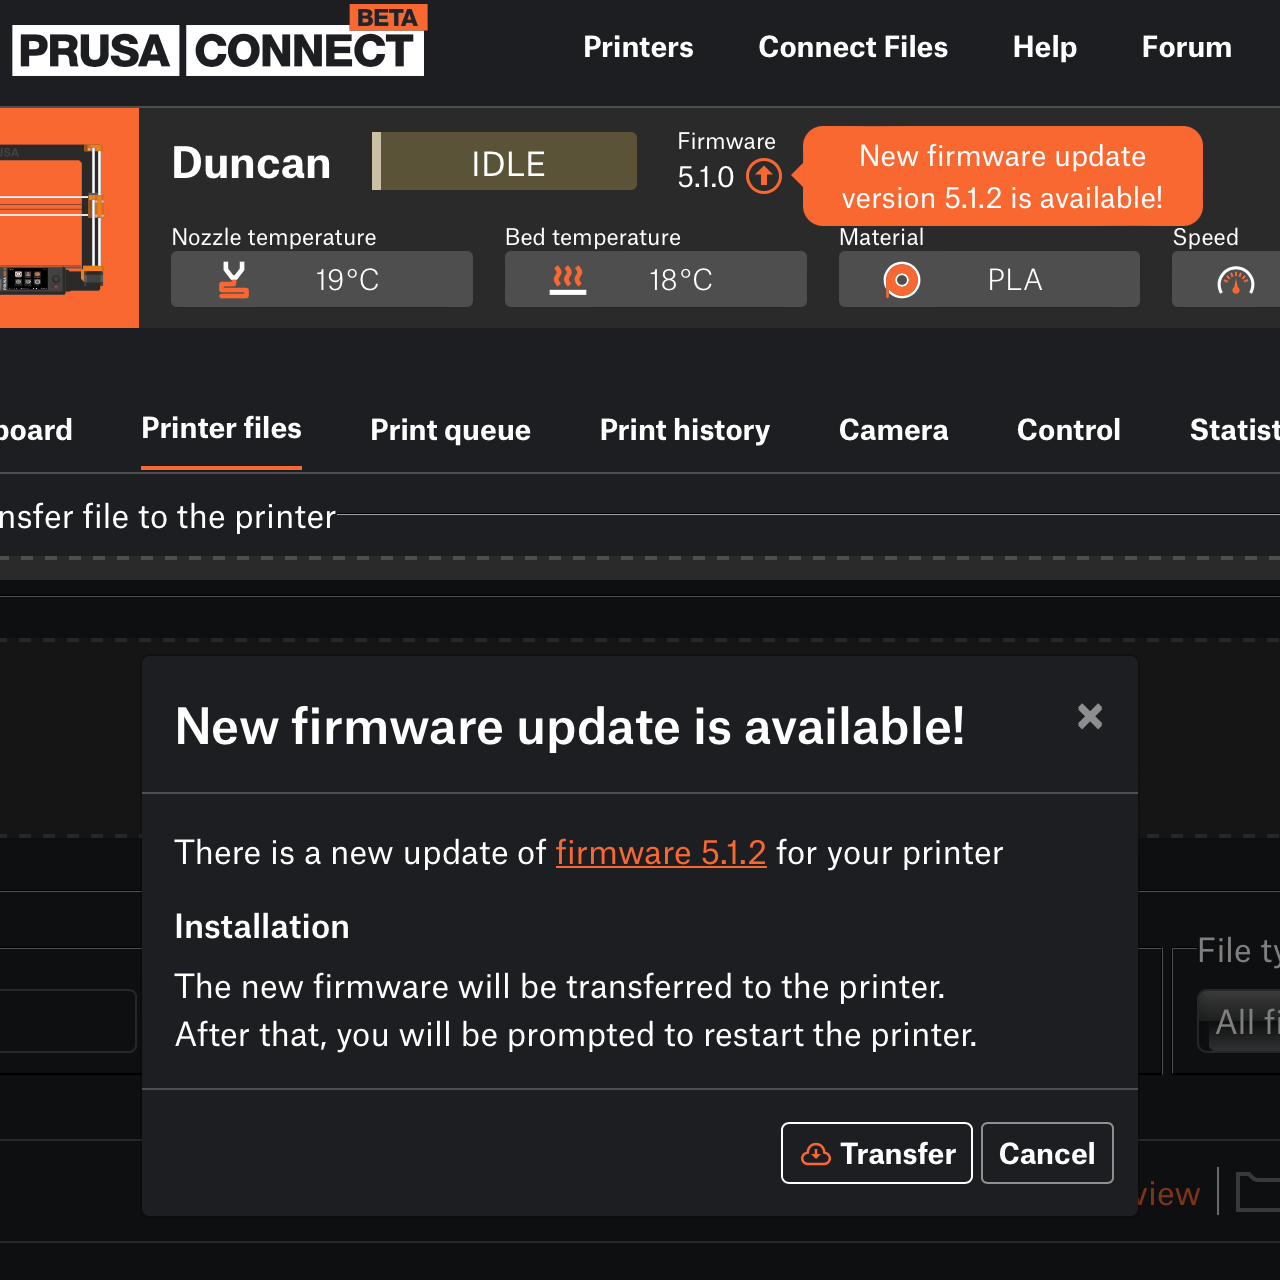 You’ll be notified when a new firmware version becomes available
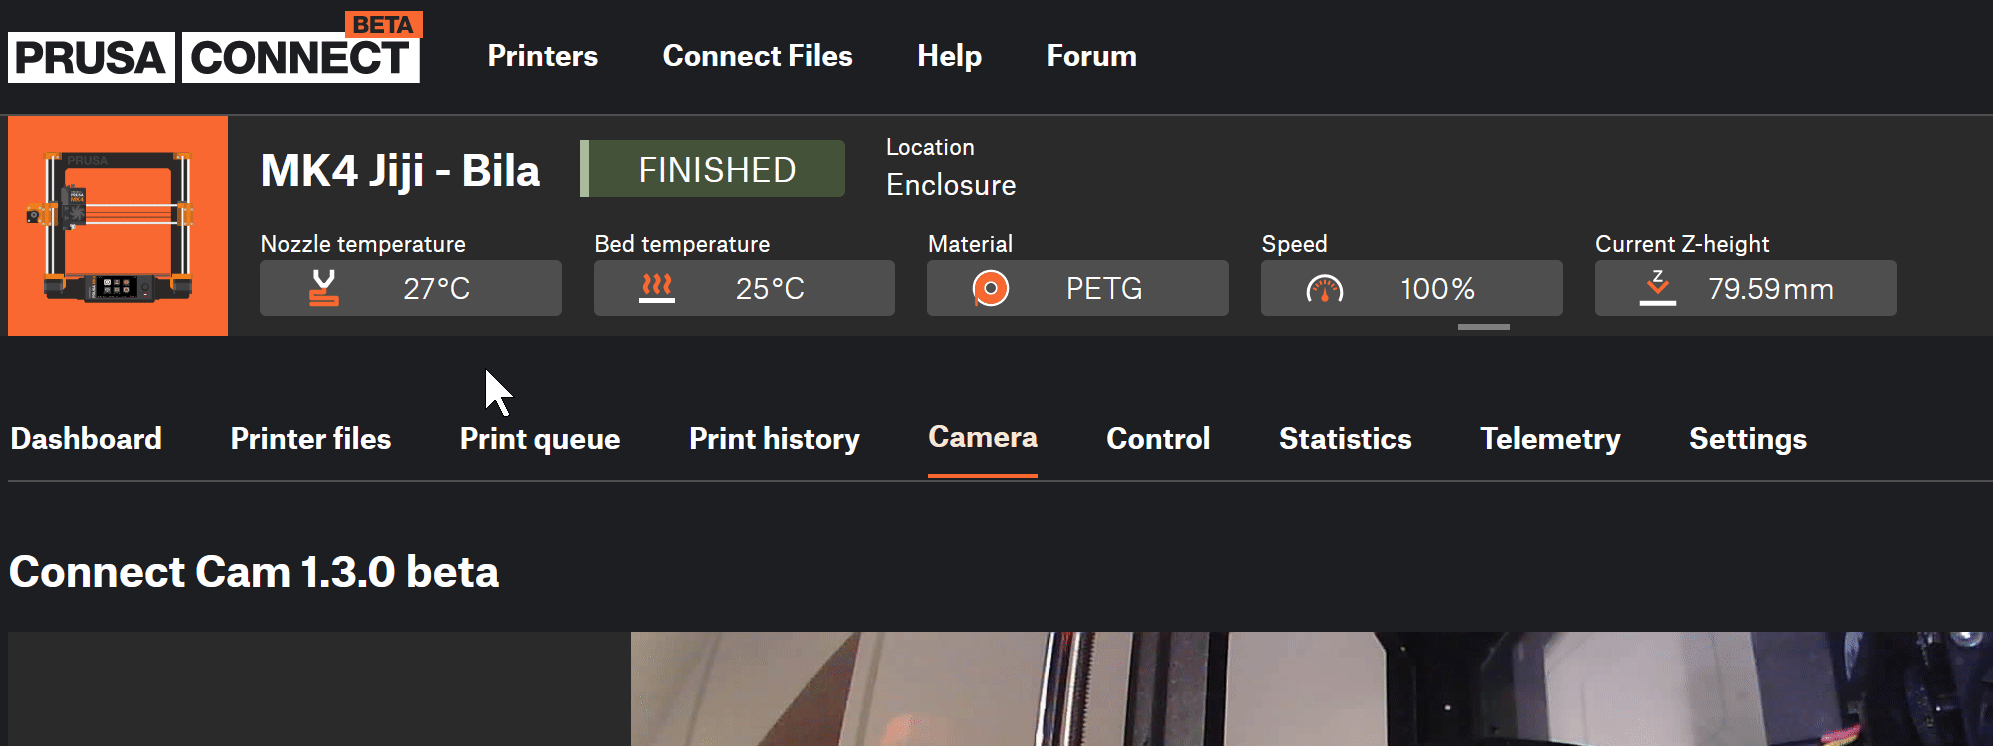
Connect the cameras!
Prusa Connect allows you to remotely check the status of a print job using one or more cameras. No more running towards the printer every couple of minutes, just to check if the print continues without any issues, or if you’ve begun the creation of a spaghetti monster. In case of any issue, the print job can be stopped anytime from anywhere, which is especially handy for long prints and can save you a lot of potentially wasted filament. 😉
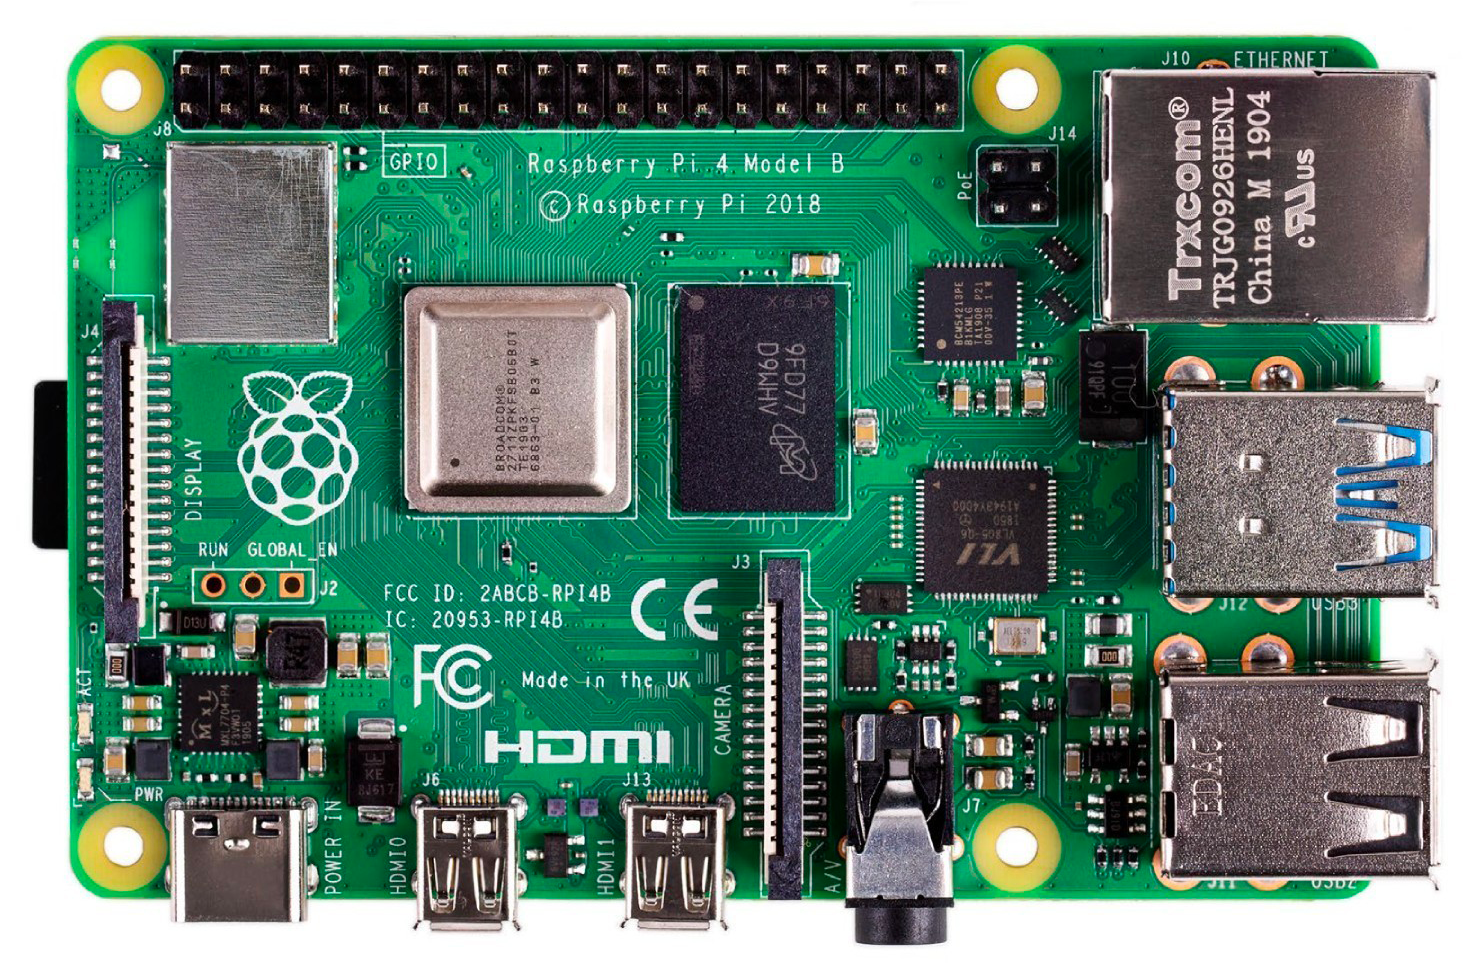
There are over 400,000 Original Prusa printers in the wild and we came up with several ways to add camera support to them. Some of these solutions are already functional, while others are still being worked on. Moreover, printers that use a Raspberry Pi for PrusaLink can use a Raspberry Pi camera.
Old smartphone as a camera
You can repurpose your old smartphone or a similar device and use it as a web camera. Just scan the QR code and you’ll see an image from your device in Prusa Connect within a few seconds.
Your camera solution with our open API
Integrate your solution and use it as a dedicated Prusa Connect camera. We have prepared documentation of our open API and token authentication. This way, you can use your existing camera solution. If you publish your solution (e.g. on GitHub) or offer it to others as a product, let us know about it!
Original Prusa Connect Camera
We are currently working on easy-to-use solution, involving an inexpensive microcontroller with a camera module, paired with a wide-angle lens. We would like to offer it with a pre-flashed firmware on our e-shop for purchase once it’s finished.
 Snapshot from the camera – in this case an old smartphone was used as a web camera
Prusa Connect, PrusaLink, and OctoPrint
All our printers that support Prusa Connect use the PrusaLink system, which allows them to connect to Prusa Connect and also provides a simple web interface, accessible within your local network. The latest printers, such as the MINI/MINI+, MK4, or XL, can be connected to Prusa Connect without the need for any additional devices, as they come with native PrusaLink included in the firmware. For older printer models, like the MK3/MK2.5, you will need to use a solution involving a Raspberry Pi computer with an installed PrusaLink system.
 Interface of PrusaLink – local network solution
However, this does not mean that you have to use PrusaLink or Prusa Connect to be able to control any of our printers. Our printers will still support OctoPrint as well. The latest firmware update for the xBuddy embedded platform included several OctoPrint support improvements and we will continue to working on it in future updates. The final decision on what software you would like to use will always be up to you! 😉
For using PrusaLink on MK3/MK2.5 printers, you can use either a Raspberry Pi Zero, connected to each printer’s mainboard via pins, or a more powerful version, e.g. RPi4/5, and install PrusaLink multi-instance to connect multiple printers to a single Raspberry Pi! You can buy both the Raspberry Pi Zero and the Raspberry Pi 4 in our e-shop.
To register to Prusa Connect, either create a new account or use your existing PrusaAccount, which is also used to log into other Prusa services (our e-shop, Printables.com, etc). Once logged into Prusa Connect, simply add a new printer and start printing. To link your Prusa Connect printer with PrusaSlicer, you have to copy the API key from your printer’s settings to your Physical Printer in PrusaSlicer.
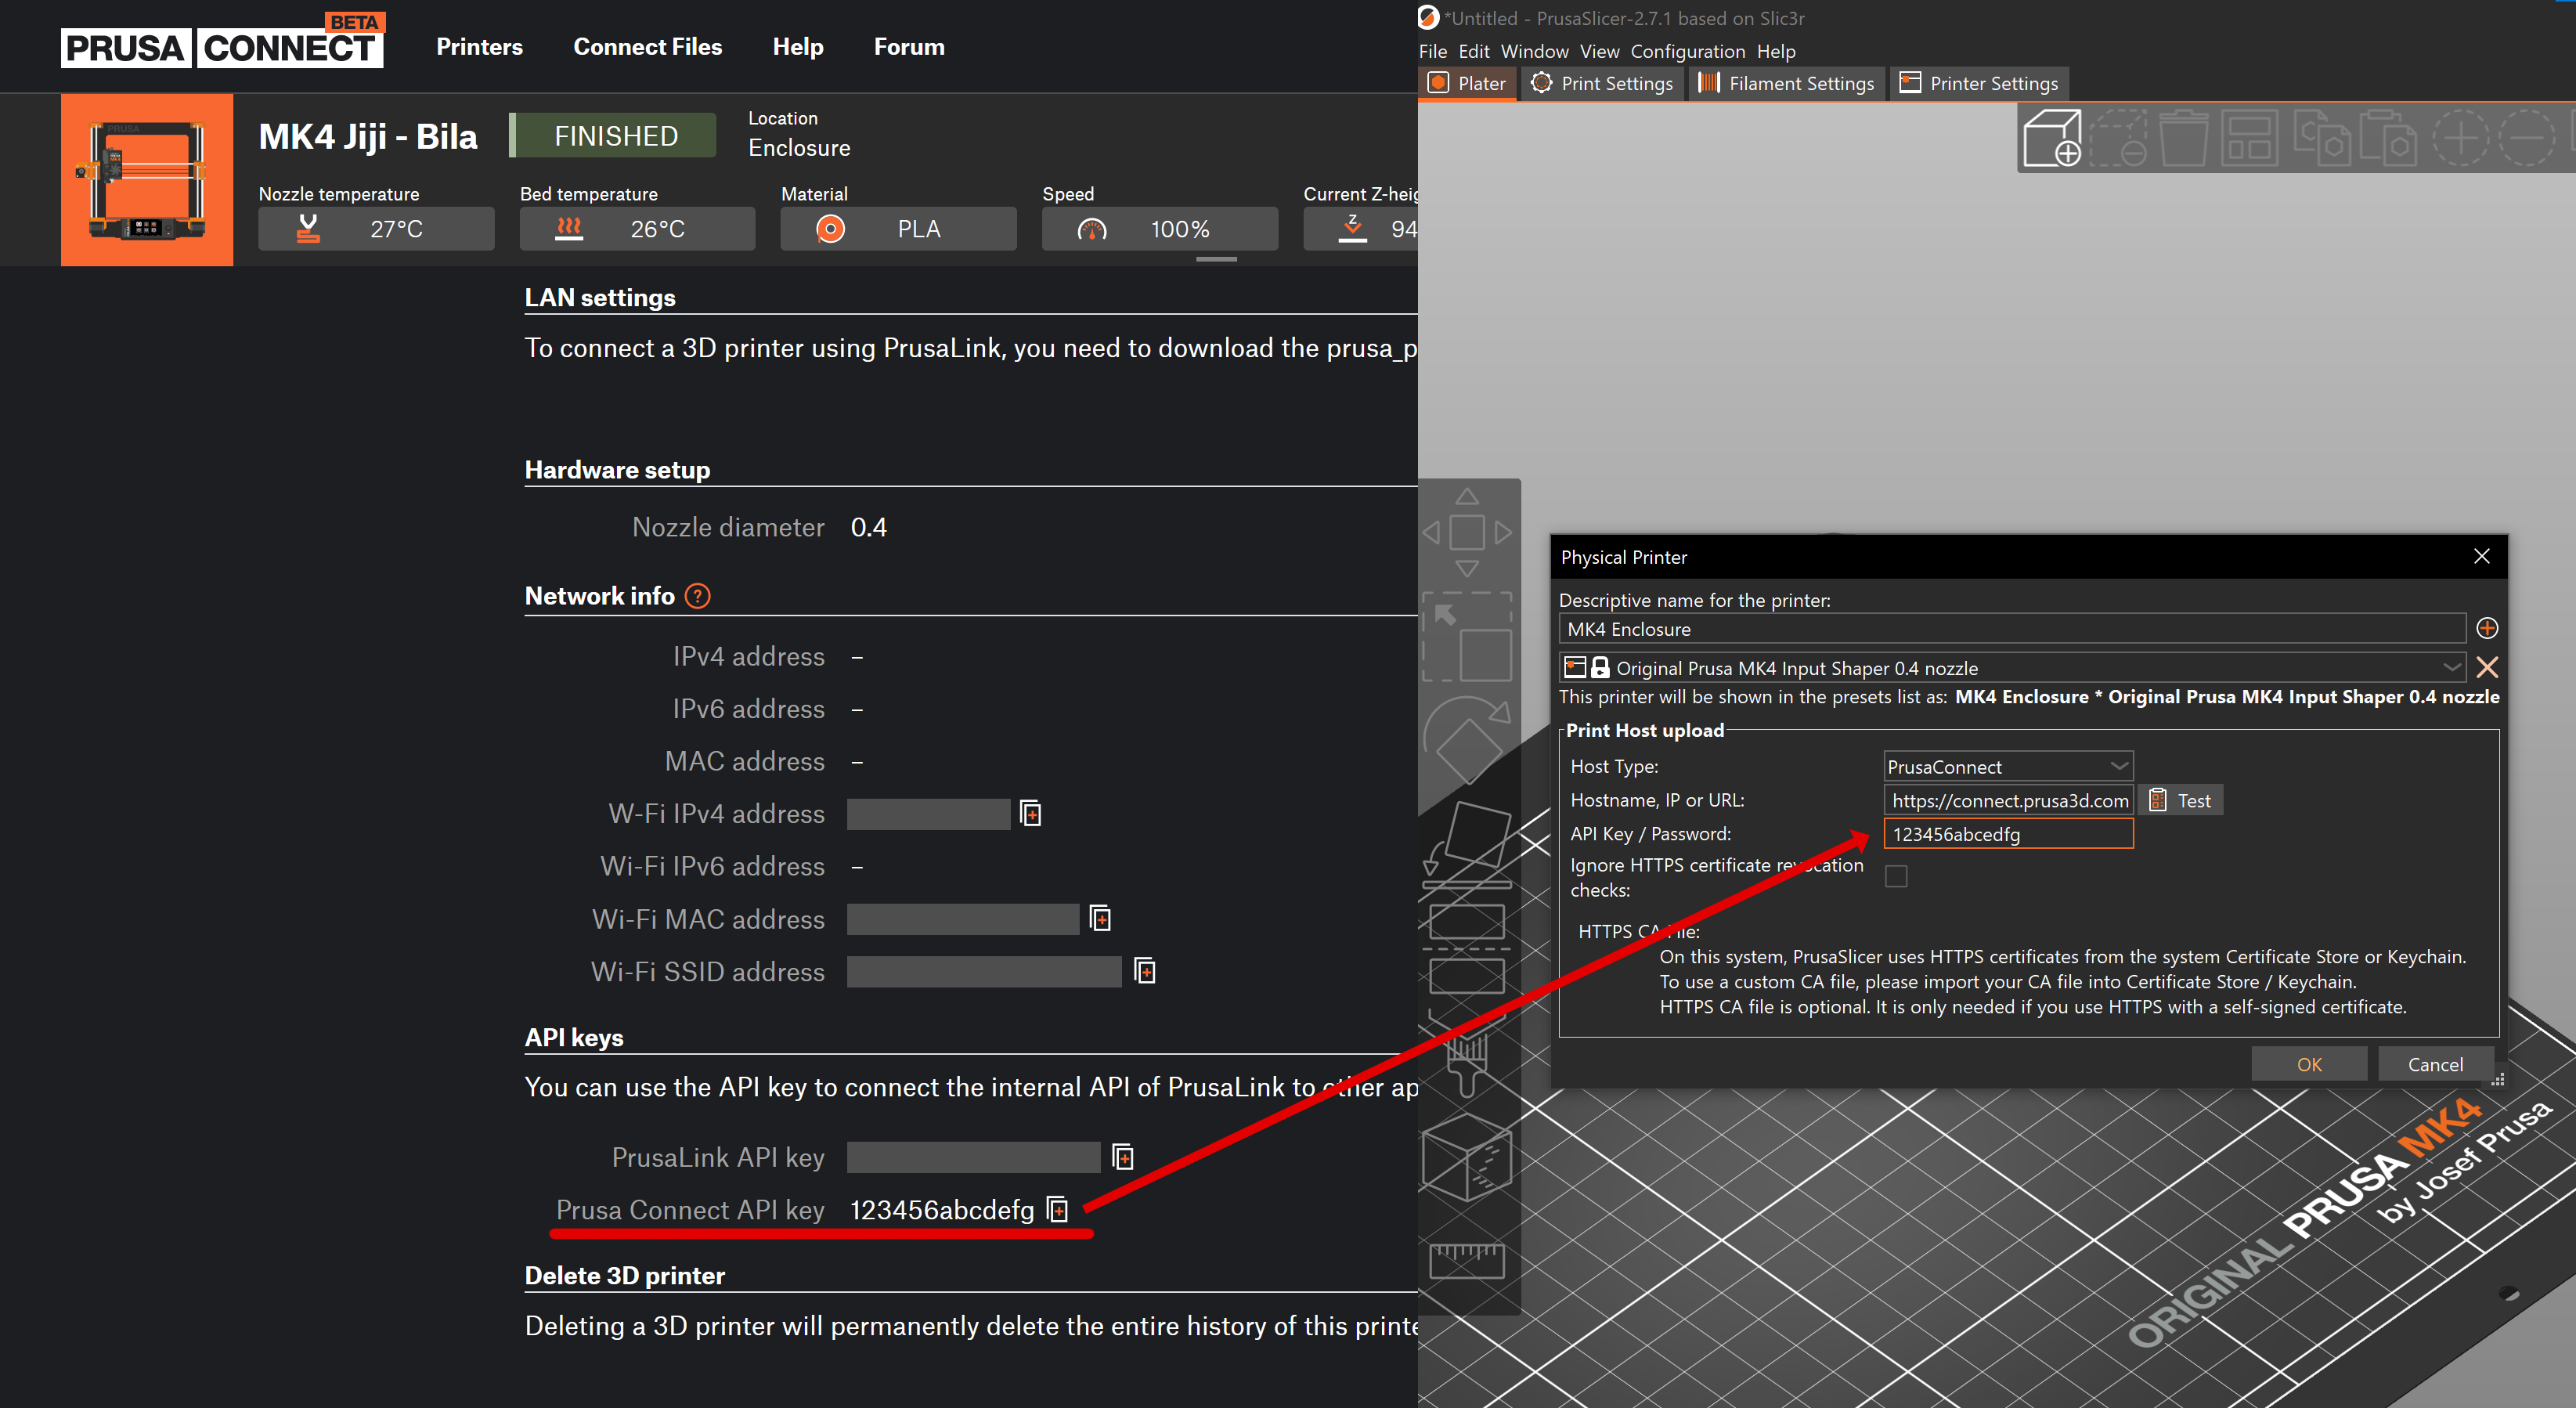 You can link your printer in Prusa Connect with PrusaSlicer using the API key
By the way, PrusaSlicer can help you even more. If you plan to connect your MINI/MINI+, MK4, or XL printer to the network via ethernet, just plug in the cable and you are good to go. However, if you want to configure the Wi-Fi connection, you’ll need to insert the correct credentials into the configuration file on the USB flash drive. PrusaSlicer can do it for you. Just plug the USB flash drive into your computer – PrusaSlicer detects it and asks you to insert your Wi-Fi credentials. After that, you’ll just plug your USB flash drive back into the printer and complete the configuration process.
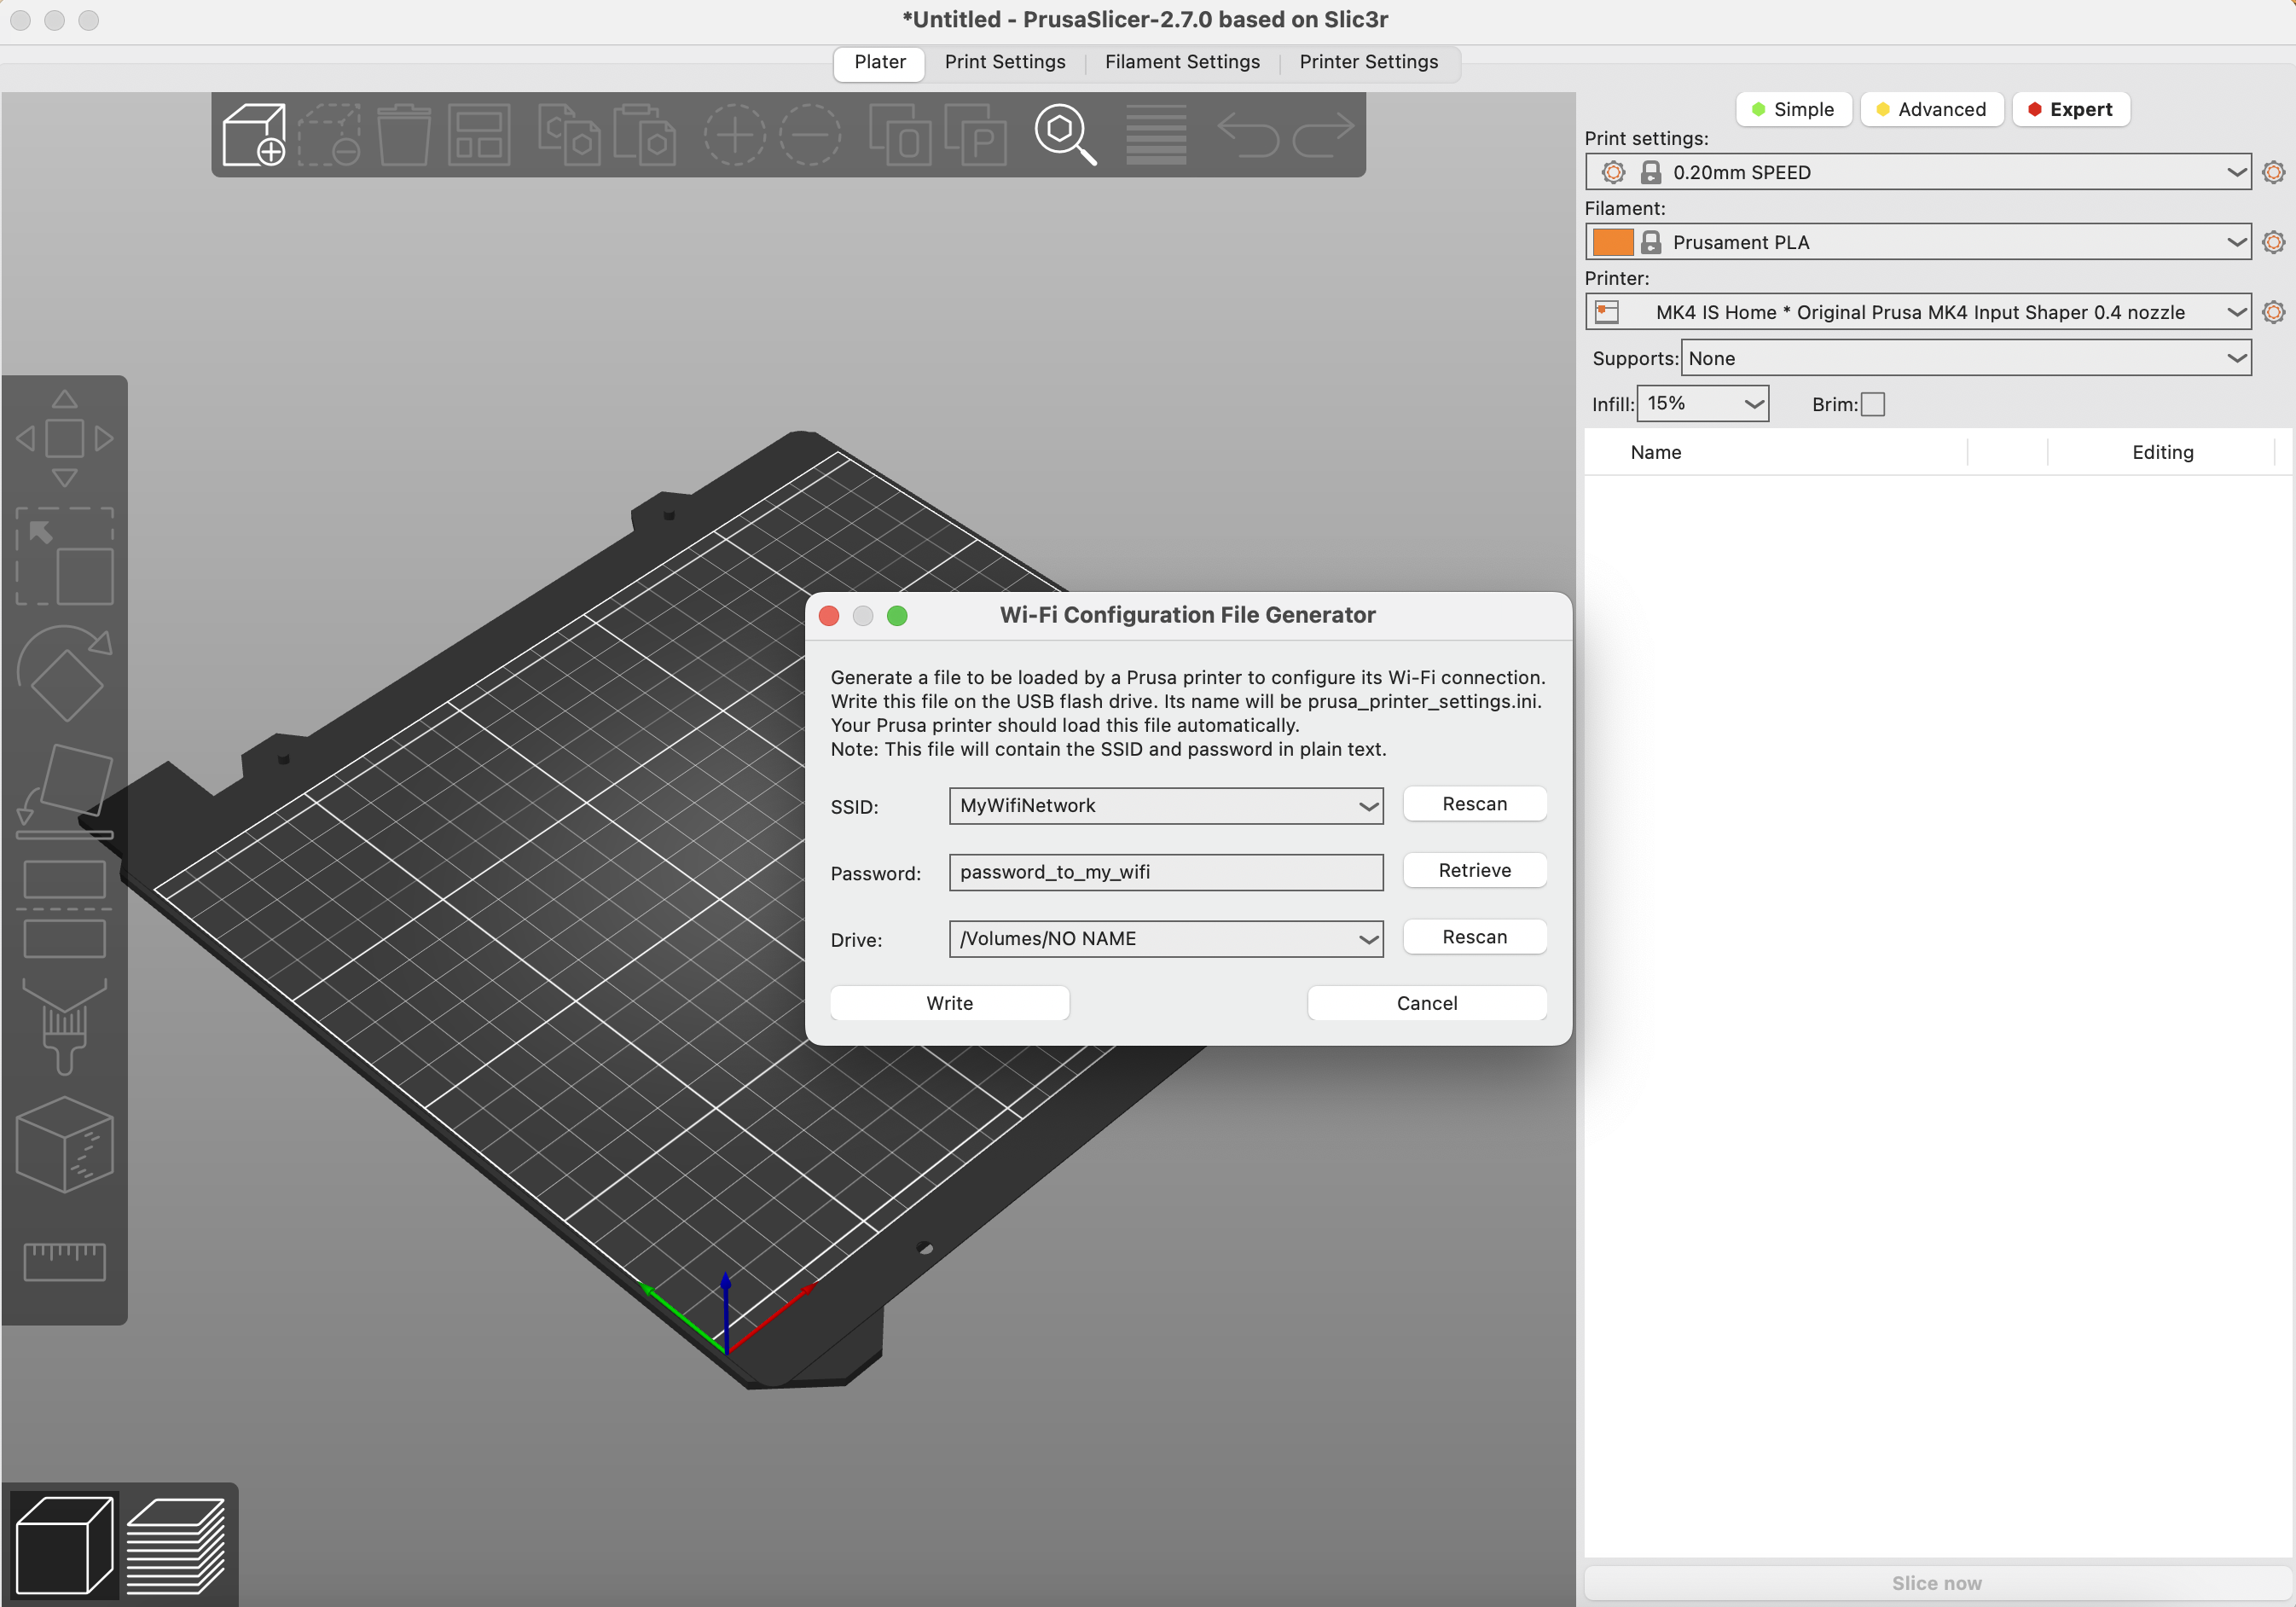 PrusaSlicer can help you with connecting your printer to the Wi-Fi network
Notifications
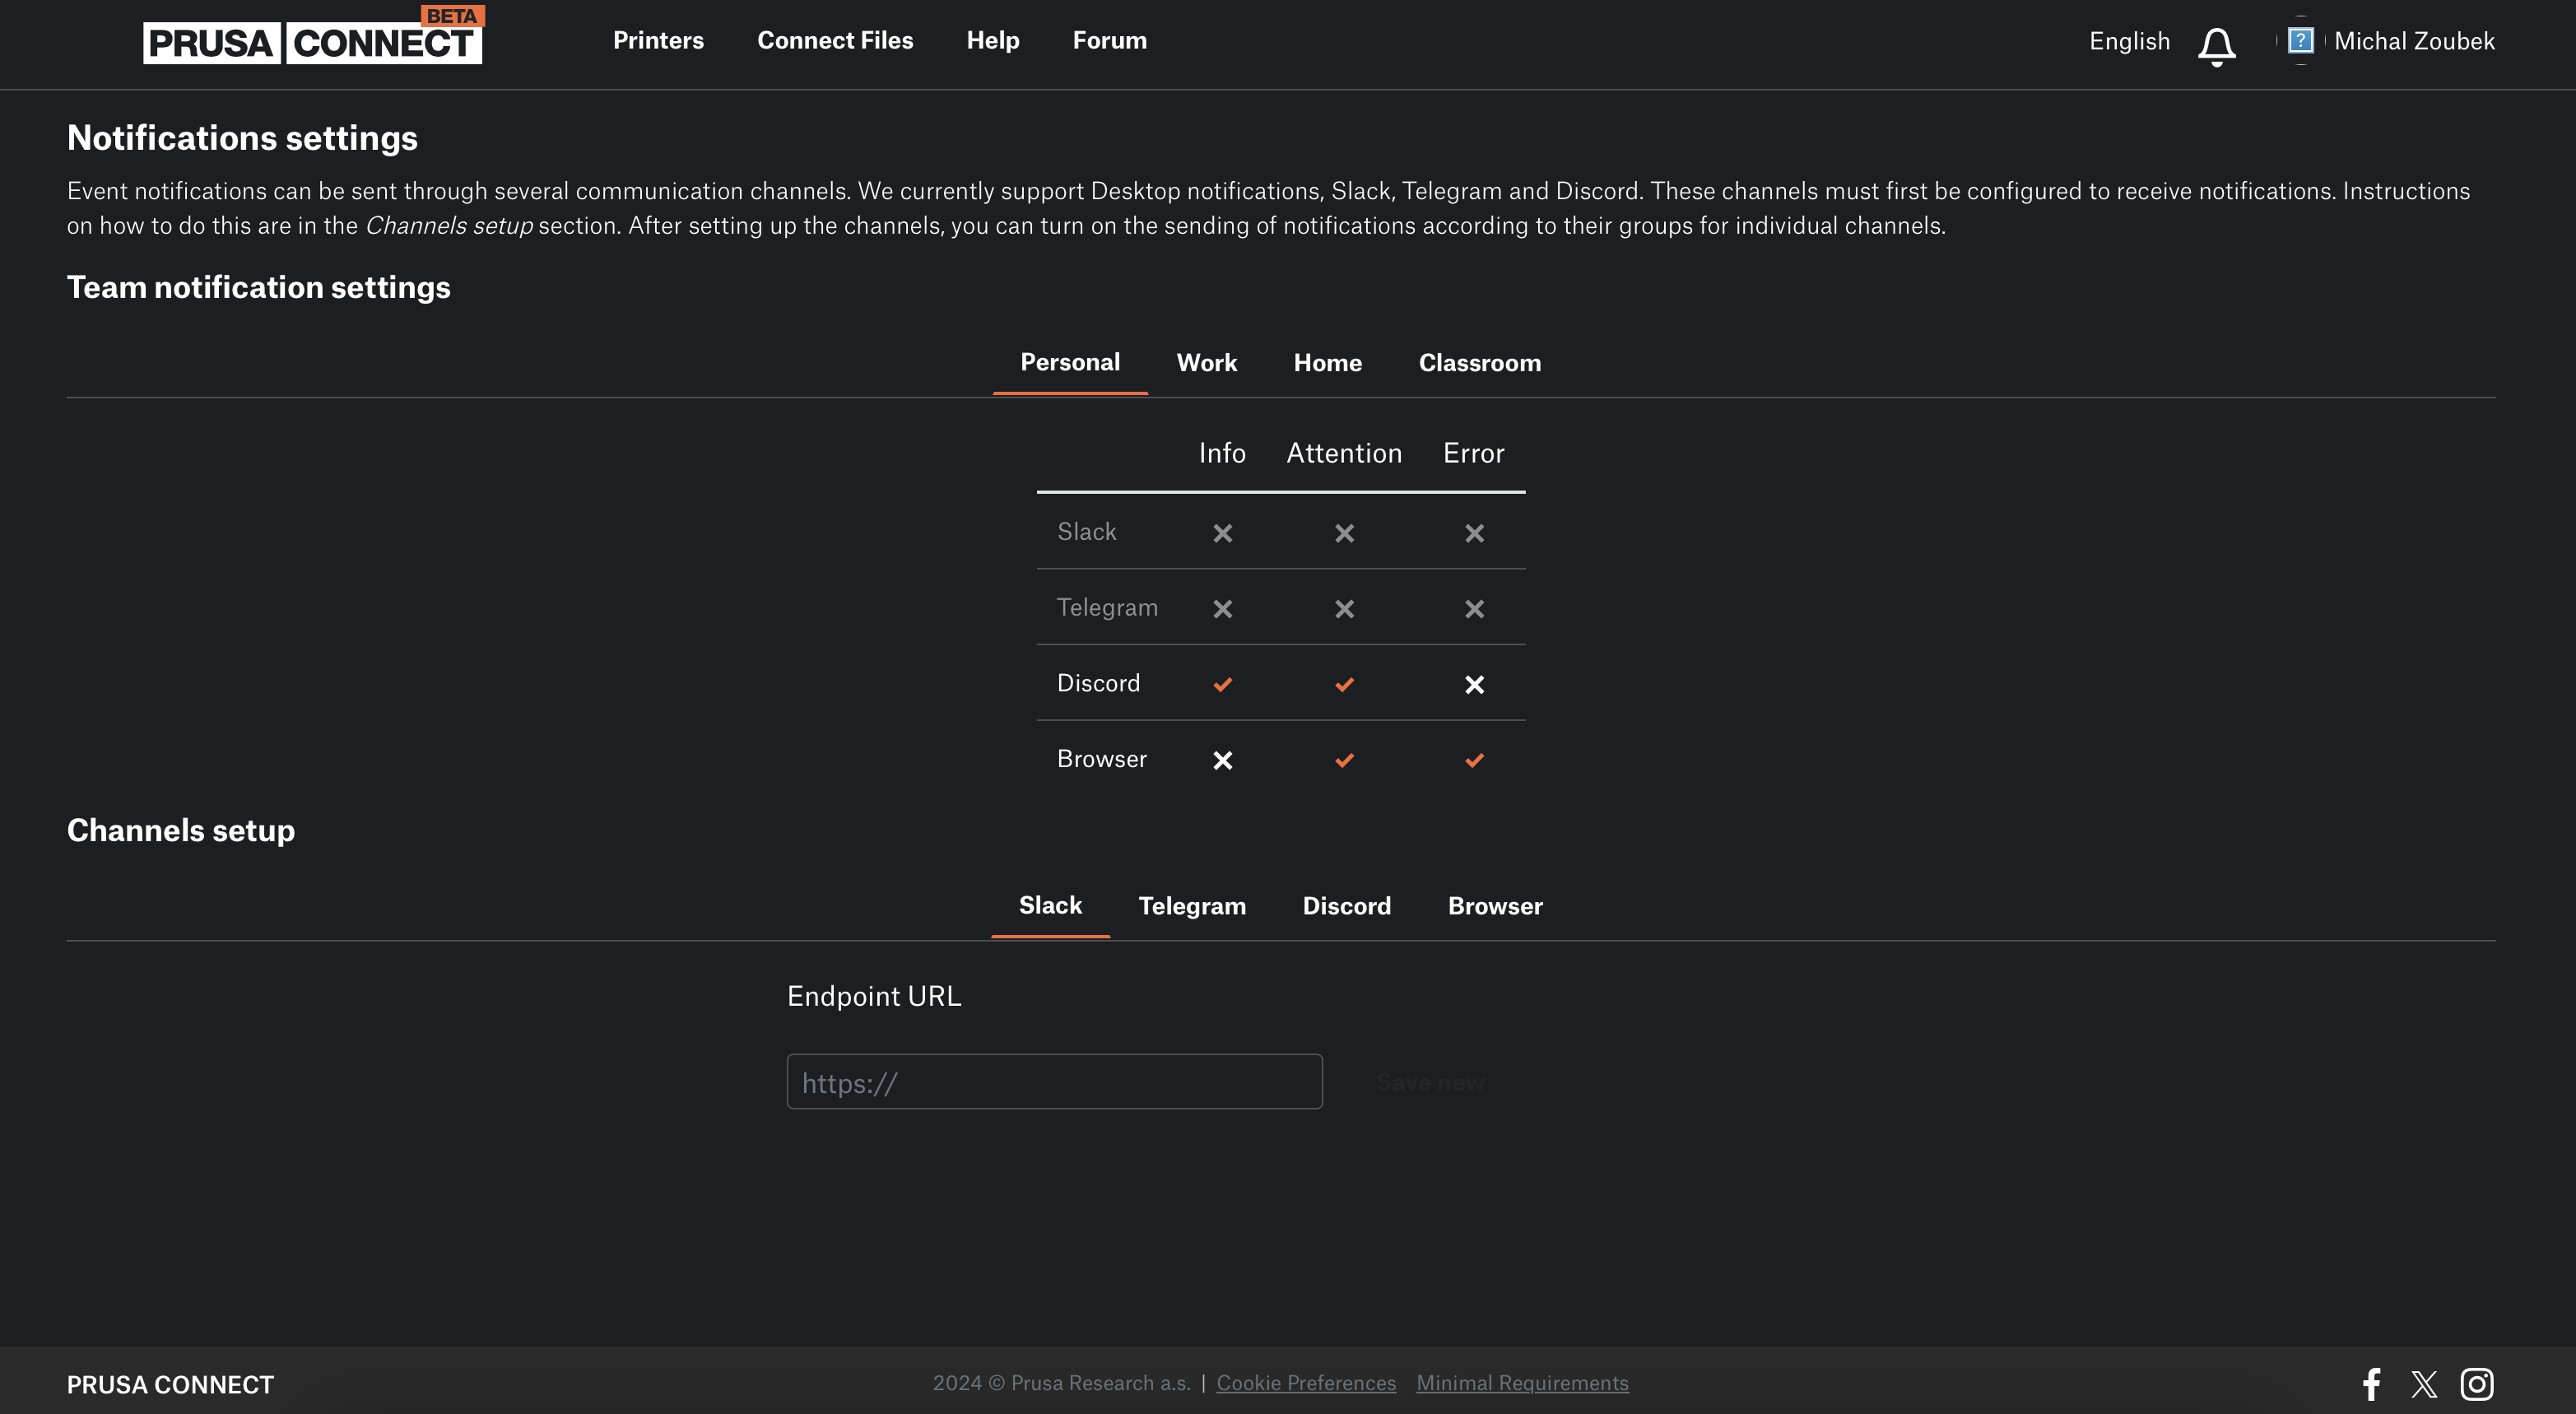
Prusa Connect can send you notifications about the current printer status to your favorite communication service like Telegram, Discord or Slack, and also to your desktop. You can choose what type of status you would like to be notified about, and notifications can be set for each team separately. Information on how to set up notifications for each service, as well as other instructions for Prusa Connect, can be found in our Knowledge Base.
Our plans for the near future
Prusa Connect is under continuous development, and we’re currently working on adding more features to make it even more user-friendly. For example, support for the MMU, remote control of the printer’s interesting Cancel object feature, which allows you to skip printing one of the currently printed objects, delayed start of the print and much more, including support for the Original Prusa SL1/SL1S Speed printers.
We welcome any feedback! Our colleagues read and discuss your comments and suggestions with the development teams that are actively working to implement them in Prusa Connect and other parts of the Prusa ecosystem. We also have a large and active community that can assist you with any other issues.
Give Prusa Connect a try and bid farewell to constant juggling with USB drive and SD card, standing by the printer and checking the print job status, and unleash your creativity to come up with the next great project. Happy printing!
There has to be a way to delete multiple files at the same time. There is in Connect Files, but there isn't in Printer Files.
Are there any plans to make the MK4's USB drive available to Octoprint for gcode storage/printing?
Love Connect but the lack of ability to connect a webcam keeps me using Octoprint.
Hello, we are working on it. Hopefully, it will be implemented soon.
Jakub Kučera – Prusa Research
Wyze web cameras are easy to install, low cost, and you be a great and easy way to link a camera to Prusa Connect.
Which Wyze model is best to use for Connect?
I found it VERY easy to add a camera. One of the tabs across the top is [Camera]. Then click [Add camera], scan the QR code with your camera (on your network) and it gets added. Nothing else to do but position your camera where you want. I was surprised how incredibly EASY it was!
I used an old iPod that had no other useful purpose.
As someone who was a skeptic about remote control of a printer as you need to be there to nurse the machine i will say that prusa connect has changed my mind completely as i am using it constantly.
My own wish list for Prusa connect is
Give printer failure messages instead of just "needs attention"
Be able to change the time on the trend charts
i use an old smartphone for a camera and would like a better solution
The pre-flashed SD card is tempting but if i have an SD card and a Pi then I'd like a way to use what i have in an easy manner
So i give prusa connect 7 out of 10 just now
A few tweaks and it can easily be 9 out of 10
However
The recent tour of the factory by strange parts gave a teeny weeny glimpse into what your own version of print farm software can do and if that doesn't become a product or a service i'll be surprised
and you are heading where i think you are heading then it will be game changing for the 3D printing space
BTW, notifications for communication services (like Telegram or Discord) already works pretty well! 😉
An plans on smartphone app like b*mb*lab? Would be nice to send prescliced models from the phone or simply keep an eye on ongoing prints and get notifications there. Thx
The web interface actually works quite well on a smartphone. Not sure about notifications though.
Prusa connect is great. And I love it! Here is my WISHLIST:
1. Nozzle size selectable on physical printer
As it is right now you will have to use configuration as seperate printers when changing nozzle size. Or how I would love to be able to have one physical printer selected and a dropdown menu in my slicer to select nozzle size!
2. Implement OTA firmware for mk3s+ even if it is implemented using normal firmware flash or maybe by using the Katapult/flashtool (former known as Canboot)
3. Oh how I wish I could add my Voron
I second that first point, but not sure how realistic it is!
I would personally love the API extended so I can obtain the printer/print information in an automated way. I regularly stream 3d prints and would like a better way of showing the information on stream than capturing a piece of the browser window (which often stops updating during a print and which also means it's pretty complex to stream 2 prints at the same time). Alternatively a configurable view would work as well but the web interface stops updating after a while.
I'd like that too. You would have the option of integrating the printer data into individual websites or, for example, to display it on an external status display using Arduino/ESP.
Integration of RTSP streams as a video/image source would be very much appreciated. The unsatisfying camera integration is the only thing that feels very un-prusalike in the otherwise very good solution.
I've made a Docker container that lets you use RTSP cameras with Prusa Connect 🙂
https://github.com/jtee3d/prusa_connect_rtsp
I'm fine with Prusa Connect. I don't want to access the printer controls remotely though. I have a wyze camera and a smartplug, if something goes wrong and I see it, I just cut power to the plug. What I do want is the ability to record quality time lapse videos of prints without having to lose functionality in my mk4 by running octoprint.
"Original Prusa Connect Camera" Sign me up. I'd still like the ability to use it with just PrusaLink and not Connect, but hey, better than the solution I have now.
I'm exited too for this one, hoping it's going to be a decent quality camera with a great low light resolution.
Currently I'm using a Tapo cam and would have loved for Prusa connect to support RTSP cameras feeds.
I've made a Docker container that lets you use RTSP cameras with Prusa Connect 🙂
https://github.com/jtee3d/prusa_connect_rtsp
I have switched from Octoprint to PrusaConnect because I much prefer the UI. For my small farm of six printers, it does a great job, and I'm glad to see that the pace of development has picked up. I was a fairly early adopter and at times was very concerned about the speed (or lack thereof) of improvements.
I understand that many people want better camera support, which doesn't matter to me as I use Wyze cams and the Wyze app. But what is in dire need of improvement is file management.
"just like in a regular file manager"
I almost spit out my coffee. There's no way to create directories for PrusaConnect files but you can on the local USB storage. Once you have more than a handful of files in PrusaConnect, it becomes a real mess. And while you can create directories on the local drive, you can't actually move files around. Multiple file selection? Works on PrusaConnect but not on local files. This all looks like two different teams working on file management for PrusaConnect and local, with no attempt to consolidate on a common set of features.
I agree about the file system. Providing true file management capabilities in prusalink is important to me.
Machine control when? I want to tell my printer to unload filament, preheat, autohome,…
You can do everything you just said except for unload filament.
You can actually do that already! Simply click on the material in the printer's summary on top.
That is a well hidden feature 🙂
Great job, when will we be able to host our own instance of prusaconnect? I'd rather not connect my printers to the internet 🙂
I second this suggestion.
As the article above, you can just use Prusa Link without Prusa Connect if you want to run it on your local network only.
Personally I think that it feels very safe as you can use Google Authenticator.
I'd rather have a self hosted Prusa Connect and be in control. It is safe in transit (although it isn't TLS 1.3), and Prusa probably won't do anything nefarious, but if they wanted to, they could.
Even though I understand Prusa Link can't be the same as Prusa Connect due to it being hosted on the printer board itself, is so ridiculously useless for anything other than sending a print that I'm 90% sure it's that way so more people would use Prusa Connect.
Still using octoprint as you don't have support for timelapses on those cameras.
If you add ability to use more cameras and all can build a timelapse of same print from multiple angles, you'd have my attention.
There is support for multiple cameras per printer already, but timelapses, yes, they quite high up on the priority list. 🙂
About the camera that you are developing. Can you tell us in what quarter an year this is planned to appear? Im waiting for such solution… But want to know if a can wait or not
@Mikolas Zuza
can we have who the author of an article is as i don't know what michael does within Prusa
Michal actually worked on PrusaConnect and PrusaLink as a programmer, but since both his passion and great talent is creating content, like writing this article, he recently joined our Content team. 🙂
Byl jsem skeptický, ale teď tiskárnu MK4 ovládám pouze přes Connect i když mám tiskárnu hned po ruce. Super BETA verze !
Only TLS1.2? All new projects should be using TLS1.3.
We at wolfSSL have an open source solution for not only TLS 1.3 but also post quantum algorithms, as well as the optional Chinese SM Ciphers required for doing business in China.
In addition to what others have said, I'd like to have an android app similar to Printoid, which is how I control my printers currently. Printoid makes it easy to control all my printers running Octoprint right from my phone while providing push notifications for print finished, bed cooldown, thermal runaways, etc. The integrated camera widgets also let me keep an eye on prints without the app being open all the time. PrusaConnect still has a ways to go to get to that level of usability.
File name length is a problem I have seen, which is not an issue with Octoprint.
I'll second this comment. I would appreciate being able to upload gcode files to Connect that are longer than the current limit.
Small thing about the article: the (EEC) in "elliptic-curve cryptography (EEC)" should instead be (ECC). Same goes for "EEC 256-bit key"
Prusa Connect is really great and I really appreciate that you made it available for older printers via the raspberry pi. I'm using it on my MK3S+ and my XL and it runs really smoothly.
For Mac users (and I'm sure you have similar options on PC), in the latest MacOS you can turn an URL into an app so you can have Prusa Connect as a standalone app instead of having to find a specific browser tab all the time.
On the phone I use the Opera browser exclusively for Prusa Connect, so it's like having a special app. But a native solution would be great for iOS.
A lot has happened since the first beta for the Mini in 2020! It was pretty useless back then hehe. Bravo!!
Prusa connect is written as a PWA, so if you add it to your home screen in iOS, it will feel just like an app – even notifications work like an app!
Fantastic! Thank you for making me aware of this, yes it's totally like an app! Perfect!
> If you publish your solution (e.g. on GitHub) or offer it to others as a product, let us know about it!
I built my own minimalistic camera solution reusing my old PrusaLink Pi Zero with USB hub (that I used on my MK3S+) when upgrading to a MK4. It's on GitHub here: https://github.com/firetech/ConnectCam/ 🙂
I really like Prusa Connect, originally I ordered RPi Zero for Octoprint, but it has gotten so delayed, that I got used to Connect. Anyway, maybe I missed it in the article, but please work on the browser notification. I installed the page as an app on my phone and would really appreciate it to get the notifications about filament runout etc. There is one small but annoying regression recently. After I launch the "app" I always have to click login, although I don't have to click Google login, it just log right after the login.
I'm also planning to explore your Camera API and I think it would be great if the camera could also send notifications via your API. Imagine having an old Android phone that can not only send pictures, but run a ML model that would detect problems with the print ie. spaghetti. It could also use a mic and for example detect if an fire detector is beeping.
Please add a dummy printer for testing, I don't want to destroy my current setup just to see that I don't want to use Prusa Connect
Hello, thank you for a great idea. I will pass it on to the development team.
Jakub Kučera – Prusa Research
I need to buy a pi zero and get this set up on my Mk3S. Feature idea relating to the camera: automatic spaghetti detection via image recognition. Similar to what the spaghetti detective and octoeverywhere plugins provide in octoprint.
Will we be able to eventually self-host Prusa Connect?
I like Prusa Link being local and I love Connect's view of your whole farm, but not being able to manage my farm when the internet goes out is a bummer.
Also local webcams for Prusa Link.
I've found the platform to be quite buggy. I get 502 errors trying to get cameras to send pictures frequently. My MK3s report status of next filament change (M601) nicely in the UI…. until the last change, when it gets stuck at "1m". My MK4s don't report that status at all, no no idea when filament changes are coming up. Many operations are slow to respond – eg resuming a print often take 15s after clicking the button. There's no way to mass or bulk queue prints from USB/SD, and we found the "Set Ready" button doesn't work on the home page, you have to go into the printer detail page to use it.
It would be nice to know where to report these issues as the forum seems to be just for Prusa Link not Prusa Connect.
What's the best way to get help with Prusa Connect? I've tried posting on the forums (https://forum.prusa3d.com/forum/bugs-errors/mini-firmware-update-stuck-on-waiting/#post-690558) but haven't received a response.
Hello, you can contact our customer support via email or online chat. They will be happy to help. https://help.prusa3d.com/article/customer-support_2287
Jakub Kučera – Prusa Research
Prusa Connect revolutionizes 3D printing with its seamless network solution, providing unparalleled remote control capabilities that empower users to effortlessly manage their printers from anywhere. A game-changer for efficiency and convenience in the world of 3D printing! It would be nice to know [https://www.3ddrucklife.de/en]
I am wondering, if the mobile UI of Prusaconnect is good enough to use it as a touchscreen and make it run as a web page in full screen kiosk mode on LineageOS Android for RPi or maybe Raspbian itself. I just finished upgrading my MK1 that was upgraded to MK2 to a MK2.5S+ with MMU3. I also added Pixel 4 touchscreen with RPi 8GB running Octoprint and Octodash. IThe touchscreen looks really nice and is very useful. So I wouldn't want to give it up.
“XL printer to the network via ethernet, just plug in the cable and you are good to go”
Where does one plug in the cable on the XL?
nice to see some progress! One of the few reasons that I'm still using octoprint is the spool manager. I use it to keep track of the remaining filament on my spools and to get warned if i try to use a spool with not enough remaining filament for the next print. i would love to see this in prusa connect! anyways, keep up the good work and happy printing 🙂
Started using Prusa Connect yesterday. Overall it is a nice system. That I may drop OctoPrint and fully switch to Prusa Connect. But with two major problems – camera and notifications.
Camera support is, well, "bad".
– only still images are supported. I don't see how do you plan to support decent video streams (like 1080p 15fps+) and timelapses without additional local hardware. I can imagine that doing that support on Prusa cloud servers would be a very expensive.
– for now we can use camera API. Camera API which is very limited. Basically what we can do is push image every n-seconds. And unfortunately our scripts have no idea what printer is doing (public API doesn't provide such info). This means that we, for example, can't optimize and push image every 60-120s if printer is idle and when it is printing push image often like every 5-10s. My printer + camera is "on" 24h, so that's huge waste of resources (network bandwidth and data transfer; prusa cloud servers processing etc) if I push image every 5-10s for 24h every day. I see that API can even accept images every ~1s but camera web page in Prusa Connect is unable to deal with such frequency (doesn't update every 1s).
Notifications – no phone notifications (unless done via discord or telegram). There are various systems like pushover, pushbullet, gotify and tons more but no integration in Prusa Connect. What would be probably simplest to implement is to push to custom user specified https:// server. That would be a great addition. That way I could push to my own server and do integration there with whatever I would like.
ps. I also don't like that it gathers my wifi SSID, local IP, printer wifi mac address and keeps that in cloud.
So since Prusa states they're committed to open source the server code is all free & open source right? As much as I want to print everything in the cloud…well I don't.
The prusa connect it is really nice, UI is clean, it s well refined.
Although I am missing a bit of Camera functions, remote access to the camera to see live the print, not just 10s refresh pictures. Aswell as the possibility to create timelapses, just through SW like in octoprint.
Any chance to open source the API? Would love to build a tool based on it but currently only finding 403 Forbidden docs linked on Github
Just got this set up here at work and it's great so far. Still getting oriented. A couple requests for future updates: 1) A notes section for each printer for keeping tabs on key points of maintenance history etc. 2) An option to run a remote self test might be handy for gaging printer readiness remotely.
until this supports ai print failure detection I will be sticking to octoprint/obico
Would be awesome if I could add a camera to a "location" instead of adhering it to a specific printer. that way i could monitor multiple printer with the same camera.
I know I could just set up a camera for a specific printer that does that, but it would just be that much more awesome if i could set one or potentially multiple cameras up at a "location" and then assign the cameras to the specific printers (plural) that the specific camera covers.
Thanks for the awesome software you made thus far tho.. big fan.. 🙂
Sometimes the printer is still running, but I need to quiet. Prusa Connect should be able to activate "Stealth Mode" and should be able to switch off all lights in a single control.
Nice would be the option to pass the preheating process.
For those of us using Prusa Link and not onboard with cloud services, could you add a simple way to reference camera URLs in the webpage that Prusa Link serves up to the browser?
This is what I envision: run some sort of camera server on your local network that hosts some number of cameras per server. Think a raspberry pi that could handle 3-4 cameras per pi. Those cameras may be pointed at multiple printers, one part of a printer, filament dispensers, etc. But each camera is a different URL for the stream.
In Link you would assign one or more URLs to the printer. Each URL would be a stream window embedded in the camera page for the printer. The browser would be showing the printer stats alongside the video streams for the assigned cameras. The browser would be doing the work of showing the camera feeds, not the printer. You could also make it so clicking on a feed would show you a zoomed in view of the stream to check things more closely.
This seems like a small thing that could make link so much more useful, making it so the printer info and camera feeds are in one pane of glass.
https://moneyrecoverysyste.wixsite.com/fu
ndrecoverysystem
Whatsapp livechat: + 1 (319) 429-9396
You can get your funds back from any online imposters. Report your case to the site above for a successful recovery.
> We take the security of your files and data very seriously
> For the telemetry and command communication between the printer and Prusa Connect, we use TLS1.2
Forgot to mention that PrusaLink has a major vulnerability since 5 years and still uses HTTP to transmit your passwords in clear text?
https://github.com/prusa3d/Prusa-Link/issues/769 – "very seriously" closed as wontfix
https://github.com/prusa3d/Prusa-Link/issues/993 – "very seriously" closed as not planned
https://github.com/prusa3d/Prusa-Firmware-Buddy/issues/4215 – no progress
2. Giving a false sense of security by providing misleading statements: https://help.prusa3d.com/article/prusalink-sl1-sl1s_146094#security
> The system is now equipped with an HTTP digest for improved printer security
There's zero improvement, it's not even security by obscurity. Anyone can see the digest and use it to authenticate as if it were a password.