


For the past few months, the 3D printing community has been poking at a very interesting question: what if a multi-material printer were not limited to the colors physically loaded on it?
And we must say it right now: This is a really awesome way to expand your 3D printing capabilities! In this article and video, we’ll show you how to print with dozens of color tones on any multi-material printer and how we made that possible. It’s a proper deep dive, so get comfy – you’re in for a ride!
Let’s talk about the community – because that’s where it started. Solutions started appearing in slicer forks, test palettes, and increasingly convincing prints. Ratdoux’s OrcaSlicer-FullSpectrum showed how virtual mixed-color filaments could be created by alternating thin layers of differently colored materials. Justin H. Rahb’s filament-mixer helped predict what those colors might look like, and community projects like PeggyPalette made it easier to compare and share results. It was one of those moments where you could feel an idea catching fire in real time. These projects are all amazing and truly demonstrate the benefits of an open-source approach.
And honestly, we got excited too. Inside Prusa, the idea spread fast: let’s create an easy way to take a couple of filament spools and let people print in dozens of beautiful colors. The teams working on Prusament, PrusaSlicer, EasyPrint, and OpenPrintTag are always pulling in the same direction, and this was the perfect project for them. We calibrated a new, more accurate color mixing model against measured FDM prints, connected it to real material data through the OpenPrintTag Material Database, brought the workflow directly into PrusaSlicer and EasyPrint, and started preparing a dedicated Prusament CMYKW set to make the whole process more reliable from the first print. Why CMYKW? We’ll explain in a second.

The result is a much easier workflow that makes printing in color feel more like painting rather than programming, with more accurate color previews than any existing solution.
Our color mixing model is published under the MIT license, so the community can inspect it, use it, test it, improve it, and build on it just like we built on the work that came before us. We call the model Prusa ColorMix to distinguish it from similar projects and products.

How does it work?
So, how is it possible to print a model that looks almost painted – using just five filaments?
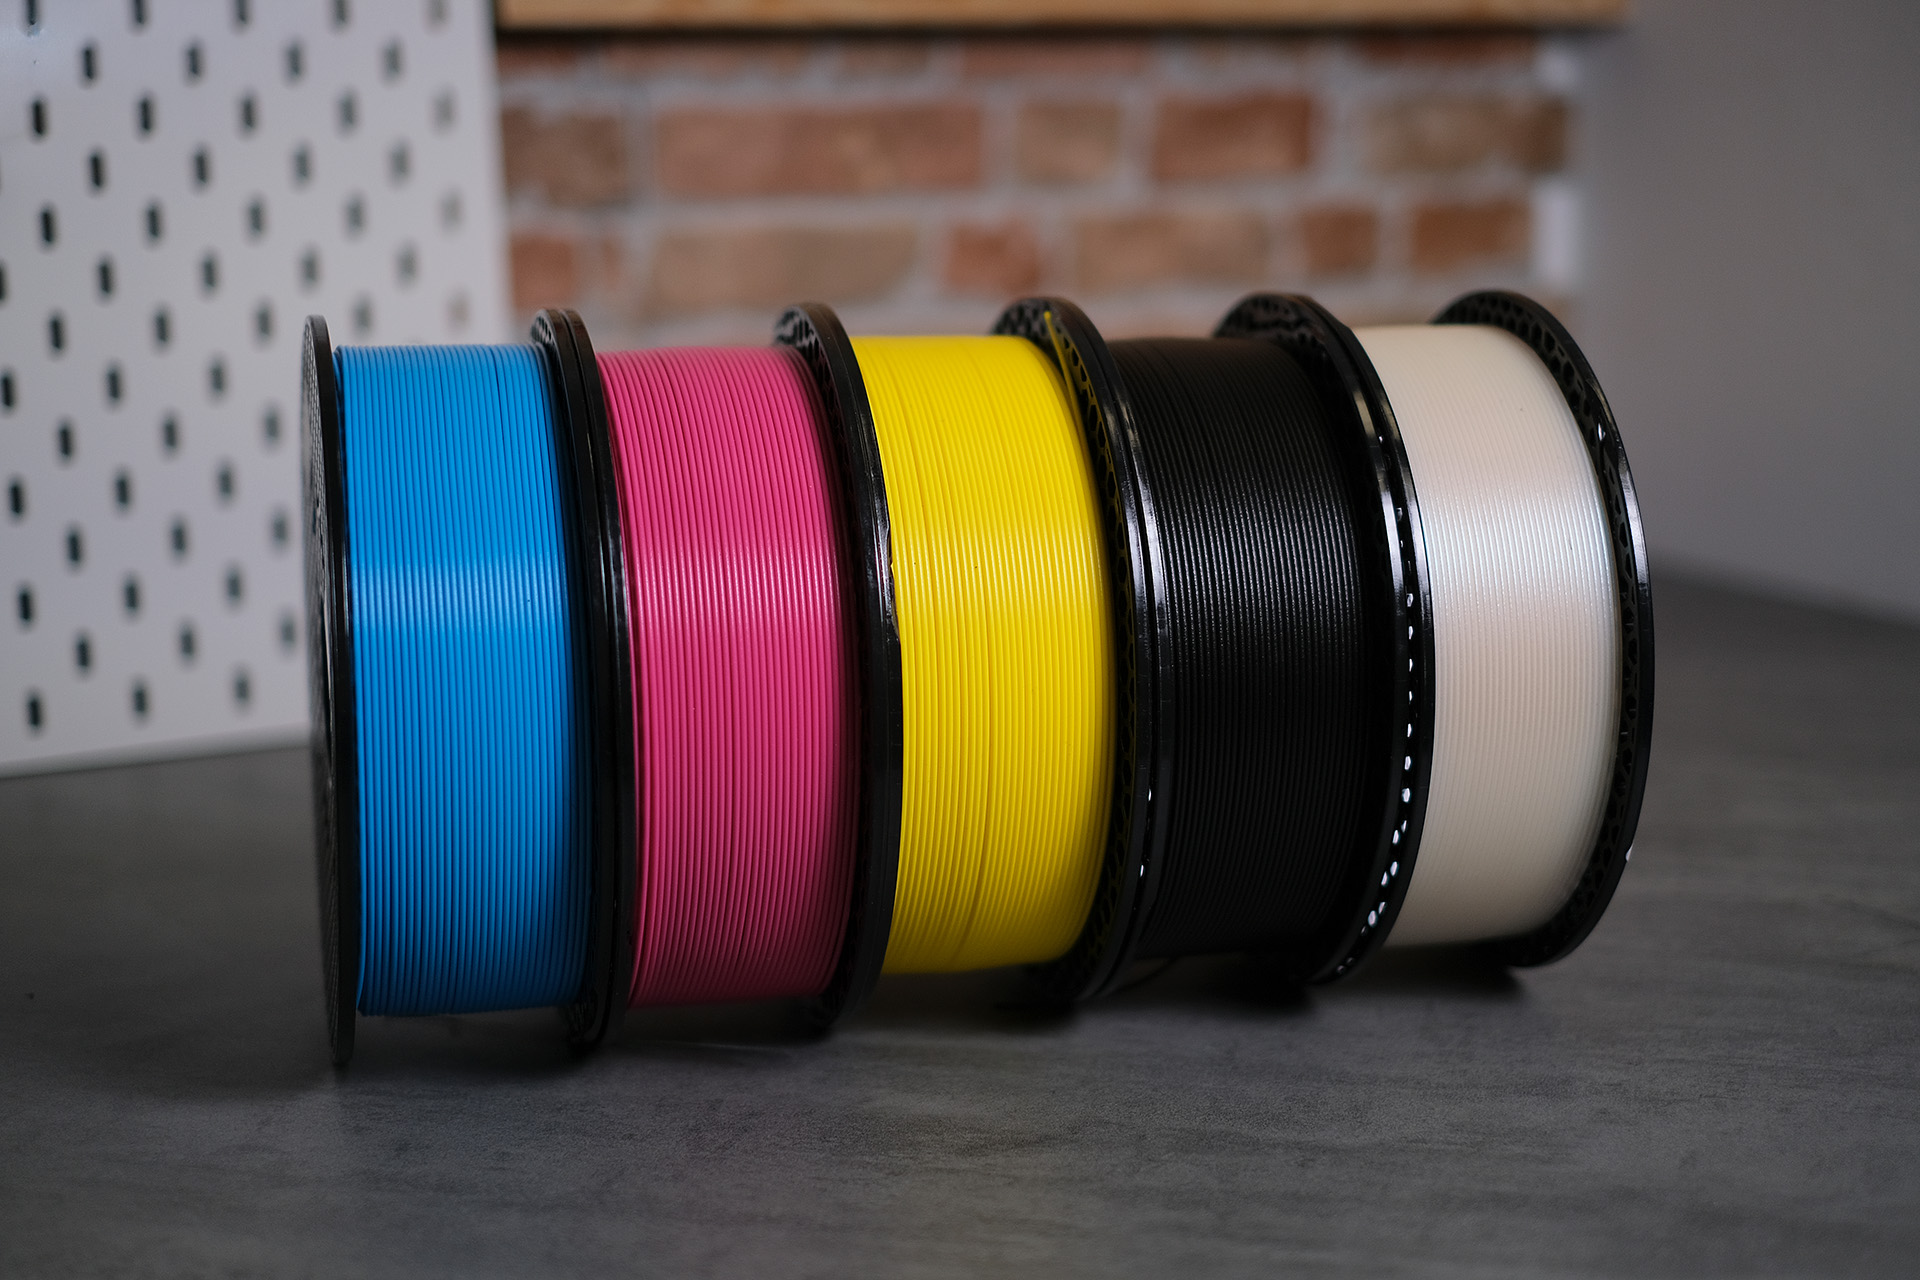
The principle is well-known from traditional 2D printing. It uses Cyan, Magenta, and Yellow (CMY) inks in a method called Halftoning, which allows a printer to produce continuous tones by varying the size and spacing of small ink dots. Printing CMY dots in equal size ratios creates black. Inkjet printers have an additional black (K) ink to save on ink and use the CMYK color model. They usually print on white paper, so white is just the absence of any printed color.

A color perceived as cerulean is a blend of cyan, magenta, yellow, and black inks, as observed under magnification. (Wikipedia)
In 3D printing, there is no paper, so the existing models work with CMY colors and white (W). Because of the nature of FDM printing, we don’t use a combination of dots, but we alternate the colors by layer. A model with a 0.1 mm layer height that has all odd layers white and all even layers black appears grey from a normal viewing distance. This neat trick is possible because of the limited resolution of the human eye, which can’t see details below a certain size. Mixing the CMY colors is predictable because it is known from 2D printing.
Behind the scenes
Let’s hear about the Prusa ColorMix from the people who worked on bringing it to you.
Meet Barbora Marsikova, from the team of Prusa Academy, who fell for the full spectrum on the way to bringing multi-material printing to 3D printing beginners.

Why I started this
I first heard about Full Spectrum from our multi-material expert from Prusa Development. When he said this is the future, I believed him. I kept an eye on the community trying out the existing fork and used every opportunity to internally promote it. But it really took off once we started printing test samples with the Easy PLA CMYK Filament Set and the Prusament Galaxy Black on the Original Prusa XL. Because everyone who saw it wanted it.
Most available multi-filament systems use four spools in parallel and therefore work in the CMYW mode. But the color mixing never produces a truly black color, more like blueish grey. On the 5T Prusa XL, we were able to directly add black and work with the CMYKW color combinations. By trying out all of them, we identified about 40 color combinations that make sense.

We also easily agreed that we would love to have our own Full Spectrum for the Prusa CORE One INDX. To have a Prusa solution, there were three key teams to get on board: Prusa Polymers, EasyPrint, and PrusaSlicer.
Everybody Loves Color
Prusa Polymers, where the in-house manufactured Prusament comes into existence, didn’t need much persuading. Before we finished testing the CMYKW filaments available on the market, they were already working on the new Prusament colors. Right now, they are tuning the final shades and transparency of the Prusa CMYKW bundle and even preparing PLA Natural Glitter, which can add a glittery look to any existing PLA.
The PrusaSlicer team is working hard on the upcoming PrusaSlicer 3.0 and, at the same time, finalizing CORE One INDX profiles to deliver the best possible performance. They borrowed the test prints cautiously but soon realized how much fun this is. So they happily became part of the movement and were eager to prepare a build for version 2.9.6 already.
The biggest leap forward came when we paid a visit to the EasyPrint & Printables team. They literally dropped (almost) everything and immediately started discussing how to implement the CMYKW slicing in EasyPrint and get it out there as fast as possible.

So, we had both the EasyPrint and PrusaSlicer teams fully on the case, and new features started popping up in the test environment every other day. When the first test batch of Prusament CMYKW arrived, we were able to leave behind all other software implementations of the Full Spectrum and work purely in the Prusaverse.

Developer’s diary
Meet Ondrej Bartas, software engineer from the Printables & EasyPrint team and the main developer behind the ColorMix model.

What we learned trying to mix colors on a 3D printer
These are my notes on building a color mixing model for layer-interleaved FDM. We’re sharing this because we want to help the community adopt full-spectrum printing, not because we’ve solved color mixing.
Why I started this
I want multicolor FDM printing to feel like painting. You squeeze tubes onto a palette, you grab a brush, you mix. The colors are right there in front of you.
It doesn’t feel like that in any slicer today. In Orca and Bambu, if you want a non-base color, you click “add mixed color combination,” pick which two extruders to mix, set a ratio, and repeat for every color. There are preset 3MFs floating around the community that skip this, but they’re workarounds. The underlying experience is still “configure machinery first, see colors second.”

So we’re building two things into PrusaSlicer and Prusa EasyPrint: a color-mixing model that predicts what color you’ll actually get when you interleave layers and a UI that gets out of the way. Load filaments, the palette appears, paint.
This post is about the color model.
How we got here
We didn’t invent multicolor FDM via layer stacking. Ratdoux did, with OrcaSlicer-FullSpectrum. They also vendored Justin H. Rahb’s filament-mixer, a polynomial pigment-mix model trained on Mixbox (oil paint) to predict the resulting colors. Bambu Studio iterated through linear sRGB, then gamma-corrected RGB, and in April 2026, vendored a filament-mixer directly.
We’re showing up with PrusaSlicer and EasyPrint integration now. We got to look at what was available, print our own test cards, and notice something nobody had done yet: the actual calibration of a model against measured FDM prints. Filament-mixer predicts oil paint behavior.
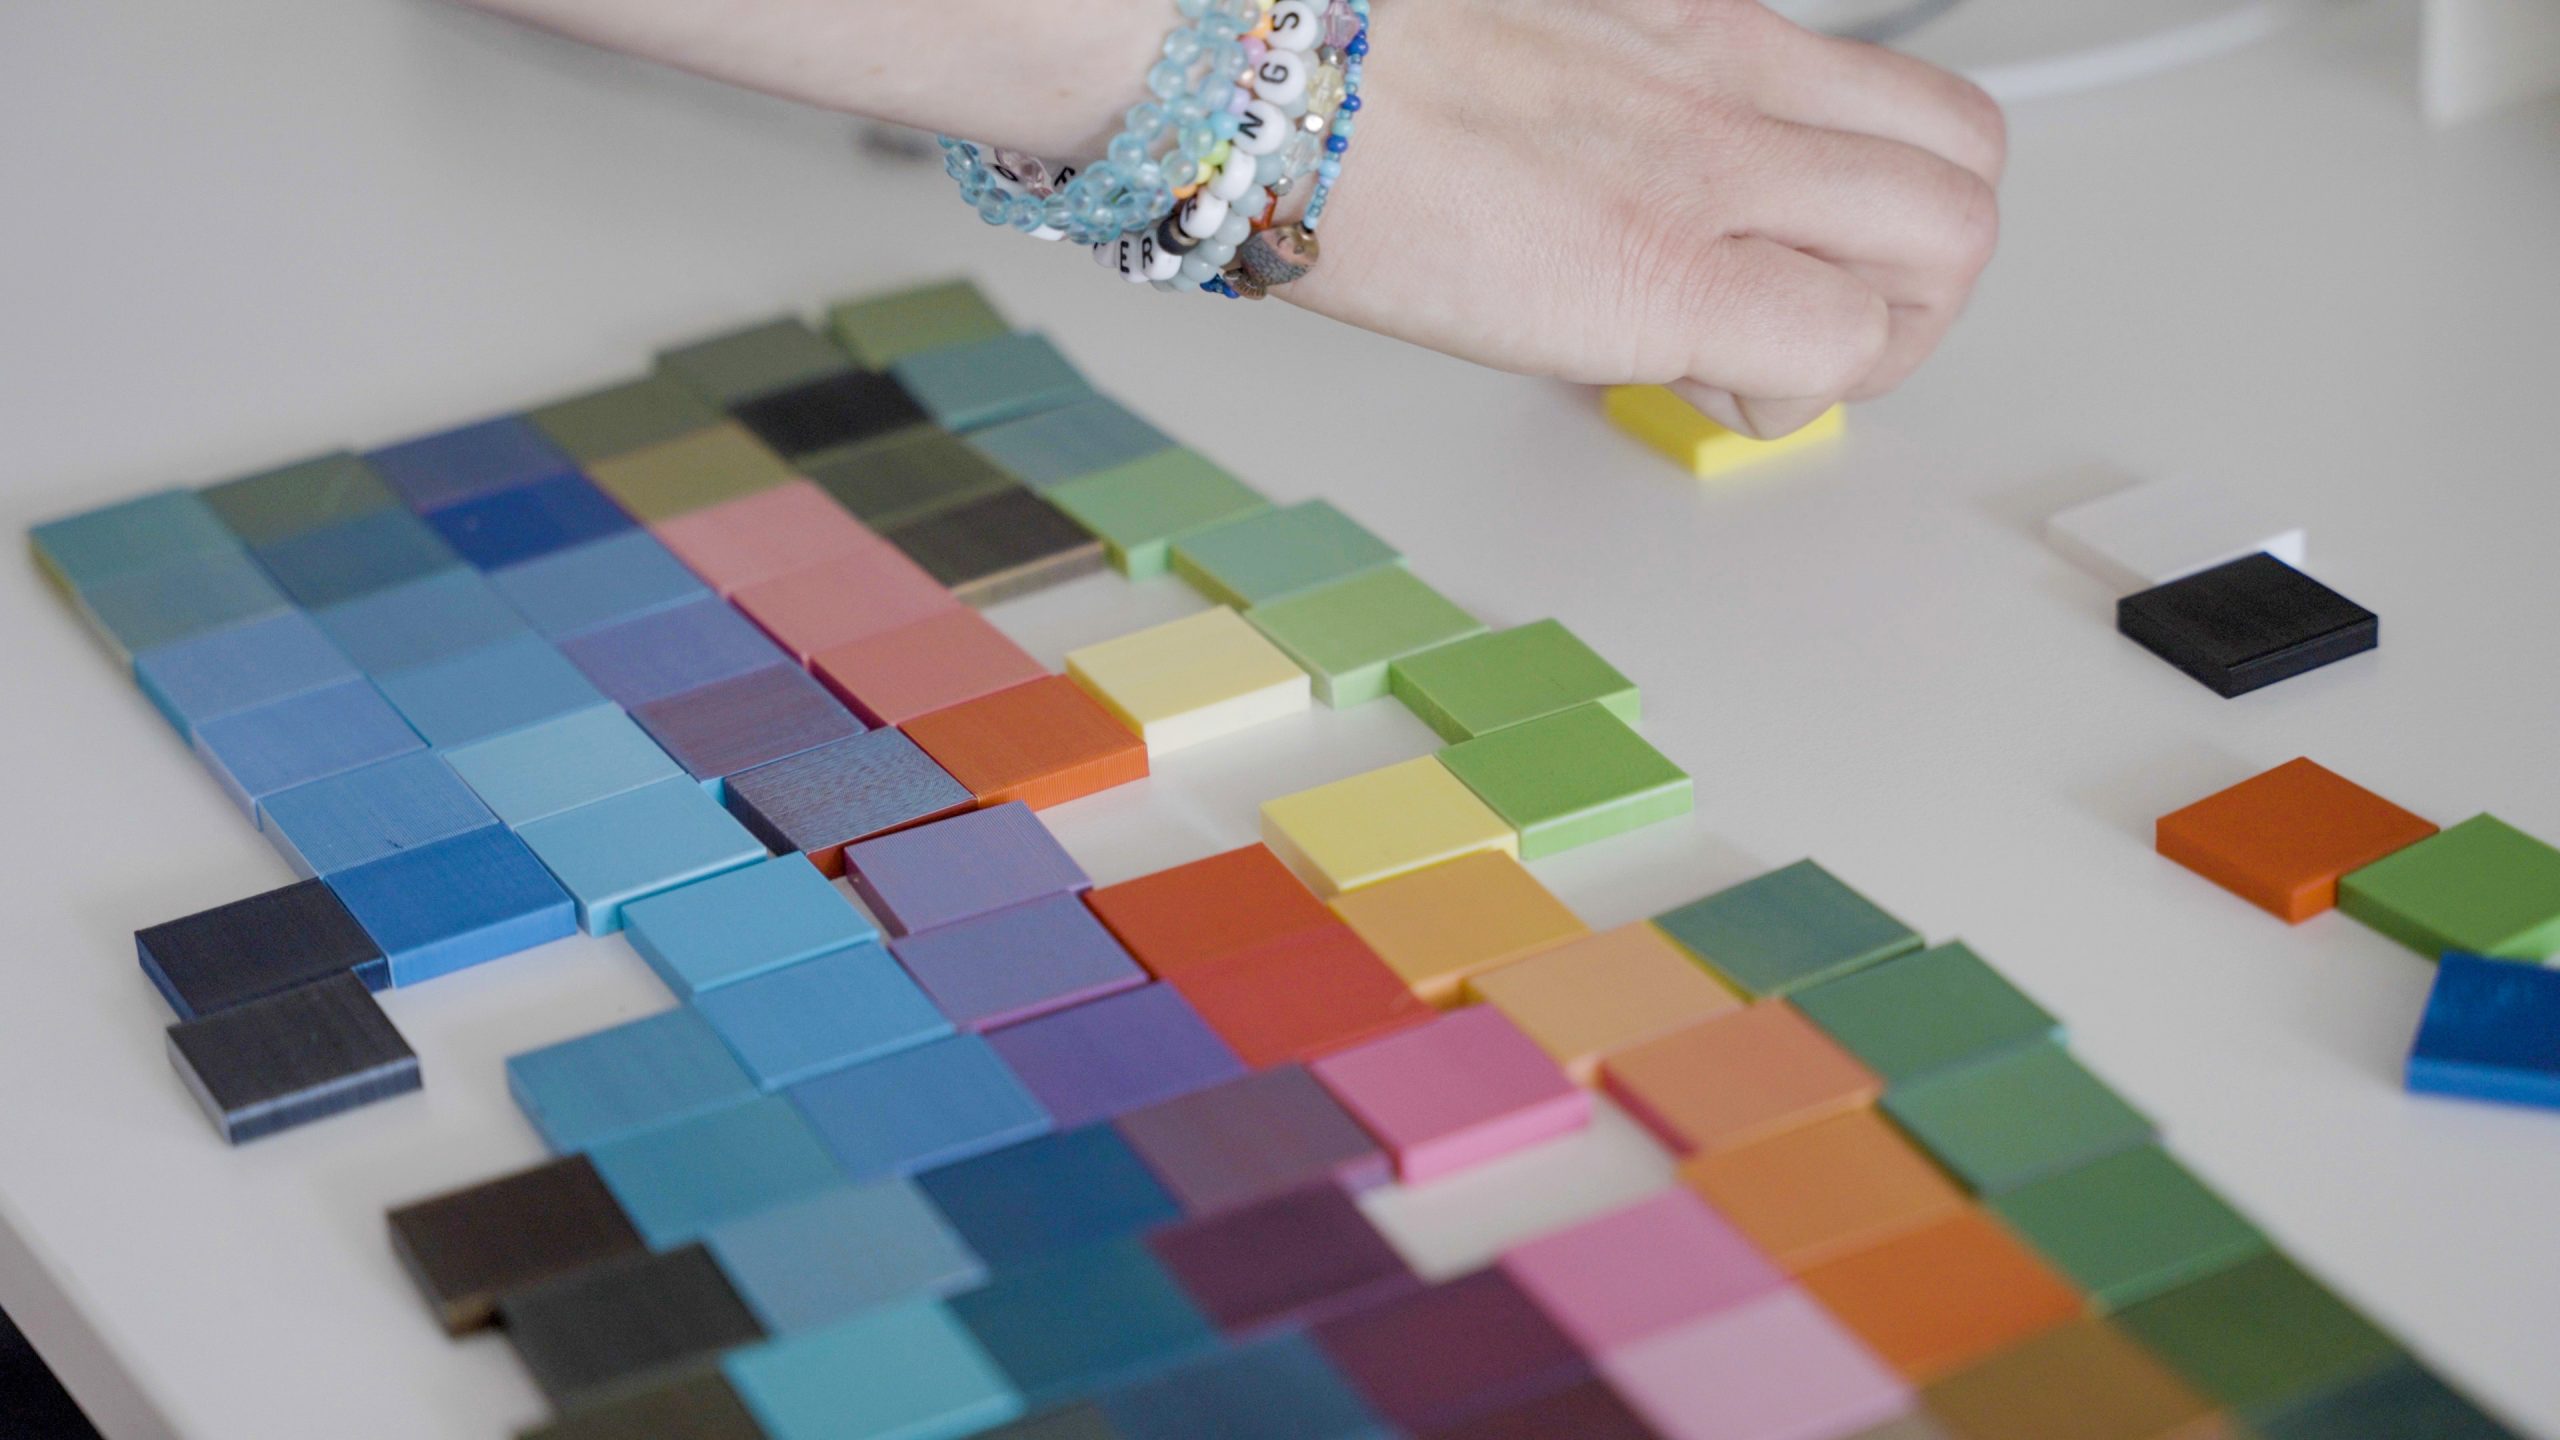
It’s good at what it was trained on; it just wasn’t trained on filament.
So that’s the gap we’re filling: we ran necessary measurements, and we applied corrections to those measurements.
What didn’t work
- Kubelka-Munk. The canonical pigment-mixing model from paint science. It assumes pigments stirred together in one medium, but no consumer FDM printer does that. Bambu AMS, Prusa MMU, Prusa XL and INDX – they all swap filaments per layer. K-M solves a different problem.
- Beer-Lambert / HueForge stacking. This is the one I almost shipped. HueForge stacks translucent layers and looks down through them. Light passes through the top, hits the bottom, and comes back. Then I caught it: HueForge looks at flat prints from above. We’re looking at 3D objects from the side. Layers are adjacent, not stacked in the light path. Different geometry.

What worked
This is halftone printing, not paint mixing. Once I got that, the physics got simpler. Side-view multicolor FDM is spatial optical mixing – adjacent thin layers blending in your eye at viewing distance. Same family as printing CMYK ink dots. The right starting formula is Yule-Nielsen, the standard halftone equation. Yule-Nielsen alone is already roughly twice as good as plain linear-RGB averaging.
The ratios (in %) are 75:25, 50:50, 25:75, and 33:33:33. Not arbitrary. Layer-interleaved mixing isn’t continuous, it’s discrete layers. A 50:50 mix alternates one of each. To get 30:70, you’d need a 3:7 repeating block, ten layers per “pixel” of color, which eats vertical resolution and visibly stripes. So the printable ratios are 1:1, 1:3, and 3:1 layers, and for three colors, there is a balanced ratio, 1:1:1. That’s what we measured, because that’s what the printer can actually produce.

Both toolchangers and MMU/AMS work. Toolchangers (Prusa XL, CORE One+ INDX) are fast but need an accurate XY offset between nozzles. With an inaccurate offset, the color of the printed object is inconsistent. MMU/AMS (Bambu X1C, Prusa MK4S+MMU) has one nozzle, so no offset to worry about, but every color change is a purge cycle. The model doesn’t care which architecture you have. It predicts what color you get from a ratio of layers.
The correction stack
Once we had measured prints, the residuals from Yule-Nielsen showed structured errors. Predictable patterns, not noise. So we picked them off:
- Real prints come out darker than the math says, especially when mixing a very light filament with a very dark one. The bigger the lightness gap between inputs, the darker the actual print is than predicted. We pull the prediction’s lightness down accordingly.
- Bright mixes lose color faster than dark mixes. A 50:50 mix of pastel pink and pastel blue comes out greyer than expected. Two dark colors hold their color better. We scale saturation down based on prediction lightness.
- Cyan mixes drift slightly warm. Surprise finding. Predictions in the cyan-blue range (180-240 hue) lean toward teal when they should be cyan. We rotate them back, strongest at the middle of the band.
- Don’t over-correct mixes that are mostly one filament. A 99/1 mix barely needs correction. So all the corrections above get scaled by a bell-curve weight that peaks at uniform mixing and drops to zero at pure components. Pure colors round-trip exactly. Gradients stay smooth. As a bonus, this also fixes three-color mixes for free – every other model collapses on three colors; ours degrades gracefully.
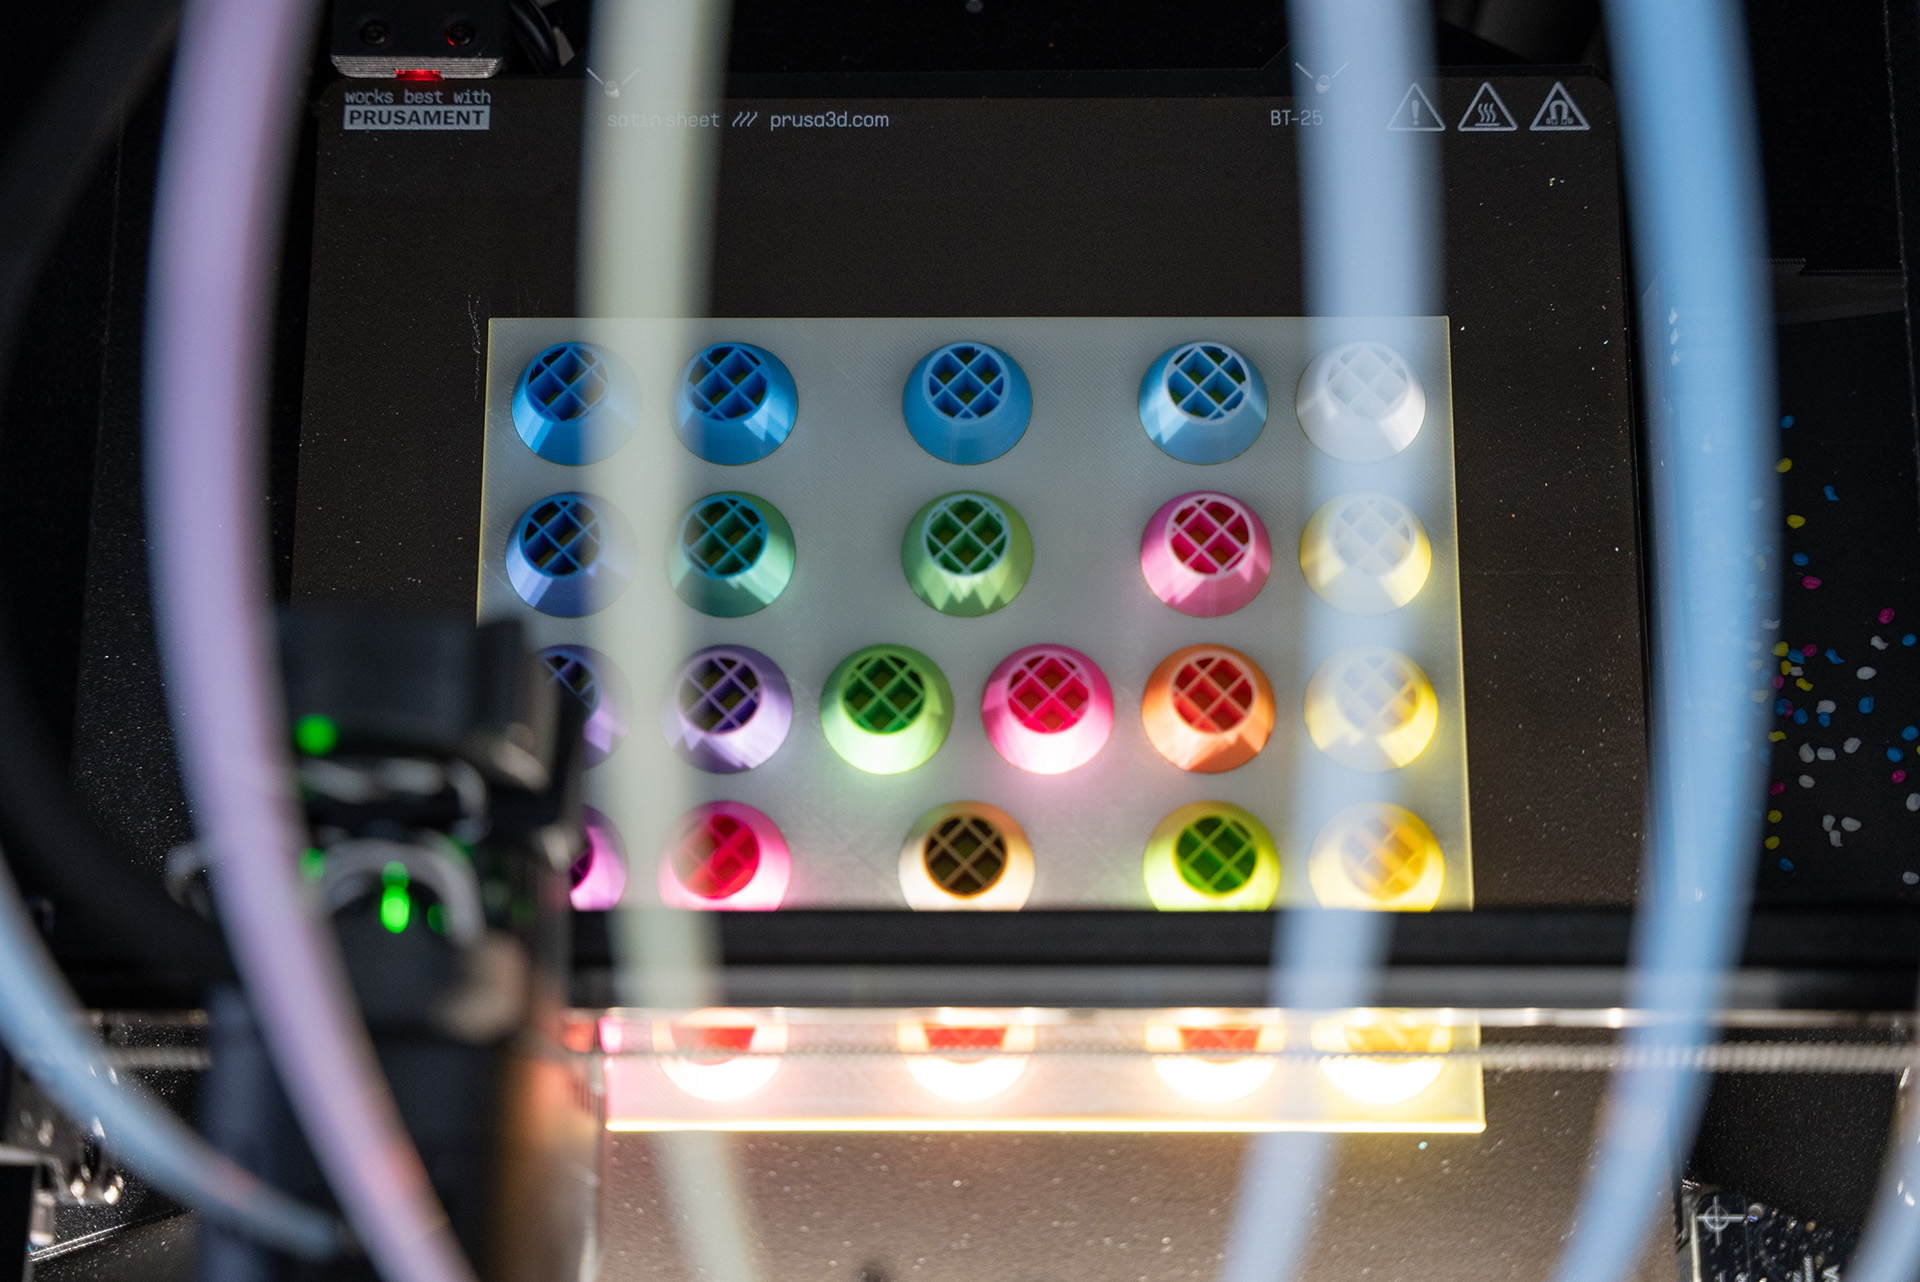
Each batch reprints its own bases. Methodology choice that mattered more than expected. Every batch of test cards includes the five base filaments printed solo plus 20+ mixes, all measured on the same colorimeter in the same session. Why: colorimeters drift, lighting varies, operators differ. If the device is reading off with a certain shift on cyan today, it’s also off on every cyan-containing mix in the same batch. The systematic error cancels when the model fits the relationship between the base and the mix, not the absolute values. So you don’t need a $5,000 spectrophotometer. A consumer colorimeter is fine as long as bases and mixes get measured together.

We also tested adding TD (transmission distance) values from the HueForge filament library as a model input. It didn’t help. So we kept the model simple: hex colors and ratios.
What we know vs. what we don’t
We measured Prusament PLA on a Prusa XL. That’s it.
The structure of the corrections should hold across PLA brands, because pigment chemistry is similar across the industry. The Yule-Nielsen base should hold for any “swap filaments per layer” architecture. What we don’t know: whether the exact coefficients are right for PETG, ABS, or non-Prusa PLA (probably not exactly, probably close), and how special-effect filaments (bronze, glitter, galaxy) behave. Their orientation-dependent reflectance breaks any scalar model. They sit in our worst-error tail.
If the model predicts wrong on your filaments, that’s a data problem, not a model problem. We need more measurements.
What’s next, and how to help
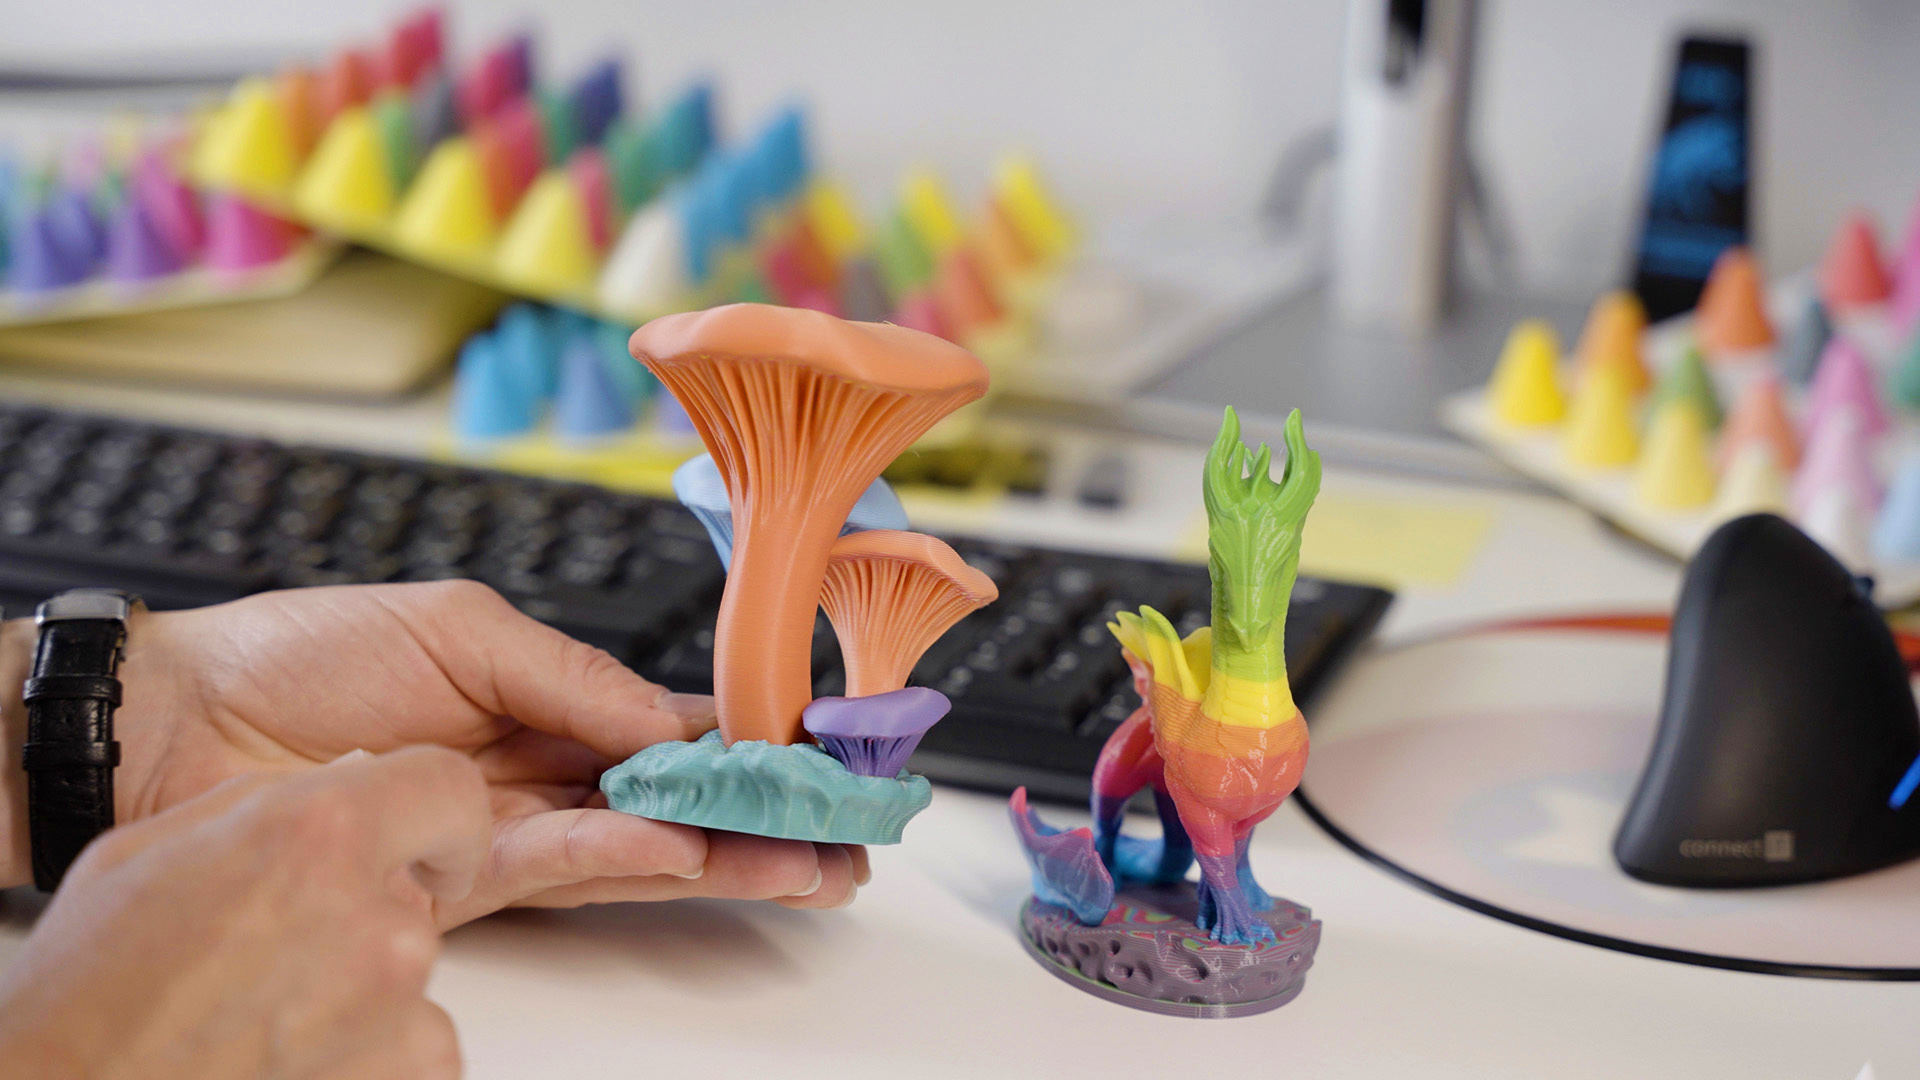
The ColorMix model we shipped is a first step. With a few hundred more measurements across brands and materials, there’s a real path to a proper perceptual colorspace model in the spirit of Mixbox or Spectral.js – predictions that are correct by construction across the full ratio space, not patches on residuals. None of this is hard. The math exists. It’s a data problem.

The repo is prusa3d/prusa-fdm-mixer., it runs as an app. MIT licensed. TypeScript (npm install prusa-fdm-mixer) and a C++17 single-header port designed to vendor straight into PrusaSlicer or OrcaSlicer. Three browser apps: a Playground, a Harness for scoring the model, and a Gatherer for entering your own LAB measurements.
If you have a colorimeter and some test cards, send us data. If you predict a mix and it doesn’t match, tell us. Wrong predictions are how the model gets better.
Both OpenPrintTag and the color-mixing model are open-source under the MIT license and published on GitHub.
One more thing
Let’s Go back to the painting thing for a second. My 4-year-old paints with everything. Hands, clothes, the toys, sometimes the wall. There’s no menu, no setup wizard, no “configure your extruder mapping.” There’s blue, there’s yellow, there’s a brush somewhere that’s been abandoned for fingers, and green just happens.
Multicolor FDM should feel like that. Not in some distant future. Now. The hardware exists. The slicers exist. The filaments exist. The only thing in the way is a UX that treats color as an afterthought and a model that lies about what the print will look like. We can fix both.

This isn’t going to take over functional printing. Single-color PETG, ABS, ASA, and PA will keep doing their job because the job is mechanical, not visual. That’s correct. But for the fidgets, the toys, the cosplay props, the figurines, gifts, desk decorations, the things people print because they want to make something cool – that whole world has been stuck on single-color PLA for too long. A printed dragon in actual dragon colors. A puzzle box with a real gradient. A nameplate that doesn’t look like a nameplate.
Help us get there.
Let’s go paint something.

Back to your printer
That was a deep dive into the development of the Prusa ColorMix. As a summary, you can now use both EasyPrint (guidelines are available on the help page) and PrusaSlicer 2.9.6 (released on GitHub) to slice ColorMix models for any printer with multi-filament capabilities. The colors you see on the screen when you assign them to parts of your model are as close as possible to the real printed colors. The use of the painting tools is about as difficult as in Windows Paint (ideal for the 90s kids).
If you’d like to try the ColorMix right now, we have a few models prepared for you: the ColorMix Calibration Cones, for testing the possible combinations of your available filaments; the colorful chameleon that uses five filaments; and the shaded fish that uses two colors.
You can also try creating your own shaded models directly in your browser using this ColorMix Shading app we’re working on.
New Prusament CMYKW colors are coming soon, but you can also mix any filaments you have at home. To experiment with CMY mixing already, you can use Prusament Azure Blue, Ms. Pink, and Pineapple Yellow. Feel free to test any filaments you have at home and let us know how it turned out.

Final brushstroke
Many of us here at Prusa are a little bit like Ondrej’s 4-year-old kid. We enjoy 3D printing ourselves, we like new features and innovations, and we want solutions for our own projects. Thanks to that, we were able to prepare the ColorMix, our own Full Spectrum implementation, in what felt like no time. Behind it is the work of many people across the company, so many thanks to them for joining the movement the moment they saw the first Full Spectrum print. Of course, we don’t abandon it here, but we’ll look into the unsolved questions, like efficient gradients and top layer mixing. We also keep working on ways to use these features to create more lifelike models, not just rainbows.

Last but not least, huge thanks to the community team that brought so much attention to the feature: @ratdoux, @justinh-rabh under https://github.com/justinh-rahb, as well as @wombley for their filament-mixer library and @huntercook for his work on the peggypalette.
Happy painting!

[Looks at his Prusament PETG only collection]
*sigh*
The feature works with any material, and PETG can arguably even be one of the better ones for it as it's slightly more transparent, though it's not as popular as PLA for regular models
(background — if impatient, skip to "weird thought" below)
I was recently playing with temporal mixing on a Commodore C64 project, drawing in black, white, and "gray" which was just black and white alternating every other 60Hz field (or frame). It was pretty painful when the black field had solid black and the white field had solid white.
BUT! If one field had a black/white pixel checkerboard, and the other field had the opposite checkerboard, it turned into a pretty nice gray without much flicker.
Weird Thought:
To help with "flattish" slopes or top layers (I'm thinking of the caps of your mushroom prints), what if you alternated colors with each outline of the outer wall? This should also help even the side-on views a little bit, because it means that alternate layers might/would slightly color through the single outermost outline. Not much, but it would bring each individual layer just a bit closer to the designed mix.
Once you've assigned your mixing colors and layer sequence, just "roll" that pattern by one color for each new layer. Now you're spatially mixing on both vertical and horizontal axes (can't really say "Z and XY", because the outlines are whatever curves they happen to be.
I *think* this would be a comparatively simple modification of the logic you already have, but I may be overlooking something.
I think things like painting color gradients on top surfaces might be solved with something like non-planar slicing. I also wonder if ironing might make a difference in the final appearance.
This seems very cool. I'm excited to see how this turns out. I think I've seen talk of PS 3.0 supporting multiple nozzle sizes in one print; pairing ColorMix with small nozzles and 0.05 or 0.07 layers on the outside perimeters could result is some very nice surface colors.
This is going to tip the scale for me to buy the INDX system once it's available and tested. Super excited.
Hey, look who's giving the community proper credit, unlike a certain other company…
Very cool. Thank you for the work you guys put in. I'm excited to try this out on my XL.
So, now that PrusaSlicer will be getting Full Spectrum support, will the XL and INDX systems be getting MMU support? It would be really nice to have even single tool MMU support on those platforms for Filament changes of infrequent colors like Black and White where the filament change operation occurs while another toolhead is in use.
Thanks for the suggestion, though at this point we don't have any plans of combining the systems as described.
Yeah, I've longed for MMU support for my XL for quite some time as there are moments where I'd wish I could have a 6th extruder for my XL so I could do 5 color printing with a dedicated support material extruder (think PETG with PLA support)
I don't know your thought process or if you will, mental chain of commands, but XL and MMU do not belong in one sentence. Either go buy Core series+MMU or multi tool XL.
@prusa question about the slicer since im going to wait till the true release. Will variable lyer height be avaliable for full spectrum? if not why? i think changing the consistency and layer height could change the saturation of the colors which would be kinda cool
Variable layer height in the direct sense of the feature is available, though I think you mean to imply, having various layer height depending on the tool used? If so, that's technically possible through the experimental feature I will link below, though due to limitations of Slicer, for it to be fully functional in a simple sense would only be with 3.0 most likely
https://help.prusa3d.com/article/experimental-printing-with-different-nozzle-diameters_821176
Variable layer height wouldn't just (in theory) change saturation, but also give you much finer control of color mixing. Instead of staying with simple integer ratios of CMYK (or whatever colors) you could tune so that what was formerly a 1:1:1 mix became 1.2:0.9:1.1 (or some other non-integer ratio) happening in essentially the same vertical interval. A little like the way that 2D color halftoning can vary the size of each color dot with almost arbitrarily fine resolution (even as everything is happening on a screened grid).
And this is in Prusa Slicer 2.9.6 ? Hmm OK, but At present I have only Prusa XL 2T, waiting on my CoreOne INDX like everyone else. And I ordered the 4 Tool version. Hmm. OK.
In Prusa Slicer I did change the filament colours to black, white, cyan, magenta, yellow.
You have to set it with RGB values -> 255 / 0 combinations
The colour mixing feature shows me only three different variations of geen if I disable white and black..
I know, I can add "own" blends and change the toogles, but how to get "all standard colours" in the first "automatic" overview? Colour settings in Prusa are same like in paint on windows XP.
Hopefully kits to add a single INDX channel to an existing INDX setup show up in the store soon for all the people who ordered the 4 channel INDX upgrade. CMYKW needs 5 filament channels, perfect for the XL and the MMU. (Was that luck choosing 5 colors for those multi-color solutions, or was someone in Prusa R&D prescient and knew there would eventually be a need for CMYKW capabilities?)
Also it would be nice to have a SKU for a 5 channel INDX upgrade (maybe a bundle SKU that pulls the 4 channel INDX plus the single INDX channel addon) for new people so they don't have to "know" to purchase both SKUs if they want to get into CMYKW printing.
Me, I'll probably get the 8 channel INDX upgrade for my C1+ in a year or so (once supply is stabilized) to have CMYKW plus support material plus 2 hot-spare or specialty nozzles.
Hopefully we can get that open print tag upgrade for our printers soon to make this even easier.
I volunteer to help test that upgrade so I can also help with this.
Hi Prusa Team,
I would like to suggest a possible approach for improving full-spectrum color reproduction on bottom surfaces, top surfaces, and intermediate areas that are relatively planar (the acceptable surface angle could be determined through testing).
From my perspective, the main limitation on these surfaces is that the visible appearance is largely determined by the perimeters and the infill lines between them. Currently, these features cannot effectively represent a mixed color because they are restricted to a single color at a time. To address this, it would first be necessary to allow multiple colors/toolheads to be used within the same layer (same horizontal plane) and distributed according to predefined color percentages.
For example, consider a target color composed of:
• 25% Color 1
• 25% Color 2
• 50% Color 3
Below are three possible approaches.
Solution A – Colored Perimeters and Colored Infill Lines
For planar ("horizontal") areas, a specific number of colored perimeters could be automatically calculated to reproduce the desired color proportions, similarly to how color blending is achieved on vertical surfaces.
Using the example above:
Perimeters
• First and second (outermost) perimeters: Color 3 (50%)
• Third perimeter: Color 2 (25%)
• Fourth perimeter: Color 1 (25%)
Surface Infill
The surface infill could be printed at a fixed angle (for example, 45°) while respecting the same color proportions:
• Two lines in Color 3 (50%)
• One line in Color 2 (25%)
• One line in Color 1 (25%)
This sequence would then be repeated across the entire surface.
Solution B – Colored Perimeters Only
In this approach, the entire horizontal surface would be generated using only perimeter-like lines, without any conventional infill.
Distribution Example
• First and second (outermost) perimeters: Color 3 (50%)
• Third perimeter: Color 2 (25%)
• Fourth perimeter: Color 1 (25%)
The same color sequence would then continue across the entire surface area, effectively replacing the surface infill with additional colored contour lines.
Solution C – Colored Infill Lines Only (No Perimeters)
In this solution, perimeters would be completely removed from these planar areas and the visible surface would be generated entirely by colored infill lines.
Using the same color ratio:
• Two lines in Color 3 (50%)
• One line in Color 2 (25%)
• One line in Color 1 (25%)
This sequence would then be repeated across the entire surface.
In other words:
• 25% Color 1 = one line
• 25% Color 2 = one line
• 50% Color 3 = two lines
The repeated pattern would create the desired visual color mixture at a single layer height.
Conclusion
Ideally, all three approaches could be implemented and made available to users. Different geometries and visual requirements may benefit from different strategies, and allowing the user to select the most appropriate method for each model would provide maximum flexibility and the best possible color reproduction.
I hope this description clearly conveys the concept. I believe this could significantly improve color fidelity on planar surfaces and help bring horizontal color rendering closer to the quality already achievable on vertical surfaces.
I wish the Prusa Team every success in tackling this challenge and continuing to push multi-color 3D printing forward.
I did something similar last year. https://github.com/Cmd-8/CMYK_Prusa
Very inspiring.
I think I saw mention that you can set the filament colours based on what you have. If it doesn't already, it would be nice to see it expanded to support more filaments, e.g. 8 with INDX (Core One) and maybe 10 with INDX (Core One L). Then we could add grey, maybe RGB, and/or light cyan / magenta (I'm thinking like traditional printers) to further expand the color palette.
A solution to the horizontal "issue" would be the icing on the cake (so to speak). I think Raoul's post covered it, but some mechanism to recreate the vertical technique on exposed flat surfaces would be great.
It may well be a consideration for print orientation – things we may have wished to print flat on the bed might now be preferable "edge on" for better colour rendition.
Try this: https://github.com/michaelhq/color-mix-lab.
With Color Mix Lab, you can specify the colors of the filaments available to you.
MIT licensing instead of GPL. Ah, community matters…
Would it be total non-sense to forget layer staggering, and just push CMY filaments into single melt-zone varying the ratios of each and producing colors this way? I guess the issue there would be slow gradients = inability to create sharp color change, unless purging. But mixing math would be much simpler I guess.
I'm surprised there isn't a CMYK Prusament offering yet. I think it would make sense for this!
This is really cool stuff with so much potential! We haven't even begun to tap into all the possibilities yet. I'd love to contribute to this with the Color Mix Lab: https://github.com/michaelhq/color-mix-lab
This does look promising buuuuuut… What does it do to print times? My MMU goes virtually unused as the extra time introduced with colour swaps just makes me roll my eyes.
It does slow it down depending on the number of changes, but the difference is also drastically less than the MMU with about 4-5 times faster tool changing speeds depending on the MMU version.
Not clear to me if this will work with any Prusa printer with a MMU3, or just the XL? I have a MK4S+MMU3, would love to try it out.