


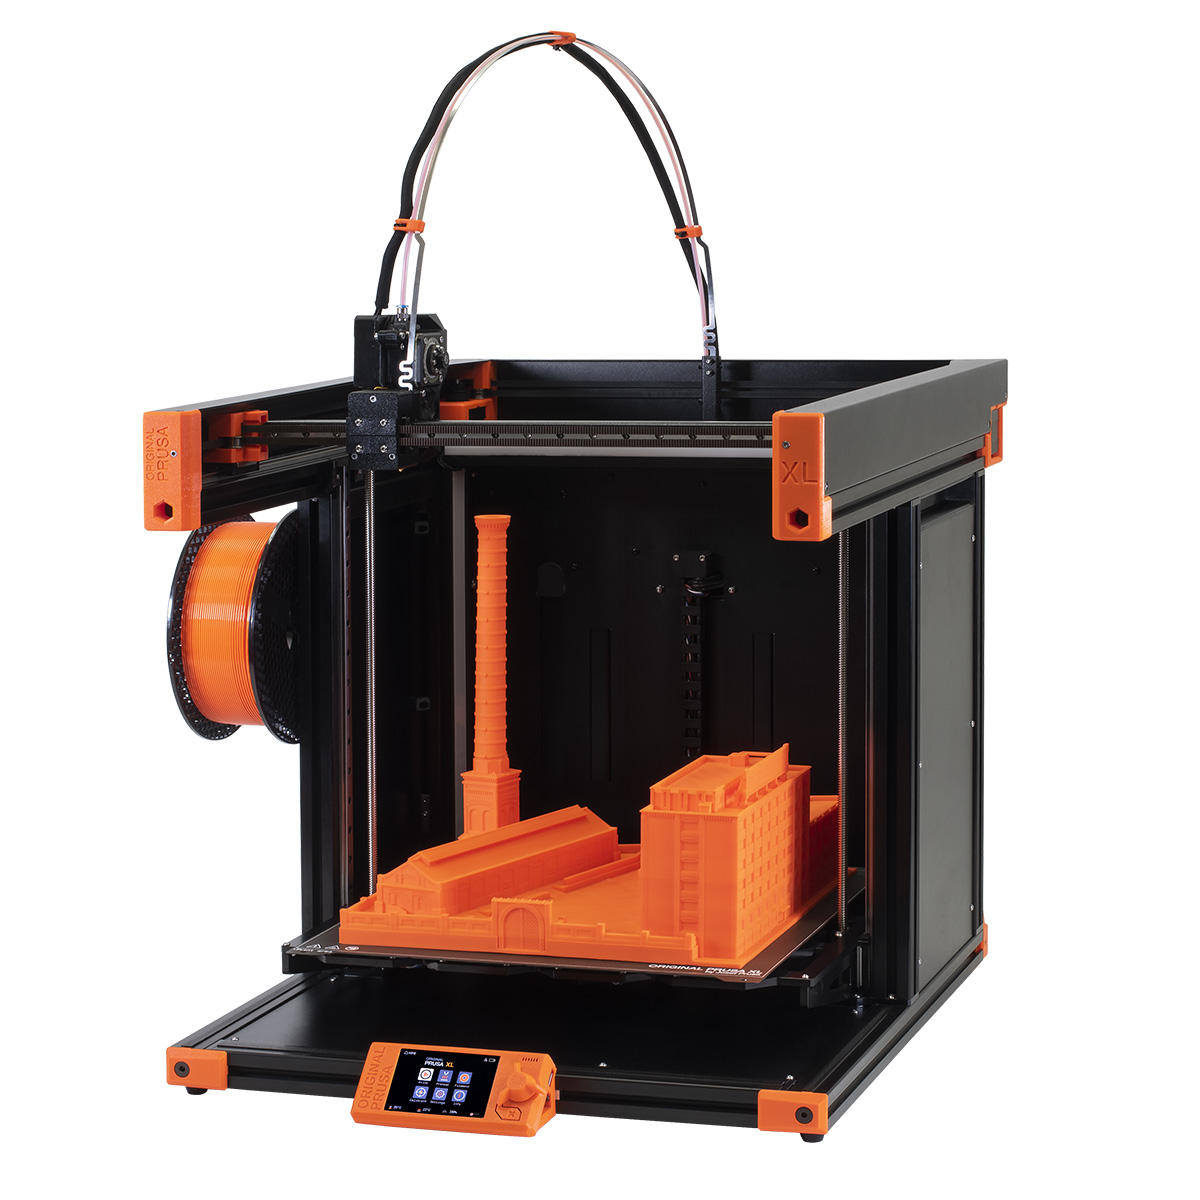
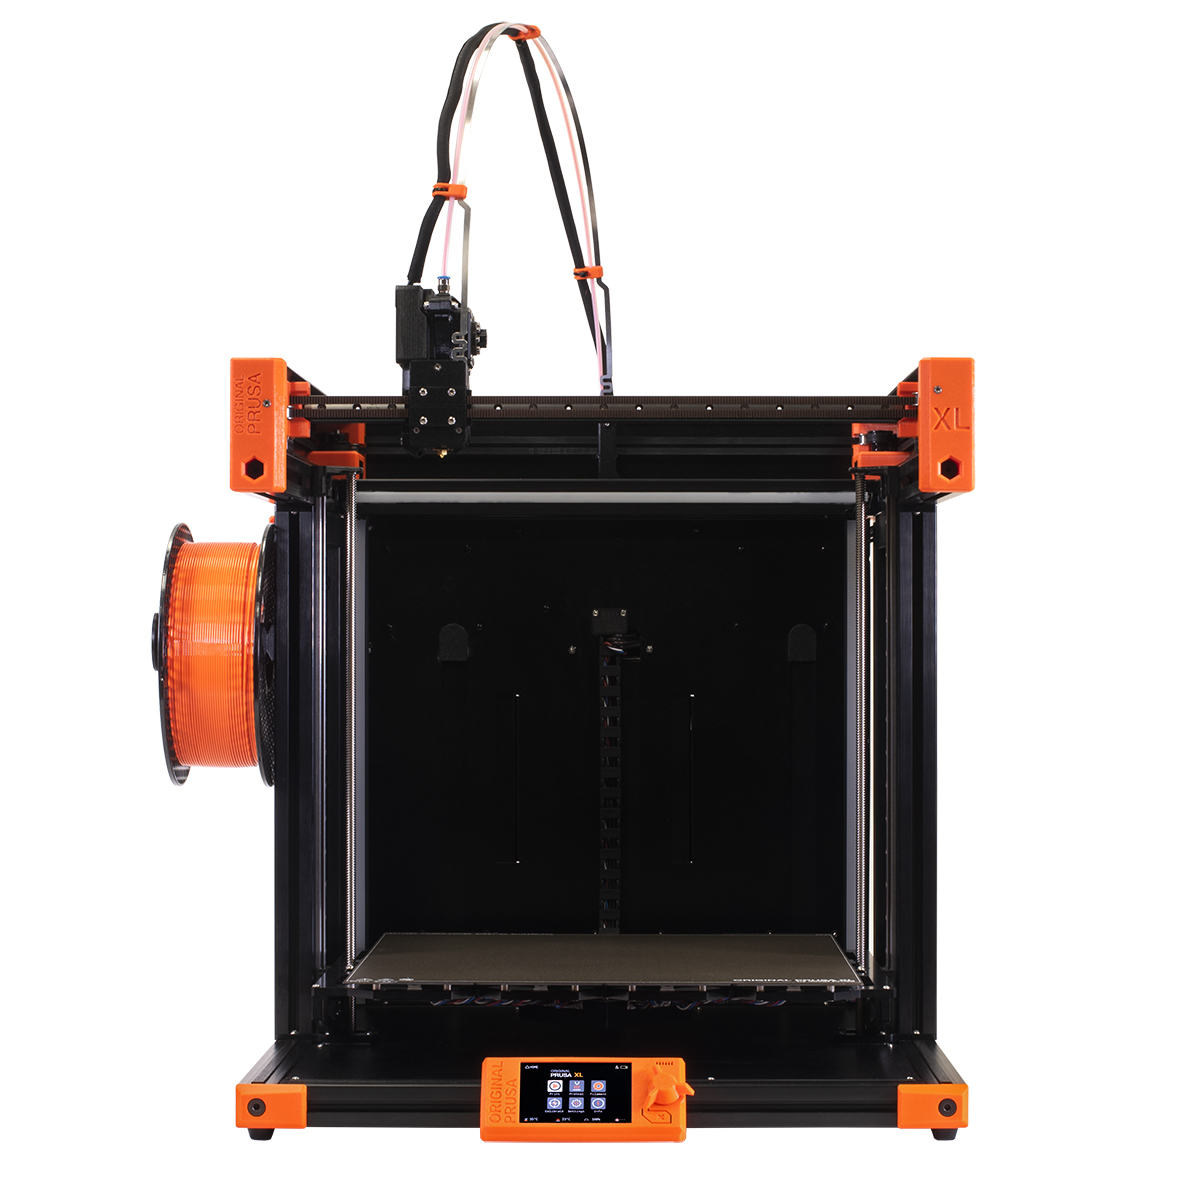
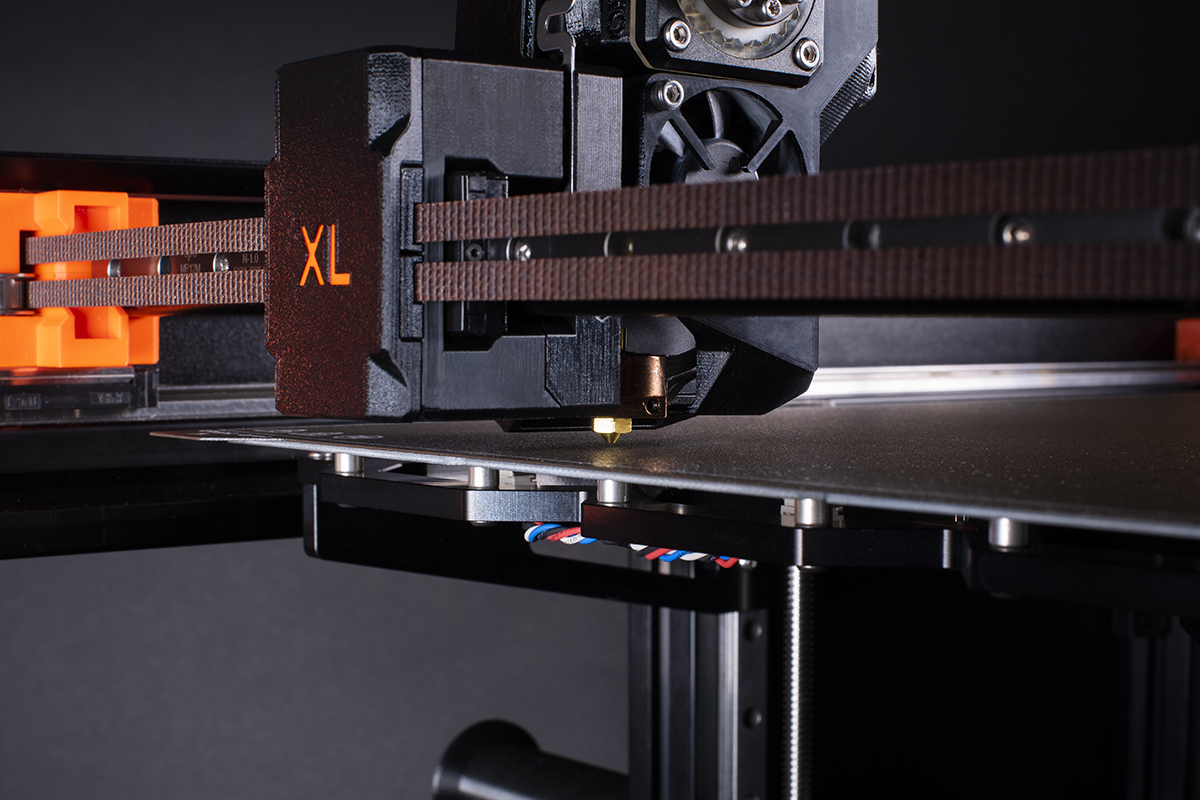
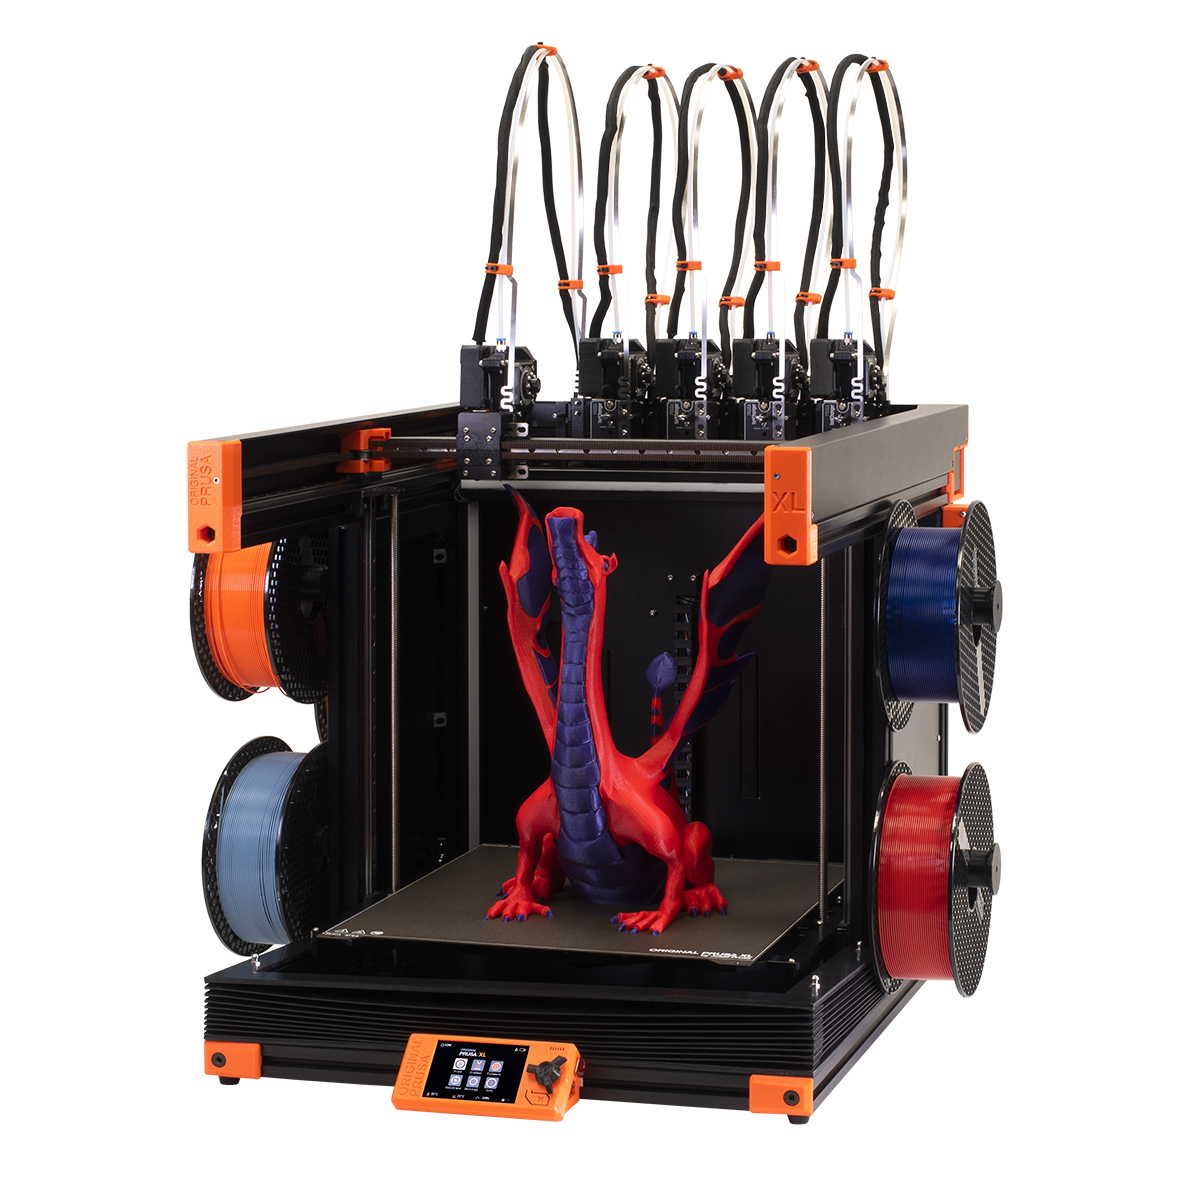
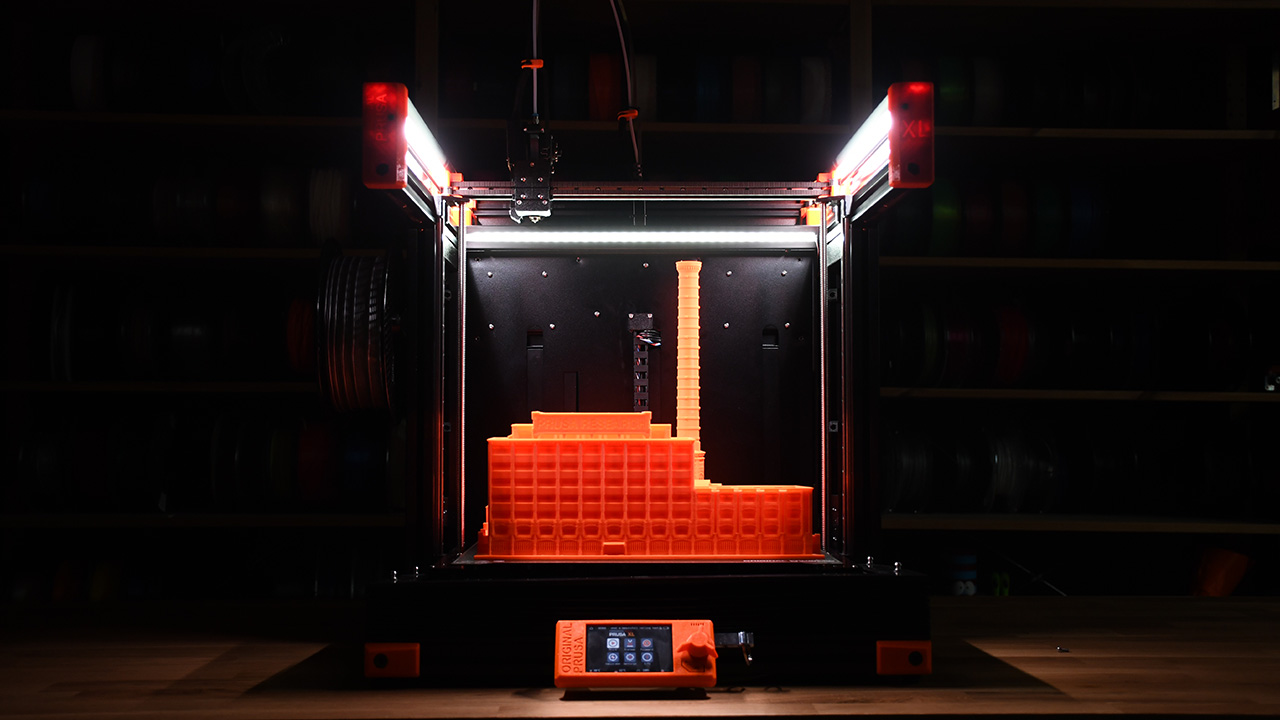
Hello everyone, here’s the BIG news many of you have been waiting for (some might say that Friday came a bit early). 😉 I’m happy to give you the first look at the Original Prusa XL, our upcoming large-scale CoreXY 3D printer with a 36×36×36 cm (14.17’’ cubed) build volume, next-generation extruder, new hotend, segmented bed, and a tool changer!
There are some crazy features packed into the XL (like an always-perfect first layer!) and I can’t wait to dive into the details because the new printer has much more than just a large build volume. Nearly every aspect of the machine has been designed completely from scratch and it is truly a beast! Currently, it’s scheduled to begin shipping in Q2/Q3 2022 but we’re launching preorders now. However, they work differently this time around with a refundable deposit instead of paying the full price upfront – there’s more info below.
Essentially, the XL is something completely different than just an upscaled MK3S+. You can even consider it to be a bit of a showcase for our future 3D printers. 😉 So let’s jump right in!
Building a Prusa CoreXY
There were a number of variables we had to consider when designing our first CoreXY printer. The first one was, obviously, the right size. We settled on 36 cm (14.17’’) cubed – for a number of reasons. The larger a printer is, the more prone it is to vibrations and other unwanted effects that translate into bad-looking prints. So, building a larger MK3 would have no actual benefits. On the contrary, in fact. Using the same design would bring a number of headaches to deal with – a large heavy heatbed moving along the Y-axis, less stability with higher Z-axis values and so on. CoreXY was the way to go.
36 cm cubed is more than enough for a vast majority of large objects – you can, e.g., print a cosplay helmet in one piece easily, or produce detailed architectural models. There’s another important aspect to consider with massive objects: the larger the print is, the longer it takes to finish. We’re still tweaking firmware and print settings to tell you the max speed, but you can be sure that thanks to the small and lightweight direct-drive extruder the XL can be very fast. Just an upfront note: we are aiming for print quality, not looking to join the SpeedBoatRace.
However, we are considering an unsupported, but official Klipper firmware for those looking to find the limits. Either way, no matter how fast the XL will be in the end, huge prints (several kilograms) will still take days to finish. Rest assured that we’re implementing all the proven features from our current 3D printers to reduce the stress from long prints – like power panic and filament sensors, for example.

Plus, there are various practical additions like telescopic filament spool holders on the side of the printer, which can hold up to 2-3kg spools – they will be needed because the XL can chew through a regular filament spool in no time. There will also be optional addons (draft shield/enclosure) available, which will be revealed later.

New segmented heatbed
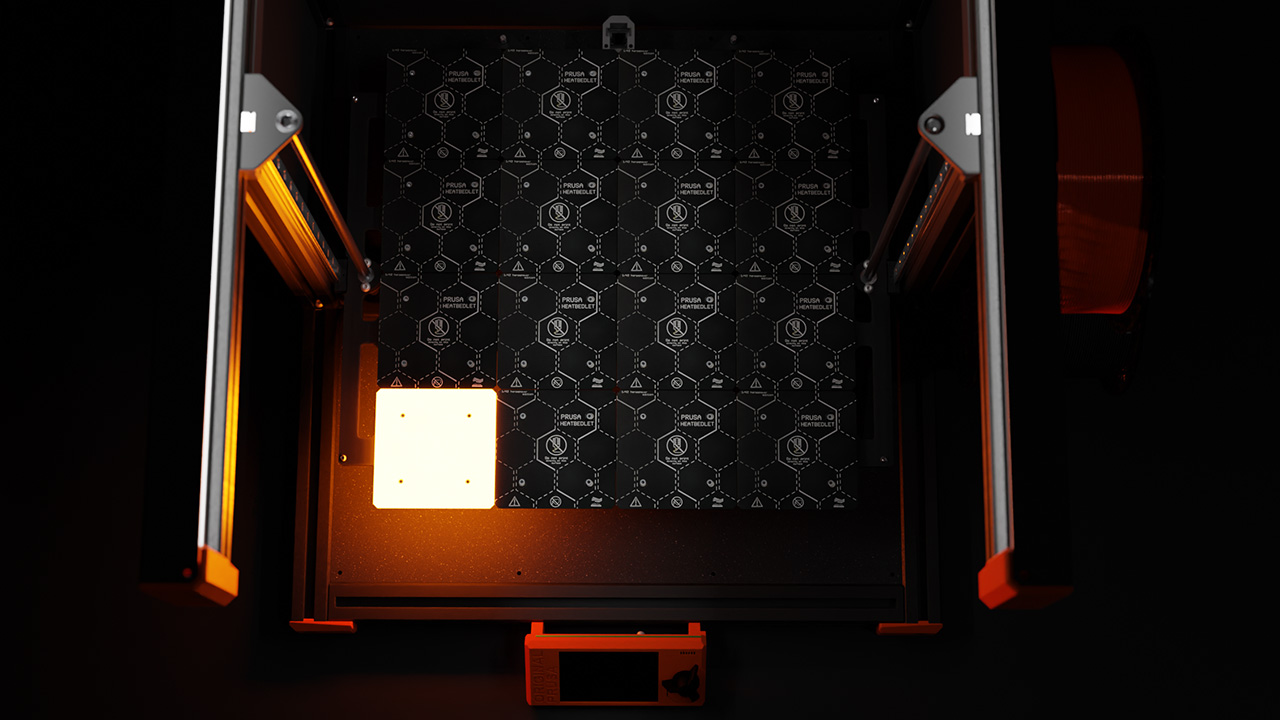
With the dimensions set, we could also finish developing another one of the cutting-edge features: our new segmented heatbed. Why not simply use a scaled-up version of our standard “MK52” bed? Every time I see a large-scale 3D printer producing something small, I can’t help but think how wasteful it is to heat up the entire huge heatbed and burn through kilowatts of energy any time you want to print something. Our new heatbed with individually controlled 9×9 cm segments is not only energy-efficient (you can turn on/off individual pads) but also effectively reduces warping thanks to its expansion gaps between each segment. To explain it a bit: regular heatbeds have a tendency to warp as the temperature increases. The problem isn’t very evident with smaller surfaces and can be partially compensated for with mesh bed leveling. However, once you have a large heatbed, the issues become more noticeable.
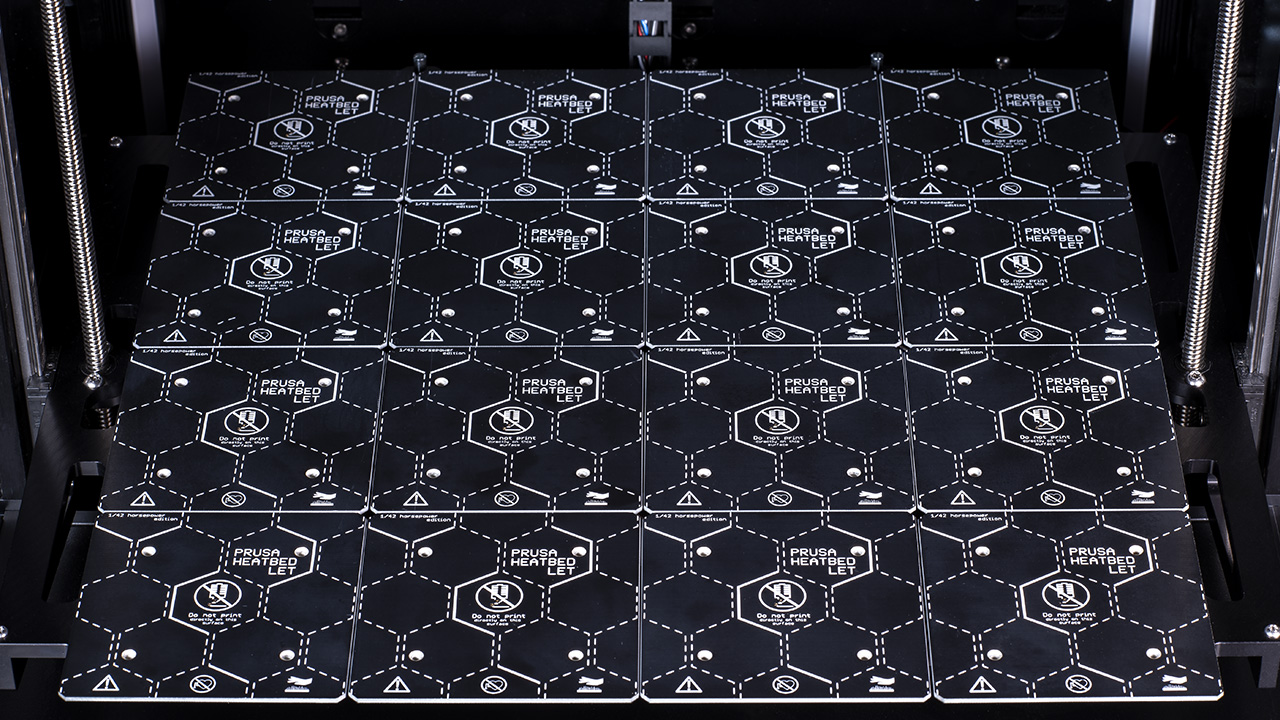
We can do all sorts of things with the segmented heatbed – like alternating heating of individual segments in a checkerboard pattern (via PWM), which reduces the load on the PSU. One of the obvious benefits is the possibility to heat only some of the 16 heatbed segments in case the printed object is small enough.
Needless to say, the segmented heatbed was not developed just for the XL. With these 9×9 cm segments, we can scale up or down our machines as required. Did anyone say Prusa XXXL? 🙂 I think nobody noticed it yet, but even the printers we’re showing at EXPO 2020 Dubai are using these pads – just in a 3×3 pattern.
But I think it’s time to get to another star of the show!
The Nextruder and always perfect first layer
The XL is equipped with our new next-gen extruder, “Nextruder” for short. It took us nearly three years to develop and, honestly, there are so many new features, it’s difficult to find the best one to start with.
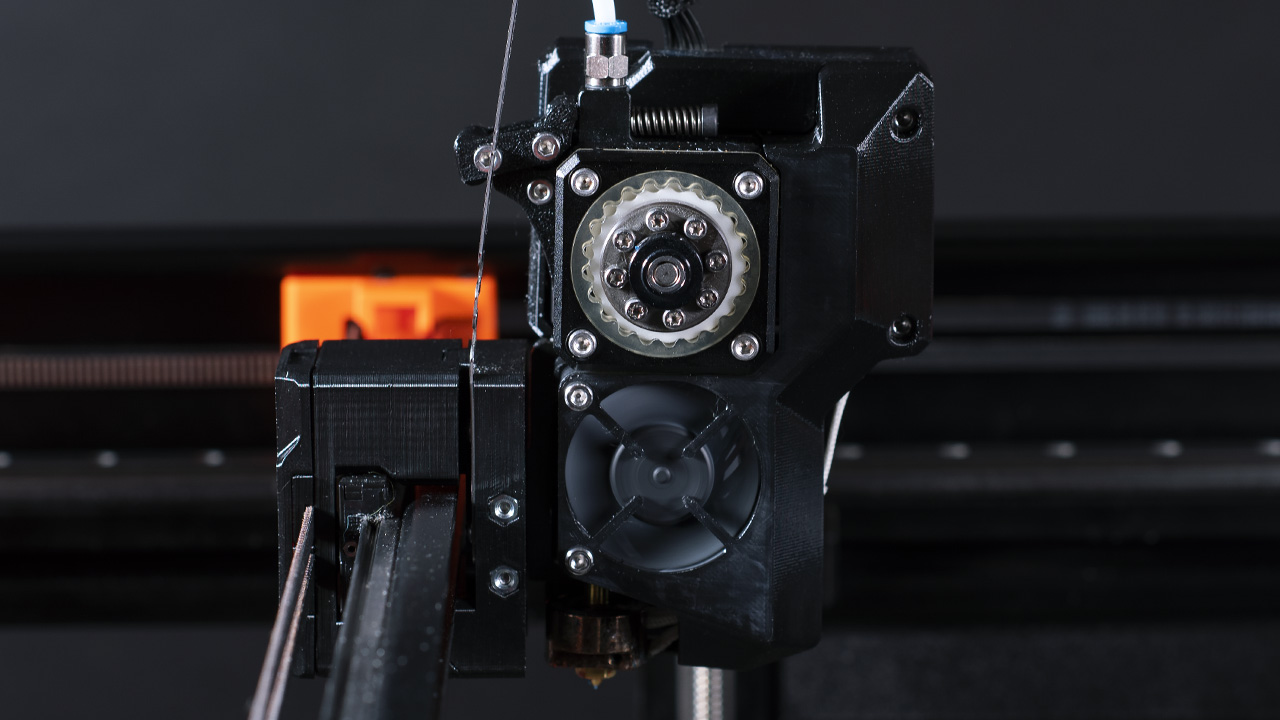
So let’s kick off with something that will be visible every time you start a new print: we utilize a highly precise load cell sensor to deliver an always-perfect first layer. Instead of an off-the-shelf load cell, we have developed our own system. It is embedded within the solid single-piece heatsink and it allows us to measure the physical load on the heatsink. As a result, we can use the nozzle as a sensor to “probe” the print surface. We use analog data readings, which gives us precise information to work with. BTW – years ago, I actually had a load cell in the i2, positioned between the extruder and the hotend to measure force needed for extrusion. Good old times… 🙂
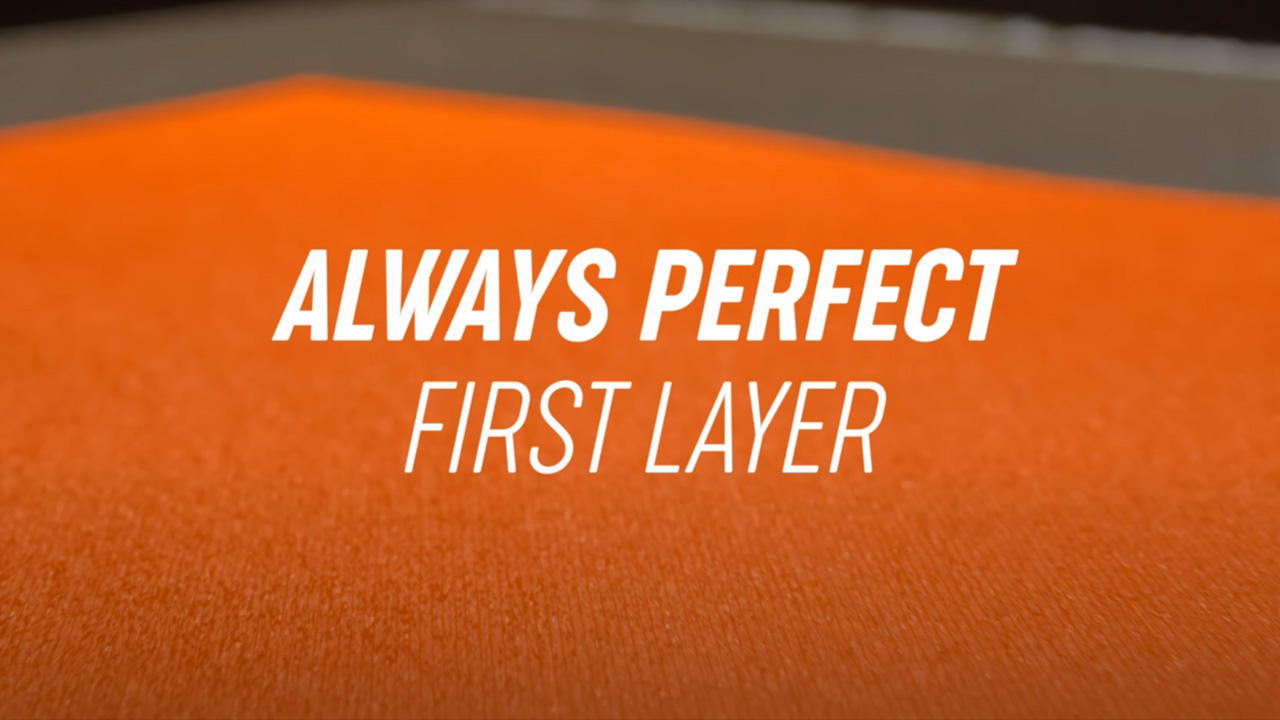
So, in layman’s terms: we can utilize the load cell system to perform an incredibly precise height calculation for the first layer. No matter whether you just swapped the nozzle or the print sheet – you don’t need to recalibrate anything. There’s no need to adjust Live Z, no manual calibrations, or any sort of complicated nylock mods to achieve a perfect first layer. It simply works every time and it’s a joy to watch it happen. If I exaggerate a little bit, theoretically you could stick a plank of wood into the printer and it would still create a perfect first layer. Don’t do it, though! 🙂 Anyway, this means you can soon say goodbye to fiddling with the first layer and Live Adjust Z!
However, the load cell sensor allows us to do more than that. We can now recognize a jam in the nozzle and pause the print. In the future, one of the things we want to focus on is the ability to detect a partial jam – so the printer could notify you in time before the actual jam happens. And maybe even detecting if the print has come loose from the bed.

Gear up!
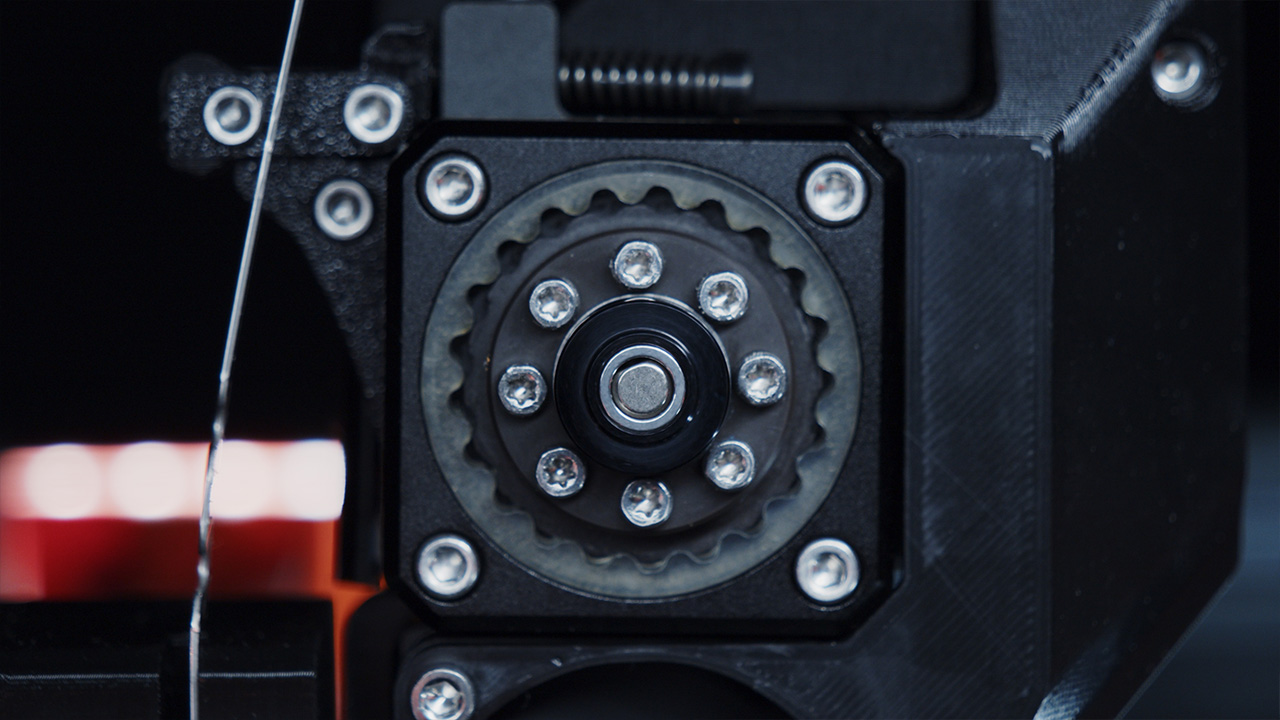
To further upgrade the print quality, the extruder now features a brand new, internally developed zero-backlash cycloidal gearbox with a large no-slip drive gear. Wow, it just rolls off the tongue, doesn’t it? 😀 This system replaces the previous solution with two small grooved gears and allows for greater control of how the filament is fed into the nozzle. In fact, we implemented a bit of an overkill solution – a 20:1 gearbox. It performs well above the power we see in most other extrusion systems on the market and delivers extremely high pushing force. And it works amazingly well.
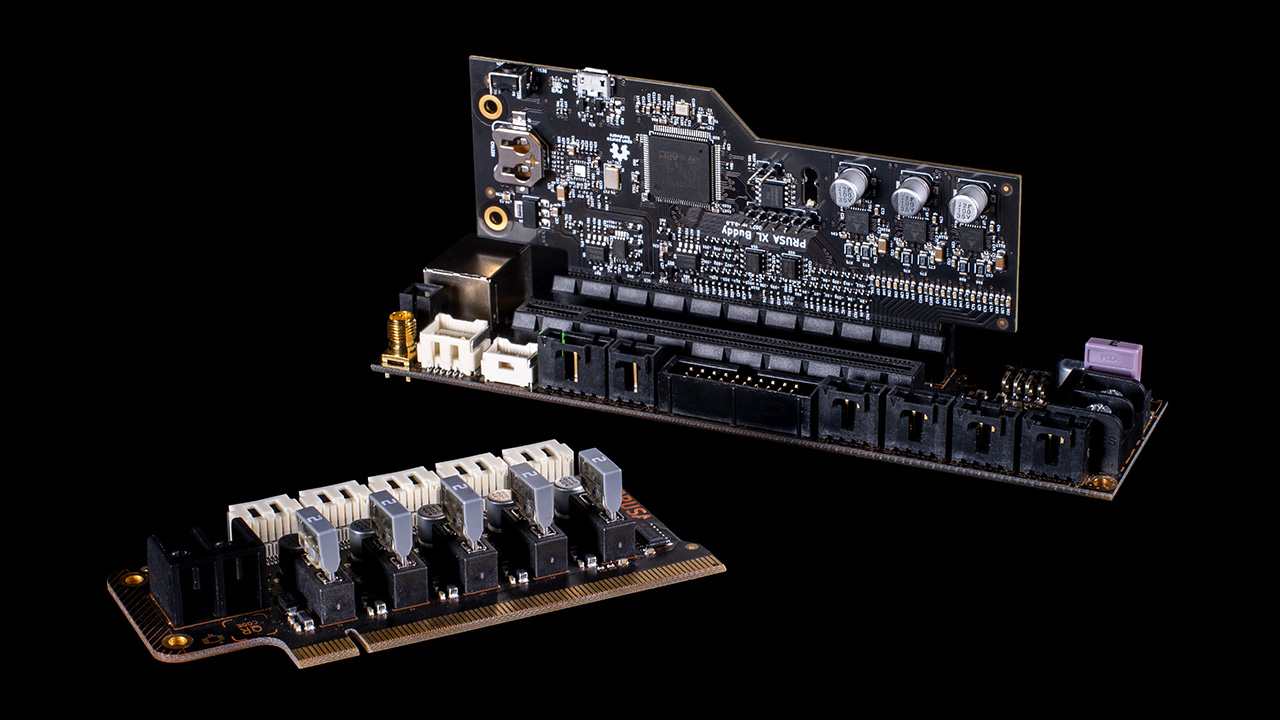
The Nextruder also features a brand new electronics break-out board with a dedicated CPU and a stepper driver, so basically, everything in the extruder connects directly to this board, which is then connected via a single-cable interface to an easy to swap connector on the edge of the new custom 32-bit motherboard. We’ve also added another thermistor into the heatbreak. This allows us to adjust the temperature according to the material spec and also detect heat creep.
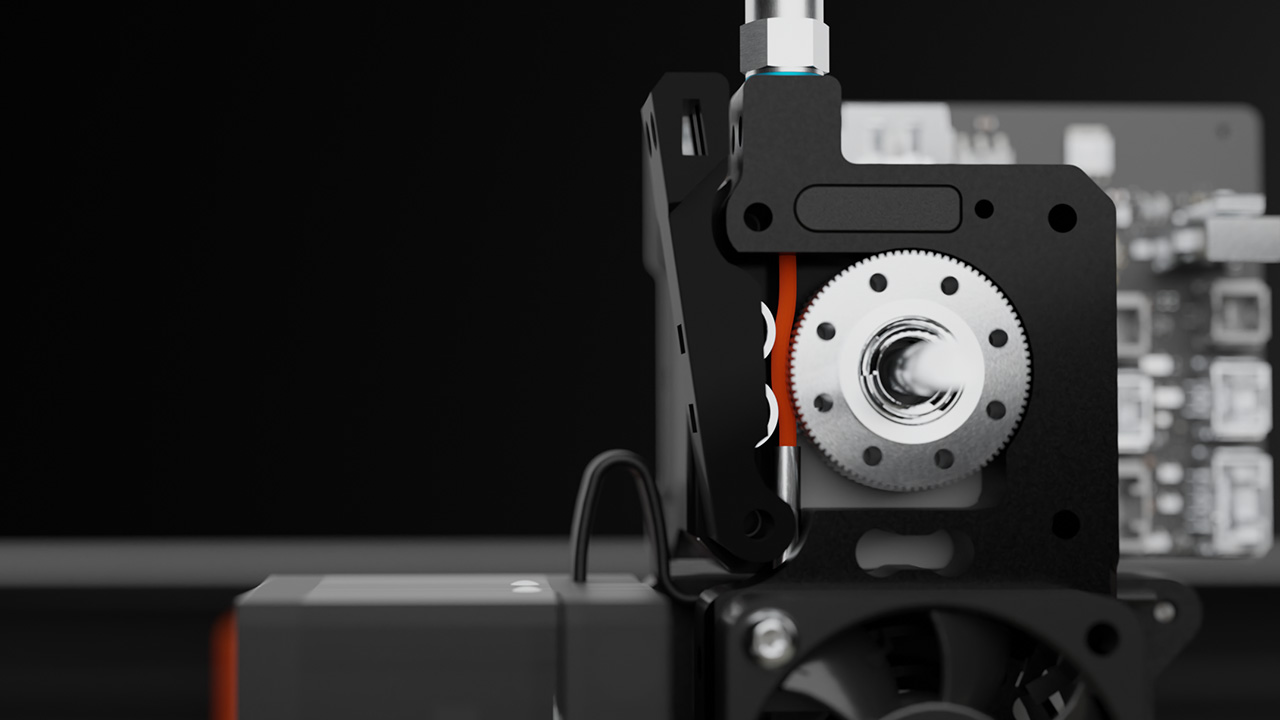
The nozzle, which has been developed in cooperation with E3D, is embedded inside an entirely new assembly that allows you to easily pull the entire hotend (with all-metal parts) out of the extruder. The nozzle is connected to a metal tube, which prevents various issues arising from insufficiently tightened nozzles. Making the nozzle easy to swap was key because we want to give you more options to print with nozzles of different sizes – e.g. use a larger diameter for more durable objects and faster printing (comes in handy with a large-scale 3D printer). To be clear, while it may sound familiar, this is different than the Revo system.
While I could write much more about the Nextruder here, I want to keep some things for later. 😉 Let’s move on!
The right tools for the job
Because XL is a CoreXY machine, adding tool-changing capabilities is something that kept coming to our minds. The result is that the machine can operate with up to five independent tool heads.
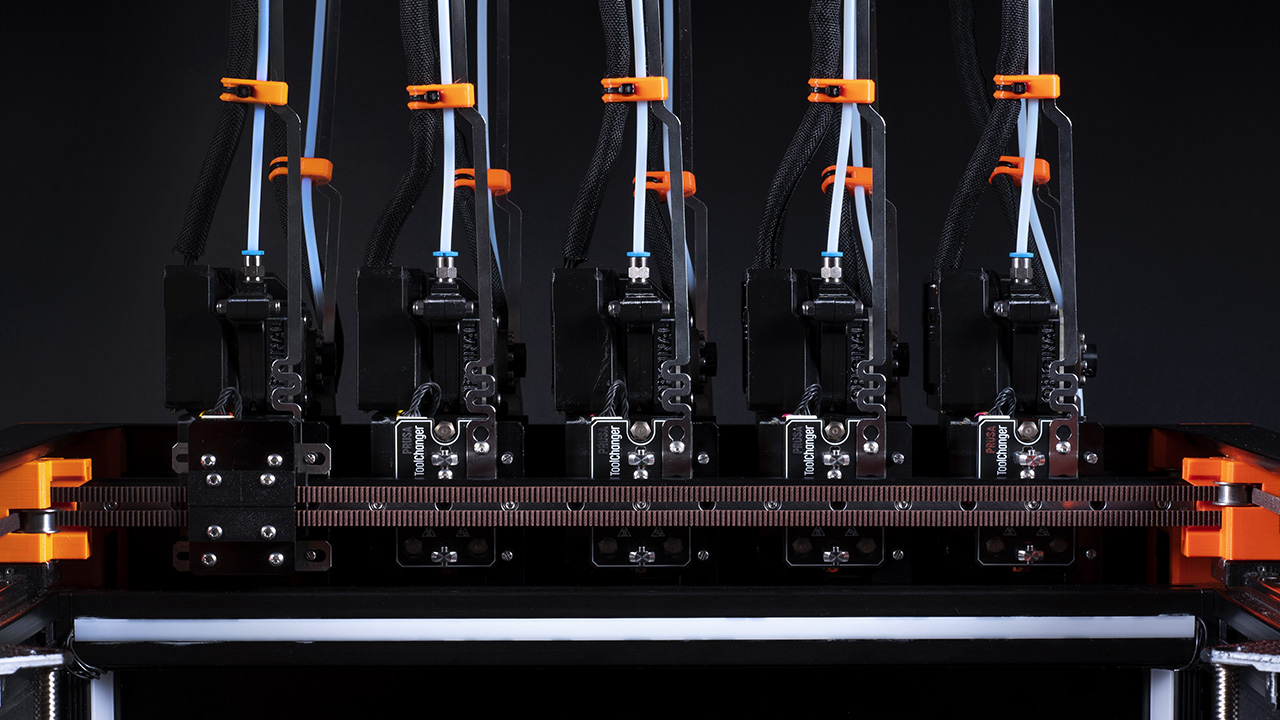
We have developed a kinematic coupler mechanism that doesn’t need electromagnets or other active elements to work. The system is extremely precise and features a fully automatic tool alignment calibration ensuring that after every tool change everything is perfectly aligned. The system is also based on the load cell sensor – no more tedious calibration prints, everything is automated. Printheads will just tap a small calibration pin and configure offsets automatically. Check out the video because it shows everything in action!
There are also sensors ensuring that the tool head has been successfully swapped. We’ve been running internal head-swapping tests for several months already and we’re over half a million successful tool changes without a single hitch.
Because changer supports up to five tool heads, it means that you can: easily print soluble supports, print with up to five colors, or use vastly different materials (because each nozzle can be preheated to a completely different temperature). We’re even thinking about mixing different nozzle sizes in a single print to shorten the print time. Of course, we’re considering other tools as well, not just extruders.
If you simply need a large-scale printer, then the single-extruder version is the one for you. However, everything is ready for an upgrade, so you can run up to five tool heads. Once you install the optional tool changer mechanism, you can easily swap between two tool heads. For three to five tools, you’ll need to add an expansion card. This way, you can upgrade your XL gradually over time to suit your needs. In other words: if you buy a single-tool XL, you will be able to purchase the toolchanger and individual tool heads separately.
Coming in 2022
Announcing a new product in these trying times is still rather difficult – I’m sure you read it everywhere: a shortage of components, long delivery times and other issues. While we’ve already set out on a journey to produce as many parts as possible in-house (we even bought SMD assembly lines!), we need more time to set everything in motion. Right now, we’re still dependent on several third-party suppliers and sourcing parts for development is no easy task. On the other hand, we simply couldn’t keep you in the dark any longer and we wanted to finally showcase what we’ve been cooking for so long in secret.
Due to the ongoing uncertain situation with components and delivery times at hand, we decided to set the start of XL manufacturing to Q2/Q3 2022, so we can also secure enough components to start production. By default, we will offer three versions of the XL in our e-shop: Single head, dual-head, and the full five-head version. Please note that with 3+ tool heads, there’s a price jump because of additional hardware needed. Based on the current situation, we’re targeting the following prices:
- Single toolhead semi-assembled – $1999 / 2099€ (vat incl.)
- Dual toolhead semi-assembled – $2499 / 2599€ (vat incl.)
- Five toolheads semi-assembled – $3499 / 3699€ (vat incl.)
The price of the fully assembled version of each variant will be $500 more. Should this change at any point, we’ll post an update.
It is very important for us to know the demand now so we can secure the additional components as soon as possible. That’s why we’re launching pre-orders on our new e-shop right now. But this time, we’re doing them in a different way. Instead of paying the full price right away, there’s only a refundable deposit of $200 USD. This way, you can secure your place in line (which we think will be again pretty long…). Once your printer is about to be shipped, we’ll contact you and you will be able to fully edit your order – change the printer configuration (e.g., select the number of tool heads), add accessories and filaments. The reservation fee will be, of course, deducted from the total price of the order. This way, we can also better scale our production based on the demand.
So, that’s it for now, the last announcement in this year. We’ll be back later to share more details about the XL. Meanwhile, you can check out the store page in our new e-shop, and if you’re at the Formnext exhibition in Frankfurt, you can see the XL in action in our booth number A127!
Happy printing!
Can you add extra toolheads later on?, say buy one or two first, and buy rest later?
Right above the “Coming on 2022” section they stated that you can expand incrementally. Anything above 2 tool heads will require an expansion board.
Yes you can. “ Once your printer is about to be shipped, we’ll contact you and you will be able to fully edit your order – change the printer configuration (e.g., select the number of tool heads), add accessories and filaments.“
I think what he’s asking is after you get it home… 3 months later you want to add 4 tool heads. Is that possible?
Same question here.
I would go for the 1 headed version until I save enough to add some more.
Will upgrade kits be sold separately to add heads in the future?
Looks awesome, is any of the new features coming to the prusa mini, such as the perfect first layer?
+1! A mini+ upgrade kit would be awesome
Only if you exchange the whole extruder. It seems to depend on sensors in the filament path (which is the only way to do this properly), so these sensors must be in the Mini extruder as well. Add a new mainboard to handle the extra connectors, and I don’t think there will be a Mini-Upgrade coming. But I can imagine a mini printer (4×4 tiles heatbed, so 18cmx18cm) with these extruder/sensor/mainboard combo…
Yeah, getting my first layer right on my mini was the hardest part of calibrating it. Call this another vote for a mini upgrade kit (even if it was $200, it’d be worth it)
It would require a whole new extruder, hotend, and electronics. Wouldn’t surprise me if it cost over $300. Not happening. Even on the I3, not happening.
I don’t imagine the perfect first layer feature can simply be an upgrade package.
However, I would be surprised if they didn’t include it in the mk4 and mini2 when/if they’re released.
pre-ordered! This is the most amazing thing ever
That thing looks so damn awesome and beat my expectations!
So I preordered a dual toolhead variant, can I later change it to a 5 toolhead variant?
Nice! I ordered that one too. I think I’ve read somewhere that you can chnage before it ships. Will consider that as well.
Towards the end: “Once your printer is about to be shipped, we’ll contact you and you will be able to fully edit your order – change the printer configuration (e.g., select the number of tool heads), add accessories and filaments.”
Can I add a MMU2 to each print head?
Probably not, but maybe 5 Mosaic Palettes?
So the to be released successor of the i3:
– will be named between Mini and XL (M or L?) 😉 ?
– will have a heated bed of 3x9cm sections. So build area of 27x27x27?
– will also have the automatic first layer?
– will have the same display as the XL?
-….will be just a scaled down version of the XL? (would be nice if they can keep the price OK-ish)
– will be announced Q4 2022 and first deliveries around Q2/Q3 2023?
He said in a video with 3D Printing Nerd that he still thinks the i3 design is still good for me MK3 size, so I doubt we’ll see that one switch to CoreXY, but I could see the linear rails coming to the MK4.
What is the total size of this new model?
Based on the pictures, I think it is around 54 cm wide and 60 cm tall (excluding the filament guide and cable bundle). I’m guessing also around 60 cm of depth.
In yesterdays video they hedged a bit saying that the final size may change but that a good estimate was 80 x 80 y 90 z to accommodate large filament spools on each side and the tubing on the top.
Wow… Looks amazing!
Soooo many new great features! Awesome!!!
… Can you state, which of these features will trickle down to MK3S? I hope, there will be kits to implement some of the features to our machines…
wow! looks like the wait has been worth it!
What is on that image: https://blog.prusa3d.com/wp-content/uploads/2021/12/XL-5.jpg (bottom, around the heatbed)? Some accordion enclosure?
” There will also be optional addons (draft shield/enclosure) available, which will be revealed later.”
…So, probably: yes
I think, if somone buys such a big printer to… well … print big parts, there will be no chance without enclosure… At least if any other material than pla is used.
Heatbed may not warp anymore, but print still will 😉
If you watch the video then you will see…
How well will the XL handle TPU and flexibles? (Coming from TPU jamming on my MK3s MMU2s)
I’m guessing it will be a huge improvement. Take a look at the Bondtech LGX (large gear extruder) which uses much larger Bontech gears specifically for improved flexibles. The new gear shown here looks as big if not bigger than those on the LGX.
I hope it fits on a Lack table.
Unfortunately, I really doubt it will fit in a Lack enclosure. It definitely won’t if you’re using the spool holders on the side. You have around 20×20 inches in a Lack enclosure. The footprint of the build area is 14×14 and it looks like the frame extends a good 2.5-3 inches on each side. Even if the width and depth are barely big enough, the tubes on the extruder probably won’t fit.
You really don’t need, or even want, to put it in Lack enclosure. The printer will be the encloser by itself. The question was just to put it on top of Lack table.
Ha-ha! As long as it comes with gummy bears…
XL Gummi Berars.
I think it will fit on top of a Lack table, barely, with maybe a little overhang, but no way will it fit inside the legs of a second Lack.
That’s what I was thinking looking at it. I have an enclosure using Lack tables for my MK3S+ that I custom built and was wondering about using the same enclosure in a stacked configuration. But I don’t think it’ll work unless I put this on the top. Hate to say it, because I like my current enclosure, but I may have to do a fully custom job to house them both.
Still no shipping to Russia?
Excellent news! 👏😎
Will one of the available tool heads be an extruder capable of using 3mm filament (maybe within the same print, like different diameter nozzles) or will any/all extruders be limited to 1.75mm filament?
While I think it would be a great & useful feature to accommodate both 1.75 & 2.85 mm diameter filaments, I doubt it could be practically implemented. It would require a different drive gear, which is not part of the exchangeable tool-head. I hope Prusa can prove me wrong, because I would use it.
I took another look & I was mistaken. The filament drive gears are part of the exchangeable tool head, so 2.85 mm filament tool heads might be feasible after all.
+1 I came here to make exactly the same request.
>We’re even thinking about mixing different nozzle sizes in a single print to shorten the print time.
Appears as if they are considering it
That’s just for the nozzle. You could use for example 0,2mm and 1mm nozzle in the same print, maybe fot business cards etc.
This is a seriously good product. Thank you, Prusa team!
One thing I noticed missing from the specs was max nozzle and bed temps. For a printer in this price range, I would expect to be able to print PEEK or PEKK. Is that possible?
PEEK/PEKK printers cost significantly more than this… And have way more sophisticated chamber heating systems / enclosures
I don’t think I’ve seen a PEEK capable printer with a build volume this large for this price. I also noticed the omission of the temp ranges on the specs. They’re also being open-ended regarding the enclosure upgrades. I believe most of the thermal-control-enclosure patents have expired recently, so it might be a reasonable upgrade if the hot-end is capable.
Interesting. I need to look into this if some of the patents are expiring.
The smallest, cheapest PEEK printer on the market costs about $4000 US more than the cheapest Prusa XL. You probably need to recalibrate your expectations (fortunately, calibration on the XL is automatic).
Over all size needed ? Thanks !
Would also be interested if this could fit inside my Ikea Pax, like the MK3s+ is right now.
Looks like they might announce official upgrades for enclosure panels so you wouldn’t need to put it in an additional enclosure. Similar to Voron 2.4. The bed moves up and down as opposed to forward and back like the i3 models, so the footprint is much smaller/efficient.
in the 3d printing nerd interview the show a pull up curtain
Looks awesome. Did anyone else notice the reference to larger spools and the image from the video showing the two different spool sizes (both prusament by the looks). I would love to have some larger spools available from Prusa for my most used colors.
Yeah it seems likely they will have 2-3Kg spools of Prusament available starting at launch of the XL. Pretty cool!
Have you all done testing with the nextruder on softer flexible filaments yet?
The diagram for the filament path looks…interesting, curious how it has performed with the likes of 85A tpu and softer.
It’s work with USB!
With the chip shortage right now, can you build the electronics in time? I mean I am still going to preorder it even if it takes a year, but still would like to know.
They said that they’re doing preorders so they can get an idea of the demand to place an accurate order for the parts needed. They have a pretty lenient window for release as well. Worst case scenario, it’ll take a bit longer to get your printer. Better to be early in the queue though 🙂
The fact that the huge build volume is the least exciting thing about this printer is pretty impressive. I can’t wait to get one.
Are there any plans for pellet based extrusion? On a large volume printer like this, using pellets would be cheaper and easier than changing filament rolls.
Even without direct pellet extrusion, I would be interested in Prusa making an affordable and reliable filament extruder. Perhaps one that can directly feed filament to the printer instead of going onto a roll.
As many in the comments I am all for upgrade kit for MK3S. Happy to swap whole extruder head. Jam detection sensor + extra thermistor in cold end are what I am after specifically. I am constantly getting jams due to either heat creep or bad filament and I’ve almost build my own filament movement detector, but it would be so much better for official solution to exist for mk3s.
Please let us know the approximate outer dimensions of the printer. It is really important for us to estimate whether we have space for it or not.
Agreed….
I’d like to know too!! I tried a little measuring on the available images using the 36cm cube as a reference. I’m estimating the frame structure is about 52cm wide and 55cm tall. However, the extruder and the feeding adds to the height, and a very rough guess there is that you’ll need 80cm free height.
Approx size is 80x, 80y, 90z per video yesterday
Absolutely loving it!! I’m wondering no body mentioned that there won’t be any purge blocks anymore \o/
Preordered the full thing ✌️
Many thanks Prusa, can’t wait ❤️
Such a huge leap forward—purge blocks are so freaking wasteful, I’m already worried about the amount of waste plastic I might generate, but with multi-heads, I am feeling much better about the whole process!
The automatic layer height calibration is super neat but depending on the materials used (ASA or Flex), the finish on the print required, and the build plate used (Textured, or PEI) I will definitely want the ability to save different print bed profiles as with the MK3s.
This is a critical feature that I think all advanced users will want. Prusa, can you please add this feature?
I agree. The automatic first layer is a great feature. But I’ve found myself in a couple situations where I need to print closer or further than “perfect” to get the result I needed. Still having the ability to still make live Z adjusts is needed.
Looks nice. I have just a few questions:
1) Preorder: OK. But if I decide not to buy it, do I get the prepaid sum returned?
2) Are the nozzles compatible with the current ones? As in: can we get nozzles from other brands as well?
3) Prusa Connect. Will that come to the MK3S and Mini as well? Thus eliminating Octoprint? I don’t want to use two different systems…
4) “Semi-assembled” Does this mean it comes in 3 parts like the Mini? I liked to built my MK3 from scratch: you get to know every screw…
It says fully refundable.
I guarantee it’s the same nozzle. They have no reason to change it.
I would assume it will have Prusa connect. No reason it wouldn’t
My guess is that it is somewhere in between the Mini and mk3s kit in assembly length/difficulty.
I’m not so sure the XL will accept standard nozzles. The video says that Prusa worked with E3D on the new nozzle design, however it’s not quite the same as E3D’s Revo Hot End and nozzle combination. Still, what if it is similar to the Revo such that it offers design features not available in a standard V6 nozzle (i.e. ease of changing whether hot or cold, elimination of critical hot tightening to the correct torque, and reduction or elimination of jams)? In that case the Prusa XL nozzles may be the only ones that initially will work with the new XL toolhead. I’m certain I won’t like the introduction of two different “standards” (Revo and Prusa), both being incompatible with prior V6 nozzles, but if acceptance of sole source nozzles (at least for a while) is needed in order to get all of the other advantages that come with the XL, it’s probably a compromise worth making.
Hmmm, so more than double the price but more than double the print area (runs away and grabs calculator)…
I run a small scale print farm of I3Mk3’s with MMU’s printing two colour prints, I can get an average or 32 objects on my i3 build plate, the printers cost me $1048 each (i3 + MMU), so that is $32.75 per object, the Prusa XL will allow me an average of 75 objects per print, the two extruder one will cost $2499, so that is $33.32 per object, not even 2% more!
Given my failure rate is around 5% of which most are caused by filament jams (which the XL is supposed to be able to detect) if it really can significantly improve my failure rate, then its a winner from the get go, and that isn’t even accounting for lost time due to failures, oh and all the downtime the fricken MMUs cause me.
Where do I sign up?
You forgot the filament saving from no more purge blocks…
I would love to see an upgrade kit for the mk3s with the new extruder and Mainboard/display. I don’t need a printer this big, but i miss the features.
If it’s reasonable priced, it would be an alternative for many costumers!
This printer is a real dream machine. It blows the competitors out of the window. It will be hard for them to catch up as you are setting the standard at top notch.
I may have to get an XL, but the problem is my two MK3S’s and Mini have been working flawlessly from the start. I wonder if I really need the XL, but I know I want one!
Has some one seen outside dimensions for this printr?
This was my next question too. I’m thinking about where it’s going to reside. I have built an enclosure for my MK3S+, and I’d love to integrate this into that same structure. Looks like a beast though. Not sure my current structure will have the space to stack them.
semi-assembled? How long and difficult to assemble? Comparing to the kit for the mk3s+
Also is shipping included?
Do you expect semi-assembled to cost less to ship?
I am also curious about this
The weight for shipping will be the same for the kit or the fully assembled version.
I hope it will be the full kit, like we had with the MK3, but I guess there will be some part pre-assembled. I hope it’s not like the Mini, but more to do, so we get to know the device…
Pre-ordered! Awesome!
I saw the video of 3D Printing Nerd on Youtube this morning. Peordered half an hour later. Never saw a printer filled with so many new features before ! Very, very awsome !
All you preorderers are welcome to fill the unofficial preorder list and see how far we go on XL preorders 🙂
https://docs.google.com/spreadsheets/d/1T3R2-HVseoCHnJVcE8VNkzwNKc2F5QdhXlxQngXHesY/edit#gid=0
PRE-ORDERED!
I was wondering if Prusa could push the boundaries like they did with the MK3 again. And they did! The future is here! I would be nervous if the name of my company was Ultimaker.
Does it mean that it will support prints with different nozzle sizes within one print? I.e if I print solid part of object with 0.6 nozzle tool, but after big part is finished switch to nozzle 0.25 to print details?
It seems so. In the text above they wrote:
“We’re even thinking about mixing different nozzle sizes in a single print to shorten the print time. Of course, we’re considering other tools as well, not just extruders”
Pre-ordered 😉 Finally!!! I have been waiting for this Prusa printer for a loooong time.
Thank you for doing actual engineering to create a better 3d printer (instead of race-to-the-bottom clones).
Please ship with plated wear resistant nozzles (like Micro Swiss sells) so we can print carbon fiber, etc…
Pre-ordered a 5 head version.
Very curious how the machine handles oozing and are cleaning of nozzles between tool changes (if it does at all).
Also curious to see what the enclosure will look like and cost.
Didnt you spot that accordion type curtain in the Formnext video?
If you look closely at the video (and the one with Joel), you can see that the upper ‘arms’ are classic extruded metal parts. The linear rails are mounted on top of them. But the outer sides seem to be free. So it would be very easy to cut plexiglass to size, and mount these with a few clamps inside the extruded arms. Some hinges in the plexiglass at one side, a magnet on the other side, and you’ll have a see-through enclosure…
I see two VERY serious issues that if not fixed we would have to NOT recommend this 3DP.
First issue is the use of the orange plastic for the parts that the x gantry rides in Y. These parts are also housing the gt2 belt pulleys. The belt tension required to these pulleys will easily deform the orange plastic. These parts have to be METAL.
Second issue is the X axis gantry is just the linear rail! We’ve learned that this part is not rigid enough over about 10” in length. The pic shows it’s well over that length which we in our experience allows it to sag and rotate.
This 3DP has the potential to lead the market for multiple reasons PLEASE DON’T ruin it by making ill informed choices in design as sooo many others have during the past 10 years! Please Do NOT leave it to your first batch of buyers to fix mistakes!
The X-Axis beam are at least two parts. You can see that the rail is screwed in every second hole to something behinde it. I’m guessing in Prusa tradition into a Misumi extrusion.
About the printed parts, Pruas has proven in the last view years that their filament is sufficient to tension a belt moving all axis without the constat hassle of retightening over and over again.
I have the prusa mini+ and mk3s.
Of course I was willing to buy the big boy but I am out. 2100€ is out of my league. I’m not saying it’s not worth that amount but I just can’t afford it.
I am really satisfied with your product. You have made a great machine and I am sure you will sell a lot.
Best regards.
I pre-ordered one yesterday when I saw the announcement.
Anyone know or has the information regarding physical size so I can think about where to place it in the workshop, which is already tight on space?
“Of course, we’re considering other tools as well, not just extruders.”
– If the printer can do extruders, CNC and laser I will sell my car to get a Prusa XL instead! Priorities set!!!! XD
So I hope they have a laser attachment for the Prusa XL. One that would cut and inscribe things.
Hi,
How much is the shipping to Australia?
Pre ordered 5 head version cant wait 🙂
Prusa Customer Support on the expected size and weight of the XL:
Thank you for reaching out to us.
The dimension of the XL printer is ~500 x ~600 x ~700 mm. Unfortunately, I do not have any information about the printer’s weight yet as it may also change in the future and based on how many tools the printer has. I will let you know as soon as I have more information about that.
Let me know if you have any further questions.
I agree with many comments, that the automatic first layer would be awesome to upgrade the MK3. I’ve to calibrate the first layer everytime I change the nozzle, and sometimes I don’t do it to avoid it.
Also, a 2×2 segmented bed could be great, as almost everything I print is quite small and it would save time to get the desired temperature, as well the energy saving.
I have my MK3S+ and the MMU since january and I wouldn’t change it right now, but I love the 5 independent extruders from this new model. Great job!
not sure if its been asked but how much assembly is required with it being a corexy machine would the frame with the extruder come built and you just bolt things together ender 3 style or would this be a full ground up Building like the mk3s kits just want to know before dropping for the built version as im not that technical and got my mk3s ready built lol.
It’s like “E3D ToolChanger & Motion System” and Voron had a child.
Exited, not that I will be able to afford it but still exited. I Just hope that this printer will create new standards for 3Dprinter industry and given some time…
Wen IPO?
Question on tool-changer option:
1) With the single extruder XL model can I still use my MMU2S ?
2) With 2 to 5 tool-heads on the XL will we still need a purge tower for multicolor/multi-material prints? Not sure how oozing of filament from a pre-heated nozzle will be addressed mid print if no purge tower? Any insight would be appreciated.
Next Gen of MK3S+/Mini+: Seems pretty obvious that the segmented heatbed/updated extruder/main board will eventually find their way into the next versions. Looking at the new bed segment size, also seems logical to expect the mini/mk3 sizes to be in multiples of 9cmX9cm bed sizes i.e 4 tiles for mini and 9 tiles for Mk3 (new 270mm?)
Would be good to hear from Prusa on their plans and timelines for existing printers/upgrades too, so we can plan accordingly.
Will one be able to change payment method for the remaining balance before shipment?
The idea of the extruder being used as bed level sensor is very interesting, but…
I guess this will only work reliably if the extruder is completely clean! Filament blobs on the extruder are very frequent: that’s why we do a purge before printing, don’t we?
I have another idea: if Prusa says the printer can change tools very reliably, then we could add a special tool: a “touch needle” as sensor for the bed level calibration. That needle will always stay clean and reliable.
It could even be used as a sensor for scanning objects. Then our printer becomes a scanner… (only in z-axis, but it’s a scanner anyway).
one of the points of that function is it will work for all different tools
and also it is not big problem as we can just clean them with brush.
What are the Physical Measurements including the filament holders?
hi
Realistically regarding the tool head changer.
Idea – awesome
Though, do you have something to calculate how many tool changes per model (yes i know it depends on size and colour changes and or supports (type and number)
I am talking an addition to the slicer algorithms as it does other calculations and knows all the above details. I just want to know will a tool changer wear out after a year of printing a few model a month?
1,000,000 changes is not a lot if a model requires 10,000 tool changes
Ok there are Questions :
1. Limited to Prusa Nozzel
2. Limited to Prusa Extruder
That two Points make me ask :
High Vibrations , when i see Videos from the Formnext , Printspeed.
I don´t want to Print a Bechy in 1,5 Hours again.
The Rest looks nice
Wondering if there will be a hardened nozzle option for this, since it’s going to be a proprietary mechanism? Currently using the E3D NozzleX on my i3 with occasional abrasive filament (luminescent); haven’t used brass nozzles in a long time due to wear concerns.
(Yes, I put my deposit down on launch day…)
Hello all,
I was wondering why Prusa didn’t come with IDEX (2 indépendants heads).
– You can print 2 objects at the same time
– You can use 2 colors without purge
If you consider the XL with 2 head mounted will cost : 3200 €
with no enclosure, no cam,no wifi not sure about ma temp of nozzles ?
For 3500 € you are reaching professional printer with IDEX
ex: RAISE3D E2 with high temp nozzle and full enclosure.
For sure there will be new ones like that when they will start to ship XLs.
I really like Prusa but I am currently hesitating a lot !
pleassse help me !
I know what you mean. There are supposed to be a bunch of upgrades and stuff before we get to order our final machines. My big issue is with wifi. I modified my MK3S with a larger enclosure just so I could put a Pi 4B inside the enclosure and hook it up to GPIO. I am still gonna buy the printer but I would really like to know that they at least put in some kind of interface for wireless printing.
My bad, that was supposed to be a reply to @Ennox, 2 messages up.
Will it support loading prints via wifi out of the box, or is that still something that will have to be done as an aftermarket addon?
Looking to see if there will be a Nextruder print head for the Mk3S+ (++?) something that handled TPU better than the current print head would be a good upgrade.
I hope some day they will offer an “XL” of the “XL” in which increased the Z axis length. Since the bed is fixed, lengthening the Z is possible without too many issues.
Hi, I’m wondering if the XL with draft shield will be able to print ASA models that are fairly large (almost the complete heatbed) without warping or that this would require a model with actively heated chamber.
The MK3S without draft shield is only capable to print chess piece sized ASA models and I’ve understood that a home built enclosure would damage the printer due to the captured heat.
After reading the latest update about the plans for overcoming the challenge of a wipe/purge tower using nozzle temp, I gotta say I’m concerned about what is starting to sound like a lack of experience or simply no comprehension of the problem. E3d could not figure it out and I really doubt Prusa will. Changes to nozzle temps during prints will greatly increase print times. You can’t simply ignore the challenge of prime/wipe. I suggest reading the solutions developed by the users for the E3d TC on their forum.
Yay.
I completely understand that Prusa3D has problems with the shortage of quality components (our company, although buying components like maniacs already since March 2020 (an intelligent move) now is forced to stop producing first variants of our product).
But still this is really bad news. I am a day 3 pre-order guy, which now probably means that I would be lucky to get my unit before the end of 2023. My custom 3D printer, in use since 2015, finally irreparably died a few weeks ago and now I need to fill the gap with some throw-away printer of the 200€ class and can hope that this thing will work at least one year (these Chinese products unfortunately did prove some prejudices to be to be no prejudices at all). Of course I could buy the Mini+ (kind of a strange idea, buy one device from a company to solely wait for another device of the same company to be delivered due to delays in production), but I just checked, the kit version now costs 459€, I recall to see a price <400€ for that just a few months back -.-
May we live in interesting times…
The price point of this 5 extruder corexy printer places it fair and square in the category of “high End prosumer” or even professional grade.
I think Prusa have dropped the ball regarding development of the XL. Yes, its great with up to 5 print heads, but certain key things are missing:
– Enclosure. Every other high end printer on the larket comes fully enclosed, nothing extra to pay. Looks like the XL could easily have polycarbonate sheet sides, top and doors added for not much extra cost. As it is, Prusa have said little about enclosure for the XL.
– Nozzles. Yes, it comes with a 0.6 mm brass nozzle. But this is a high end nozzle. Printing with composites is “normal”, so why do we not see hardened steel nozzles available. I think prusa ought to include a selection of nozzles, including 0.4mm and 0.6mm, and both steel and brass in the box.
– Beds: Again high temp and composite materials form the mainstay of high end printing. So, why ship the printer with just a smooth steel bed? Why not include, Satin, Textured and PA Nylon bed sheets.?
Really, Prusa should look at what competitors are offering. Yes, the 5 Extruder capability makes this printer distinct from the crowd, but why to customers need to order extras for it to get a fully functioning system ? All the others offer fully enclosed (and some have heated) enclosures.