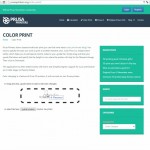
We managed to make another progress in our colorprint! We have placed the interface for adding changes to gcode on our websites. So now you can modify your gcode online! No additional program is needed.
In this video Dave shows how to prepare gcode for multiple color printing.
Never heard about ability of multiple-color printing? Check our previous post.
How to do it:
The way how to modify your gcode stayed simple:
- First of all you need to prepare regular

gcode with common print and filament settings.
Save the file.
- Then go to out websites and choose

Color Print in the header menu.
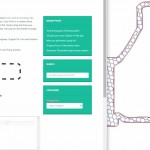
- Find the height of the layer, where you want to

make the color change. This can be easily found in
Slic3r under tab “Layers.” The scale along right side
displays the height of idividual layers. Set this number to the box.
Number of these changes is unlimited. - When you are done with your modification,
download the file. This file is ready to be printed!
Insert the filament which you want to start with into your printer and start printing the file. When the printer is triggered from the gcode it will act like this:
- Stop moving and retract
- Raise the Z by 2 mm and move quickly outside the printbed
- Unload the current filament
- LCD panel will ask you to insert the new filament and confirm when it’s done
- After the initial loading of the filament you will get three options on the LCD 1) Everything is correct and printing may continue 2) Filament didn’t load, try again 3) Extrude a bit more if the color is still tinted by the previous one
- After confirming, printer returns to the original position and continues to print.
Notice
You should always use the same material or combine materials with similar print temperatures and settings.


This is something that I am REALLY interested in trying out. I am running windows and, unfortunately, I have been unable to get the online app to work on any of the browsers i use (explorer, chrome or firefox). Is this only compatible with iOS at this time, or is there something I am missing perhaps?
This does not seem to work with more than one layer, several attempts at 3 or more color changes always fail at change 3. 🙁 It will load the first two, then on a third, it will just stop and not so anything, just stop mid print.
This is not currently working it gives me no option to make a color change even though it recognised the G-Code as Slic3r. I tried chrome and firefox.
Any solutions to this Prusa? I would really like to be able to give this a try. I could spend some time learning to hack the gcode but if this tool does it for me then I would prefer to use this!