3D printing is quickly becoming a widely accessible and user-friendly technology. Despite this fact, some users (especially beginners) can sometimes run into various difficulties during the printing process. Such problems are usually caused by improper configuration or just by a random accident.
We have compiled a list of five more-or-less common issues you can theoretically encounter with your 3D printer. Plus, we’re offering useful tips how to solve these problems or prevent them from happening completely.
The first layer does not stick to the print surface
This is by far the most common 3D printing problem, and probably the first one you may encounter. The first layer is the essential one as it is the base of the printed object. Therefore, if it isn’t perfect, the chance of print failure increases.
What happens when the first layer isn’t perfect? Most of the time you will not be able to start the printing process, or the printed objects may continue to constantly detach from the print surface.
Making the first layer stick:
- Proper calibration of the first layer – First, you must perform the First layer calibration. Once you are happy with the result, you can start printing. Later on, you may apply small adjustments to the nozzle height through the Live Adjust Z option when the printer is creating the initial three layers. Just press the Knob and go to the Live Adjust Z. If you are not sure how the proper first layer looks, check out the photo above.
- Prepare the print surface – Keep the surface free of grease. Otherwise, your first layer will have a difficulty sticking to the print bed. Before starting any of your prints from ABS, PLA and many other materials, simply wipe the print surface clean with IPA 90%+. Also, you should use Acetone from time to time, when prints stop sticking – but do not use it on daily basis. PETG is an exception, so do not use IPA 90%+ and Acetone when you are printing with this material. For PETG, we recommend using a separating agent (e.g. a glue stick). A complete guide how to prepare the print surface can be found at PEI print surface preparation
- Use proper printing temperatures – Make sure to use the proper nozzle and especially the correct heatbed temperatures. If you are experimenting with new materials that don’t adhere well, you can try to bump up the heatbed temperature by 5-10°C. This way the plastic will stick a bit better.
- Decrease the printing speed – If everything above failed, then try decreasing the printing speed. The easiest way how to do it is by rotating the knob during the printing process. Anti-clockwise = decrease speed, Clockwise = increase speed. We suggest decreasing the speed to about 75% for first three layers, then return it to normal.
Layer shifting
Layer shifting is an error which causes some of the layers to shift from their designated positions. It is usually associated with improper movement of an axis, leading the extruder head to be misaligned mid-printing without any notice. In other words, there is at least one layer which is not properly aligned.
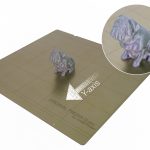
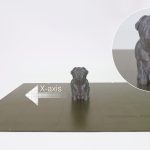
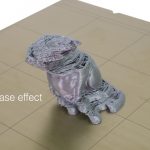
You may experience layer shifts in different axis movements. To troubleshoot the issue correctly, it is crucial to diagnose to which axis it is happening. To clarify, check out the photo below which demonstrates three different kinds of layer shifts. Troubleshooting itself is the same for both axes.
Preventing layer shifts from happening:
- Check your printer’s power mode – For objects larger than 200–300g, or for objects with a complex geometry, run the printer in Normal mode. You can change Power mode in the LCD Menu – Settings – Mode.
- Check your X/Y belts – Make sure that belts are tight enough. Belts should be tight enough to sound like a low bass note when plucked.
- Check your X/Y axis pulleys – Make sure that the pulley on the motor shaft is secured and the idler pulley can move freely on the opposite end. A loose pulley is usually the main cause of staircase layer shifts.
- Make sure nothing is blocking the movement of your axis – Make sure there are no obstructions in the path of the bearings or any possible waste from previous printings stuck around the belt (usually around the Y-axis pulley). You can read more about general printer maintenance in this article.
- Difficult geometry to print – Objects with larger overhangs are generally harder to print. These overhangs might warp mid-printing and hit the nozzle. To prevent this, you can cut the object (check out one of our previous articles Cutting STL models). You can also try to increase the print fan speed or increase the Z-hop distance in Slic3r PE. Both of these settings can be changed in our Slic3r PE. Print fan speed in Filament settings – Cooling and Z-hop distance in Printer Settings – Extruder 1.
Stringing
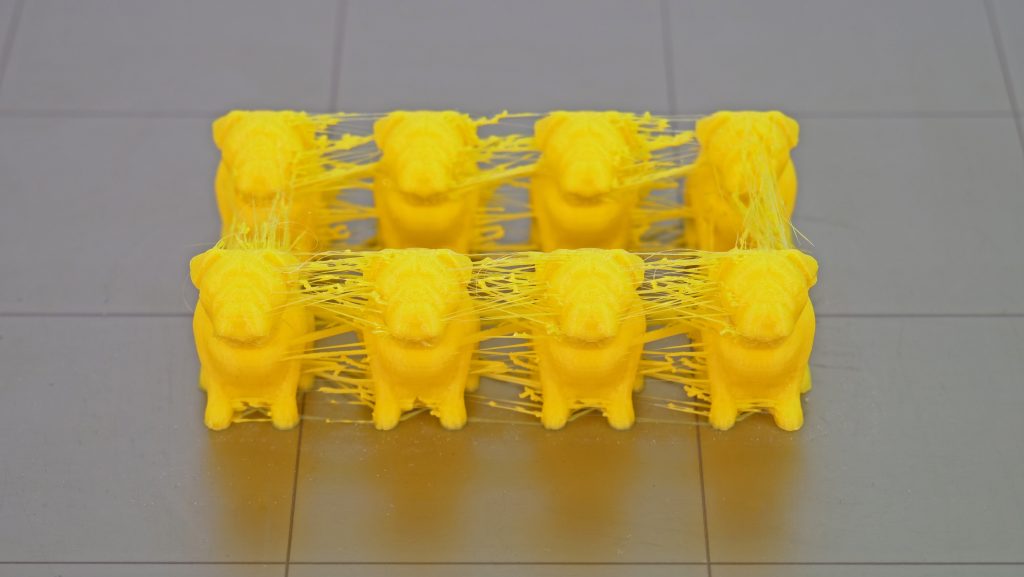
Stringing usually appears if your print settings are not accurate, while you are printing complex objects (such as Moon city) or multiple objects at once. This is recognizable as a marginal line of plastic left behind or between the object/s. In other words, it’s that hairy bit of plastic we don’t like to see.
Keep in mind that some filaments, such as PETG or flexible filaments, may be stringy even with perfect print settings. In the photo below, you can see an extreme case of stringing. Usually, the stringing is not so severe, but if you encounter something similar to the objects in the photo, follow the instructions below.
Preventing strings from happening:
- Check the tension bolts – Before you touch any of the settings, make sure that the Tension bolts located on the extruder idler are properly tightened, although, this is not that common.
- Use proper printing settings – We highly recommend using the preset settings in Slic3r PE or PrusaControl. However, if you are printing with your own settings, make sure that you have the retraction settings set correctly. Retraction settings can be found in Slic3r PE in Printer Settings – Extruder 1.
- Try to lower the nozzle temperature – Lowering the temperature will minimalize strings. Therefore, you can try to decrease it by 5 – 10°C.
- Don’t bother, just use a heat gun! – If you don’t feel like tweaking any of the settings, well, then there is an alternative. You can get rid of the strings with a heat gun (or possibly with a lighter). Just set it to around 200°C and aim at the strings for one or two seconds. This will melt the strings, and the printed object should remain undamaged.
Spaghetti monster
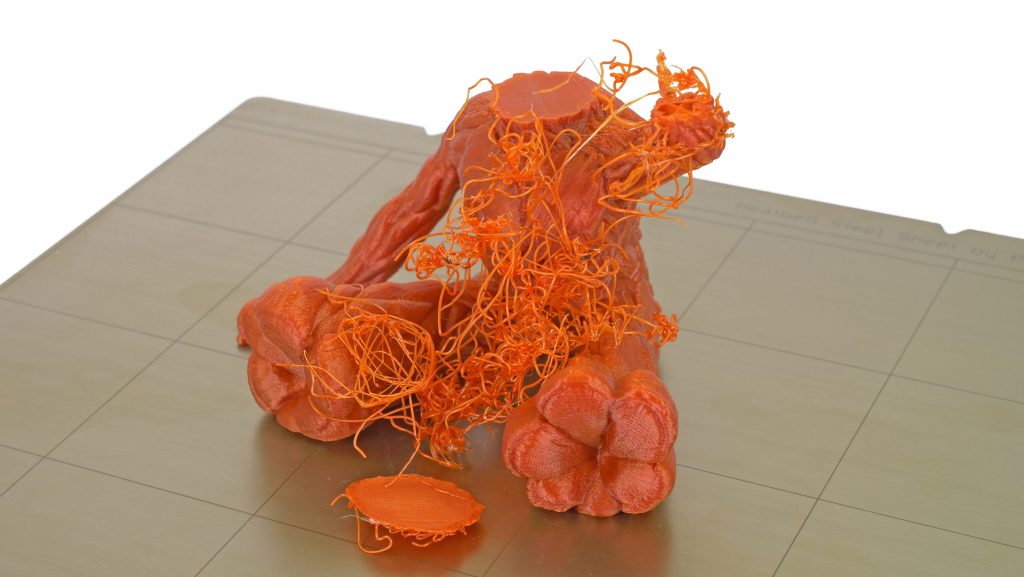
Even though the name of this printing error sounds pretty cool, that’s about the only thing that’s good about it. It usually happens after most of the printing is complete.
As mentioned above, once the first layer isn’t perfect, the chance of any type of print failure increases. The so-called spaghetti monster is a perfect example of this. What usually happens is that the printed object detaches from the print bed mid-printing, and the remaining layers stop sticking to the object. The other common source of this problem may be an error within the STL object.
How to prevent the spaghetti monster from appearing:
- Check the first layer – Simply make sure that the first layer is sticking properly to the whole print surface. You can refer to “The first layer does not stick” chapter mentioned above.
- Check the object for errors – Always check the generated G-code in the Preview of our Slic3r PE. In case you find any gaps or broken geometry, you can either repair the STL object yourself or you can use one of our previous guides where we show How to repair corrupted 3D objects.
- Try to increase the bed temperature – If you have already experienced this error, try to re-run the print and increase the bed temperature by 5°C. This should help with the first layer adhesion. You don’t have to re-slice the object and prepare a new G-code. Just start the print, go to the LCD Menu – Tune – Bed.
Extruder blob
Extruder blob is one of the worst printing problems you might face with your 3D printer. Unlike the spaghetti monster, this issue occurs earlier in the process, usually during the initial 5 minutes of the print. The first layer becomes detached and covers the nozzle, while the extruder keeps extruding and the blob grows and grows, leaving you with a non-working printer.
Don’t worry, it is really easy to prevent this situation from happening. However, it is quite tricky to clear it after it happens. Just to make it a bit easier for you, we have prepared a short video where we show you how to remove it.
How to prevent extruder blob from happening:
- Check the first layer – Since an improper first layer is the source of extruder blob in most of the cases, make 100% sure that the first layer is sticking properly to the entire print surface. You can refer to the “First layer not sticking” above.
- Monitor the print for 5–10 minutes – Let the printer run for 10 minutes and check the progress. We recommend doing this every time. If you observe any issues, restart the print. If everything seems running okay, then you can just let your printer finish the job. After the initial 10 minutes, it is unlikely your printer would create an extruder blob.

Hi,
Could you simple add the values (optimal ones) of the belt tension as it is possible to see instead writing ‘sound like a low bass note when plucked’ it would be much more useful for everybody. In the book it is written values 240 +/- 40 are good. What does it mean if I will have lets say 100 and what if I will have 400? It would be nice to explain it. Thank you.
The measuring of the belt tension by the stepper drivers isn’t accurate enough at the moment for us to be able to tell you “This number is wrong” or “It should be exactly this value”. It’s a unitless value measured as an average motor load and currently, it’s only there to quickly recognize very badly tensioned belts or loose pulley.
“PETG is an exception, so do not use IPA 90%+ and Acetone when you are printing with this material.”
Why?
Because the print will stick too well to the bed, however I find that when using the textured sheet and printing petg, it works well with IPA. But the PEI sheet can be damaged.
Hi,
after a ton of perfect prints I had to go through this again, because of a new textured sheet. The old one I ruined with aceton.
After feeling like a newbie again, I think a have a fix, which I think prusa could apply for everyone. I am printing at low ambient temperatures (10°C) so I guess this is why Prusa and many others may be not affected of my problems.
I believe the problem is leaving the extruder too long at high temperatures without printing. The filaments start to clog an drool out because heating my bed can take a few minutes.
Each time printing the intro line made a very small blob on the nozzle. The nozzle was super clean before starting and dirty after the intro line. If you have the same problems this might be for you.
With a dirty nozzle it collects more filament and looses it clogging to the print object. Well that was it for a lot of my prints.
So here is the fix: In the beginning heat the extruder to 30-40 °C less than needed for printing. Wait for the bed to be heated. While mesh bed leveling go to final extruder temp.
This gives a super clean intro line an nozzle through the print.
Here is my user defined G-Code:
…
M83 ; extruder relative mode
M104 S190 ; set extruder temp just below melting too much
M140 S[first_layer_bed_temperature] ; set bed temp
M190 S[first_layer_bed_temperature] ; wait for bed temp
G28 W ; home all without mesh bed level
M104 S[first_layer_temperature] ; set extruder temp
G80 ; mesh bed leveling
M109 S[first_layer_temperature] ; wait for extruder temp
G1 Y-3.0 F1000.0 ; go outside print area
G92 E0.0
…
Happy printing!
@Prusa: this would help almost everyone I guess. A print will take only 2 seconds longer.
Is there a reporting function for spam in comments?
My base layers dont stay flat. Filament pulls away and leaves empty spaces and the printer head just catches the hard pieces and pulls up my prints. Looks like water surgmface 8n some spots and the bottom is trashed. Besides this bed does not go flat on the mini
Wow! Looks like water surface.
3D printing can sometimes be frustrating due to common errors, but most issues are easy to fix with the right approach. If your print isn’t sticking to the bed, level the Gold build plate and adjust the nozzle height. For stringing, reduce the printing temperature and enable retraction. Warping? Use a heated bed or adhesive like glue sticks. Layer shifting often occurs due to loose belts or pulleys—tighten them properly. Under-extrusion may stem from a clogged nozzle or low filament flow—clean or adjust settings accordingly. Overheating can cause blobs; improve cooling with a fan. If layers aren’t bonding, increase the extrusion temperature. Regular maintenance and calibration ensure smoother prints. With these fixes, you’ll minimize errors and achieve high-quality results.<a href="https://regalcapitallenders.com/">Gold</a>