


The SLA 3D printing technology is usually the first one that comes to mind when you think about scale modeling hobby. Of course, the level of tiny details, which could be rendered by printers such as our Original Prusa SL1, is hard to match. On the other hand, many hardcore scale modelers may undervalue or dismiss the FFF (FDM) technology altogether, based either on a bit outdated experience (what cheap FFF printers were capable of 5-8 years ago) or unrealistic expectations. Of course, FFF cannot compete with the SLA directly. No matter how hard you try, it won’t produce a half-decent 1/72 or 1/48 scale machine gun, cockpit seat, or radial engine. Does it mean the technology is irrelevant for scale modelers? Not at all!
If you look at a broader picture, things start to make much more sense. First, there are all the “indirect” applications where visible print layers don’t matter – various jigs, spray booth components, airbrush holders, storage systems for your paint bottles, stands, display bases, etc. We hope to cover such things in some of the future articles.
But there are also vast possibilities of using the FFF technology for the actual models. Of all the various specializations, it will probably be the most attractive for diorama modelers.
The usual downsides of the technology don’t matter much here, as many diorama parts are going to be heavily post-processed (large terrain blocks) or are supposed to have a coarse texture anyway (ruins, bridges, concrete bunkers, trees, etc.). However, we would like to show you that even much more delicate scenery pieces are well within the capabilities of your Original Prusa i3 MK3S or MINI printers. Imagine small scale furniture, various vegetation (tree stumps, cactuses..), statues, verge blocks, wayside shrines… well, the list could go on for the rest of this article 🙂
By the way, we have already covered a similar topic of taking a FFF printer to its limits in one of our previous articles, focused on printing miniatures.
Two important tips from this article deserve to be underlined:
- Precision can be significantly increased by changing the nozzle to the 0.25mm diameter
- Very good results can be achieved with ASA. It’s very similar to styrene, the base material of most scale model kits. It can be sanded, carved or rescribed more easily than PLA. Surfacer and paint “bite” better into the surface, and the material reacts to usual modelers’ solvent glues.
But back to the topic of dioramas. We present to you an excellent example, sent to us by our external contributor Michael Mandau.
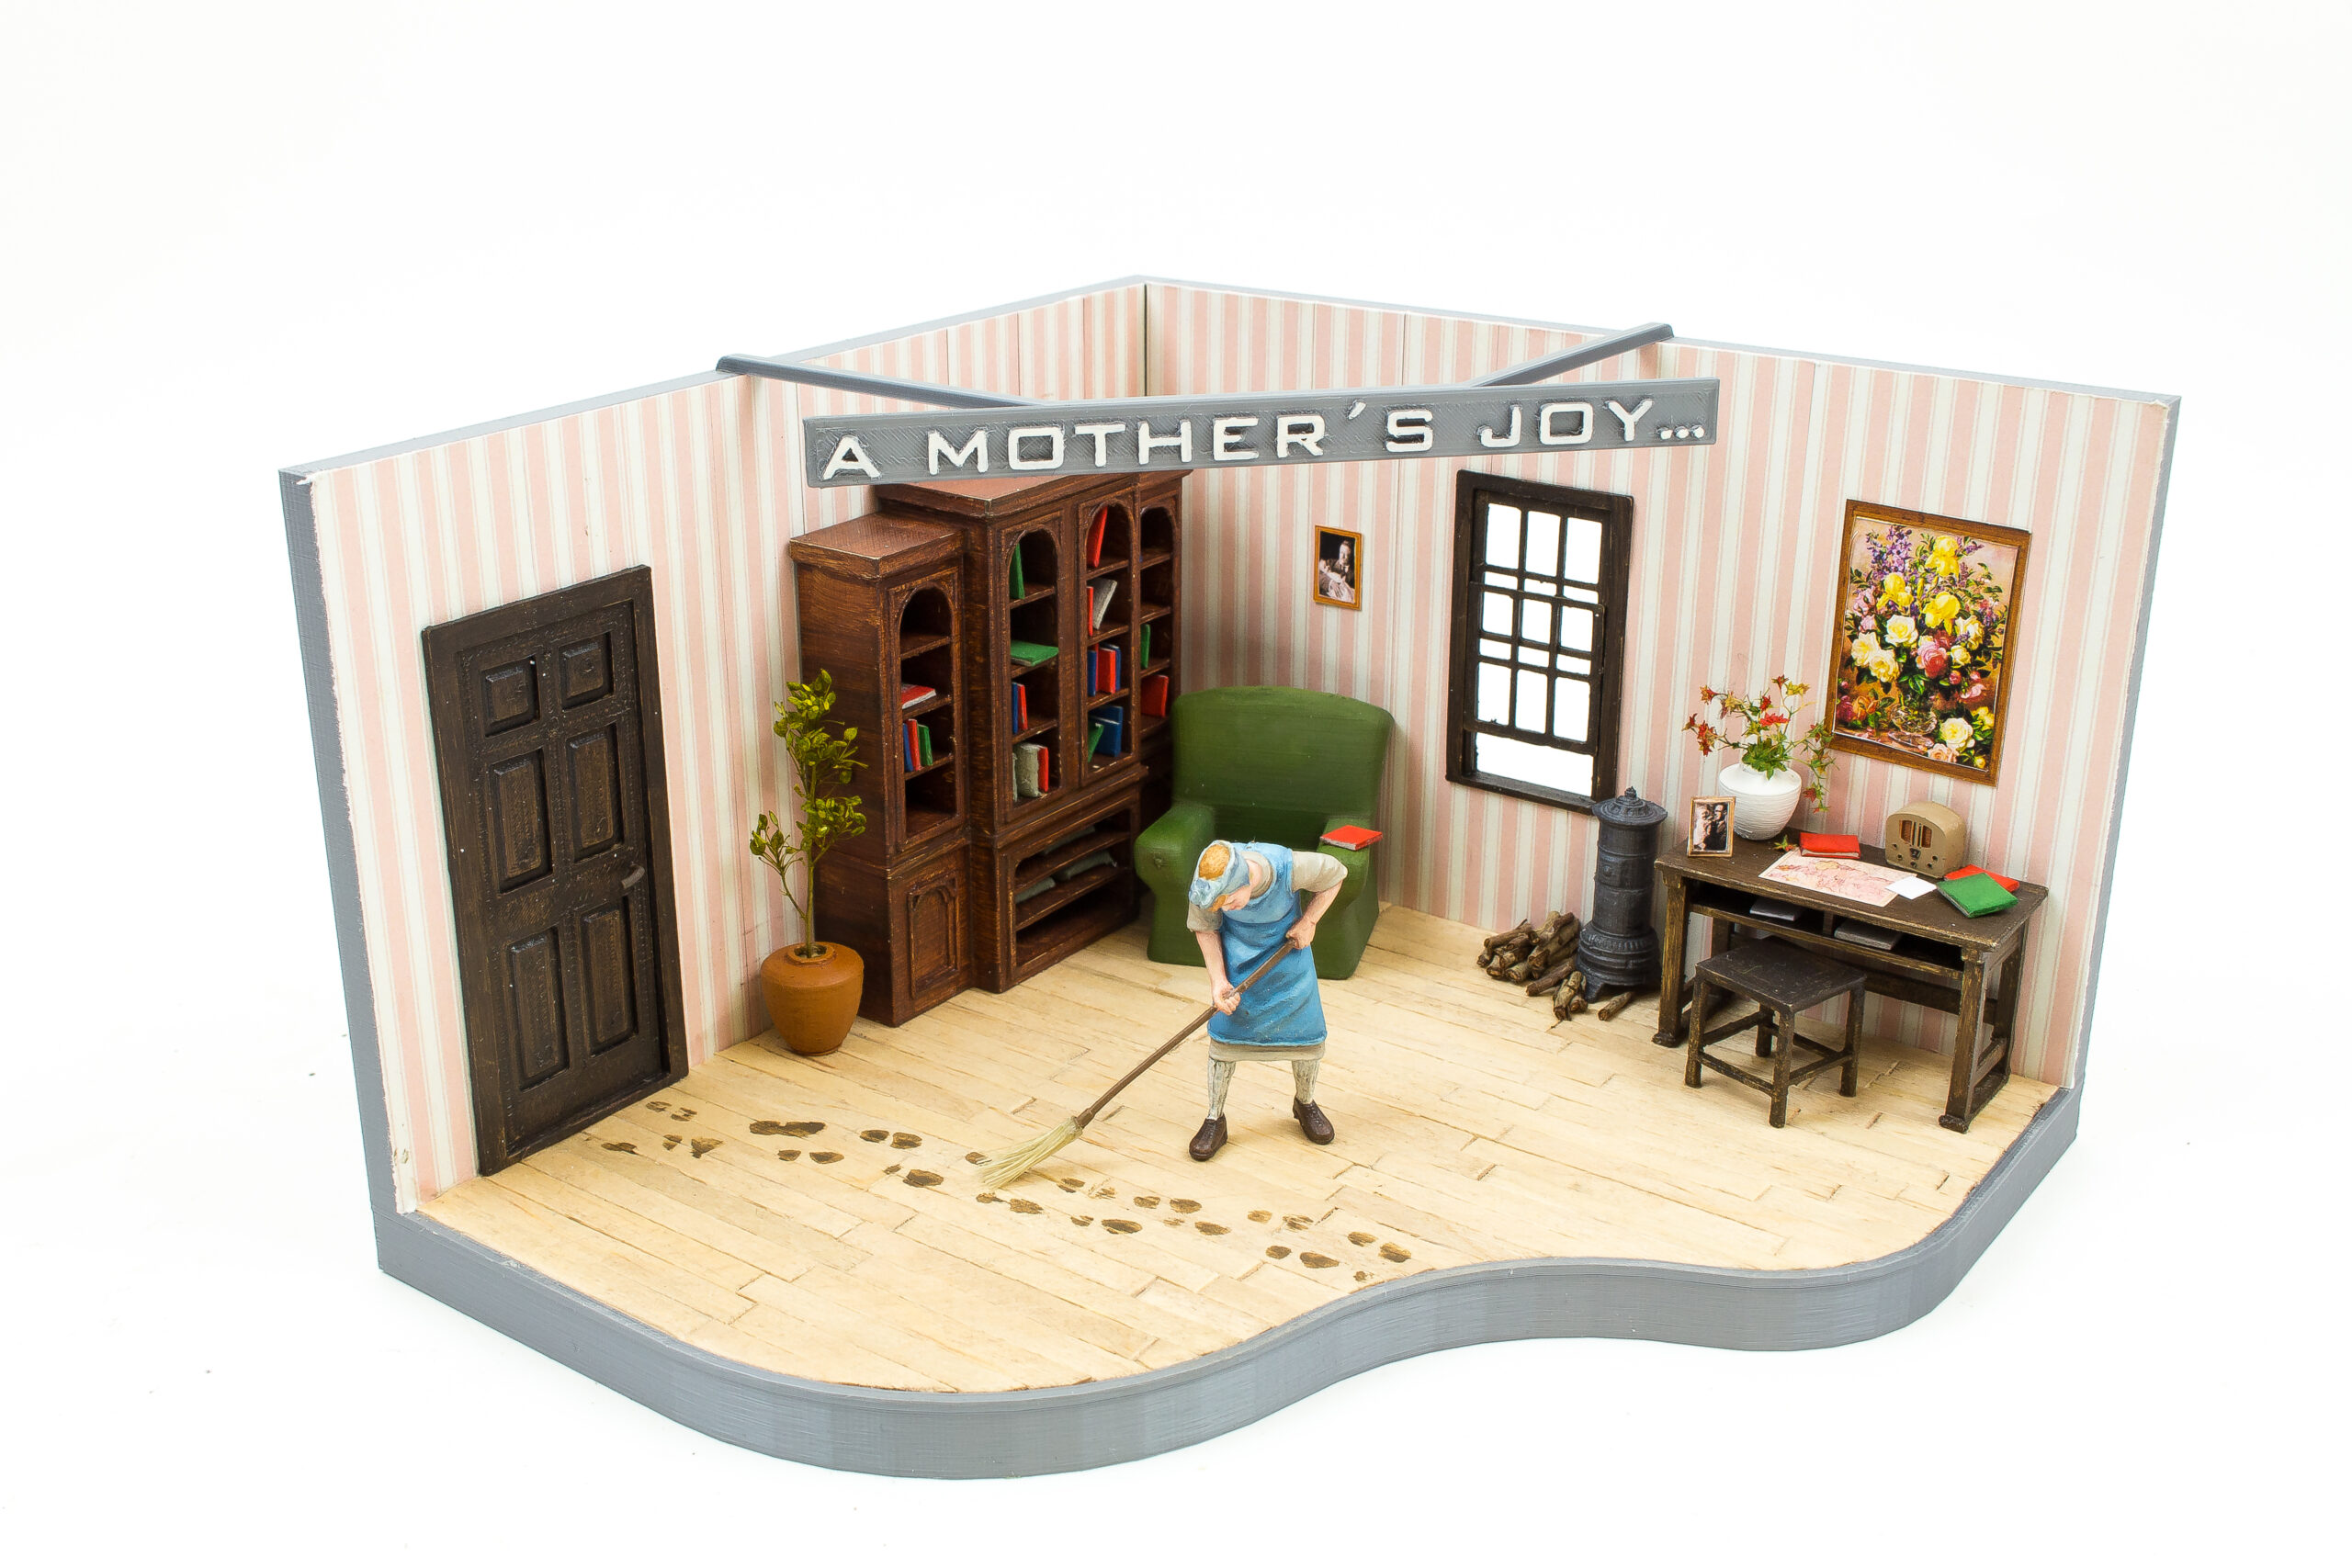
Michael is an experienced diorama modeler and a fresh owner of the Original Prusa i3 MK3S printer. Usually, he makes quite elaborate war-themed scenes. His latest work, called “A Mother’s Joy” is quite the opposite: a simple, light-hearted vignette. It’s mainly just a proof of concept for some later, more complicated projects. For this reason, Michael kept it simple on purpose, using a “vanilla” MK3S with factory settings, a 0.4mm nozzle, and a regular PLA filament. Almost no 3D modeling was needed, all objects are ready-made, downloaded from free online databases. And most importantly, no tedious post-processing (sanding) was necessary, the scenery is just printed and painted.
Anyway, without further ado, over to the author himself:
A Mother’s Joy…
The other day, one of my little kids rushed in with dirty boots still on, leaving behind a trail of mud, much to the dismay of my wife. An idea for a simple diorama was born! After a quick search through the available online databases, a few interesting objects were found and rescaled to 1:35 scale using the Scale function in the PrusaSlicer. With those models at hand, the planning could begin.
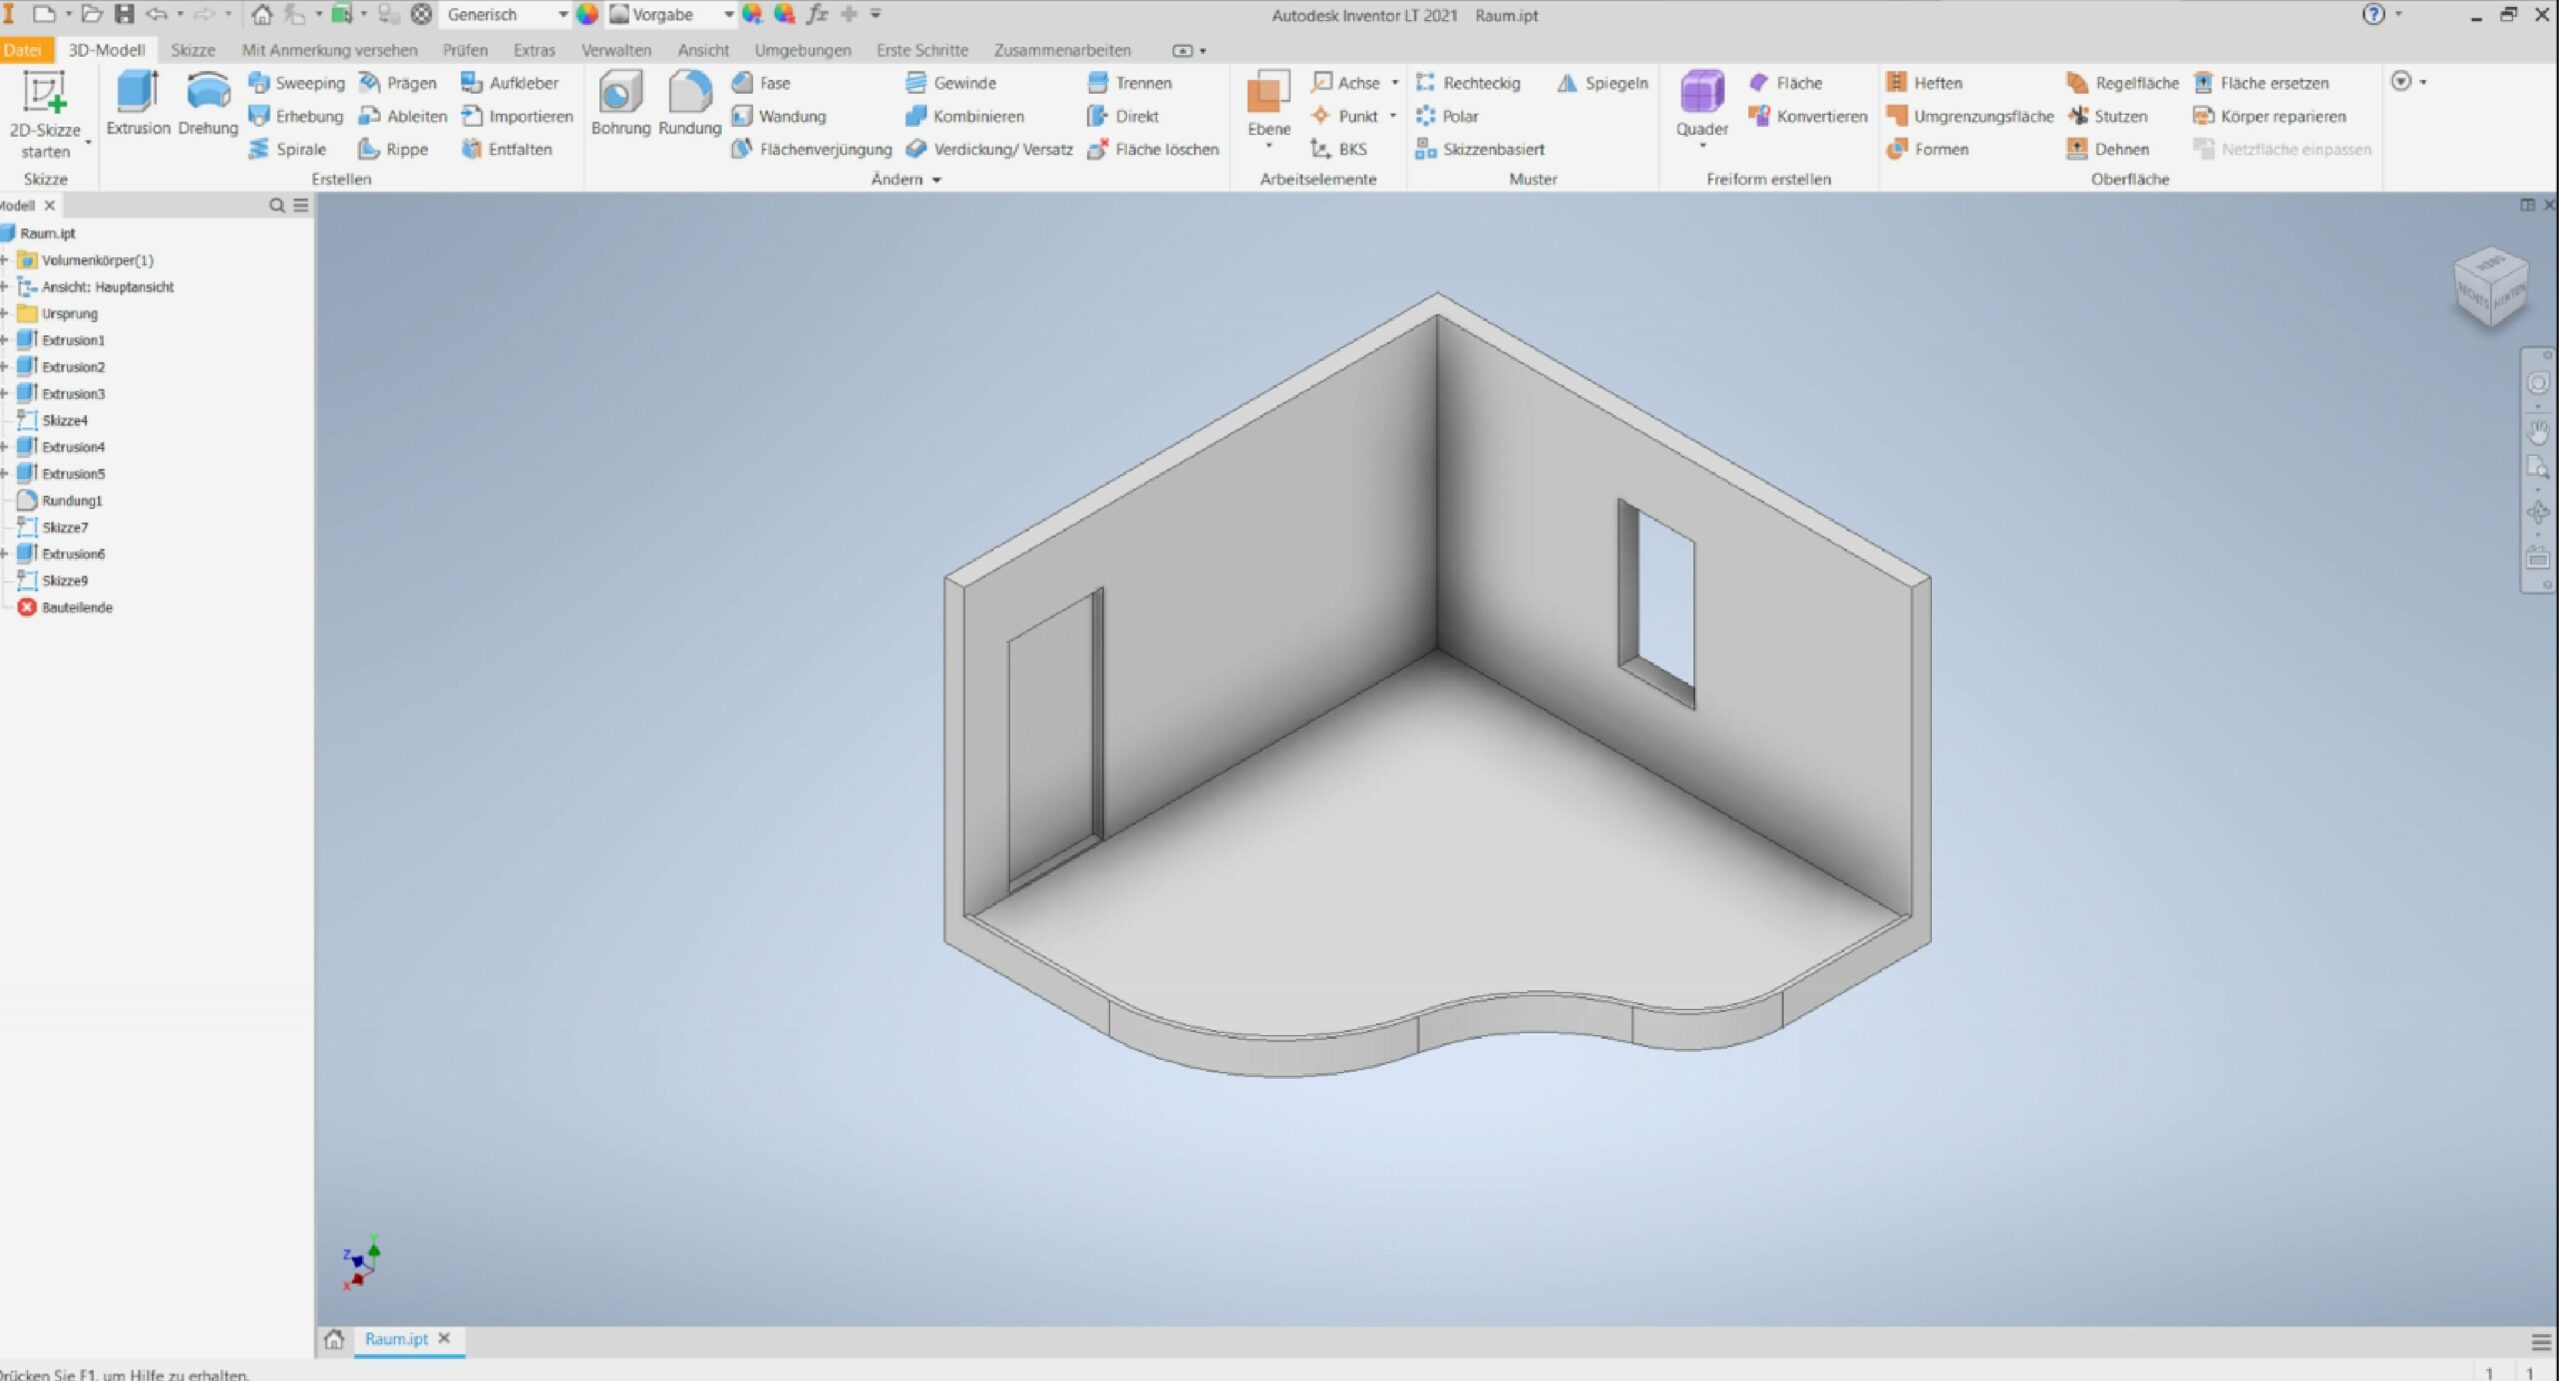
A simple room cutaway, already with a door and window, was constructed using a free student license of Autodesk Inventor. Most other 3D modeling programs would do. The base is 15×15 cm. Note the slightly raised outer edge around the floor area.
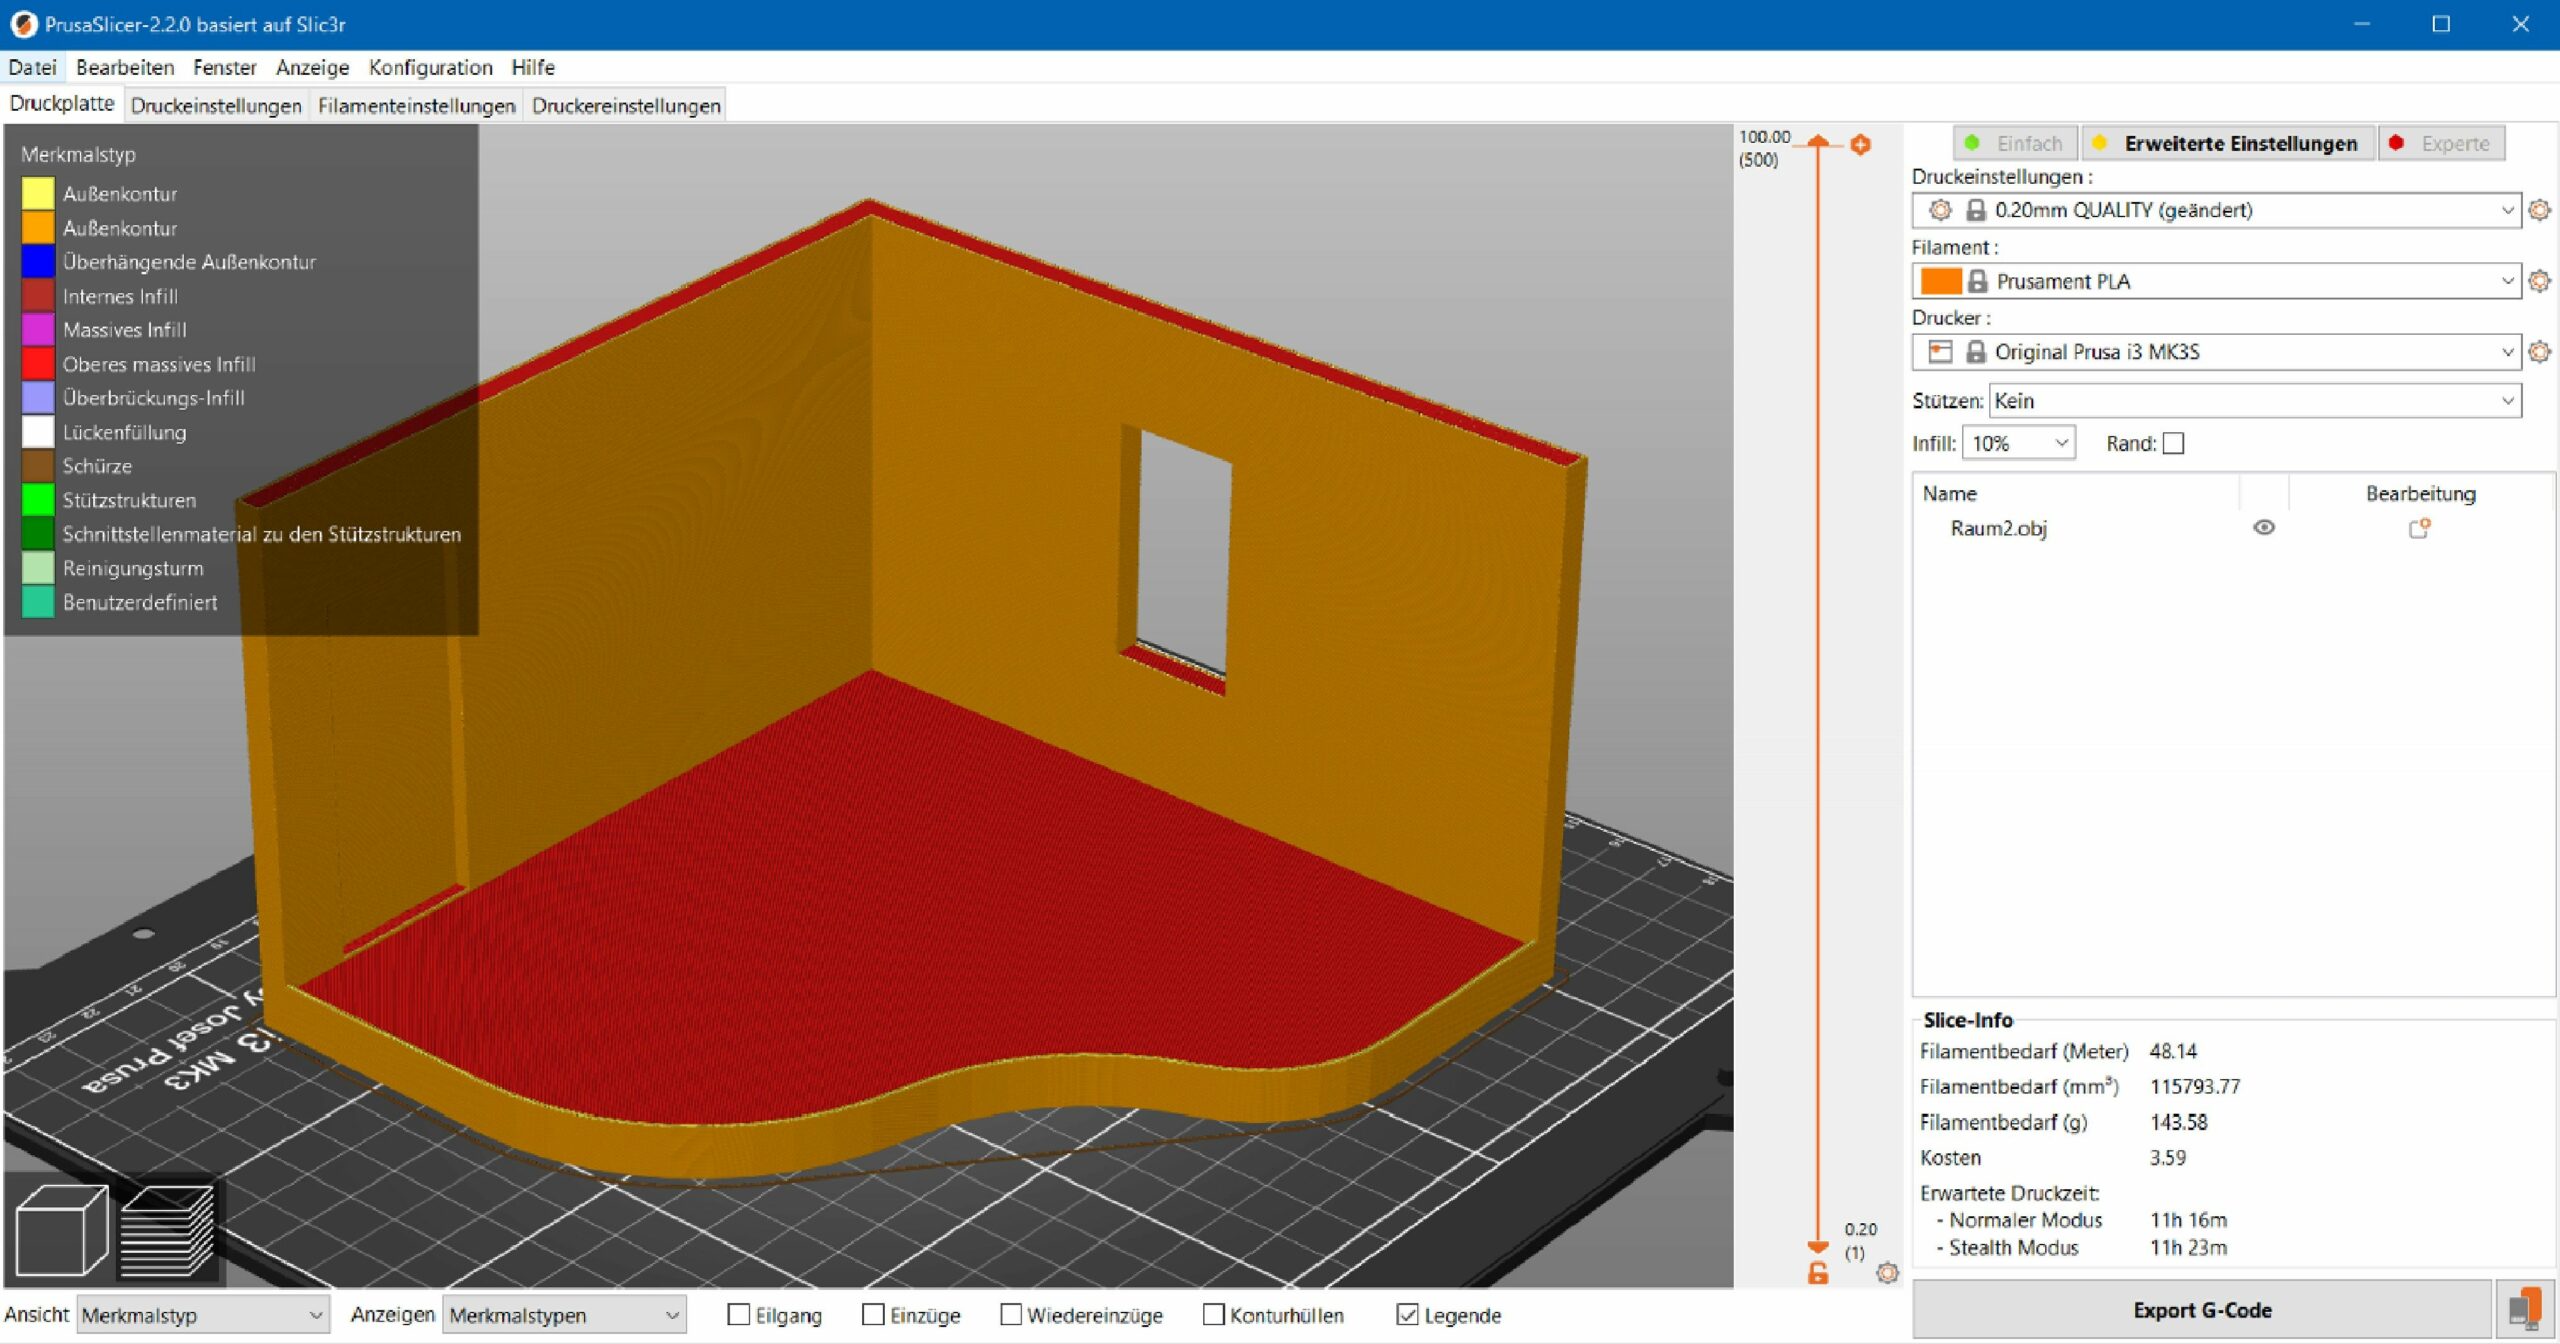
The exported file was then put into the PrusaSlicer and prepared for printing. I used the PLA filament that came with the printer, with the following settings: 0.2mm layer height, 10% infill, no supports. The printing time was 11 hours, using circa 150 g of filament.

The first attempt already turned out nicely. Initially, I planned to paint the backside as well, but the result was so good, I thought it would be a nice touch to expose the printed surface and show its origin.
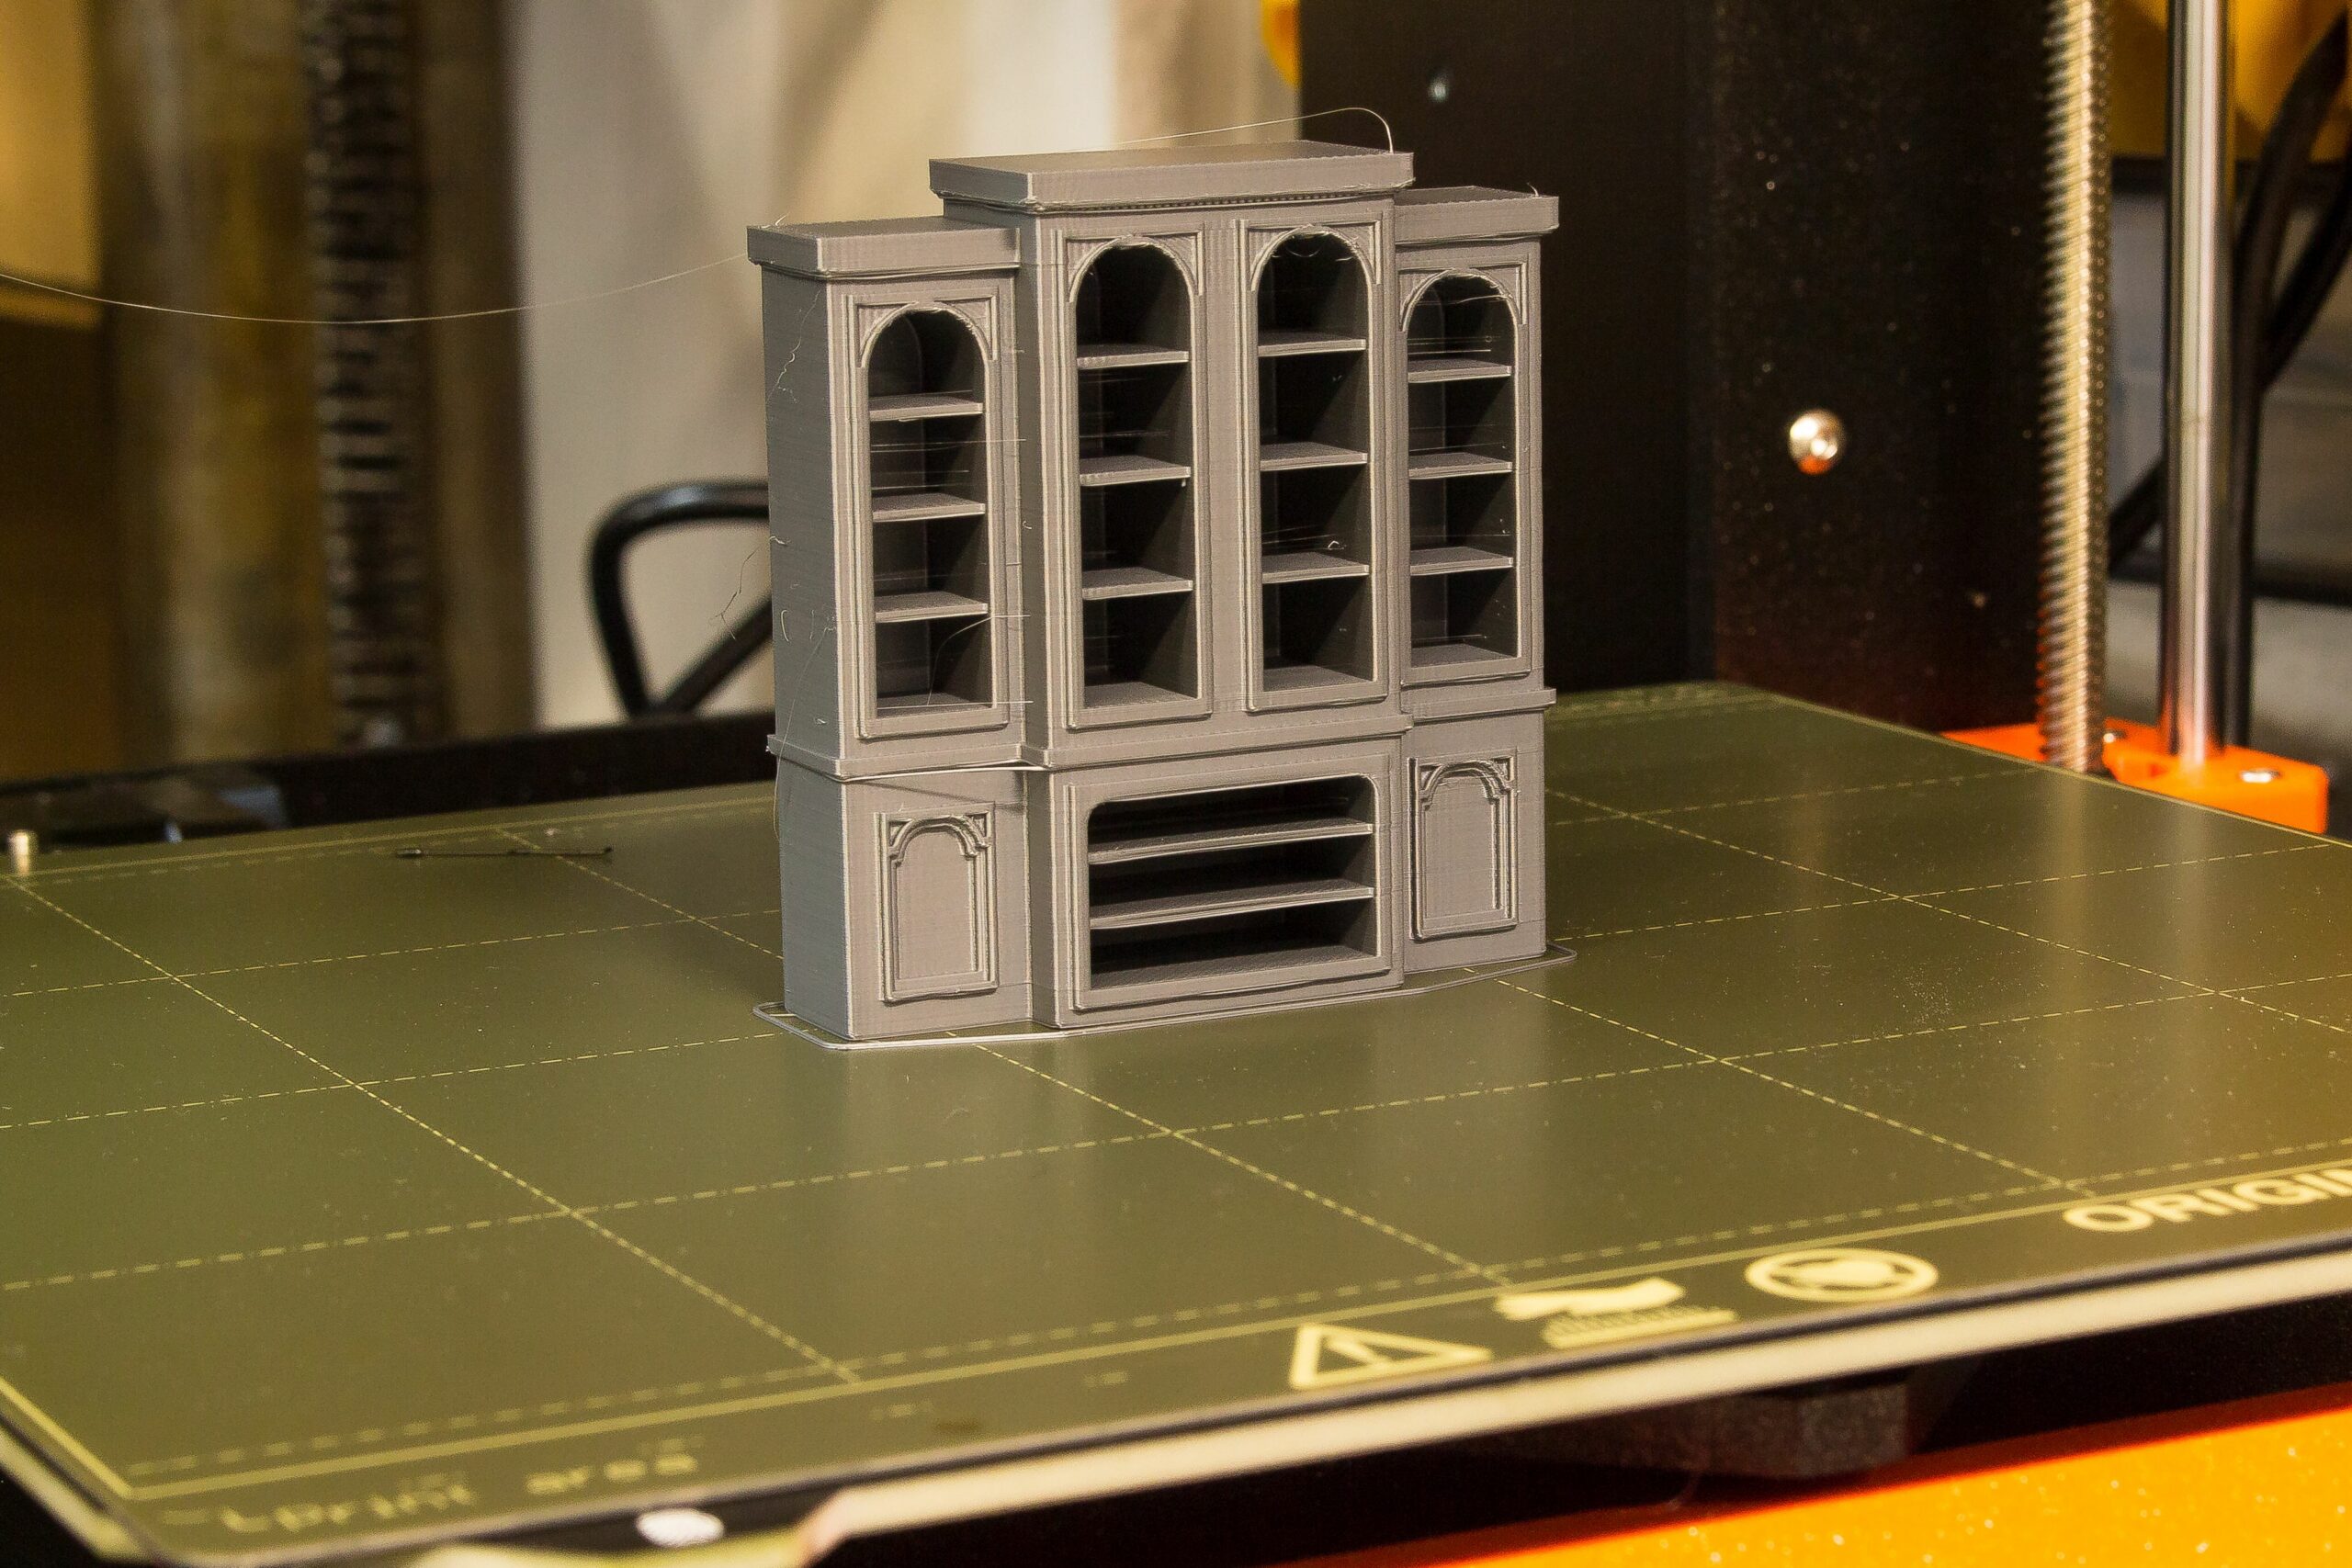
Some furniture I found available for free, rescaled to 1:35, and printed with 0,05mm layer height. The results are simply astonishing. The quality with a 0.25mm nozzle would be even better, but I wanted to show what is possible with just stock settings.
All the other parts were printed and cleaned from a little stringing and some minor defects. But in general, everything was left as is – without sanding or any other treatment.
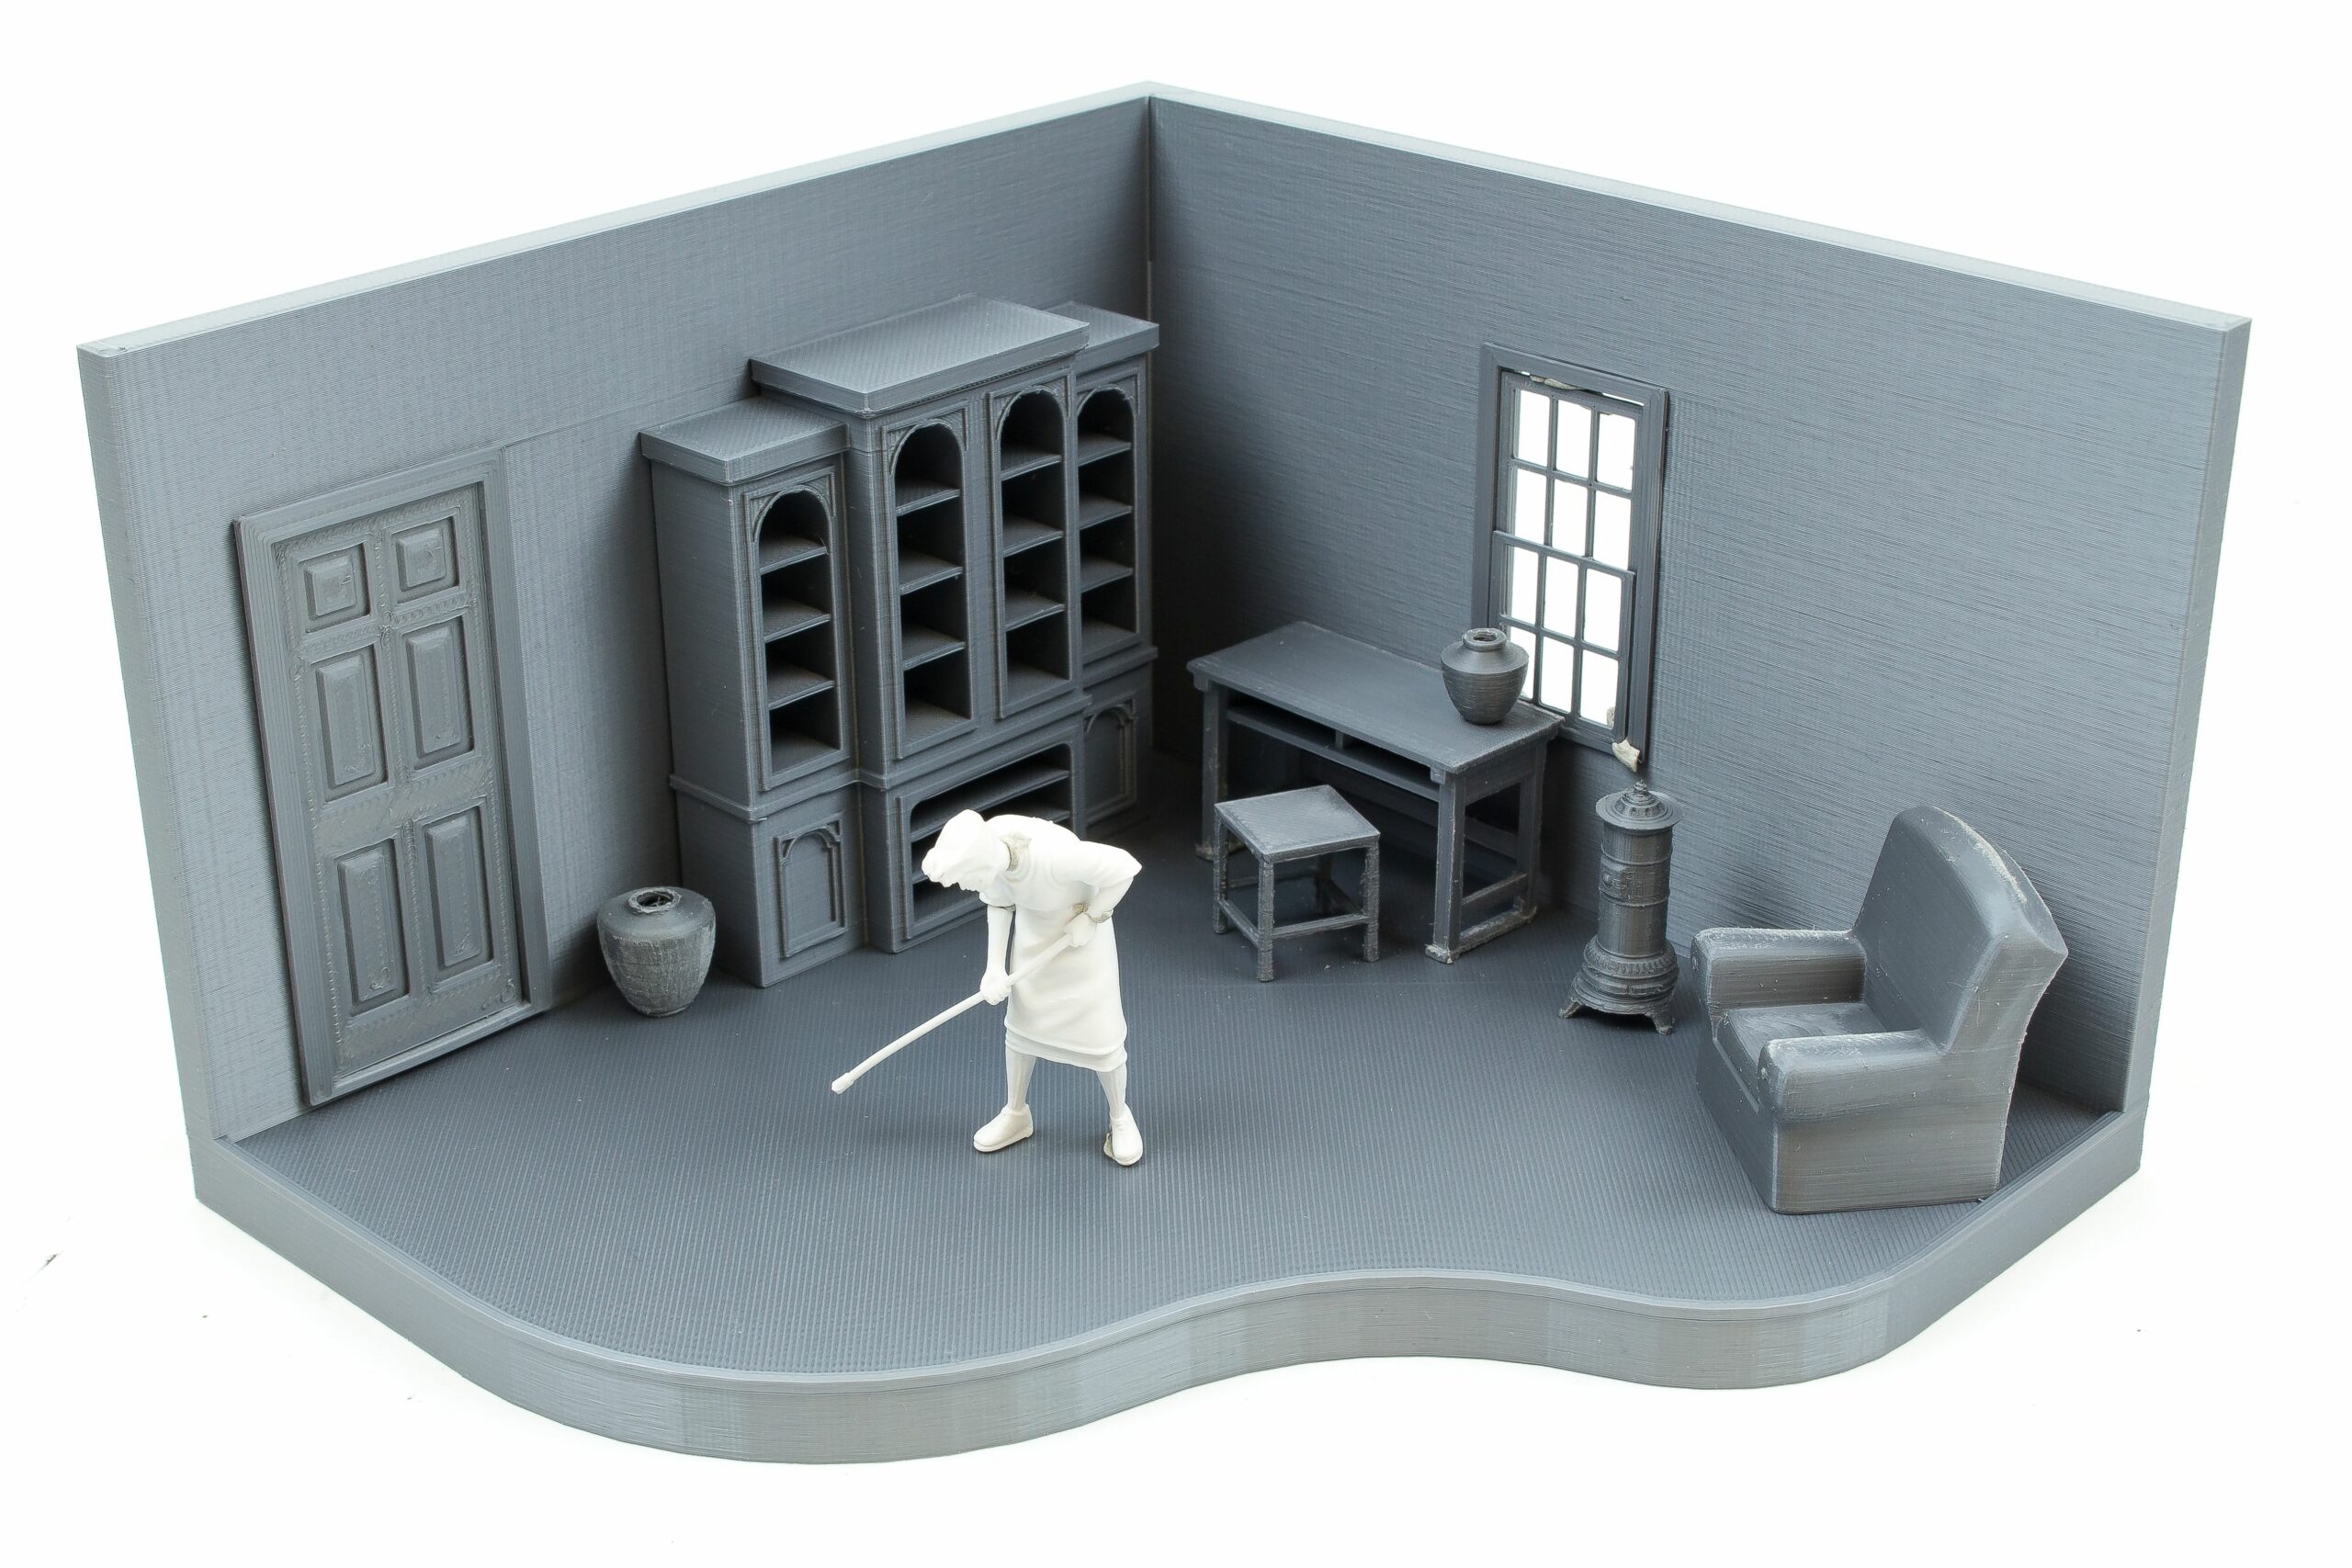
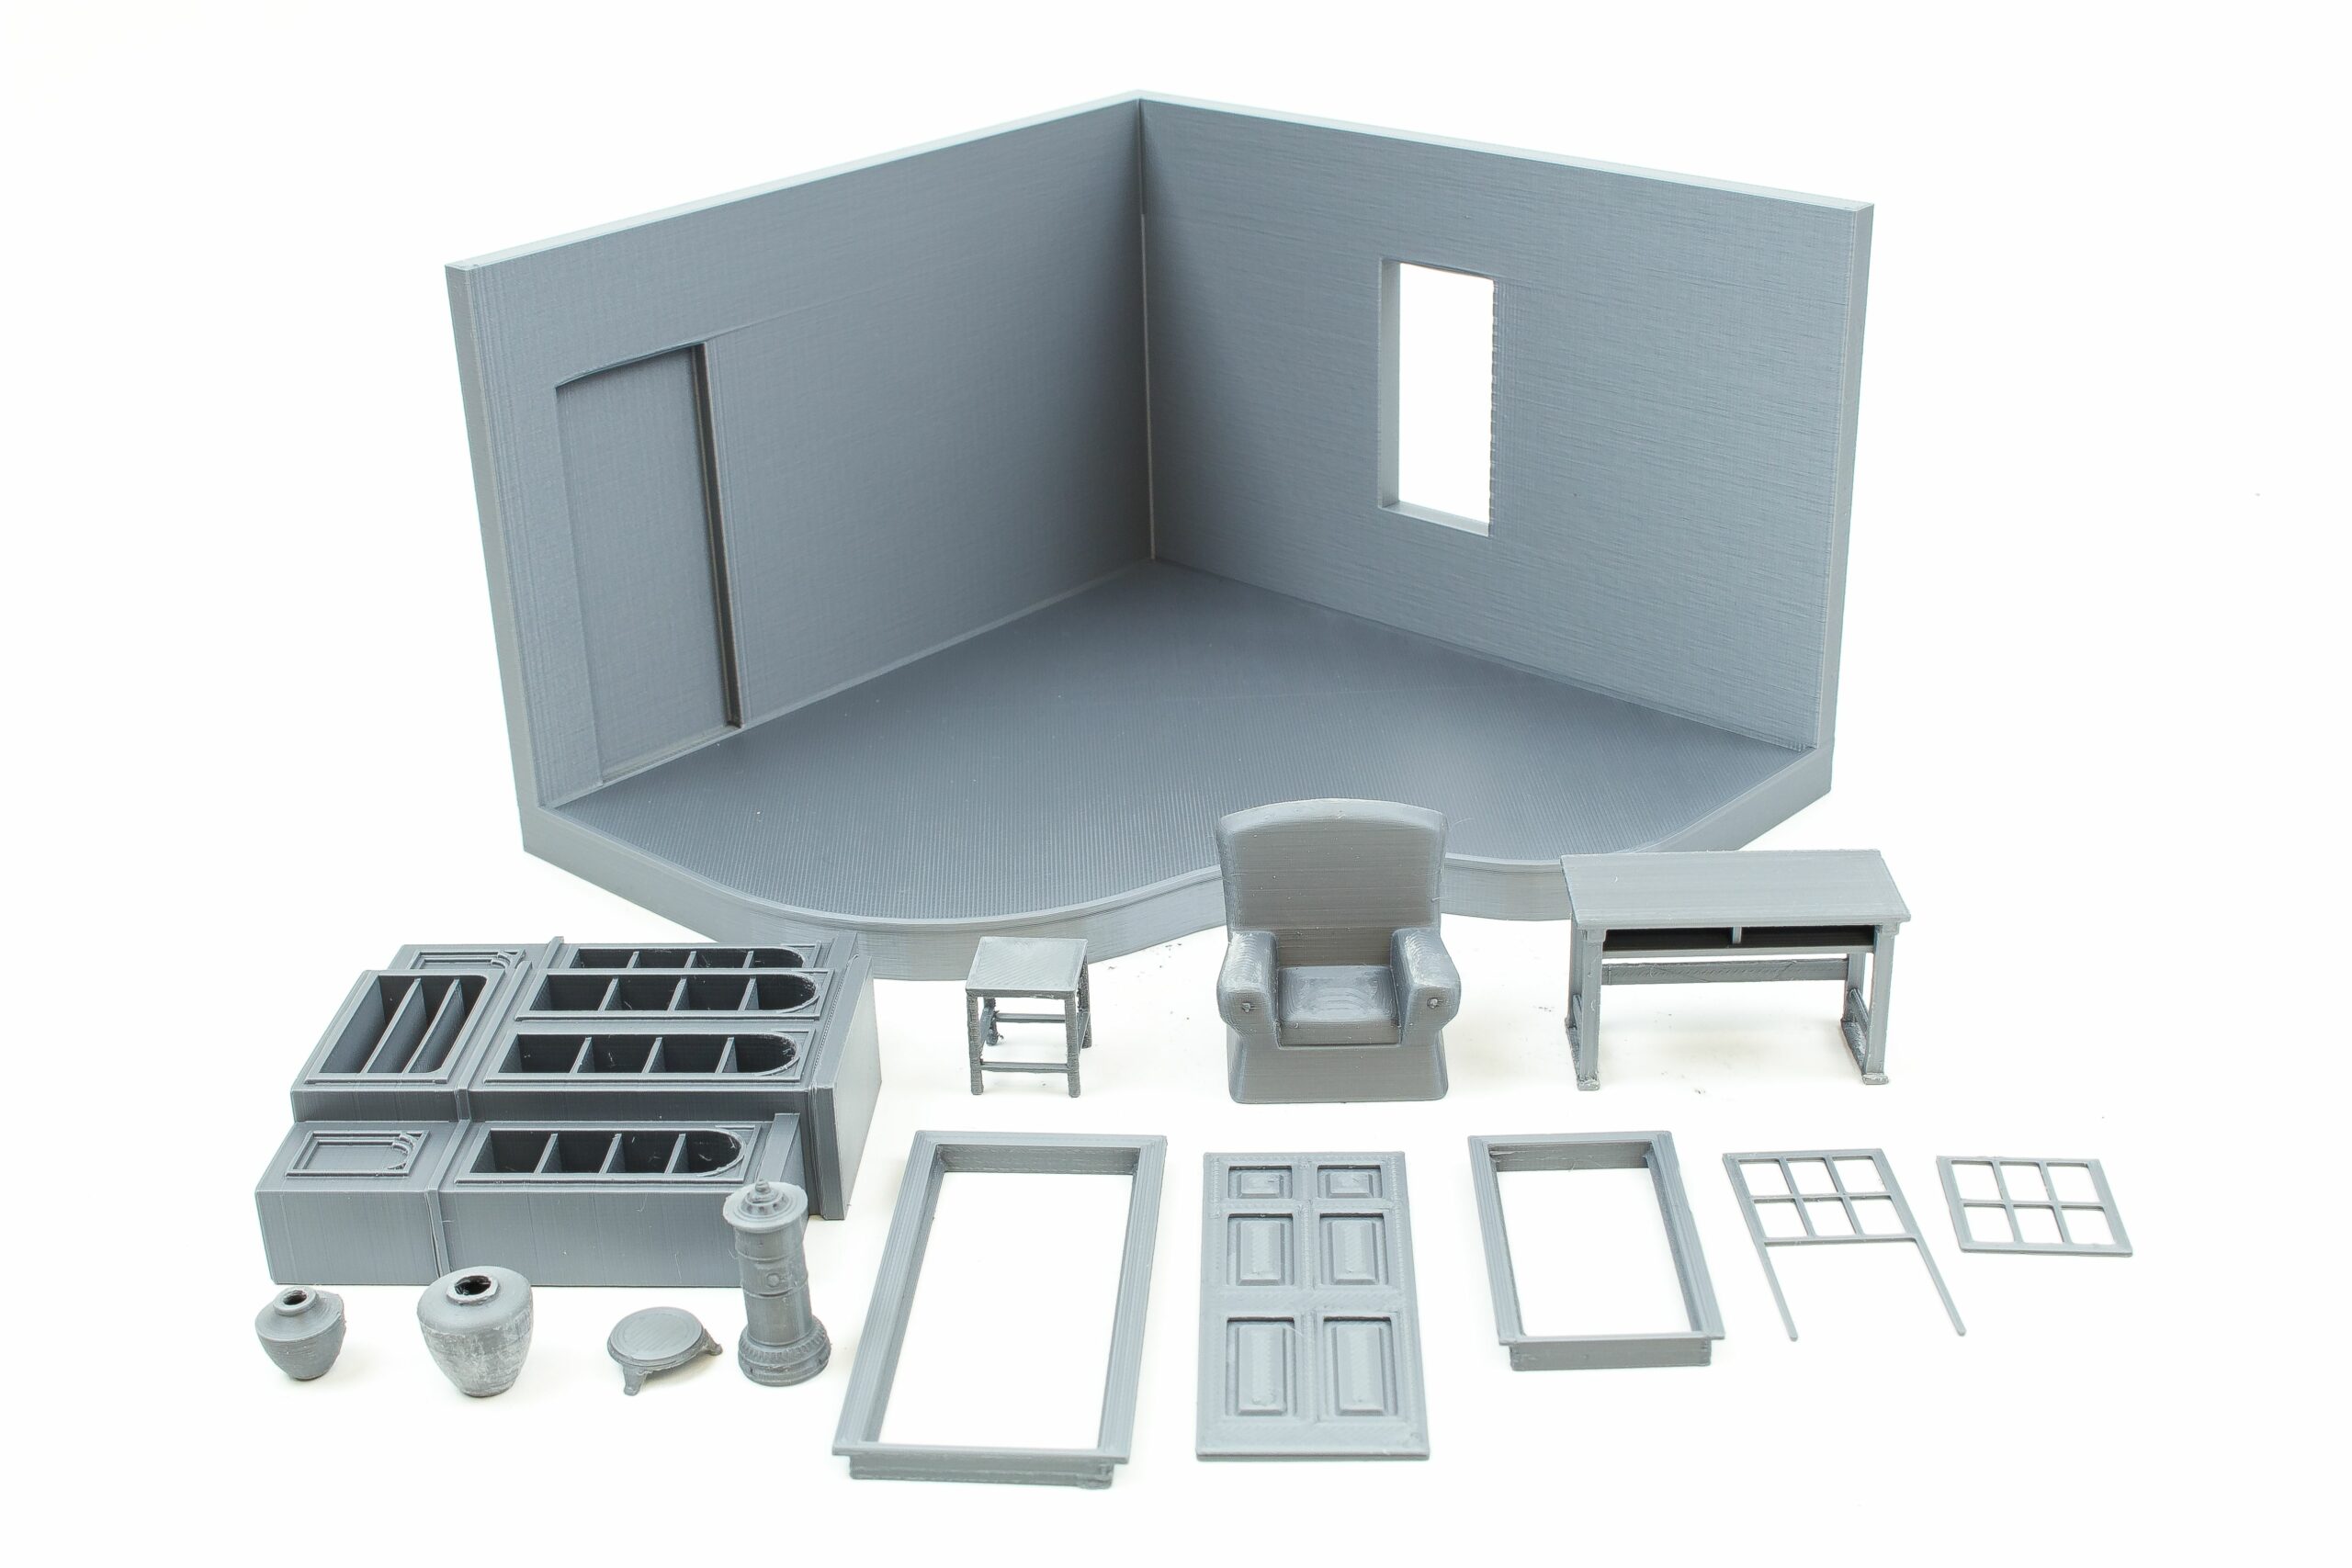
The only non-printed larger item is this woman figure made by Preiser. It’s a rather old model from the 80s, so the quality is a bit poor. I also put all the printed scenery to their intended location, to see if the dimensions are harmonizing.
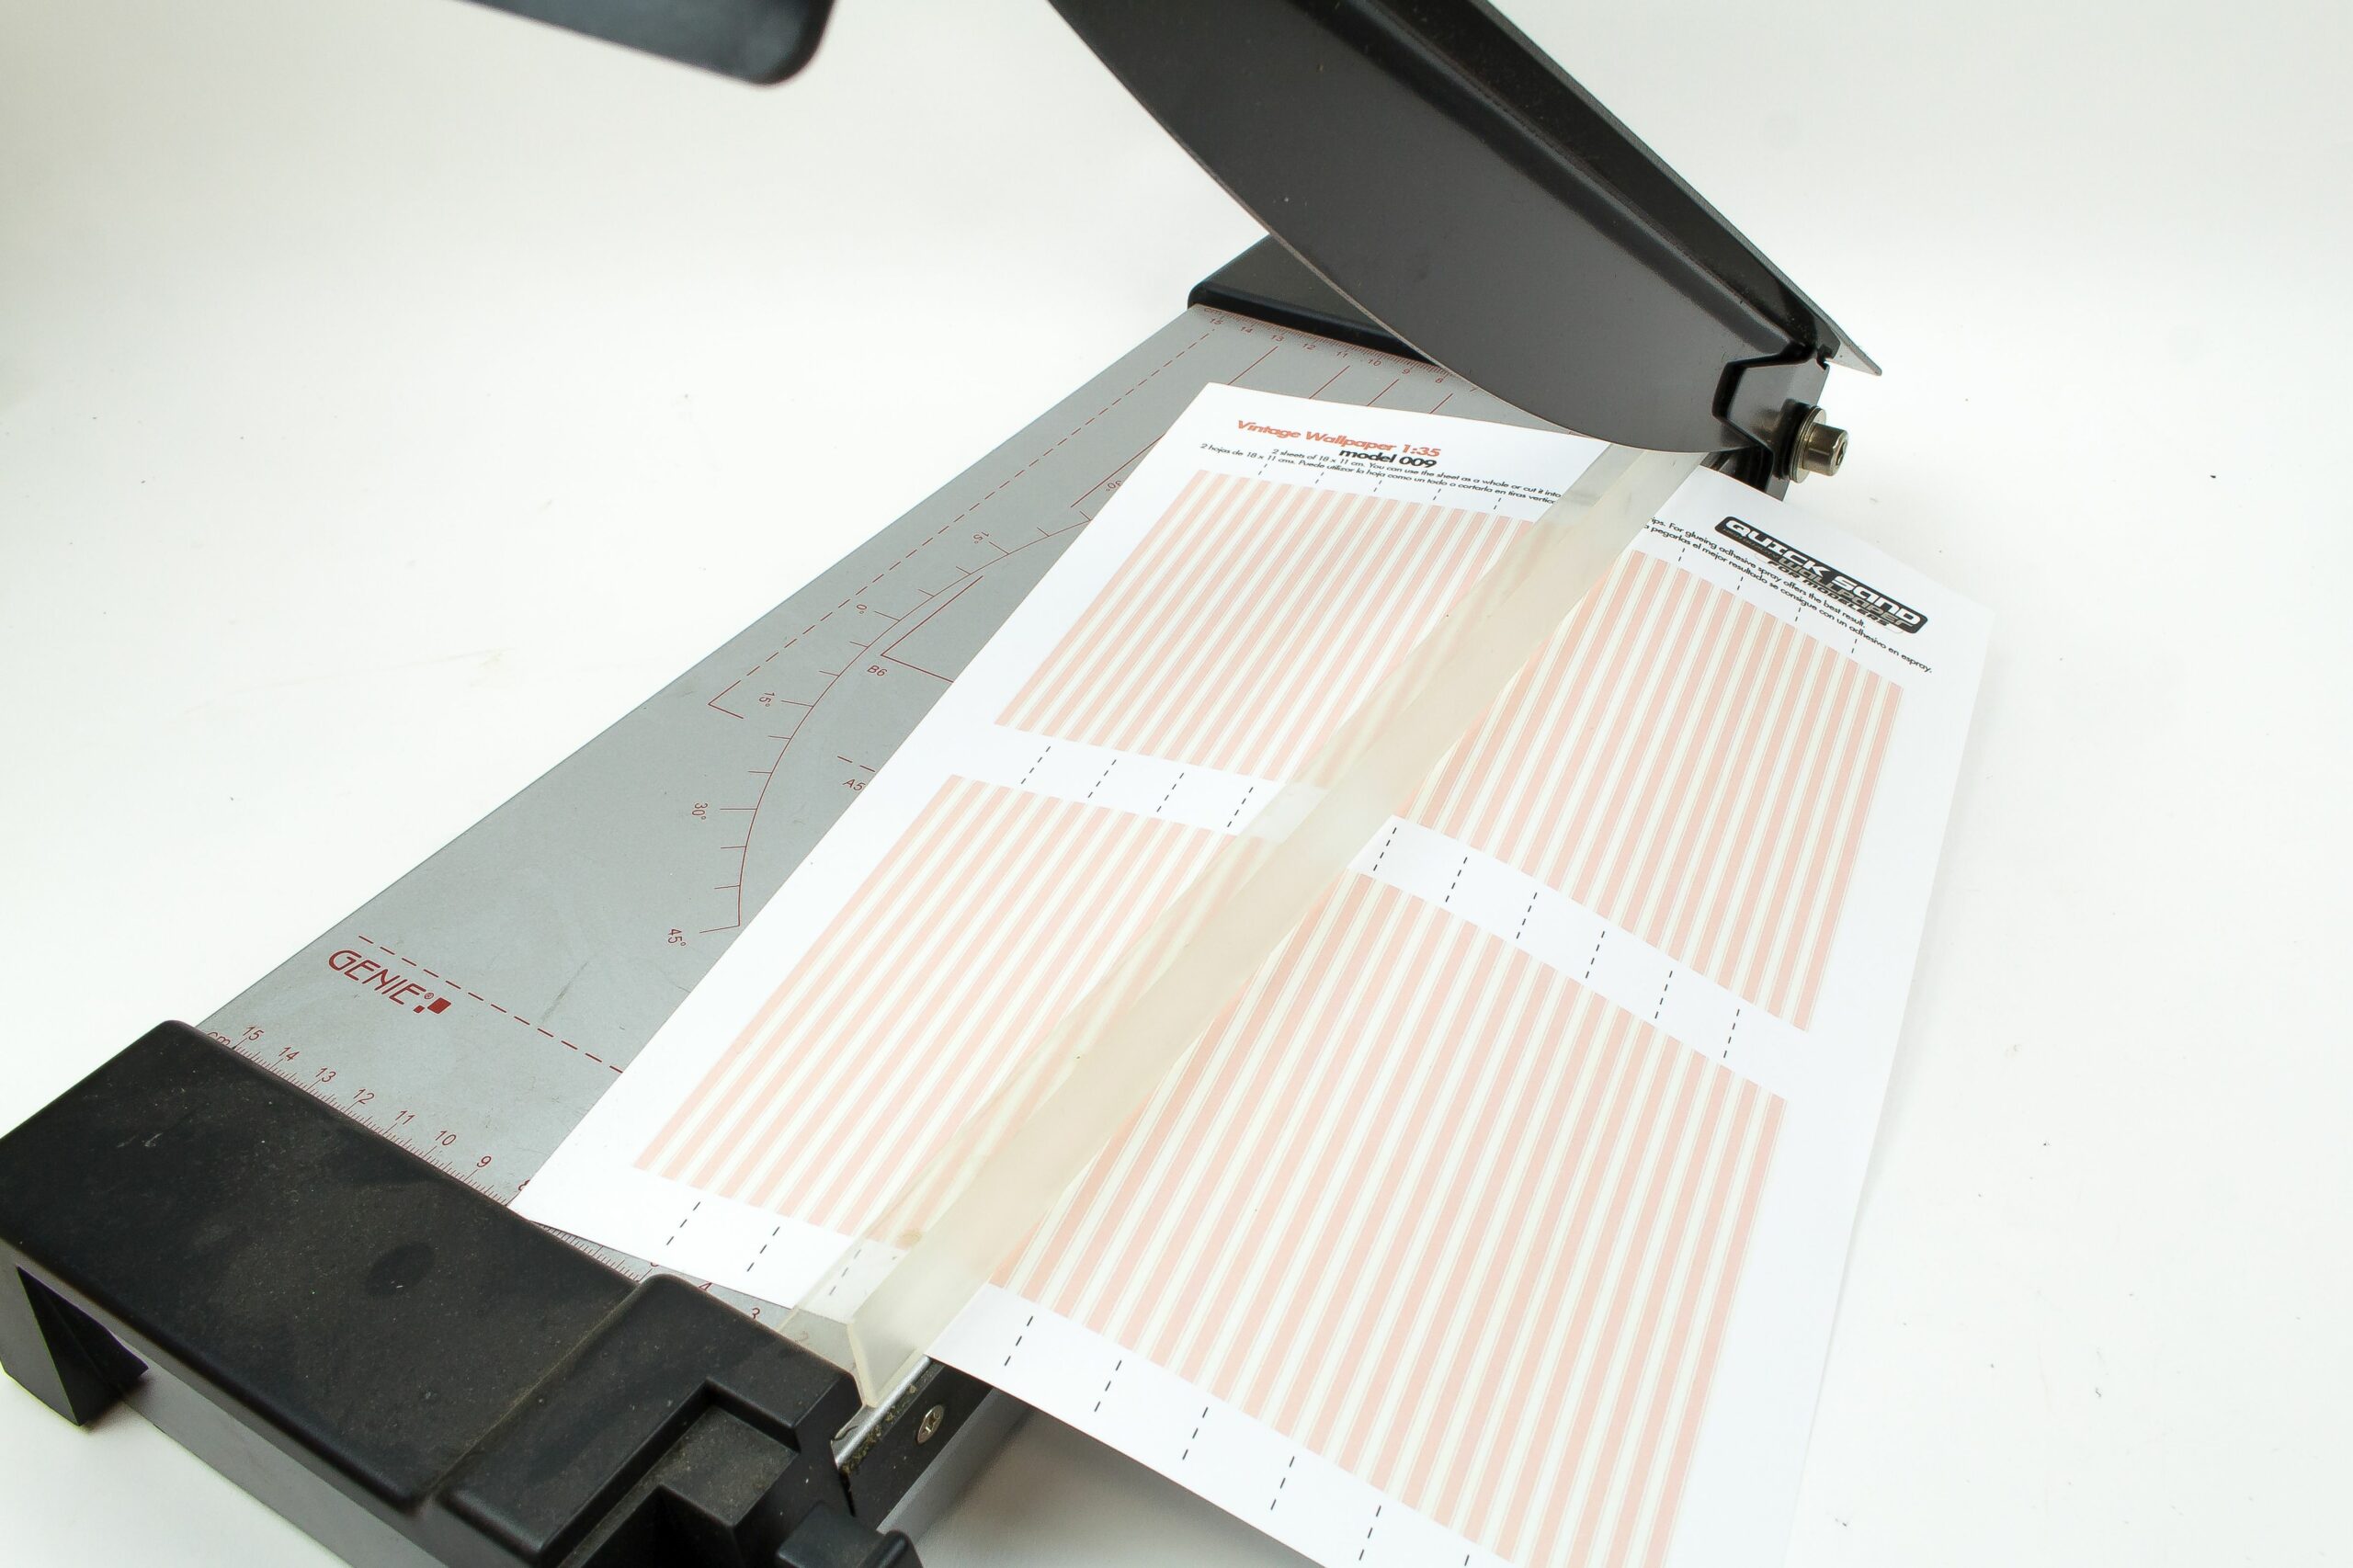
For the walls, I used some pre-printed wallpapers from Hobbyworld, but any other wallpaper or even paint would do. The paper was cut into even strips with a paper cutting machine.
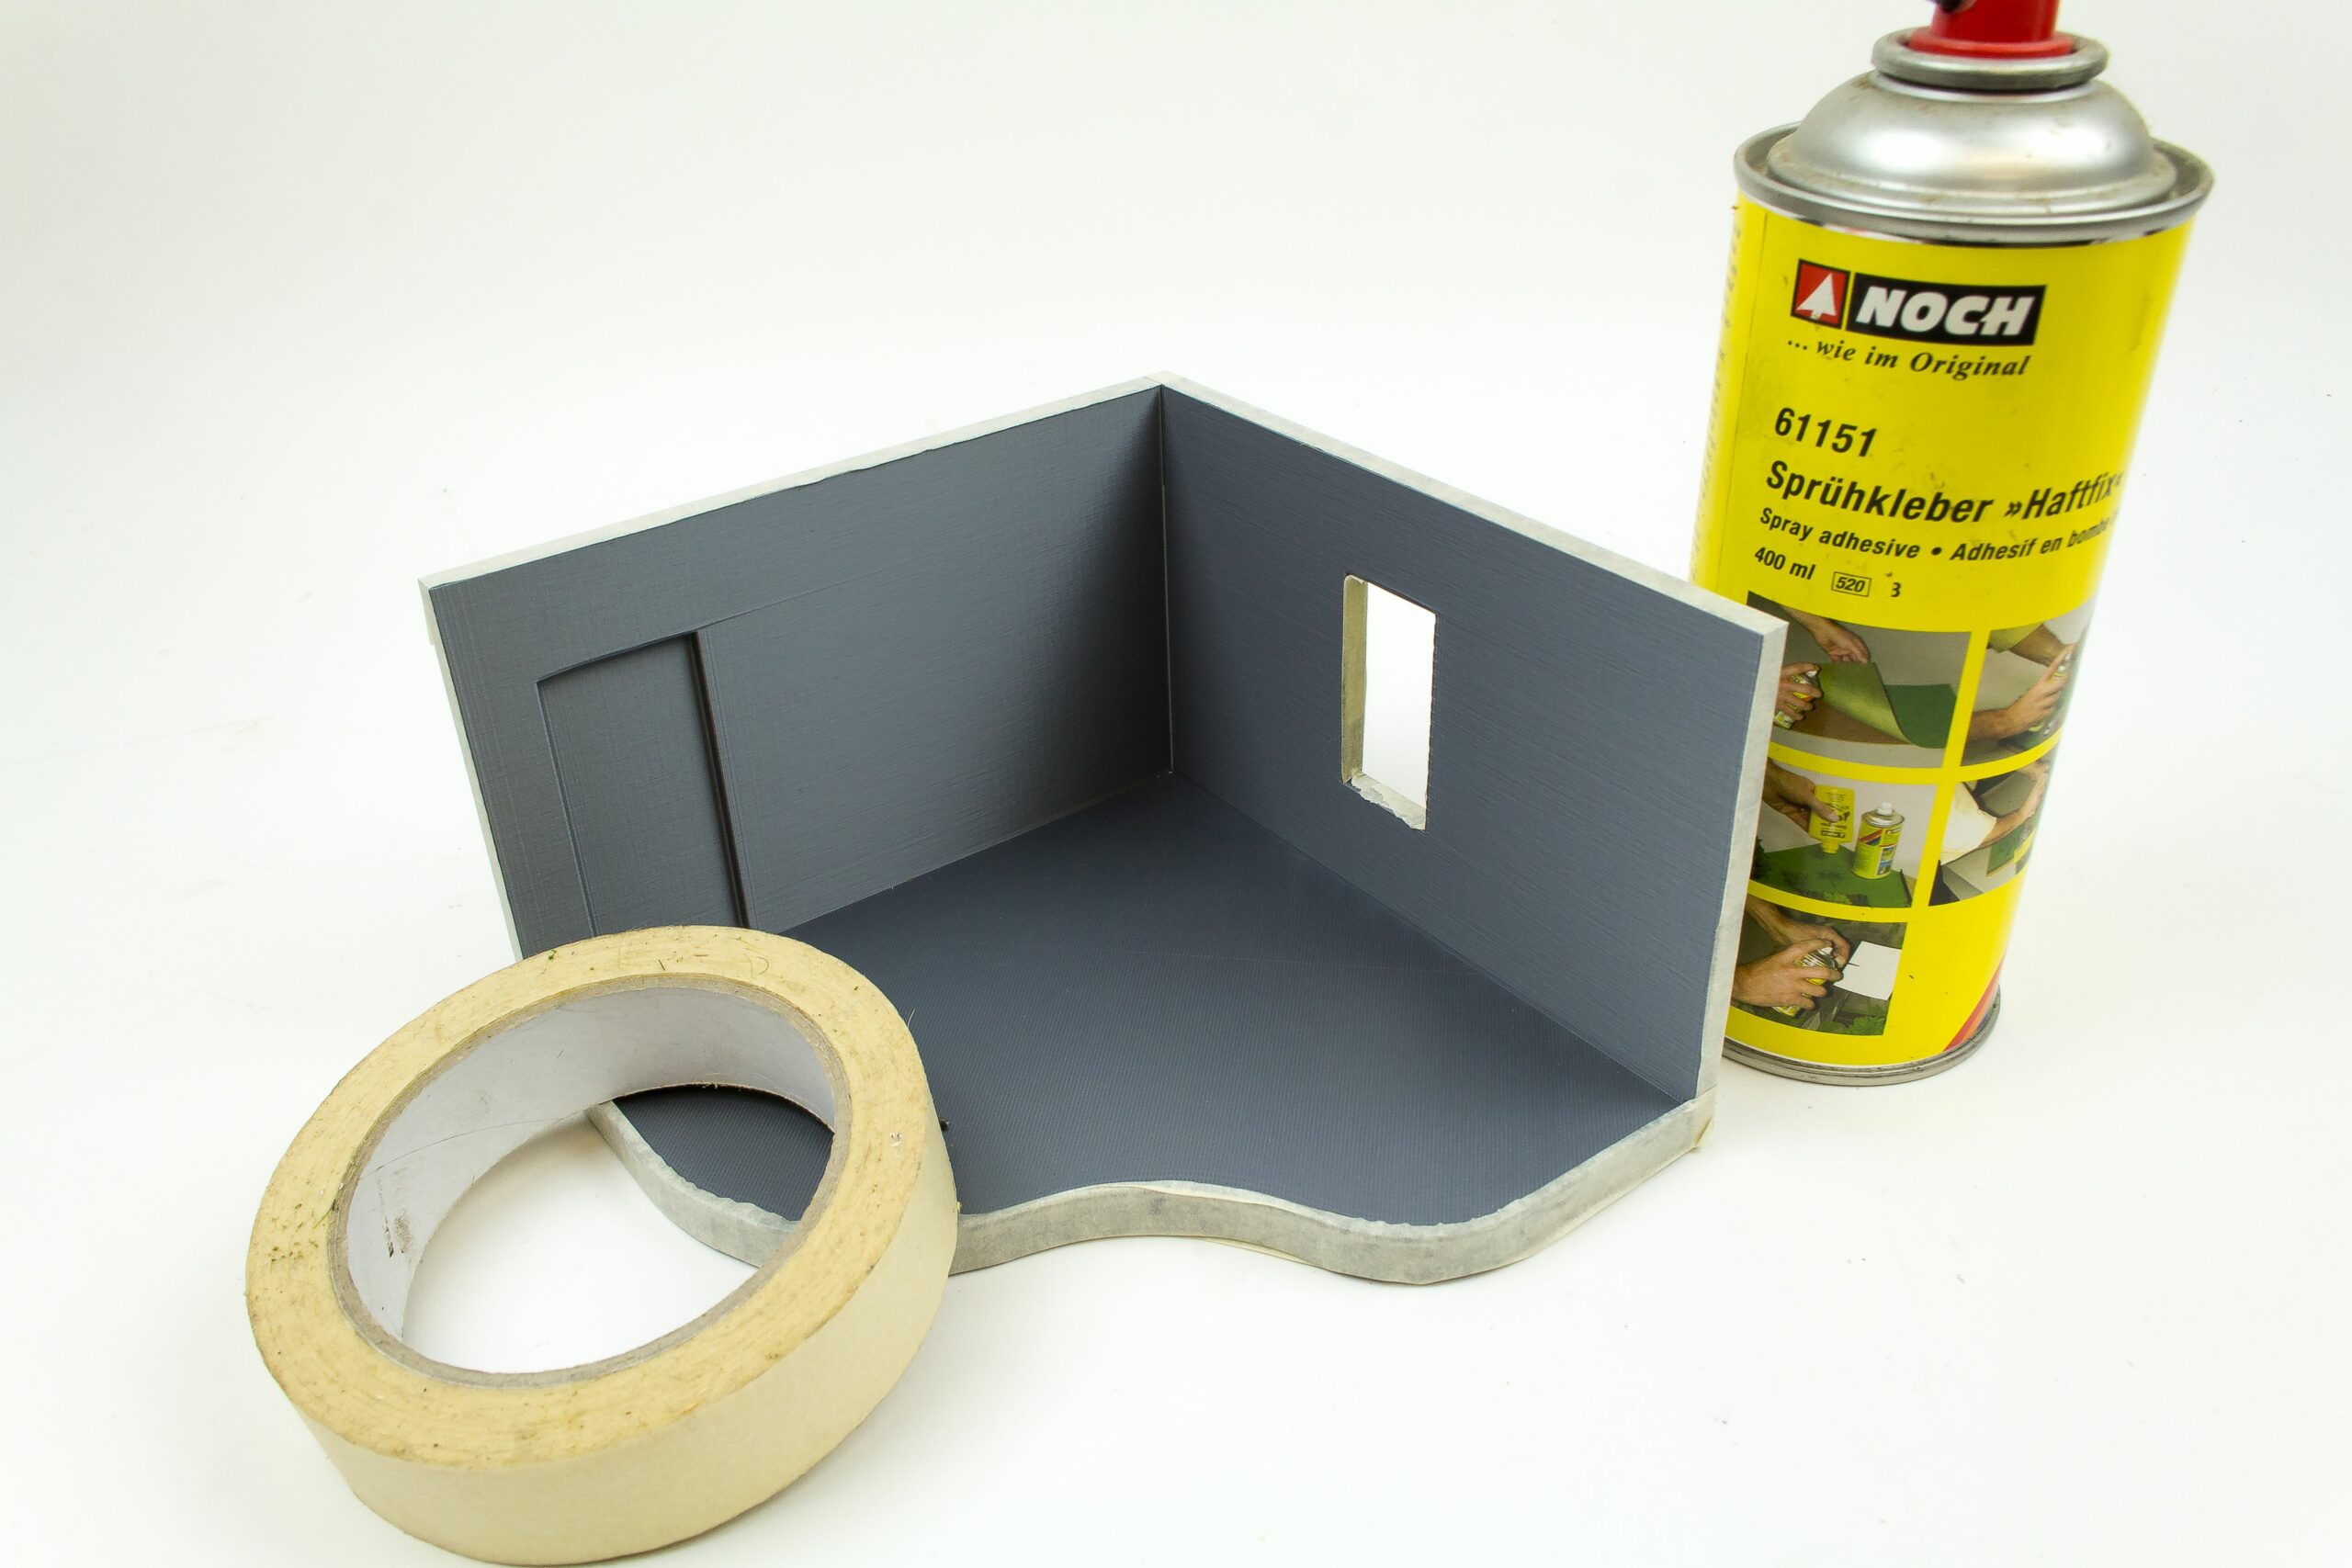
I attached the wallpaper with spray glue. To prevent overspray, I masked the surroundings with adhesive tape. An even coat of glue was sprayed on both inner sides.
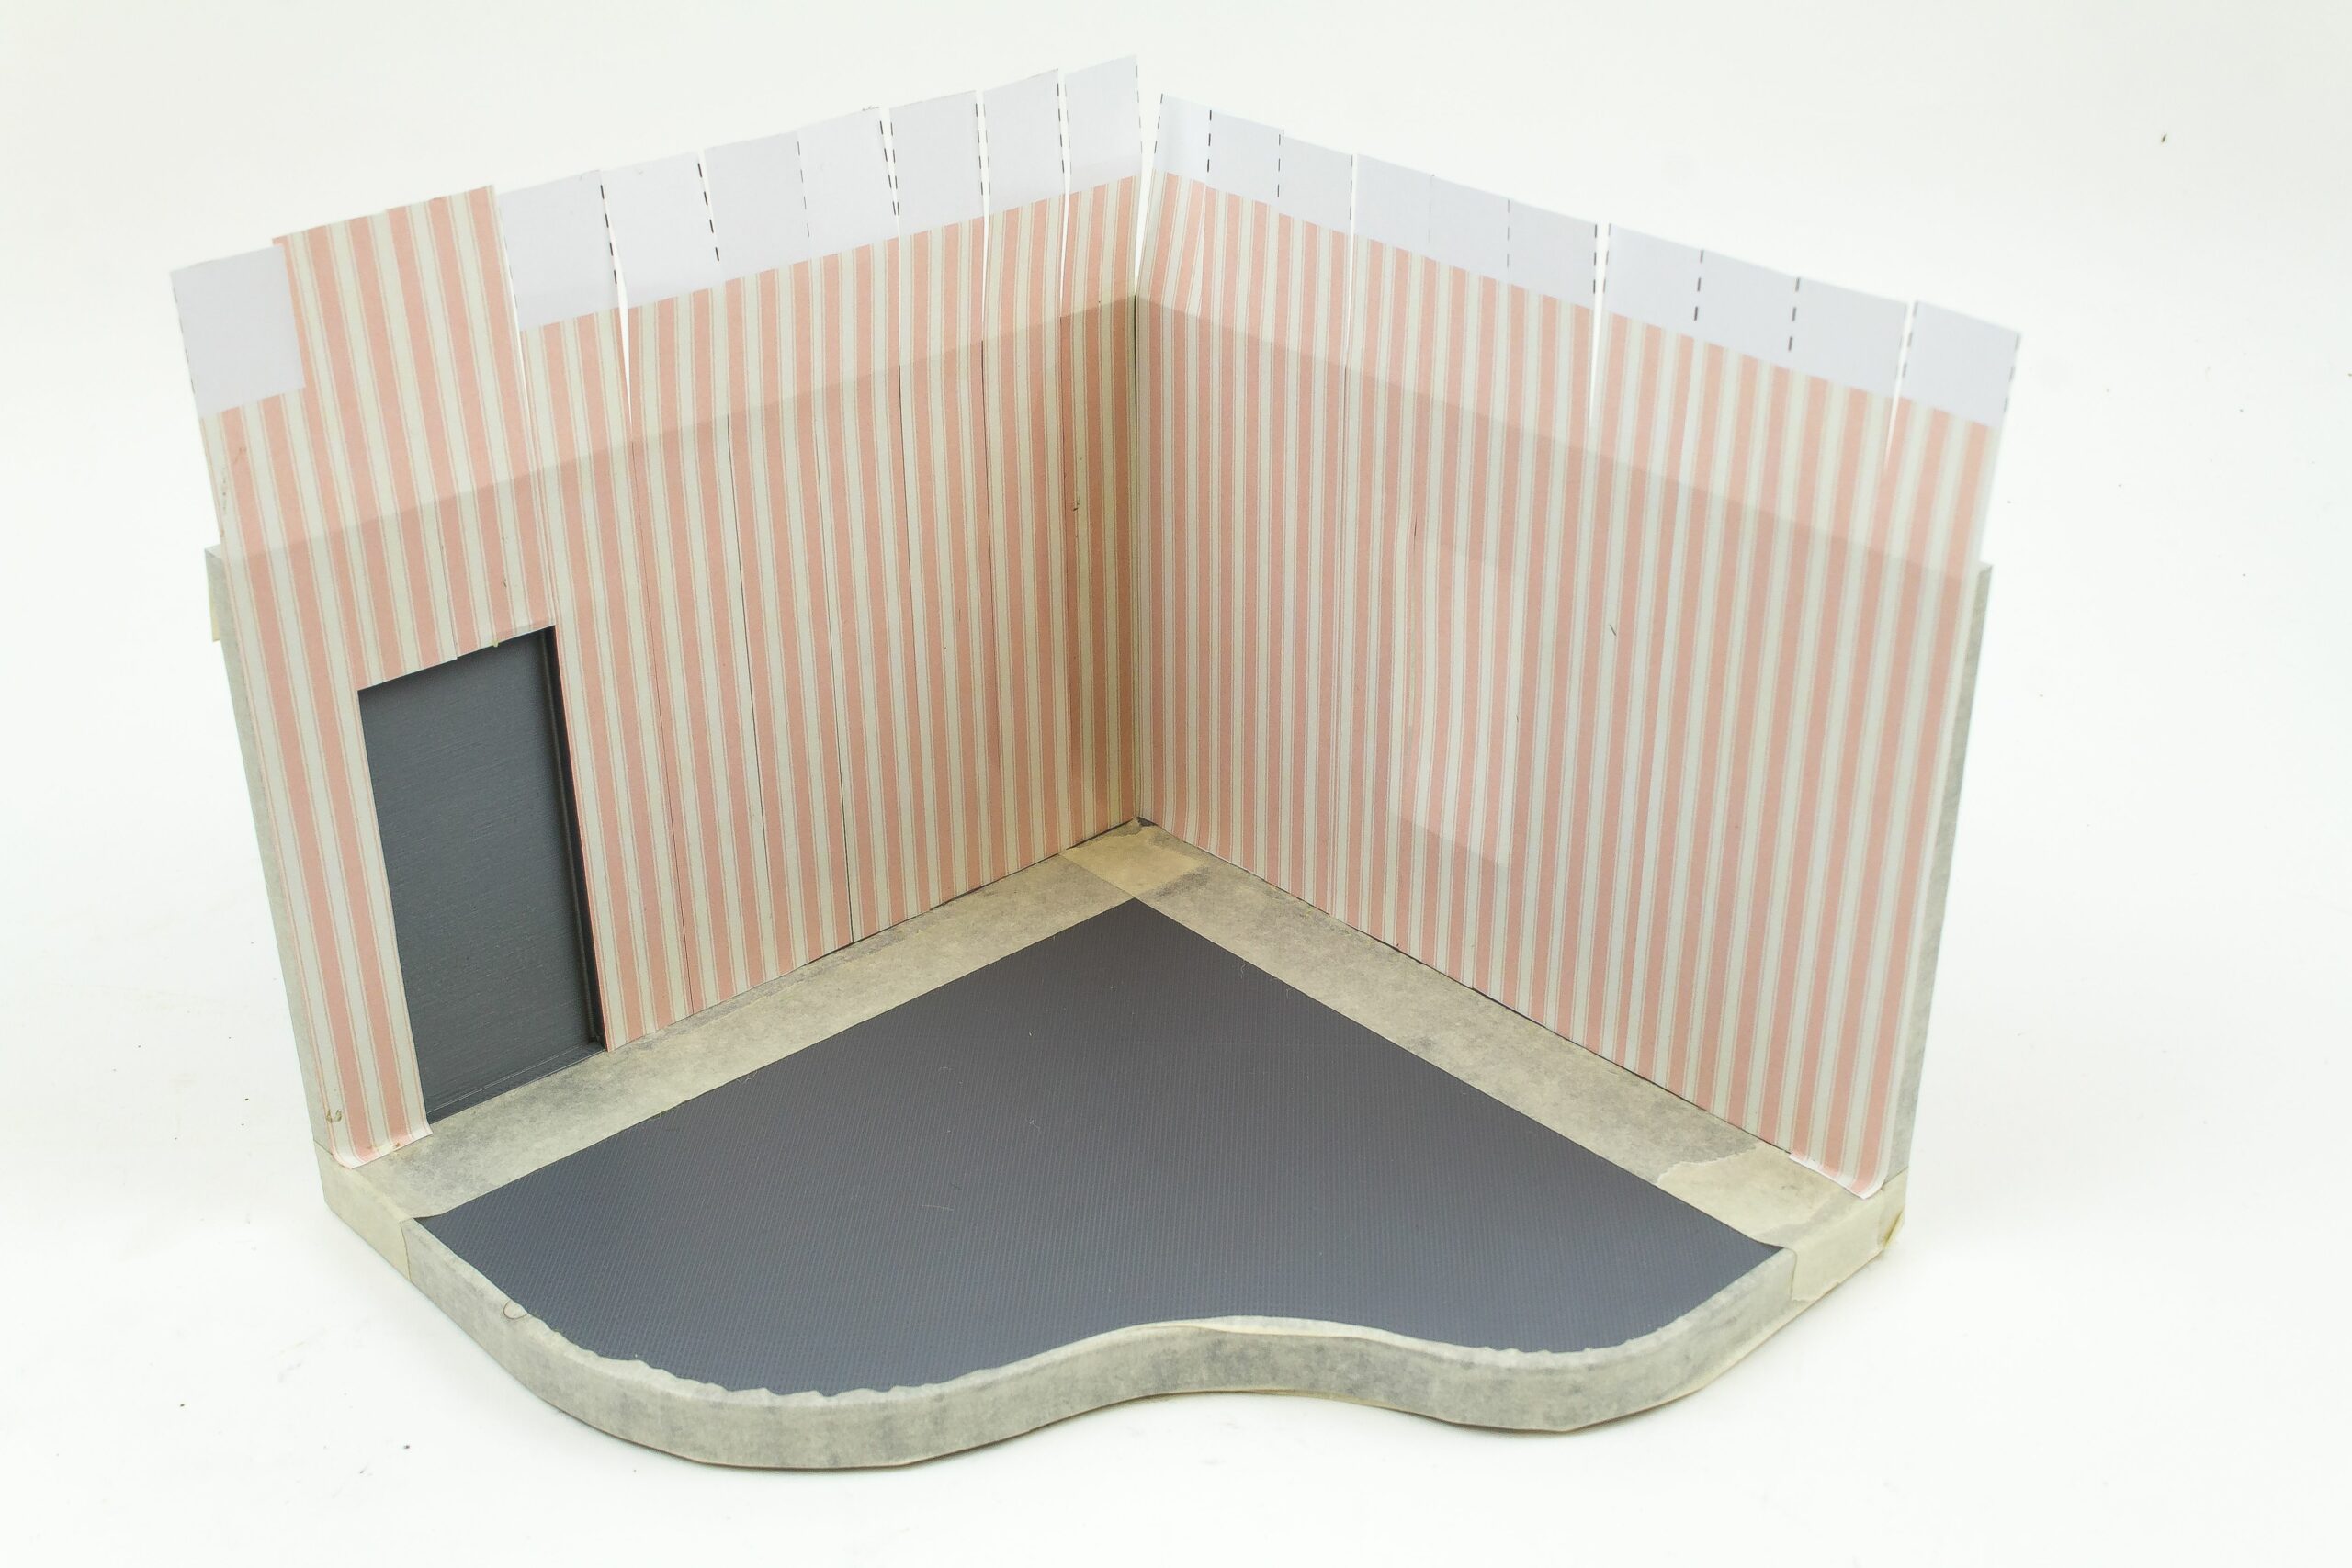
The small strips of wallpaper were carefully aligned and glued next to each other directly on the wall. Thanks to the cutting machine the edges of the stripes were perfectly straight.
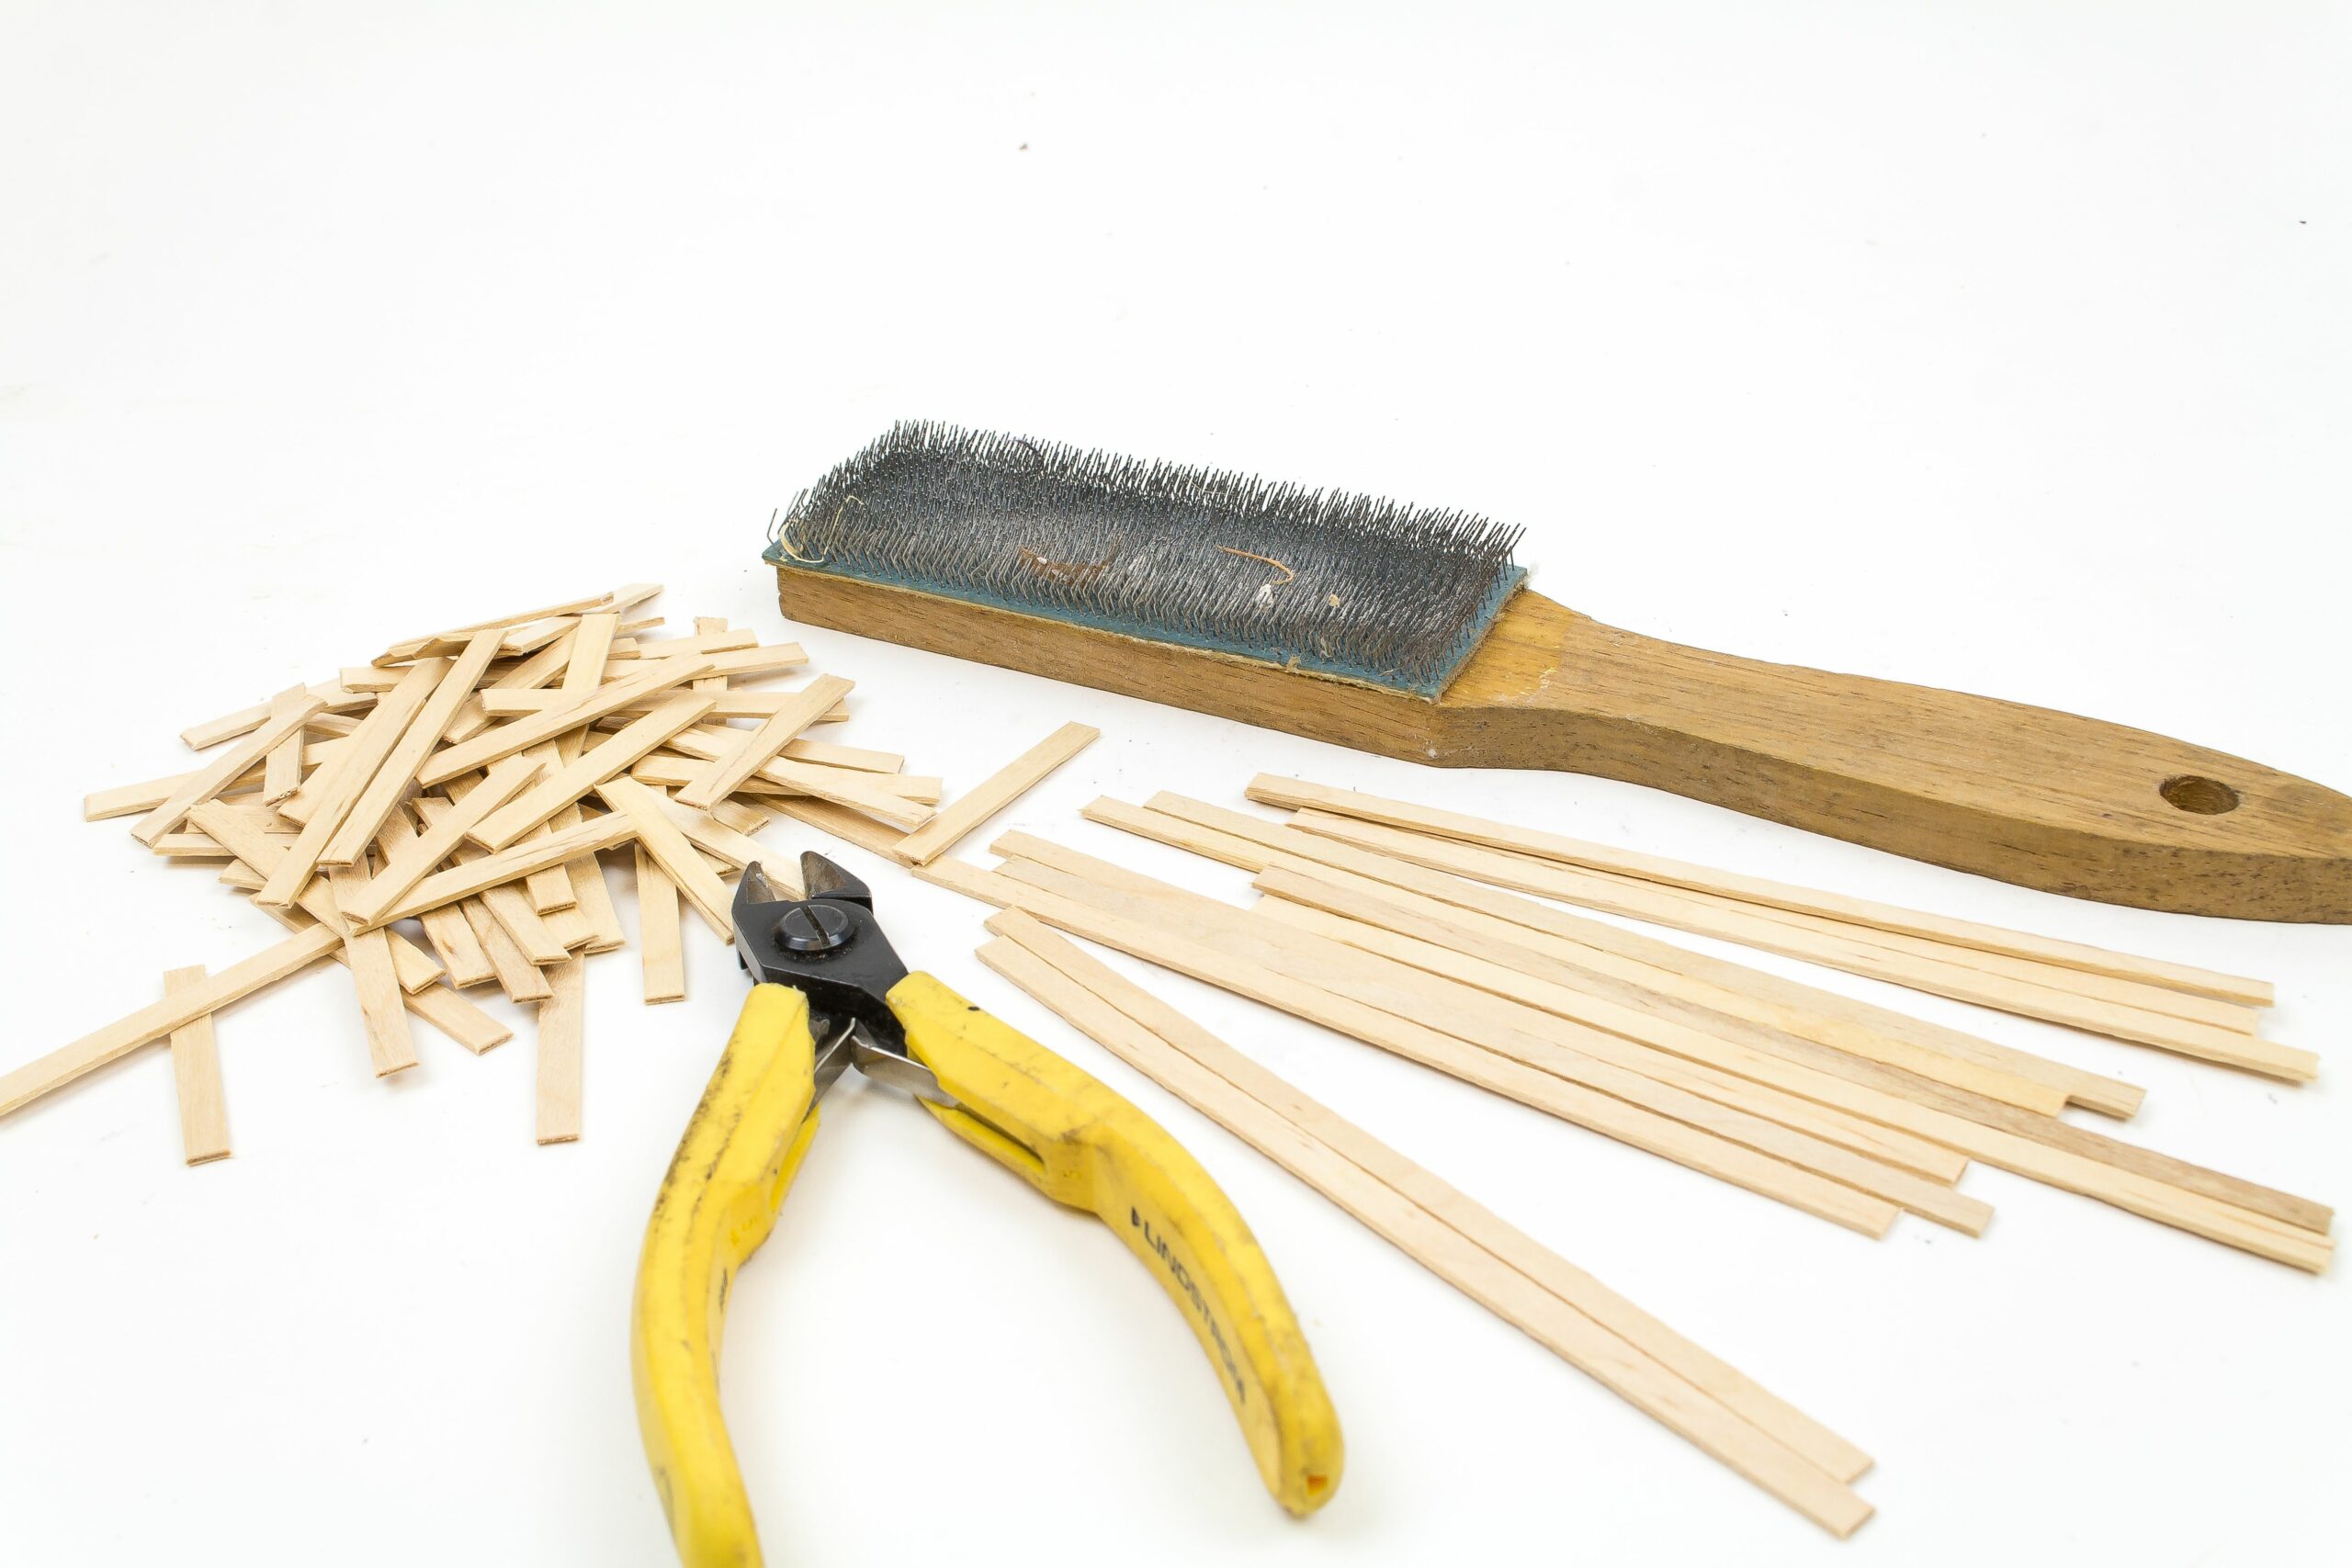
While the wallpaper was drying, I prepared the parts for the wooden floor. These are simple coffee stir sticks, taken for free from a fast food 🙂 Every single stick was treated with a wire brush to underline the wooden grain structure and then cut to length with a side cutter.
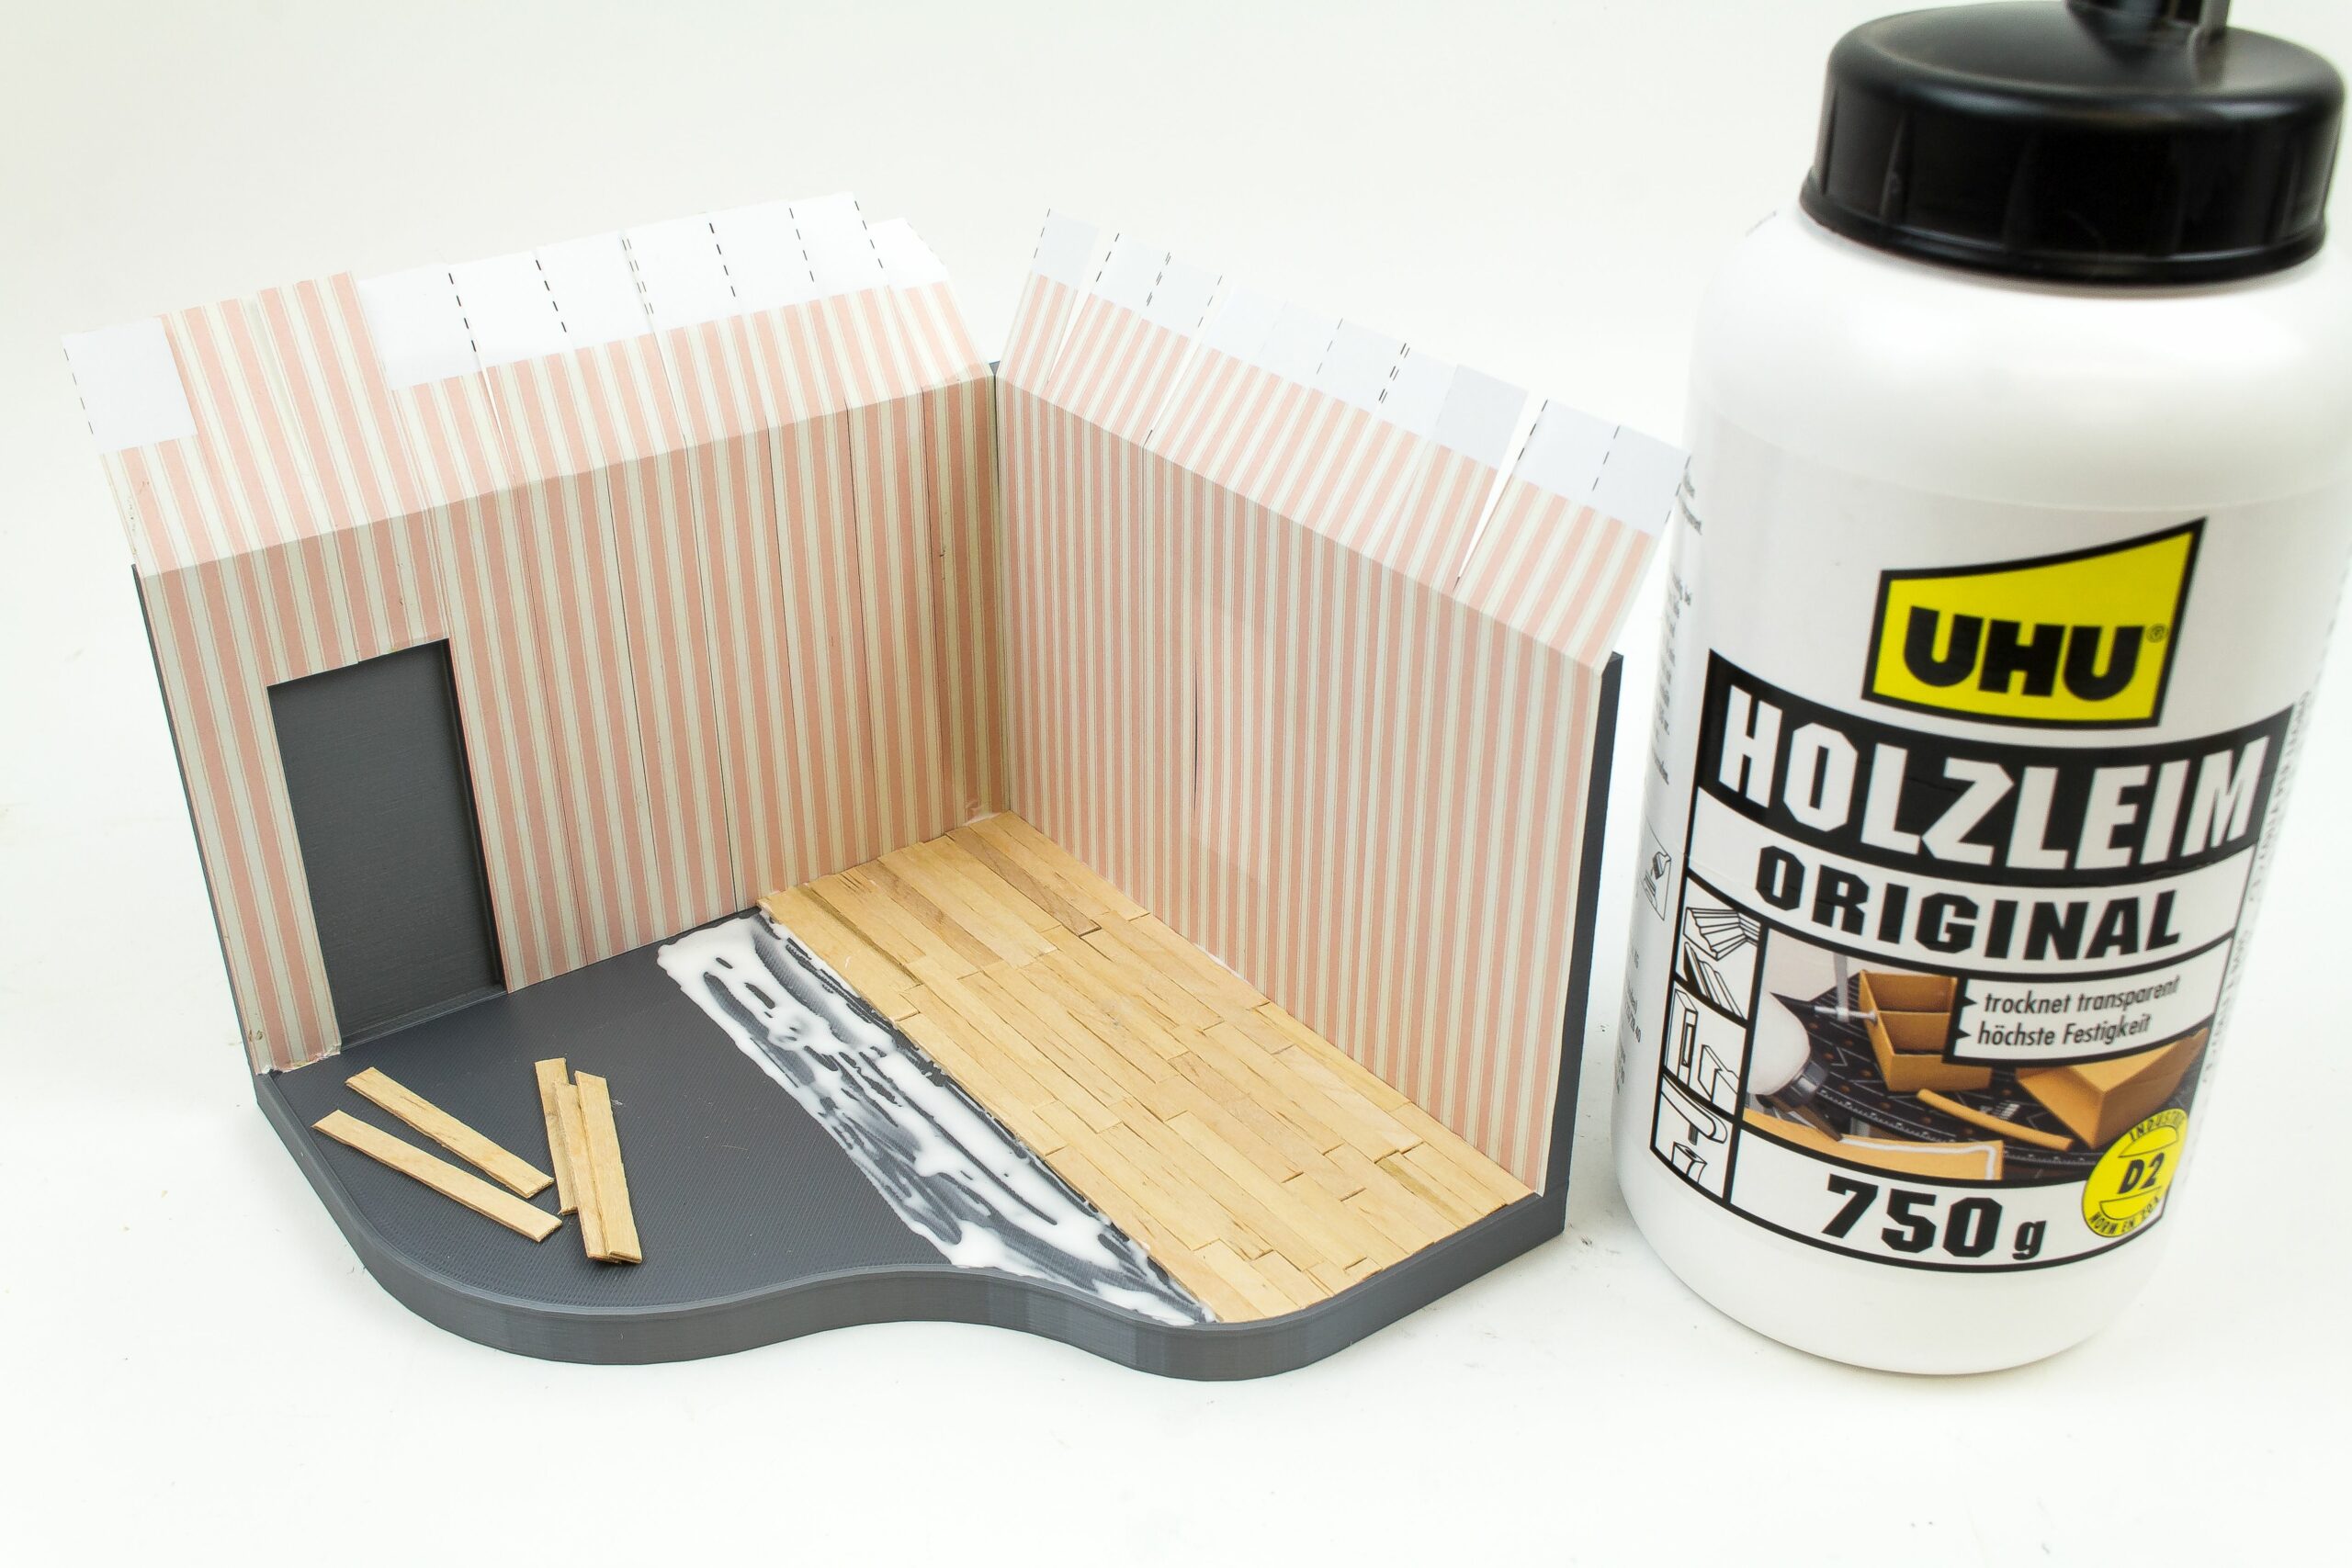
The wooden planks were then glued onto the floor using white glue. Note how they fit onto the slightly raised outer edge around the floor area.
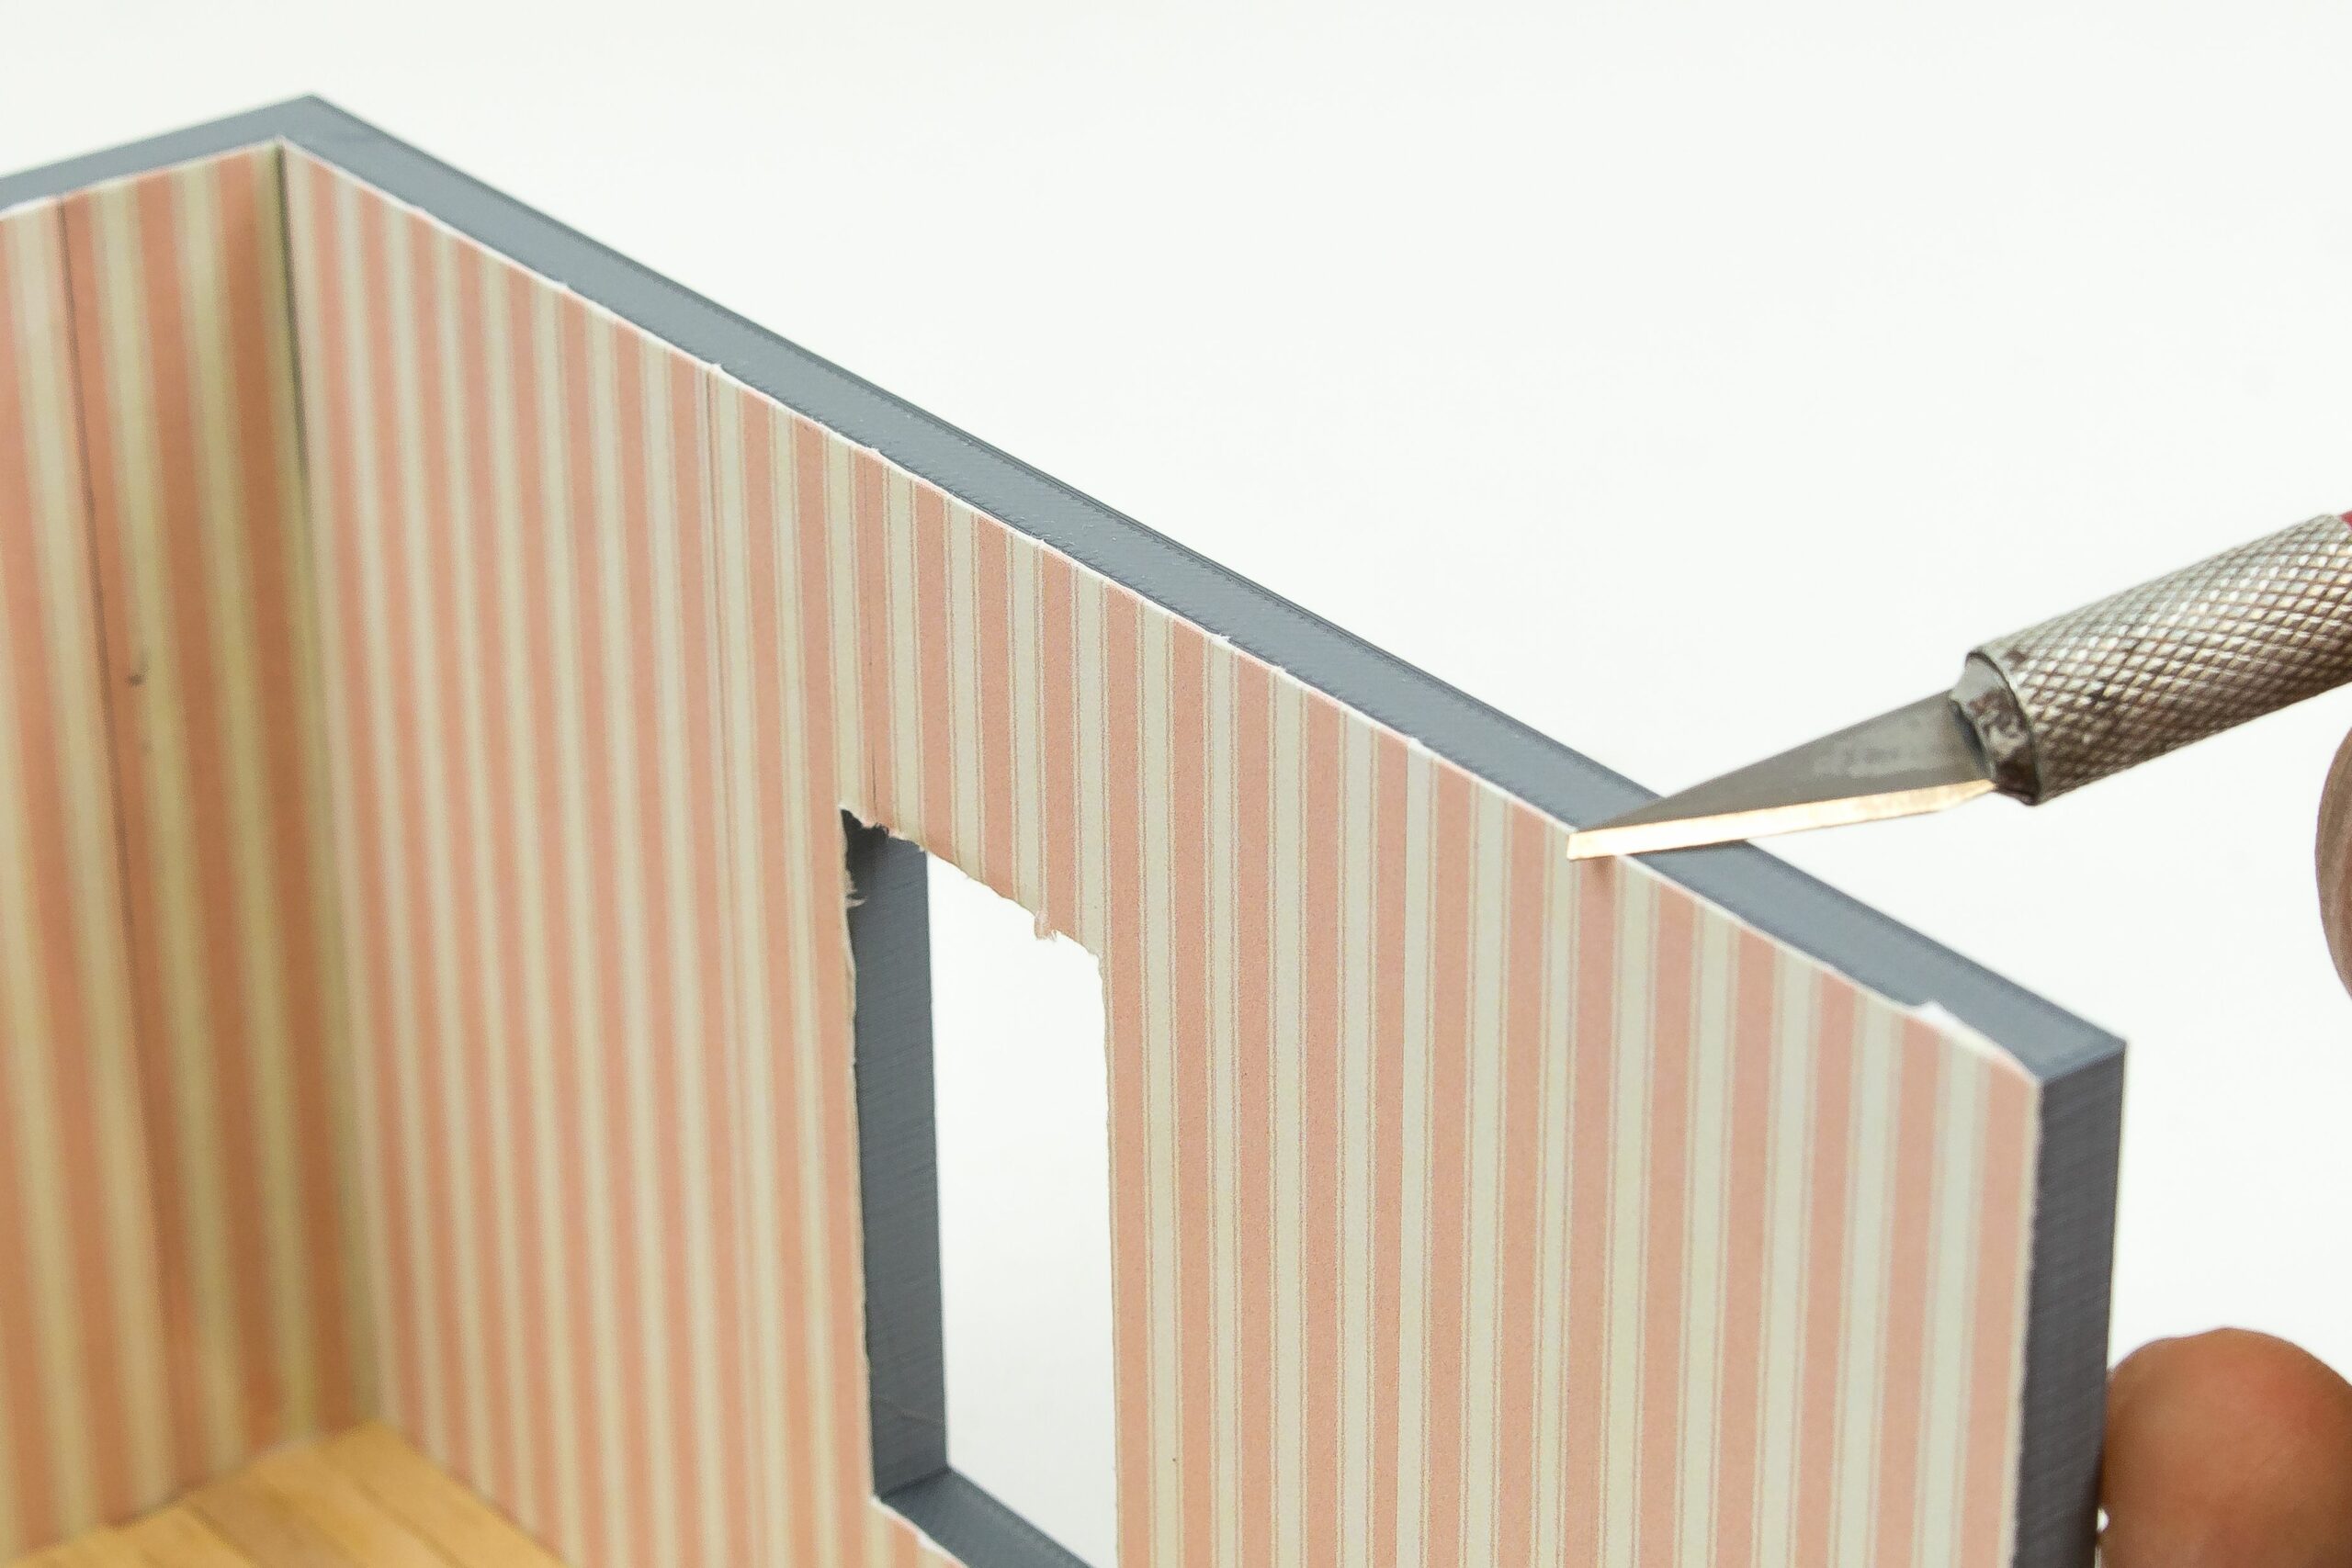
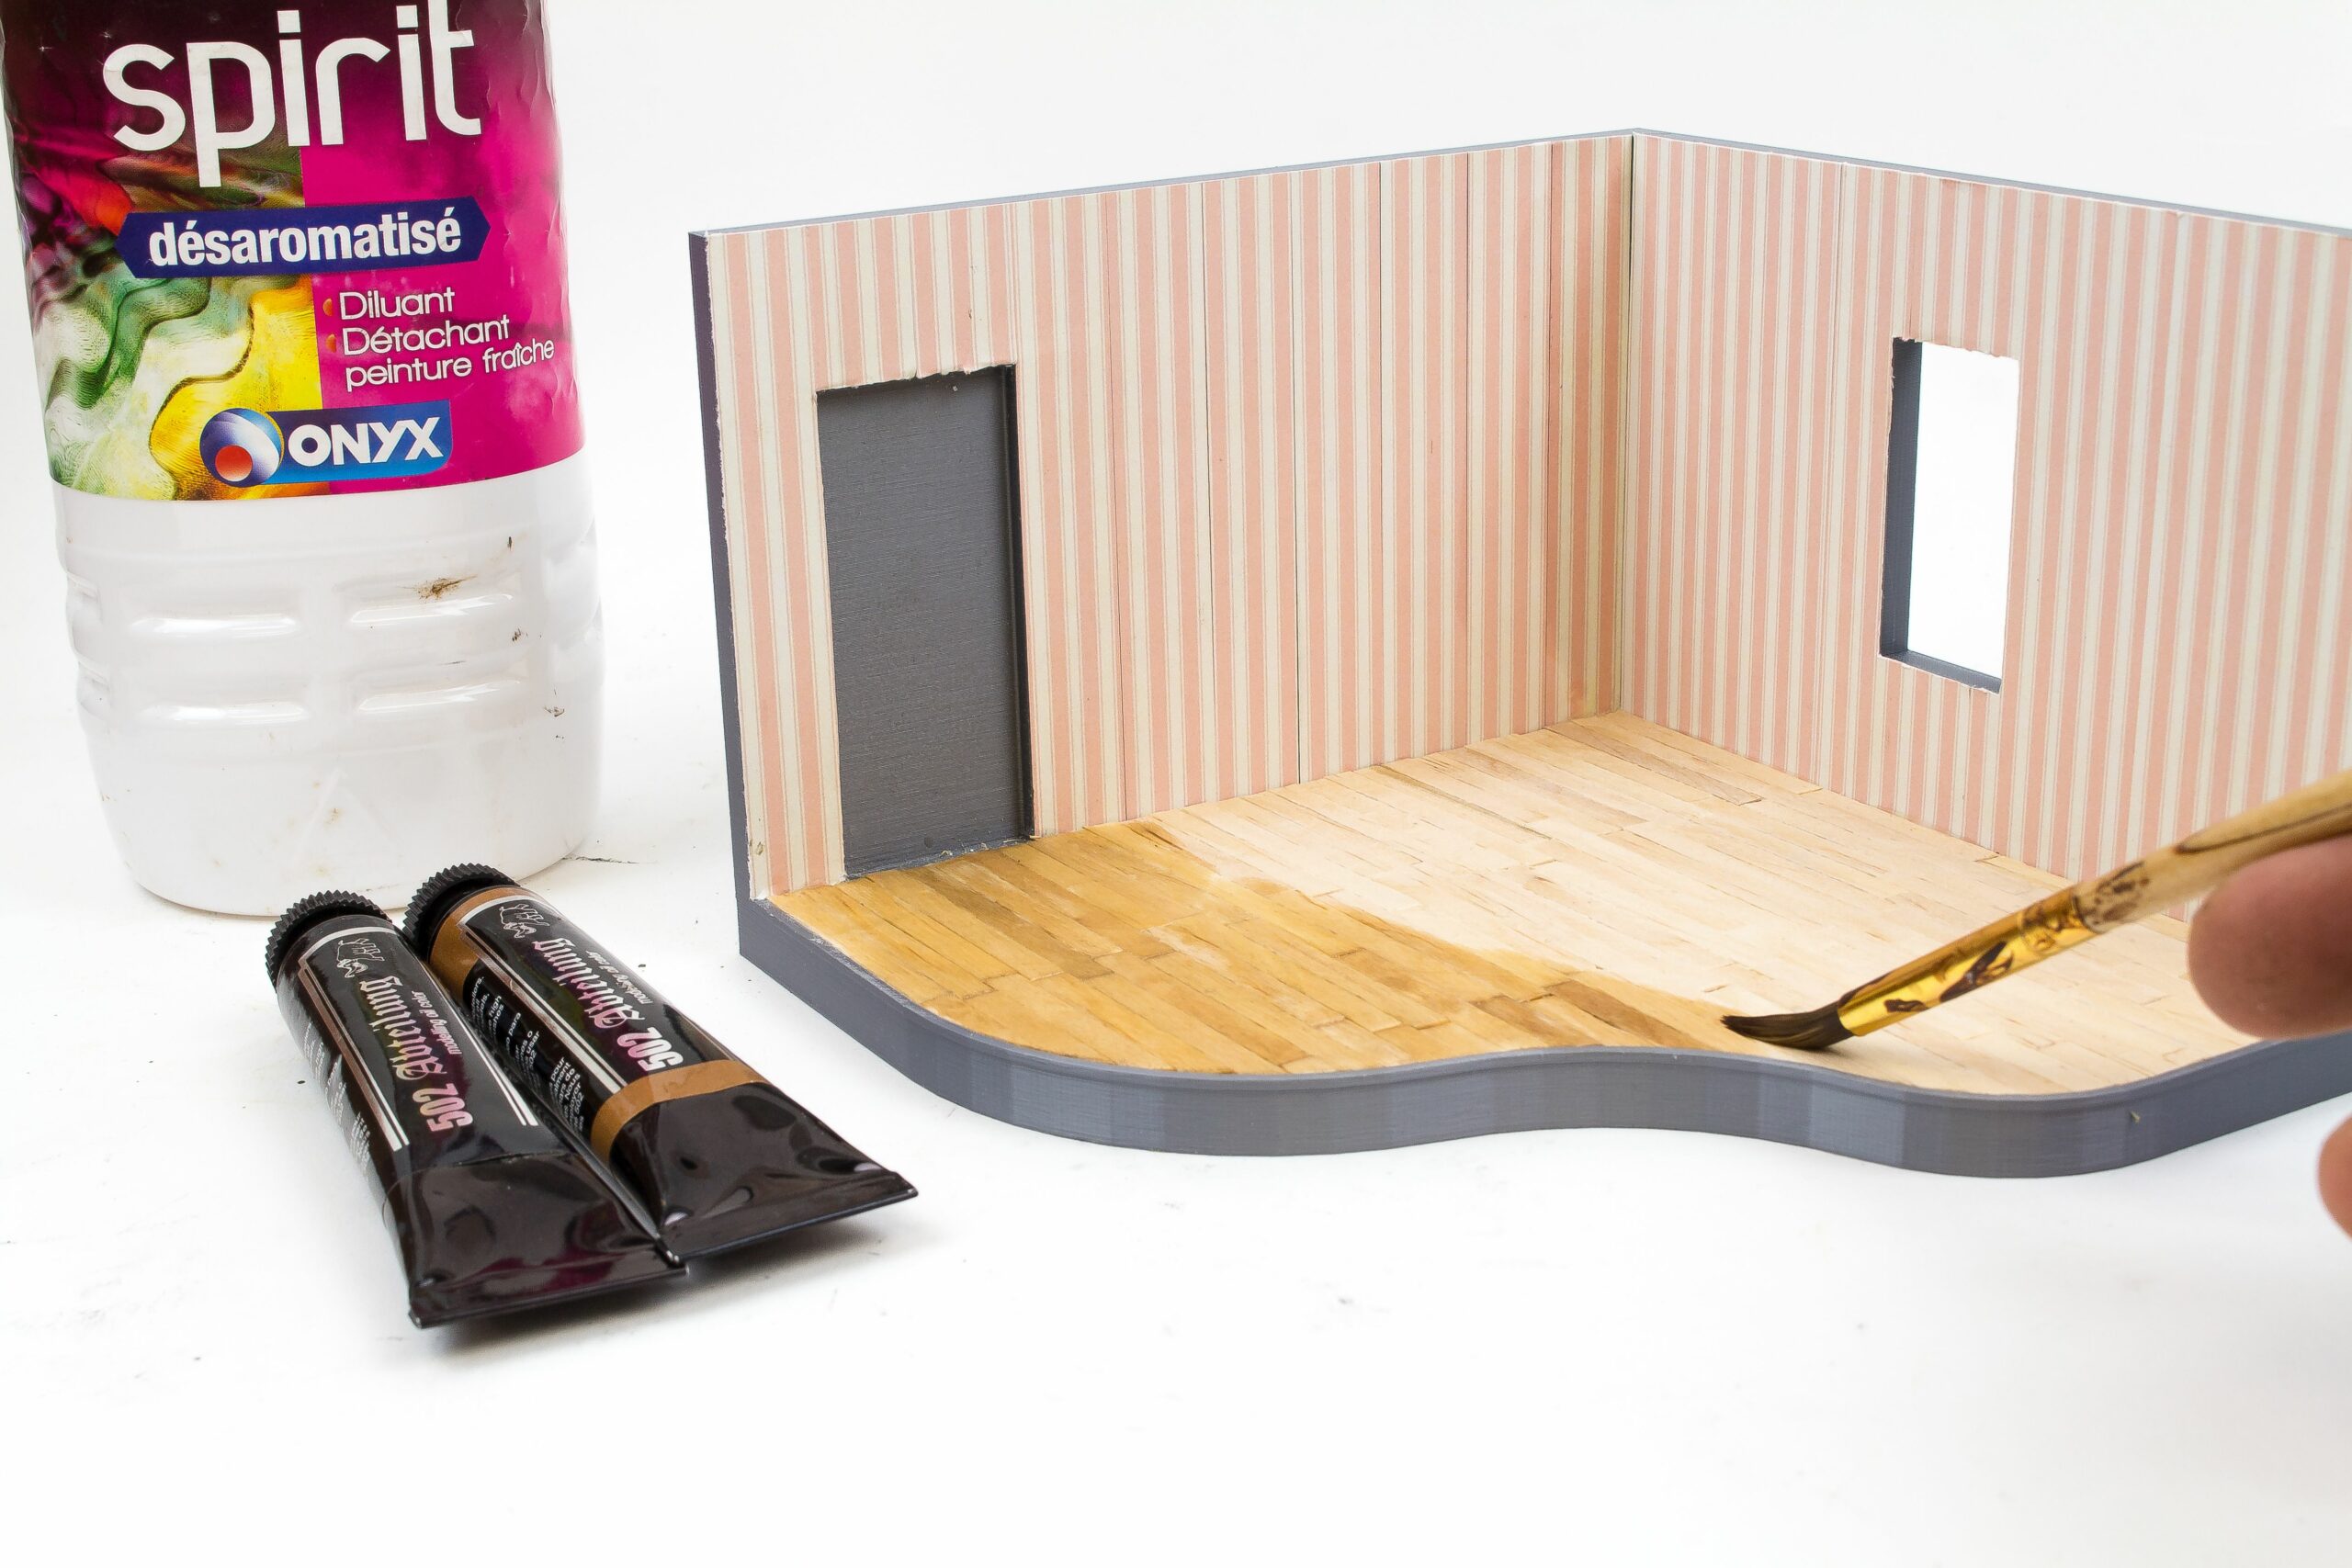
After the glue has dried, the overhang of the wallpaper was cut away with a fresh scalpel blade. It took some care to get a clean and even cut.
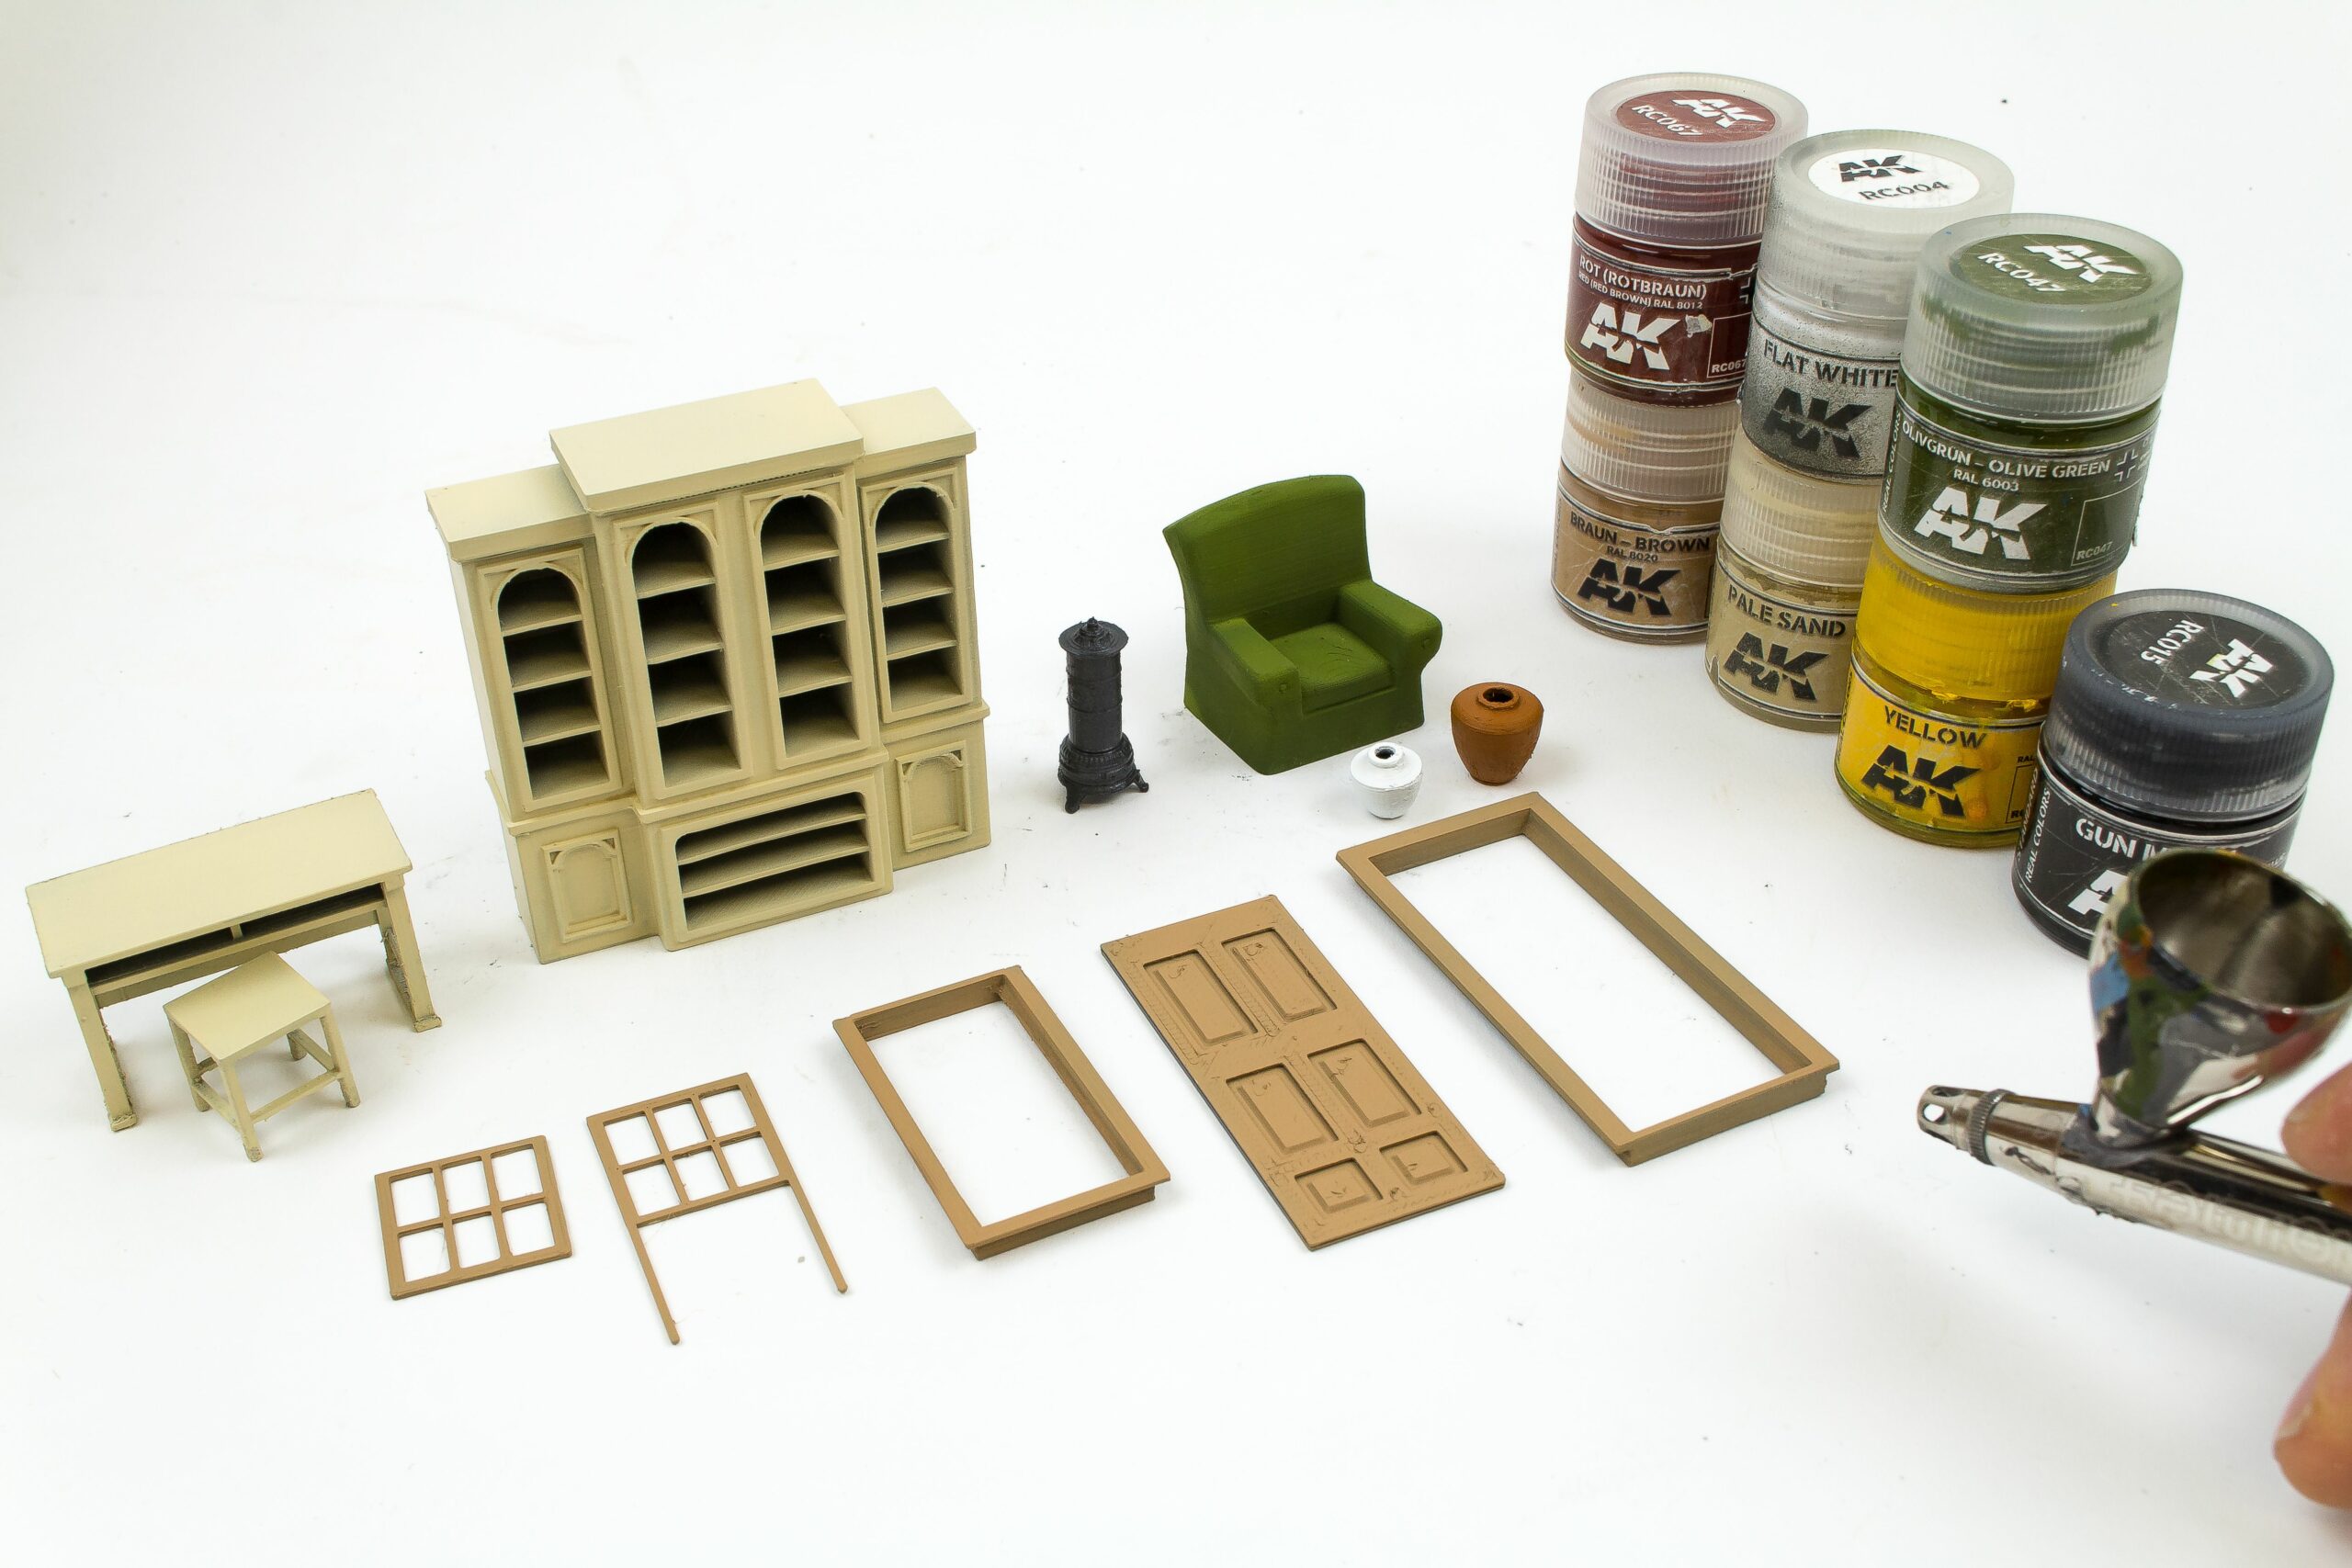
All other parts were washed to get rid of some grease marks and then spray painted with an airbrush. I am mostly using the AK Interactive Real Colors, but any quality acrylic scale model paint would do (Gunze, Tamiya, etc.).
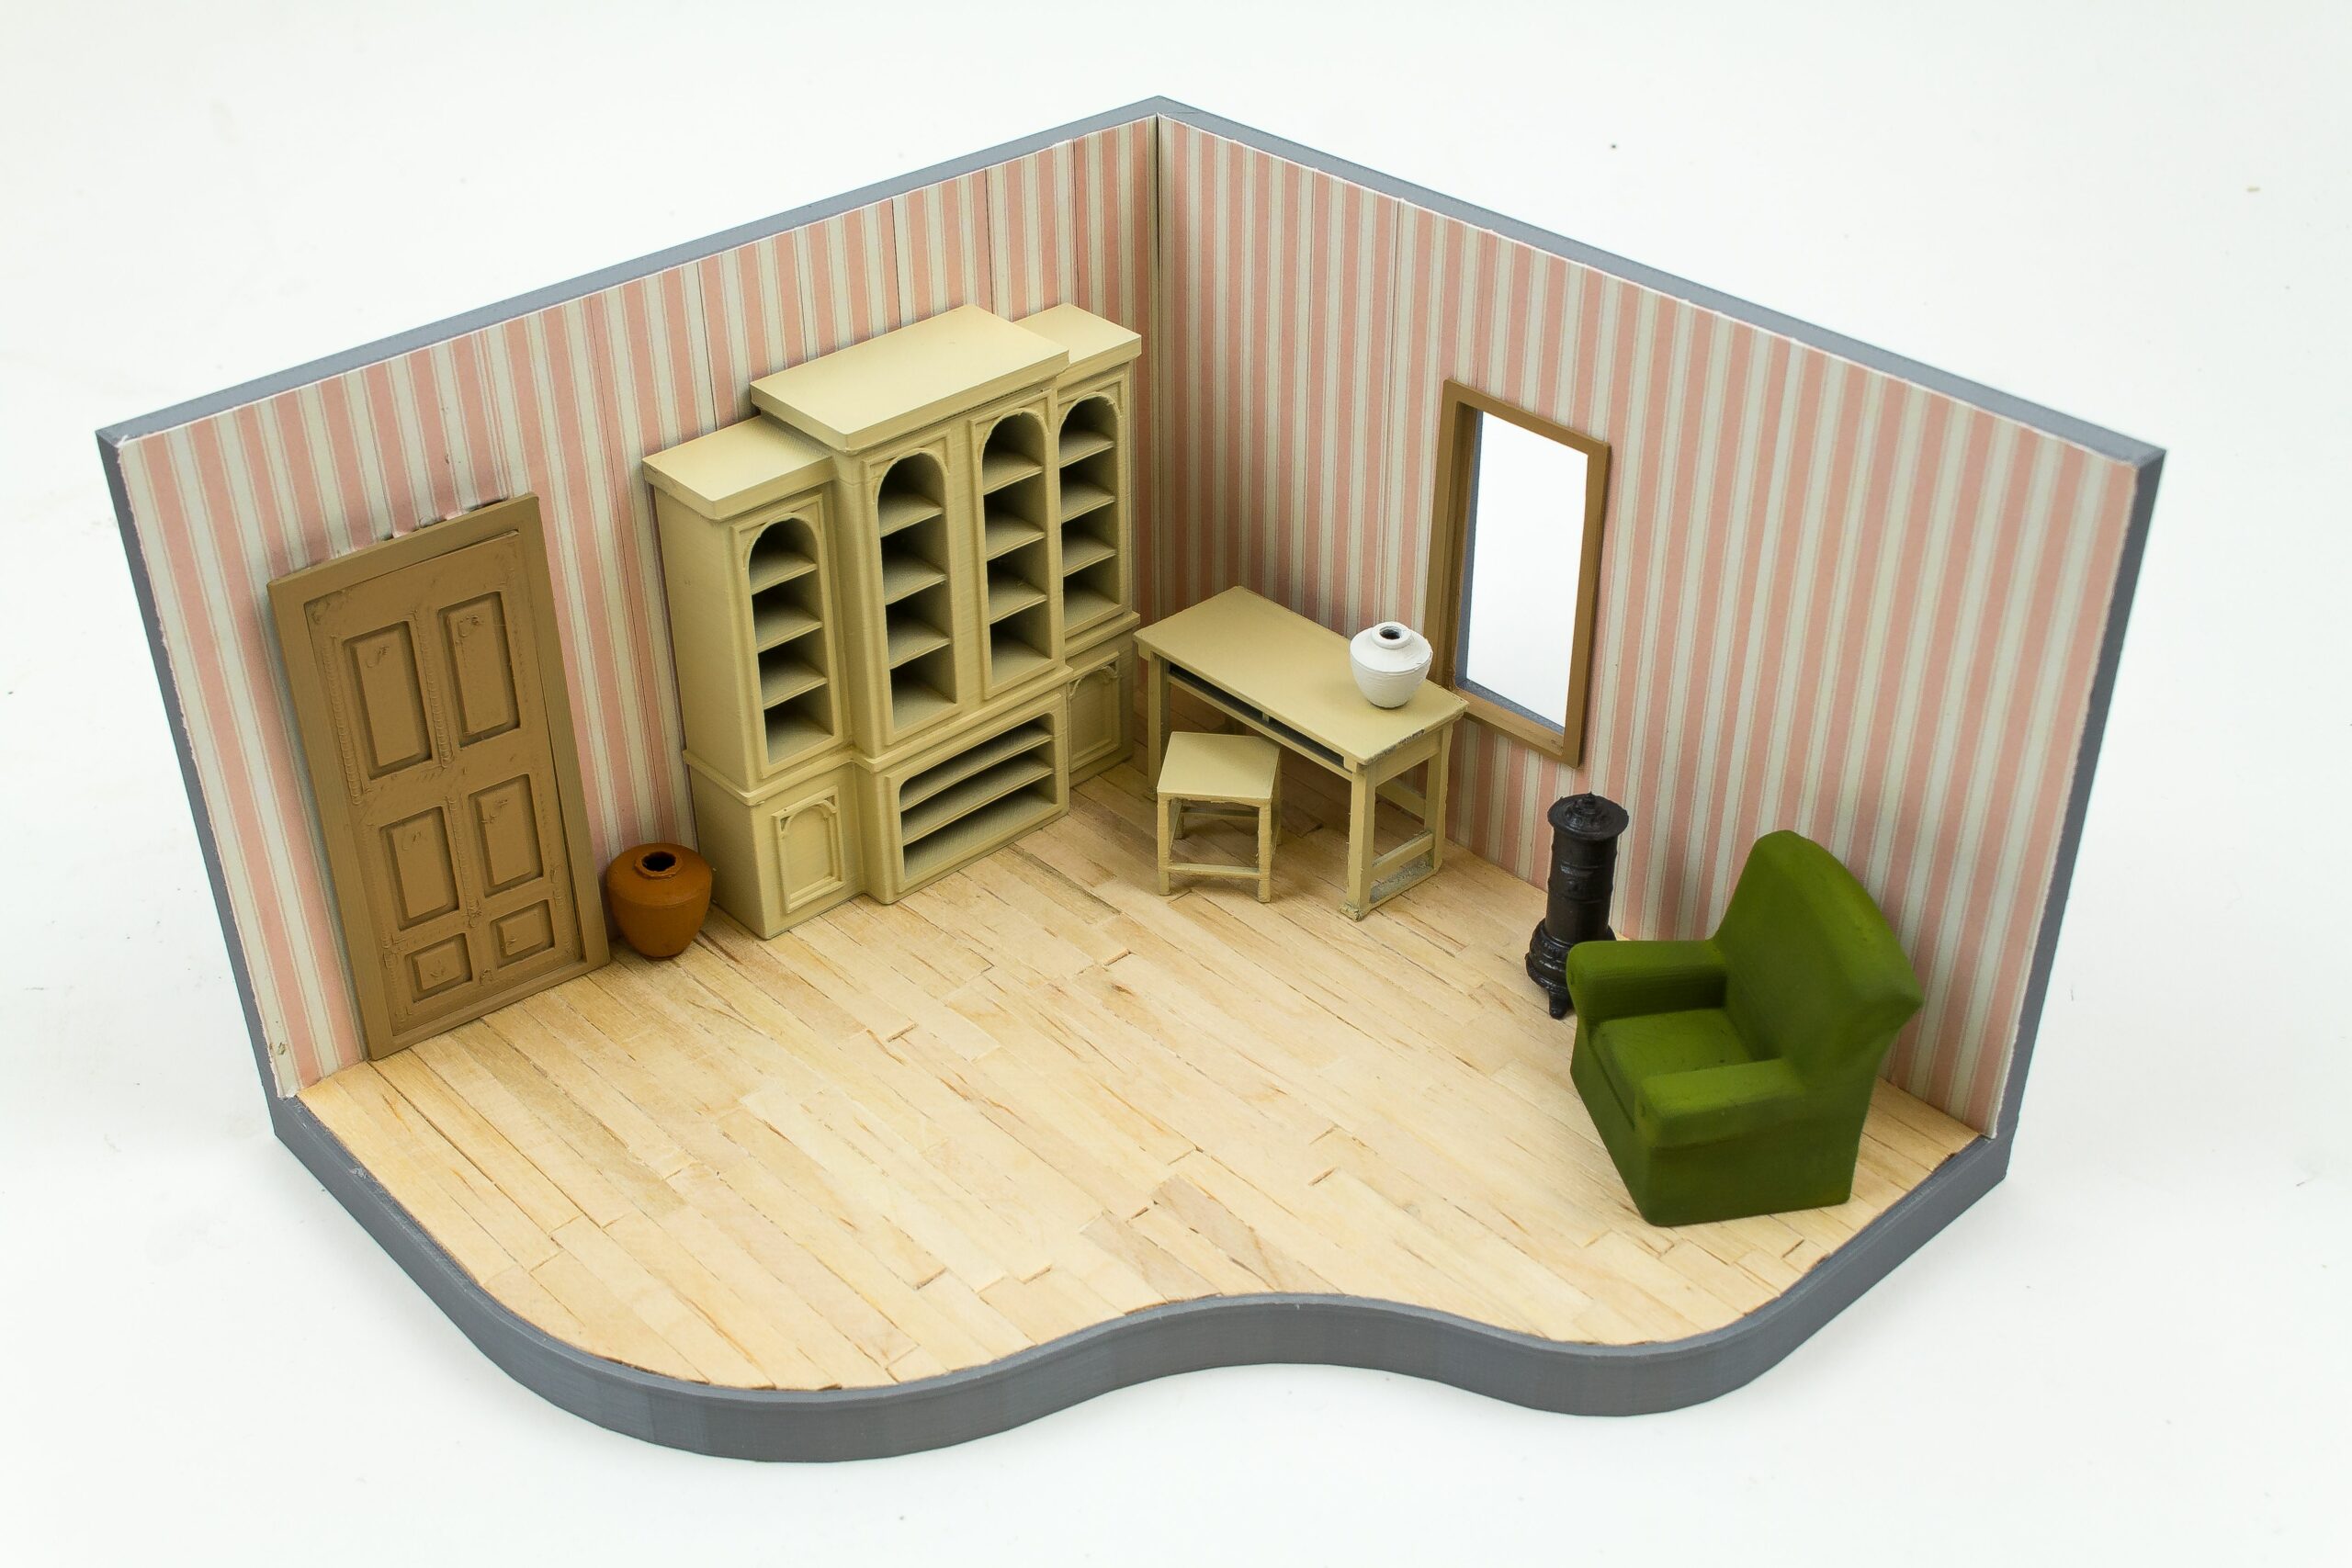
The painted parts were again test fitted, to see if the overall result is pleasing or if any colors needed to be adjusted. It’s just amazing what astonishing effects a little bit of paint can provide.
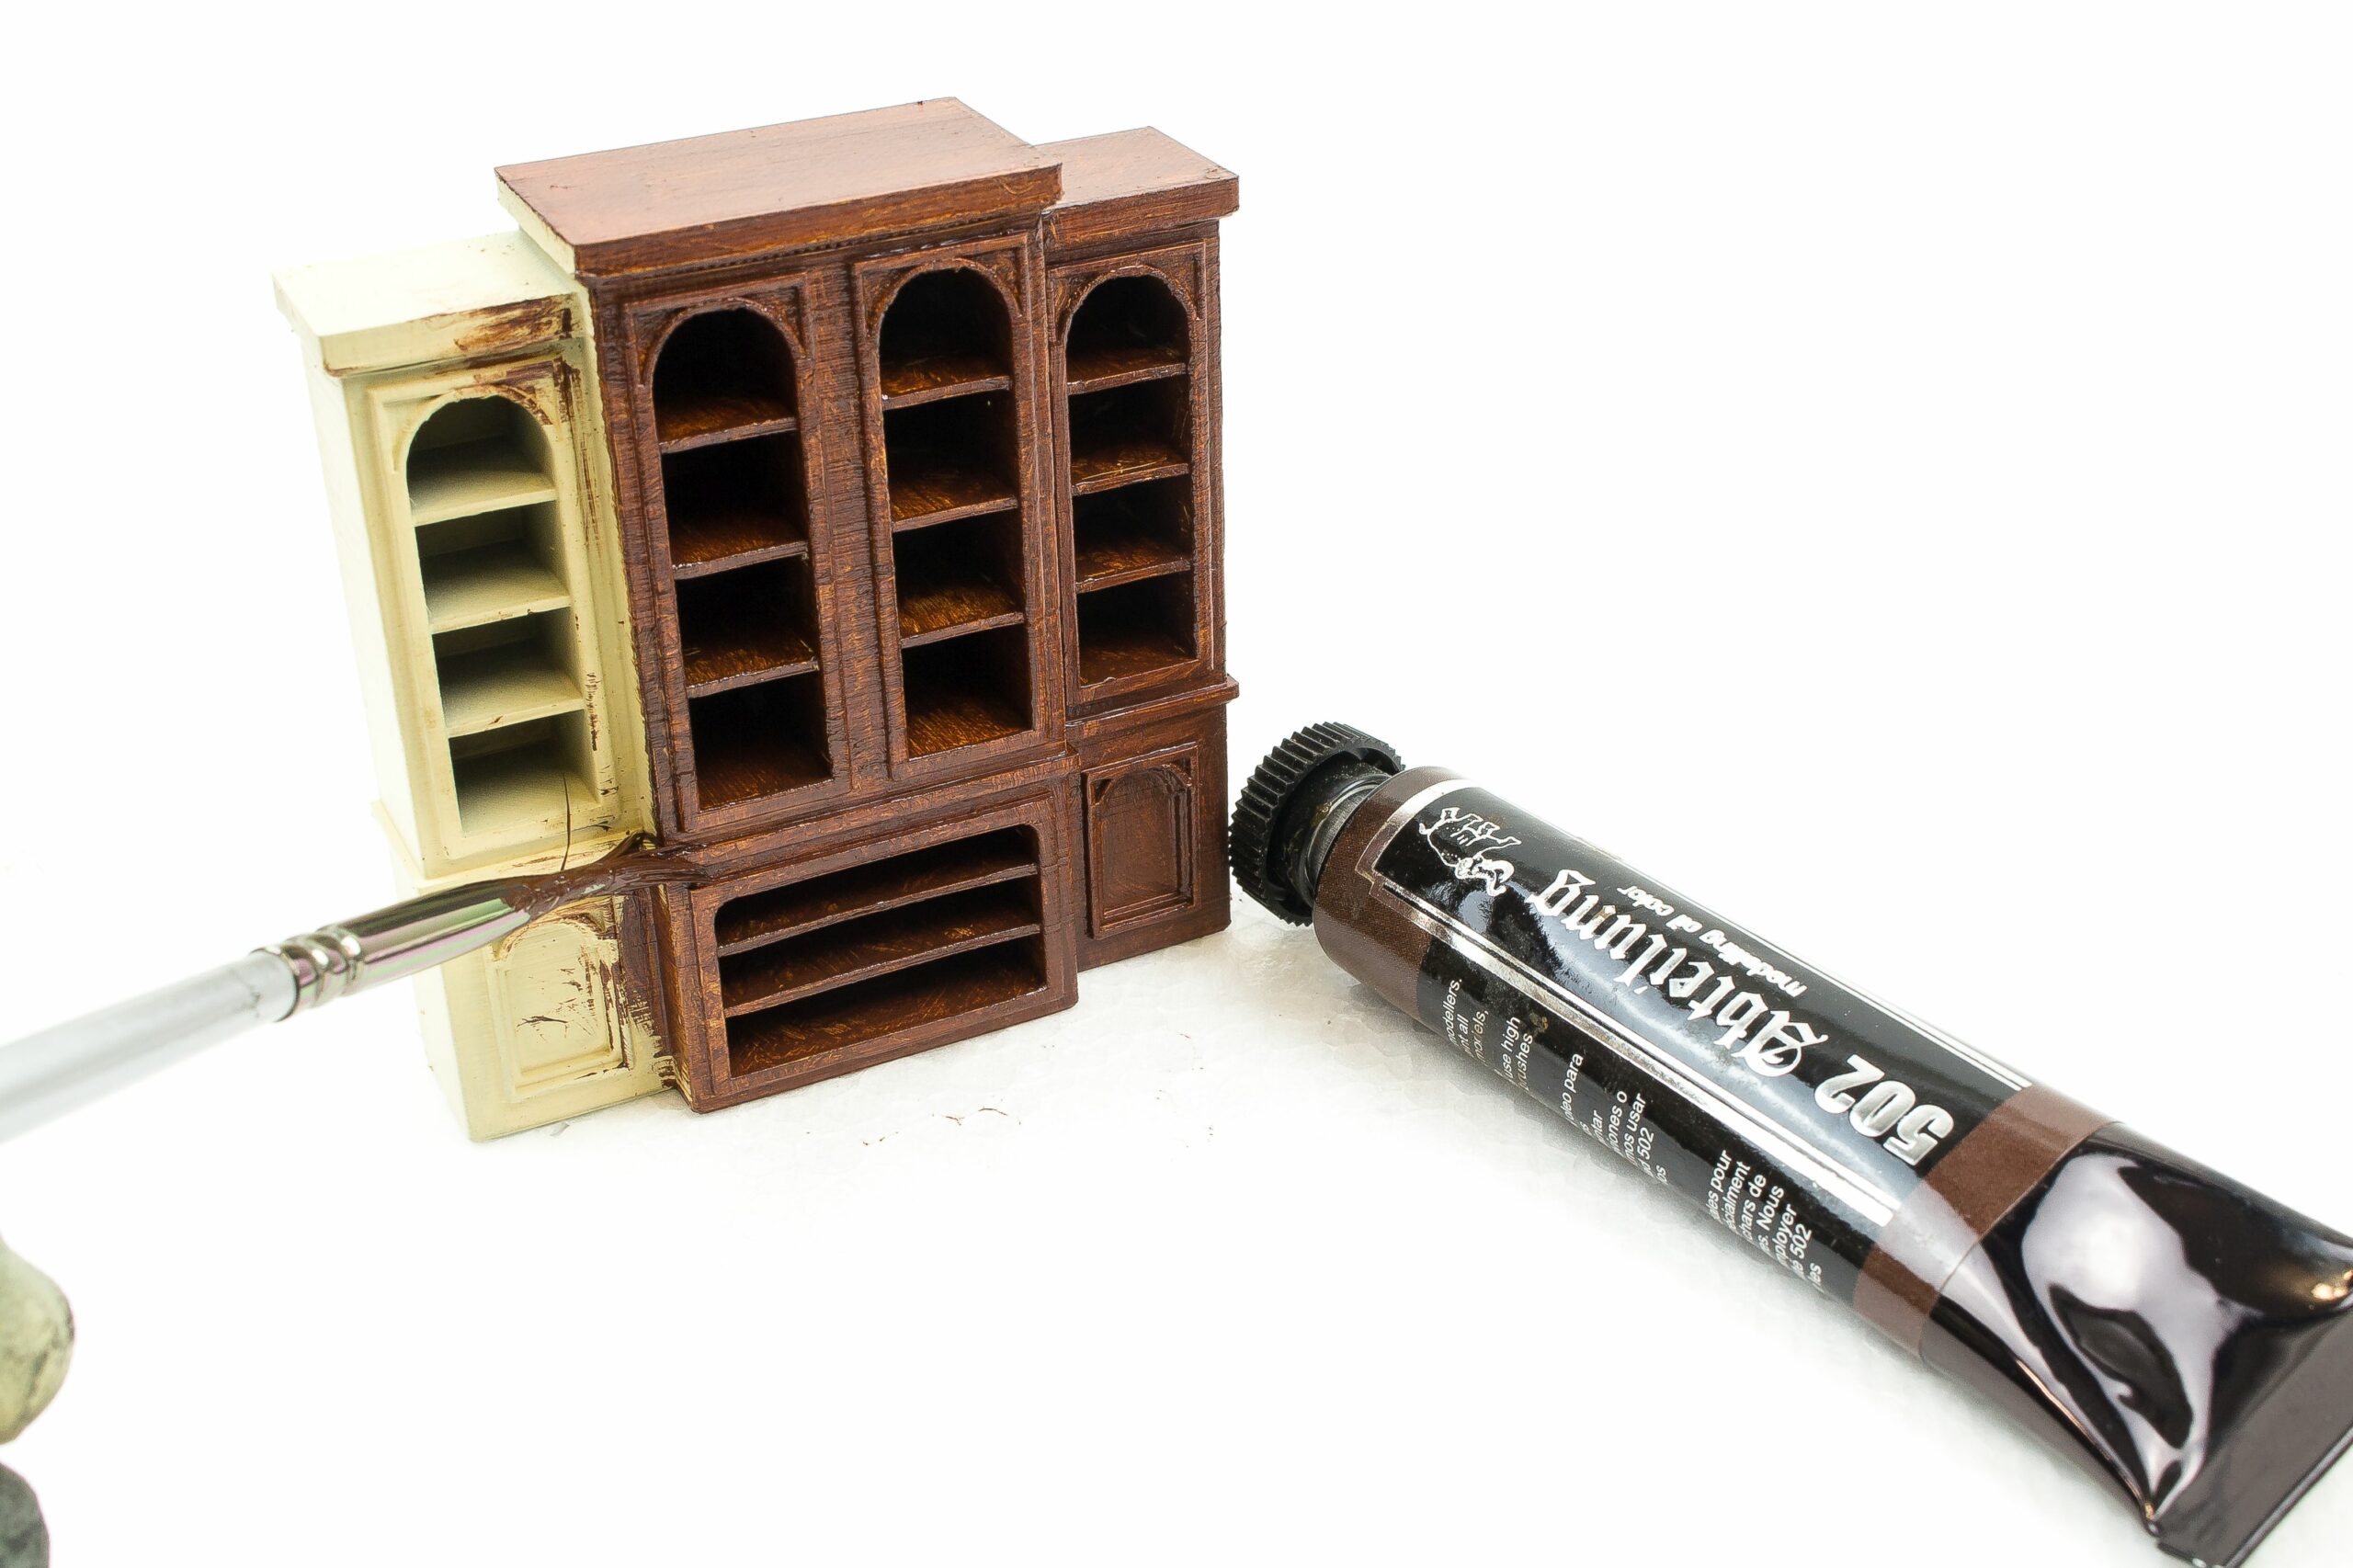
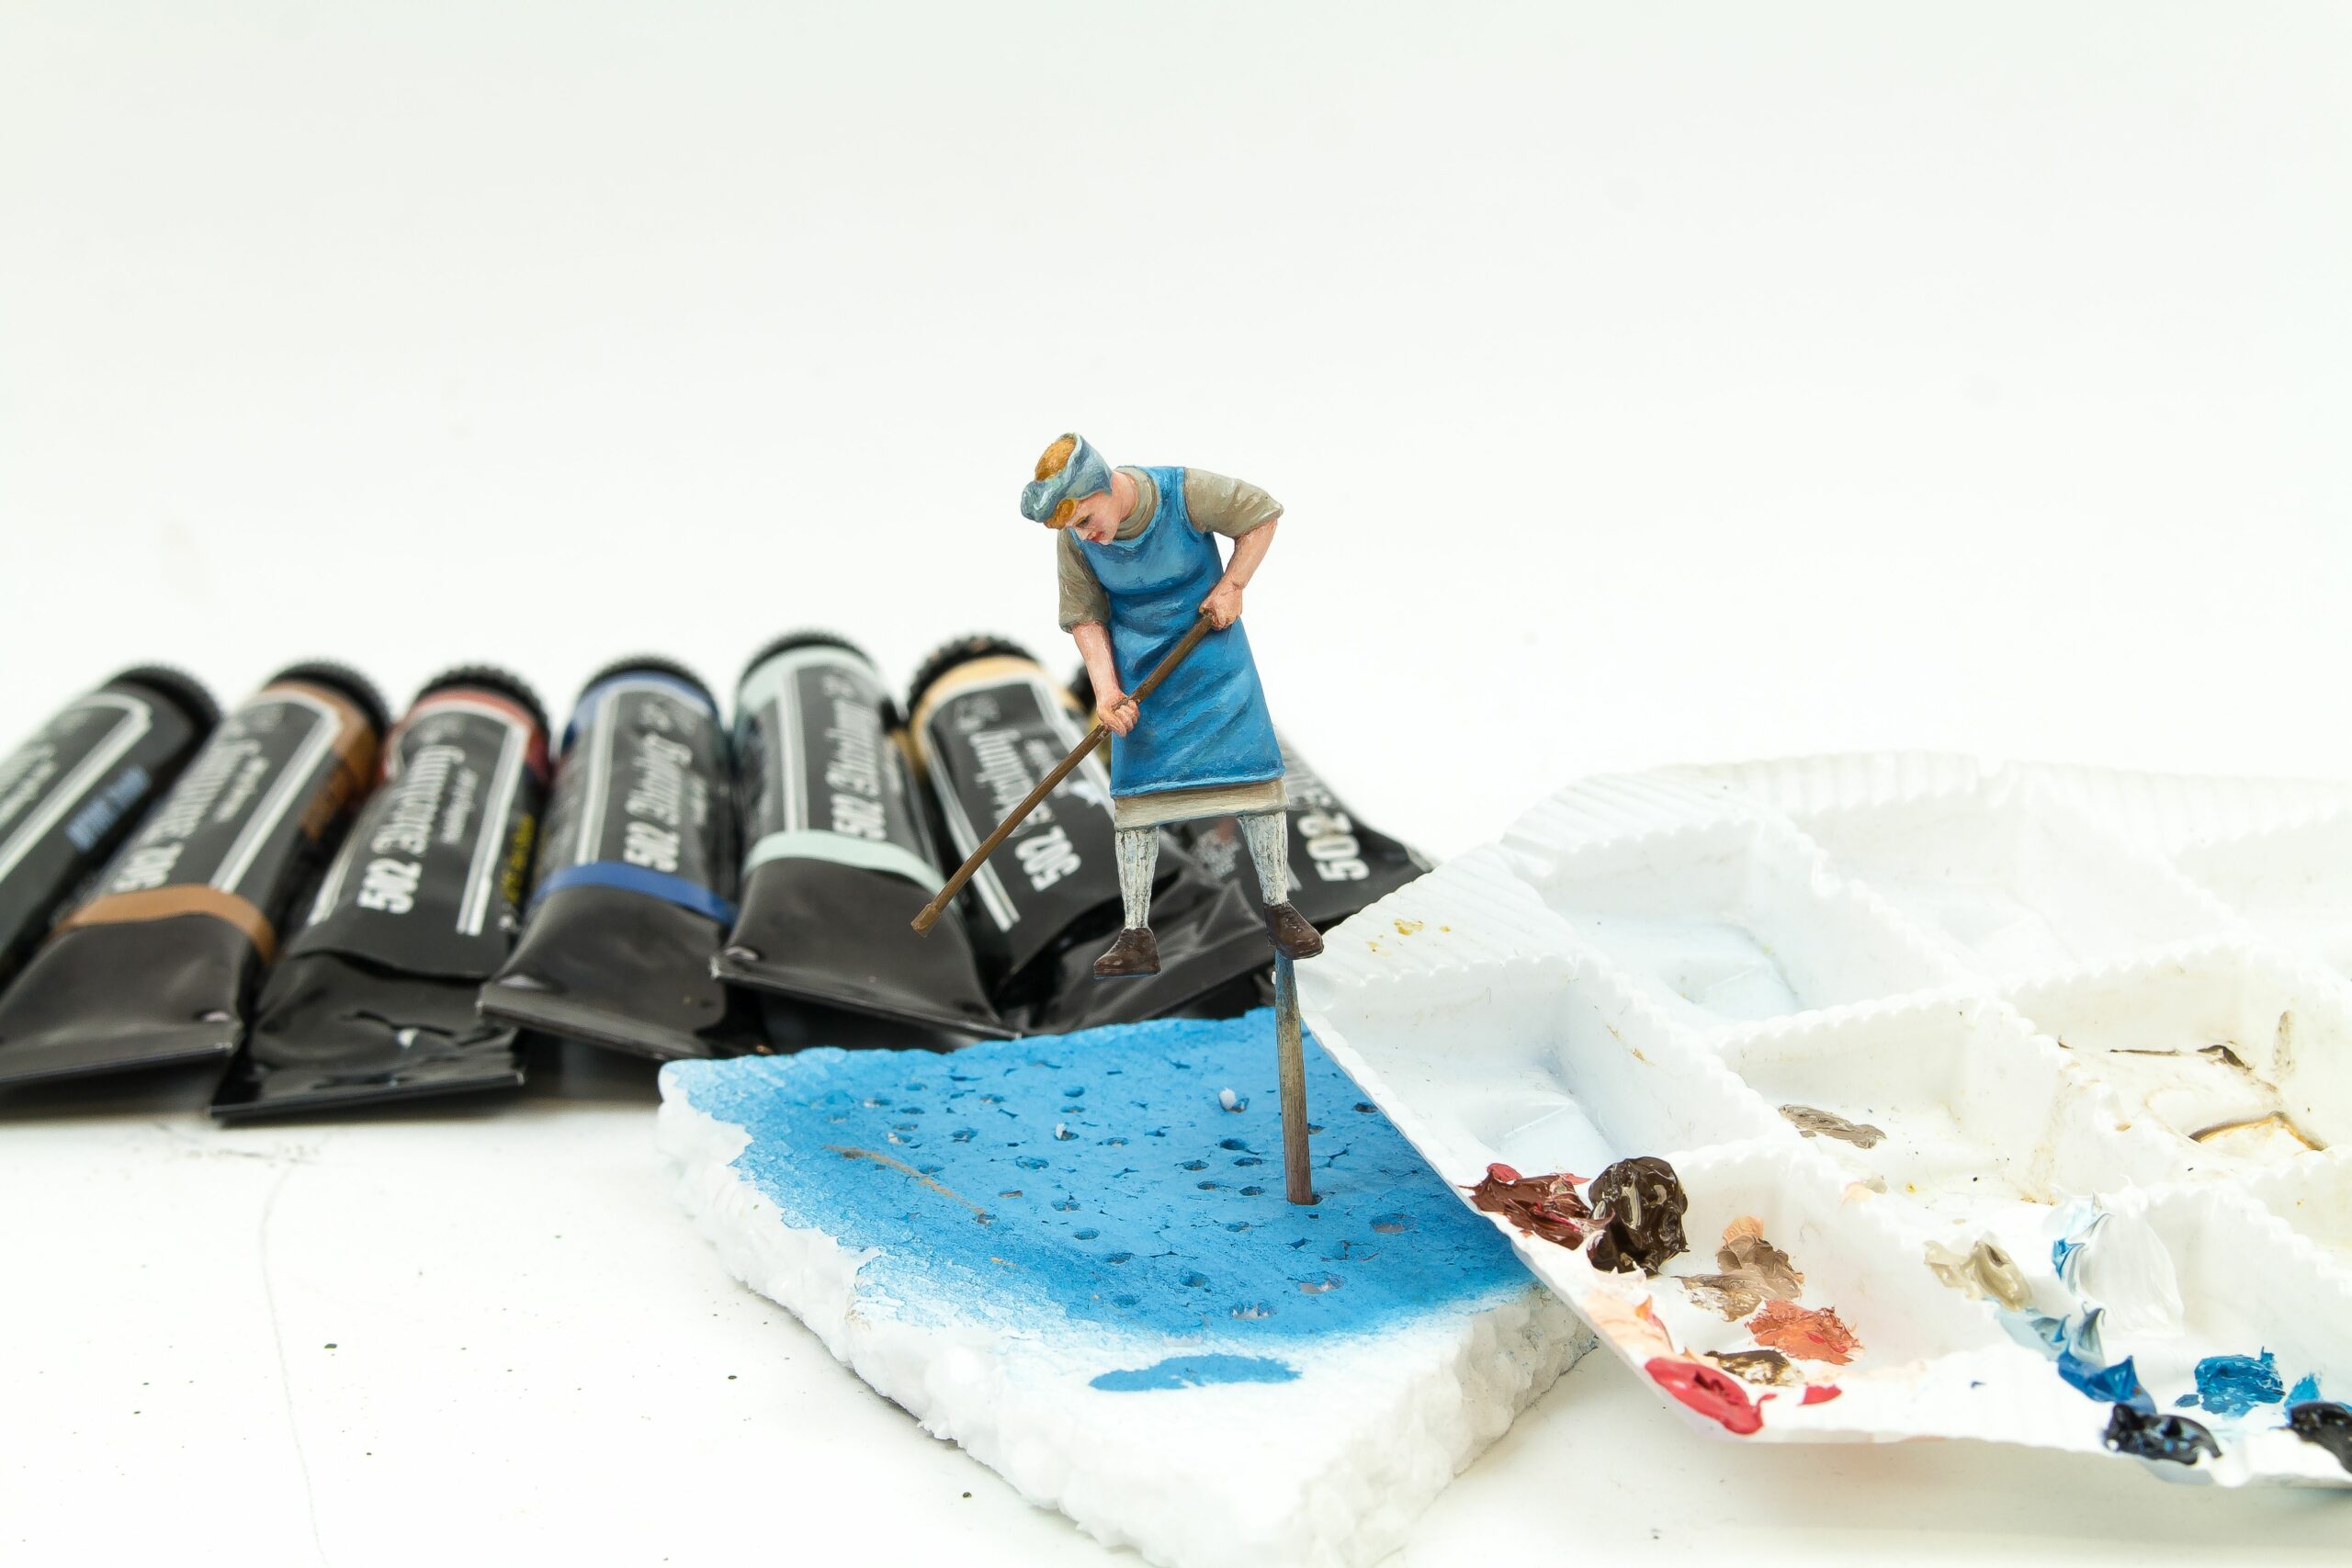
For the wooden texture, I prefer to use oil paints. A thick layer of paint was brushed on the light-yellow base, intentionally creating a streaky effect with the brush bristles.
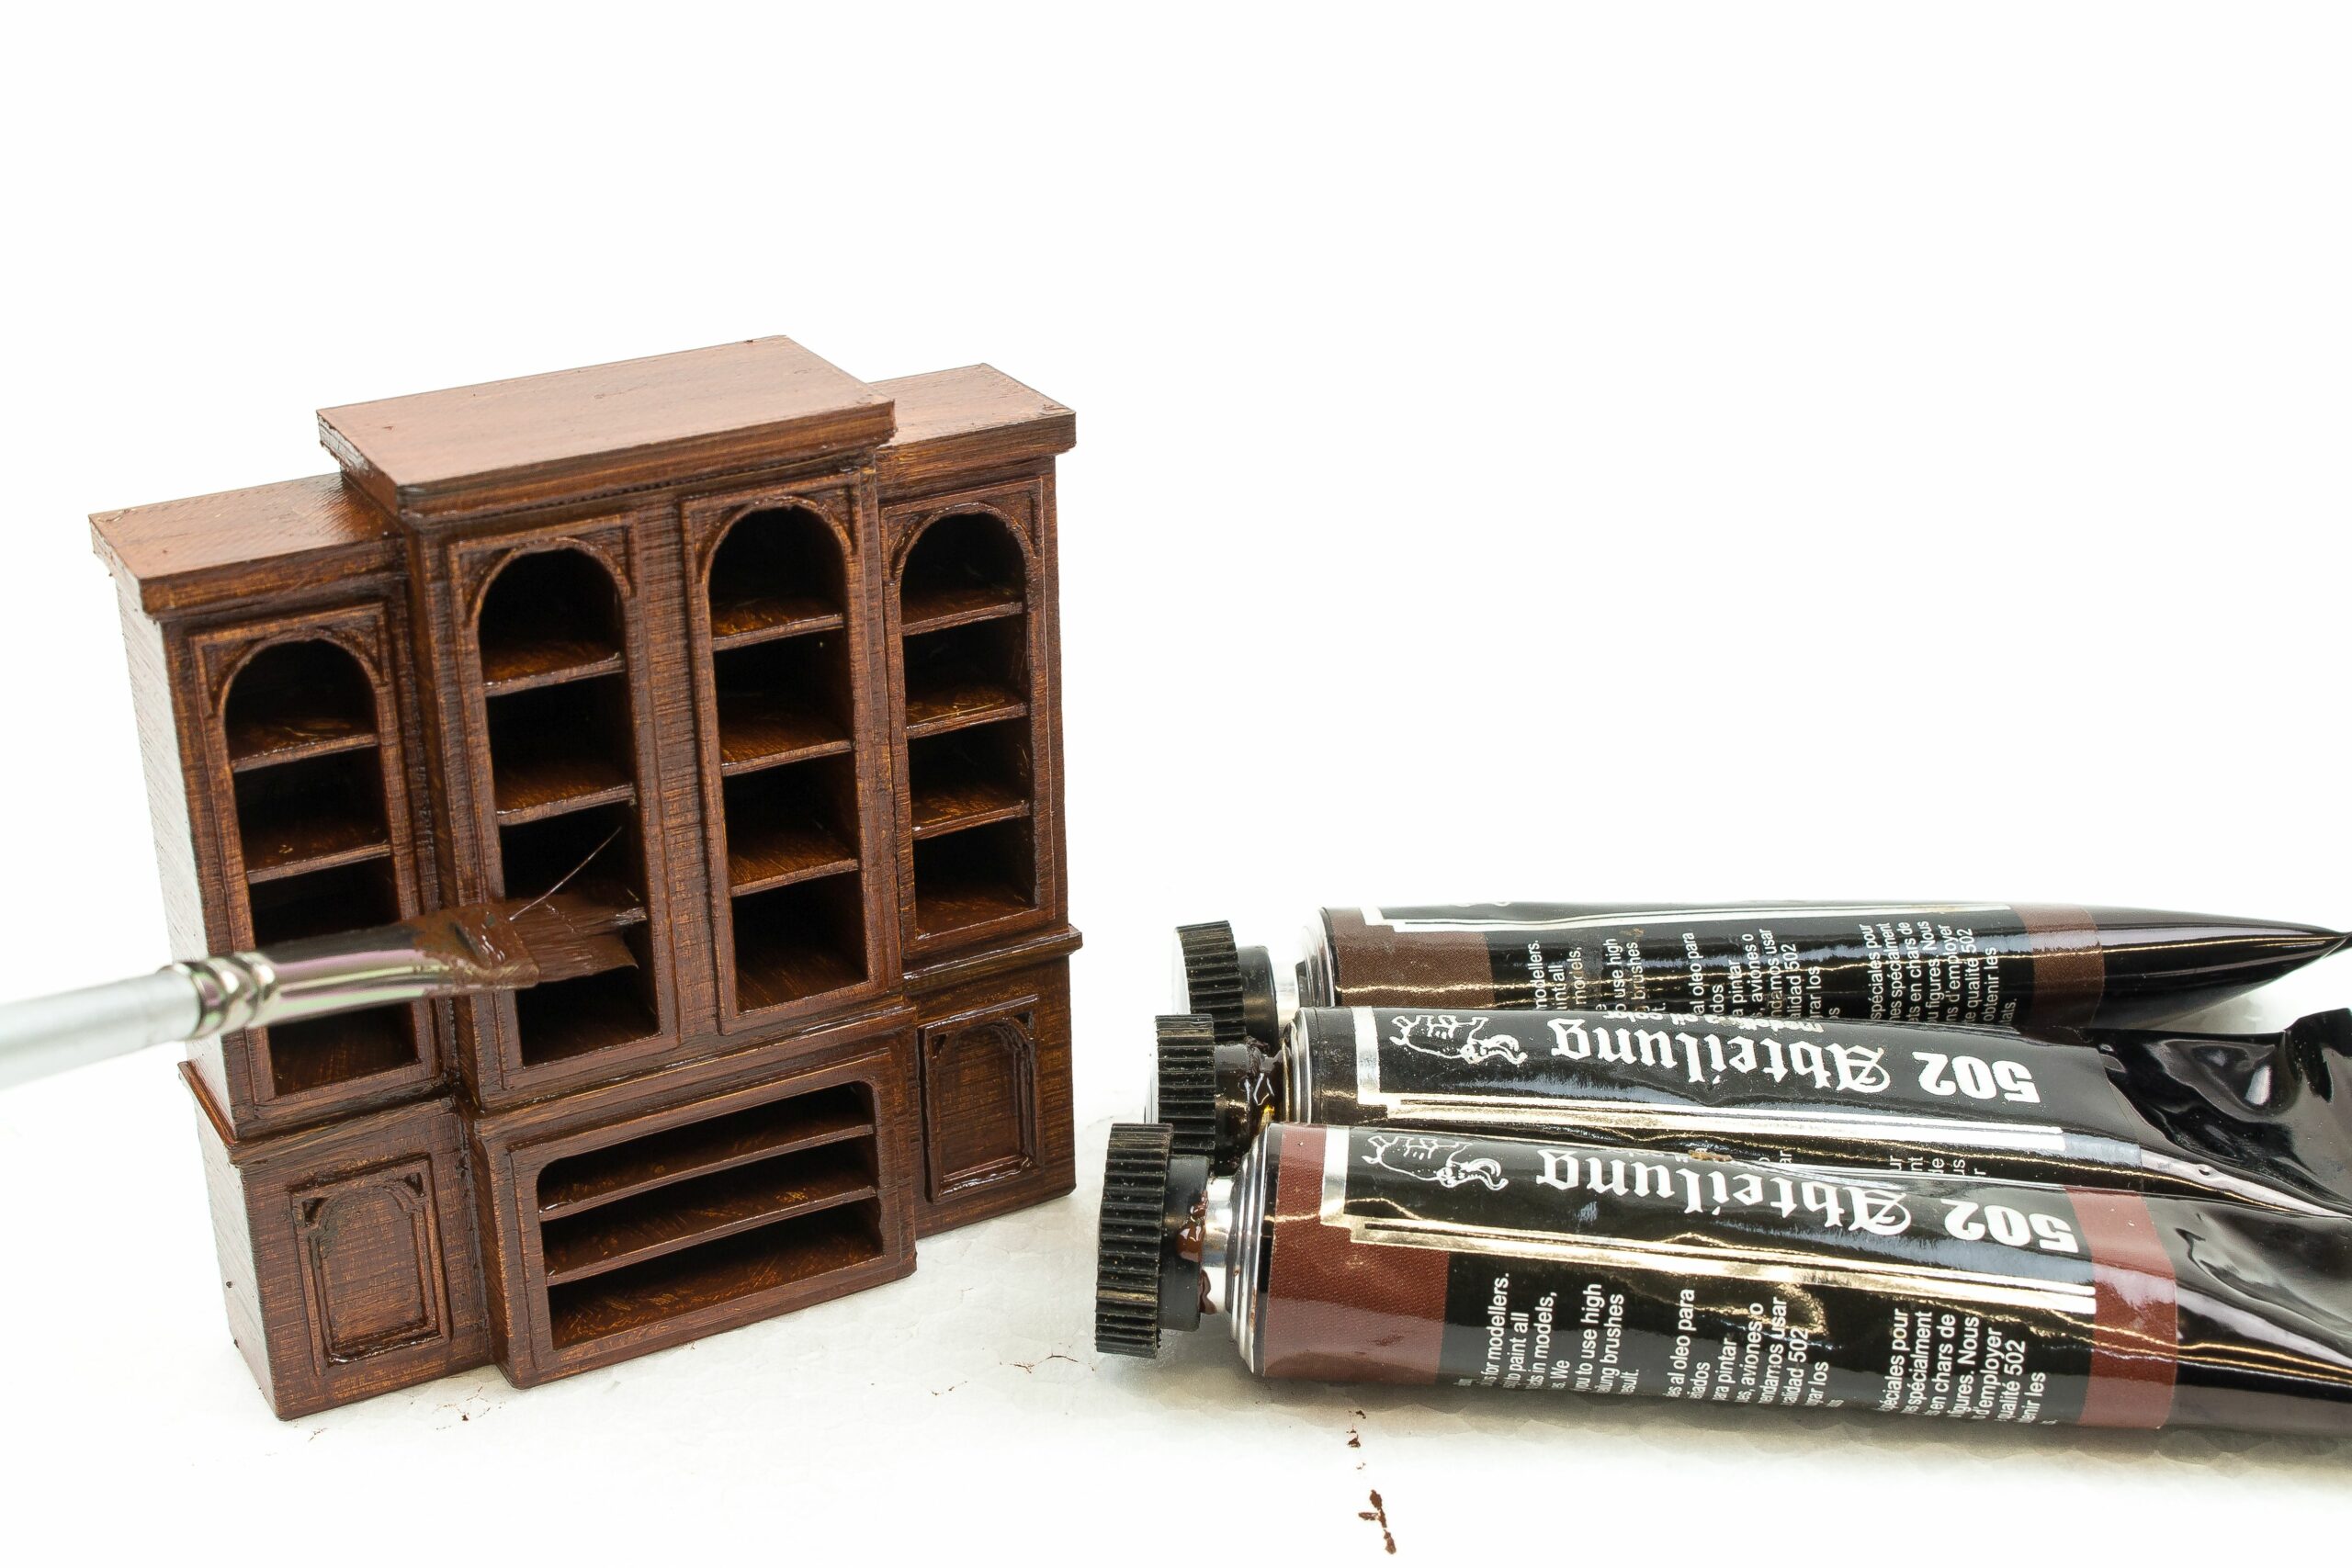
I created a subtle tonal variation using different shades of oil paints. The only disadvantage is that the oil paint takes ages to dry – a couple of days before the surface is even halfway touchable. I waited a week before spraying a final layer of matt varnish.
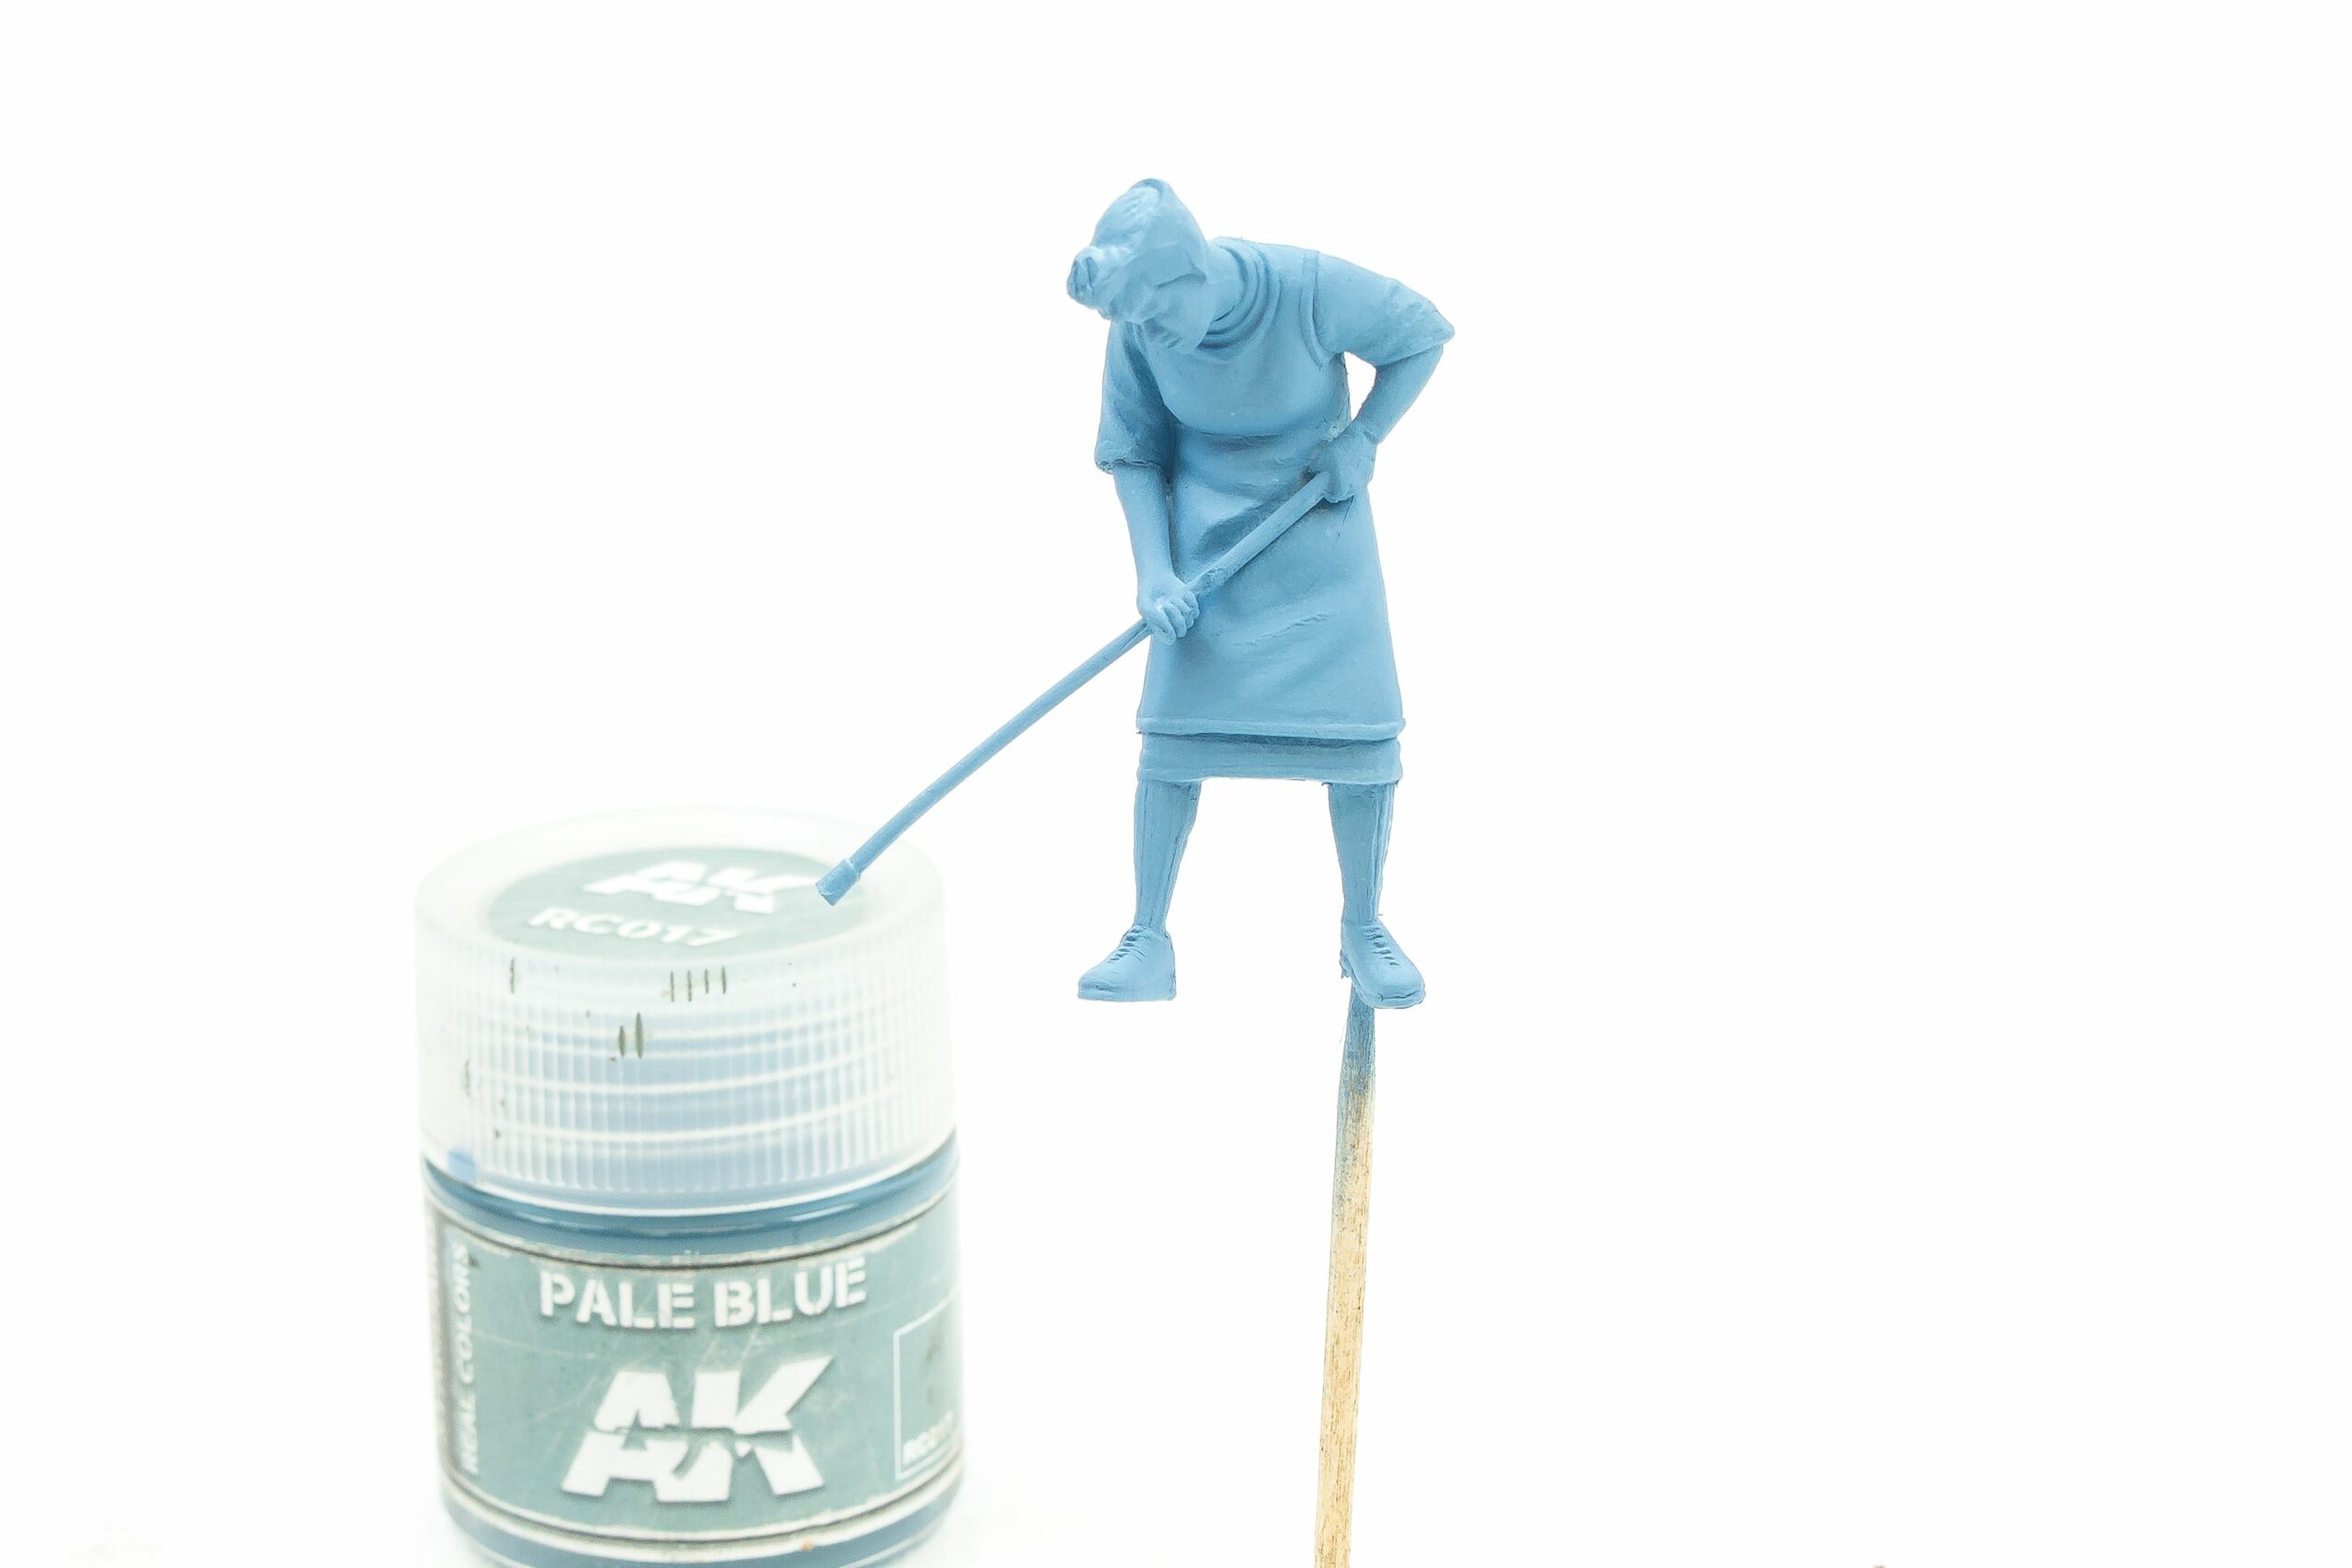
Meanwhile, I painted the female figure. For easier handling, I drilled a hole in one foot and glued it to a toothpick. First, I airbrushed a pale blue base layer…
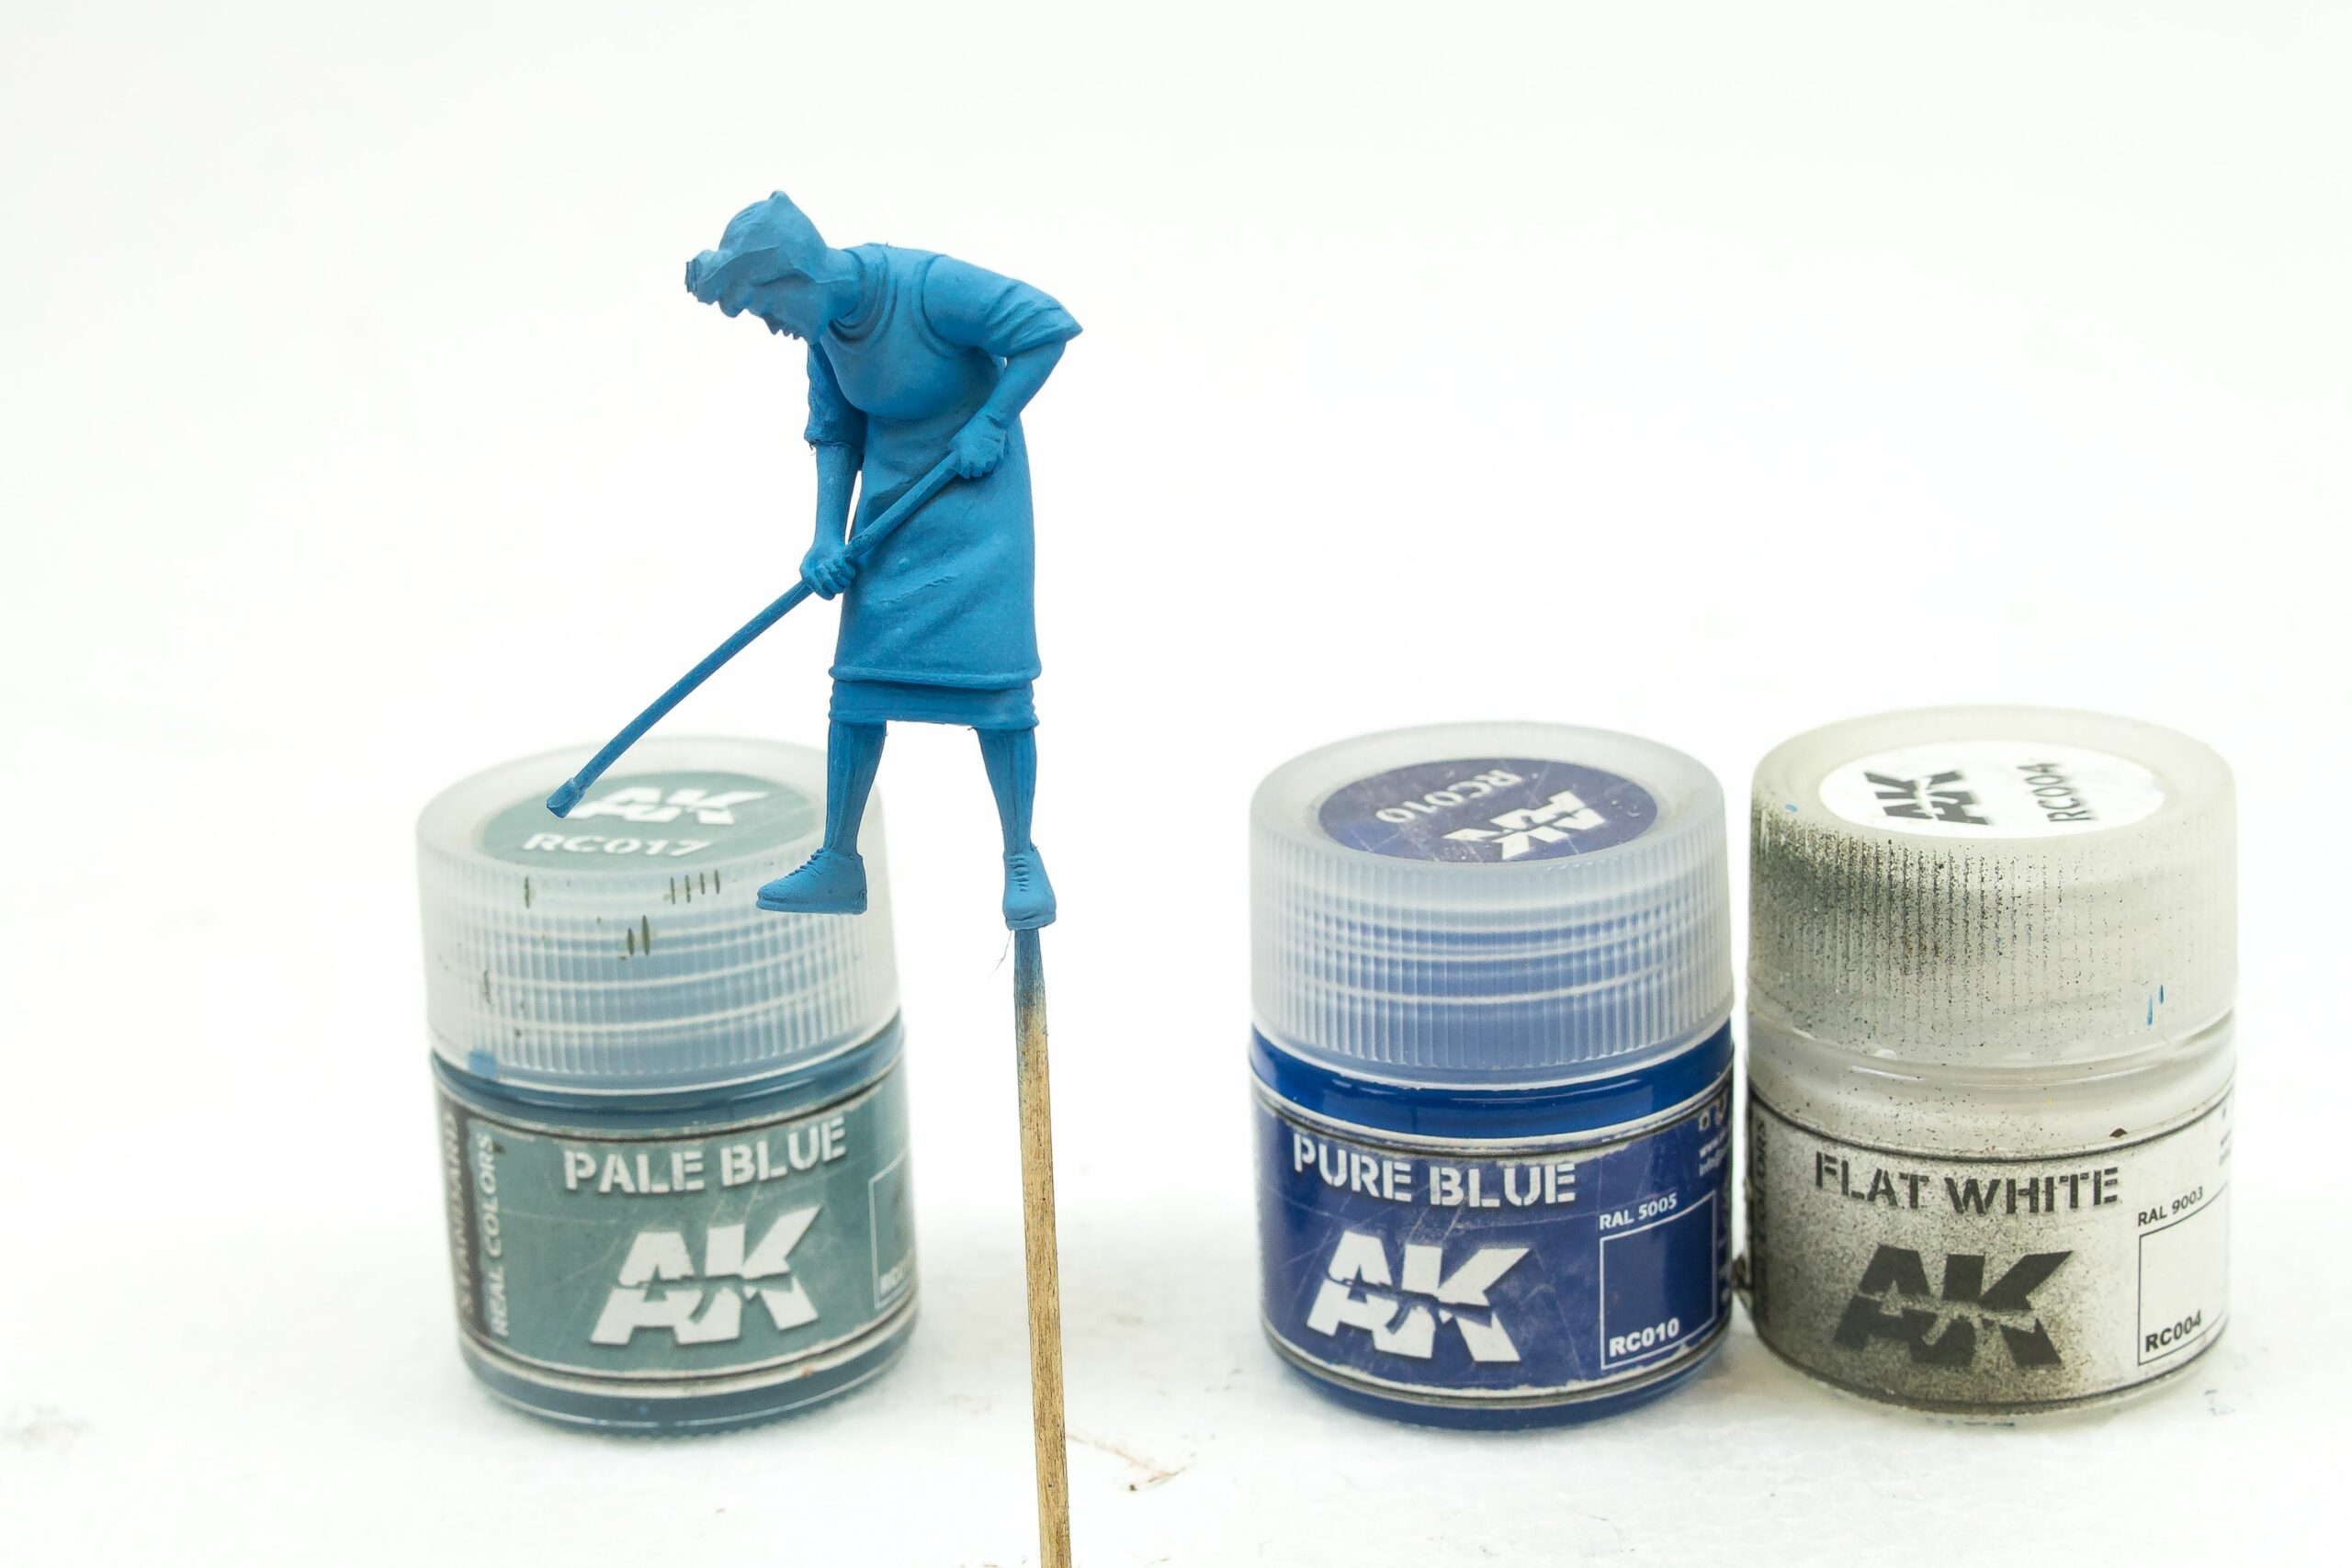
…then added highlights and shadows with lighter and darker mixtures of Pure Blue and Flat White. The darker shade was sprayed onto the figure from below, while the lighter tone was sprayed from the top. This results in an easy 3-dimensional effect.
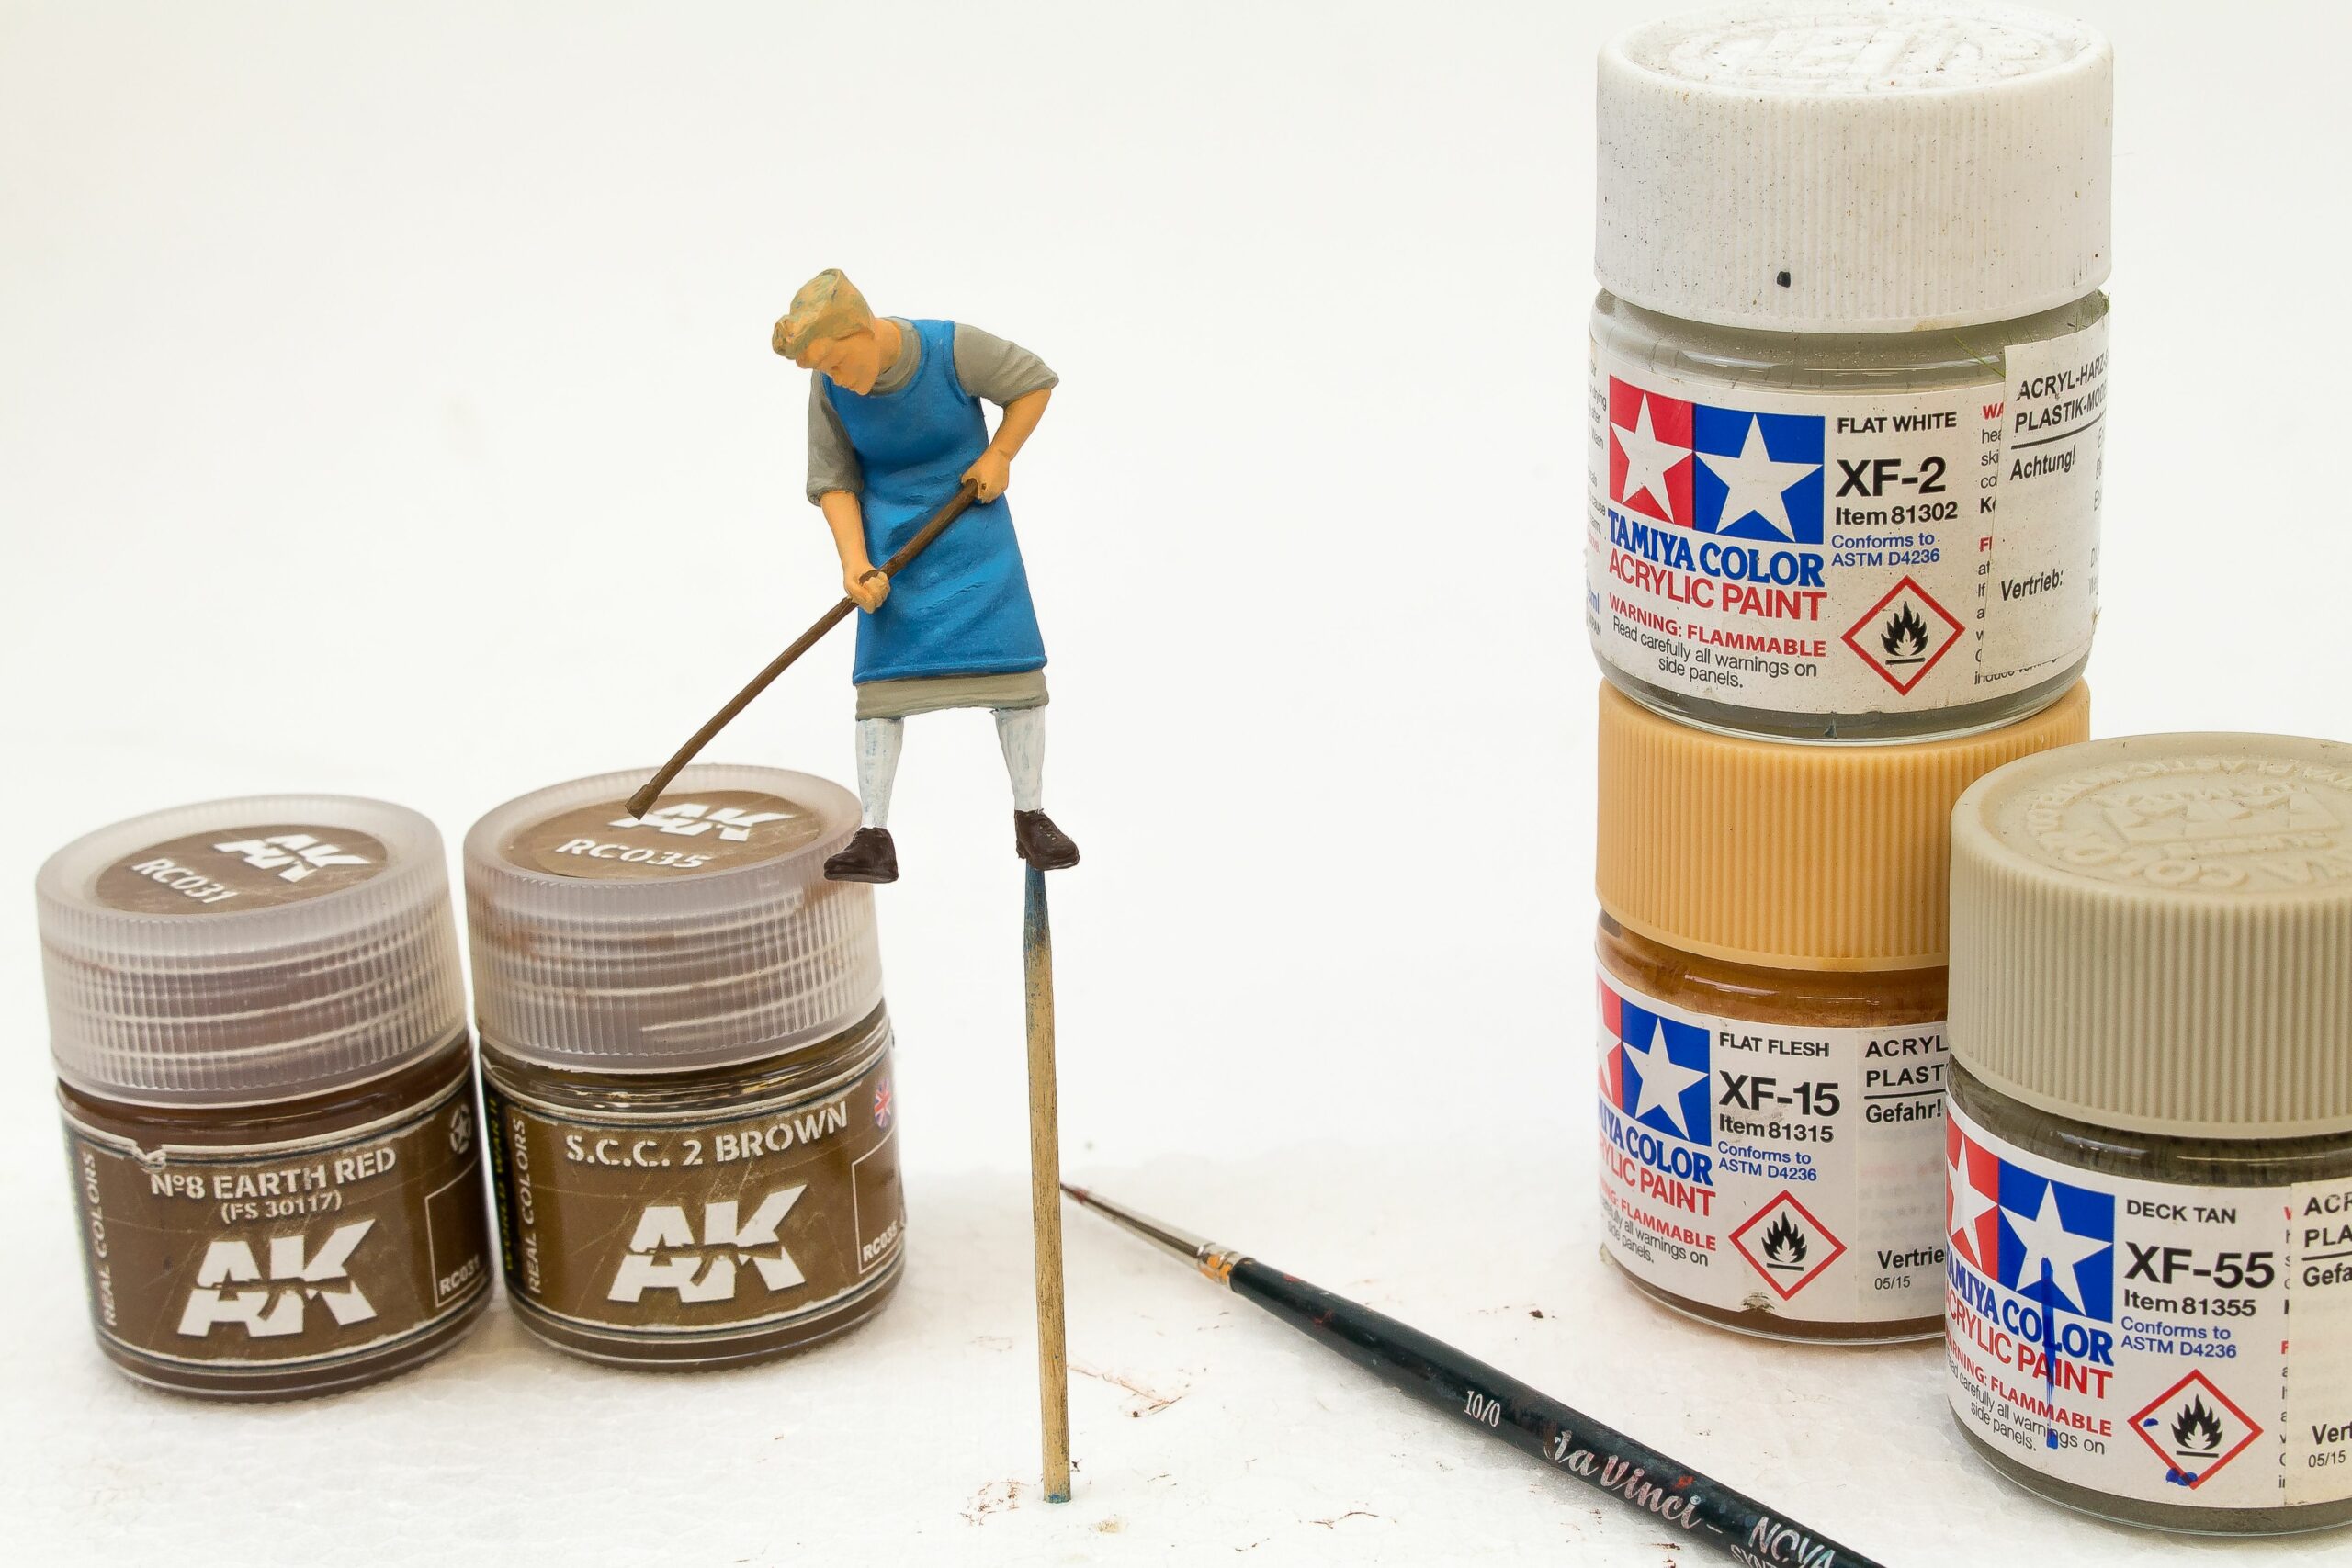
The parts that weren’t supposed to be blue, were then brush painted. It’s better to paint 2-3 thin layers than a single thick one that hides all the details.
Again, I brushed oil paints to create tonal variation, shadows, and highlights, then sealed everything with an airbrushed layer of matt varnish.
A “wash” – a highly diluted mixture of oil paints and white spirit, was applied on the floor to give it a bit weathered look. It was applied using a soft brush while taking care to not stain the wallpapers.
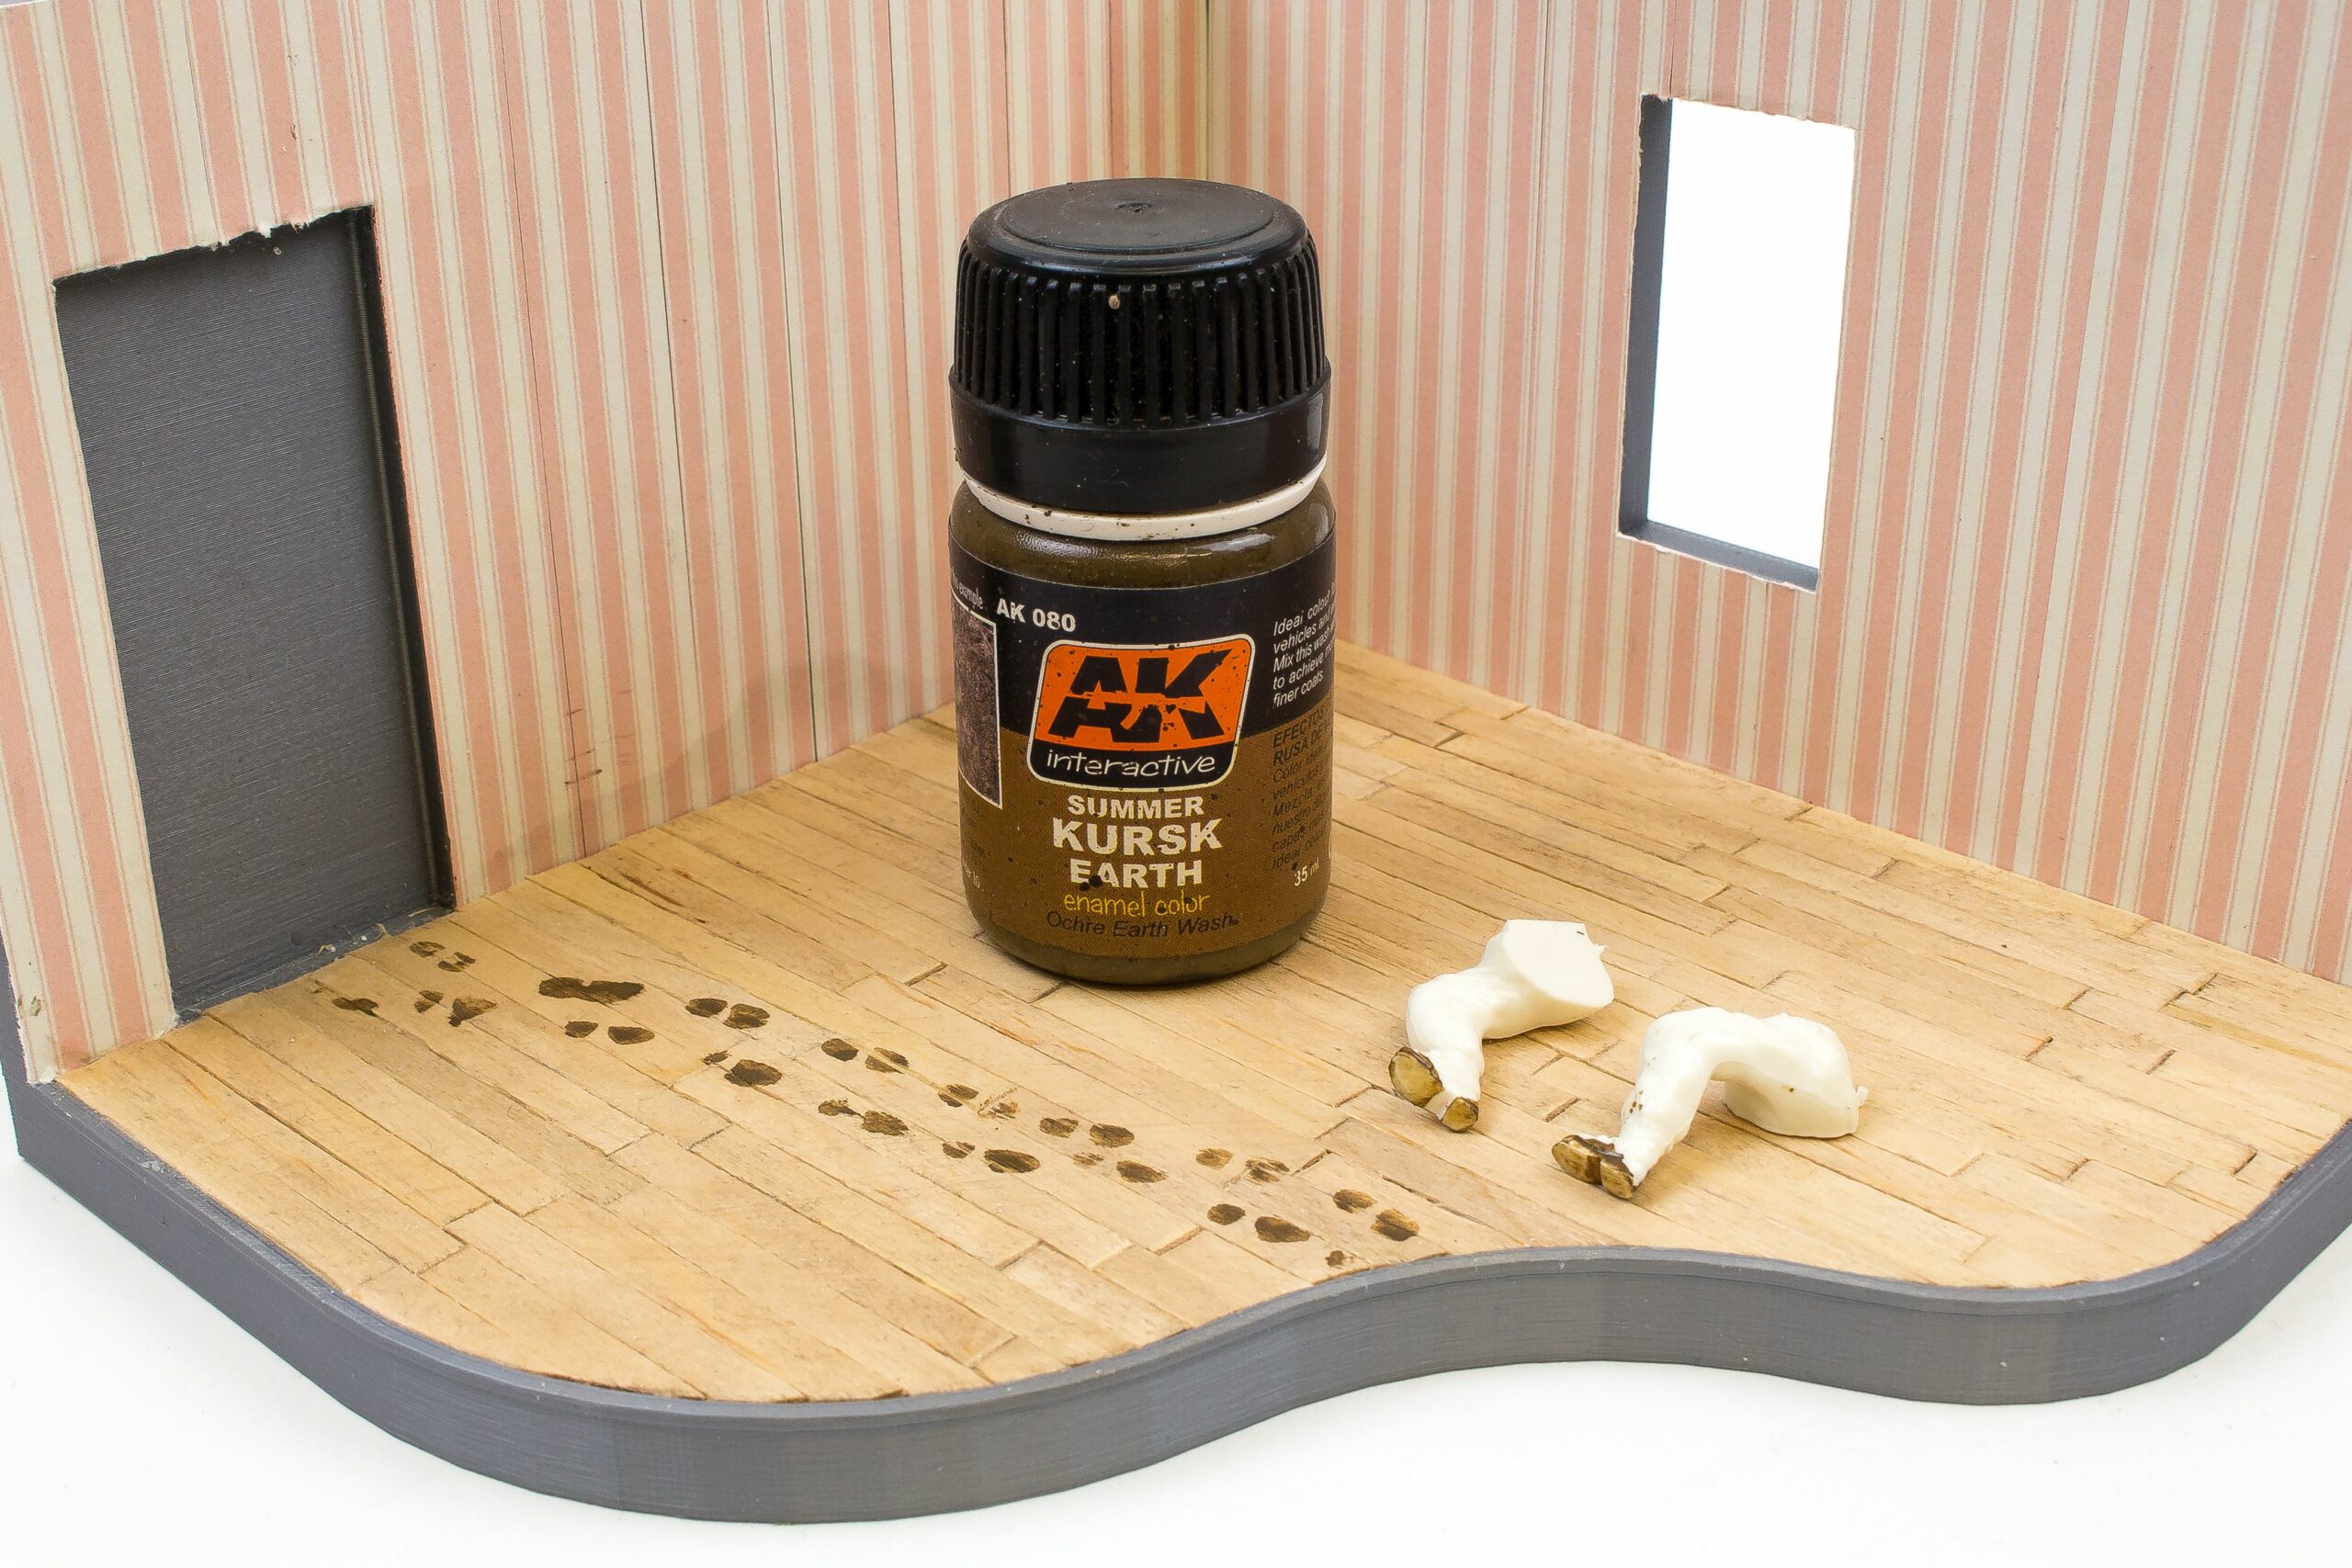
I used some legs from my spares stash as a stamp to create dirty footprints on the floor. The soles were painted with enamel color and then carefully stamped onto the floor.
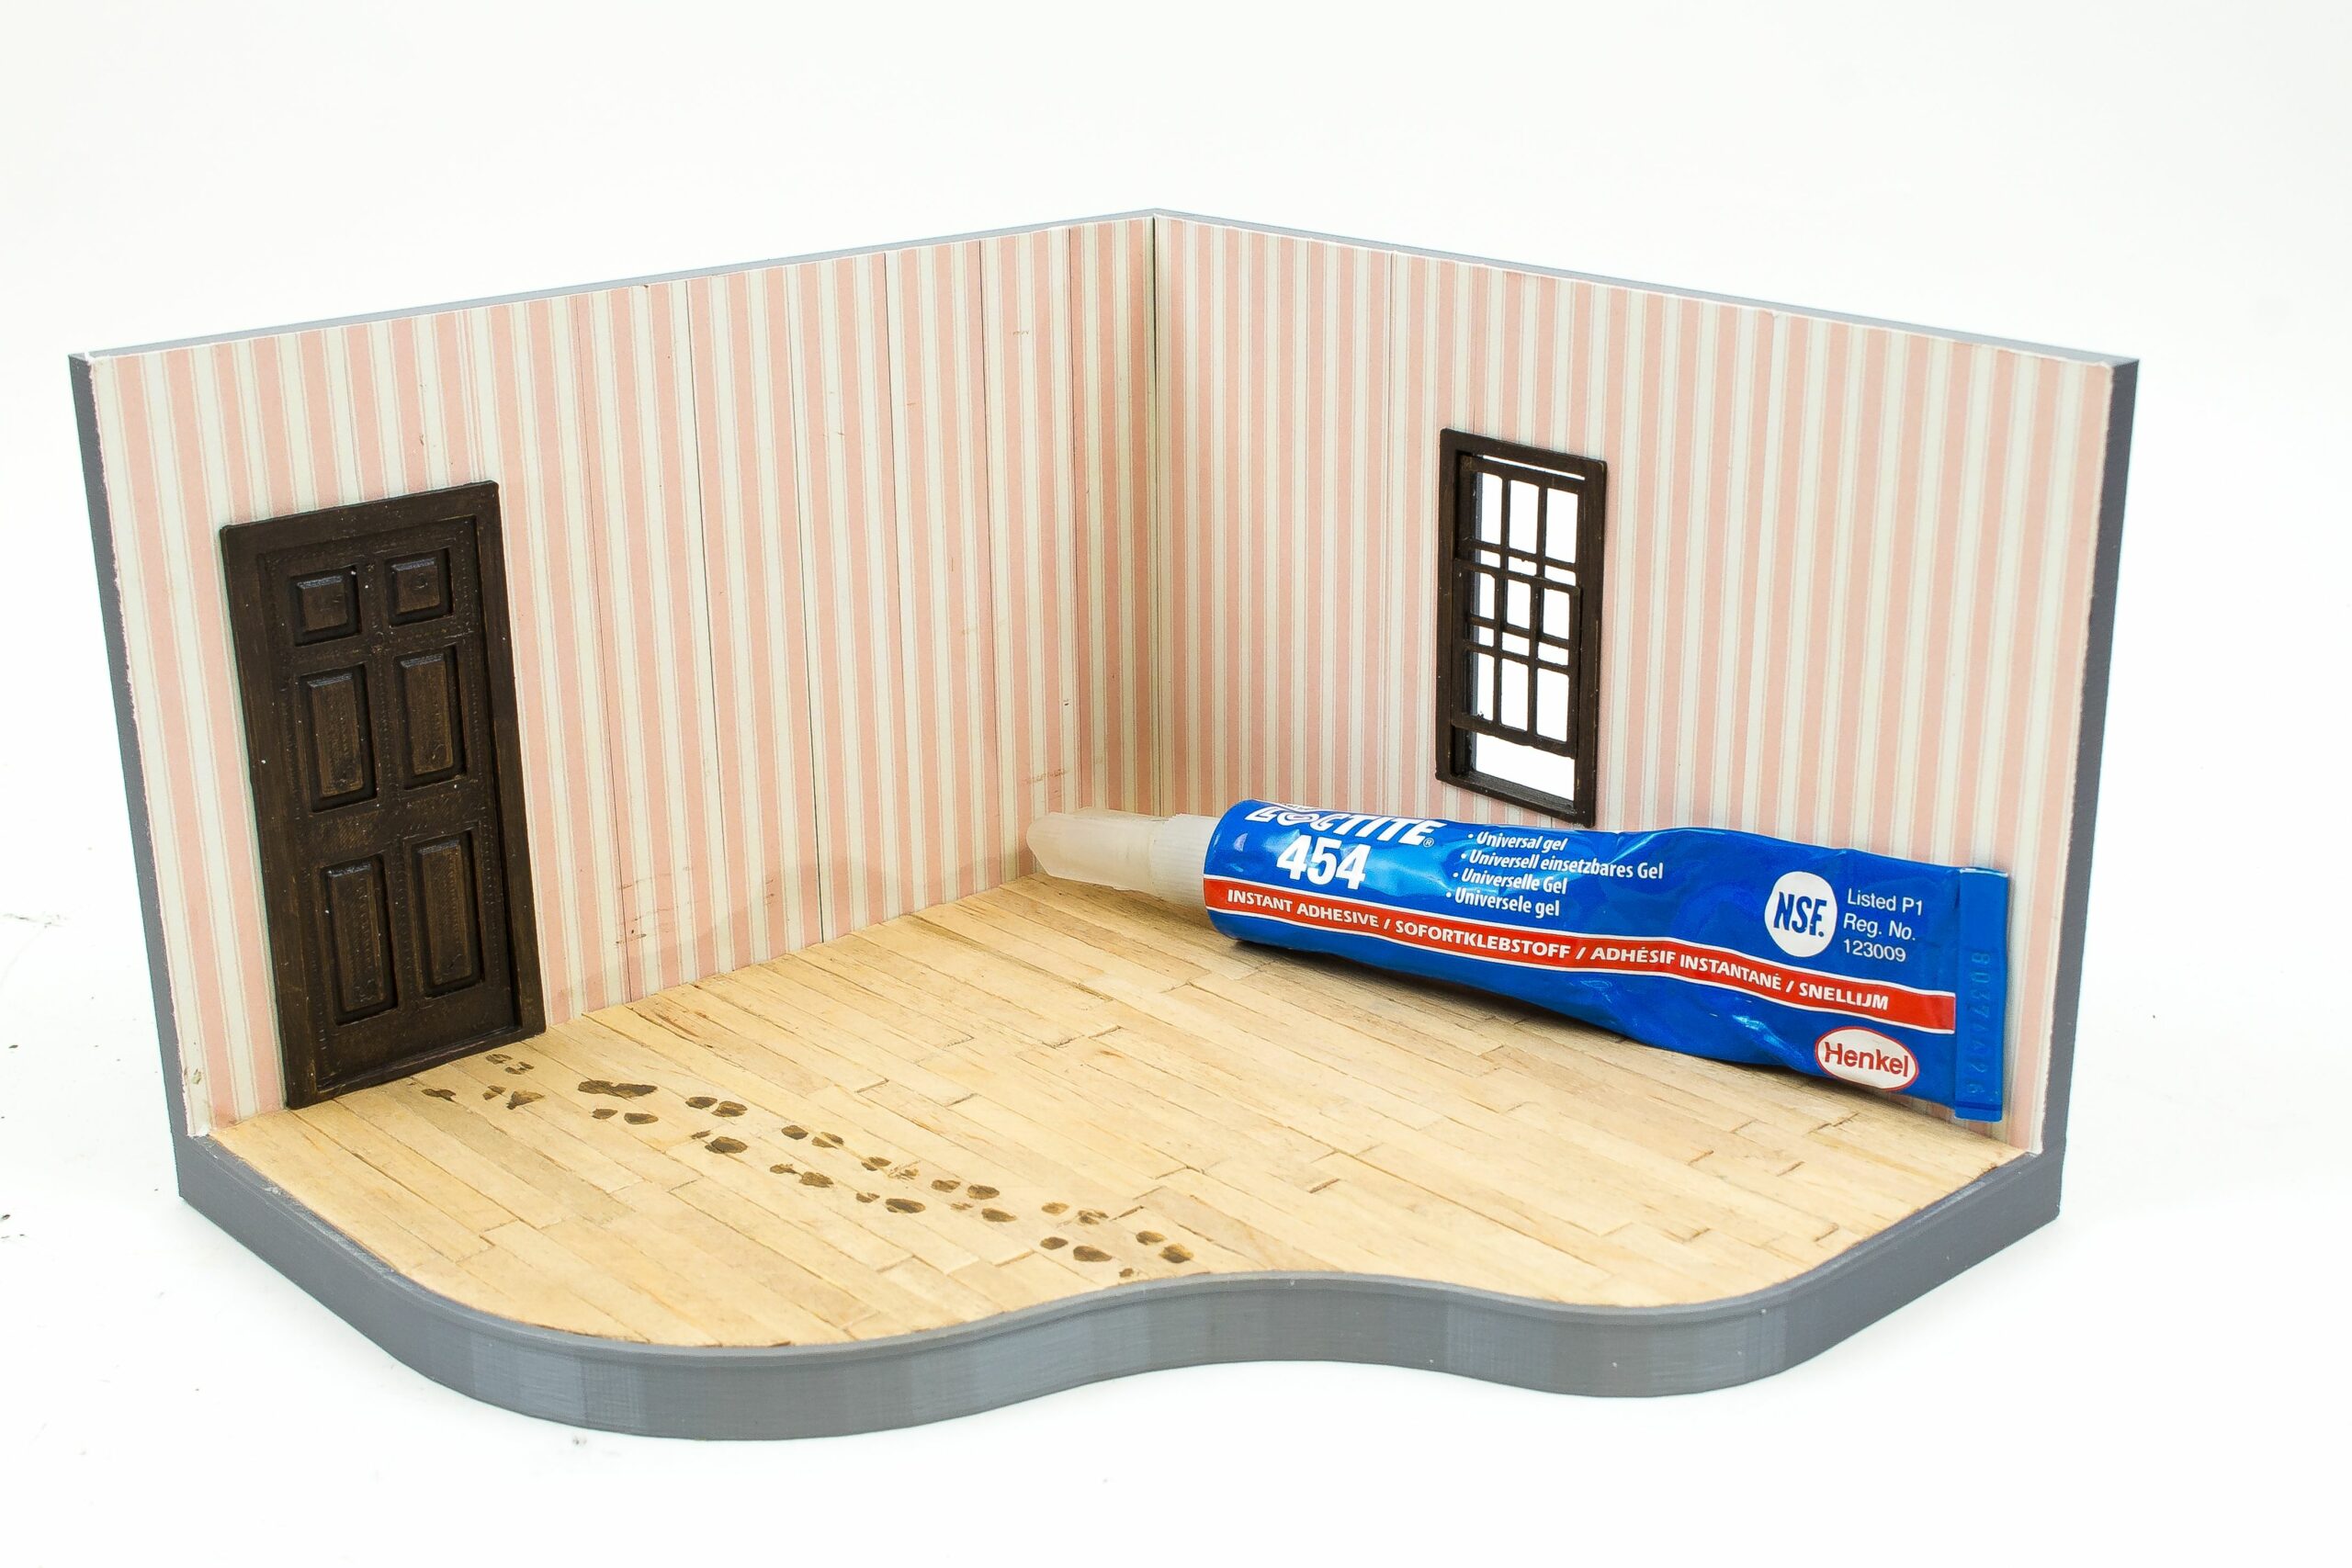
The final assembly is one of the favorite parts of my hobby – the countless hours of work come to fruition. First, I glued the door and window with some superglue.
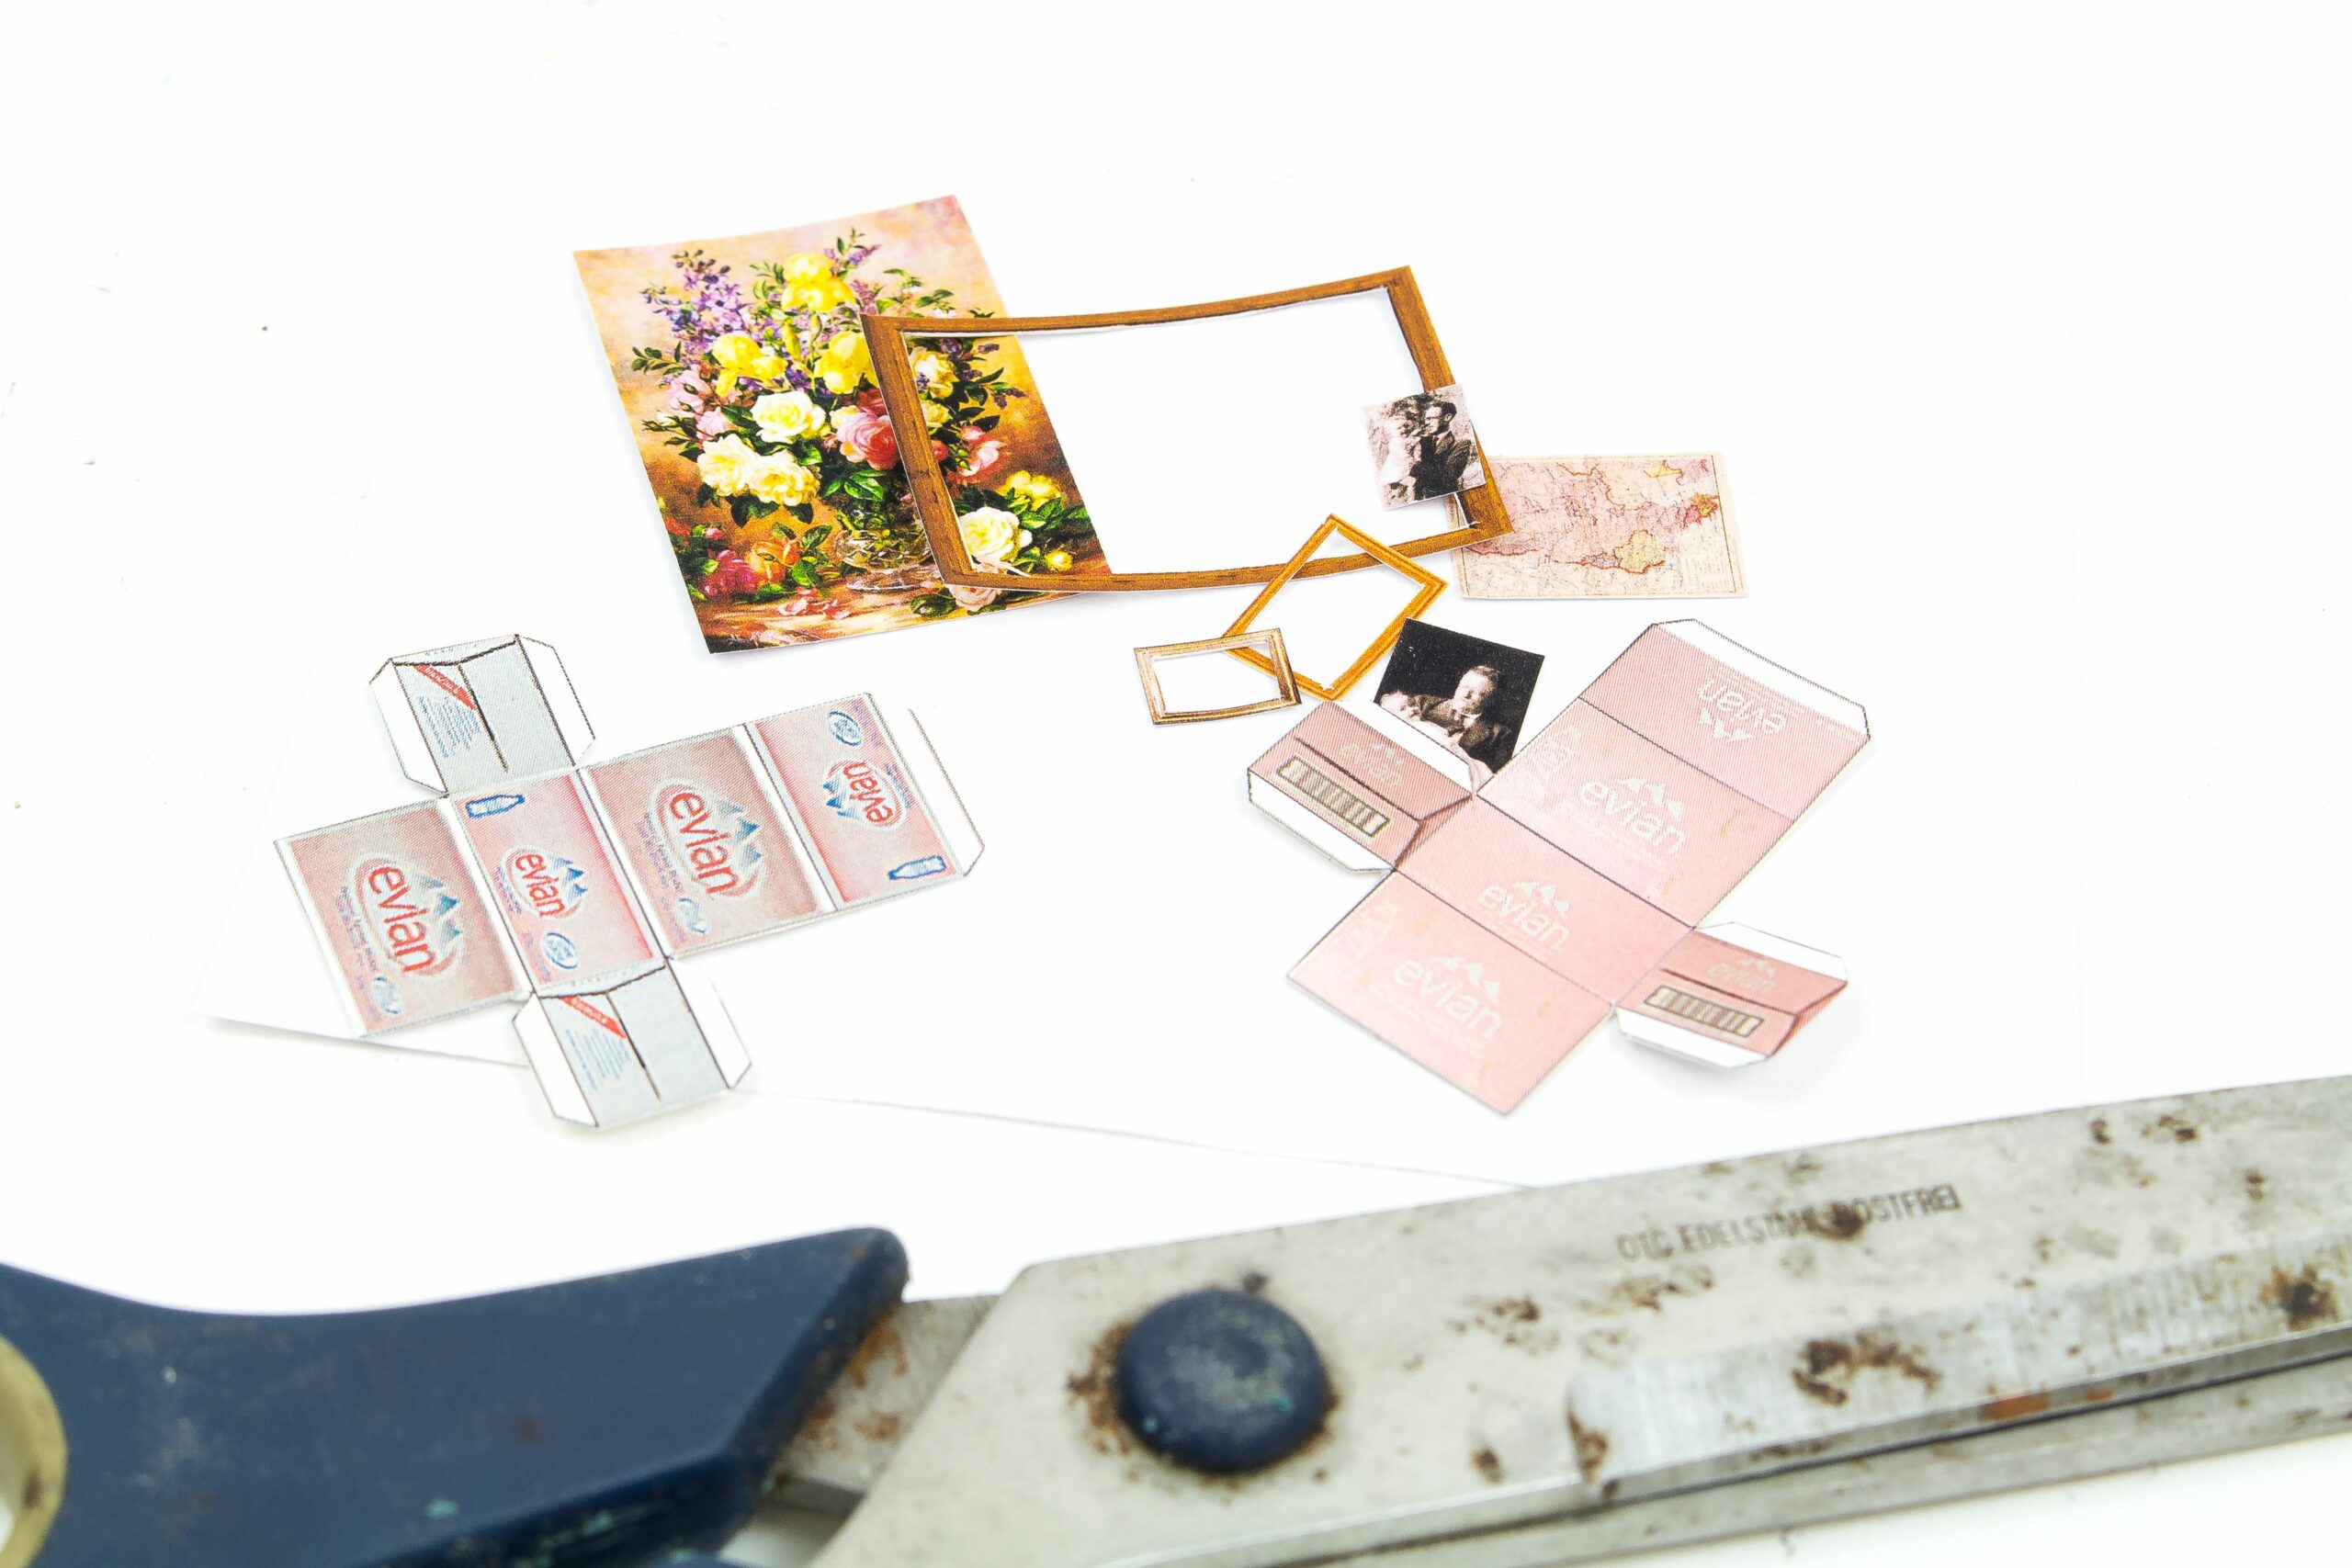
I prepared some decorations, again, using pre-printed paper products from Hobbyworld. Of course, you could also use your own designs and print them yourself.
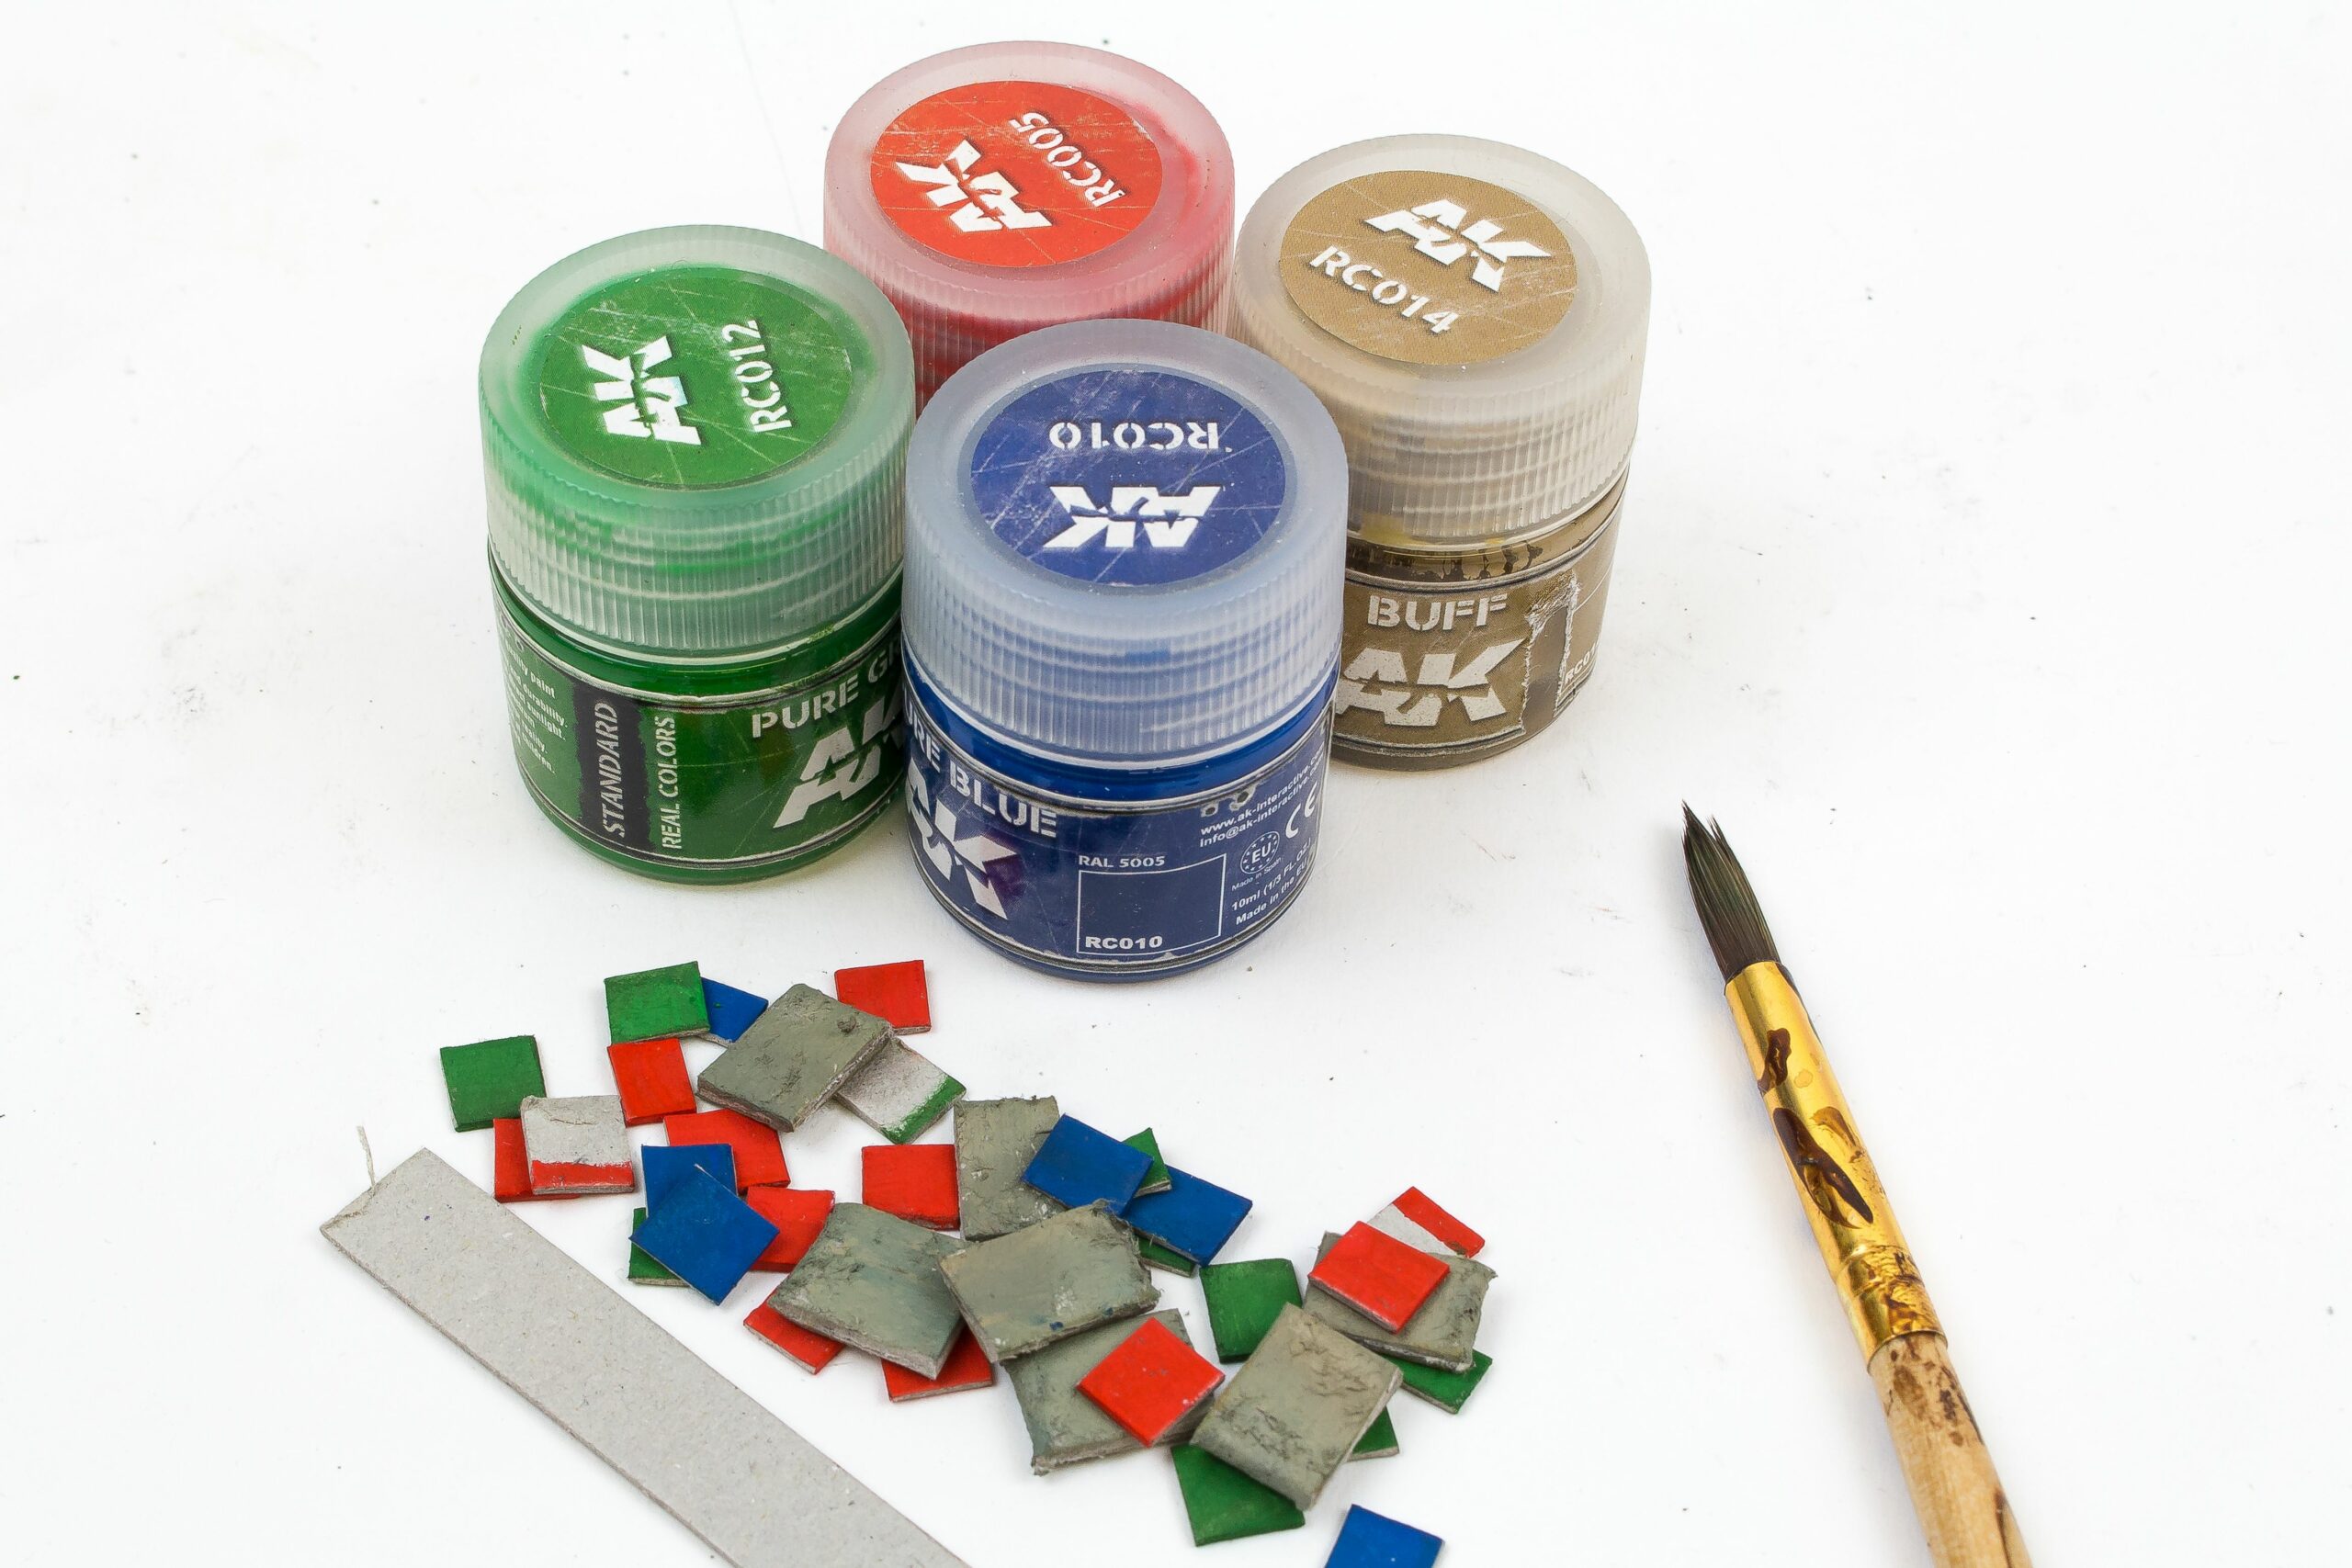
To create “fake” books for the cupboard, thick cardboard was painted in different colors and cut to size.
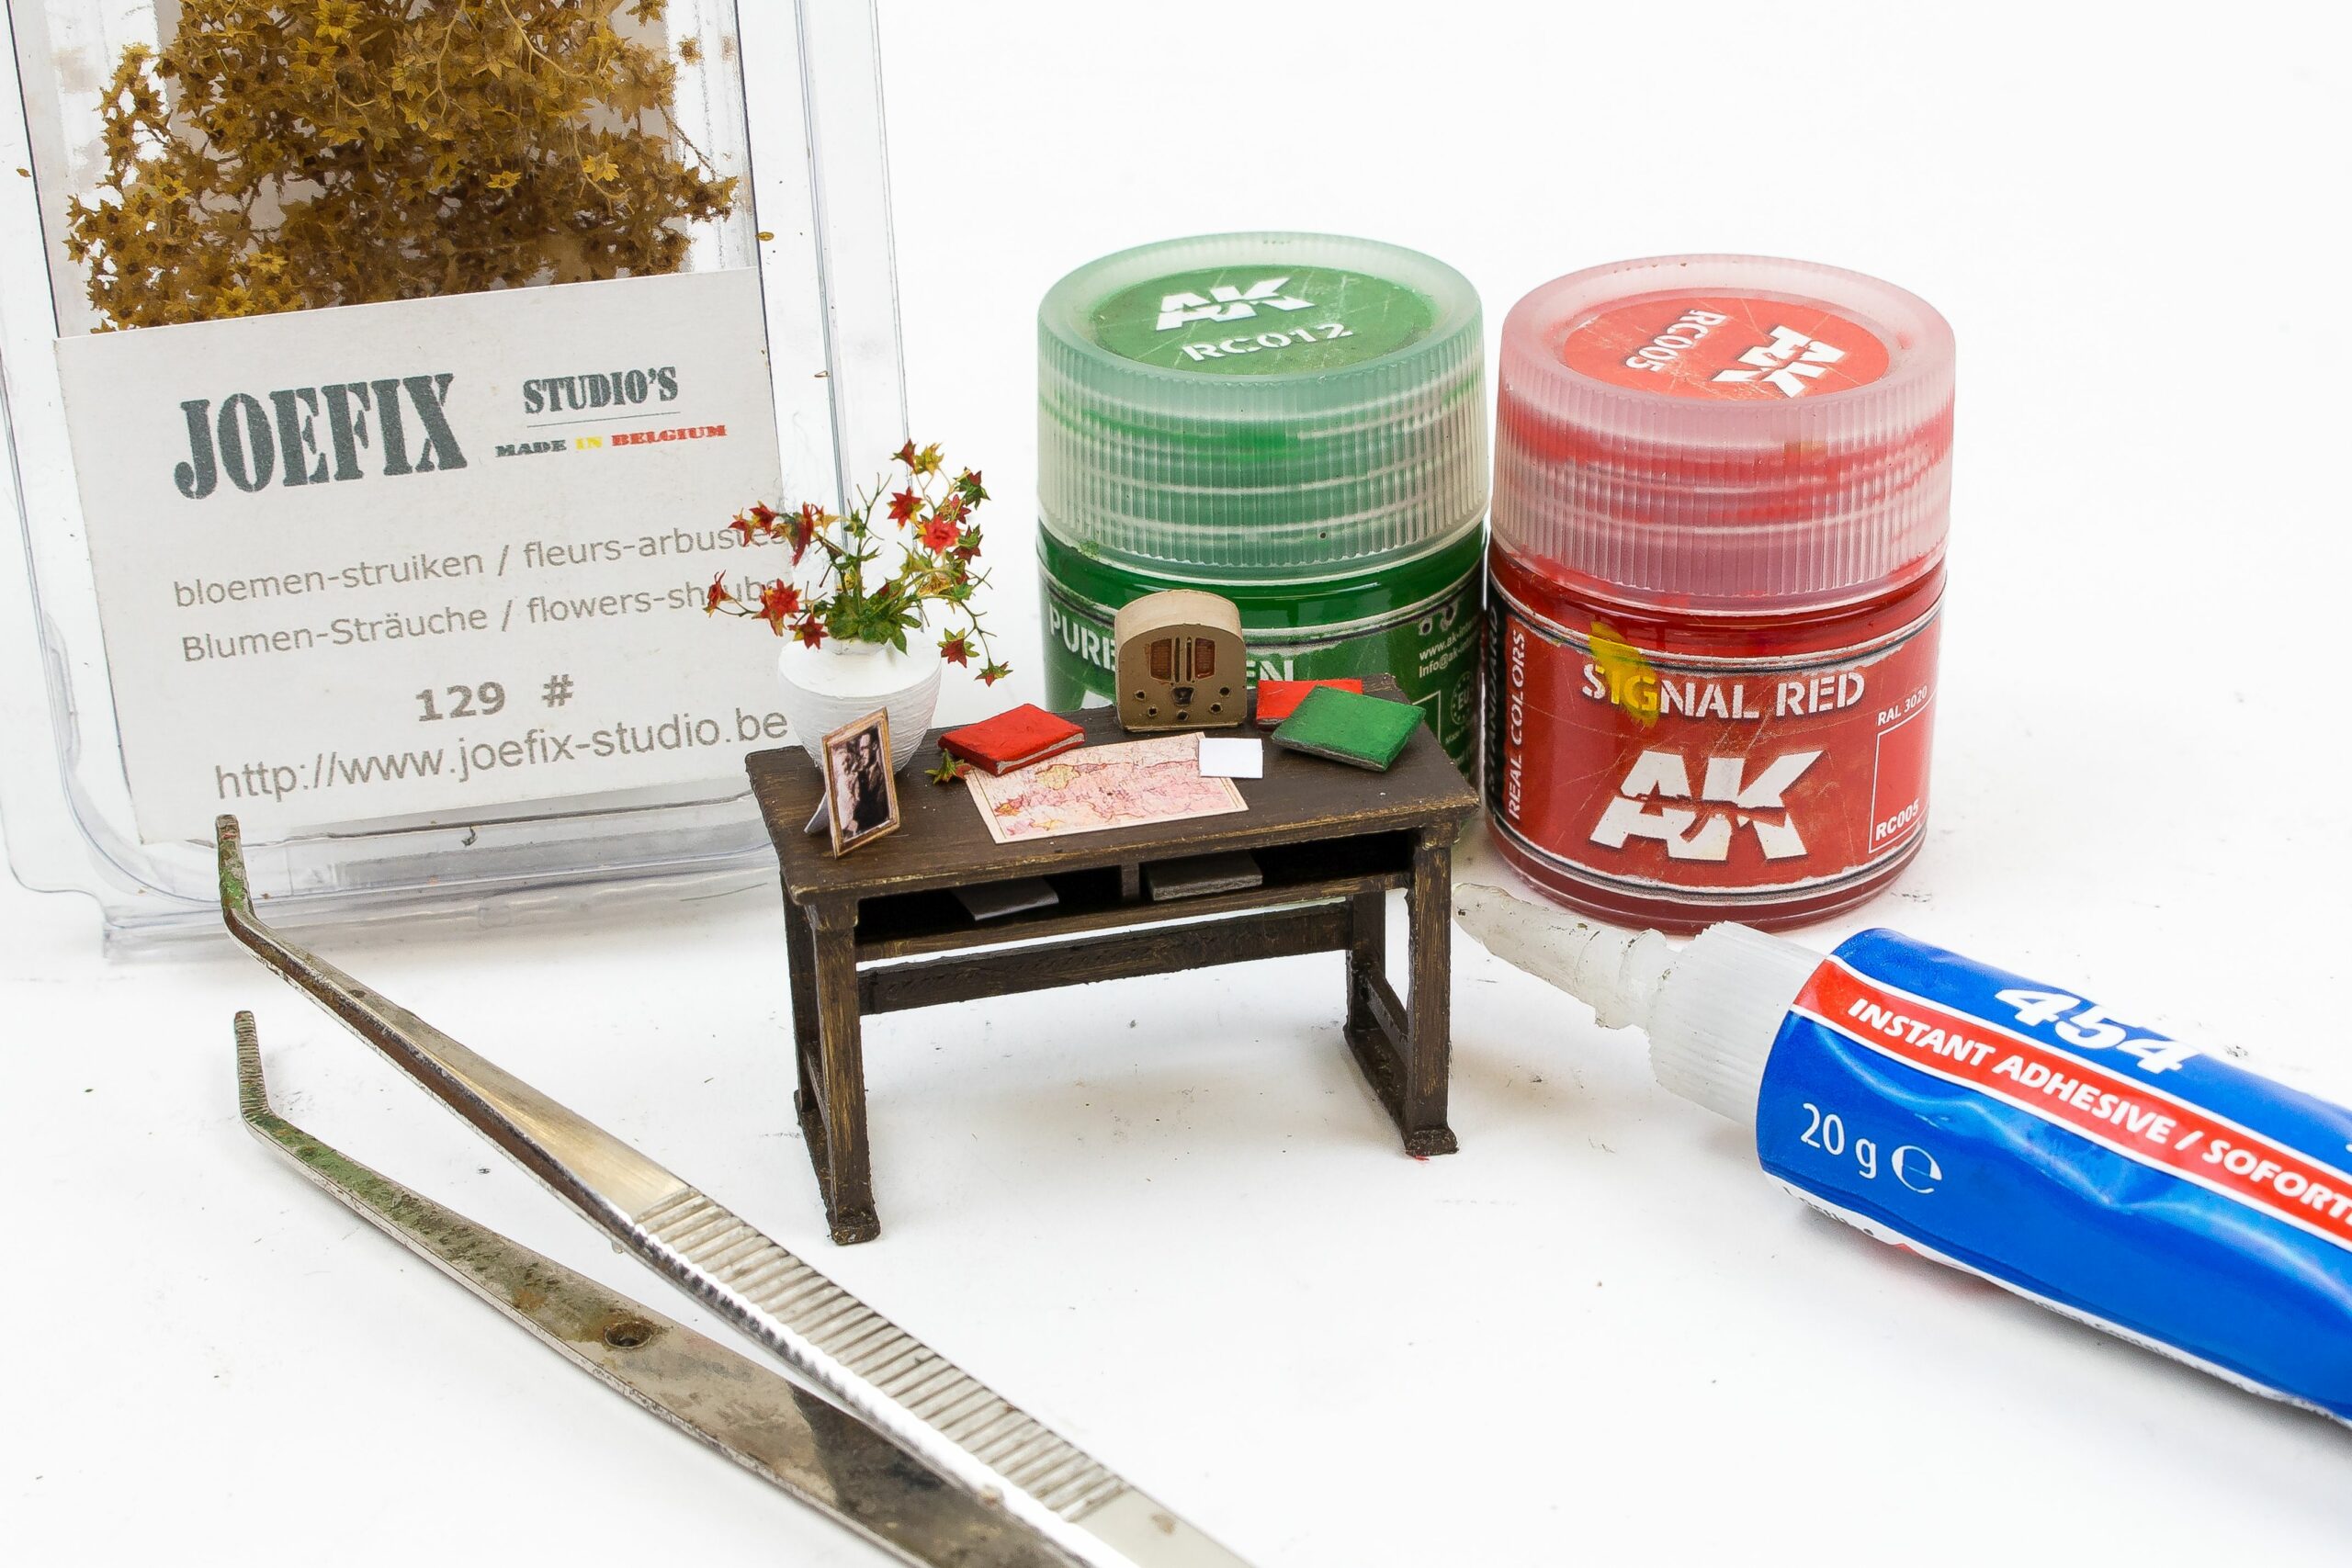
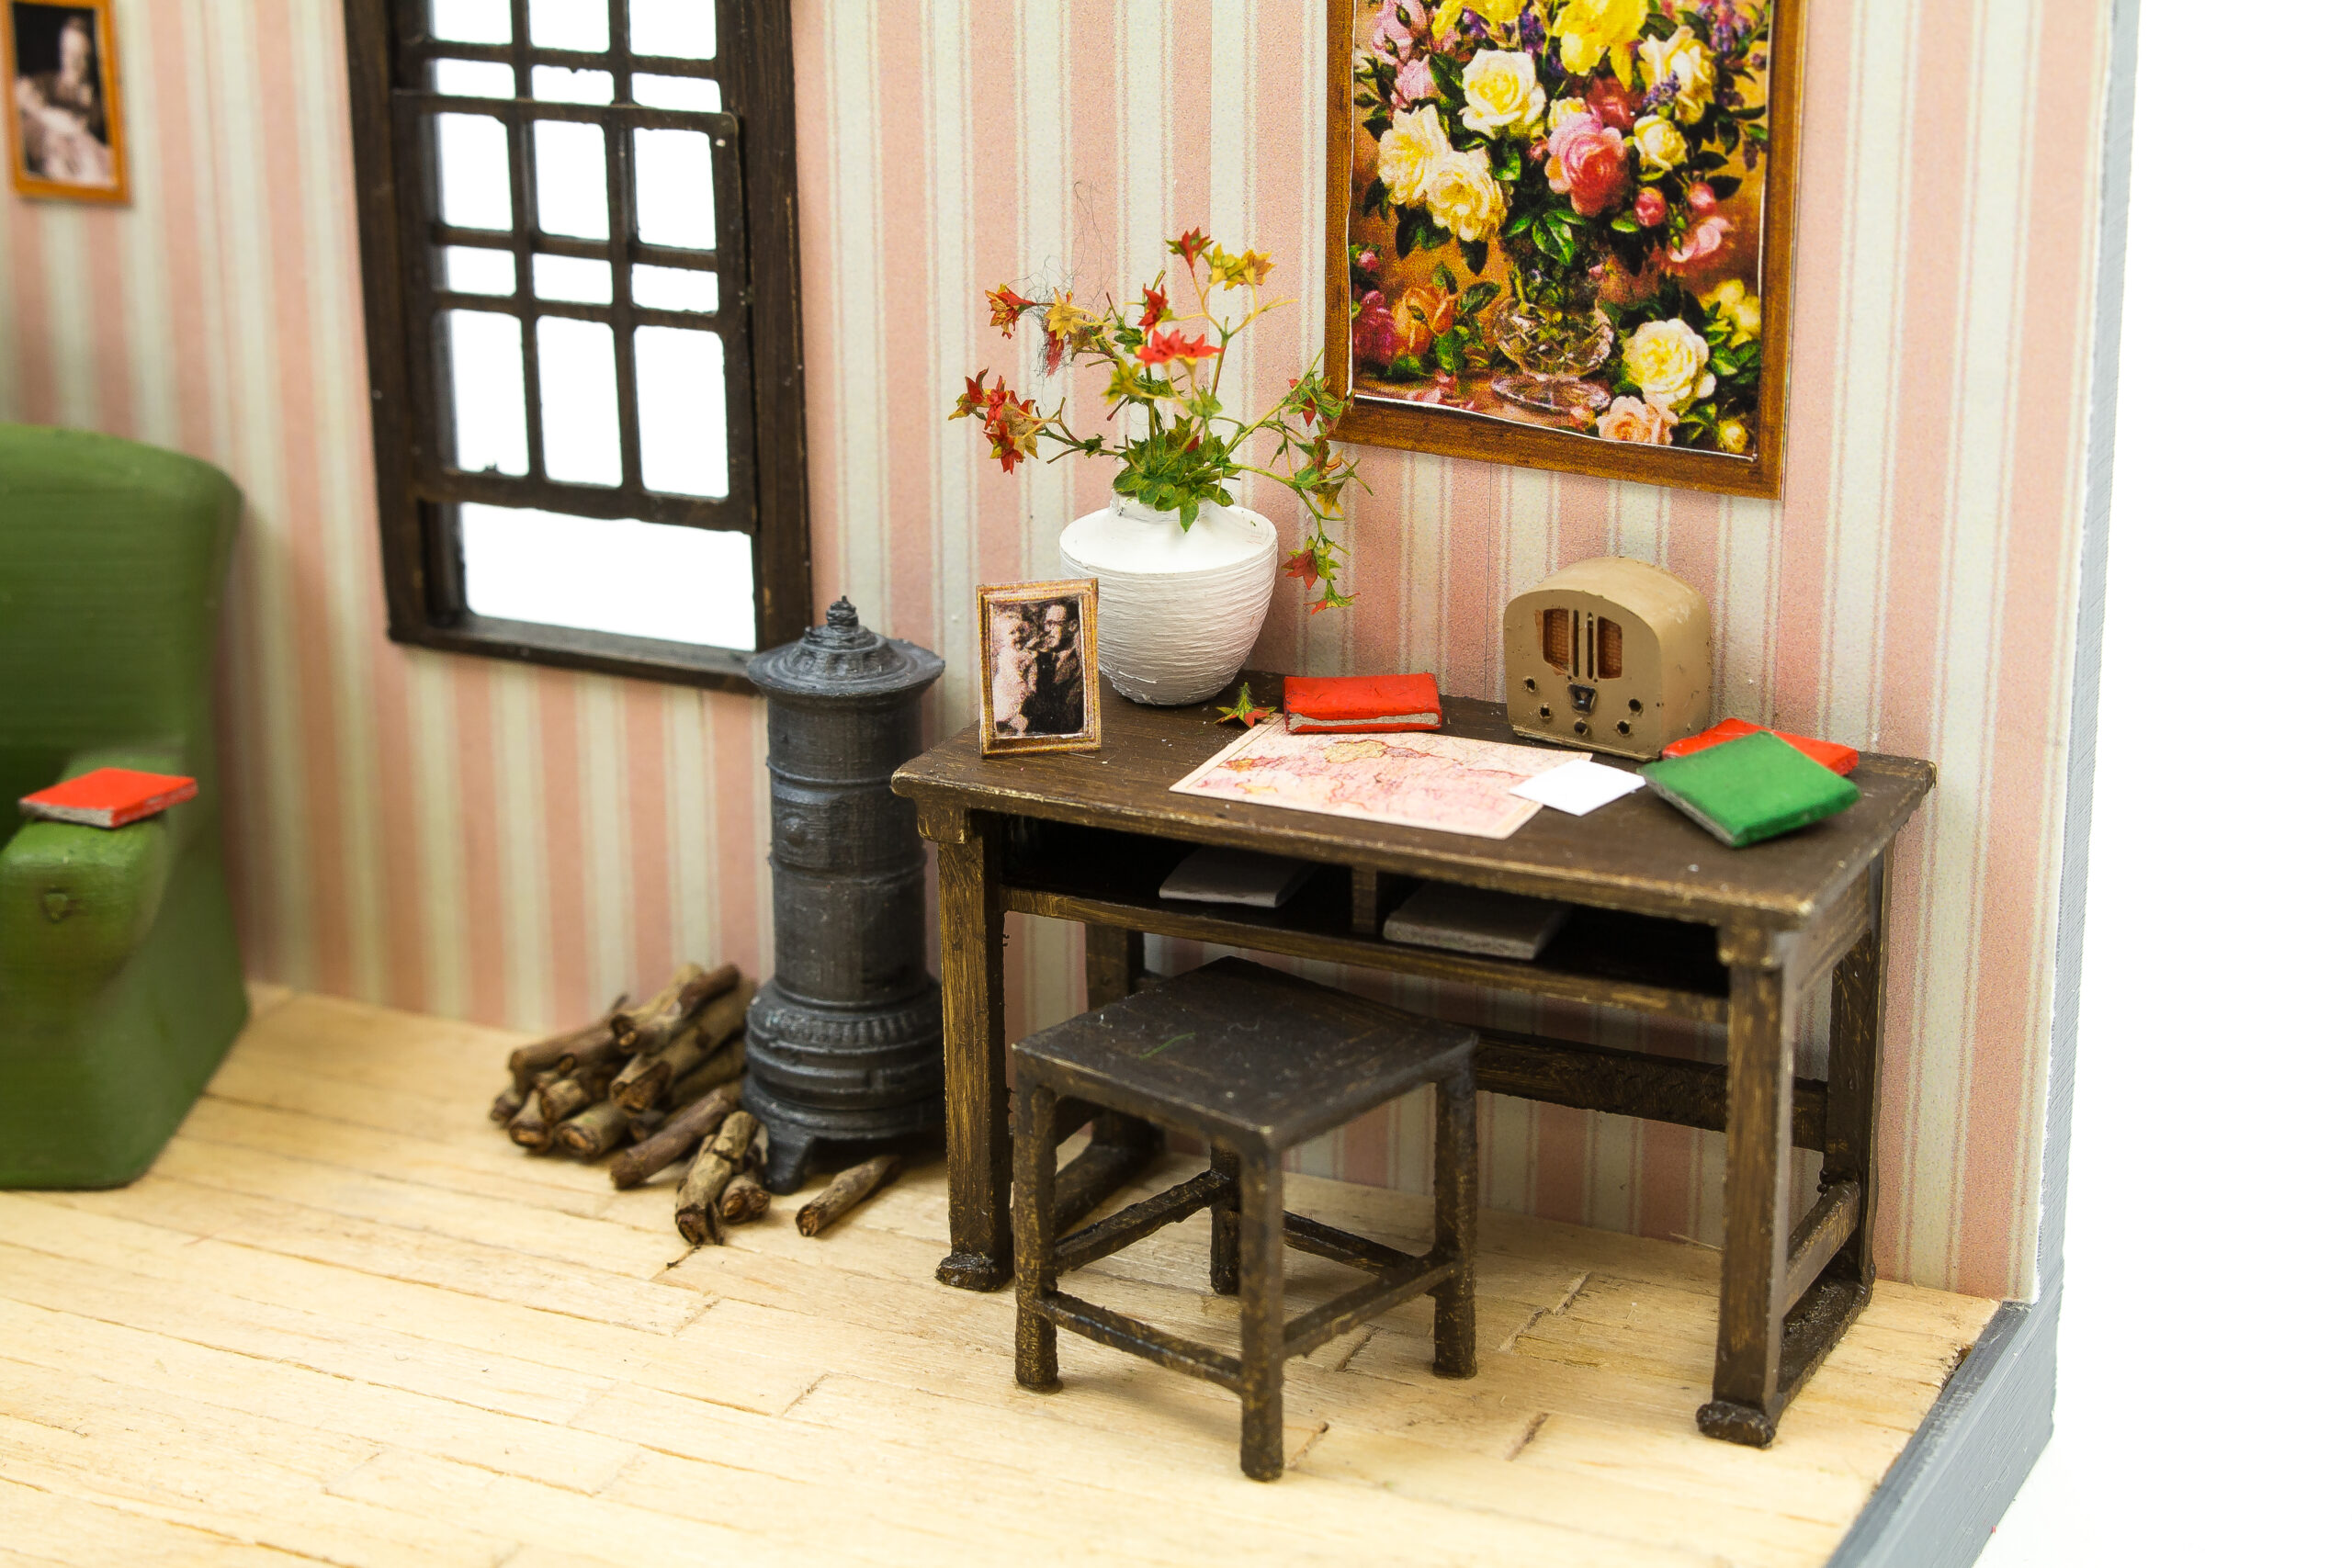
I made the table look busy with various little stuff. The dried flowers are made by Joefix.
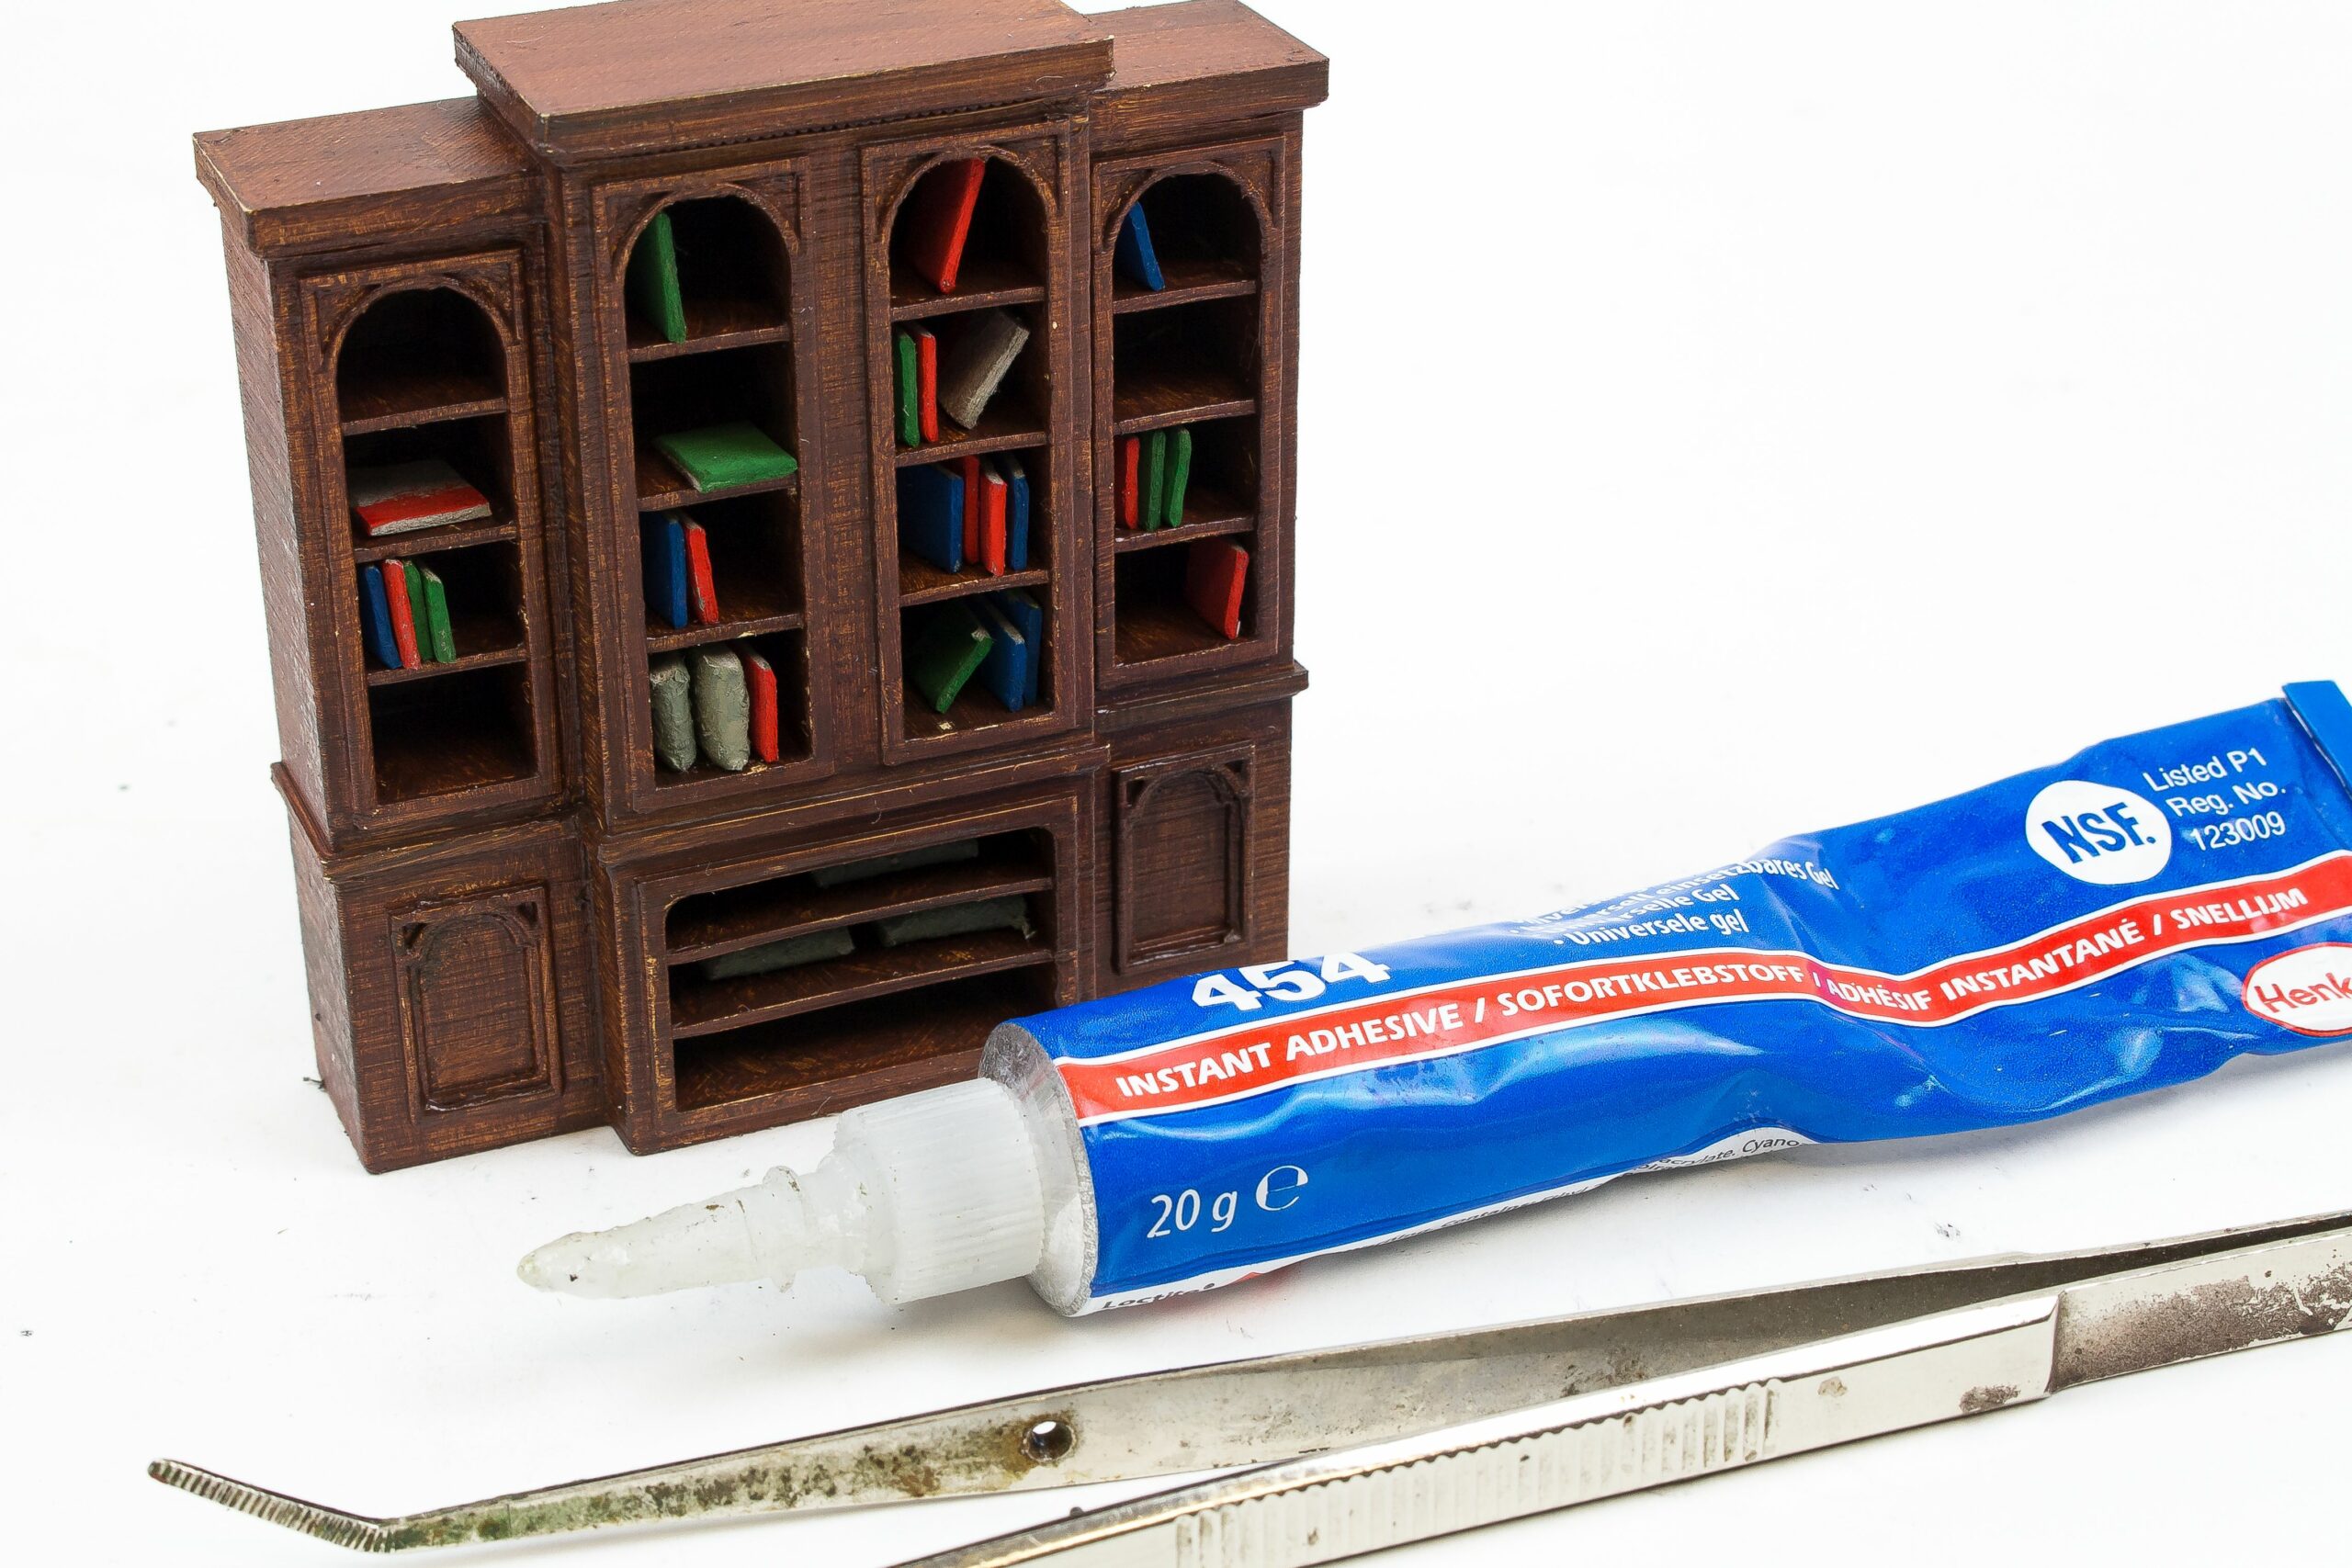
With a bit of patience, the other small “books” were glued into the cupboard. I think it’s amazing what difference a little painted cardboard can make.
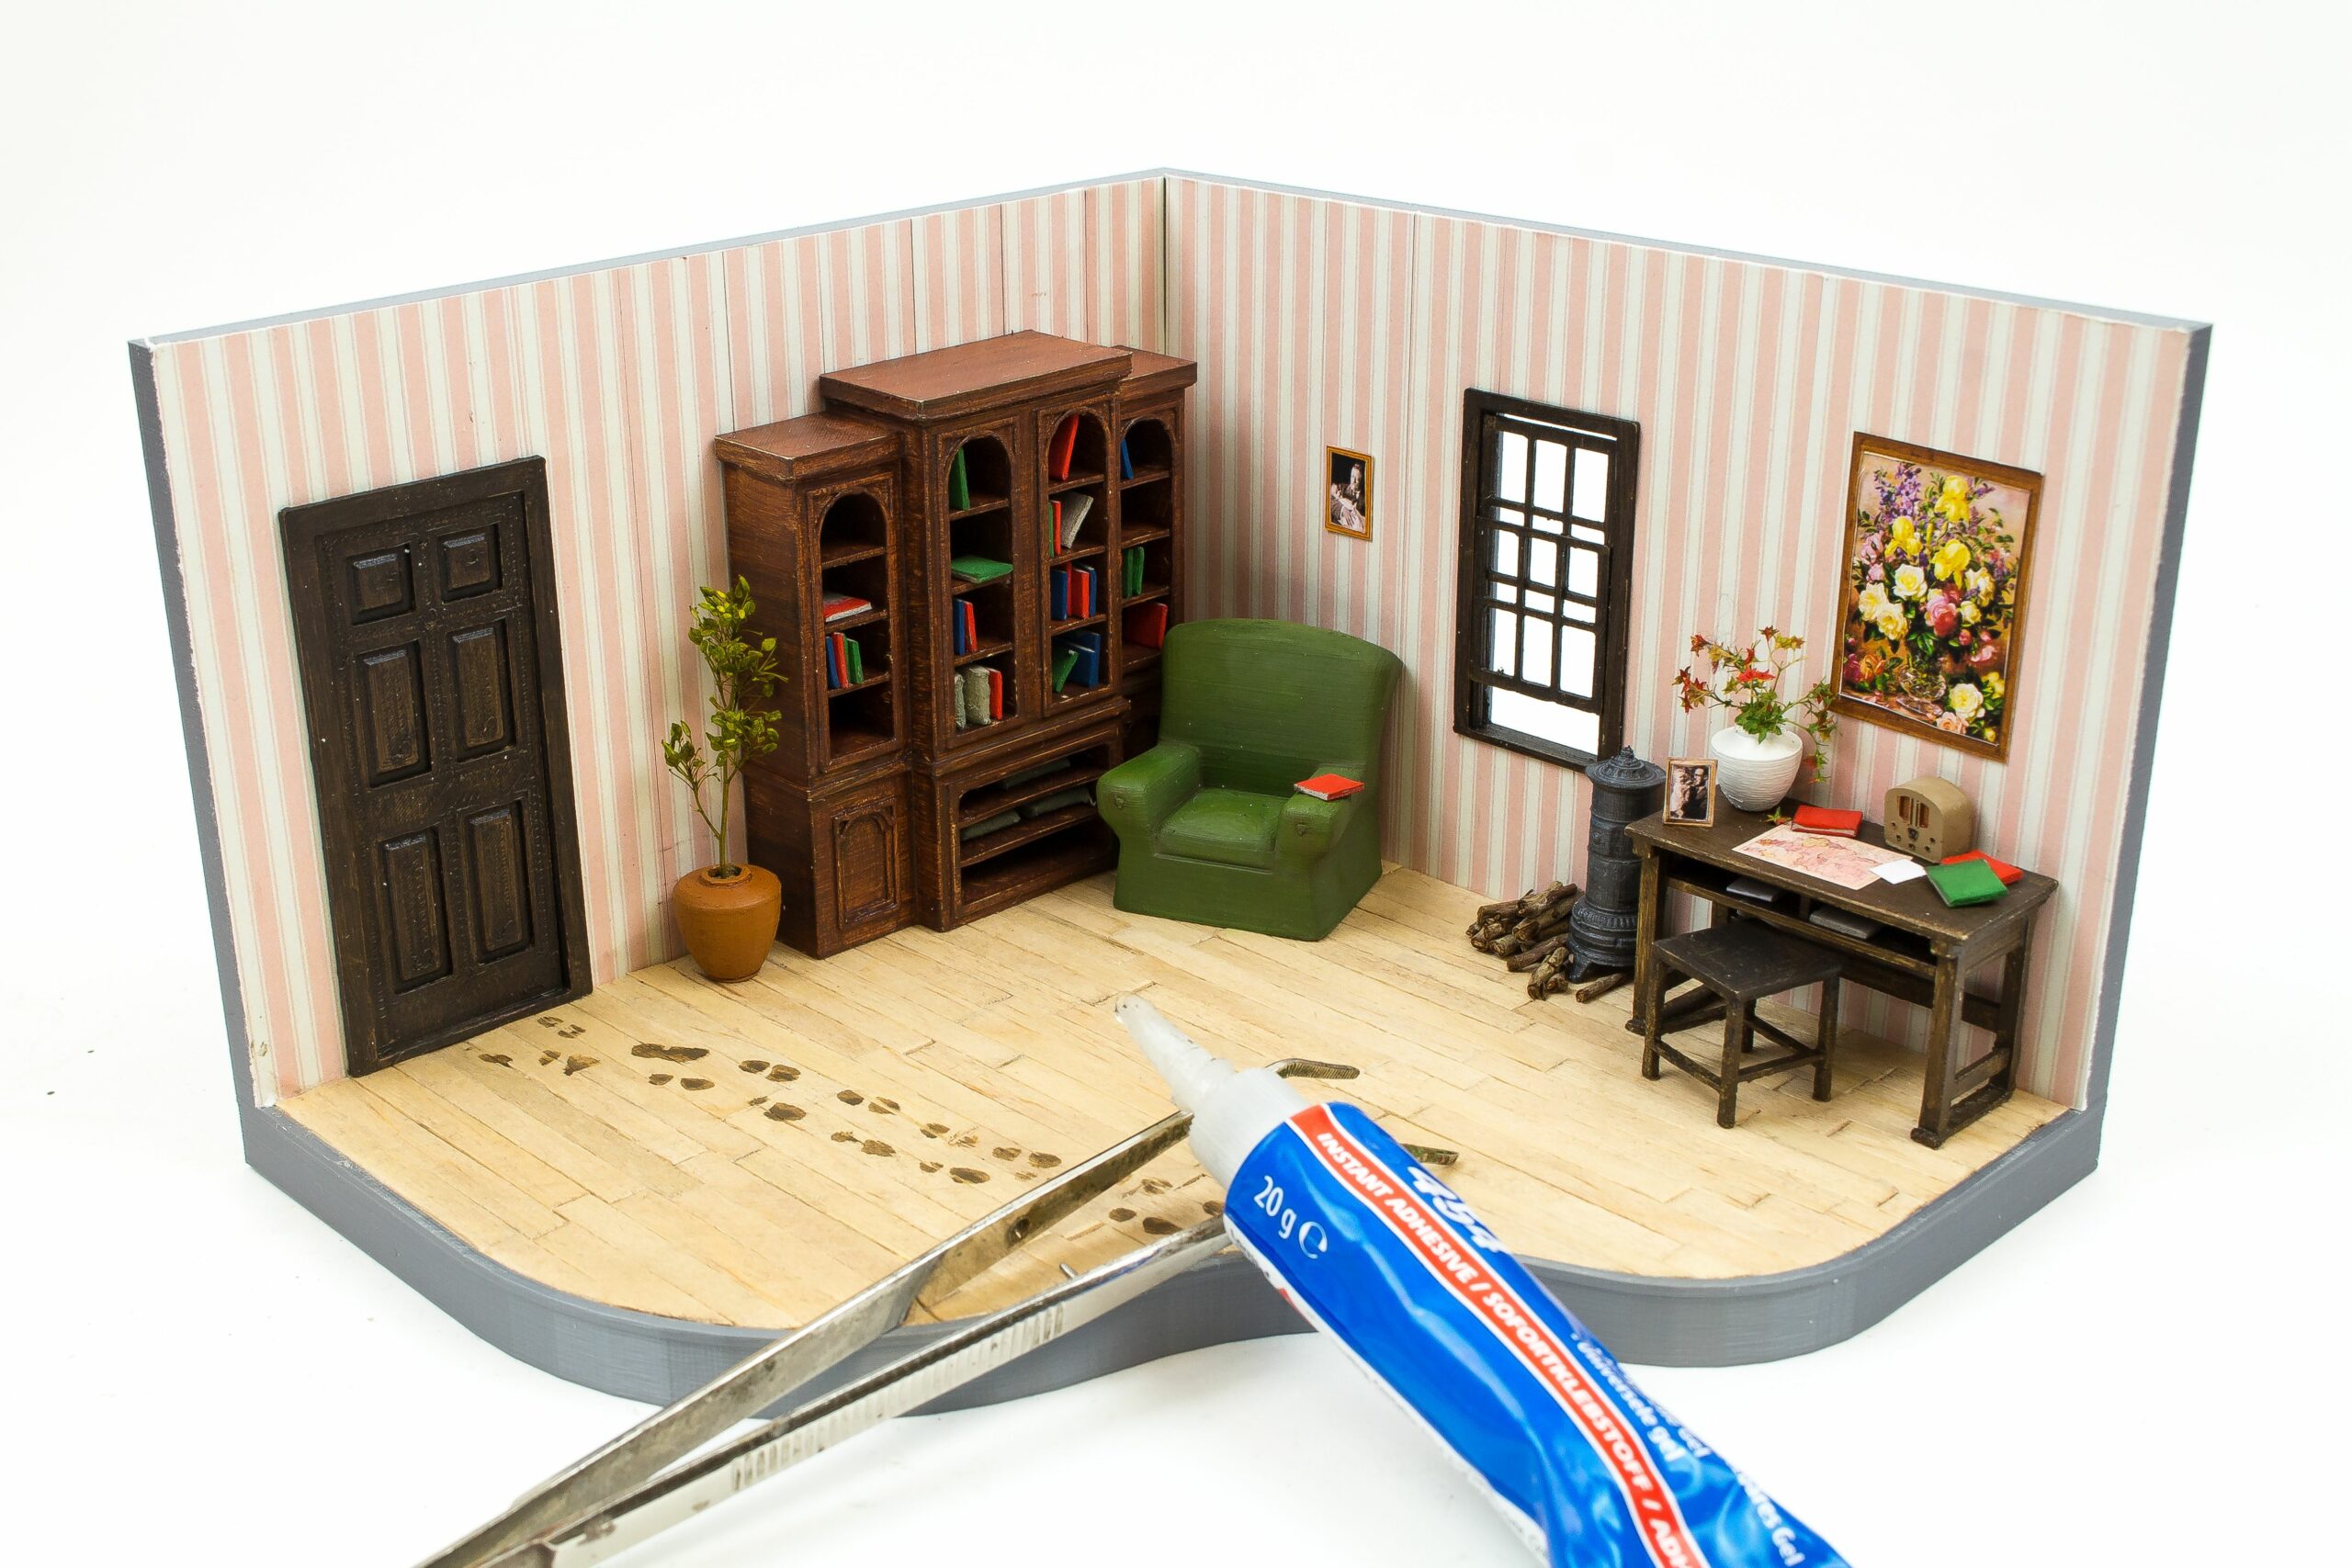
Finally, everything was put in its place. The scene comes alive just by adding small little details, like the firewood in front of the stove or the small little tree in the pot.
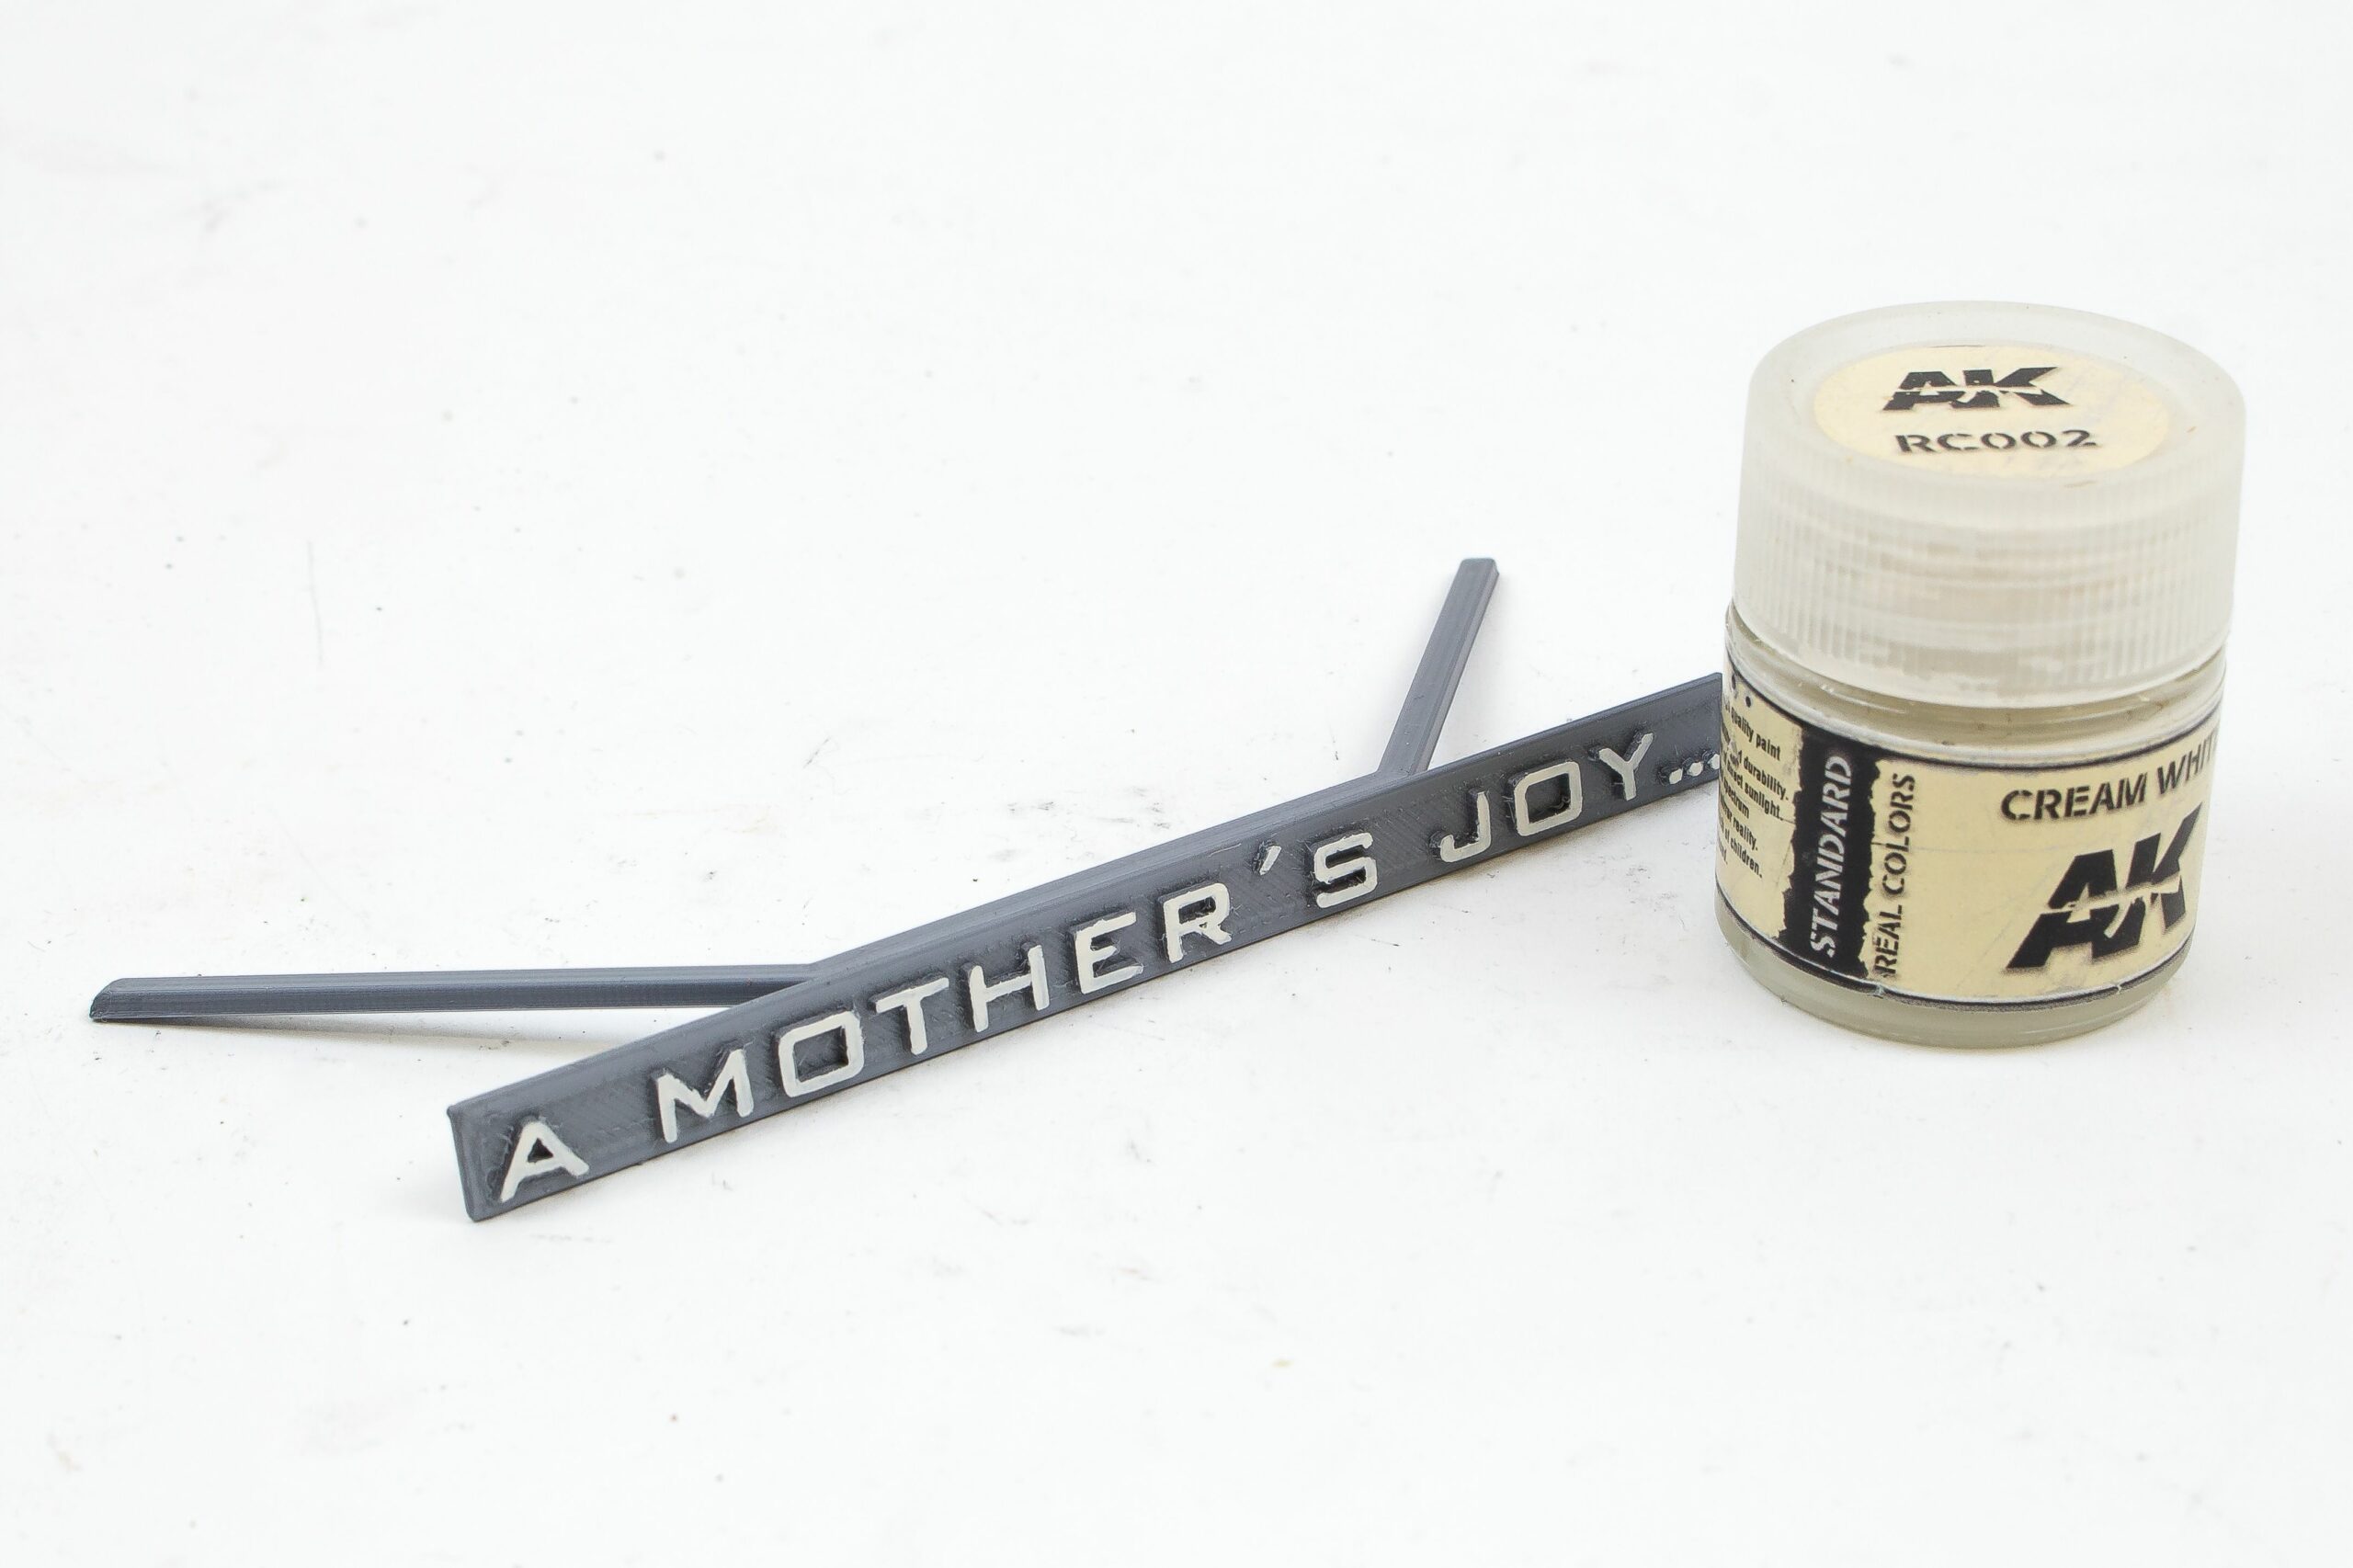
But there was something missing… a title for the scene. With a bit of irony, I chose “A mother´s joy…”. The sign was again modeled in Inventor and printed as 2 parts from PLA. The letters were painted using acrylics again.
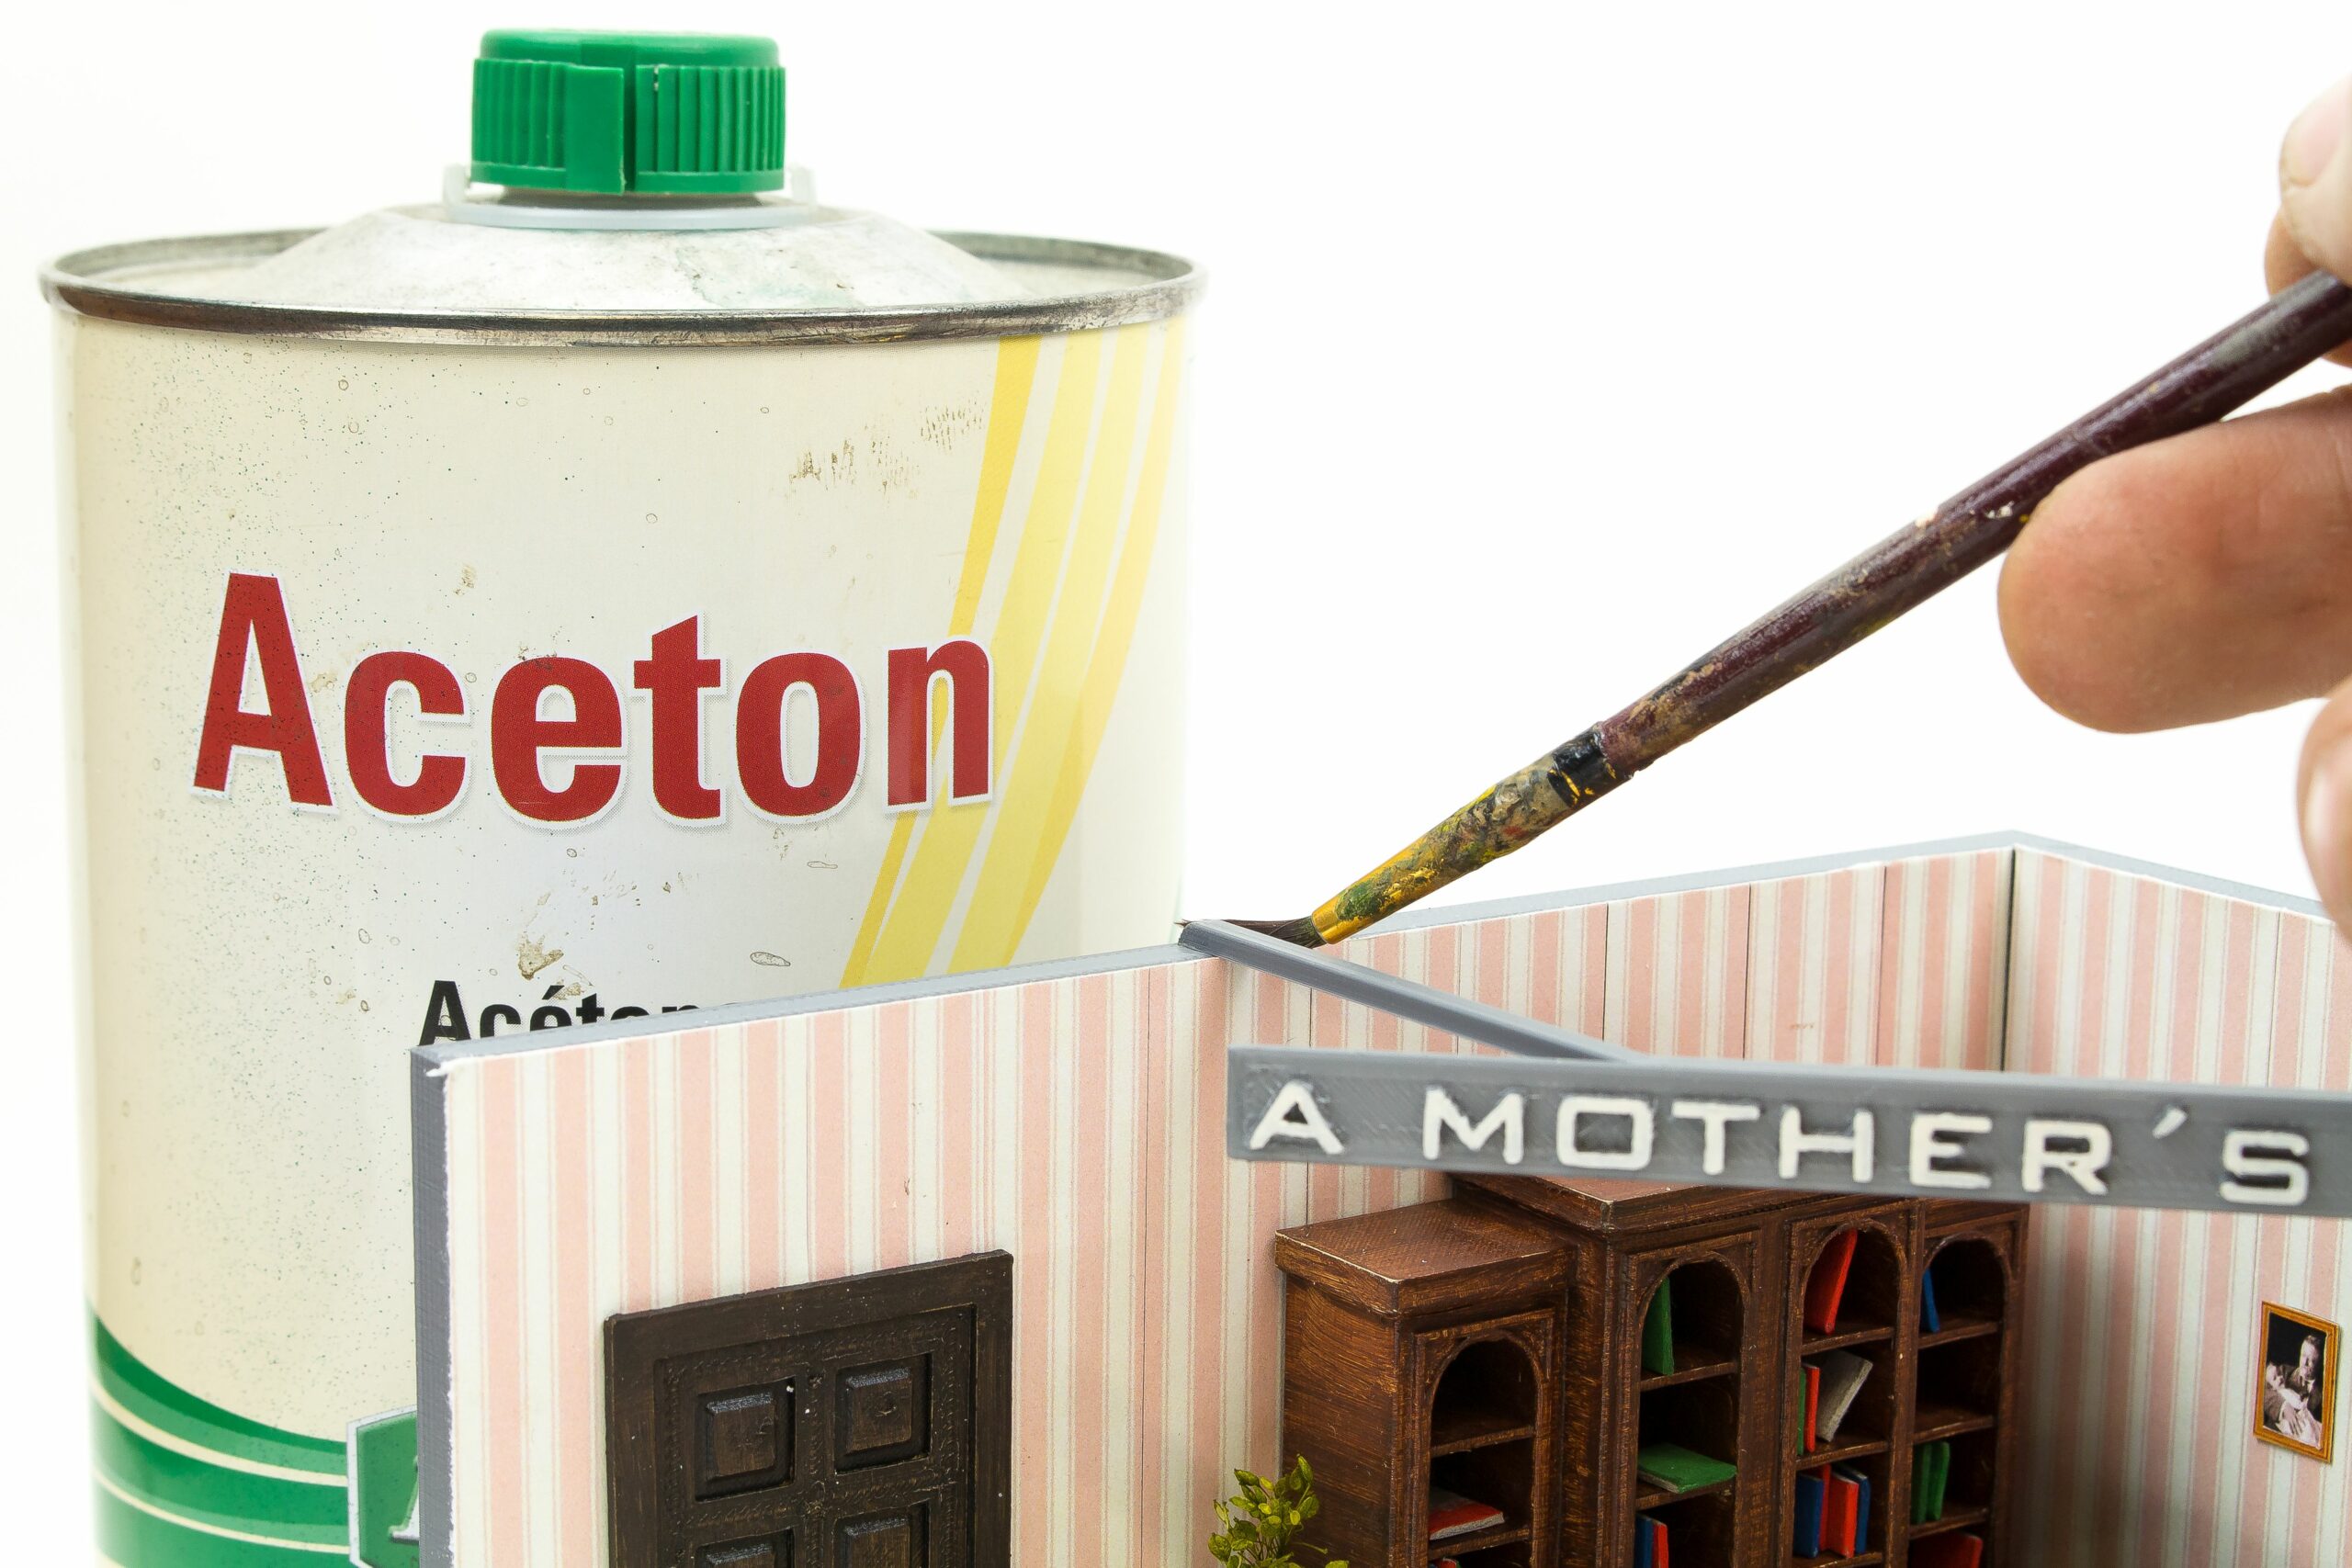
I glued the sign using acetone – surprisingly, even though PLA should be more or less inert to it, the bond was strong enough.
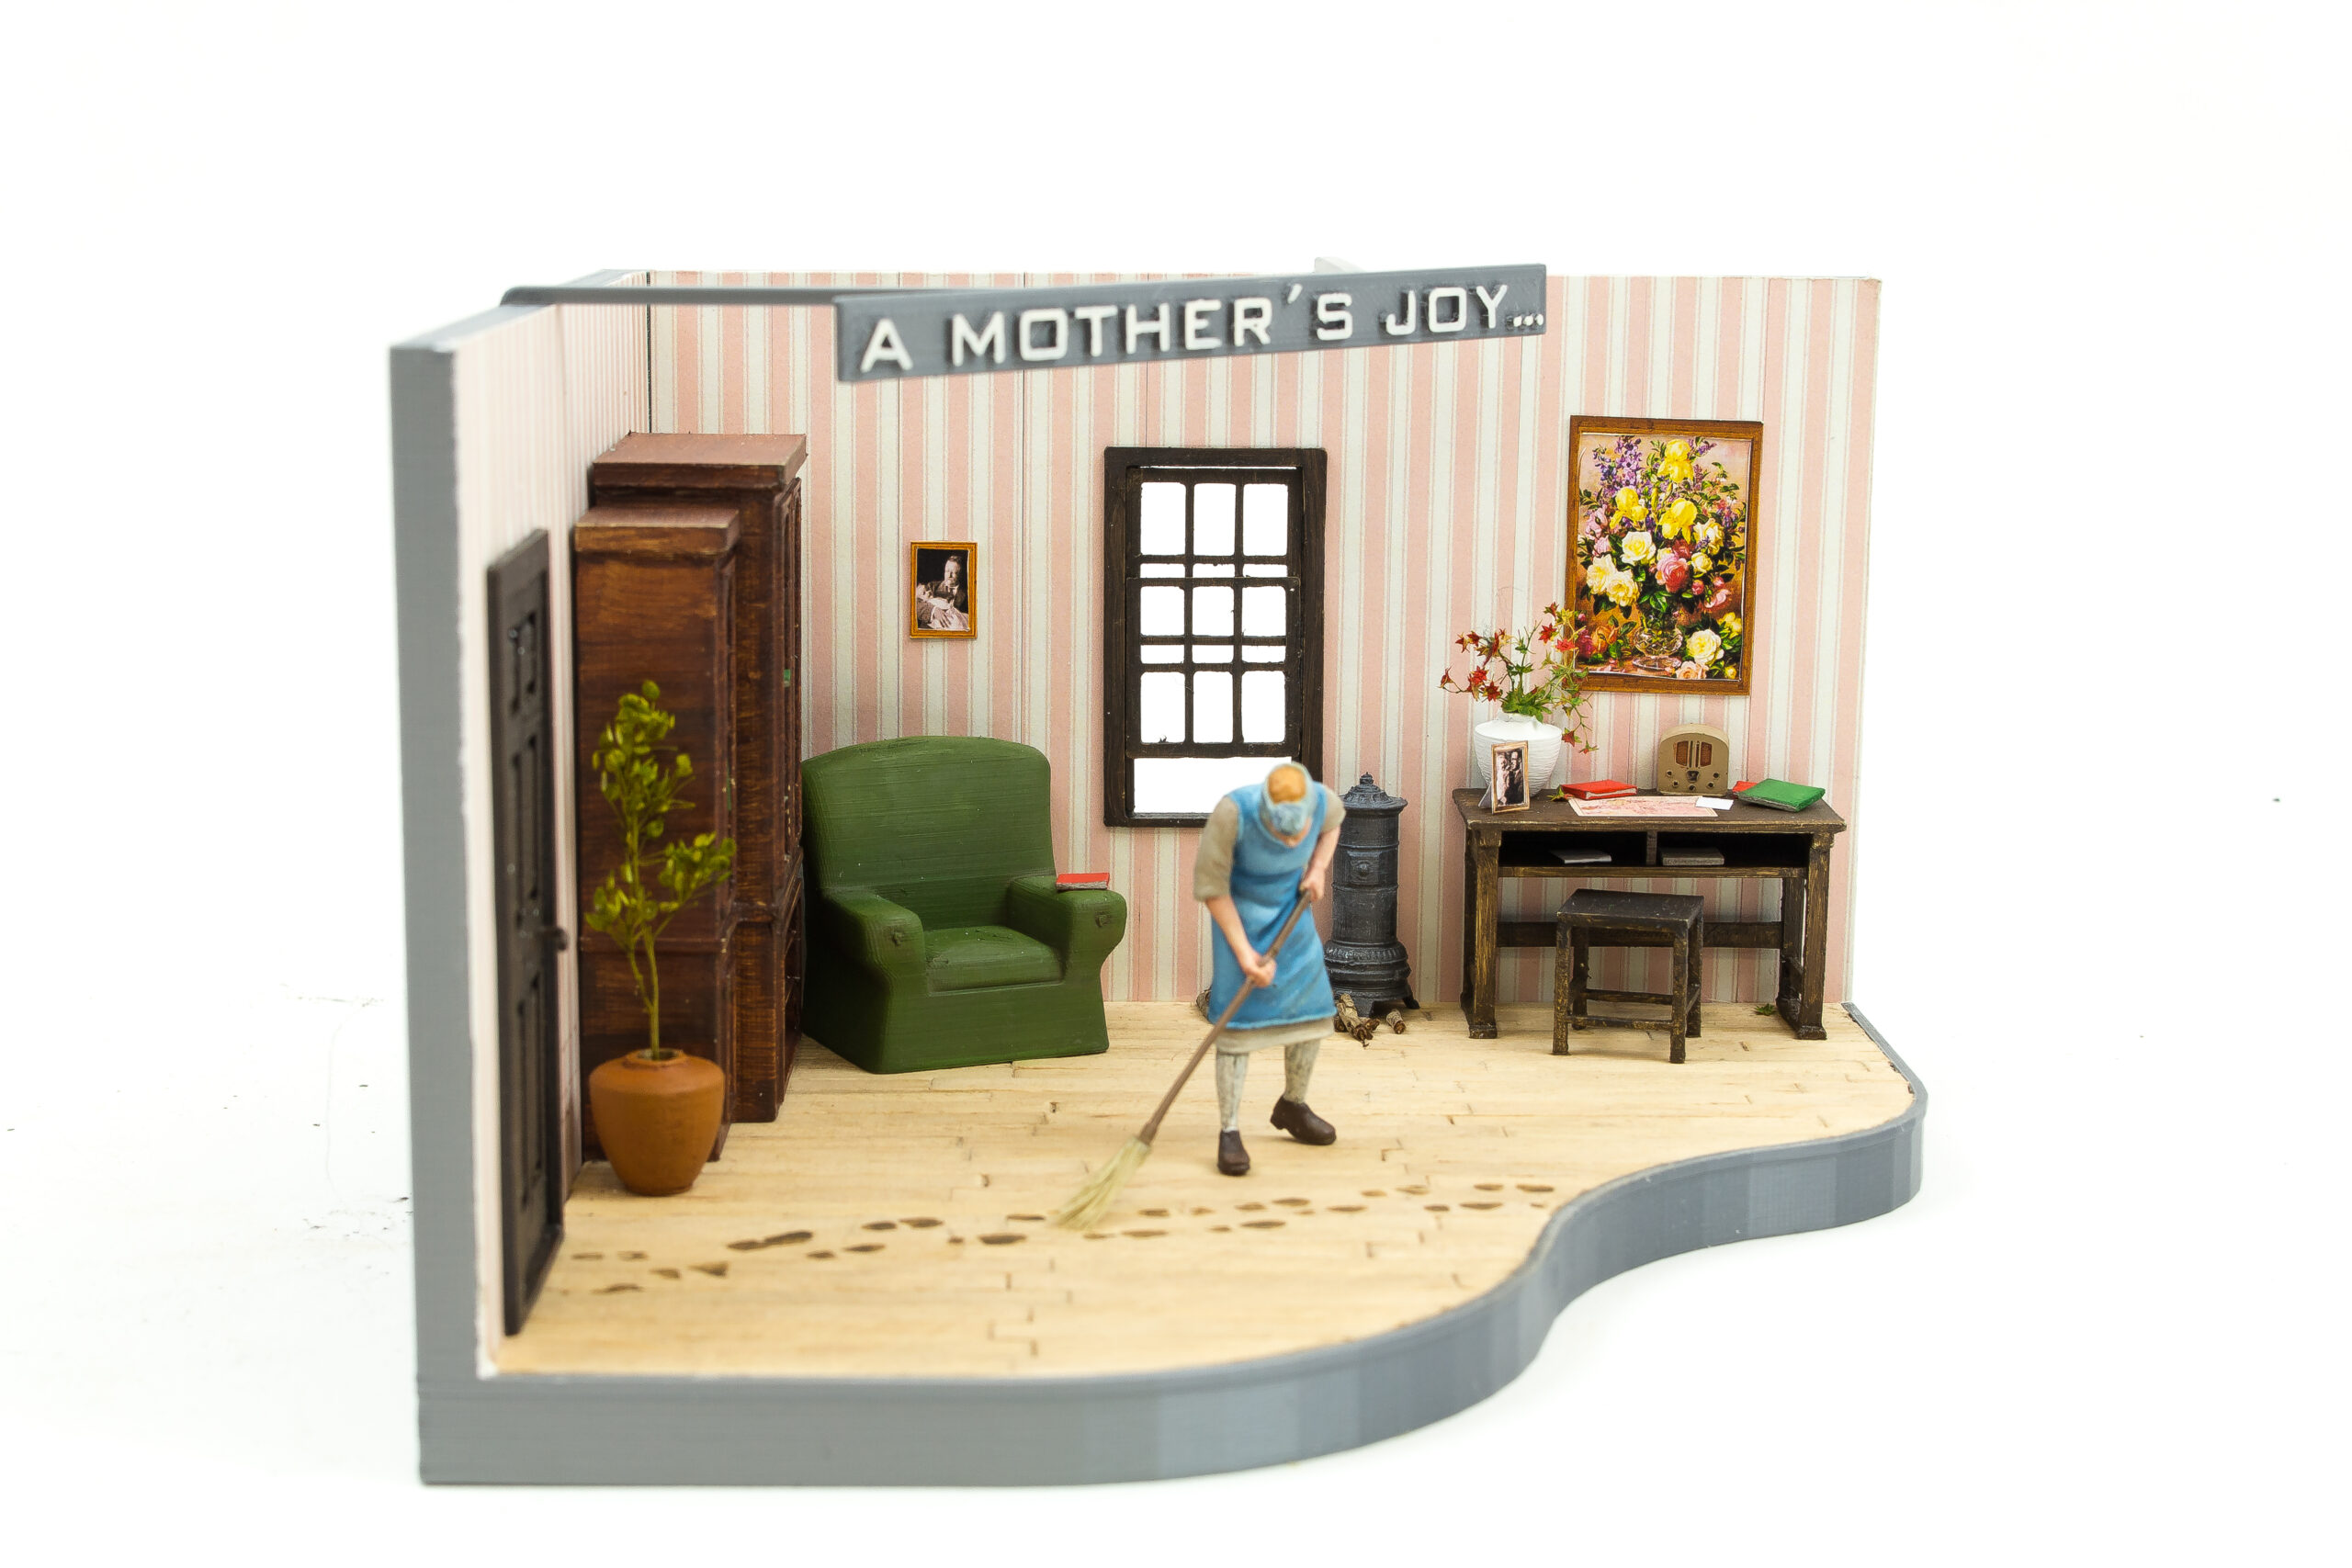
Finally, I added the woman figure, and it was all finished! With a big grin on my face, I gave this diorama as a gift to my wife – to which I dedicate this project.
In hindsight, I am more than happy with the result a stock FFF (FDM) printer could give, and I hope you found this little journey entertaining!
Links to 3D models used in this diorama: room cutaway & sign, chair, table, jar/vase, armchair, bookcase, stove, door and window
Great stuff. This gives me some great ideas. It put everything in perspective 😉
Many thanks.
My acquaintance told me about artificial intelligence which is a technology that allows you to make a lot of money. You can read this page if you want to learn more about this method. You have learned how to utilise the chat gpt site here as well. You can use everything with ease as a result of this.
This article showcases the fascinating intersection of 3D printing technology and the artistry of scale model diorama creation. ChatGPT Nederlands can certainly appreciate the precision and creativity that goes into crafting these intricate miniature worlds. It’s a testament to how technology like 3D printing allows enthusiasts to bring their visions to life with remarkable detail and accuracy. Kudos to the scale modelers for their dedication to their craft, and to Prusa3D for sharing this inspiring journey.
This was a really interesting breakdown of how FFF printing can still be useful for diorama work, especially for terrain and larger scenery where fine detail isn’t the main concern. I’ve actually tried similar setups with PLA and was surprised how good the results looked after painting and a bit of finishing. For beginners, combining ready-made models with simple slicing tweaks seems like the easiest way to start. I also came across some helpful resources on <a href="https://gtasandresapk.com/">gtasandresapk</a> that explain file handling and scaling, which made the whole process smoother for me.
This was a really interesting breakdown of how FFF printing can still be useful for diorama work, especially for terrain and larger scenery where fine detail isn’t the main concern. I’ve actually tried similar setups with PLA and was surprised how good the results looked after painting and a bit of finishing. For beginners, combining ready-made models with simple slicing tweaks seems like the easiest way to start. I also came across some helpful resources on https://gtasandresapk.com/ that explain file handling and scaling, which made the whole process smoother for me.
This was a really interesting breakdown of how FFF printing can still be useful for diorama work, especially for terrain and larger scenery where fine detail isn’t the main concern. I’ve tried similar setups with PLA and the results after painting were surprisingly good.
I also found some helpful guides here: https://gtasandresapk.com/ which explain file scaling and handling for beginners.