The most of newcomers in the 3D printing world already know that except the 3D printer, they will need to obtain 3D models on the internet or create their own in a 3D modeling program. But between downloading/creating a 3D model and printing there is one more step that many beginners underestimate – slicing. Creating a properly tuned G-code is an essential operation which is crucial for the quality and trouble-free printing. You can set up almost anything in the slicing software, and every detail can have a significant impact on the printing result.
But do not worry! Basic slicing is very easy, and you can handle it without any problems with our PrusaControl software. PrusaControl will not allow you to fiddle around and everything is pretty straightforward. But sooner or later you might feel limited. That is the point where most of the users become confident in 3D printing and look for more advanced software. And this is the time for Slic3r Prusa Edition.
Slic3r PE is based on original Slic3r. There are many boxes with the settings. An inexperienced user might wreak a disaster just by unchecking seemingly unimportant button. But once you puzzle out all the options, you will love it. You just have to overcome the first difficulties. This article should help you with that. Consider this as the first part of a brief tutorial for Slic3r Prusa Edition. We will take you through the interface step by step and focus on the most useful features.
Quick links:
- Download & installation
- Interface
- Default slicing with Prusa presets
- Positioning the object
- Duplicating models
- Further print settings
- Additional features
Backdrop
The Slic3r project was born in 2011 within the RepRap community as an effort to provide the growing 3D printing technology under the leadership of Alessandro Ranellucci. Slic3r spread among users quickly. When Josef Prusa was looking for a leading slicing software for our printers the choice fell on Slic3r. It is open-source, powerful, decent software. However, as Prusa Research was growing (very, very, very fast), we needed to be more flexible with the slicing software development. We needed to make changes to the software, and the changes had to be done asap. We also needed to add more features. At this point the co-operation with the detached original Slic3r team was unsustainable. And let’s be honest, we even weren’t in a position to demand the software development in the way we wanted. The bottom line is that Prusa Research decided to establish an offshoot. Slic3r Prusa Edition was released in November 2016 – read more about the launch here. Meet our Slic3r guys! The team is still growing. And even though they have gone a long way and made so many improvements, there are still many ideas to work in. They are programming under one roof with all the Prusa Research folks in our new headquarter.
DOWNLOAD & INSTALLATION
The best way how to get the Slic3r Prusa Edition on Windows is to install it together with the drivers for our printers. (You can also visit our GitHub where you can find all the releases, beta version included). We are using the Windows version for this guide
When installing on MAC and Linux the profiles are not installed automatically. Backup your old profiles before you proceed. After launching Slic3r PE, go to Help – Configuration Wizard… and load the presets for selected printers. (When installing Slic3r Prusa Edition for the first time, the Configuration Wizard will pop-up automatically.) Don’t forget to tick Reset user profile, install from scratch.
- Go to our website www.prusa3d.com. Download the newest version of drivers. At the time this post is being written the Slic3r PE Version 2.1.3 is out. Run the Setup – via prusa3d_win_2_1_3.exe file.
INTERFACE
Tabs
Slic3r PE consists of 4 main tabs – Plater, Print Settings, Filament Settings and Printer Settings. Most of the time you will use just Plater and Print Settings tab.
In Filament settings, you can specialize values for the filament – temperatures, cooling, etc. However, Slic3r Prusa Edition comes with default profiles of the most common filament.
We tested all the profiles and we are using them regularly, so we believe you will not have to change anything unless you want to experiment. The same is true for Printer setting – nozzle diameter, retractions etc. are things you will not change on daily basis. So, for now, we really advise remaining on just the first two tabs.
Scene
Use left-click to rotate the view, right-click to move with the scene and scroll to zoom.
DEFAULT SLICING WITH PRUSA PRESETS
In the beginning, we do not have to go into detailed settings. Let’s take it easy. Prusa presets are ready to help you!
Import STL
You can load as many models as you want into the scene. Just remember to properly position them and keep in mind the printable area as well, but we will focus on this later.
Print quality settings
From the drop-down menu choose print quality. The main difference is in the layer height. Lower layer height makes the print smooth and more detailed. However, it extends the printing time. Higher layer heights work the opposite.
Filament selection
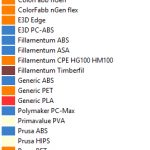
After setting the print quality, you can select a material from the drop-down menu. With our printers, we are shipping a spool of PLA – in case you are using this spool “Prusa PLA” will be your choice. We are supporting all the filaments from our e-shop.
Printer selection
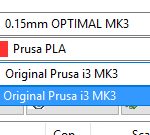
The last thing to do is to check the selected printer. In our case, there is nothing to choose from as we installed just the Slic3r Prusa Edition for MK3. But our customers do have both MK3 and MK2s and it is common to use the wrong version of the software by mistake.
Slicing & verifying
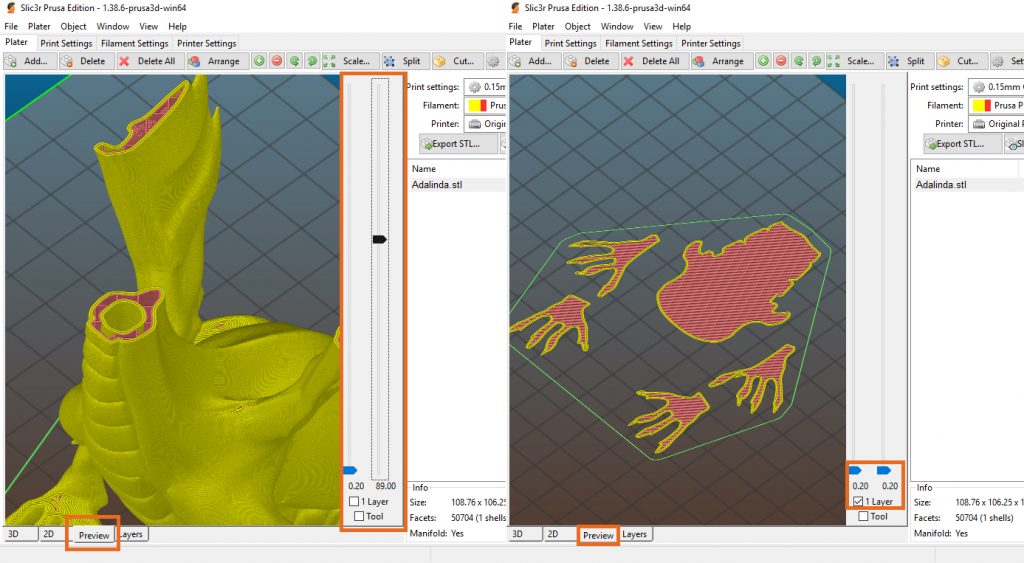
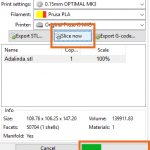 We highly recommend you to Slice the model first and check the data before exporting the G-gcode. Hit Slice now. Slic3r will generate the data file for the printer. You can see the progress on the bar in the right bottom corner. When the slicing is done, go to the Preview tab. It shows you generated data – this is how the printer will print. You can see the individual layers, perimeters, infill, etc. Use the sliders on the right side to clip the preview. You can clip the preview from the top, as well as from the bottom or you can visualize just one layer. This is handy when you want to see if the first layer is flat and properly placed on the pad. The data in Preview tab & Layers will be shown only after Slicing or Generating G-code is done.
Exporting G-code
When you are happy with the preview of generated data, hit Export G-code… Data will be generated into a G-code file, which you can upload to your SD card and insert to your printer.
POSITIONING THE OBJECT
Moving
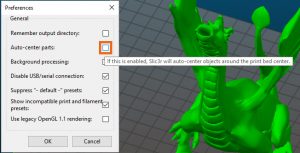
Auto-center parts feature is enabled in Slic3r by default. It means that whenever you’ll place the object into the printable area, the software will automatically place it into the center of the bed. Anytime you add another model to the scene it will align it. While this function is enabled, you can’t move the object manually. For manual position, go to File / Preference and disable the Auto-center parts function. Now you can move the object within the area by holding the left mouse button.
Rotating
![]()
To rotate the object use arrows in the upper menu. The object must be selected to enable the arrows buttons. The object will be rotated around the Z-axis in steps of 45°.
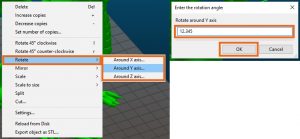 If you want to rotate the object at a specific angle or around another axis, click on the object with the right mouse button. Choose Rotate from the pop-up menu and select which axis you want to rotate around. Then set your desired angle.
Scaling
To scale the object uniformly, select the object and click on the Scale… button in the upper menu. Then enter the % scale factor.
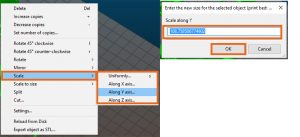 To scale the model just in one dimension, right-click on the object and from the pop-up menu choose Scale. Then select the direction in which you want to scale the model and fill your desired % scale factor.
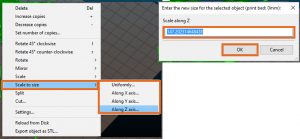 To scale object to the certain size, right-click on the object and choose Scale to size from the pop-up menu. After that, choose along which axis you want to set the to-be model dimensions and set the final dimension in [mm].
DUPLICATING MODELS – ADDING MORE COPIES
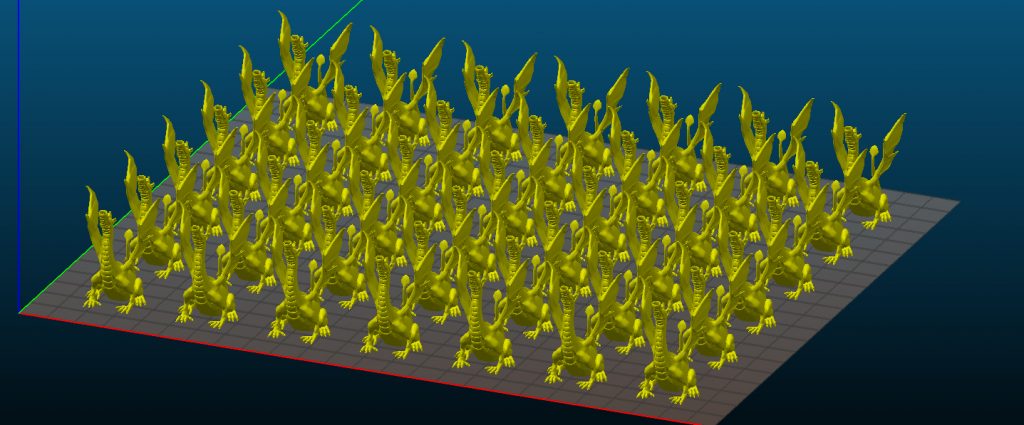
In some cases, you may want to place the object multiple times. Rather than drag and dropping the stl file several times, select the object in the scene and increase the copies by using “+” on your keyboard (or “-” to decrease copies). You can also use the buttons in the upper menu. It is convenient to have the Auto-center part function enabled. Slic3r will place the copies into a grid with safe distances.
To set a number of the copies, right-click on the object and from the pop-up menu choose Set number of copies → and enter the number of copies of the selected object
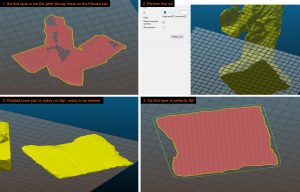
Splitting
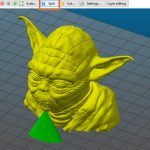
If your stl file is composed of several solid meshed you can split them for the purpose of manipulating with separate parts or deleting them. For example, you wish to remove supports from this Yoda model. For splitting use the button Split in the upper menu. Depends if the stl model consists of more individual meshes. You can not split a single mesh.
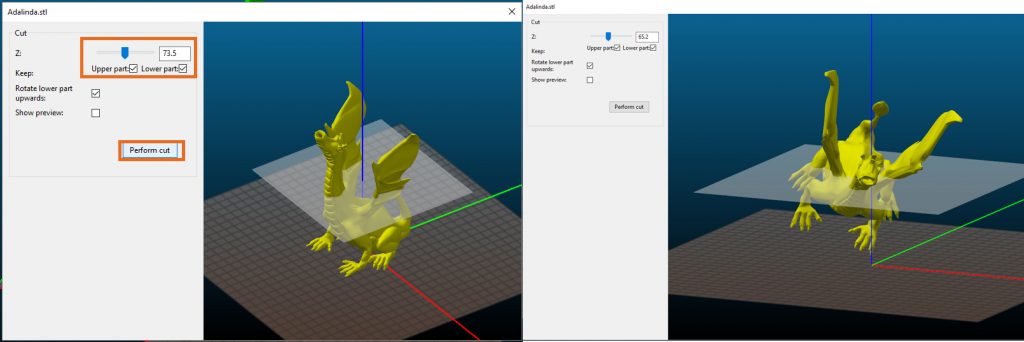
Cutting
Slic3r provides an elementary cutting function. Cutting in Slic3r is possible only with XY plane. Select the object and click on the Cut button in the upper menu. Then enter the Z height [mm], check both boxes to keep the upper and lower part. Then hit Perform cut. Cut your model is handy when you model is too high and you want to cut it into two parts to fit the printable height or the model does not have a flat base and would not stick properly to the print bed. To cut model with different planes rotate the model first and then perform the cut.
FURTHER PRINT SETTING
Our presets work great, but that doesn’t mean you can’t modify them. For example, if you’d like to add supports, change infill or increase horizontal shells. In that case, you need to go to the Print Settings menu. We will introduce you the modifications we use the most frequently.
Layers and perimeters
Layer height – Do not change the layer height by using these boxes. Layer height affects other settings as p.e. extrusion, time per layer etc. as well. Use the overall print quality setting on Plater tab instead. An inexperienced user is not able to harmonize the setting. You will just mess it up.
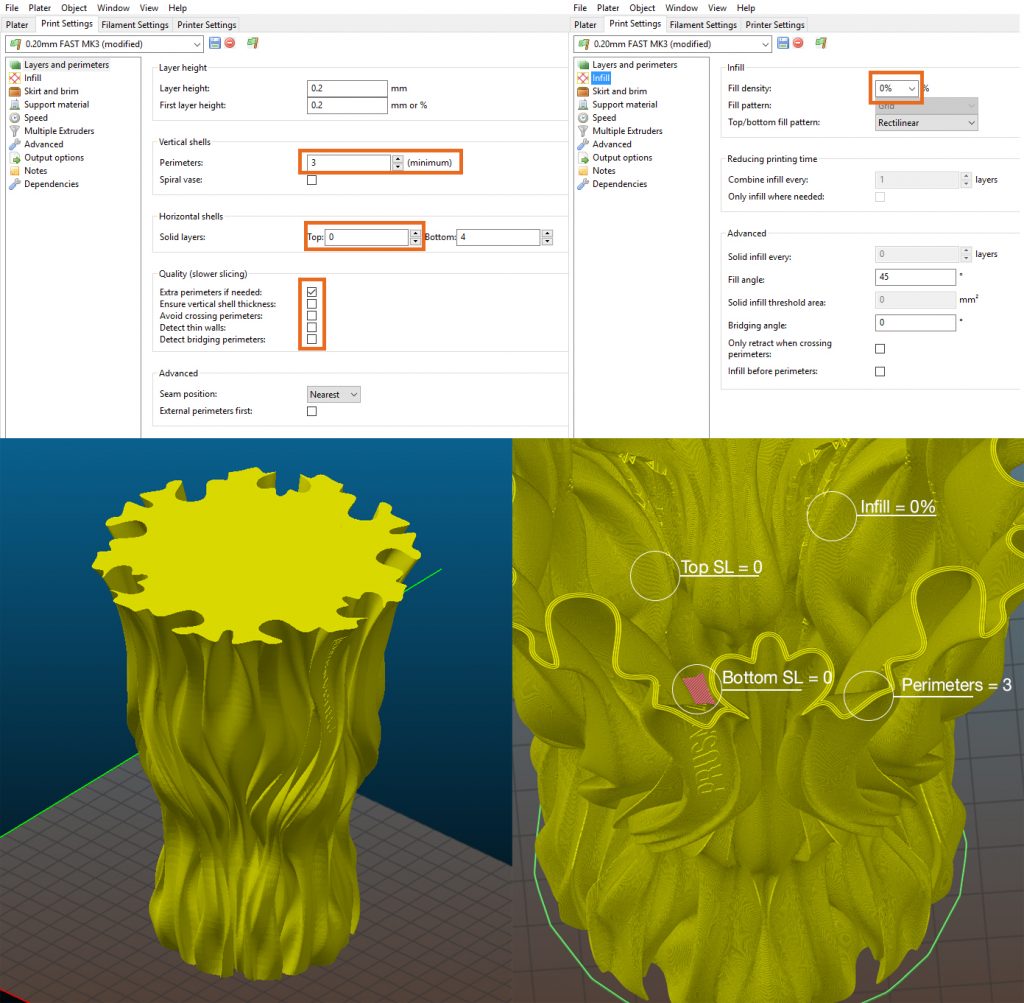
Vertical shells – The given number of perimeters basically indicates how many threads will form the printed wall. What are perimeters good for is described in this post. Spiral vase means the printer will print only one perimeter, no infill, no top solid layers and no support. It is good for printing vases, it is fast and the vase is watertight. Basically, the print head moves on spiral trajectory without any stops or steps between rising Z coordinates. By checking the box you will change the linked setting as well.
Horizontal shells – The number of horizontal shells sets how many solid layers will be printed on the Top and Bottom of the object. Adjustment of this will not influence printing p.e. statue. But it is very useful when printing a vase, or a box. When printing vase from a solid object, set the Top solid layer to “0“. (Do not forget to change infill to 0% as well.)
As the example model, we are using this Fluid vase.
Quality / Detect thin walls – Thin wall detection is useful when your model has a thinner wall then the nozzle diameter. (Shipped Orignal Prusa i3 MK3 printers have 0.4 mm nozzle.) In case the wall has less than 0.4 mm Slic3r will not generate a perimeter. In that case, switch the Detect thin wall function on. We are using this feature mostly when printing a text.
Infill
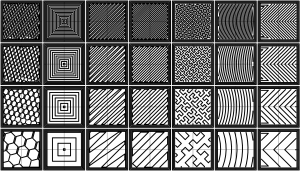 Fill density is probably the only thing we keep changing often. We are using 0% for a hollow object, 10%-20% for regular printing and 90% for small manually strained prints. Then you can change the Fill pattern and set by which pattern should by used for the top and bottom layers. Read more about the patterns and density in this article.
Skirt and Brim
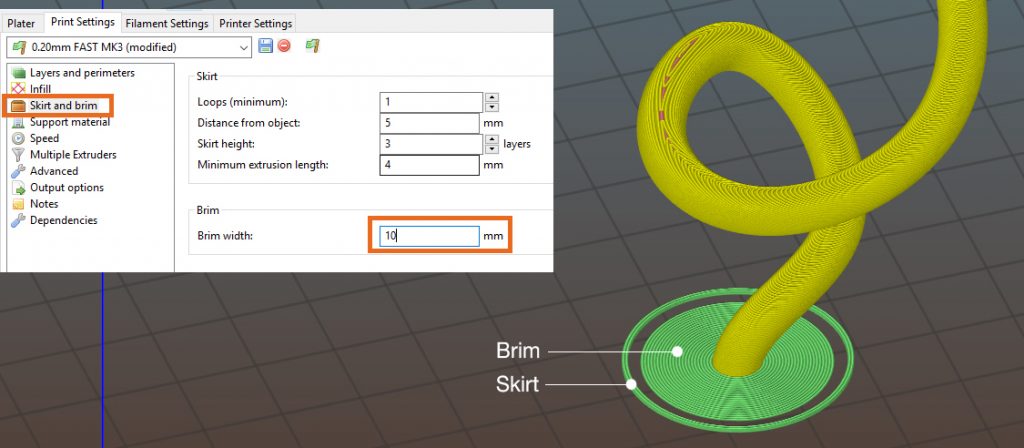
A skirt is an outline that surrounds your print. You can set how many loops it will have, the distance from an object, its height in layers and minimum extrusion length (in case of small objects).The skirt is used to establish a smooth flow of filament in the extruder. We are also using the skirt to see if the bed is flat and the printing head is at the right height to print a nice first layer.
The Brim function is used to increase the bed adhesion. The brim is a widening of the first layer circumference. You can set the brim width in [mm]. The brim is mostly used with a slim tall object that has a small contact area with the bed or on sharp-edged shapes because the corners tend to warp.
Support material
One of the “disadvantages” of the FFF printing technology is that you cannot print into the air. So in that case, the geometry of your model is floating in the air and you have to use supports to print it. To turn the supports on go to the fourth tab Support material. Usually, we just check the Generate support material box and we leave the software to do the magic without any further changes. Sometimes we are rewriting the Overhang threshold. The number sets up to what slopping angle of the geometry the supports will be used. It’s also good to know about Support on build plate only option. By checking the box you disable supports based on the geometry itself. We use this when we are printing a complex model with many folds and nooks and it would be impossible to remove the support form inner spaces later on.
With the Original Prusa Multi-material upgrade using supports gets to a higher level. Because a soluble material can be used for supports. You can read about this great feature in this article.
Read more about support material in this manual.
ADDITIONAL FEATURES
Variable layer height
With Variable layer height, you can gradually change the layer height. It combines the advantages of high layers (fast printing) and low layers (detailed printing). More about Variable layer height is written in this article.
Colorprint
If you want to print from more than only one color, use the Colorprint feature. This allows you to modify your gcode with commands for changing the filament. Decide on which layers you want to switch the colors and the printer will pause the print at those spots and let you load a new filament. These color changes can be done only by layers. More about ColorPrint is written in this article. And here.
HAPPY SLIC3R EXPLORING!
Thank you for reading the article all the way up here. If you would like to add more information to the article, please tell us in the comments. Also, share with us your own Slic3r hack!





Guys, just integrate the ColorPrint functionality (and more) in Slic3r. It is easy. Just pause at the desired layer. See for details:
https://github.com/prusa3d/Slic3r/issues/378
Hi, thanks for the reaction. Yes, we have this feature in Prusa Control. This feature should be implemented to our Slic3r as well in the future. I hope it will be as soon! However, the list of implementations is quite long.
Hey, I have a suggestion to a blog post. I would really like to see some recommended “New filament workflow” by Prusa. I don’t consider myself a beginner but I am no expert. I imagine something like:
You get a new roll of filament, what is the next step? Calibrate the extruder? How? measure diameter across certain length and do the 100mm extrusion test. Great, what next?
Temperature? Oozing? Under extraction?
I think there should be a certain order on what setting should be defined first, I really don’t know the correct order.
Find ideal temperature? How? Print a temp tower, does Prusa have a favorite one? Can you supply it?
Next, oozing? How? Is there a tiny print to test it?
Is benchy still the “benchmark”? I know that everybody have their way, but I really like to know if prusa can come up with an official workflow.
Thanks!
It is possible to add a rotate (along axis) button instead of have to open several menus from the toolbar? It’s annoying.
Another feature that would be useful is the possibility to add pauses at certain level to add magnets and nuts.
Hi, thanks for the reaction.
– We are already working on the new UI. The new UI will be more user-friendly and intuitive. There is a big work-flow list with priority hierarchy. I believe out Slic3r team will work on it!
– Yes. It is possible, but not yet directly in Slic3r. Use Prusa Control or Slic3r + ColorPrint feature. Just basically set “color change” at the desired layer and the printer will pause. Yes, unfortunately, it will unload the filament and you will have to load it again – but I believe it is not that big issue;) … https://blog.prusa3d.com/generate-colorprint-gcode-online/
Thank you for replying! I’m looking forward to seeing the new UI. It’s an awesome news! Keep it up!
Unloading and reloading is not a big issue, but it’s annoying to have to do it each time you add a nut or magnet. It’s possible to write code to pause and move the print head away, so why not add the function to the GUI?
I always wanted to learn modeling or printing, but the manuals I read did not suit me. So I decided to try to write a certain work myself first. I read a lot of reviews at https://papersbattle.com/best-assignment-writing-services/ and decided to use the help of qualified professionals because I read a lot of good reviews. Thanks to the best assignment writing services, I will soon add my work that will be useful to someone.