


You might be looking at your unicolor 3D print and wonder: ‘Wouldn’t more colors make this just perfect?’ You could grab a set of brushes and give hand painting a try. While relaxing, it takes a lot of time and skill, though. Luckily, you can take a more straightforward path to sleek multicolor prints. We’ll walk you through it and show you different ways to add color to your 3D creations right from the start using your Prusa FDM 3D printer. Let’s get to it!
In this article, you’ll learn:
- The easiest way to get multicolor prints.
- The power of Color Change on the printer you already own.
- How to print five colors with a smart add-on MMU3.
- How to get the best multicolor experience with the XL.
- The magic of multimaterial supports.

Minions MMU by _Building_Arts_
Now, brushes and paints aside, how can you end up with a multicolored print? “Option 0” is to use a model cut to multiple parts, printing the pieces separately in the color of your choice and assembling them by simply clicking them together or using a droplet of glue. Printables is full of such models; take this cool Chameleon Keyholder or the hall-of-famer Dummy 13. They’re a perfect starting point.
If assembling isn’t your thing, you can also use a special filament that blends multiple colors or shades in a single spool. For example, Prusament Mystic Green creates nice reflections and changes color when you look at it from different angles. It’s a great way to add some pizzazz to your model, but you don’t truly have control over the color distribution. Before we go further, we have a little advice: printing with multiple colors can be a tad tricky, so we recommend you get comfortable with single-color printing first and treat this as the next step in your 3D printing journey.

Loki mask from the movie “The Mask” by Byambaa printed in Prusament Mystic Green.
Option 1: Color Change
All the way from Prusa MINI+ to the XL, you can set up multicolor prints already in the PrusaSlicer. The Color Change feature makes it super easy to switch between different filament colors within a print (for other handy applications read this article). It automatically pauses the printer once it reaches the layer you want to have printed in a different color. Then, the printer ejects the filament you’re currently using and asks you to insert a new one. When you’ve performed the filament swap, the printer resumes printing with the new color till it reaches another change, if there’s any.
The sweet thing about Color Change is it’s super intuitive to use. You slice your model and in the Preview mode, you simply drag the plus icon on the right axis (a.k.a. the layer slider) all the way to the layer prior to your planned color change, right-click on the plus, select ‘Add Color Change’, and drag the plus up again, now with the new color. The number of changes is up to you, just bear in mind you have to change the filament manually, so it’s not the most fitting solution for larger prints with lots of different colors. Plus, each change should be at least a few layers high to avoid problems with transparency (especially when printing signs). By the way, the PrusaSlicer has a handy feature for signs and logos – after you’ve sliced them, it offers to apply Color Change automatically. So, you can be all set in just one click.
Setting up Color Change is this easy! Model: Warning by Kenkay.
Now that you know how it works, let’s explore some of the best ways to use Color Change. It’s perfect for signs and keychains, where layering colors creates popping symbols or inscriptions. It also works well for figurines, helping to distinguish the stand from the model itself. Plus, you can use it to add a stylish touch to everyday items like mounts, boxes, or covers.
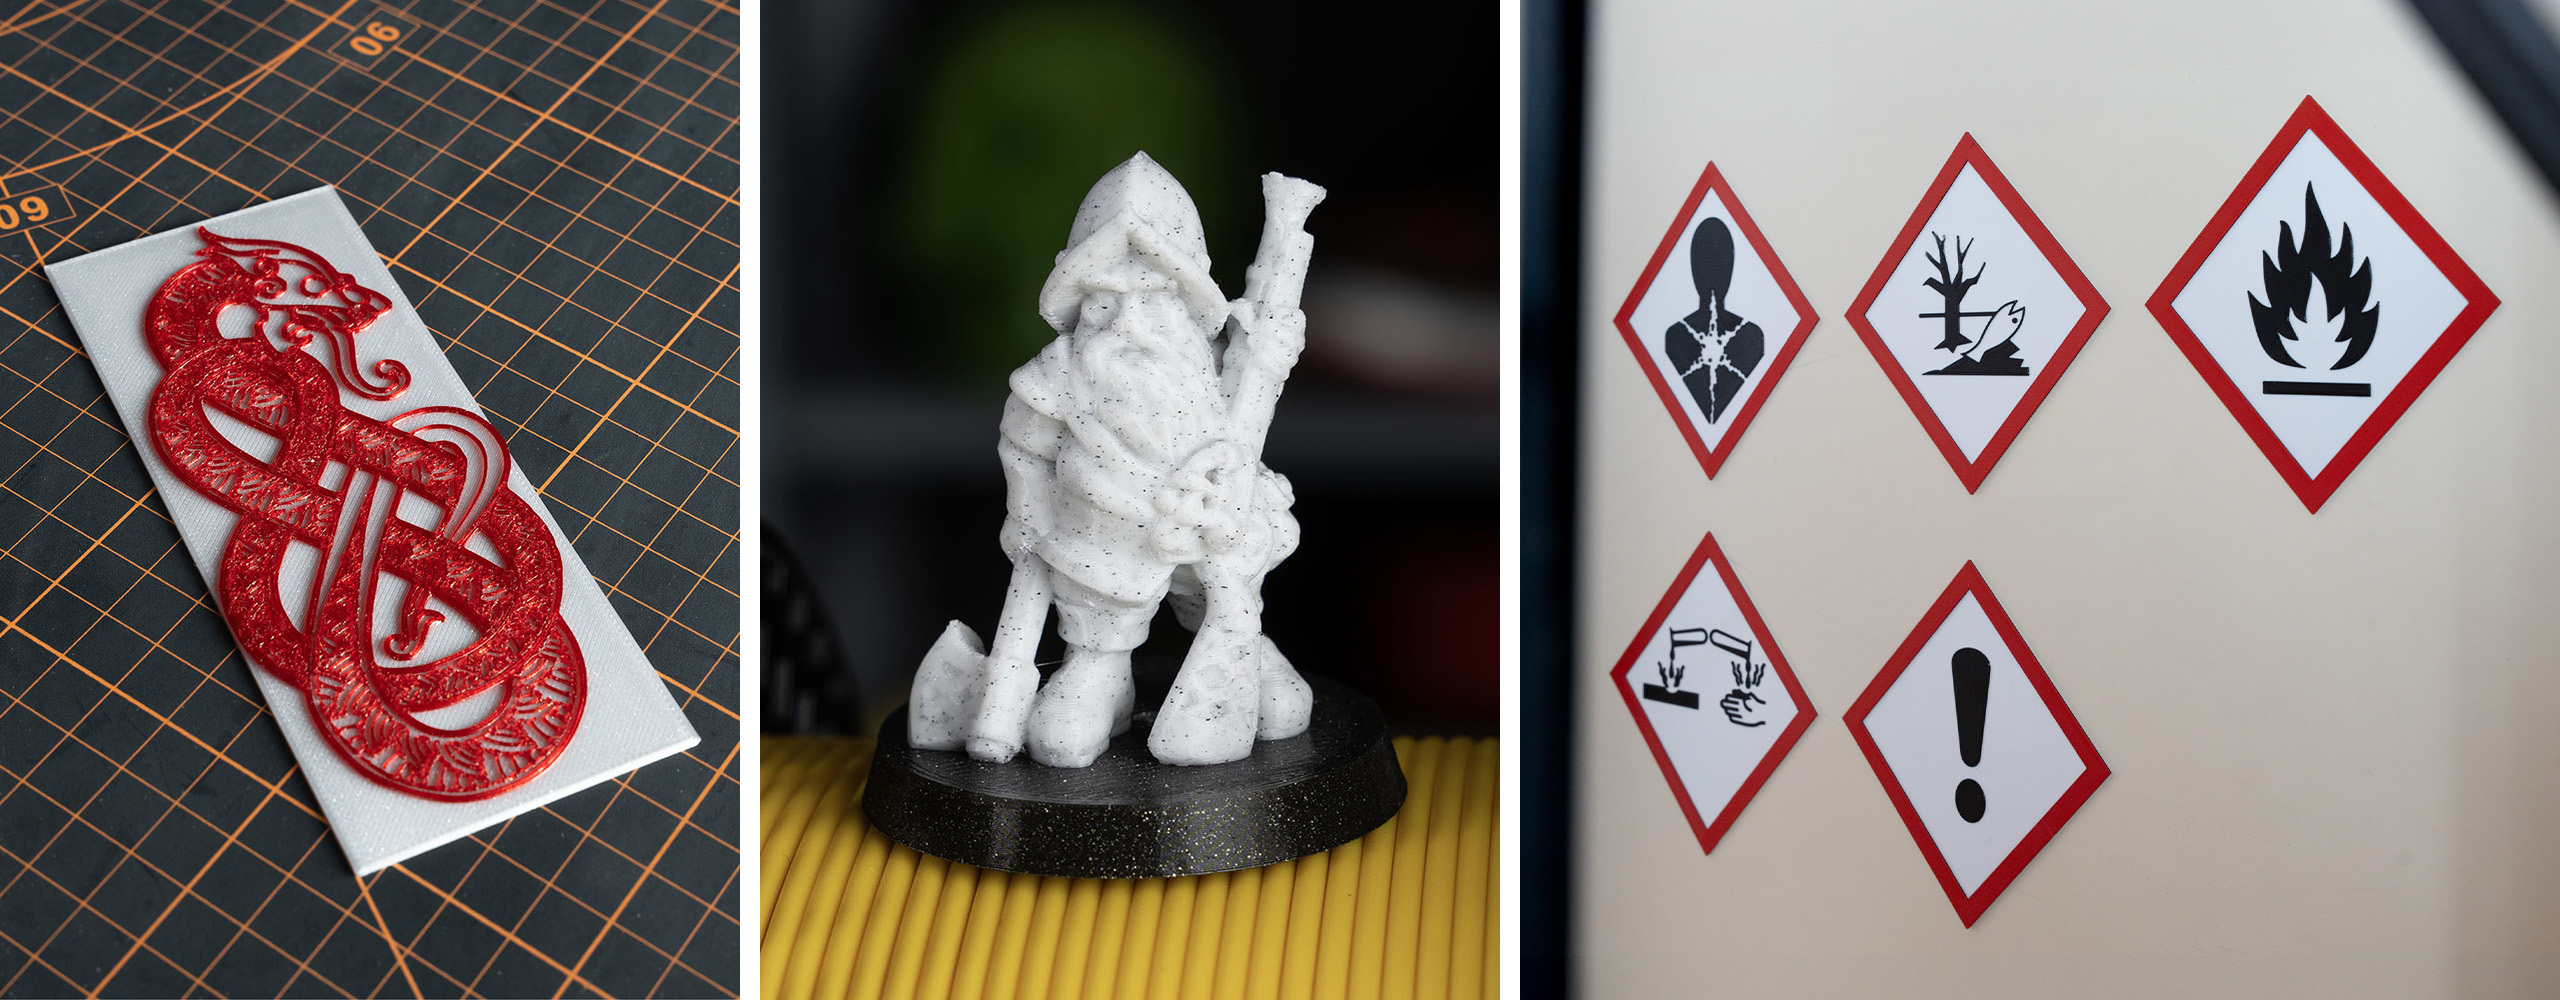
Dwarf rifleman 28mm by Brite Minis, Viking dragon plaquet by Factorium of TS,
GHS Hazards Pictograms by Drunken Monkey – all printed with using the Color Change.
If you get bored with horizontal stripes, try rotating the model in the PrusaSlicer to create diagonal ones for even more flair.

Just tilt your model to get unique designs.
Model: Extraordinarily shaped vase “Facetta” by Deltaprints.
Option 2: MMU3
Color Change works great, but it has its limits – it can’t truly blend various colors in one layer. For truly multicolor printing, you can level up your Prusa printer with the Multi Material Upgrade 3 a.k.a MMU3 that lets you print up to five different colors in one single layer!
Simply put, the MMU3 is a clever box that sits atop your 3D printer and carries out hundreds or even thousands of automatic color changes for you in one single 3D printing session. Not to drown you in technicalities, here’s how the MMU3 works: You place your filaments in holders, load them into a buffer that prevents tangling, and from there, they travel through plastic tubes to the heart of the add-on: the MMU3 Unit that sits on top of your Prusa. The Unit has up to five colors pre-loaded and when a color change is required, it simply switches between filaments. It retracts the current one to the buffer and pushes another one to the extruder. The Unit can have up to five colors pre-loaded and when it’s time for a color change, it simply switches between the loaded filaments. It retracts the current filament to the buffer and pushes another one into the extruder, using a rotating barrel idler.

The MMU3 works super fast with minimal waste.
Model: Melting Rubik’s Cube by Malte.
You might be wondering how the printer knows where to print which colors. You’ll configure this yourself in PrusaSlicer using the Multimaterial Paint function. You select the areas you want to color using a brush or smart select and simply change colors in the drop-down menu. To preview the final look, you can match the actual filament colors with those in the Slicer. When you’re done coloring, you simply load the filaments into the numbered MMU3 slots. From this point on, everything’s automatic – the printer has all the necessary info in the G-code you’ve created.

You’ll color everything seamlessly in the PrusaSlicer.
Model: Spaced-Out Mid Century Plant Pot by Deltaprints.
By the way, you can also paint your models seamlessly in our online slicing tool EasyPrint. Be it on Printables or the Prusa App, you assign colors to your creations directly in the browser or your phone a few clicks or taps!
Coloring models with Easy Print is quick and super intuitive.
The MMU3 truly opens the multicolor chapter of your 3D printing journey. It’s available for all our MK-series 3D printers from the MK3S+ and up, and there are several versions available for the CORE One. When it comes to model selection, the world is your (3D printed) oyster. The MMU3 works perfectly for figurines, product prototypes, artsy decorations, or anything in between. Your color combinations are close to limitless: our Prusament PLA lineup alone comes in 25+ colors! And one more thing: the MMU3 is also super waste efficient and able to save you kilos of filament.

Chibi Wolverine by FunserviceStl, The Frog Prince by Loubie3D,
Mini Viking by Wekster – all printed with the MMU3.
Option 3: The XL Toolchanger
While Color Change and MMU3 are “extras” for MK-series and CORE One printers, the Original Prusa XL was born for multicolor printing. Unlike the MMU3 and other similar solutions, you can equip it with up to five separate tool heads, which means each color gets its own extruder and nozzle. This makes the entire multicolor process much smoother, faster, and super efficient.
Here’s how it all works. At the back, the XL has a dock with up to five toolheads with each of them having their own filament spool loaded in. The key component of this system is the XL Toolchanger. During printing, this smart mechanical ‘box’ undocks a printhead, prints the part defined in the G-code with it, and when it’s time to change the layer color, it docks the current printhead, fetches another one, and uses it until the next color change… well, you get the idea. Even three years after its release, the XL is still by far the least wasteful multicolor solution in its category, helping you save loads of filament.

The XL Toolchanger, ready to print.
Once again, you’ll do all the coloring in PrusaSlicer, and when you’re finished, simply send the G-code to the XL. With the huge build volume of 36x36x36 cm and pristine color printing, the XL is your go-to 3D printer for any multicolor print. Be it a large statue, detailed car models, or a piece of cosplay, it’s ready to nail any colored print.

The XL is your dream printer for any multicolor project.
Models: Prusa3D Box by Prusa Research, Melting Rubik’s Cube by Malte, Mark XLVI Bastard Concept Inspired Helmet by Budwin.
Multimaterial Magic
The XL comes with an additional perk worth mentioning: multimaterial printing. We’ll cover it in more detail in another article, but here’s the gist. While MMU and other single-nozzle systems are great for mixing different colors of, say, PLA, they don’t mix different filament materials all that well. The XL does – with flying colors. With its unique Toolchanger system, you can easily assign a dedicated print head (and even nozzle) to each filament, creating ideal conditions for multiple materials simultaneously. This allows you to seamlessly combine e.g., PLA/PETG with flexible TPU and many other combinations.

Combine multiple materials in one print. PLA + FLEX model & PETG for supports.
Model: Life-sized Flexible Forearm by Karel Pěnička.
One of the best ways to incorporate all this into your colorful model printing is by using multimaterial supports. With more challenging models – especially complex figurines or intricate designs – supports are a must. Removing them can become a tedious process involving nerve-racking peeling of supports from brittle areas or sanding down the model-support contact points. However, with the XL, you can benefit from the fact that PLA and PETG don’t adhere well to each other. You can print a model with four different PLA colors and use PETG for the supports. You’ll peel them right off and be left with a perfect, smooth model. We’ll cover more multimaterial support combinations in more detail in the upcoming article.
As you can see, Prusa machines are more than ready to print multiple colors. From the simple Color Change feature in PrusaSlicer to full-blown five-color printing with the XL, you don’t need a brush and model color set to achieve stunning prints.
Happy multicolor printing!
Would be nice to see a guide on how to use a MMU3 to change what filament to use for infill. I do not want to use the same filament as both the base print and infill. I want to use older filament up as infill just to get rid of it, but I do not know how to do this. There are no video guides anywhere.
@BioZombieActive Print Settings -> Multiple Extruders -> Infill extruder
Keep in mind wall thickness and opacity of the filament, otherwise you might get color bleed.
One thing to note for printing colors using MMU or tool changer, the more times you change the color on a layer, the longer it will take to print. Often the top or the bottom is the best place for text, logos, etc if you want to minimize print time.
There is a slightly advanced option 1b, I'm missing:
Printing multi color in the same layer with a single extruder (without mmu). This is lengthy discussed in this article: https://forum.prusa3d.com/forum/original-prusa-i3-mk3s-mk3-how-do-i-print-this-printing-help/can-i-print-multiple-colors-at-the-same-layer/#post-671614
They heavy advanced stuff is not needed. It is enough to make this small changes and a few manual filament changes:
"Basically you have to go into Printer Settings-General and set the number of extruders to the total colors your are using. Then in Custom Gcode tab you add the following to the Tool Change Gcode section: {if layer_num > -1}M600{endif}
Then go into Print Settings-Multiple Extruders and uncheck Prime all printing extruders."
—-
Great guide for getting started with multicolor printing on a Prusa! I’ve been experimenting with a few custom designs recently, and this really helped me understand how to set up filament changes properly. Planning to print some custom logos for <a href="https://jacketsparadise.com">Jackets Paradise</a> merch next—can’t wait to see how the colors pop!