Welcome, mortal! We hope you are not easily spooked! Why? Because we have decided to open our cabinet of curiosities and bring you some Halloween-themed inspiration! Our mysterious masters of 3D printing and post-processing ghouls selected many strange items from the place, only the brave and foolish dare to enter – The Internet! (*distant thunder*). But let’s not limit ourselves to things found on the internet. We also have our own inventions and modifications of already existing projects and much more!
With Halloween two weeks away, you still have plenty of time to get everything ready for the festival of fear and fright! Do you prefer crows with glowing red eyes? Rotten arms of the living dead raising from your front lawn? An innocent-looking pumpkin with a nasty spider-surprise hiding inside? Or a zombie strikingly similar to Jo Prusa? We’ve got it all!
Zombie Jo
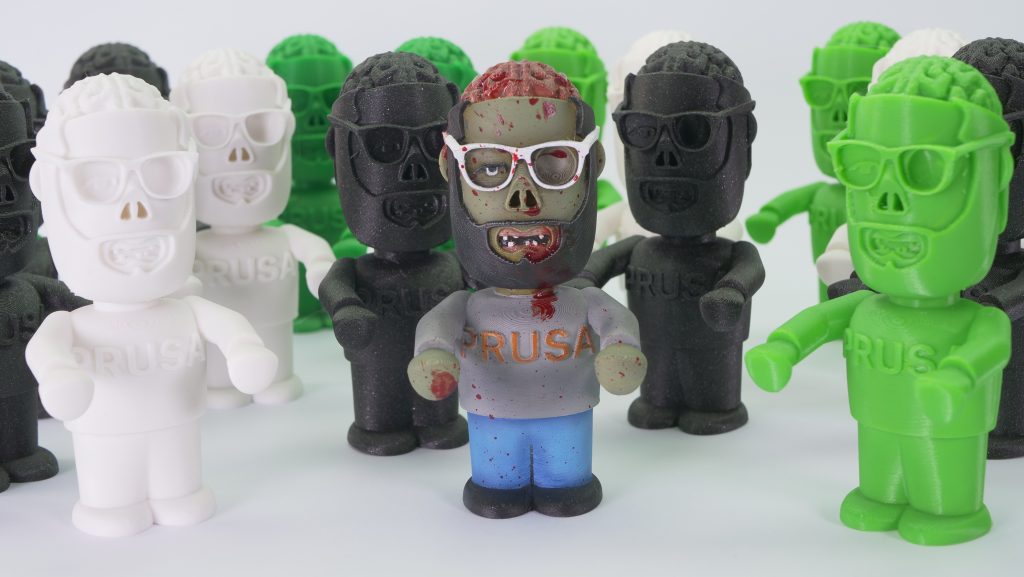
A full moon hangs above the Prusa Research HQ like a… huge shiny thing in the sky. And at those times, when the moon is full, Zombie Jo and his army get really hungry. What are they after? Brains? Nope, wrong. It’s Prusament, of course! Delicious pink Prusament!
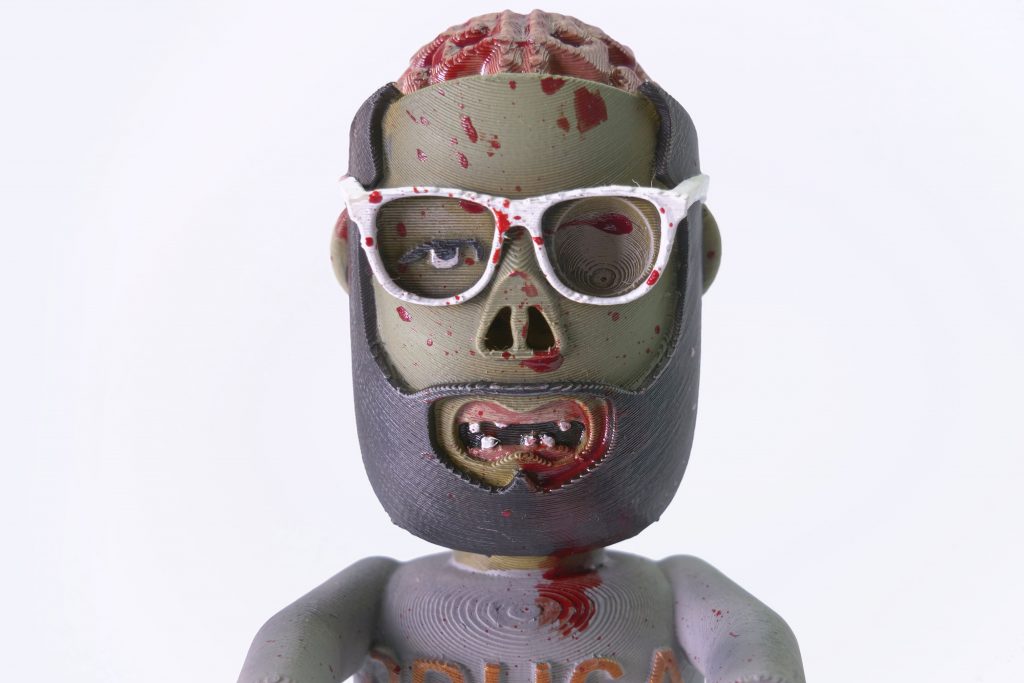
Zombie Jo is obviously our own creation, and the model can be printed in both single-color and Multi-Material modes. We recommend using a nice green filament for the face and hands to achieve that chic zombie look.
But if you don’t have the Multi-Material Upgrade 2.0 (yet), you can still print the figure with a single filament and paint it afterward. The shapes are quite simple, so you don’t need to spend much time with post-processing, such as sanding. Just spray the printed model with a primer color, let it dry and then use acrylic colors (we have used Citadel colors) to finish the job. And for god’s sake, keep him away from your precious filaments! 🙂
Download link: Zombie Jo MMU version | G-code (0.2mm, PLA, MK3 MMU2) | Zombie Jo Single Color | G-code (0.15mm, PLA, MK3) |
Halloween Pumpkin Spider Transformer
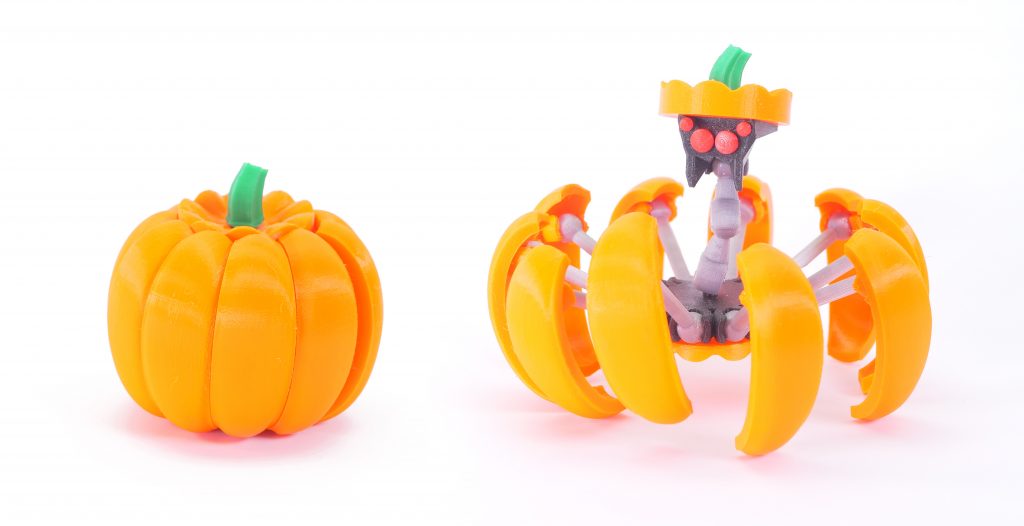
Spider-Man, Spider-Man, does whatever a pumpkin can… Featured on the Thingiverse.com front page, this model perfectly demonstrates how much fun you can have with designing models for 3D printing. New Zealand-based maker William Bruning designed this model really well – you don’t need any sort of special tools, soldering, metal parts or anything like that to assemble this pumpkin-turned-spider. A simple superglue and a lack of arachnophobia is enough.
The model consists of seven different parts, and the creator recommends using 0.15mm layer height and a 10% infill for slicing. The assembly process is described on Thingiverse and it pretty much consists of gluing two parts together and then pushing the leg ball joints into the chest sockets. It’s built around a great idea, it’s well-designed, imaginative and easy to print!
Plus, you can also play around with the scale. We decided to print a cute little pumpkin-spider, but you can easily scale the parts in Slic3r using the “S” key and print a pretty big eight-legged crawler. And, of course, all parts are separated, so you can print each set with a different filament to get that nice orange-black combo.
Download link: Halloween Pumpkin Spider Transformer on Thingiverse
Glow in the dark prints
We feel that models printed with glow-in-the-dark filaments aren’t as common as they deserve. They look so cool! Sure, printing from GITD filaments requires a hardened steel nozzle. However, thanks to our article and video, changing the nozzle shouldn’t take you more than just a few minutes. You can order the hardened steel nozzle from our e-shop and it’s definitely not a one-trick pony. It comes in handy when you want to print with highly abrasive materials such as ColorFabb XT CF20, Bronzefill, Brassfill, Woodfill and others.
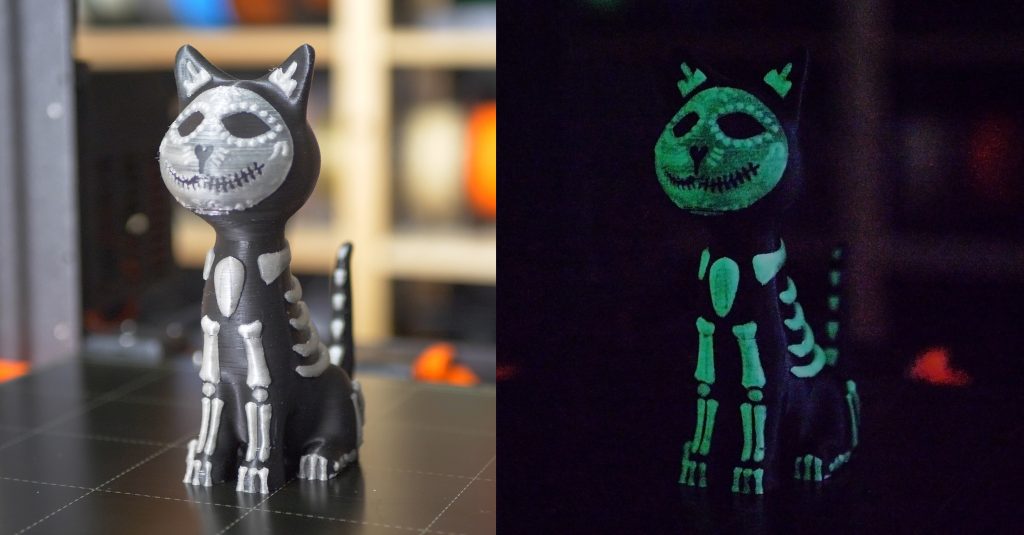
The glow in the dark filament is the perfect choice for Halloween. Print all sorts of ghosts, spiders, skulls and other creepy things from the lexicon of terror! You can even combine the GITD filament with standard PLA materials, so if you have our Multi Material Upgrade 2.0, you can easily print more complex objects, such as this lovely Halloween cat.
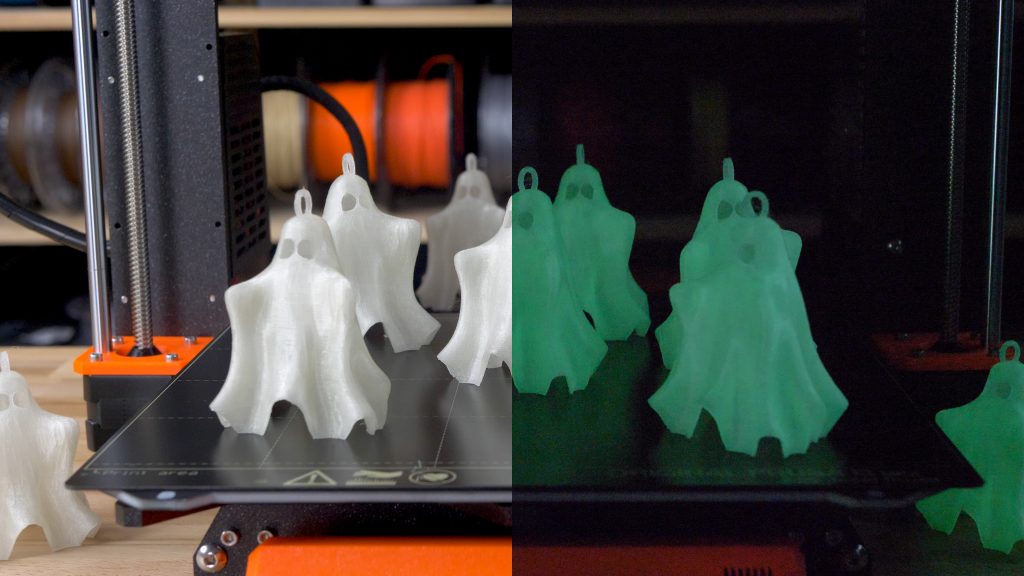
With a single-material printer, you can still print a ton of various models. We recommend these ghosts, since they are pretty easy to print, so you can create a whole lot of them before Halloween! It’s good to add a brim, though, to increase the contact with the print bed.
Download links: Sugar Cat on Thingiverse and Cute Hug Me Ghosts on Thingiverse | Sugar Cat G-code (0.2mm, PLA, MK3 MMU2) | Ghost G-Code (0.2mm, PLA, MK3)
Crow with Glowing Eyes
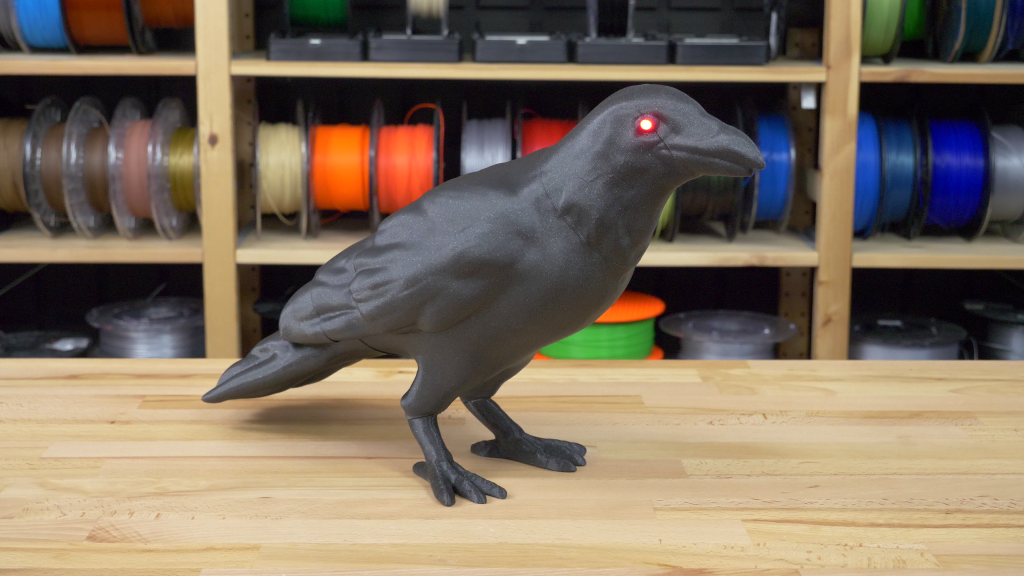
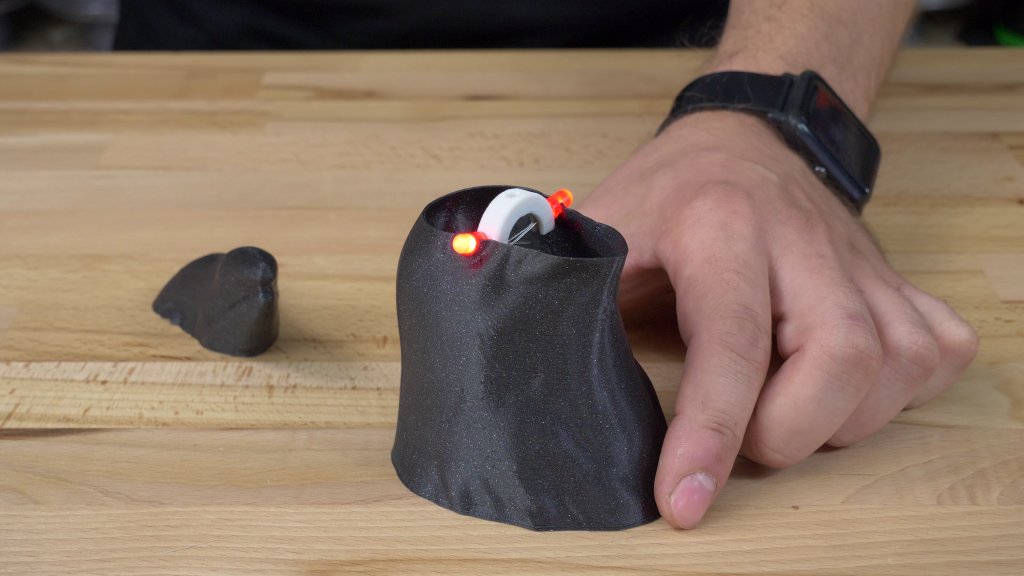
This Halloween, you could become responsible for a murder… a murder of crows! This model is free to download from Thingiverse and it has one really cool feature: you can drill two holes in place of the eyes to create little holes for LED lights.
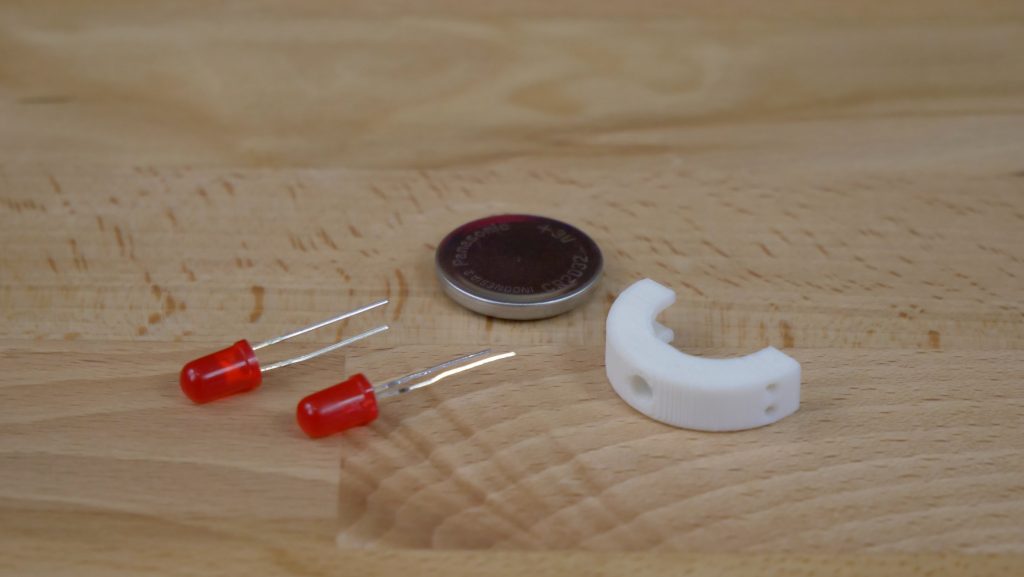
But the model description does not provide any instructions on how to actually get the LEDs up and running. We are here with the solution! We have one incredibly easy and cheap way how to light up two LEDs using our little clasp – no soldering required. Just buy a CR2032 lithium button cell battery (3V) and two red LEDs (5mm diameter). Insert the battery into the clasp and add both LEDs as shown in the picture below – and voilà! Evil red eyes!
The model itself can be printed with only two-perimeter walls, saving overall printing time.
So… how many of these can you fit on your porch? 😉
Download link: Halloween Crow with LED eyes (remix) on Thingiverse | G-Code (0.2mm, PLA, MK3)
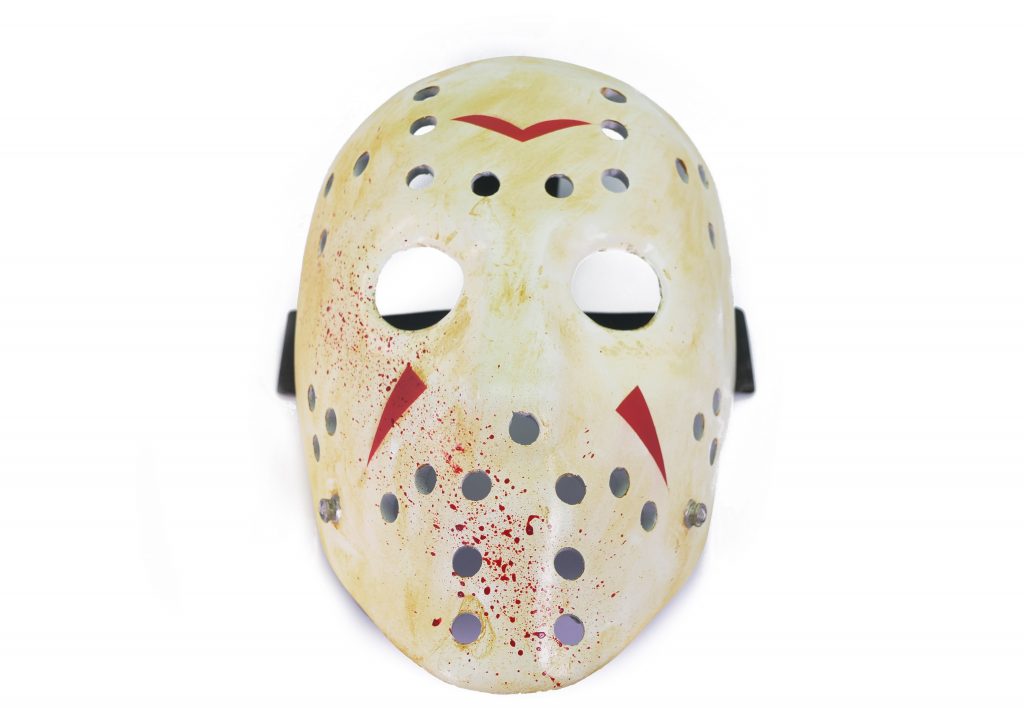
Jason Voorhees Mask
Fun fact: Did you know that the legendary horror antagonist Jason Voorhees didn’t wear the iconic hockey goalie mask in the first two movies? It appeared in the third Friday the 13th movie for the first time.
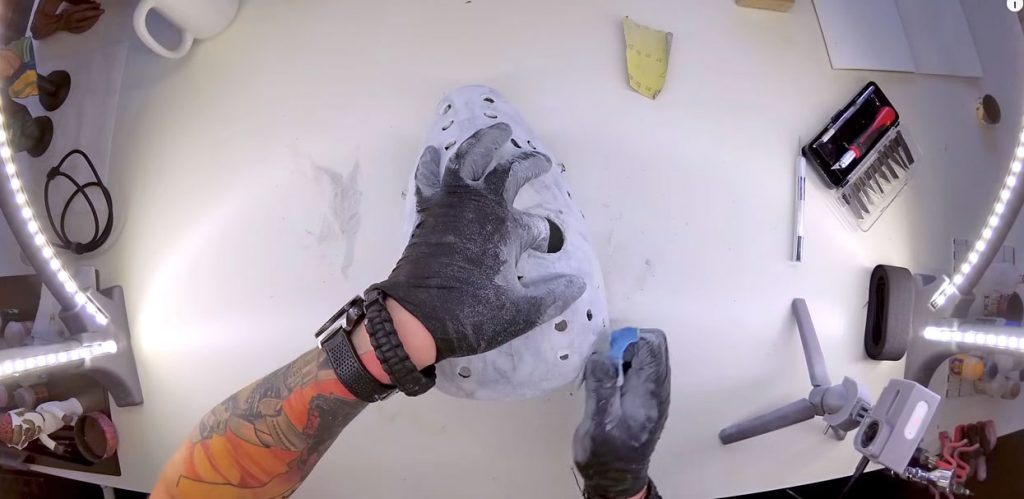
Anyway, we chose to include the mask not only because of its pop-cultural status but also because it’s really easy to make one with some very simple post-processing. The mask itself is cut into five parts for easier printing. Once it’s printed, use superglue to attach all pieces together. Then it’s all about automotive body filler and sandpaper. Cover the mask with a thin layer of putty (e.g. Evercoat) and then sand it down. Start with lower grit sanding paper (P40 – more rough) and make your way to finer sanding papers (P-240). If any inconsistencies show up, add some more putty/filler and sand it down again.
Next step: painting. Start with a primer spray paint. The filler will help you detect any gaps, visible layers, seams and other unwanted elements. Repeat the ‘filler-sandpaper’ procedure to get rid of those and make the surface nice and smooth. Once the filler is dry, take a generic white paint spray and apply the base color from a distance of about 25-30 cm (10-12 in.). Make sure the primer (usually grey) is no longer visible and the color across the surface is consistent. Let the paint dry and finally use a matte finish spray to preserve the color. Use blood red color to give it the final touch. Check out the video embedded at the beginning of this article to see the process.
This model comes with small protrusions that can be used to attach a piece of rubber band. By the way, don’t forget that you can scale down the model in Slic3r, so it fits your head perfectly.
Download link: Jason’s Mask on Thingiverse | G-Code (0.15mm, PLA, MK3)
Zombie hand
We usually include free models in our articles, but this zombie hand is just so awesome we had to mention it as well! And it doesn’t cost an arm and a leg either 🙂 It’s 2.99 USD on MyMiniFactory.
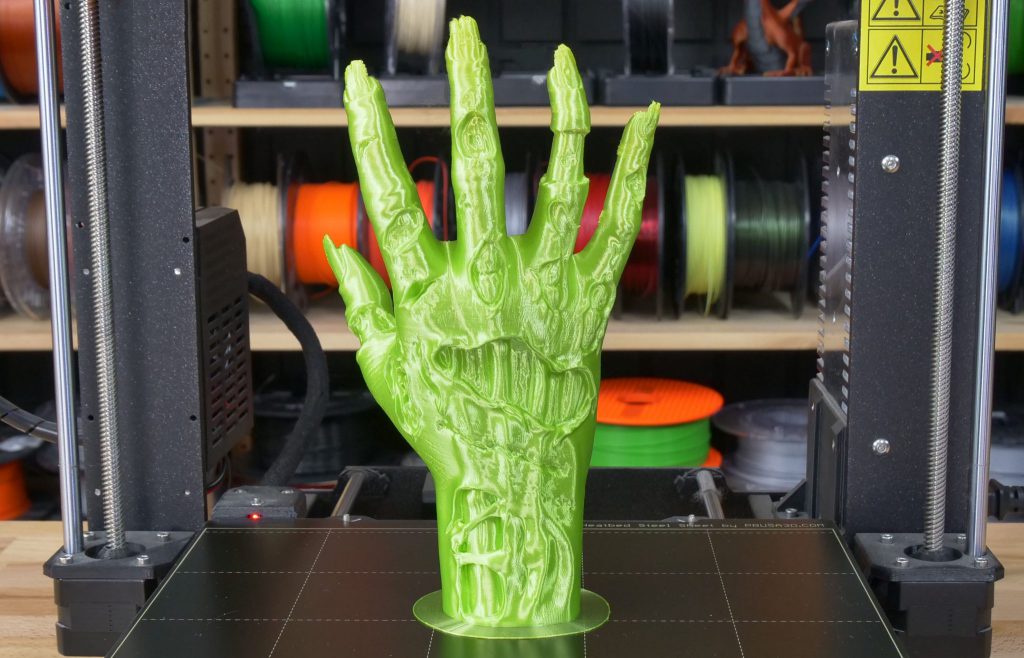
The amount of detail on this model is just astonishing. Plus, the whole thing is designed to be printed as a whole without any supports. Just buy the STL, scale it, slice it and print it!
In case you want to turn your flower beds into a full-scale burial ground with plenty of rotten hands sticking out, you can print the model with no infill and only two perimeter wall. That should save you some time, which is always… you know… handy.
Buy and download link: Zombie Hand on MyMiniFactory
Halloween drink coasters
We definitely don’t recommend eating or drinking from 3D printed models – at least not repeatedly, because tiny holes between layers accumulate bacteria easily. However, you can print some pretty nice accessories.
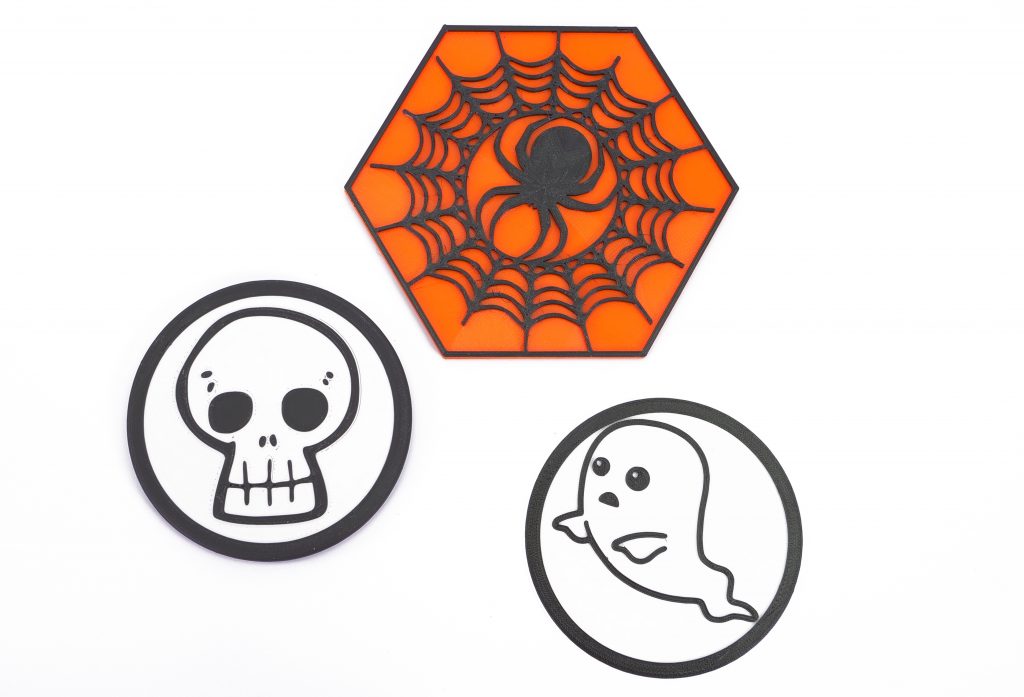
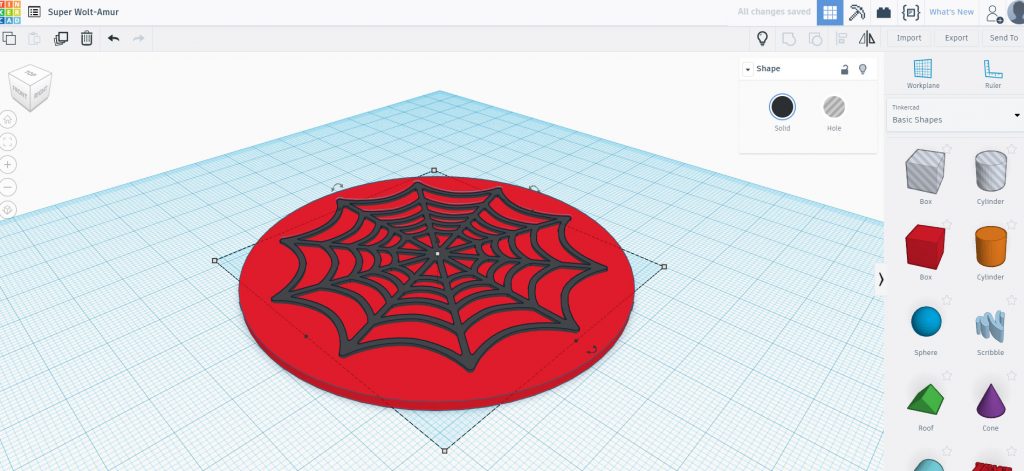
As an example, we’re offering our own selection of drink coasters with traditional Halloween motifs. These were created by our colleagues and they are available for download from Thingiverse and MyMiniFactory (links below). But it’s also incredibly easy to create your own for free!
Here’s how it works:
- Search for images in .SVG format – any simple shape on a white (or transparent) background should do the trick. You can search websites such as lovesvg.com or simply googling something like ‘spiderweb svg’. Once you find a nice looking SVG image, download it to your computer
- Go to www.tinkercad.com and create an account if you don’t have one already
- Create a new design
- Click the “Import” button in the upper right corner
- Select the downloaded .SVG file
- Once the file is imported, it will be automatically converted into a 3D model. You can use the scale gizmo to scale down the object (hold Shift to keep the aspect ratio)
- Create a Cylinder (use the menu on the right), increase the number of its sides to make it nice and round and then choose the desired dimensions
- Select the imported SVG shape and use the gizmo to move it on top of the cylinder
- Finally, click the “Export” button to download and .STL file, which is ready for slicing. You can adjust the final size in Slic3r using the scale tool.
Protip: Use our online Colorprint web app to create colorful coasters!
Download link: Spider Coaster on Thingiverse and Halloween Coasters on MyMiniFactory | Halloween Coasters G-Code (0.2mm, PLA, MK3, Colorprint)
Other Halloween props
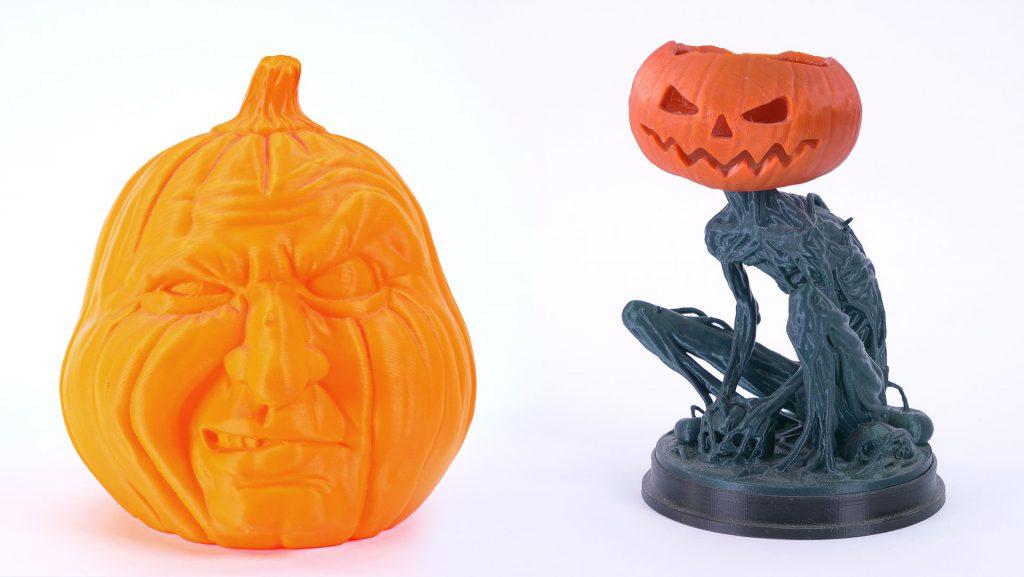
Thingiverse, MyMiniFactory and other websites are of course full of various Halloween-themed items, including some really good ones, such as the pumpkin monster or the grumpy pumpkin, which you can see in the photos below. What’s great about these models is that they are hollow. And that means you can use our battery clasp mentioned above to add some spooky light effects.
Download links: Pumpkin Monster on Pinshape and Grumpy Pumpkin on Thingiverse
Or if you don’t feel like decorating your house or your garden, you can stick to some nice little add-ons for your printer, such as the extruder rotation visualizer (read more about them here).
Download link: Halloween Extruder Visualizer on Thingiverse | G-Code (0.2mm, PLA, MK3) and Pumpkin Filament cleaner on Thingiverse
Did any of the selected models attract your interest? Or are you going to print something completely different? Let us know in the comments!
Happy Halloween!


Hey! it’s a nice post, the 3D print halloween the mask itself is cut into five parts for easier printing.