
Our customers love Prusament, so this is a good opportunity to tell you more about the Prusament spool design evolution. Also, we prepared 5 ideas on how to reuse the spools! Download the printed parts and start creating!
Have you found some unusual and interesting ideas on how to reuse empty spools? You will have a perfect chance to share them, because we will launch a design contest soon. So keep checking our usual social media channels, so you will learn how to submit your designs and win great prizes! More details below.
![]()
As you know, we started our own filament production. We wanted to have the whole manufacturing process under control, so we could achieve top production quality. If you have accidentally missed the launch last month, learn more in this article and watch the video!
Every new product has to have a good branding. What about the name, for example? To be honest, there wasn’t much pondering about it. PRUSAMENT was a clear choice from the very beginning 🙂
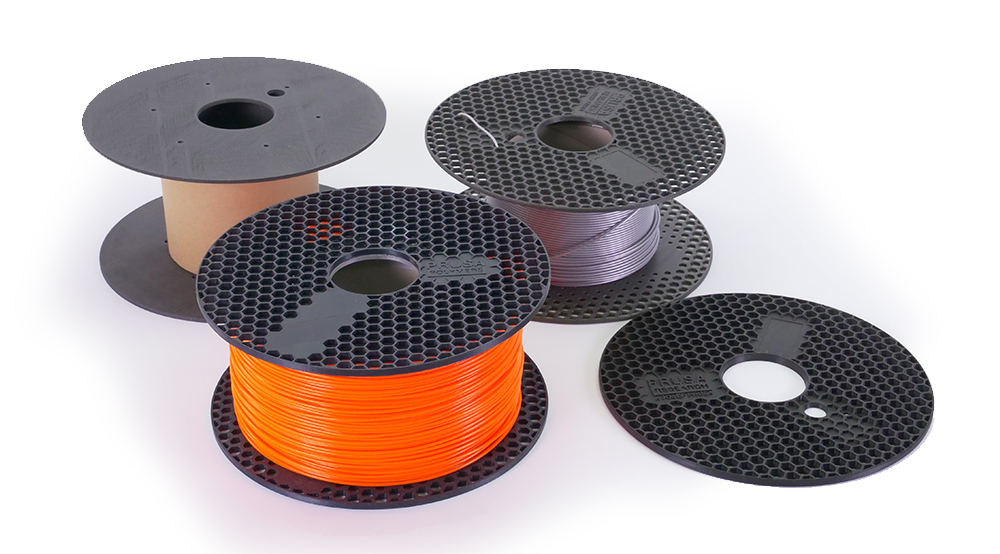
VARIATIONS
However, the design of the spool and its functionality was a much bigger challenge. How should a spool of premium-quality filament look? It should definitely be recognizable and have some space for the PRUSA logo 🙂 Plus, it should have some potential for future use. So, don’t throw empty spools away – they could be useful. We will give you advice on how to use your 3D printer to find a new use for them.
SPOOL DESIGN EVOLUTION
There were dozens of iterations, so let’s go only through the major milestones.
Cardboard
CARDBOARD SPOOL
The first attempt was to go fully ecological and make the whole spool from recycled cardboard. We made several prototypes and realized paper is not suitable at all. Paper just doesn’t meet our requirement for mechanical properties. Paper flanges (sides of the spool) can be easily bent, making further printing very complicated. Another problem is with storage. When paper spools are stacked on top of each other on a palette, the spools on the bottom suffer a lot. Spool components are stored separately to save space before being put together and reeled. However, the filament demands very low humidity and this is not quite achievable in our warehouse. (FYI: This problem is just with the semi-finished product. When assembled and reeled up, spools are immediately vacuumed to maintain filament quality). Paper flanges are not rigid enough. And we need a rigid material on the sides for future automatization as well. Bottom line: cardboard is not the way.
Master-spools
We are pretty sure you have heard about so-called master-spool. Basically, you have a spool body, which is dismantlable and can be refilled. This spool body can be 3D printed. The producer is shipping just the knot of the filament. It is a brilliant idea and we love it! We did some designs and tested it. But the results are not what we expected. The filament tied just with zip ties can get tangled easily. So when a user wants to install the filament onto the spool, the filament can jump out and end up in a tangled cluster. And that’s pretty much the end. We were trying to come up with some kind of design for a special box that would make the installation easier and more reliable. However, everything we came up with was complicated and hard to produce. Plus, the elemental idea of the master spool would disappear.

PERFECT WINDING
Coming to an unsuccessful print due to the tangled spool is one of the most frustrating moments of a 3D printing enthusiast. And we just love our perfect winding! So, for now, we decided to mothball the master spool design.
Final form
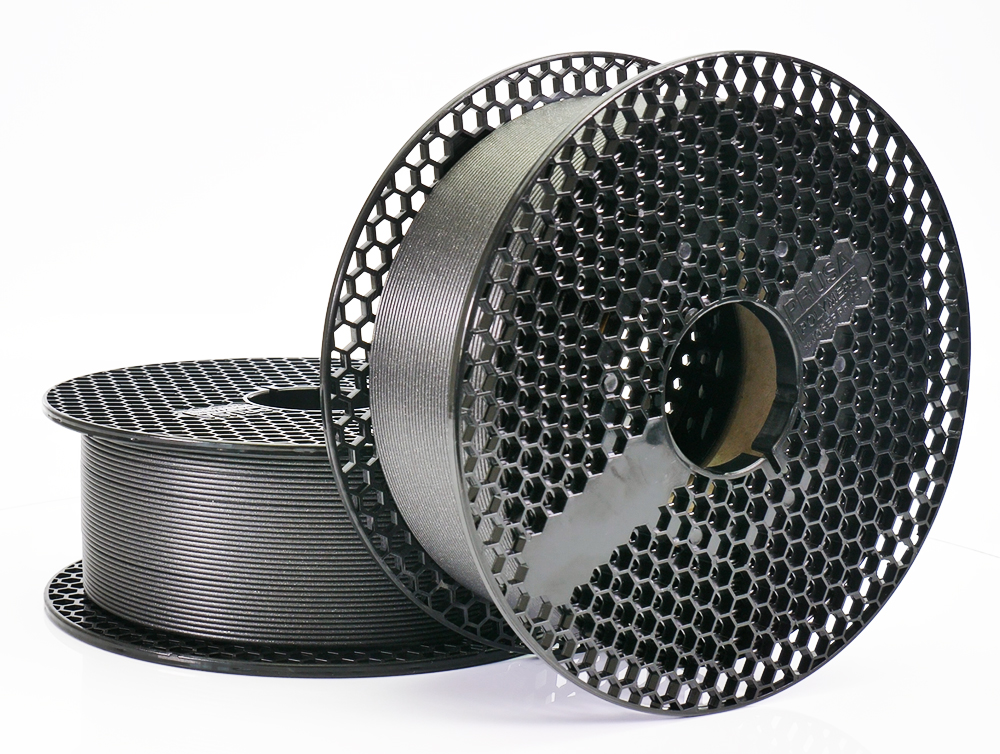
FINAL DESIGN
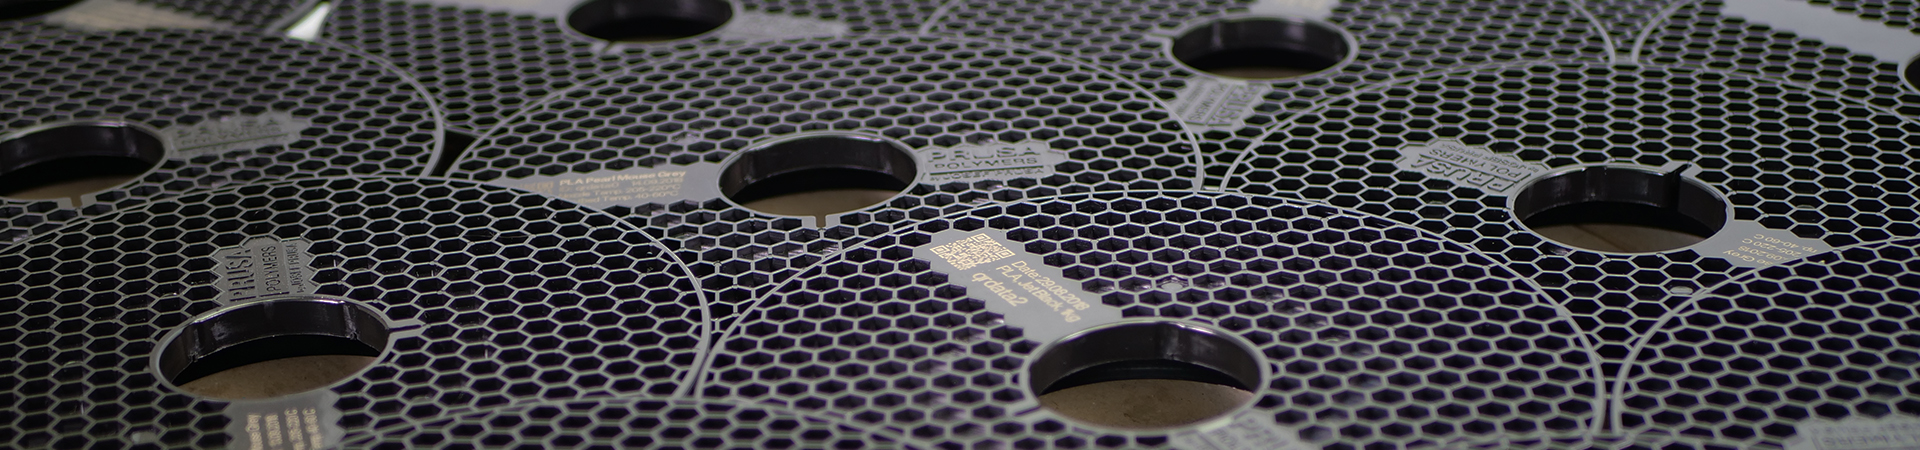
Finally, we ended up with classic plastics flanges. However, we managed to replace the central tube with a paper one. Our spool is detachable and single parts can be recycled separately. 45% less plastics than in the previous classic version are used for the body, thanks to the hollowed flanges and mostly the paper central tube. We wanted to give our spool a unique and recognizable look so we decided to go for a hexagon pattern. It turned out, the complex hexagon pattern was not the easiest shape for the injection molding, but we managed it. A couple of changes were made due to the preparation for the future automatization, the label placing, the assembling…
That brings us to the final design which you are familiar with. The flanges are injection molded. Each frontage weights 81.5 g. The central tube is made of 3mm thick cardboard with the external diameter of 100 mm, the height of 65mm and the weight of 39,5 g.

HEXAGON PATTERN
Hexagon pattern is useful for many things. First of all, you can pull the filament through almost any hole when securing the spool. Plus, it’s an awesome base for future reuse and redesign – a regular pattern is exactly what you want! Here are some ideas on how to give an empty spool a new life.
DID YOU KNOW?
The hexagon pattern is a reference to the infill highly used back in the days. So-called “HONEYCOMB” infill had this hexagon pattern look.
You can find this graphic on many items linked to 3D printing.
Have you seen Josef’s tattoo? 🙂
IDEAS FOR REUSE
TIP 1 – WINDMILL
WHAT YOU WILL NEED:
• 3D printed parts – DOWNLOAD THEM
• Prusament spool flanges – 2×
• Smooth rod 8mm/370mm – 2× (actually the same type/length used in our printers)
• Radial bearing (ø 22mm/ ø 8mm) – 2× (the ones we are using for MK2 extruder idler)
• ø 3mm screws in lengths: 30mm – 2×; 20mm – 4×; 10mm (flat head) – 2×;
• Square nuts for 3mm screw – 8×
• Super Glue
First, 3D print the files linked above. We printed those from Prusament PLA Galaxy Black. But if you plan to place the windmill outside, go for PET or ABS, because PLA can’t resist high temperatures, especially black color – it absorbs almost all of the sun rays energy. You will need 12× blades, 1× base, 1× shaft parts, 1× tail & tail grip, clips (1× A; 6× B; 5× C) and 1× nose (only this one needs supports the rest in printable without supports. There is no special printing setting needed, just go with the default settings.
 When printed parts are ready, you can start assembling. Take one spool flange and push it onto the base and insert the smooth rod. Place the joint on the opposite end of the rod and slide the second smooth rod perpendicularly in.
Insert nuts into the holes and secure the rod with screws. Take the tail and slide it into the tail grip, secure it with screws and install it on the longer end of the horizontal rod. Secure the whole tail as well. Take the second spool flange and prepare the clips. Click the clips onto the spool as shown in the pictures and insert the blades in. Use a super glue if needed. The last thing to do is to assemble the shaft. It’s important to secure the 3D printed ring between the gears – it will protect the wheel from sliding off. And do not forget to use the screws with the flat head for securing it, as it needs to rotate freely inside the shaft cover. 
The windmill is ready! You can also consider linking it to a motor using a belt and turning it into a ventilator for hot Summer days 🙂
TIP 2 – 3D ZOETROPE
A zoetrope is one of several pre-film animation devices that produces the illusion of motion. This one is 3D!
WHAT YOU WILL NEED:
• 3D printed parts – DOWNLOAD THEM
• Prusament spool flanges – 1×
• Smooth rod 8mm/70mm – 1× (exactly the one we are using for printer axis)
• Radial bearing (ø 22mm/ ø 8mm) – 2× (the ones we are using for MK2 extruder idler)
• Super Glue
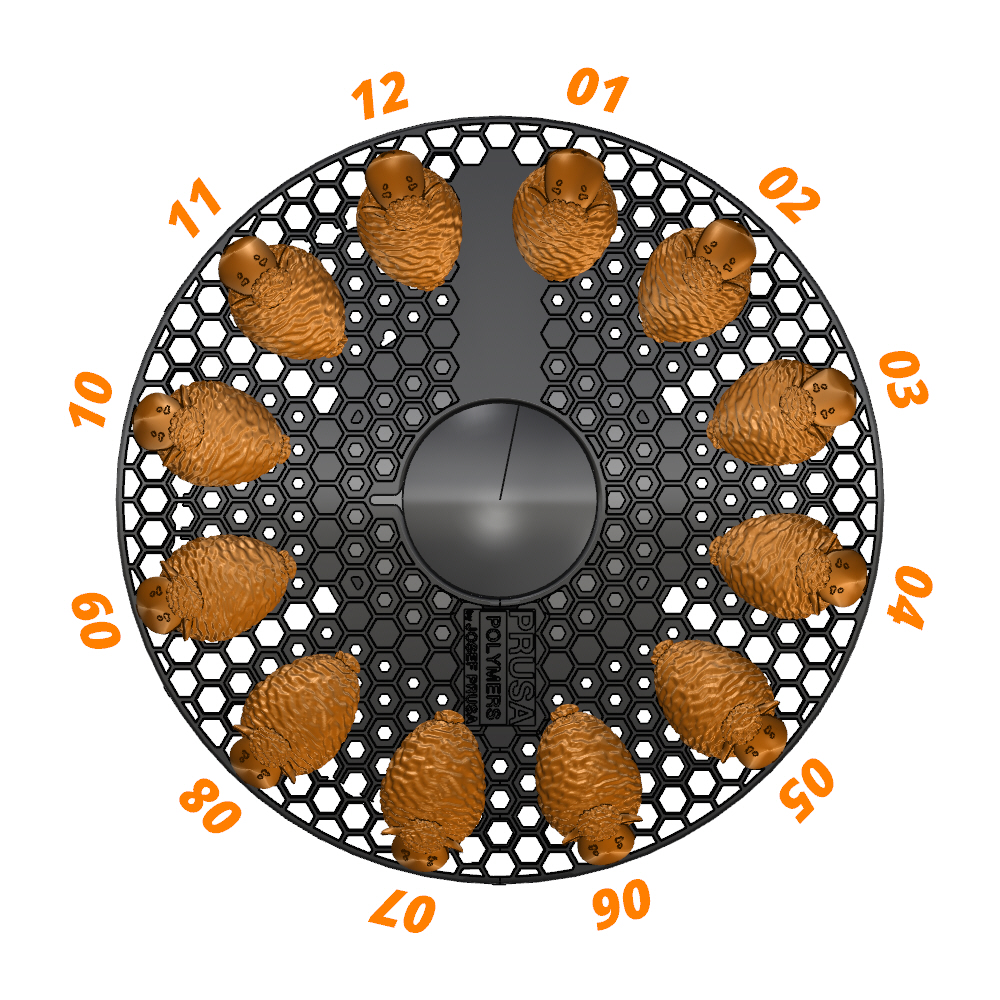 The assembly is easy, there is not much to describe. You need to 3D print the files. Add supports when printing the sheep.
Later click the sheep on the spool frontage, use super glue if needed. Remember to place them there at the exact positions as shown in the picture, otherwise, the hexagon pins will not match the hexagonal pattern. Insert a bearing into the bottom and top part and slide both parts onto the rod. Push the spool with the sheep on the top. And that’s it!
Now comes the harder part – the zoetrope effect can be recorded only when your shutter speed matches the spinning speed. To test it, just start recording and spin the zoetrope with hand. As it slows down, you will experience the effect probably just for a second. But it looks amazing nevertheless. You can also add a stepper motor and a simple gear mechanism to achieve a constant speed matched to the camera shutter speed.

TIP 3 – SPIROGRAPH
WHAT YOU WILL NEED:
• 3D printed parts – DOWNLOAD THEM
• Prusament spool flanges – 1×
• ø 3mm screws 20mm – 7×
• Square nuts for 3mm screw – 7×
• A pen…
First, 3D print the files linked above. There are no special requirements for the printing nor the assembling. The inner circle just clicks into the spool. Then put together the outer circle and secure it with screws. Just be sure you are putting matching segments together, they are marked with 1-5 dots. Then choose any hexagonal hole, put a marker in and start moving it in circular motion. You can combine several ornaments just by switching the holes.

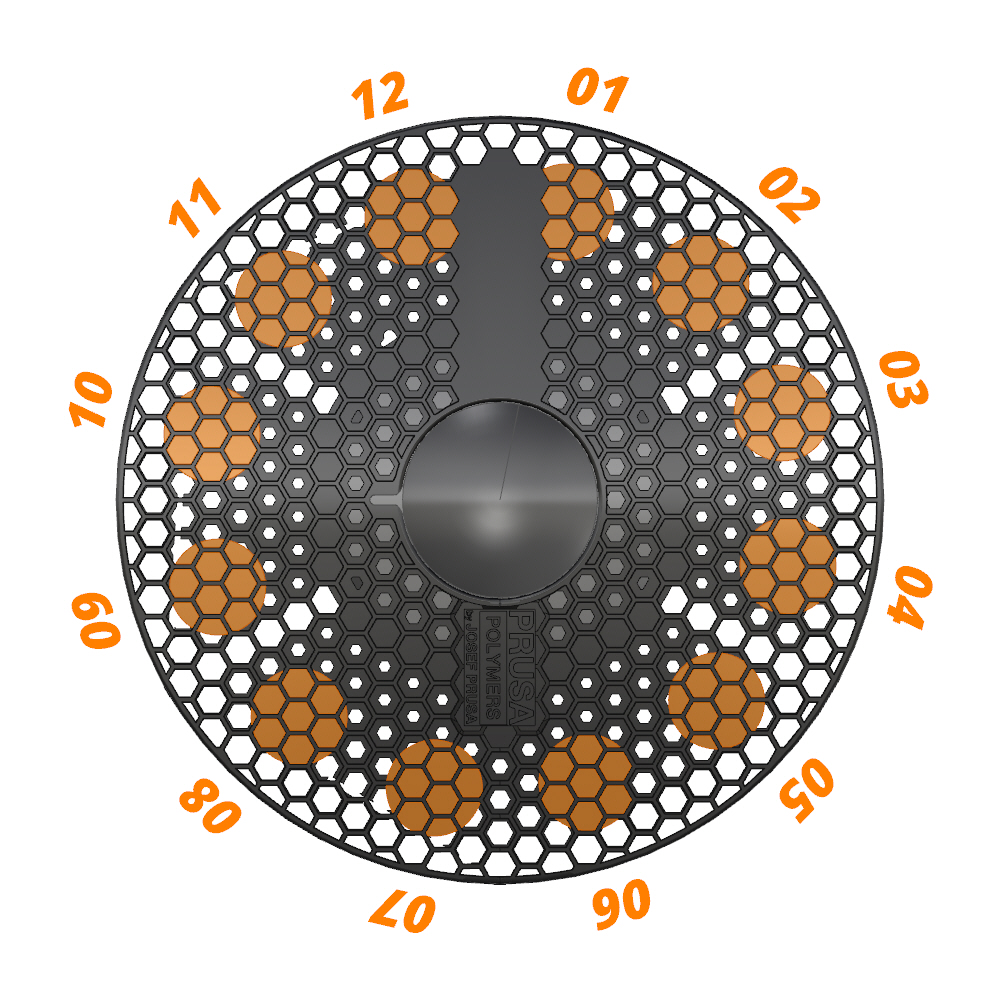
TIP 4 – CHANDELIER

WHAT YOU WILL NEED:
• 3D printed parts – DOWNLOAD THEM
• Prusament spool paper centers – 19×
• ø 3mm screw 10mm – 1×
• Square nuts for 3mm screw – 1×
• Cable with a switch, a light bulb socket, a light bulb, outlet plug
• Hot glue gun

Print the parts and warm up the hot glue gun.
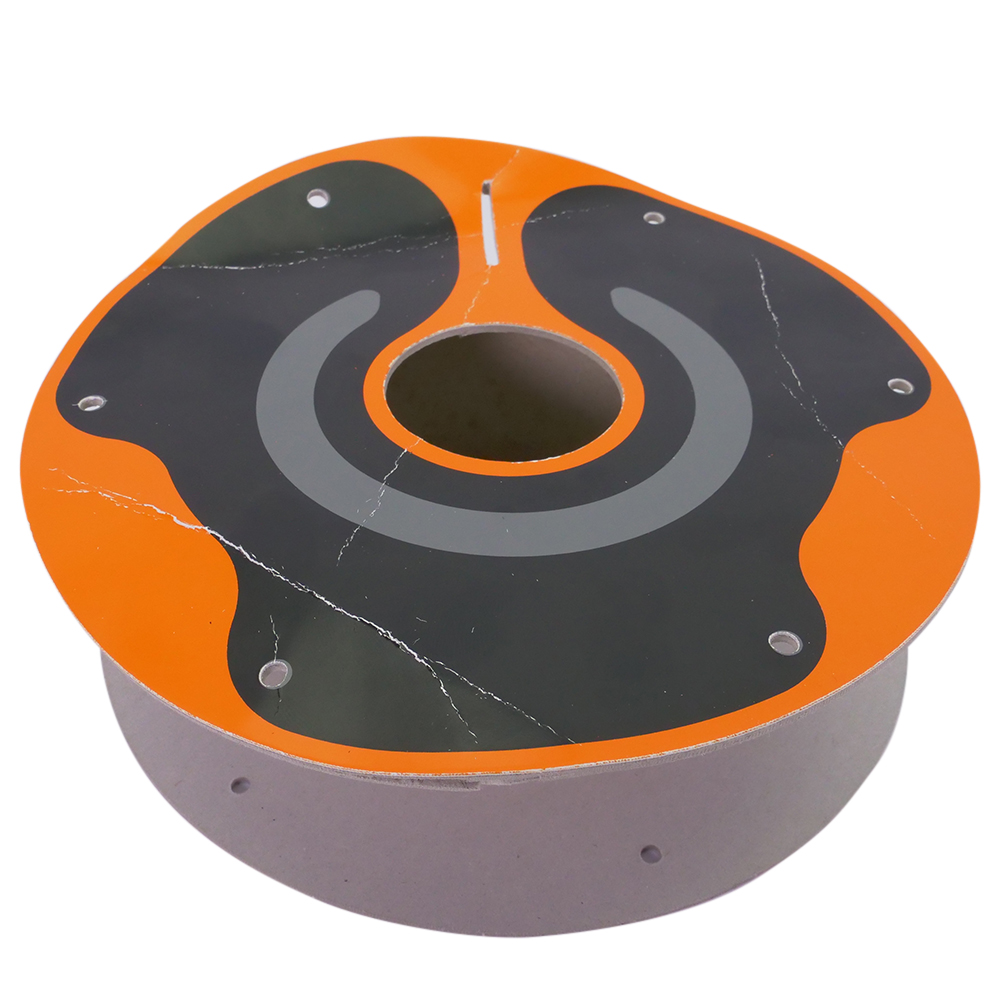
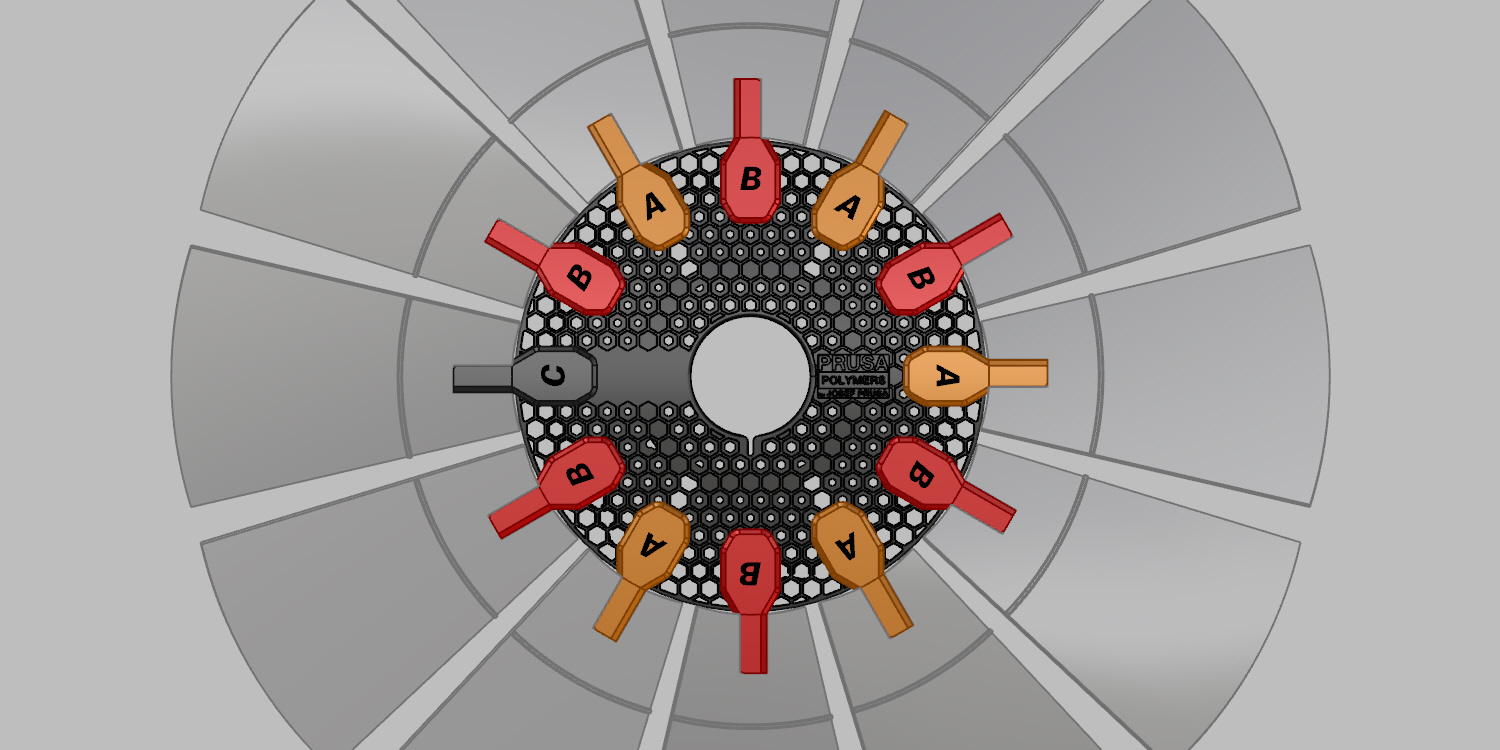
First, you will need the R1 parts (they have the middle partition, marked with orange in the illustration). The sides with one dot have to be inside the first tube (the first row). Place them around the tube in 60 degrees steps and fix them in place with a hot glue gun. Next step is to glue another 6 paper tubes (the second row) around the central one.
These 6 tubes (the second row) are vertically secured with R2 parts (the green ones). These have symmetrical sides, so there are no special requirements for the position.

Next step is to place R3 parts (blue). There are always two of them in each tube (of the second row). R3 parts have on one side 2 dots. The side with the dots must be inside the tube (the second row). Then add another 6 tubes (which will be creating the third row).

Then you have to place the R4 parts (the red ones). There are always two of them in each tube (of the
third row). R4 parts have 3 dots on the side. The side with the dots must be inside the tube (of the third row). Parts are not symmetrical, they are sloped on one side. The lower part directs upwards. Finally, you can add the last fourth row of 6 tubes. The body is finished.

The next step is to prepare the wire and the bulb. The choice of the switch, the light bulb socket, the light bulb, and the outlet plug is up to you, depending on your country system. When installing the cable through the top part, remember to leave a couple of centimeters there, so the bulb socket is NOT directly under the 3D printed part. If you place it too close, the plastic part could be easily damaged/destroyed because of the heat. Secure the wire with a screw. Do not forget to protect the cable with 3D printed cable protector. Pres the top element into the top tube. Use glue if needed. 
TIP 5 – CONTAINERS

You can easily turn the paper centers into a handy container for accessories, pens, jewelry or even a money box!
WHAT YOU WILL NEED:
• 3D printed parts – DOWNLOAD THEM
• Prusament spool paper center
3D printing is easy and quick, and so is the assembly. Use the piece part to connect more paper tubes together into a higher container.
DESIGN CONTEST
We will publish the contest once we tweak the last few things. And we also want to wait a bit more until there are more Prusament spools in the world. However, you can start working on your ideas right now. Here is a vector PDF with the spool hexagonal pattern, so you can easily incorporate it into your design. You can order Prusament here.
When disassembling the spool keep in mind not to use to much force. You have to pull it apart gradually.
Thank you for reading the article. If you have any questions or tips, let us know in the comments. Feel free to experiment and try different designs – and stay tuned! The design contest is coming soon! Right now, I can promise you some nice prizes like the Original Prusa i3 MK3 3D printer and also unique experimental Prusament colors, which are not on sale!
I dont have a Prusament Spool yet. But I would like to build the Zoetrope. Is there an stl file of the side of the spool, so I can build the very cool zoetrope? Pleeeeeeeaaaaase…
Thank you.
Michael
+1 for me – found Zoetrope on thingiverse, printed everything and only then realized the platform is missing.
STL would be great as everyone could then print the platform, or is there anyone willing to give/sell empty spool in Prague? Thanks 🙂
Why not combine the Masterspool system with paper flanges? There is a Masterspool adapter for Proto-pasta paper spools to enhance their mechanical properties for example.
If you do something similar you can still go “fully ecological”. Just let something Masterspool like (reusable plastic flanges) cover the ecological and cheap paper flanges.
With suitable cutouts, you can still show the spool description and the QR code. With a cardboard core and paper flanges, you would also compensate for the disadvantages of ordinary refills.
Nice idea! Just ship it in a cardboard spool then at home you add the plastic to strengthen it! 😀
Some excellent ideas there
As you craft the design contest…keep in mind that Matterhackers, RigidInk, Filabot, etc. (just “google it”) have solicited / posted ideas too. I’ll be submitting my useful and practical idea! Looking forward to more specifications on the spool to help the design.
Will the spool material be highly desirable recyclable plastic — be stamped with appropriate plastic type? Some plastics are valuable, others get tossed in recycle plants’ trash bins. Could the flanges be collected/stored and then — when you have 50 or so — box them up for shipping and reuse by PRUSA? (Cardboard is easily recycled most places, plastics…not so much.)
I also have about 5 MasterSpools (filled with DasFilament) in use – no problem. Only after retying them with some Zipties and removing them it can get problematic.
Love the filament but the spools are a pain because the centre hole is about 1mm smaller than standard and it isn’t round, it has slots, etc, so I can’t run it on bearings without adding a hub or an inner sleeve.
I use some filament from Filamentive in the UK. All their 1Kg spools are 100% cardboard, and are quite robust. At the end of the day you can only make use of so many plastic spools, then they will get thrown away, so if that can be avoided entirely it’s better for everyone.
Witam, chętnie odkupię puste szpule
I wonder if Prusa could accept these empty spools back by creating a recycling stations around the world to reuse them, because we alone could end up using 200 spools per year, I couldnt imagine all this spool plastic being left alone in the environment.
Great news. Less damage to the environment. I’d suggest the basic colours like White and Grey as they are the most common I’d guess.
My first thought for the next PLA Refill choice is Lipstick Red PLA
The eye exam is a routine part of many people’s lives. The eye exam is performed for many reasons, but most commonly it’s done when you have an eye problem like glaucoma or cataracts. Additionally, eye exam plainview can help detect diseases early and prevent them from developing into something worse. It can also tell you if you are at risk for developing certain types of blindness. Tests used to diagnose vision problems include computerized tomography (CT) scans and magnetic resonance imaging (MRI). These tests use X-rays and radio waves to create detailed images of the inside of the body.
Je vais faire quelques boites mais l’imagination me manque pour écouler tout mon stock de bobines vides…. Est ce qu’un concours ne permettrait pas de trouver des nouvelles idées de recyclage ?
It would be fantastic if Prusa could publish STL or STP files of their Prusament spool. I have an idea to design a container using old spool parts that can be used to dry silica gel in a filament dryer, such as the Sunlu S2 or S4. By utilizing the pattern of the outer spool, this design would save a lot of filament. You would only need to print a permeable outer ring, and the project would be complete.