As promised, we have prepared another article about more-or-less common 3D printing errors. In the first part, we were dealing mainly with the first layer and the ways how to make it just right. This time, we will take a closer look at difficulties related to filament extrusion and how they affect the quality of your prints. Just like last time, it’s pretty easy to solve them – or to avoid them completely.
Filament grinding
Starting with the easiest one to spot. Filament grinding, which is accompanied by a “clicking” sound coming from the extruder, usually happens when the extruder gears are unable to push the filament further towards the nozzle. Over time, the gears grind away the filament, until they can’t grab it anymore.
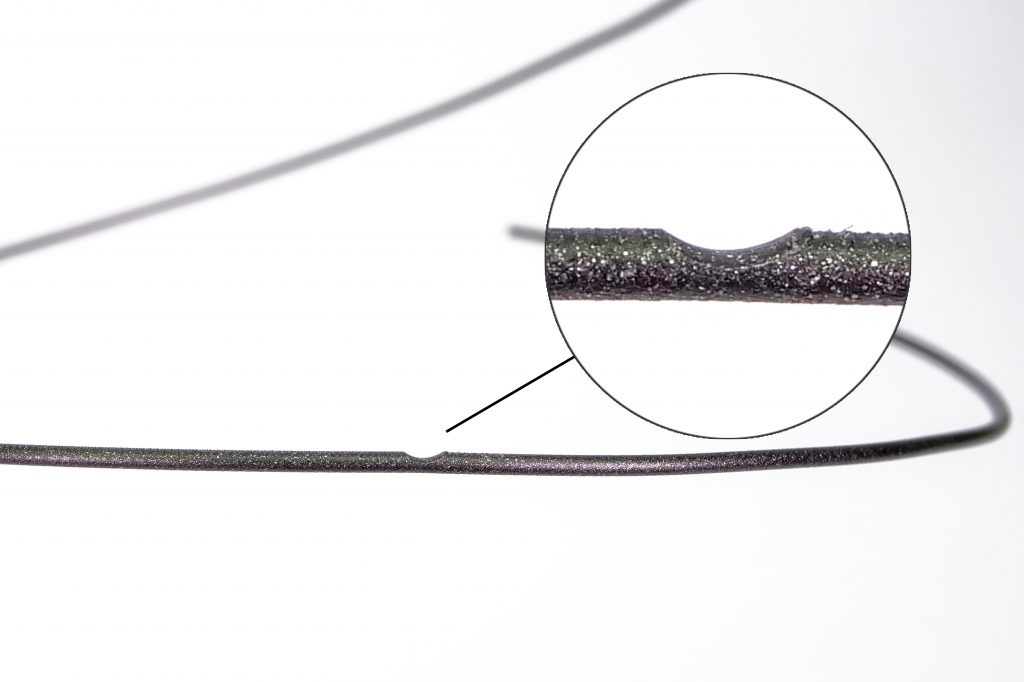
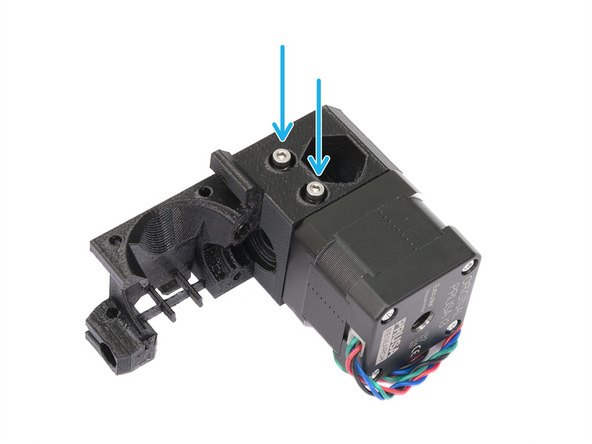
In order to remove the filament from the extruder, open the idler door located on the right side of the extruder by unscrewing two bolts on the opposite (left) side. Now you are able to manually remove the filament using the supplied pliers.
In general, this is hardware problem caused by the following:
- Overtightened extruder idler – Make sure that your extruder idler is properly tightened. If the extruder idler screws are overtightened, the gears will not push the filament properly. Check our video to learn how to adjust the extruder idler door correctly.
- Dirty extruder gears – Make sure that your extruder gears are clear of any leftover plastic. You can clear the plastic with a sharp corner of pliers or with a durable pin.
- Jammed PTFE tube – While checking the extruder gears, take a look at the PTFE tubes as well and make sure there is no debris in them that would prevent the filament from being loaded properly. To inspect the PTFE tubes, simply open the extruder idler.
- Clogged nozzle – If none of the above solved this problem, you might have a clogged nozzle. Check the last chapter to learn how to fix it.
Not extruding at the start
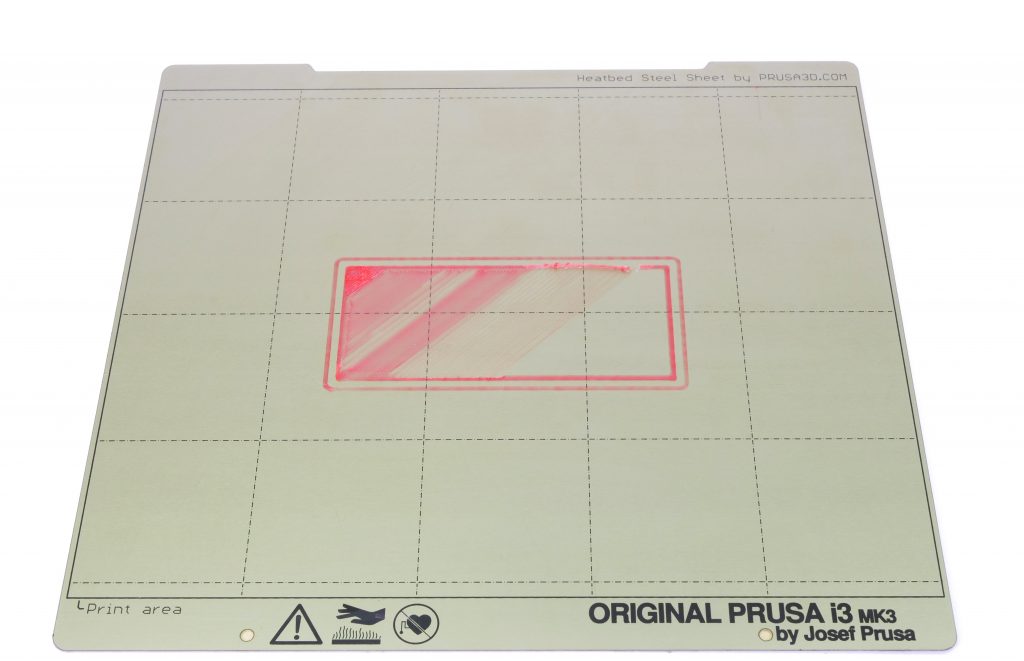
The first layer is the crucial one. Without the first layer properly laid down, it is virtually impossible to print anything. That’s why we have thoroughly described what to do when the first layer doesn’t stick to the heatbed in the previous article. But what should you do when the first layer does not appear at all?
If your printer does not print the first layer at all, then check the following:
- Proper material/temperature settings – Always make sure to use the correct printing temperature for individual materials. Don’t print PETG with PLA settings!
- Filament is loaded properly – Check if the filament was successfully loaded. If it isn’t loaded properly, you will be able to pull it out of the extruder with your hand without any force.
- The nozzle is touching the heatbed – Double check whether your printer’s nozzle isn’t too close to the heatbed or even touching it. If it is, re-run the First layer calibration.
- Over-tightened idler – This is usually given away by a clicking sound as described in the previous chapter. However, you can double-check the extruder idler even when there’s no unusual noise coming from the extruder gears.
- Clogged nozzle – If none of the above solved this problem, check out the last chapter about a clogged nozzle.
Under-extrusion
You can recognize under-extrusion when there is material missing in your print’s layers. Printed objects with under-extruded layers tend to be fragile and will usually break apart in the under-extruded layer area. When the under-extrusion is as severe as shown in the picture, it’s usually caused by a hardware problem. Software adjustments mostly work only as a hotfix and they might cause further problems in the future. However, if you have been tweaking the slicing settings yourself, then we would highly suggest doublechecking them because that might be the actual cause of the problem.
Here are the most common causes of under-extrusion:
- Loose extruder gears – Make sure that your printer’s extruder gears are properly tightened. They must be tight enough to grab the filament and push it into the extruder, but do not unnecessarily overtighten them.
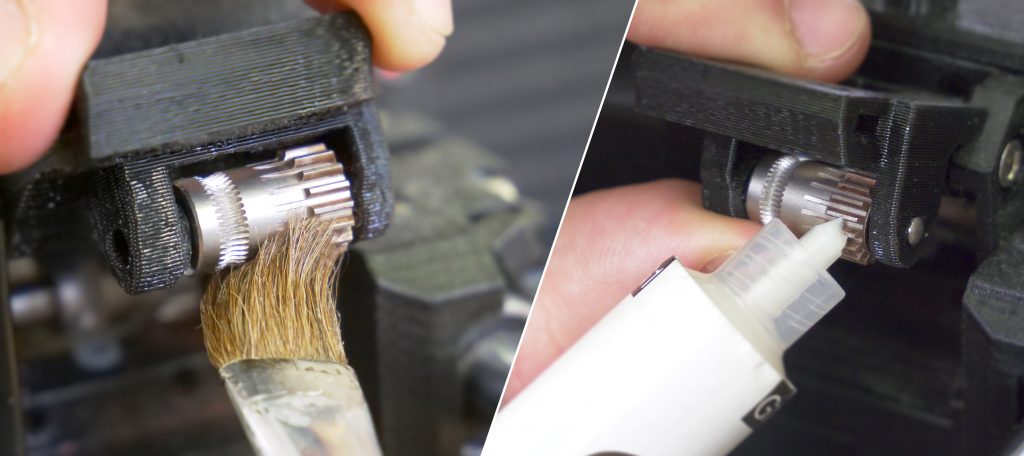
- Dirty extruder gears – Always check that your extruder gears are clear of any leftover plastic. The extruder gears can also accumulate a layer of rust over time. Use lithium-based grease to clean them, but apply it only to the toothed part as seen in the right photo below! If you apply it to the whole gear, it will be unable to grab filament properly!
- Bad filament – If the filament’s diameter is larger than the standard tolerance, it might be the source of the problem. You can use a caliper to check the diameter (+/- 0,05 mm is acceptable, but not perfect). Also, try using a different filament in case you can’t properly inspect the current one. See if the problem persists with a different spool.
- Extrusion multiplier – One of the possible solutions is to tune the extrusion multiplier. However, before you do that, first make sure that hardware is not the cause of the issue. Increasing the multiplier will increase the flow of the filament into the extruder, decreasing will have the opposite effect.
This should cover the most common problems related to under-extrusion. But what about the over-extrusion? Frankly speaking, it’s quite rare. Over-extrusion happens almost exclusively when you used incorrect printing settings for extrusion width, perimeters etc. A newer version of our Slic3r PE won’t allow it to happen. We recommend to always use the latest version of our Slic3r.
Stopped extrusion mid-printing
A problem with extrusion can rarely happen mid-print without any previous warning signs. This can result in a missed layer or the extrusion can even stop completely. There might be several causes, although low-quality filament is often the main issue.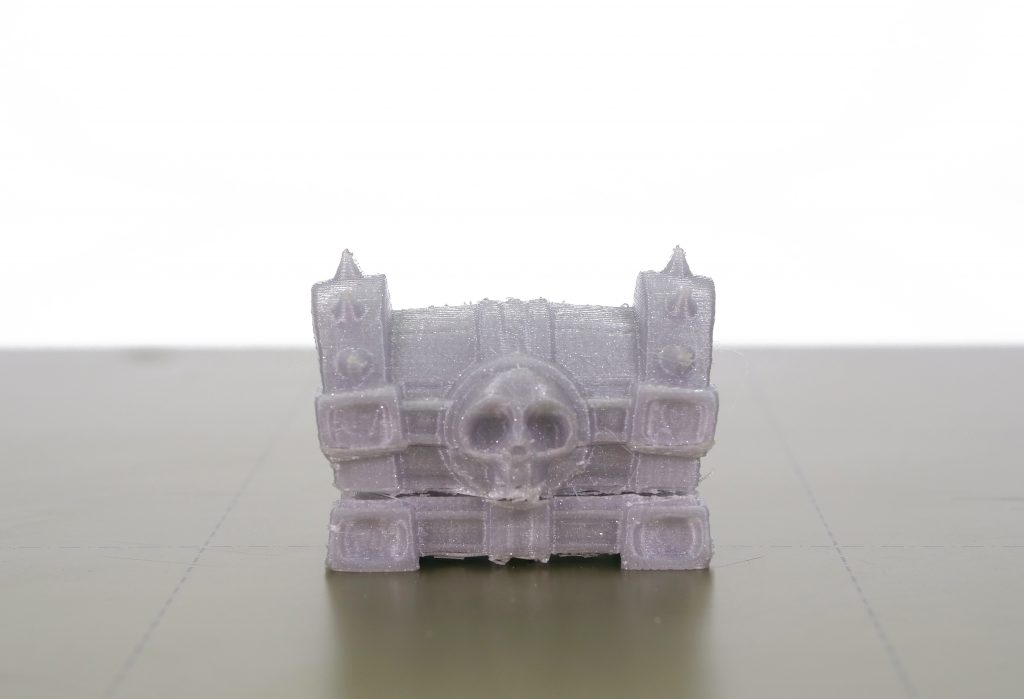
What causes the printer to stop extruding mid-printing:
- Low-quality filament – certain low-quality filaments are the most common cause of skipped layers or even a clogged nozzle. If you keep running into trouble with extrusion, try a different filament.
- Filament runs out – The easiest one to spot, you simply ran out of filament. Users of Original Prusa i3 MK3 shouldn’t encounter this issue since the filament sensor will pause the print when this happens.
- Errors in the object’s geometry – Always check the generated G-code in the Preview of our Slic3r PE. In case you find any gaps or broken geometry, you can either repair the STL object yourself or you can use one of our previous guides where we show How to repair corrupted 3D objects. New version of Slic3r can repair a broken STL model automatically, try right-clicking the object and selecting Fix STL through Netfabb.
- Heatwave – Ambient temperatures play a huge role in 3D printing. In case your region is currently experiencing a heatwave, try to maintain the surrounding temperature for your printers below 27C.
Object warping
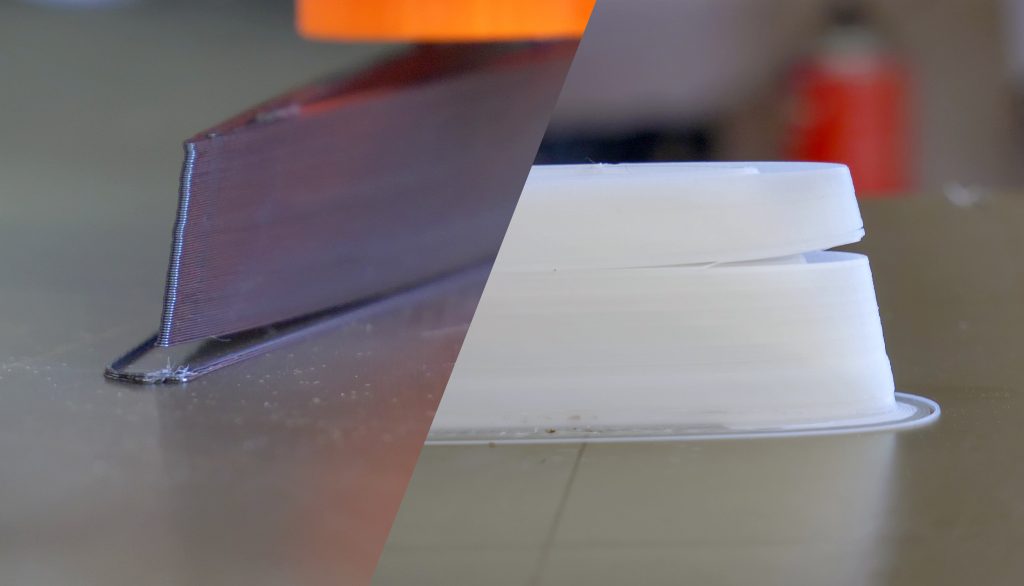
When printing large objects, you can sometimes run into an issue with the corners of the object being lifted from the bed – mostly when printing with ABS. Why is that happening? It’s usually a result of a sudden temperature difference between the melting temperature of the nozzle and the ambient temperature. When this happens, the plastic might shrink and warp.
How to prevent warping from happening:
- Ambient temperature – Try to maintain stable ambient temperature. An open window or an AC unit nearby the printer will increase the occurrence of warps. If you print with ABS most of the time, you should consider building an enclosure. A complete guide on how to build one can be found in one of our previous articles How to build a simple, cheap enclosure for your 3D printer?
- Use the brim – Brim is a good way how to increase the adhesion to the print surface. You can enable this feature in the Slic3r in the Plater window.
- Keep the surface free of grease – Before starting any of your prints using ABS, PLA and many other materials, simply wipe the print surface clean with IPA 90%+. PETG is an exception, so do not use IPA 90%+ or Acetone when you are printing with this material. A complete guide on how to prepare the print surface can be found at PEI print surface preparation.
Problems with infill
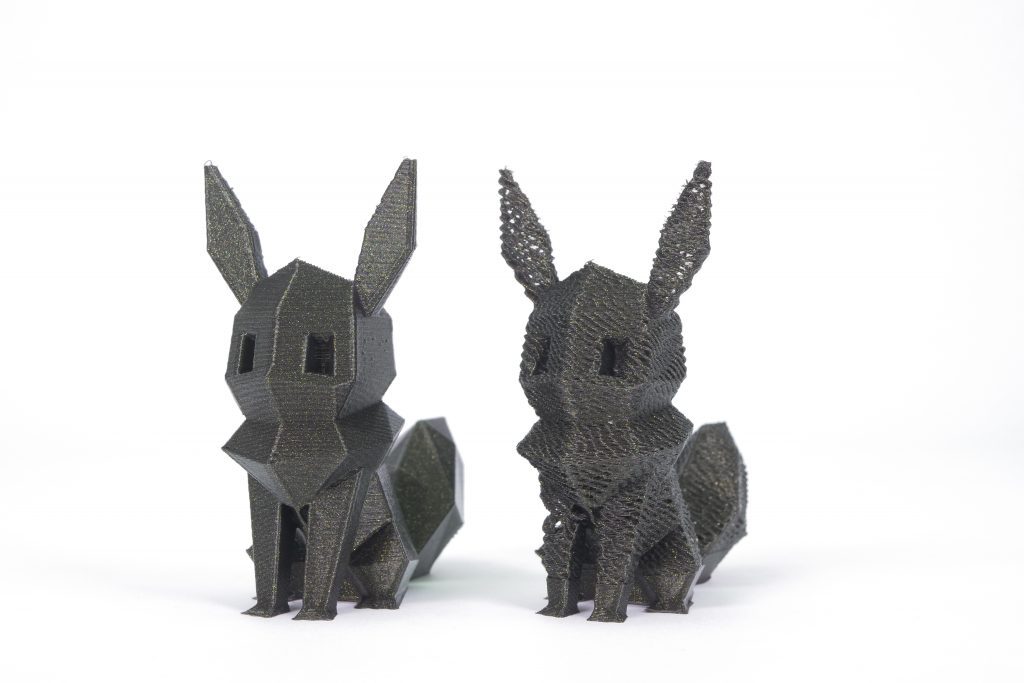
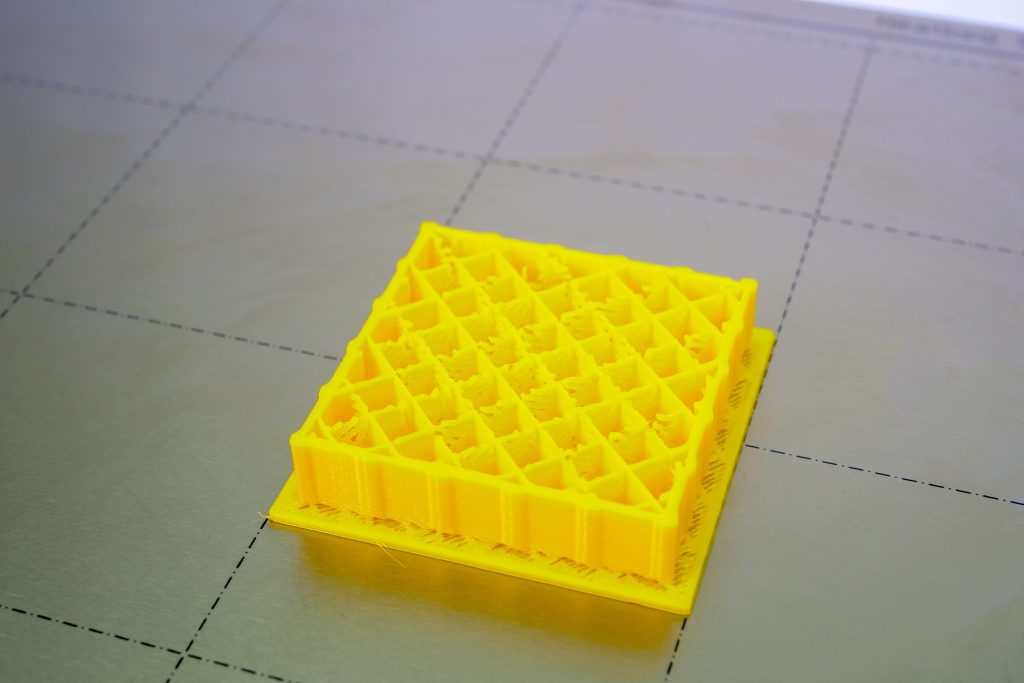
Various problems with infill are not the worst kind of trouble you may come across, however, in some cases it can put the structural integrity of your prints at risk. The best moment, when you should check whether the infill is okay, is when the object is still being printed. An example of a weak/incorrectly printed infill is in the photo below.
Preventing infill-related issues from happening:
- Change infill type – Certain infill types are more difficult to print, such as the cubic infill. Try using a different one, if possible.
- Flexible filaments – Do not try to print complex infill patterns with flexible filaments. This type of filament is especially vulnerable to imperfect infills. The best bet is to use the GRID infill when printing flexible filaments. You can change the infill pattern in the Slic3R PE – Print settings – Infill – Fill pattern.
- Lower the printing speed – If none of the above helps, try to slow down the printing speed of the infill. This can be done in Slic3r PE in the Print settings – Speed – Infill.
Clogged nozzle
You can tell that you are experiencing a nozzle clog when there is no filament pouring out of the nozzle. Also, early signs of the nozzle starting to clog can be seen when the filament poured out of the nozzle does not curl nicely. There are two common procedures which will clear the vast majority of all clogs without the need for major disassembly of your extruder.
Nozzle heat up
You can try to melt the clog by increasing the nozzle temperature. Go to the LCD Menu – Settings – Temperatures. Then set the nozzle temperature to 260°C for PLA or to 280°C for PETG/ABS. Wait 5-10 minutes and try to load filament again. The new string should push the stuck material from the nozzle. If these instructions didn’t help, try to do the Cold pull.
Cold pull
This is a little more tricky procedure, but it’s one of the best ways how to clean your nozzle properly.
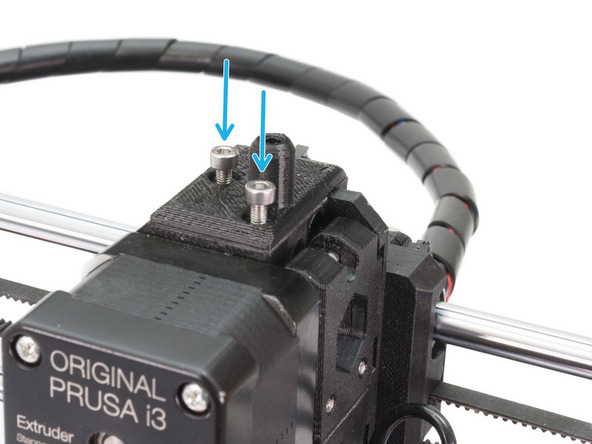
- Unscrew the top cover of the extruder by removing the 2 bolts which hold it.
- Go to the LCD Menu – Settings – Temperatures – Set nozzle temperature to 215°C and load PLA.
- Fully open the extruder idler.
- Lower the nozzle temperature to 90°C.
- Once the temperature hits the target, manually pull the filament out of the extruder.
Removing the top cover of the extruder
Releasing two screws to open the extruder idler door
Once you finish any of the procedures, you should try to normally load a filament and see if the clog was fully cleared.

Just in time to save my prints! Thanks! (inferior filament is my guess)