


In the previous article, we showed how to create a basic landscape suitable for model railways. However, what about trains, buildings, people and other details that bring the landscape to life? Let us show you how to enhance your model railway with some great techniques and 3D prints.
3D printed trains
Trains are the most important part of every model railway. It doesn’t matter if you’re already completing the tiniest landscape details or just starting to build the basics, the trains are always number one. Almost everyone (including us) is usually eager to place their train models on the tracks even without finishing the landscape. It’s also useful in determining whether the tracks are positioned correctly – that should be done before we glue them to the landscape.
To test our tracks, we printed several models of locomotives and passenger cars. Some of them are printed with our Original Prusa SL1 printer and others using the Original Prusa i3 MK3S. Let us introduce you to these models with brief instructions on how to print them.
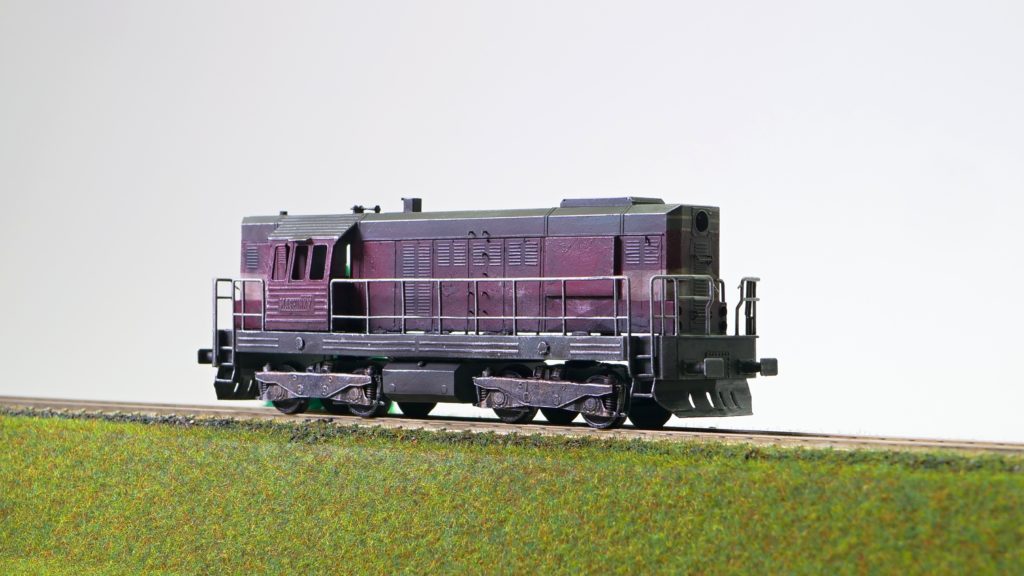
Locomotive 742 from the Mashinky game
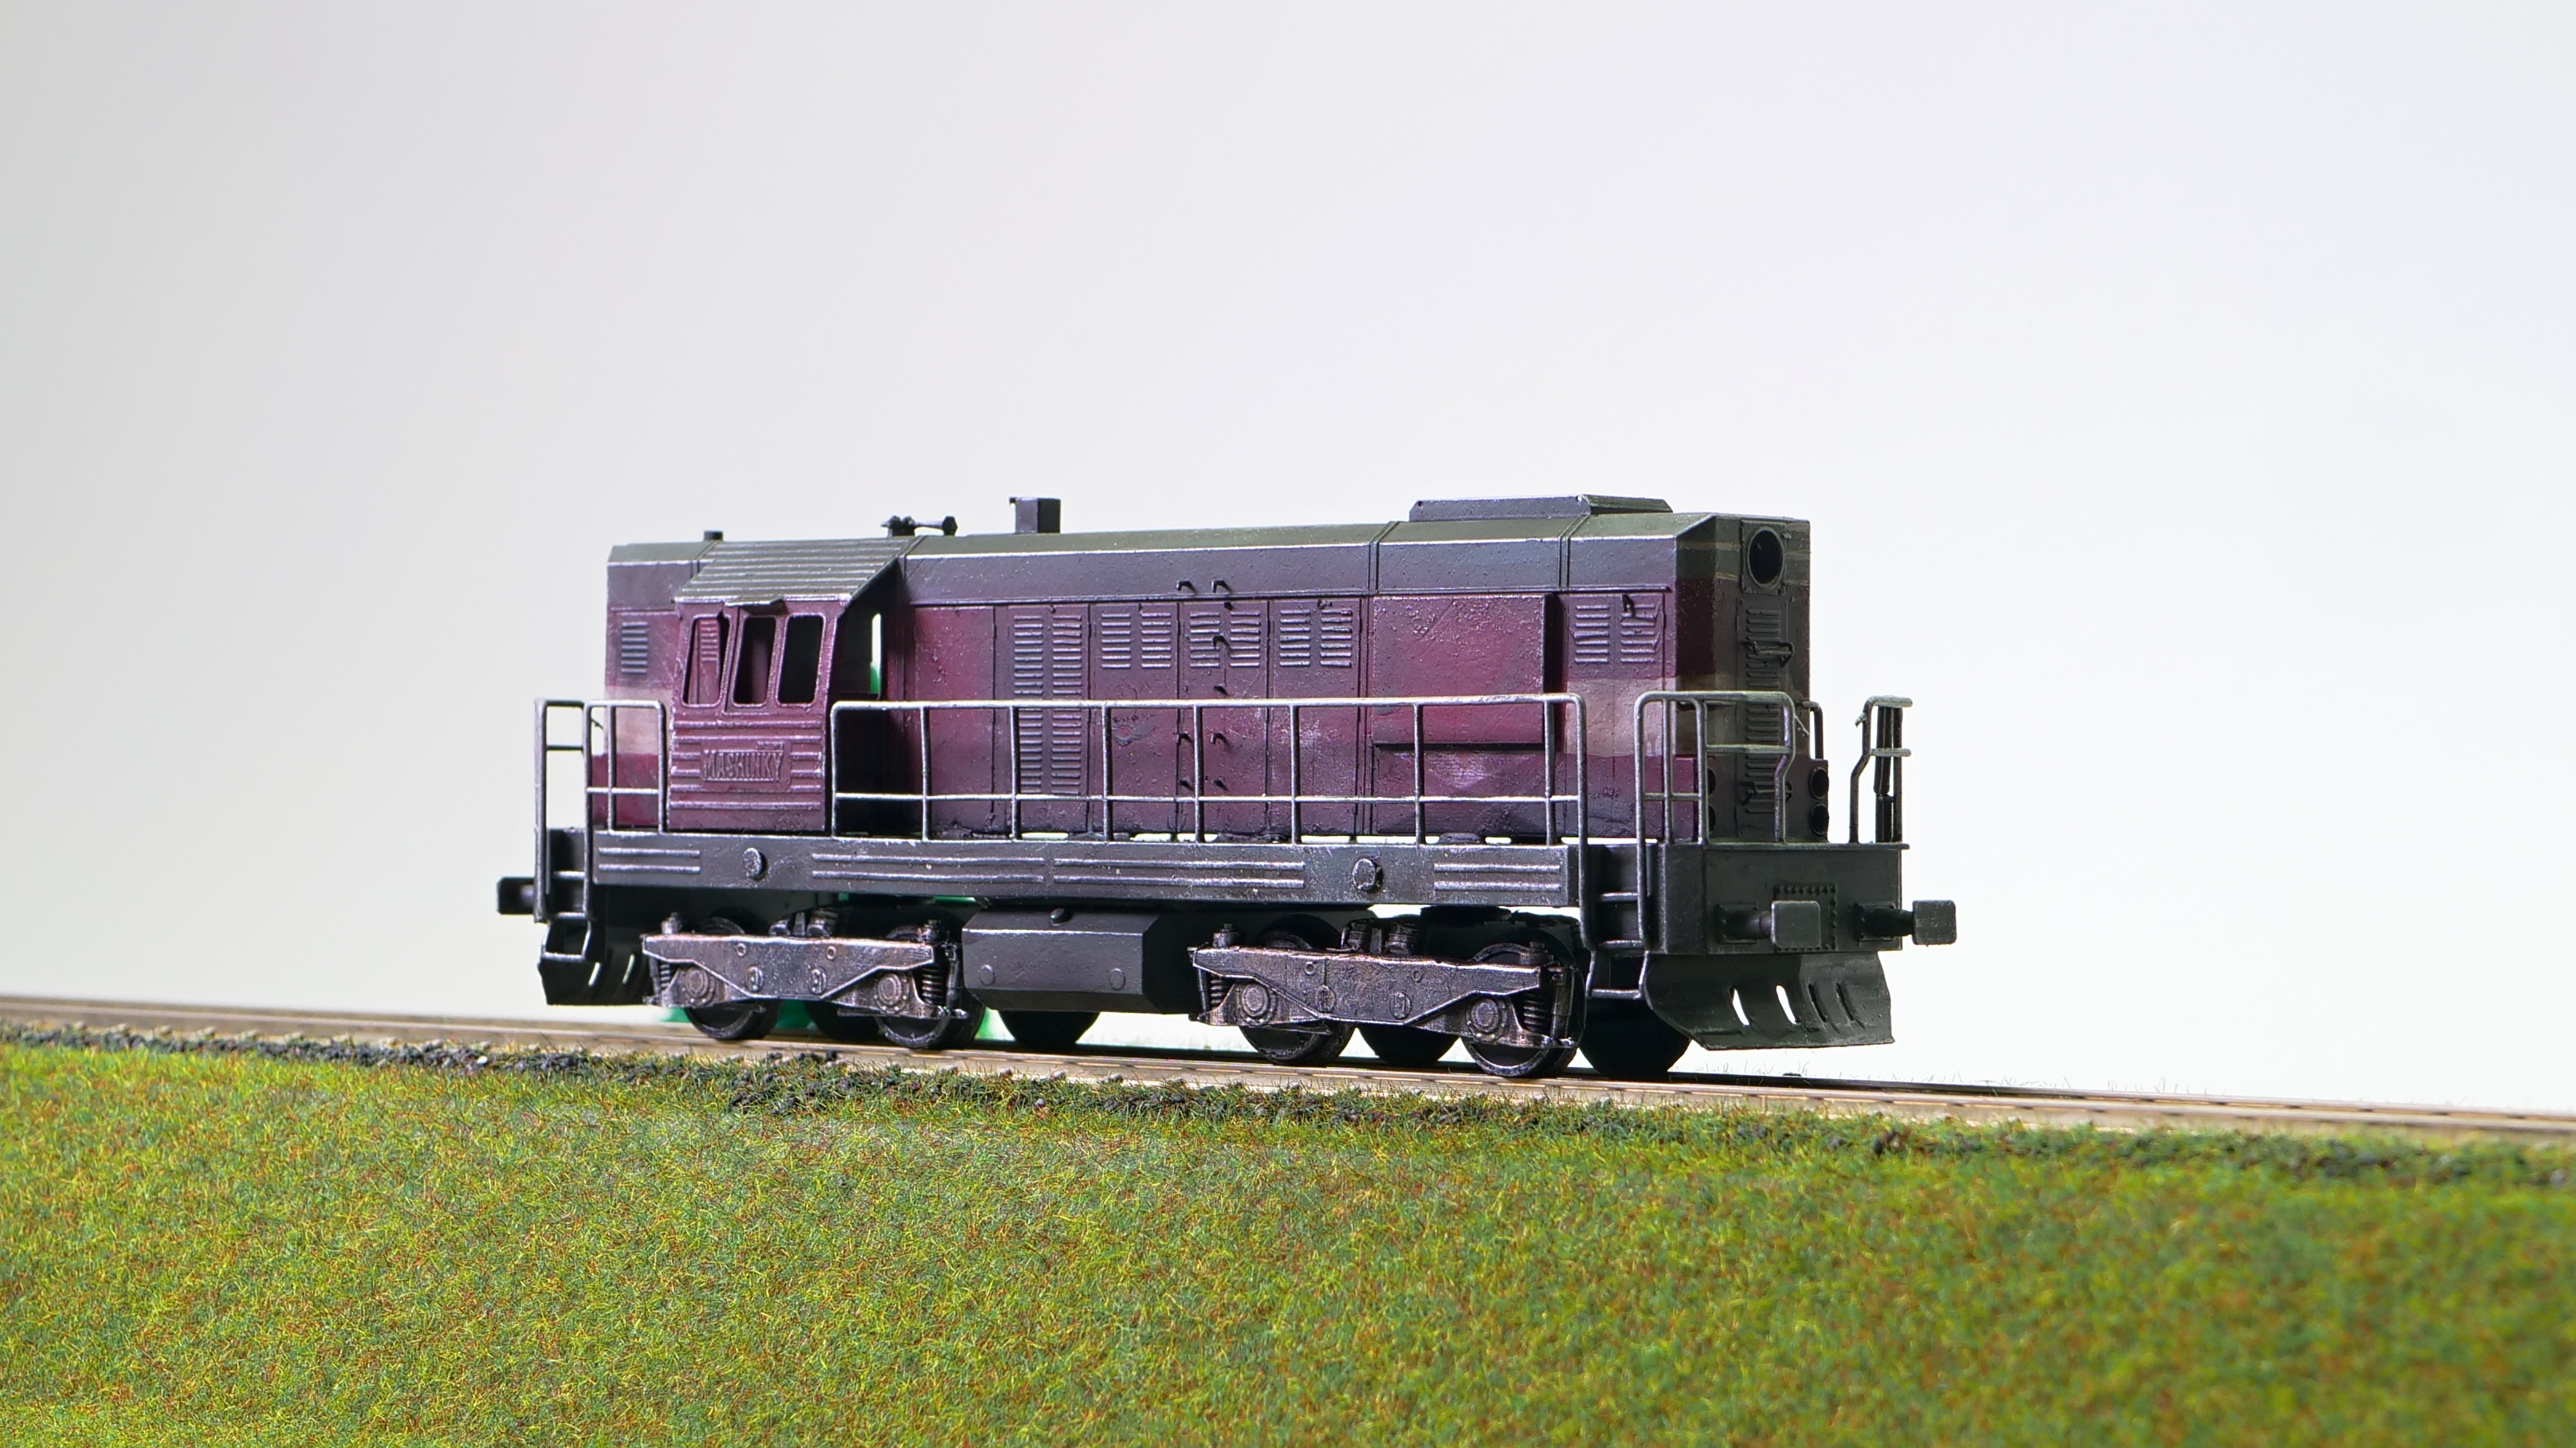
The first and the most detailed model, frequently used in the Czech Republic, is a locomotive 742 also called “Kocour” (“tomcat” in English). The model itself comes from the Mashinky game by Jan Zeleny. It is an intricate and very entertaining computer strategy game, in which players build their own railway empire. This model is impossible to print at an H0 scale using FFF/FDM printers because it contains a lot of tiny details. It is necessary to use the qualities of MSLA printers. We achieved the best results using the Original Prusa SL1 printer with Prusa Orange Resin at 0,05mm layer height. The locomotive can be printed as a static model, however, you can easily modify it and place the electronics inside.
The locomotive 742 is small enough to be placed in the printing area without the need to cut the model. It is better to print these models as a whole: cutting the model and gluing it later requires extra effort (e.g. to hide the seam) and doesn’t bring any real benefit.
When you print train models, we don’t recommend using the automatic supports generation. Instead, place the support points manually. This way you can be sure that all the overhanging parts are supported and there are no unnecessary supports created in places where we don’t want them. It is important to support all of the edges to avoid warping or peeling. Use 0,3mm support heads for tiny and thin parts of the model. Removing supports with 0,4mm diameter might lead to damage to some delicate details. If you are not sure, look at our model (see the photo below). The wheels need to be printed perpendicular to the print platform to make them as round as possible.

When the print job is done, wash the model with isopropyl alcohol, but do not cure it with UV light! First, remove all the support structures using a very sharp knife or scalpel. Once all of the support material is removed, cure the model with UV light. Next, smooth out the supported spots with a rasper or sandpaper and confirm that everything fits properly. If so, the model can be assembled and painted now. The locomotive 742 can be seen in various colors, we chose the most common red base color with a beige stripe.
“Kocour” is finally complete and ready to go. You can see for yourselves that the locomotive looks quite authentic – our thanks go to Tomas Krakora, Jan Zeleny and his game Mashinky for such an amazing model.
You can download the model from PrusaPrinters.org.
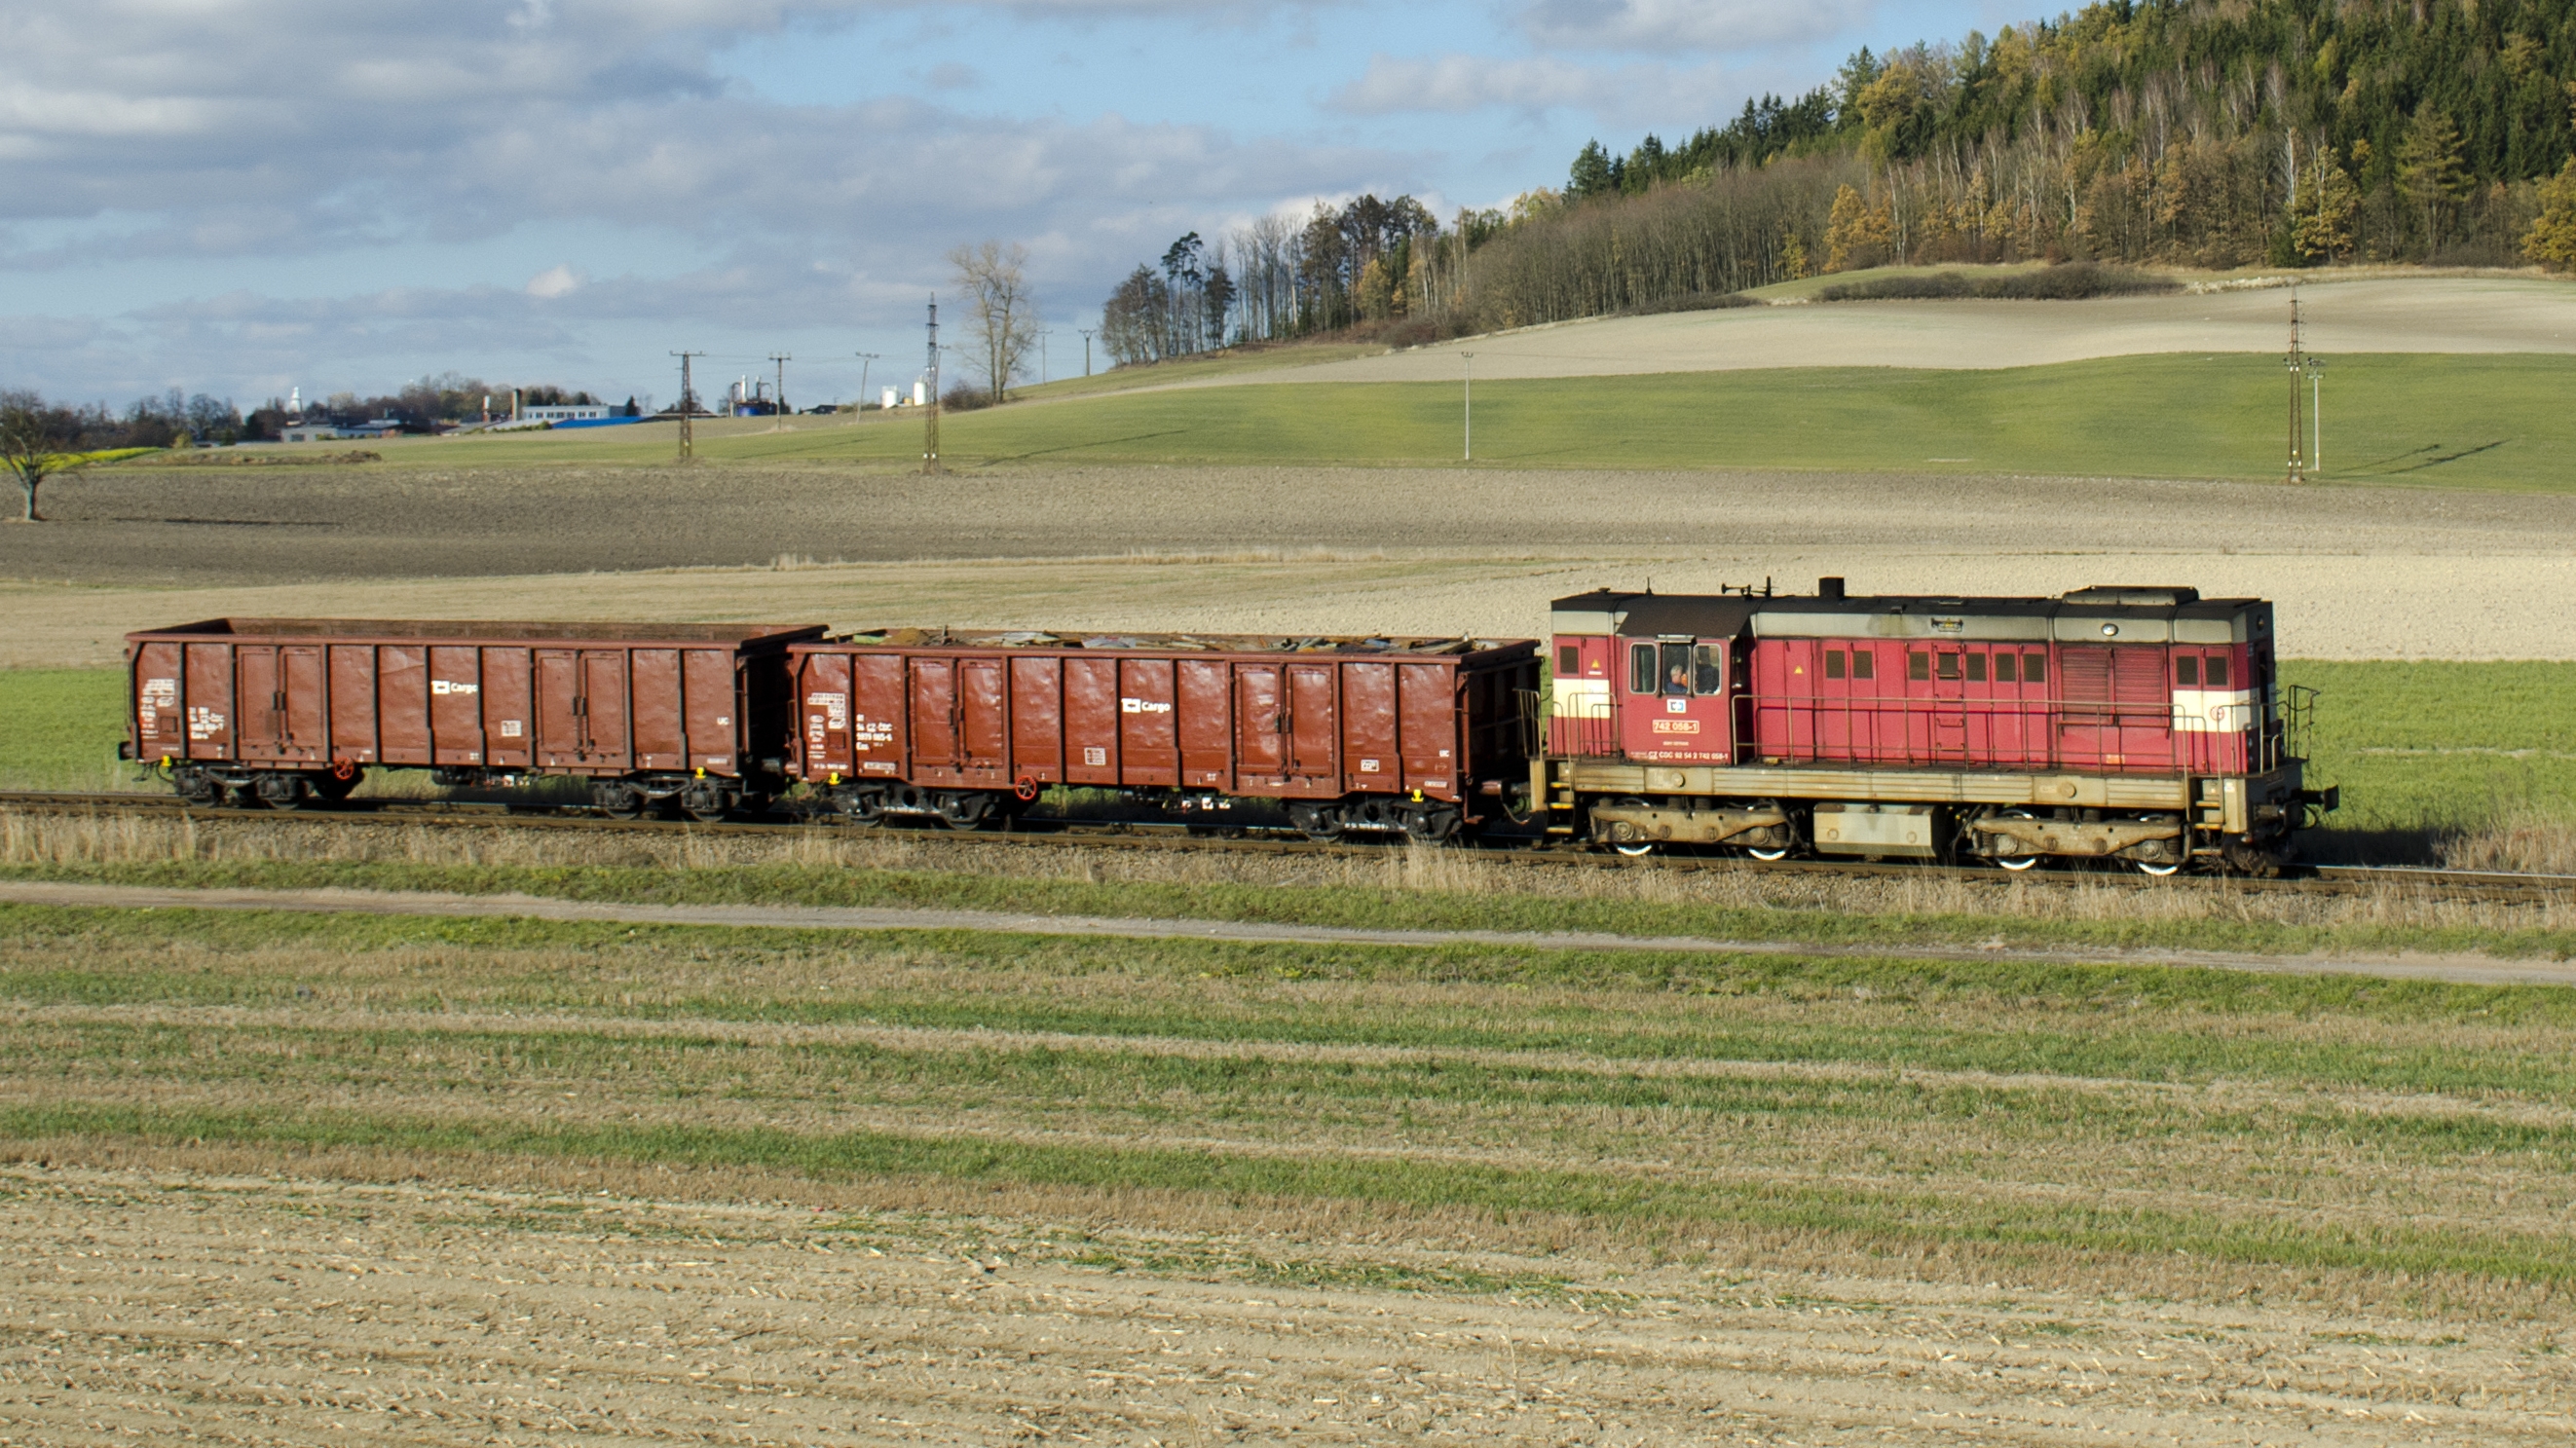
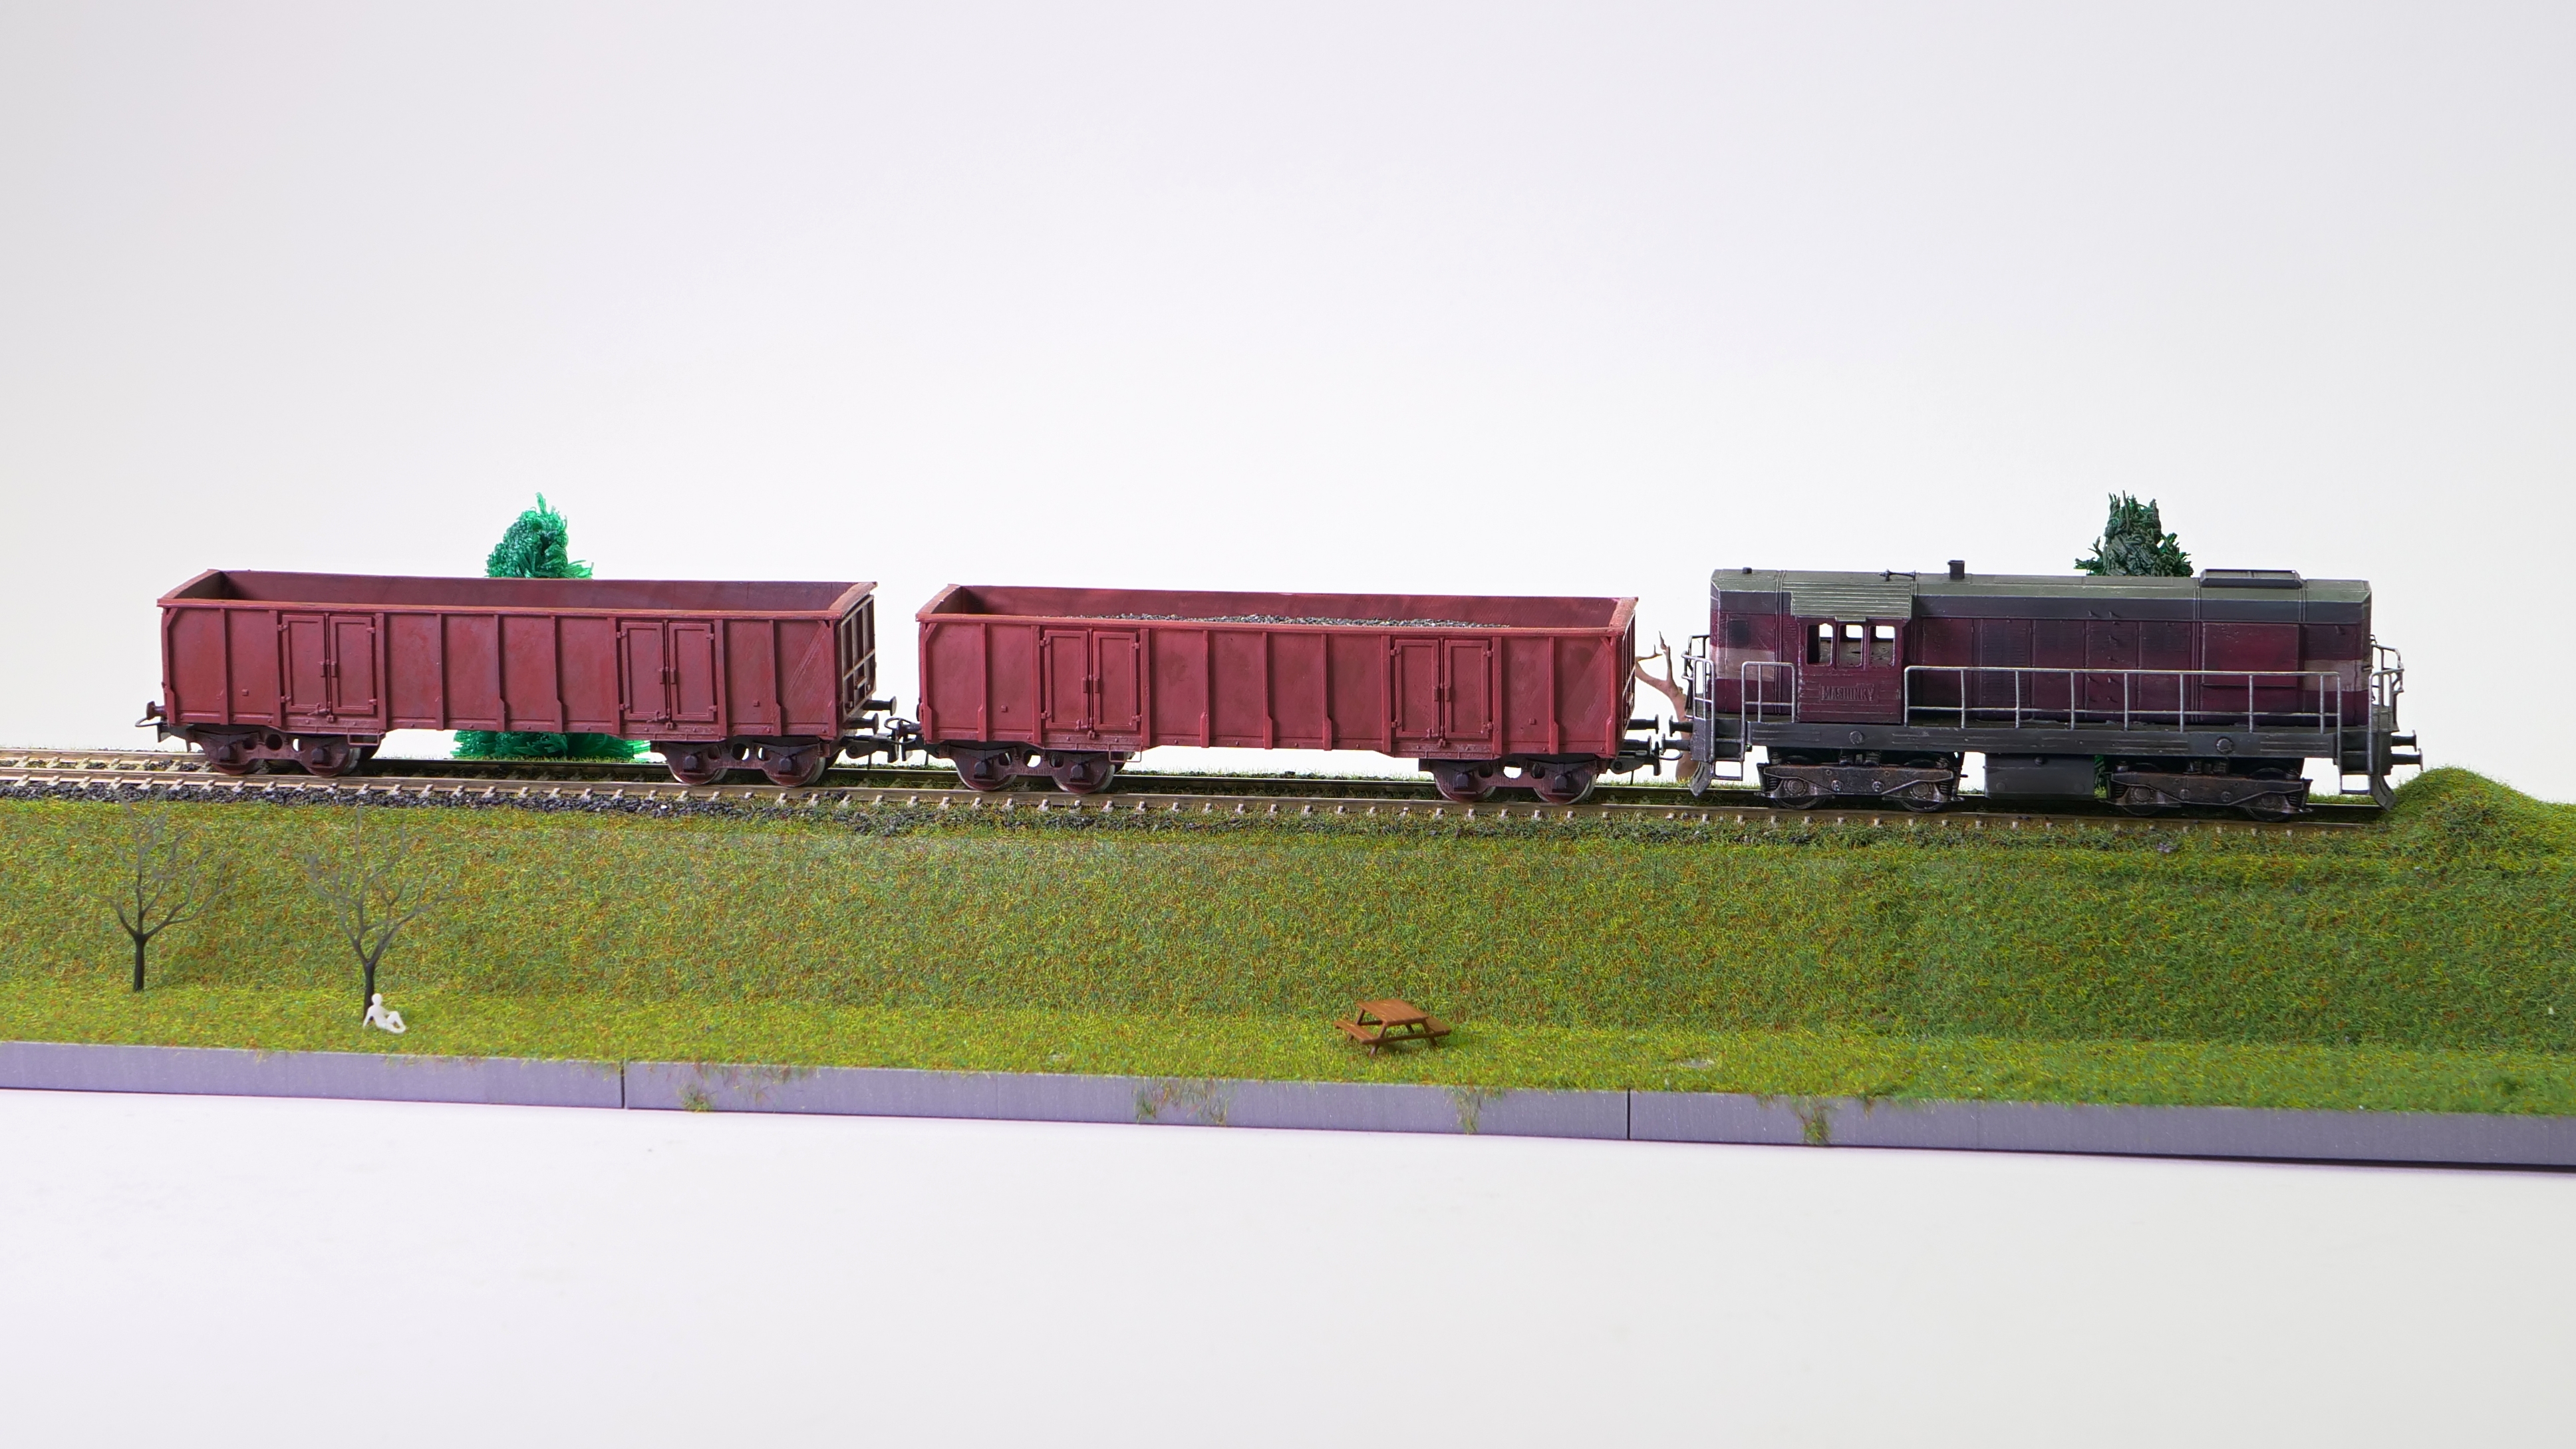
EAS freight car
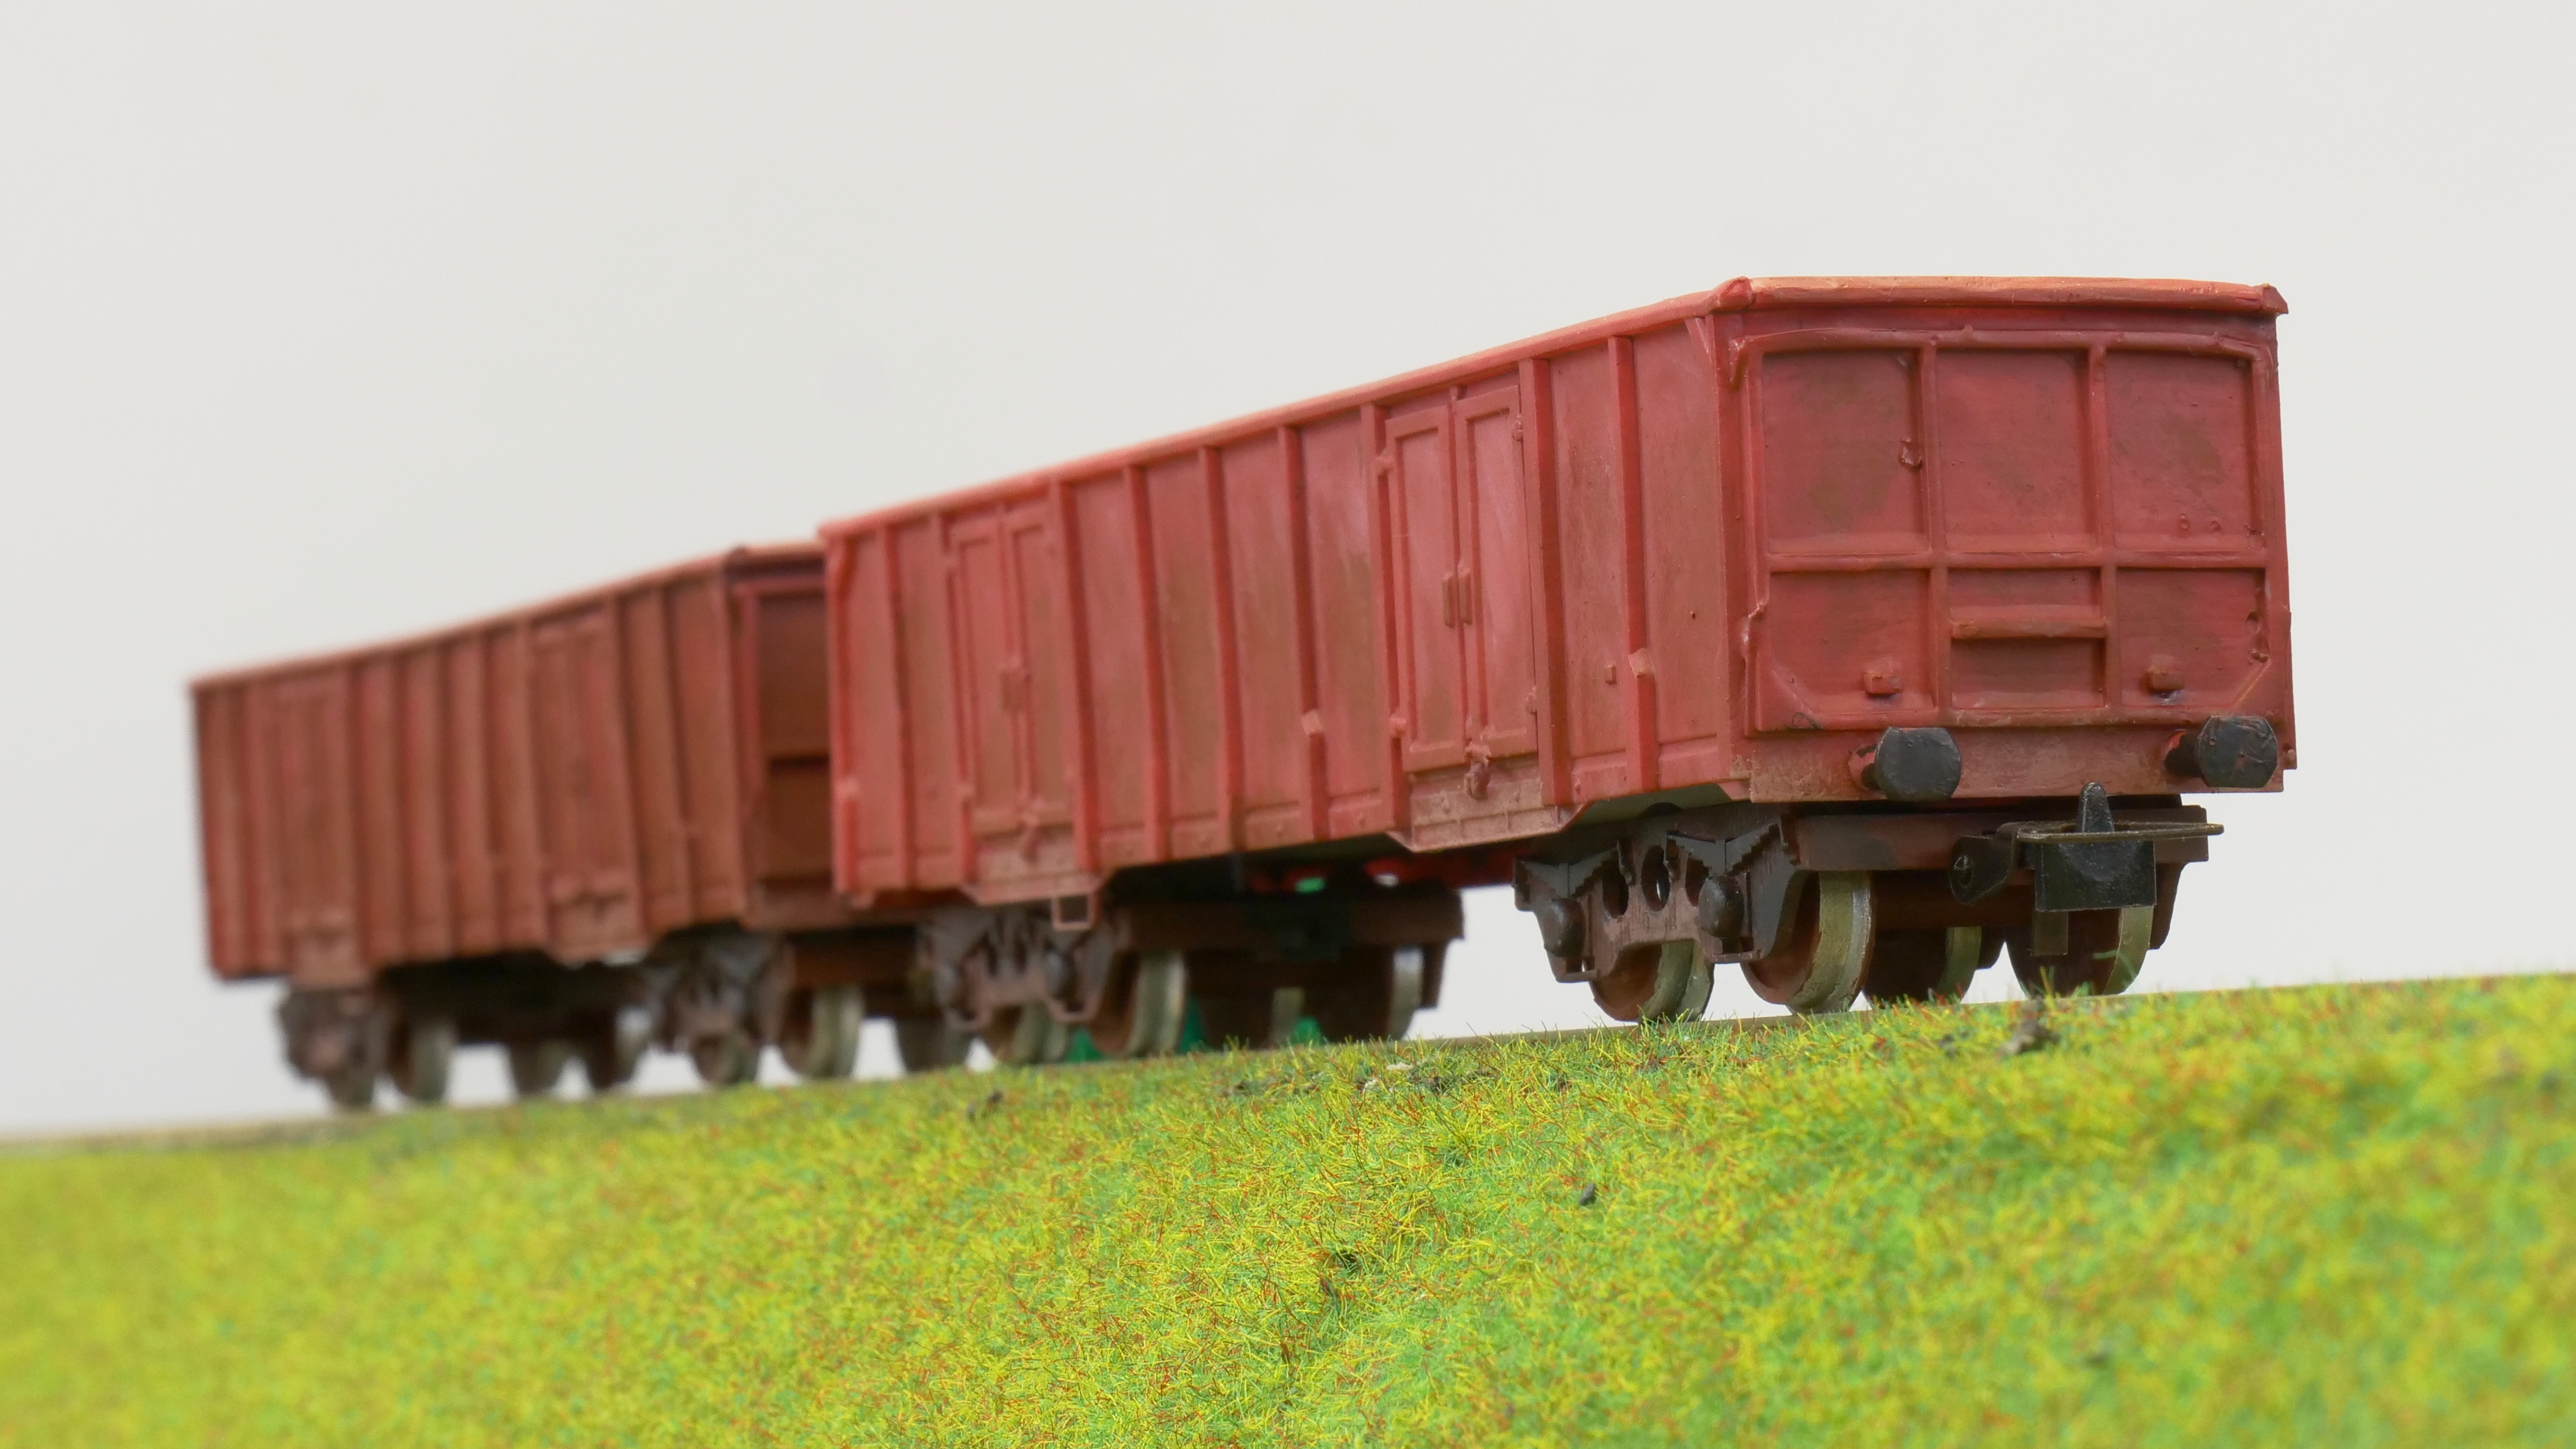
The locomotive itself is really nice, but it should have some cars, too! Let’s print some type EAS freight carriages, also used commonly throughout the Czech Republic for transportation of wood or coal. This miniature is much easier to print thanks to fewer details. This model is also possible to fit inside the printing volume of our Original Prusa SL1 in one piece. It is better to rotate the cargo space part upside down. The chassis and wheels should be printed separately and oriented perpendicularly to the print platform to achieve a perfectly round shape that prevents the car from falling off of the tracks. You can buy the wheels and fit them into the chassis if you don’t wish to print them. The assembly is very easy and intuitive – you need only a few drops of super glue and proper couplers. The EAS cars are usually colored red but nowadays they are mostly corroded and dirty.
The EAS car can be printed not only using the Original Prusa SL1 printer but also the Original Prusa i3 MK3s. However, you should keep in mind that you have to use a 0,25mm nozzle and expect that some details will be lost.
You can download the model from PrusaPrinters.org.
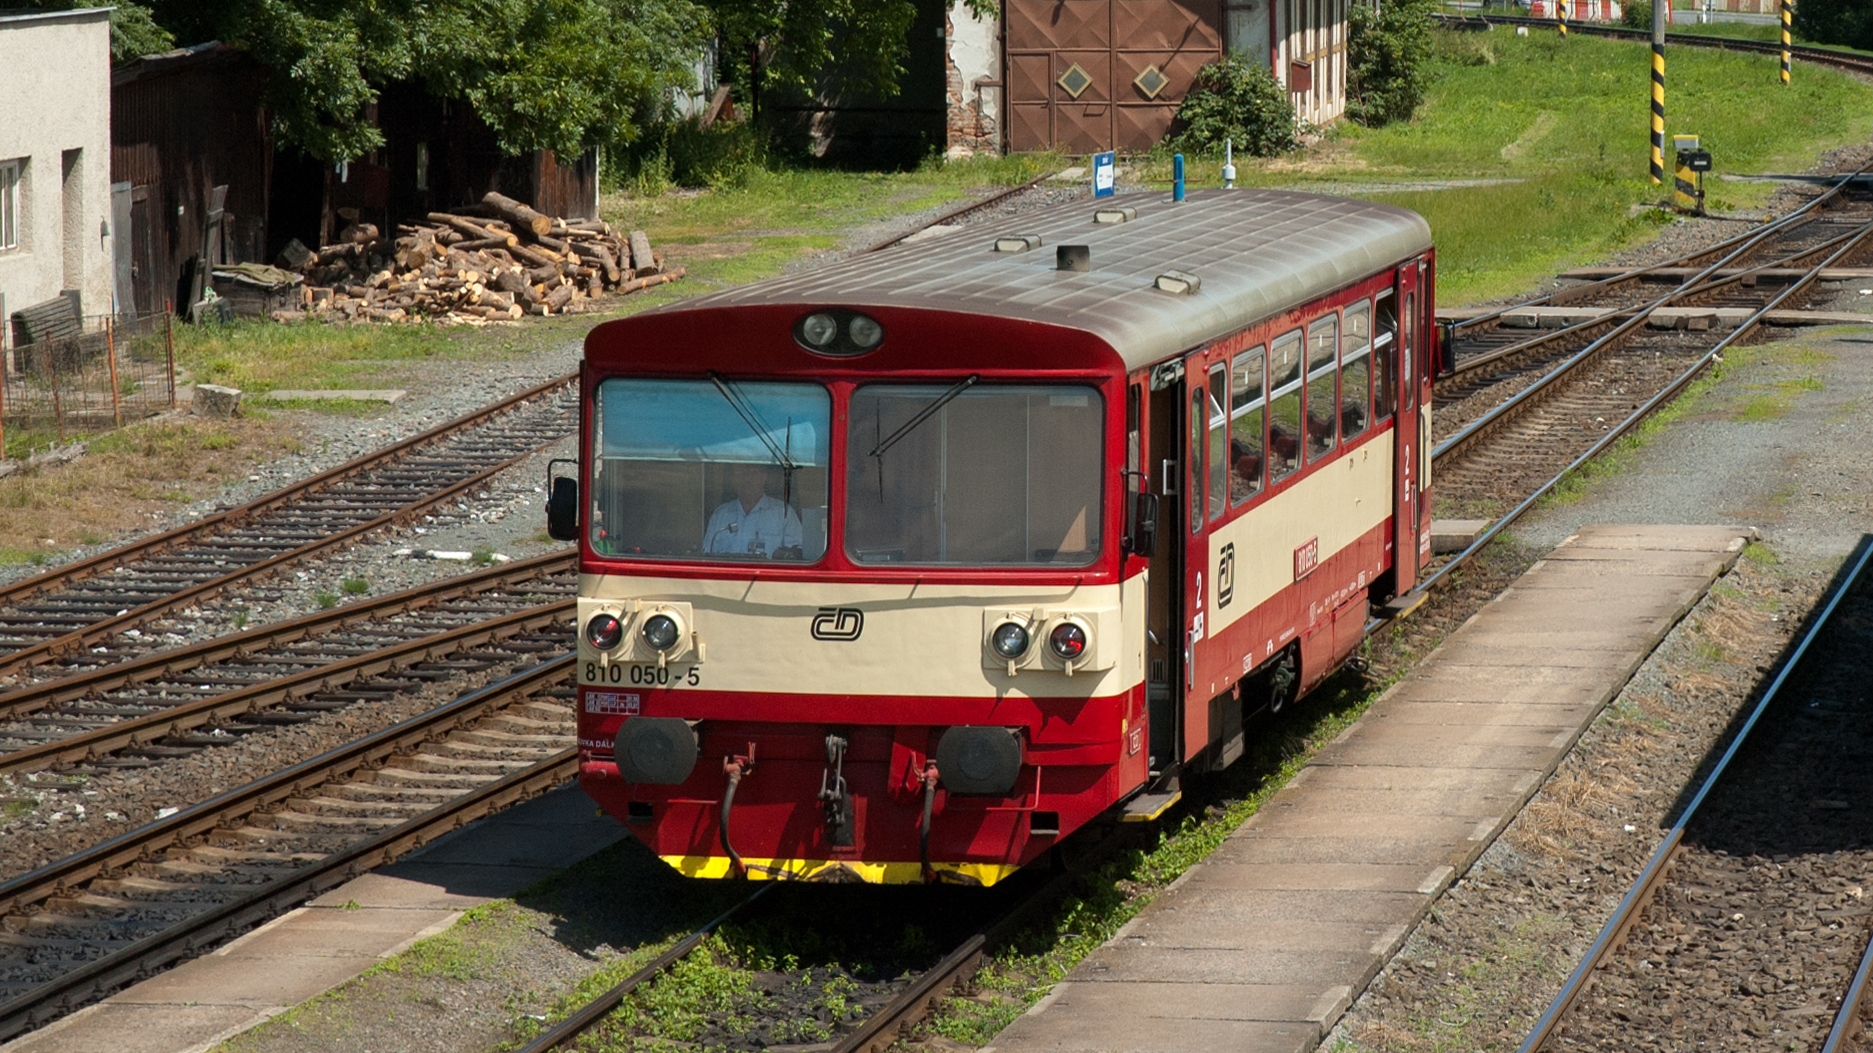
Motorized carriage 810
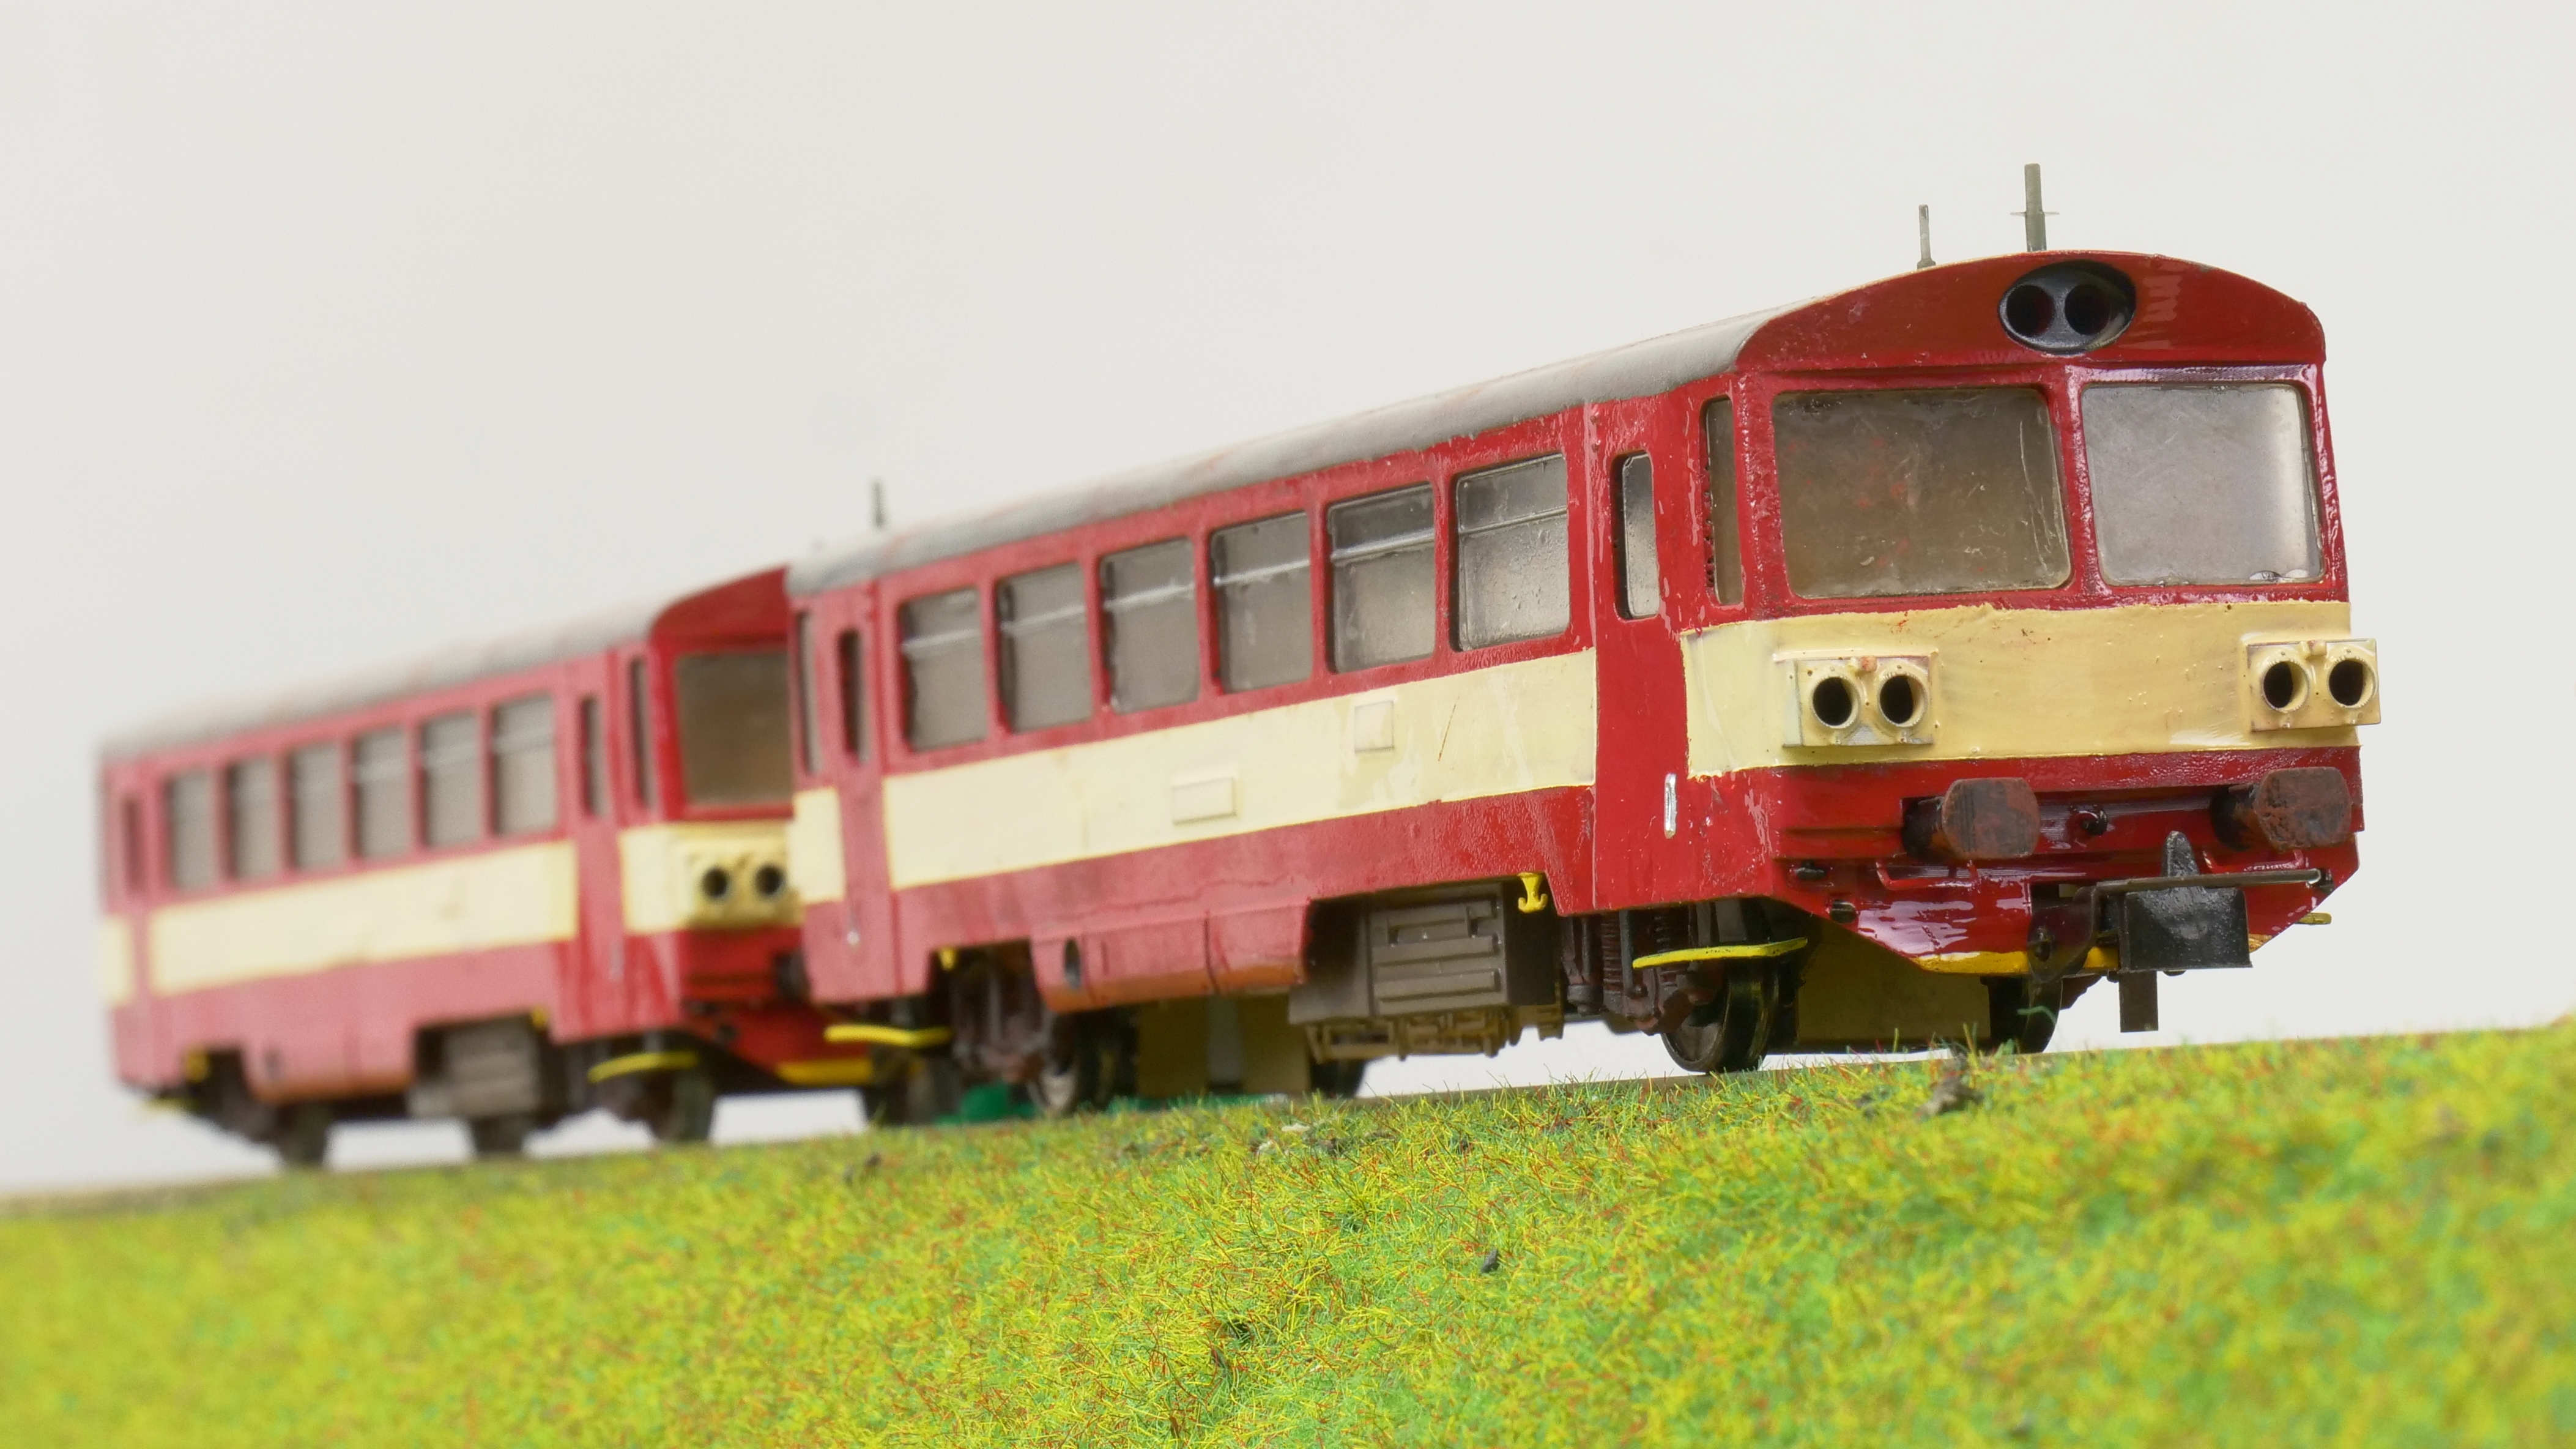
The freight train is ready to go but how do we transport the passengers? Let’s use the legendary “motorák”, also frequently used on the Czech tracks. We designed two versions for you: A simple motorless carriage (you need only 2 couplers and 2 axles if you don’t want to print them) and a motorized unit with a hole for the Bramos carriage. Keep in mind that the carriage can be bought in the Czech Republic and it might be challenging to find them abroad, though.
This model contains more tiny parts and details than the previous one. We recommend to print it with the Original Prusa SL1 printer. The print and support generation process is the same as for the locomotive 742. Choose the support head diameter according to the detail, manually place the support points and print the model using 0,05mm layers. Windows should be printed with transparent resin and with the flat side facing the printer platform (don’t use supports and pad).
Wash the parts with isopropyl alcohol but do not cure them with UV light! Carefully remove the support material using a scalpel or sharp knife and cure the parts only after this is done. Sand the rest of the support material and confirm that everything fits. Sand the windows with wet and very fine sandpaper (roughness 1500 and higher) and spray them with glossy acrylic clear coat. This way, the windows will be transparent enough so you can see the interior of the carriage. Don’t forget to color the parts before you insert the windows and glue everything together. The motorized carriage 810 is usually colored red with a beige stripe, but reconstructed units can be seen in blue with a white stripe.
You can download the model from PrusaPrinters.org.
Carriages and locomotives for FFF 3D printing
We understand that not everyone has an SLA 3D printer, so perhaps you would like to use your Original Prusa i3 to print some railway models. Fortunately, there are models designed for FFF 3D printing, which are also compatible with MSLA printers. Printing these models is quite easy – in fact, all the pictured models can be printed using a 0,4mm nozzle and 0,15mm layer height.
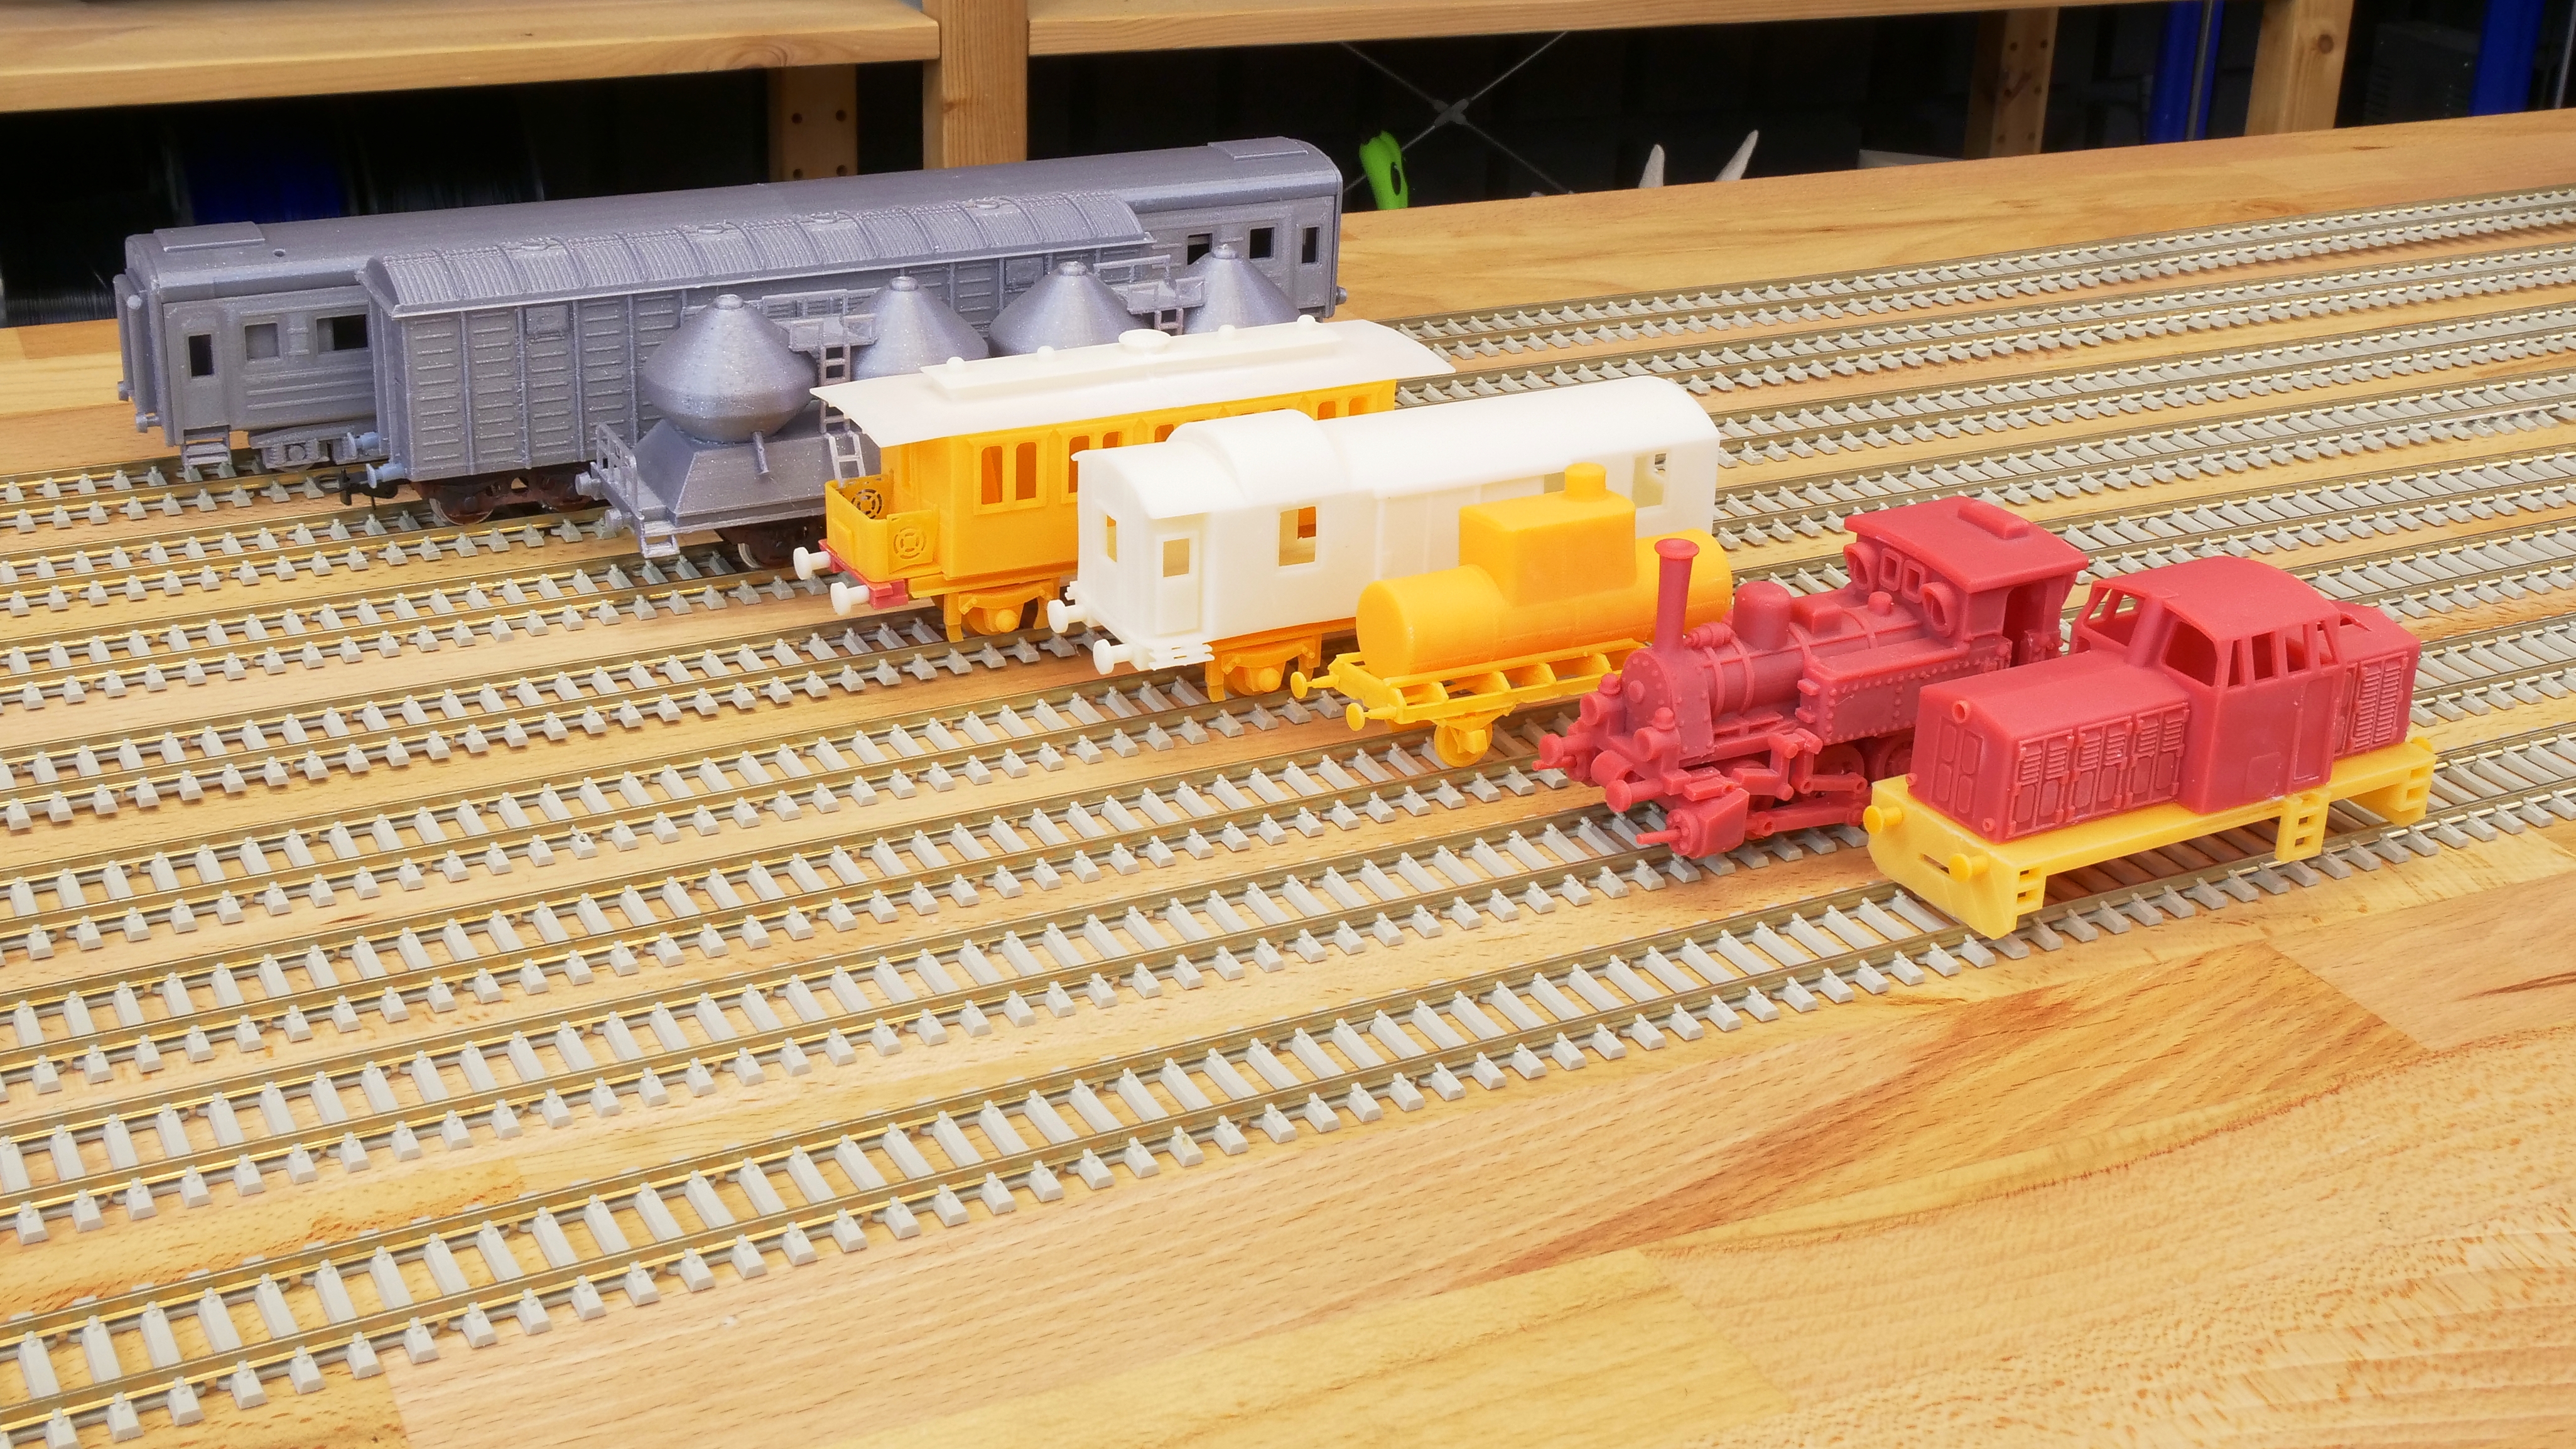
Models shown above can be downloaded here:
Steam Locomotive T3 scale “0”:
https://www.thingiverse.com/thing:1069482
T334 – diesel train engine – H0 (1:87) scale model:
https://www.prusaprinters.org/prints/5500
Cement train car – H0 scale (1:87):
https://www.prusaprinters.org/prints/5503
H0 scale old time baggage train car:
https://www.prusaprinters.org/prints/5501
Old railway passenger wagon in scale H0:
https://www.thingiverse.com/thing:1112510
Old tank car 1:87 (H0):
https://www.thingiverse.com/thing:3199283
Russian Passenger Car – Scale H0:
https://www.thingiverse.com/thing:2742465
SZHD/RZHD boxcar 1:87 (H0):
https://www.prusaprinters.org/prints/5512
Buildings and small detailed parts
The trains are printed and ready, so now it’s time to print the static models. This means human figures, buildings, cars, furniture and an endless number of other models that will give the landscape an authentic appearance. Large static models (buildings) have one great advantage: they can be easily printed using classic FFF/FDM printers. We’ve selected a couple of buildings (see below) and printed them using Prusament PLA Galaxy silver with 0,4mm nozzle and 0,15mm layer height. However, it doesn’t matter what color does your filament have, everything will be printed. On the other hand, various filament colors can be used in a variety of smart ways – e.g. unpainted Prusament PLA Silver can represent cement between bricks.
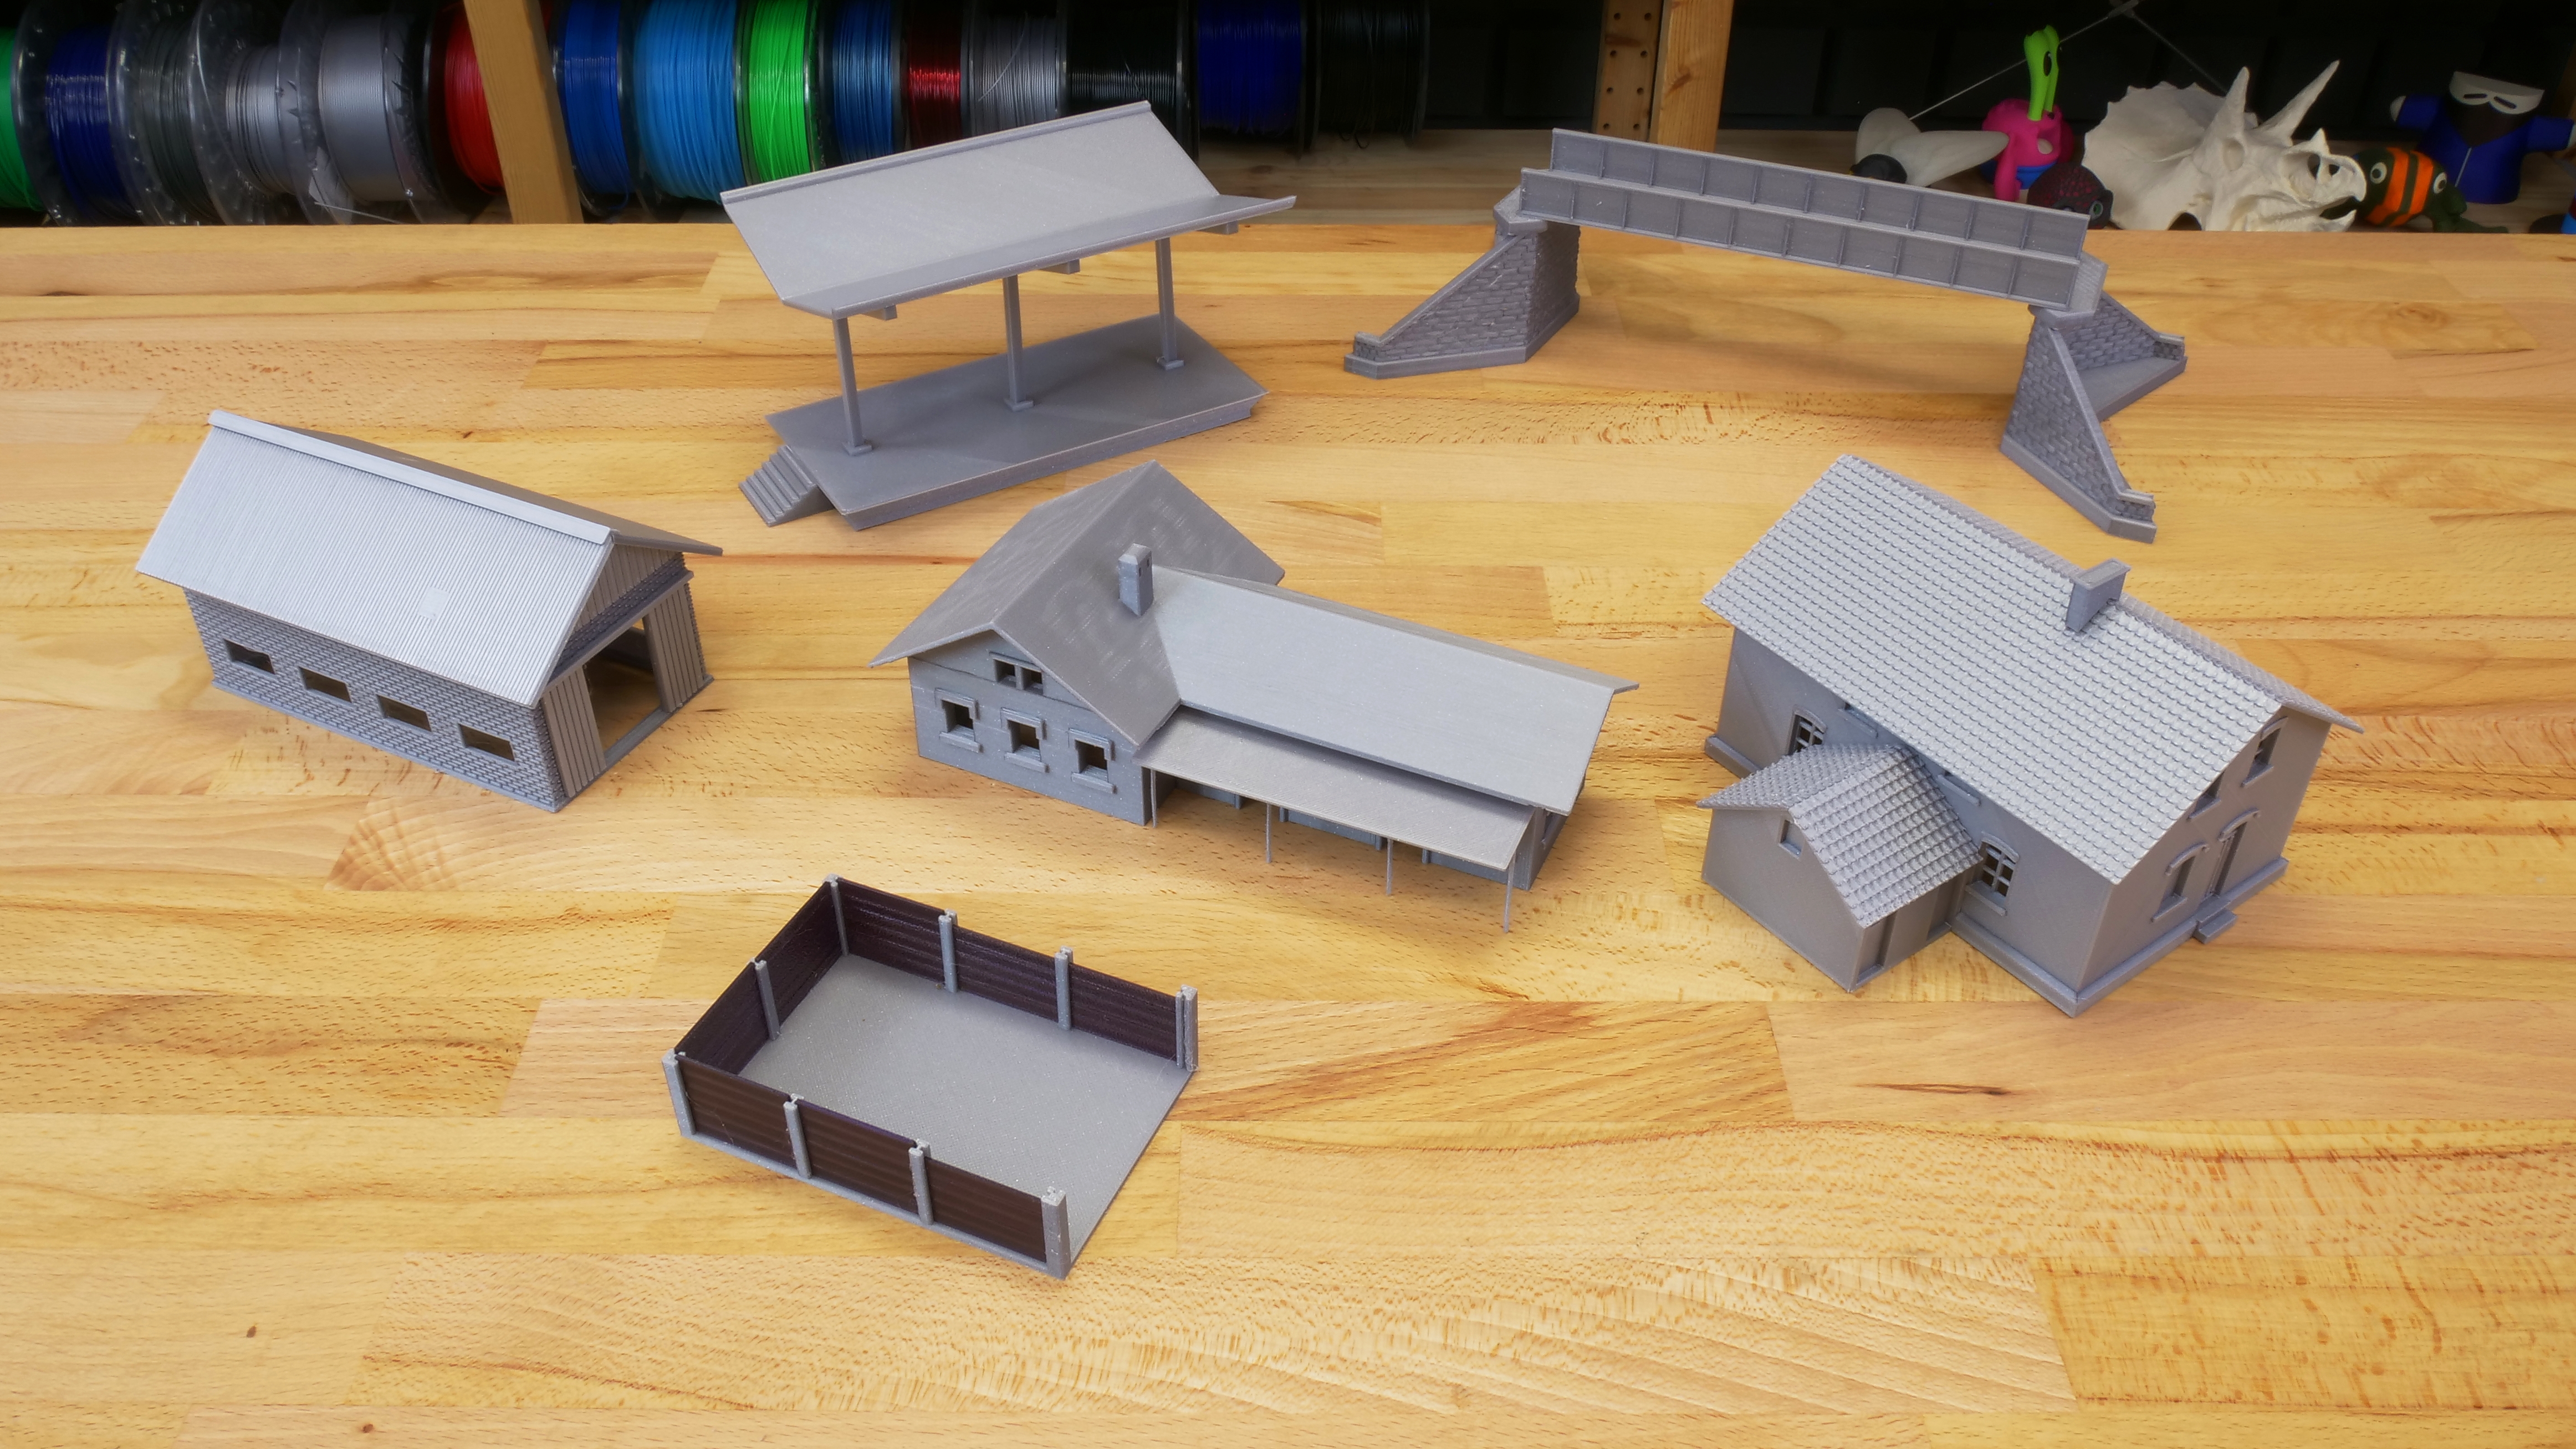
All models are available at Thingiverse or PrusaPrinters:
Girder Bridge:
https://www.thingiverse.com/thing:3463147
Cattle shed:
https://www.thingiverse.com/thing:3270540
H0/HO Coal Bunkers / Kohlebansen / Lagerplatz:
https://www.prusaprinters.org/prints/5489
H0 model train platform:
https://www.thingiverse.com/thing:2656062
H0 Train station model:
https://www.prusaprinters.org/print/5470/
Tiny models are a bit more complicated. Small, highly-detailed objects such as human figures, furniture, lamps and objects necessary to complete an authentic landscape appearance need to be printed with SLA printers.
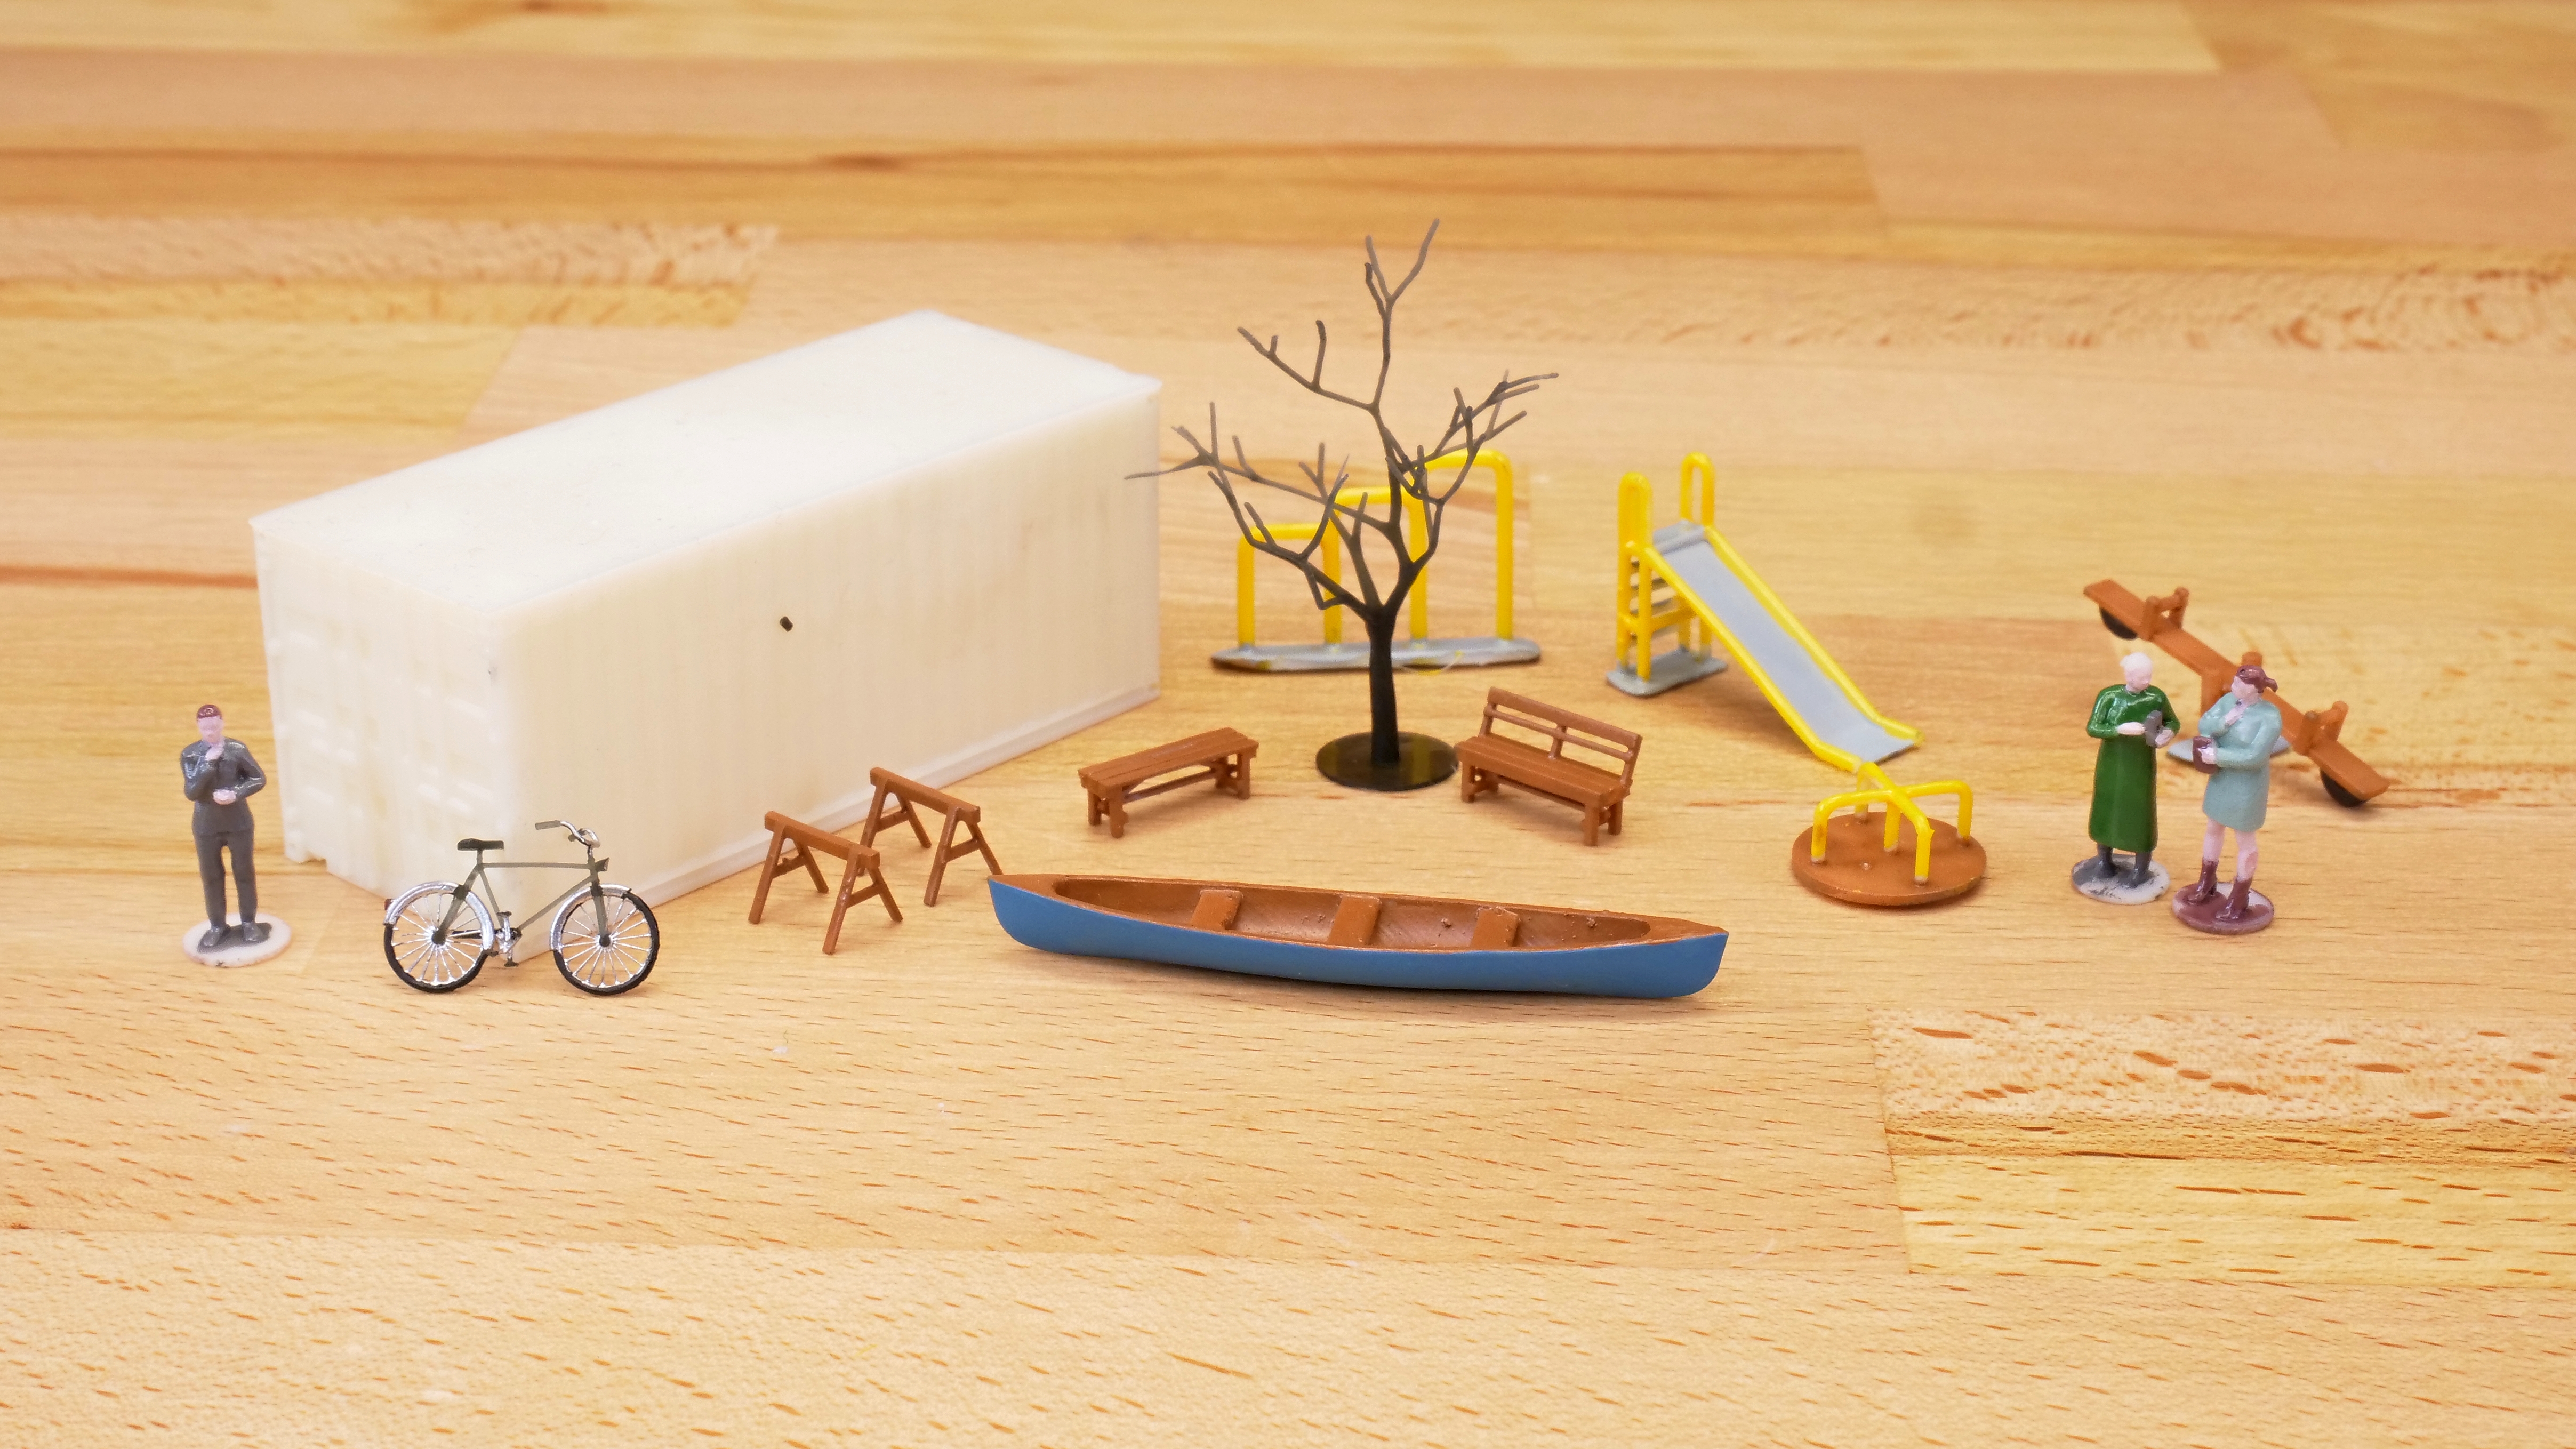
Here’s a selection of several models to get you started:
Customizable woman with coat 1/87 scale (H0):
https://www.thingiverse.com/thing:2863048
Customizable woman with long coat 1/87 scale (H0) – selfie:
https://www.thingiverse.com/thing:3063503
Bike H0 / HO scale (work in progress!):
https://www.thingiverse.com/thing:3131722
(The bike size should be increased by 20% to the sides for printing all the detailed parts. The support head diameter should not be higher than 0,2mm.)
Canoe H0 scale remix:
https://www.thingiverse.com/thing:2993121
Sawhorse H0 scale:
https://www.thingiverse.com/thing:2993130
Outdoor furniture set H0 scale:
https://www.thingiverse.com/thing:2994789
Park bench set H0 scale:
https://www.thingiverse.com/thing:2998944
Playground H0/HO scale:
https://www.thingiverse.com/thing:3067351
HO scale container 20ft (piko-compatible):
https://www.thingiverse.com/thing:3372971
Tree:
https://www.thingiverse.com/thing:1196196
Model railways and 3D printers are an amazing combination. There are many models available on the internet – and often for free! All you need to do is to take your time choosing the right ones. And if you don’t find any suitable model, you can always make your own and share it with the community. Another great thing is that even with the costs for the printer and materials included, you can still save a good amount of money when you decide to 3D print the assets instead of buying them. Plus, you’re getting that amazing sense of accomplishment when you create something cool entirely from scratch!
You are so correct, model railroading and 3D printers are an amazing combination. However, for some master model railroaders, the concept of building from scratch is likely much different than the concept as held by today’s model makers of 3D printing. Because prior to the electronic tools such as CAD applications, much of the craft of scratch building was truly draft table or manual as opposed to a machine that could generate the perfect part. Such is a dilemma, when does it no longer become scratch building when an automated piece of equipment can produce a part or model nearly as perfect as a prototype coming straight out of the car and foundries of the past? I like to think of today’s modelers as lucky to have such a good variety of tools to make mix media models at their disposal as “Electronic Craftsman”. Enjoying your series, keep up the good work!
I designed and did a Kickstarter for an entire HO scale Old West Town last year. Most of your model railroad crowd haven’t really gotten in to 3d printing as a way to build their layouts.
Buenas tardes ,me pueden decir donde puedo descargar los railes tanto rectos como curvas.
Muchas gracias
Hola,
Me gustaría saber donde puedo encontrar los modelos de las vias de tren (escala H0) de linea recta y en curva. Veo locomotoras, paisajes y más accesorios pero no las vías. Muchas gracias.
—
Hello,
I would like to know where I can find the models of the train tracks (H0 scale) of straight and curved lines. I see locomotives, landscapes and more accessories but not the tracks. Thanks a lot
I've been reading different opinions on 3D printing vs traditional model building, and a friend told me that the key is finding the right balance between technology and hands-on craft. He shared an interesting case study about risk control without compromising the experience, which honestly applies to so many hobbies today. You can check it out here: https://olympia-casinoo.com/app/. It really opened my eyes to how modern tools can enhance rather than replace the creative process. Great discussion here!