
It’s been a pretty long time since my last update on the Prusa Research status and I have loads of great news, so let’s get to it!
- Shipping and support
- Multi Material 2.0
- Slic3r PE 1.40.1
- Inconsistent extrusion
- Firmware 3.3.1
- Better cooling and extruder upgrade
- Other news
Shipping and support
Our shipping process has recently received a major update. This might sound rather boring, but it is a change which positively affects everyone. Every day, we ship over 800 packages consisting of printers, printer upgrades, filaments and replacement parts. Basically, 5 trucks show up every day and we fill them to the top 🙂 Believe it or not, just a few weeks ago, we were preparing backorders and shipments by hand and putting them all into a giant Google Docs sheet. Ugh…
Mistakes were made and it was slow. Now we have our e-shop, ERP and couriers API all connected and orders are flying out faster than before! Items in stock, when ordered before 1 PM (Central European Time / CET), should be shipped on the same day! Sure, there might be some exceptions, but same-day shipping is our goal! We have some more news regarding shipping as well: we added DHL, which tends to be a bit cheaper, and also negotiated better rates with UPS, too (these will come into effect in the upcoming weeks).
Shipping improvements offloaded a lot of the stress from our support staff, everything works smoother and fewer people need to inquire about shipping dates as the orders are going out so swiftly. We hired a lot more people in our support department, too. With about 90.000 printers in the wild, the amount of support queries obviously increased. We continue to add more languages to our guides and firmware (Czech, German, Polish, Italian, Spanish) so the plan is to have native speakers in each new language we add. With the MK3 we can theoretically add hundreds of languages thanks to SPI flash, since we’re not limited by the storage space as we were with the older RAMBo board.
We shipped out some powder coated sheets! And everyone seems to love them! Finalizing the production was a huge pain, to be honest, but it is totally worth it. We struggled with getting a uniform roughness. And every time we thought we got it right, a new unexpected problem appeared. Like in the game of whack-a-mole 😀 We were fighting with PEI not adhering to the metal, later with pigment from the white markings interfering with adhesion. Anyways, we are able to produce a few thousand units per month now, if there are no further complications.
The first proper sheets went out unannounced to customers who opted out of the smooth PEI sheet switch and were waiting for months. When all of these are shipped, we will be sending out $10 vouchers with free shipping in waves to everyone who opted for the smooth sheet (Eligible orders are the ones without a sheet selection, before March 2018, that received the default sheet version, orders directly selecting sheet with the smooth double-sided PEI to shorter lead time are not eligible.) We are expecting this to happen at the end of August 2018.
When you receive your sheet, make sure to run the First Layer Calibration as the powder coated version and smooth one has different coating thickness and do so every time when switching between those. You can find more info about printing with different sheets on our Knowledge Base.
Oh BTW! MK3 lead time with smooth PEI is down to 3 days only! Finally! Well, at least for the time being, we don’t expect it to stay this low for too long. 🙂 You can check out up-to-date lead times in our shipping table.
Multi Material 2.0
Multi Material 2.0 is getting closer to being shipped to our selected beta testers very soon now. We are running a little bit late compared to what we promised, but every day in development means it’s going to be a better product than we originally announced. Recently we added PINDA as a filament sensor since we know some materials do not like to play well with our standard laser filament sensor. And I already teased on Twitter, and on a few shows, that we have the wipe to infill function implemented, which is awesome news. We cannot eliminate the wipe tower completely, because some models do not have enough infill, but it can be greatly reduced nonetheless. As a bonus, we added an option for a waste object, so if you want to print something that doesn’t require a consistent color, you can use this feature to wipe the hotend into another object, too 🙂

Wipe to infill
Waste object
We are planning to release a specific MMU 2.0 article soon! (Probably during the next week.)
Slic3r PE
Wipe into infill and waste objects are Slic3r PE features, so let’s talk more about it now. Our slicer team grew to 7 full-time employees and as everyone is getting up to speed, new features are popping up faster and faster. Slic3r PE has a new configuration assistant and, as you certainly noticed in the latest driver package, you already have only one Slic3r PE icon instead of one for each printer model. The whole settings system was rewritten from Perl into C++ and new settings are automatically updated from the internet, if you opt for it in the configuration wizard. Also, we would like to remind everyone that the Firmware updater app is now a part of the Slic3r PE.
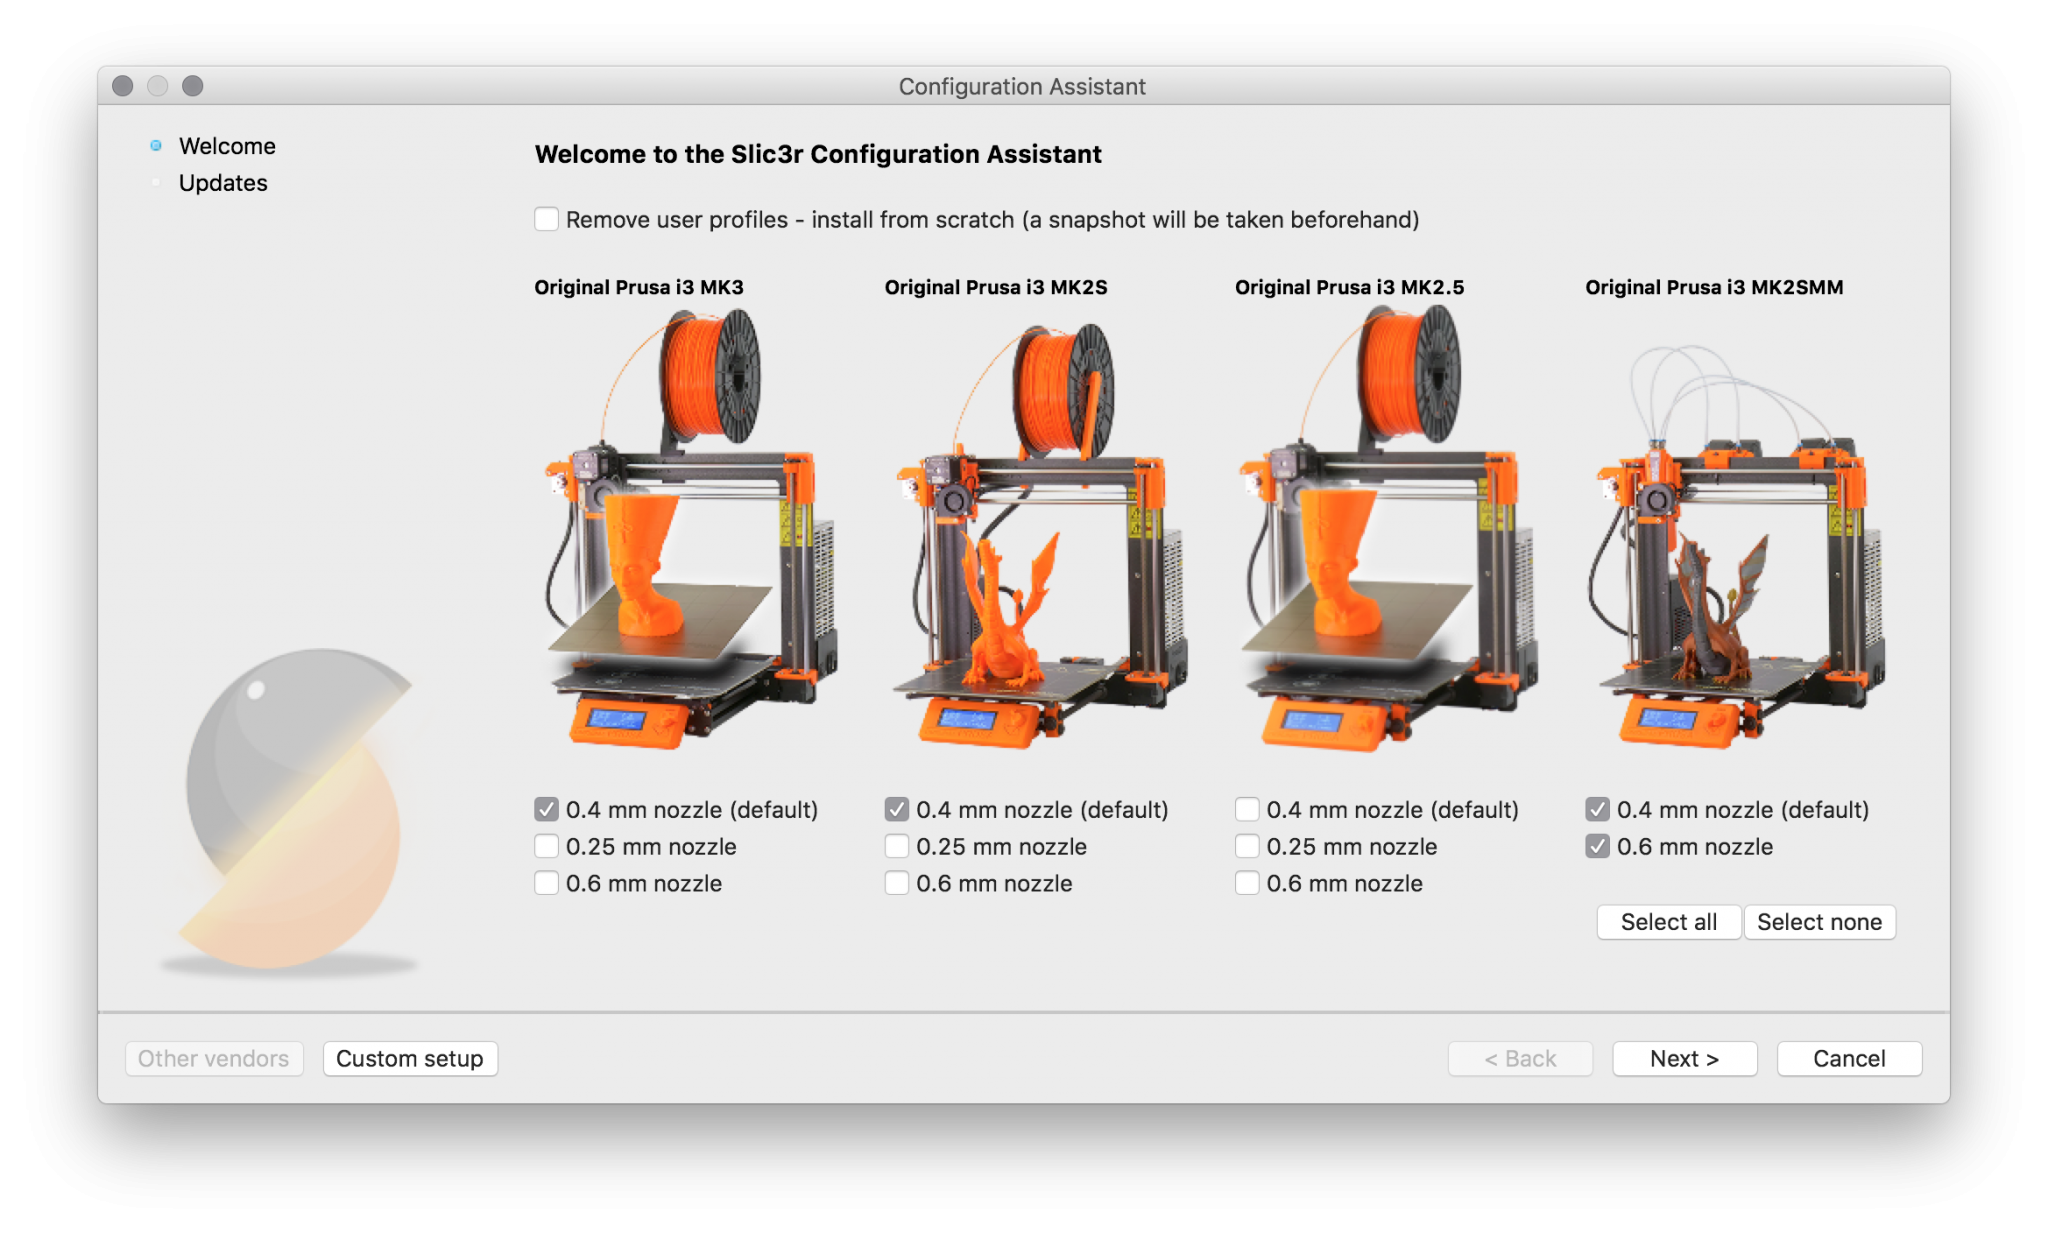
Slic3r PE Configuration Assistant
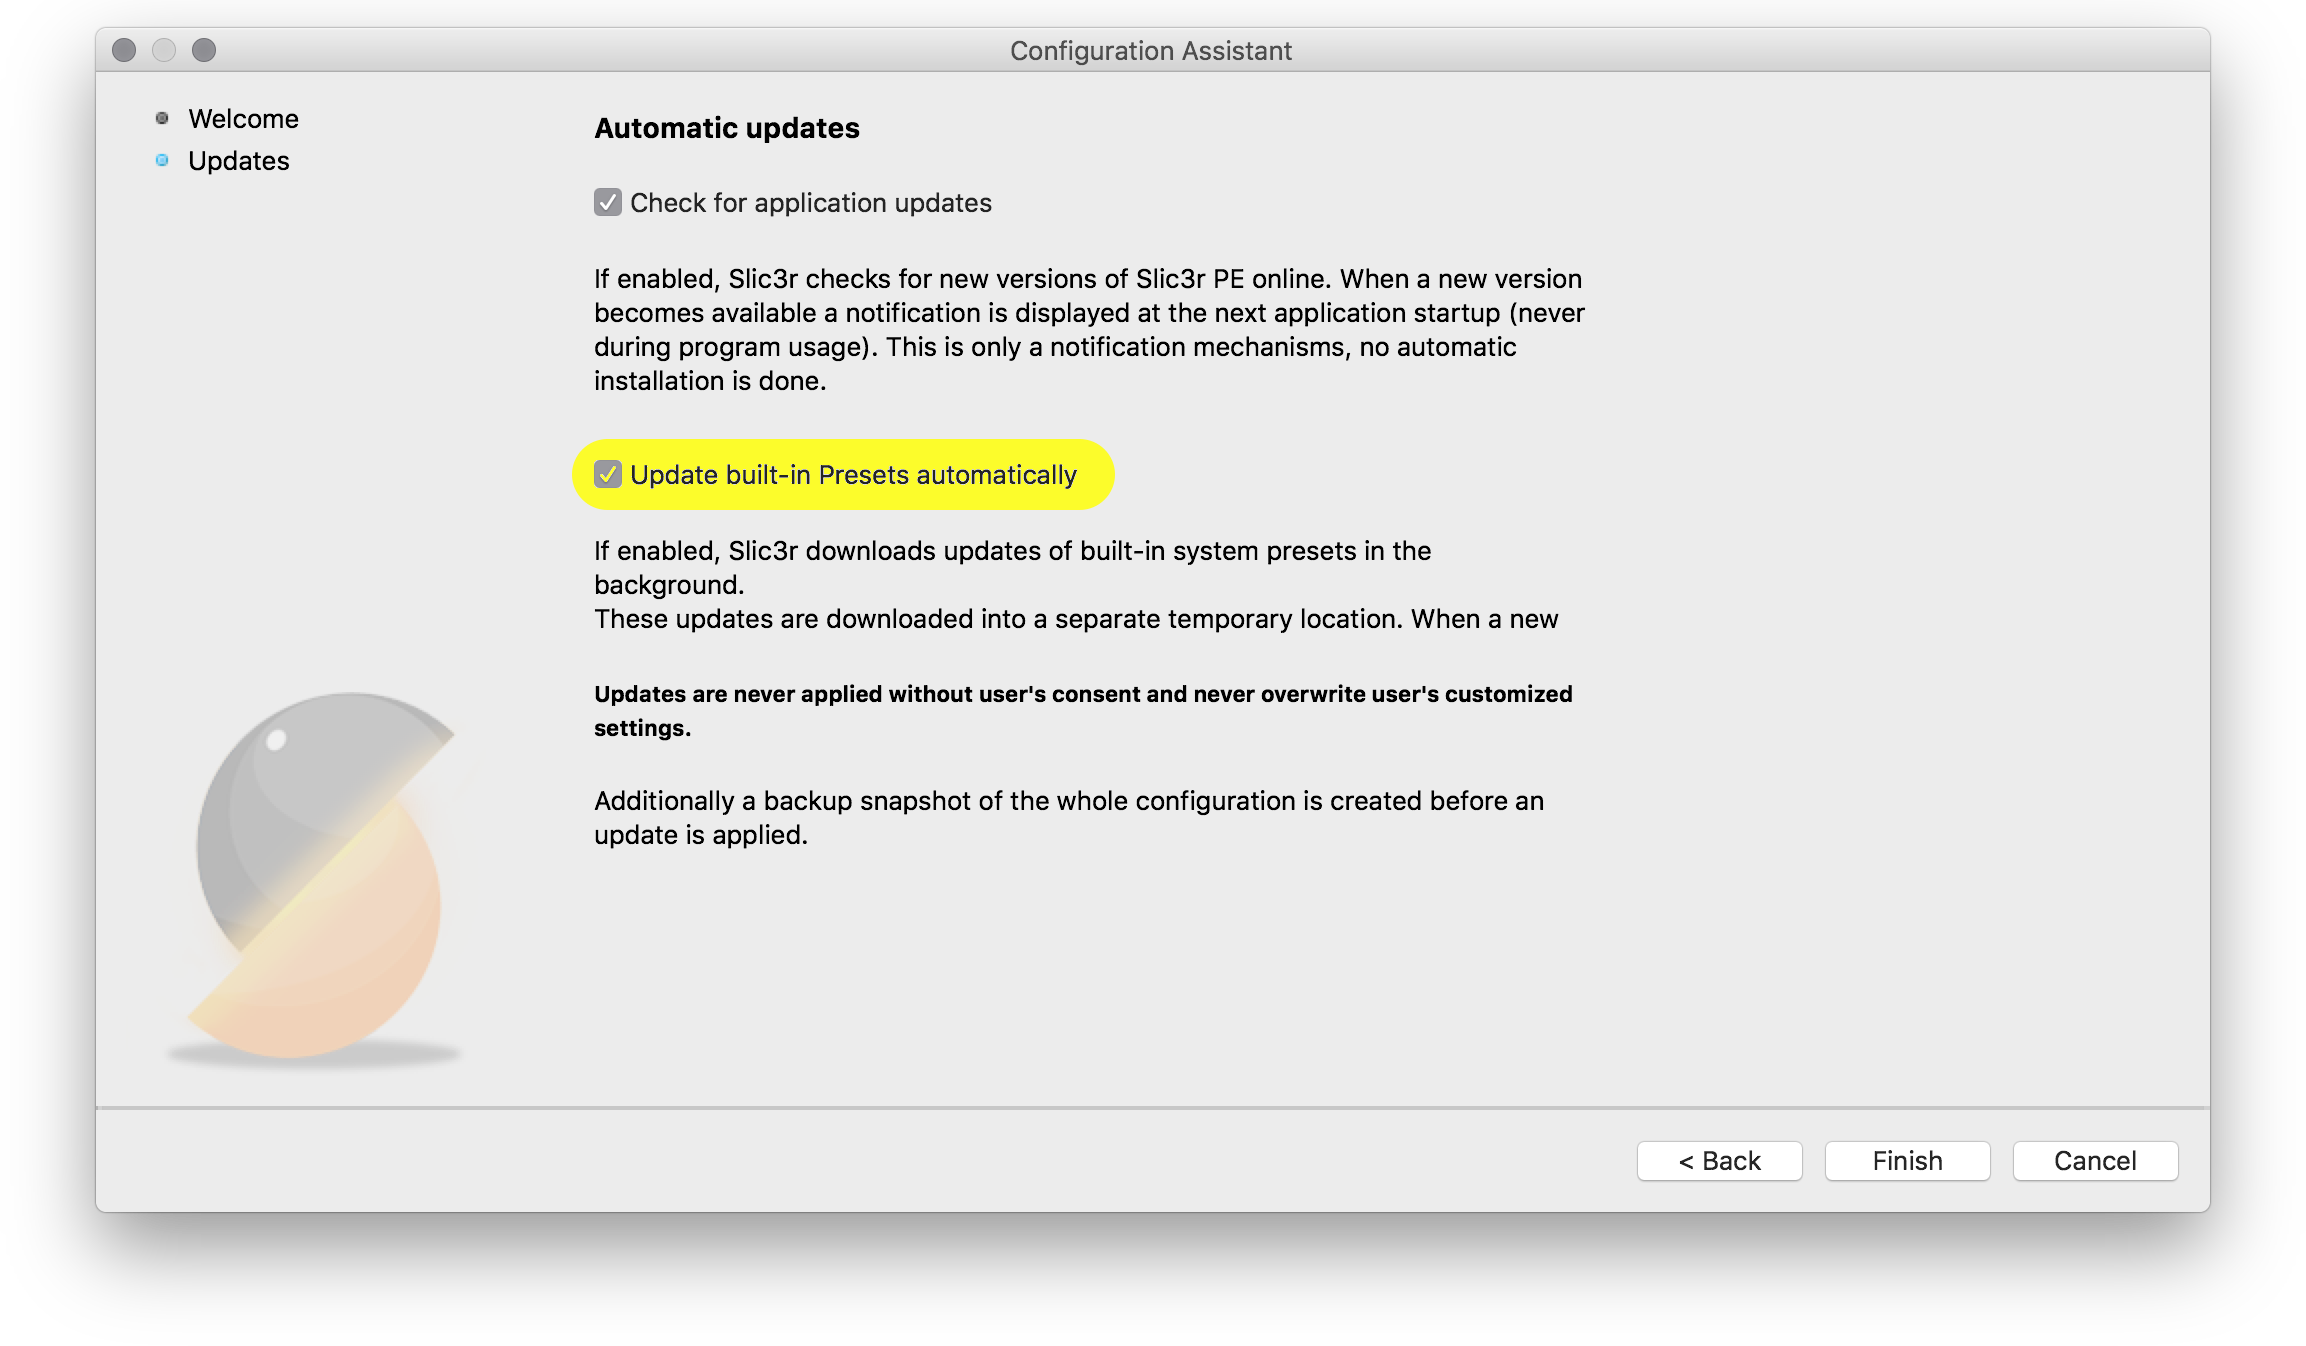
Auto-update feature in Slic3r PE
Slic3r PE is now fully translated into Czech, English, French, German, Italian, Polish, Spanish and Ukrainian!
Differential print profiles were my dream for a long time and they are already implemented as well. Imagine a situation when you like our print profiles, but every time you update, you have to change the number of perimeters. When you do this in Slic3r PE 1.40.0 you will have to save the profile as new, but when we update the system profiles, you will get the latest settings coupled with your specific changes! When you are playing with the profiles, the changes you made are highlighted. Settings now also have snapshots, so you can always go back to the previous working state!
Last but not least, we have accurate print time estimation by simulating the firmware with the same settings as on the printer and it proved to be extremely accurate! In the future Slic3r PE versions (1.40.2+), this will be added into the G-code so the remaining print time will be displayed on the printer’s LCD panel 🙂 Actually one more thing! We have a beautiful G-code visualizer! You just have to export the G-code first, but we are working on that too.
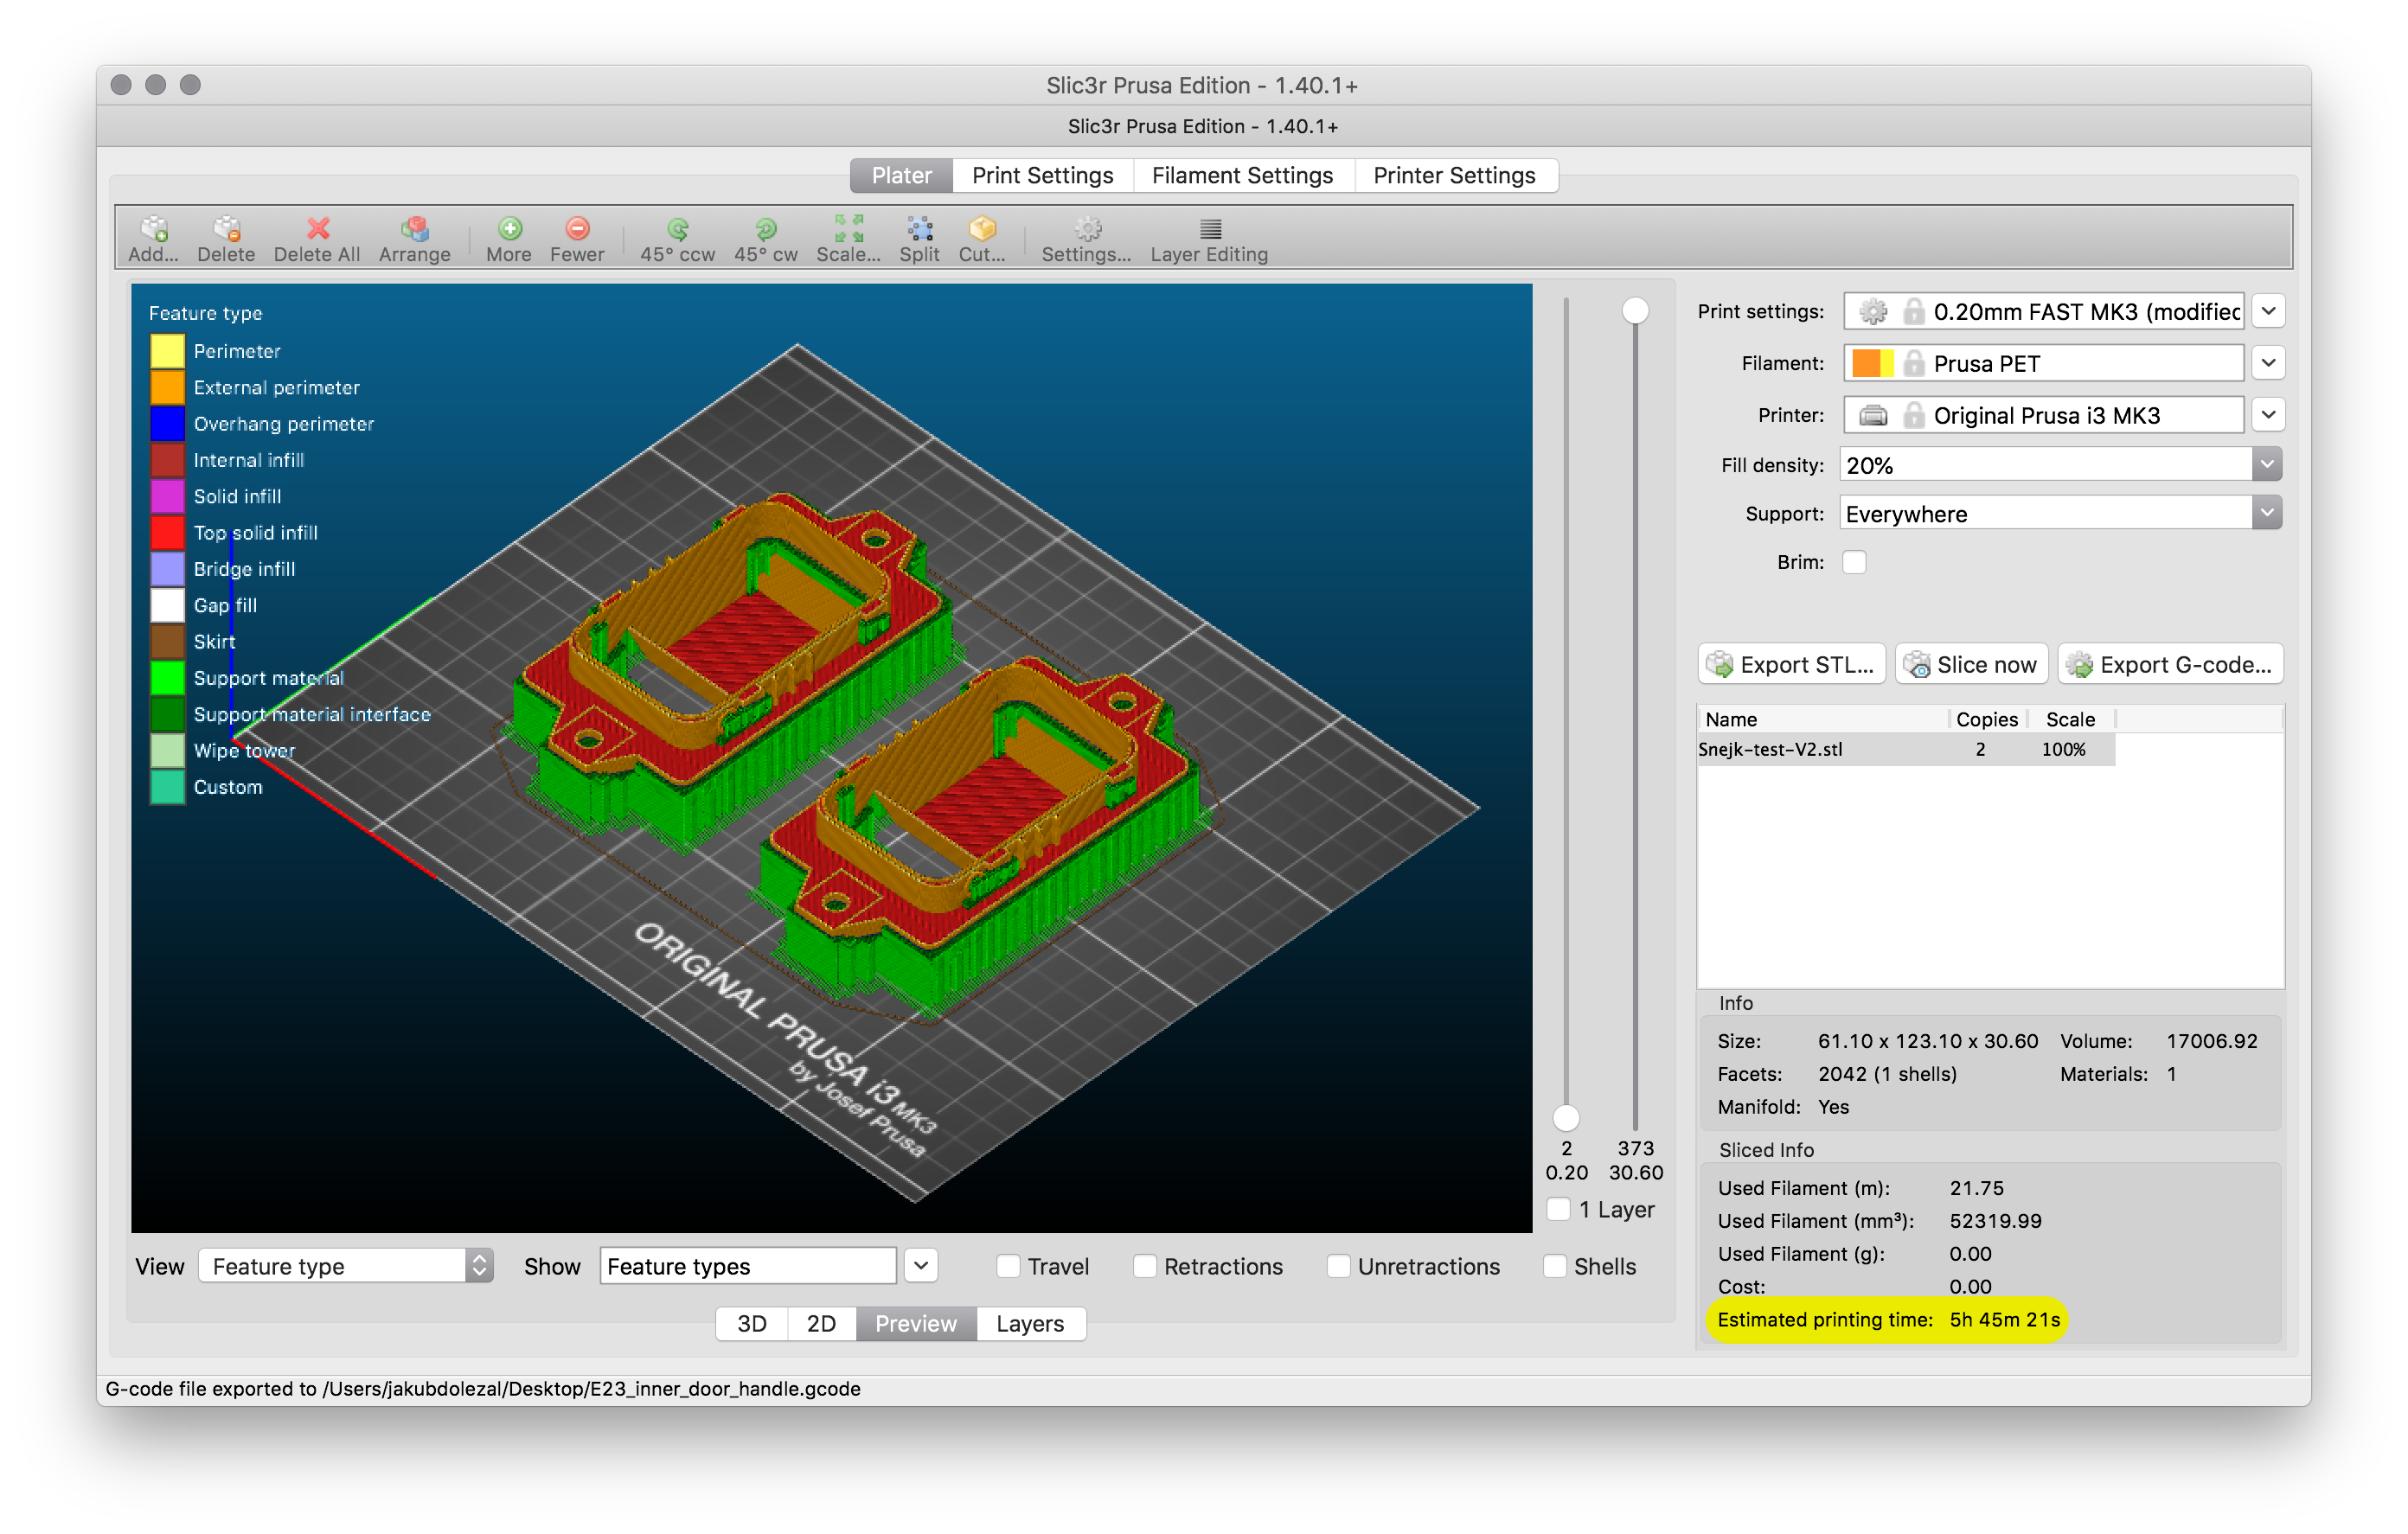
Estimated printing time in Slic3r PE
You might have noticed that we haven’t updated PrusaControl in a while, and there’s a reason behind it: we are working hard on porting everything into Slic3r PE, which will become the PrusaControl 2. PrusaControl was a standalone experiment with GUI, since we didn’t want to completely change the way you use of our primary slicer. But now it’s time to unite them together 🙂
Slic3r PE v1.40.1 is a part of our Drivers package or you can download it separately from Github.
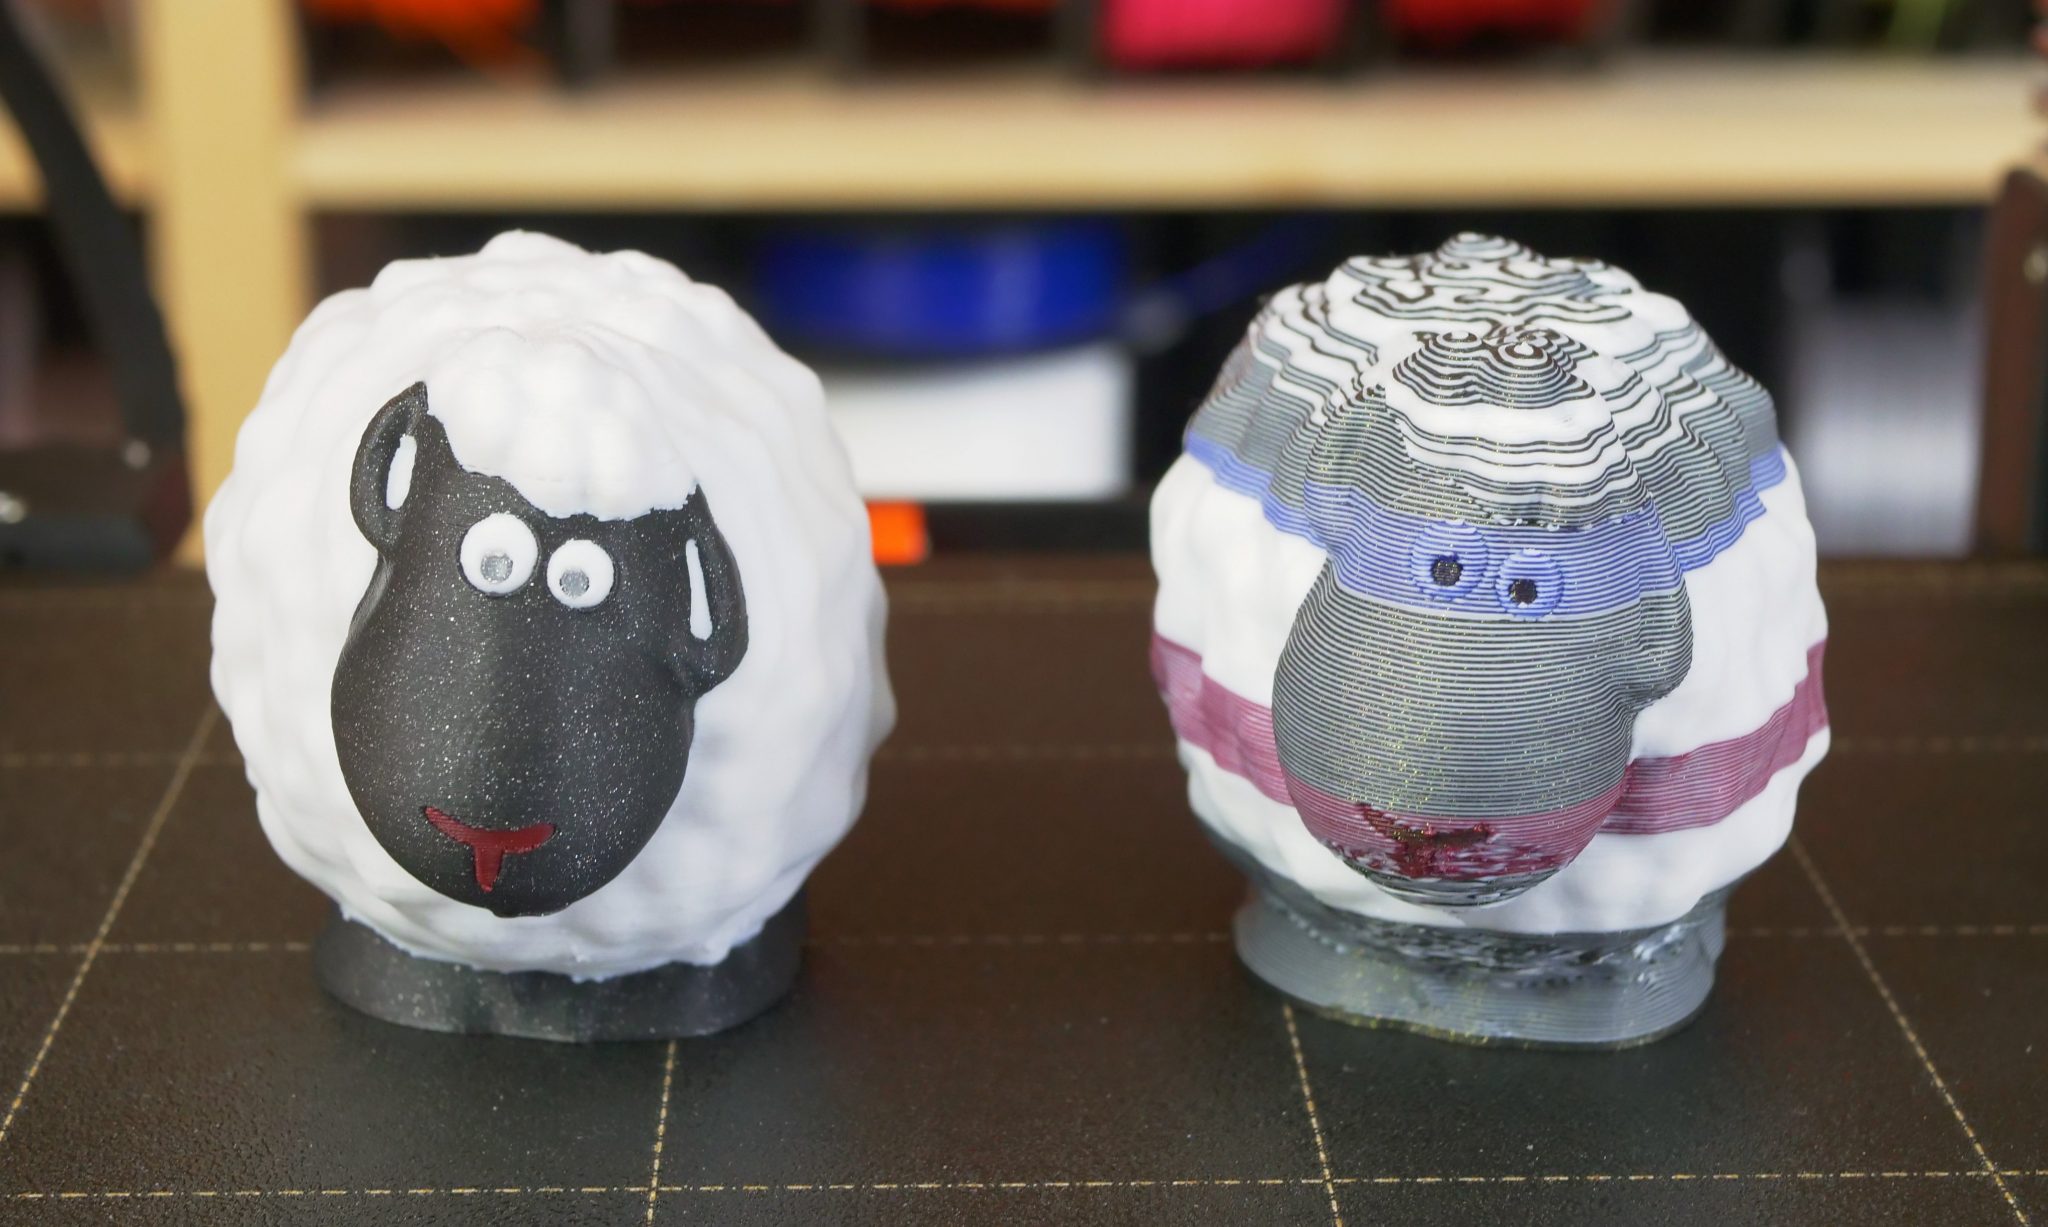
Inconsistent extrusion
You might have heard about inconsistent extrusion or the elusive GitHub issue 602 if you are watching Prusa related facebook groups. No one knows exactly what it is, but everyone likes to talk about it. So we dived into it and were working tirelessly for the last few months, searching for a solution for this “problem”. Eventually, we found out that two things are getting mixed together, inconsistent extrusion and plain bad prints caused by incorrectly assembled or broken printers. The true inconsistent extrusion is omnipresent on all 3D printers we have here in the office – from cheap to expensive ones. If you position a light source in parallel to the object wall you can see it as a light noise in the object texture. Good material hides it, but some materials, like the light blue we used in our tests, make it more visible. My theory is, that a large amount of the white pigment in the formulation makes it act a little bit like a non-newtonian fluid.
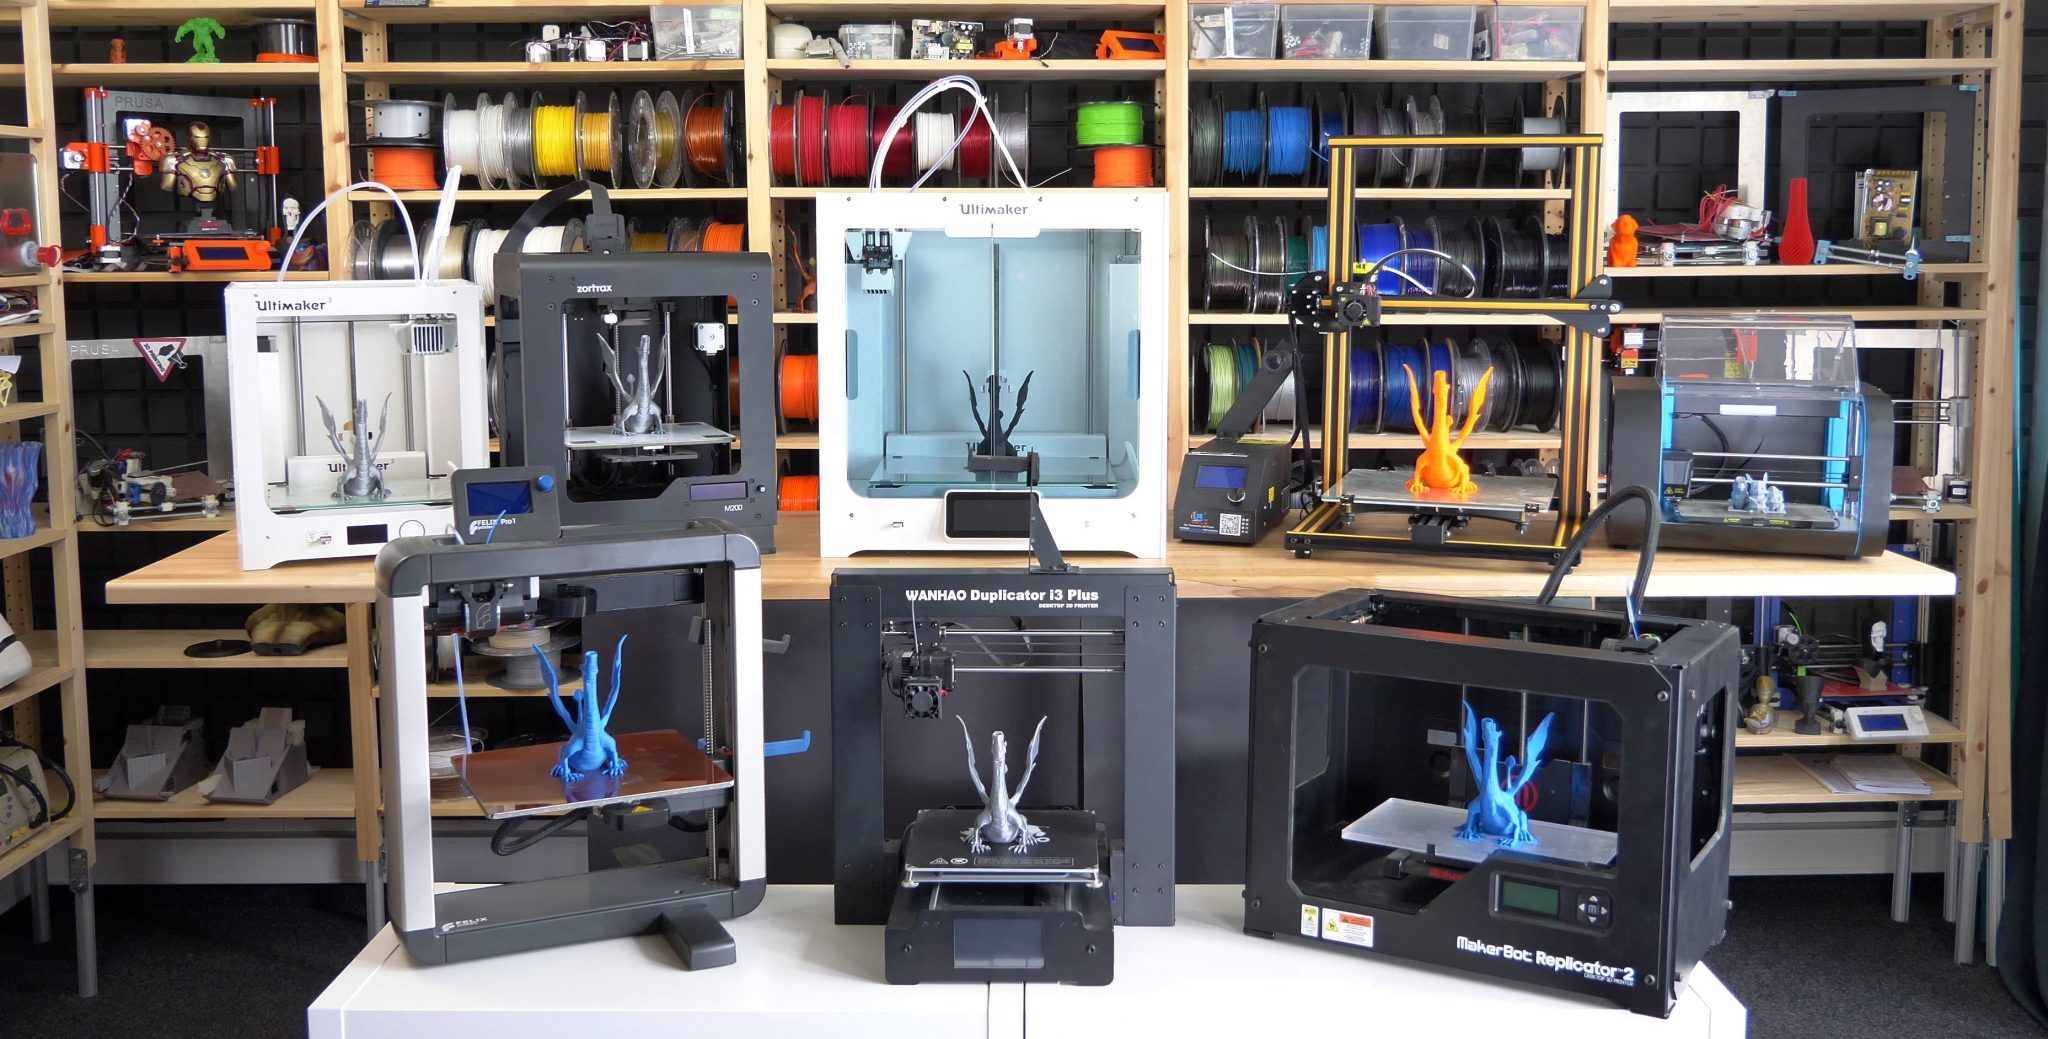
All our test 3D printers

Test prints from various printers in random order under parallel light with respective printer default settings
But before we continue with inconsistent extrusion, let’s help everyone to get their printers up to spec first.

Normal print vs. print from an incorrectly assembled printer, which is often mistaken for inconsistent extrusion
Based on the examination of printers received back from the customers, we compiled a list of the most common problems causing poor print quality, which are often getting mixed together with the inconsistent extrusion problem.
- Make sure you have BOTH bearings in the Bondtech idler
- Check if the Bondtech gears are aligned with the path of the filament.
- Check if you do not have too much tension on the extruder idler springs. Just tight enough, so the filament doesn’t slip!
- Check if the backside of the X-carriage is properly tightened
- Check if the Z-axis and X-axis smooth rods are properly secured
- Check if the U-bolts holding LM8UUs are not too loose or tight
- Check if you have a good filament and that it is dry.
- Check the filament diameter.
- Check if you are using MK3 presets! Yes, other printer settings are way too common! Specifically, many people use Cura with MK2 settings for MK3.
- Calibrate the extruder linearity
- Adjust the extrusion multiplier to prevent over extrusion
Getting back to the inconsistent extrusion, I will try to give you an idea about all the tests we ran.
It is not caused by firmware or the board at all
- We ran the MK3 with EINSy and RAMBo mini with our Prusa Firmware and latest vanilla Marlin to no change at all.
- We also have tested EINSy with Prusa firmware and vanilla firmware on MK2 with no change of quality compared to the previous state.
- We tried Klipper firmware with EINSy and RAMBo providing little improvement on some machines and no improvement on the others, but with the blind test, we were not able to identify individual printers.
- Last but not least, we tried Duet Wifi on the MK3 to no measurable change.
- Changing the stepping interpolation on Trinamics didn’t affect anything, too.
So after all these tests I confirm that the root cause isn’t Firmware, Einsy, Trinamics or using an 8-bit platform, as some suggest. Some combinations provide improvements, but not to the particular issue.
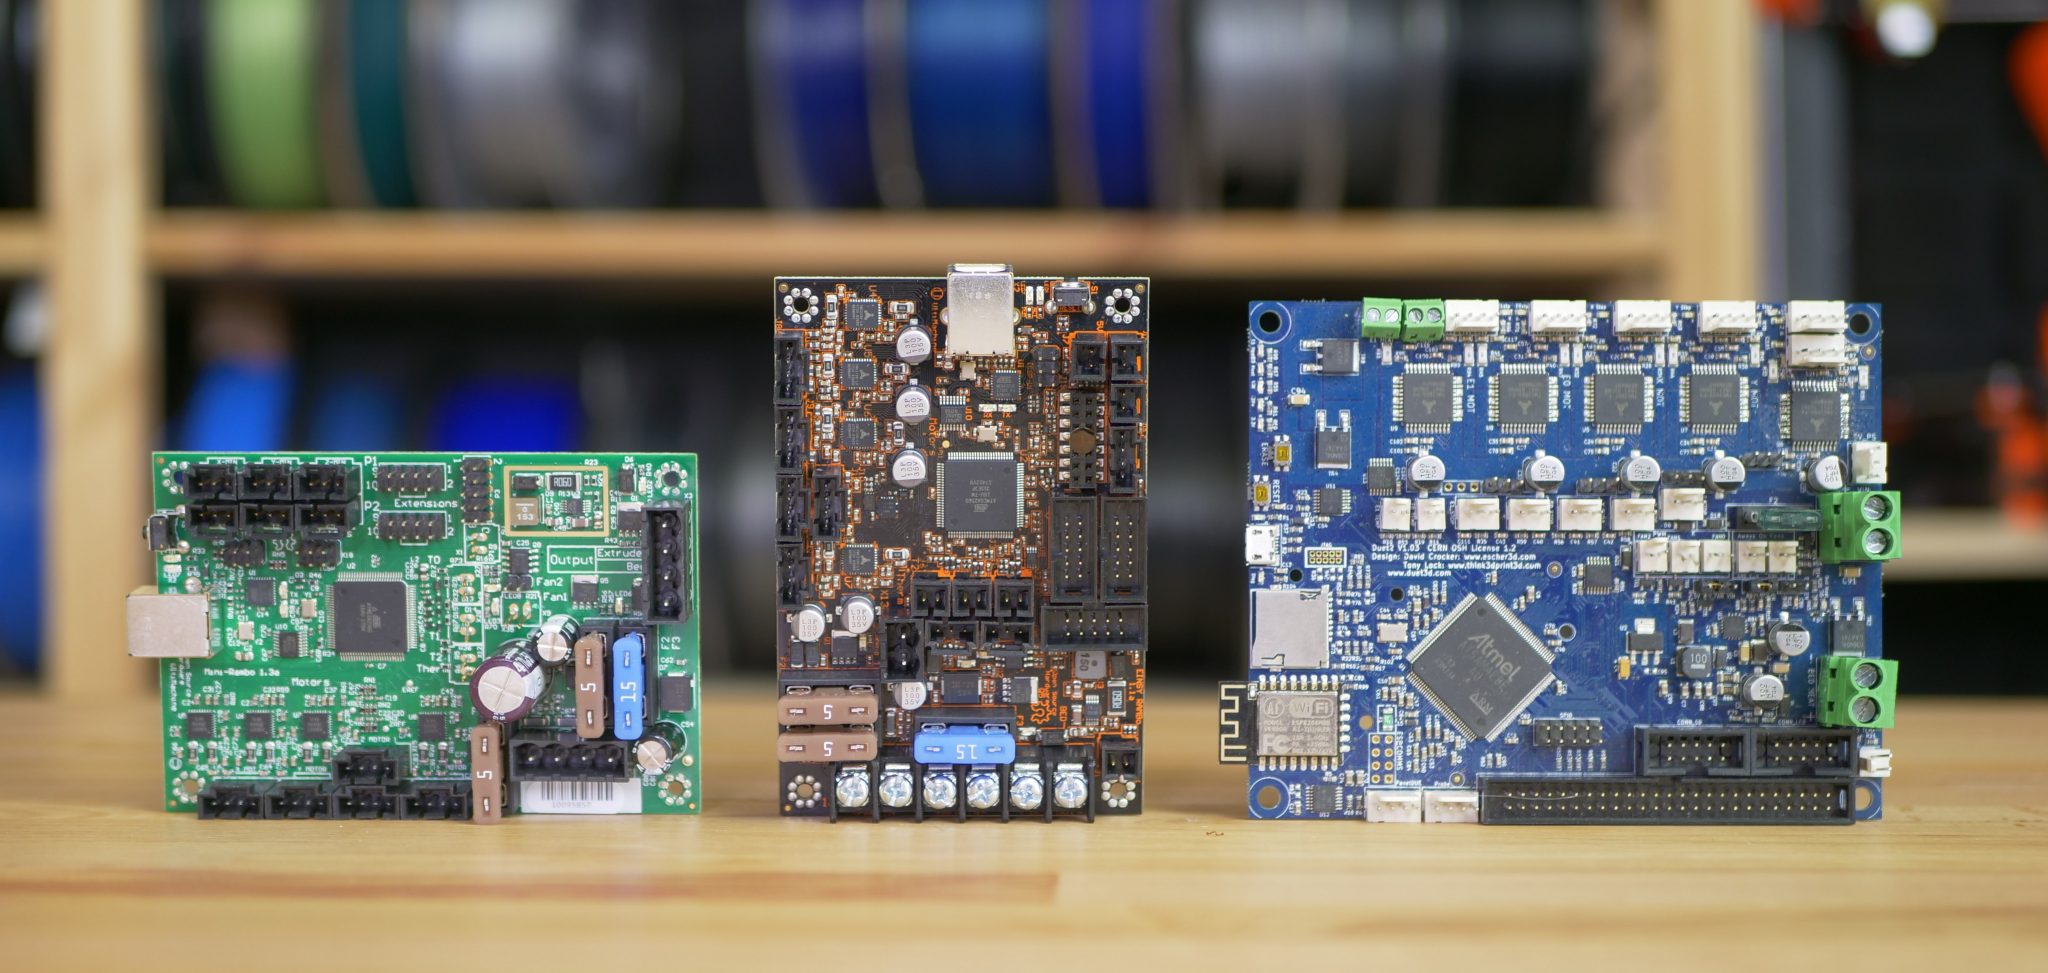
All the boards we tested with different firmwares
The frame is not to blame either
I wasn’t very convinced by this theory, even in the beginning, since MK2 was much “softer” and didn’t have marginally worse prints. But we tested it anyway.
Toothed belt idler pulleys provide no improvement. We tried to make the frame double thick with added braces, because we thought it might act as a tuning fork, yet again to no avail. We made braced X-axis with four smooth rods to prevent any extruder wobble, again to no significant change.
The only thing which affects the quality from the hardware standpoint is the rubber feet, at certain objects, it might be the source of some oscillation.
Switching from generic GT2 belts to original Gates GT2 did not provide much improvement either, but since we saw the varying quality and we had to throw out a lot of them, we decided to switch to the original ones and they are being shipped now.
Conclusion
These were just some of the tests we made, but they cover most of the “sure solutions” circulating on the internet.
In the end, we used a printer from a different manufacturer, which we had lying around, and just mounted our extruder on it. This printer is rather overengineered with branded lead screws, Hiwin linear rails, and heavy milled aluminium construction, so no negative mechanical effects were present. The problem remains.
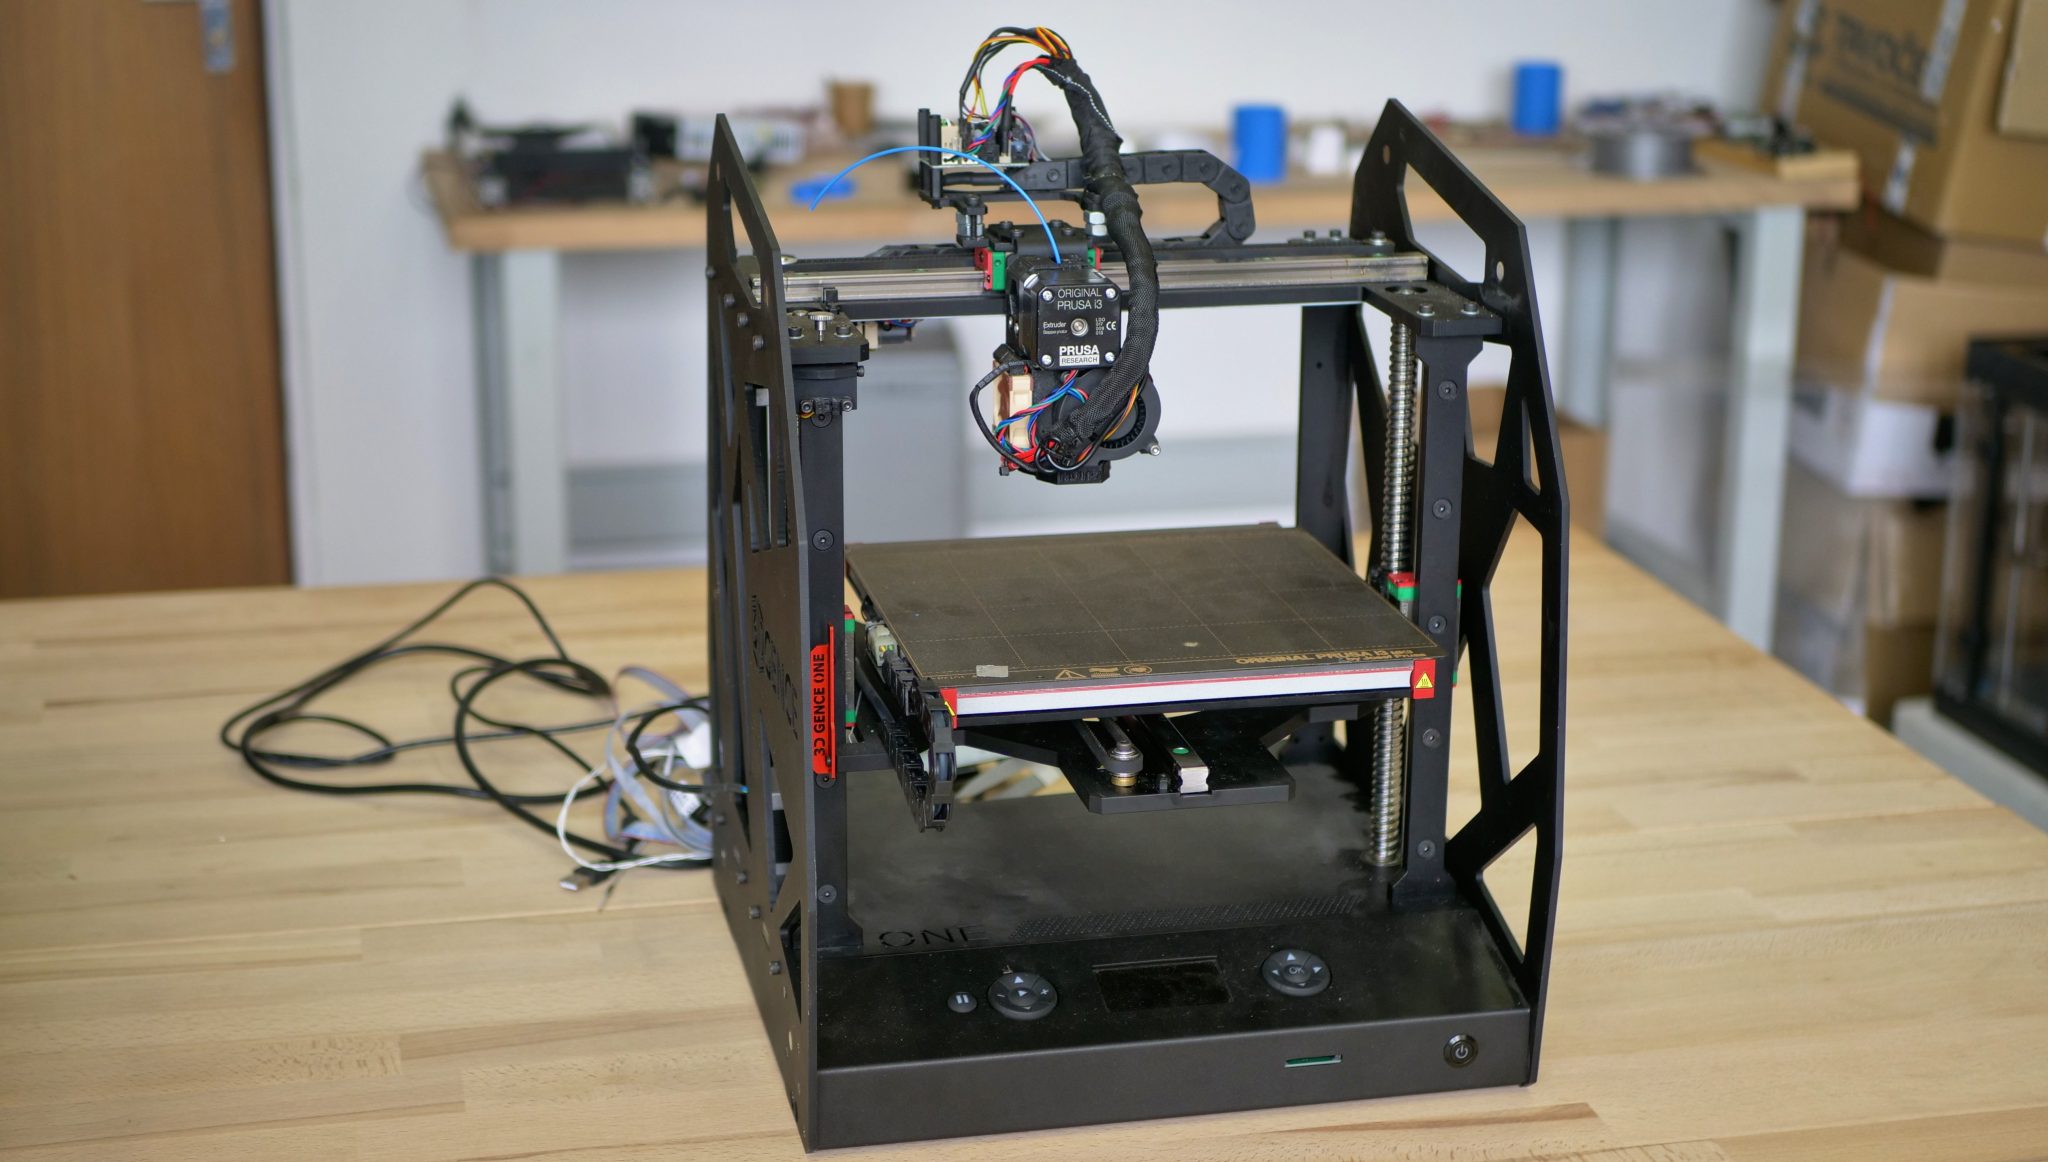
“Donor” printer with MK3 extruder
So our latest lead is that it is caused by the nature of the drive gears everyone is using and how toothed they are. We and some other members of the community are working on this and we will share more later.
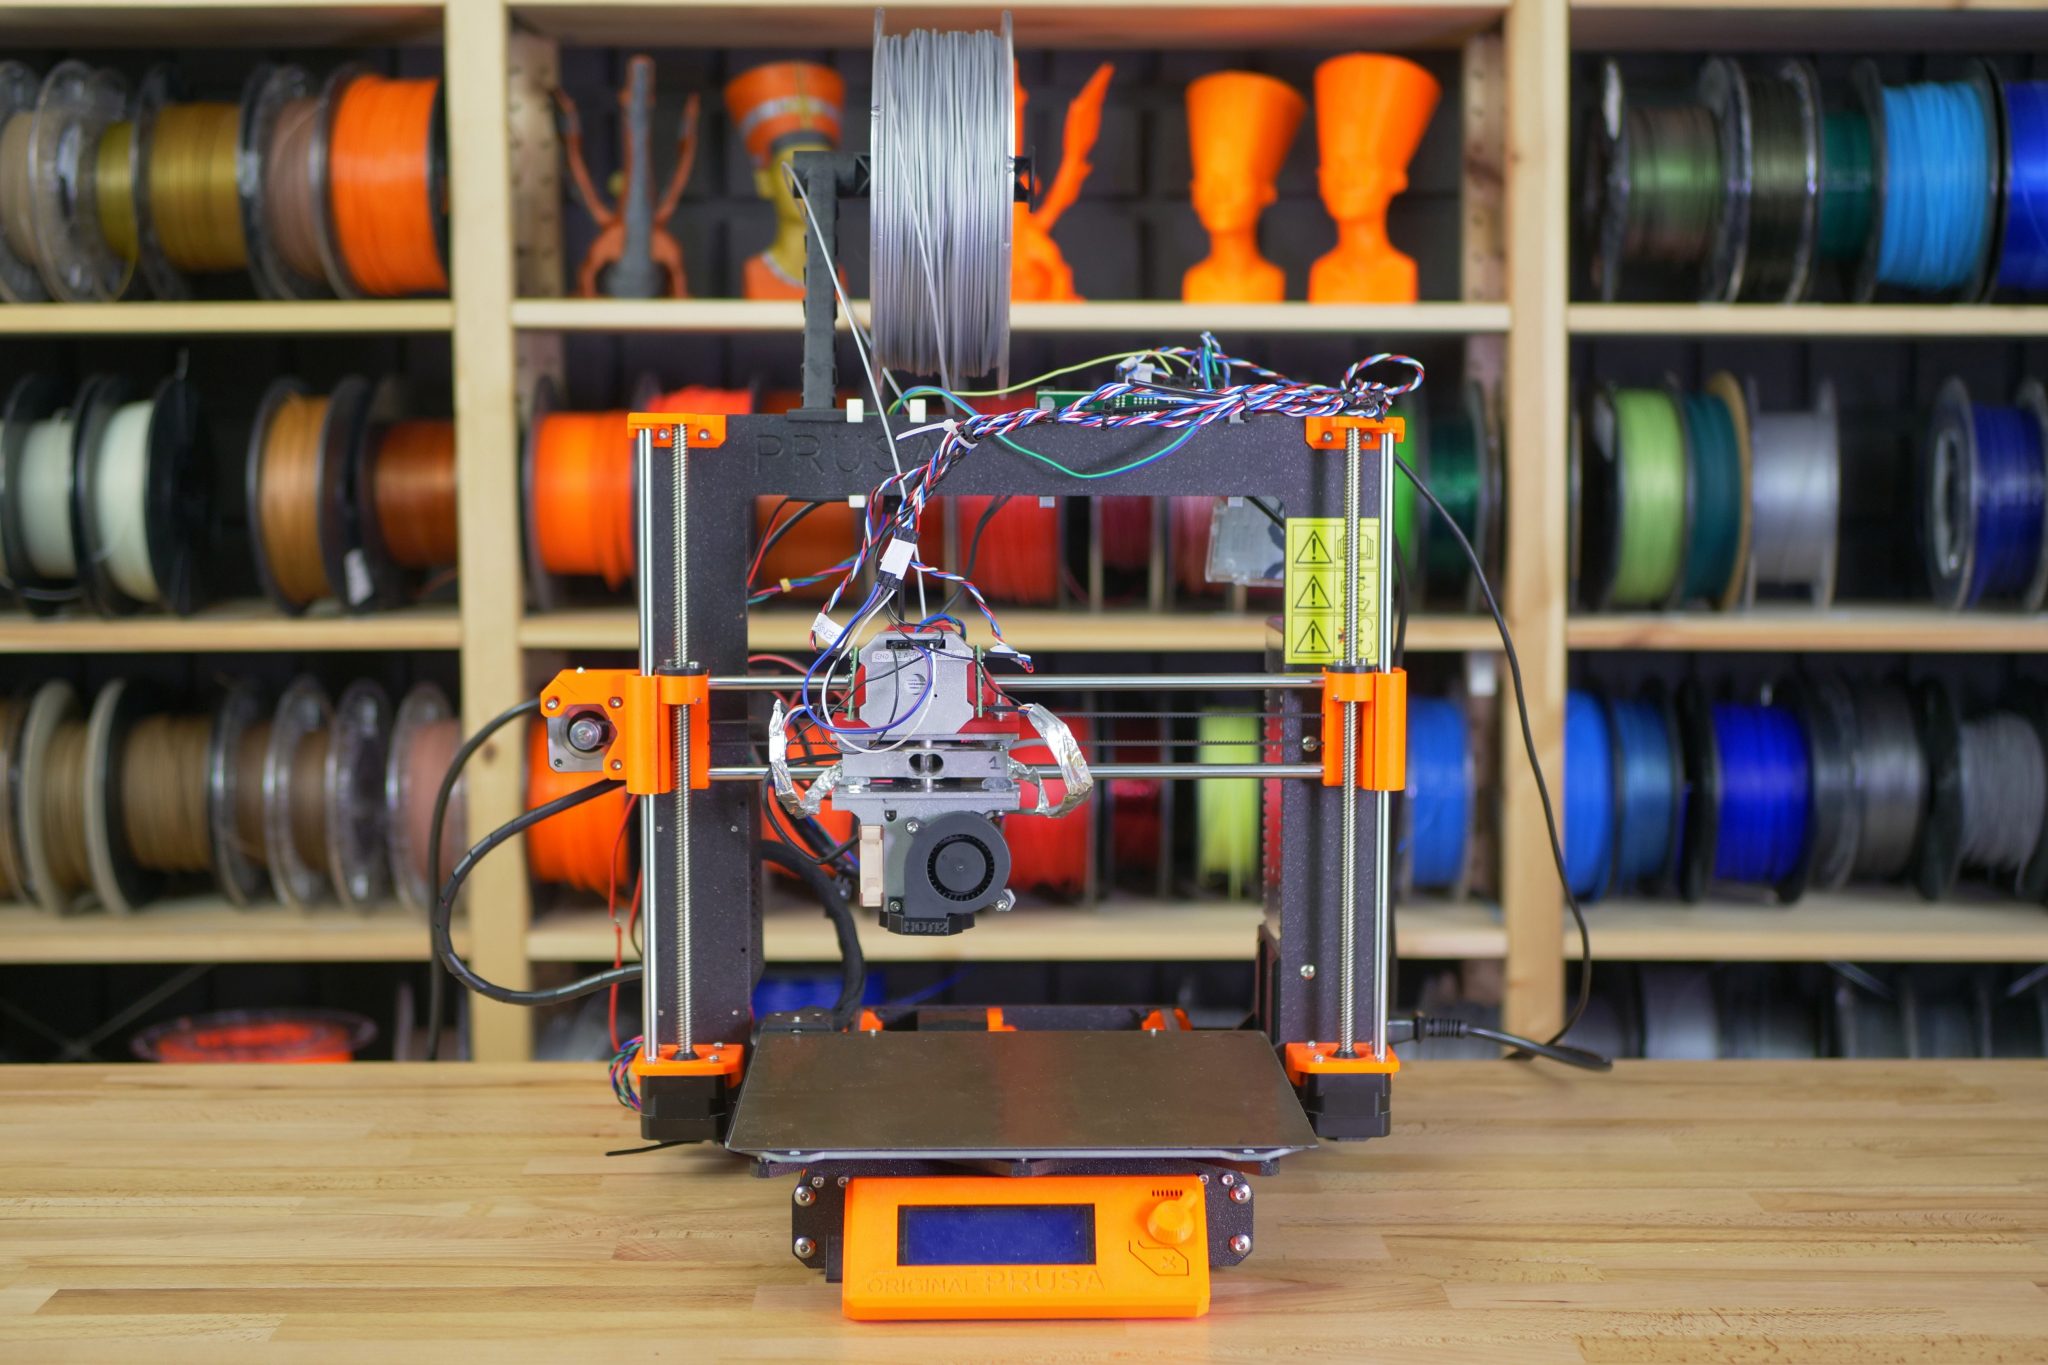
Modified MK3 capable of measuring pressure in the extruder
All in all, if you are looking for extrusion inconsistency, you will find it on every printer and I am sorry it got out of hand and once you see it you cannot unsee it. It is present even on our brand new Ultimaker 5S. :-/ I am glad we are on this case, as I don’t see anyone else working on it. But for now, it is not an issue, just a property of all FDM machines. But that doesn’t mean we won’t be able to improve it.
Firmware
Firmware had its fair share of updates in the last few months too. Linear Advance was brought back in 3.2.0 along with a safety timer (when you leave a printer preheated without starting a print, it will cool down) and an improved, much faster XYZ calibration process. In 3.3.0 we are adding multiple language support, and additional languages are stored in the SPI flash (so far English, Czech, German, Spanish, Italian, Polish is supported but basically unlimited number can fit inside). You have to use Slic3r PE to successfully flash the firmware with all of the languages. We also added support for an extremely accurate remaining print time from Slic3r PE. Basically, we will embed the time into a G-code every few minutes so you will know how much is remaining from start to finish. Little thing, but it will make life much easier for a lot of people.
Here’s a list of some more improvements since 3.2.0:
- Extruder linearity correction
- A recurring crash detection limit
- Automatical Z axis raise during filament loading
- Better temperature calibration
- Stealth mode for Z-axis
- Mesh bed leveling StallGuard
- Extruder motor current correction
Make sure you update the firmware regularly to benefit from these features. The current latest version is 3.3.1 released yesterday.
Right now we have Octoprint bug fixes for MK2 in our pipeline and we are also planning to unify firmware for MK2, MK2.5 and MK3.
Better cooling and extruder upgrade
MK2/S default cooler was unidirectional from the front. When we were working on the MK3’s cooling, we wanted to have a more even cooling around the object. This means that overhangs facing away from the fan are printed better, but the ones facing the fan cannot be as steep as those on the MK2/S.
We have prepared an angled fan mount which increases the airflow and ups the cooling performance.
The new angled fan mount on the MK3
We have also improved the extruder body, providing better extruder heatsink/heat-break cooling. This helps to prevent some jams in situations when the printer is placed in a high-temperature environment or in an enclosure. There is around 3°C improvement on the heat-break and between 10-30°C on the heatsink itself. It uses air inducement effect similar to the Dyson Air Multiplier. 🙂
This new extruder also provides better performance for flexible materials. 🙂
Feel free to try out the STL models and G-codes (the same for both MK3 and MK2.5) and share your feedback on our forum, where you can find more info about particular parts. If you like them, we will put them into production soon. 🙂 Print them from PETG or ABS and make sure that the extruder parts are printed in BLACK. The filament sensor is calibrated to operate in a black-colored environment only. Otherwise, it might be giving false readings.
Other news
We opened our own hackerspace, PrusaLab, in our offices, so if you are ever traveling to Prague, make sure to visit us and do a little project there! Or at least check out all those sweet machines we’ve got there!
We also made an EPIC Maker Faire here in Prague, check out the video or photos as I think it was the best one so far in Europe with over 10.500 people visiting 😉
Plenty of news for one little update article, but rest assured that we have much more to share – all in due time! 😉
Great job Jose!
All great news! Trying desperately to save for a MK3 and MMU2… Knowing my luck I’ll just order them and you’ll announce the MK4 and MMU3!! LOL!
Any idea when Slic3rs supports will be worked on? I can’t print objects to the edge of the bed as it generates supports off the bed edge!
Have you considered using variable infill along with the “wipe to infill function” whenever there is not enough infill to completely wipe the material?
I would prefer to have more infill in some layers than continuing to have the wipe tower.
This would also help increasing the print area in some cases.
Excellent update! I’ve got my 2.5 upgrade working extremely well, so I’ve got to think about whether and when to upgrade the extruder. Hmmm…. The power-coated PEI sheet doesn’t need any further thought, though. I’m looking forward to making use of the voucher.
I’ll have to check out the new Sli3r PE, too. I sure hope it will install on my laptop. I’m running an older version of Sli3r on it, but I wasn’t able to install PrusaControl due to its requiring GPU support.
Thanks for the update. I’m very happy with my printers. Keep up the great work everyone.
Could You also check bowden setup with popular x-carriage created by Tech2C?
It is light weight, a lot of ppl uses it on another machines and I would be really happy to see the result before i try it on my MK3
Additionally the print speed could be increased without sacrificing quality
Jo,
I could’t be happier with my i3 Mk3. But with support you really need a help desk ticketing system.
Great news. Love it! Keep up the good work.
With the new extruder parts, it seems like the arm on extruder-cover-v2.stl is now unused. Is that correct, as there doesn’t seem to be a bolt in the right hand side of the fan in the photo above? If this is the case, may be a good idea to upload a version without the arm. I have no issue removing it myself prior to slicing, but other may prefer an stl download.
I just ordered a MK3 kit last week, fingers crossed it will have these updates!
Great stuff, are the new extruder and fan components to be printed with 100% infill?
Cheers
Darragh
Hi Darragh,
20% of infill will work perfect!
Dick Vlasblom
Nice work on the extruder cooling! The new “Extruder_dyson_body” looks very similar to the standard MK2.5/MK3 one – are there any subtle differences? I’m wondering if I can just attach the new “Extruder_dyson_cover” to my existing body, which would be a really quick mod. Completely disassembling the extruder to build around the new body would obviously be less so 🙂
Never mind – I stopped being lazy and loaded up the new and old models. Prusa have done some work on the air intake and exhaust profiles in the new extruder body along with a few other subtle changes, so a full replacement is required.
I should add that I’ve just finished stripping and reassembling the hotend for the second time due to multiple extrusion failures, and it looks like heat creep could have been to blame so this improved heatbreak cooling will be very welcome when I get round to installing it!
Hi. I can’t seem to find this G-Code visualizer?! Where is it located?
Thank you!
Best regards.
When you want to remove the teeth on the filament drive gears to resolve the inconsistent extrusion, what do you think about a suface with small saphire particles, like a file for fingernails ( coarser side). The grip on filament is excellent……
Having links to the mentioned products, upgrades, etc… inside the article would be greatly helpful. I always have a hard time tracking down where to find out if I can get my powder coated metal sheet or where I can download the changed fan mount. I also can’t always remember where to get the download of the latest slicr, etc… if you had links in this article it would be very nice so we don’t have to hunt around. Thanks!
Great news with the powdercoated PEI sheets. But do you have ANY news for those of us that ordered in March or later? Will we be able to buy powdercoated or even smooth PEI plates / sheets anytime soon? I did at first order with the powdercoated but all the gloomy news and chat replies made it clear I should switch to smooth. Please don’t leave me hanging and disappointed in the end.
Do go ahead and make the hot end and fan parts available, I would rather buy them than print them. However, since you are in redesign mode, is it possible to make the nozzle more easily seen from the front?
>So our latest lead is that it is caused by the nature of the drive gears everyone is using and how toothed they are.
As far as I can tell you didn’t say you tried a different extruder setup. By “everyone” do you mean most/all printer designs or “everyone” as in Prusa printer users?
Also, labeled comparisons would have been nice. There’s no way to know which is which and it seems you didn’t include a picture of the MK3’s print.
I am a happy owner of the MK2S + MMU 1.0. However, all the new firmware updates are only for the MK2.5 and MK3. Will these new awsome ideas like “wipe to infill” and “waste object” come also to the MK2S series? There has not been any updates to my printer since 3.1.0 (November 2017).
Best Regards
Stefan
Hi All,
I have tested the new head printed parts (only the dyson body) and can confirm – it solved my long prints filament clog issue i had.
Before that I had a very bad issue of the extruder getting blocked (filament stuck inside) after about 2 hours of PLA printing. I tried fully cleaning the head, replacing the nozzle, replacing the ptfe tube, nothing helped. I was about to contact support when I got this update email. I decide to give it a try, and what do you know – it worked!
Thanks!
I’m very happy that you have admitted that the inconsistency in the print quality is due to bad printer assembly. The MK3 was my first 3D printer and although I felt confident assembling the printer my self I have decided to purchase it pre-assembled because after all it was my first one. However the first few prints looked exactly the same way as those shown in this post. Overtime the quality got even worse so at one point I was sure that the printer assembly was poor and I have decided to reassemble it myself. I have a lot of experience building robots and all sorts of other machines so this was no challenge. At the end the printer was finally printing with the advertised quality but this made me wonder why I have paid for the assembly in the first place when it was made so unprofessionally… Don’t get me wrong… I really appreciate your work and I respect how far you have gotten with what you do but please at least try to improve the quality control a little bit. I highly doubt that printing your name qualifies as a QA test. I hope you look at this comment as a constructive criticism and not hate, because it really isn’t ment to be hateful.
Interesting update! I’m looking for my first printer. 602 has put me off but I’m closer to ordering. The real issue is while always present in FDM printing the Prusa appears to fair worse than printers in the same price point.
Please include a publish date on these articles so can easily tell how up to date or out of date they are. Did not see a date on this but by the comment dates I expect that it was just out this week.
Any chance to get a Linux 32-bit build for slic3r PE? I am not able to compile it (under recent Debian).
Tyty so much for this, It helped me so much. I had new filament and the color really showed dark lines and I thought it was inconsistent extrusion. However the video you made showed the problem, I had the gear backwards on the filament motor pulling the filament. The big gear was pulling it instead of the small as the other side. Once I put it in right, the lines got much cleaner. It helped quite a lot, thank you so much.
https://imgur.com/a/0vpkjF6
Hi,
I have now my ordered Prusa I3 MK3 kit assembled and running for one month.
I must say a magnificent peace of engineering!
As an independent 3D consultant I also work with high end printers starting
from 350.000 + euro’s.
Now printing the new extruder parts with PC-ABS. Yes, quite challenging to keep the parts
sticking to the bed… Just relax and wait until the new PEI sheets will be shipped.
Also printing Adalinda with nGEN, sure the wings will break in the first two prints due to my wrong temperature settings, well that’s part of the game calibrating a printer!
What I don’t understand is the huge amount of negative rumours about the so called
“inconsistent extrusion” never saw that problem from the first second.
Maybe people should understand that you get with the Prusa I3 MK3 an absolute top
product, for only a few bugs…… But if I read in what a terrible state Prusa receives that printers back…….. Please learn first to read a manual and then how to hold and use the included tools……..
Don’t believe me? Buy a high end printer for let’s say 200.000+ and a maintenance contract
of 20.000 a year…..
Dick
Hello, I’ve allready mounted “Extruder_dyson_cover” on MKS2.5 extruder : everything fit perfectly. Printing test: the print quality with extraction between two location works better ( no spider wire effect ). And during changing filament operation, I’ve noticed that molted extremity after unload filament request have no spider wire and very clean. It’s very useful to replace another filament without jam.
Good job !
Hey, your blog is great. I will bookmark it and I plan to visit regularly.that’s very clear and meaningful keep sharing.
i have an interresting idea for cooling that you should try and i think it will make a great advance to your machine if it works
Is the filament path angled so once it’s fed in it doesn’t rub on the hob?