Disclaimer: This article is meant only for those who are planning to produce protective face shields in large quantities. If you want to print a couple of shields at home for your relatives, then you shouldn’t need a certification.
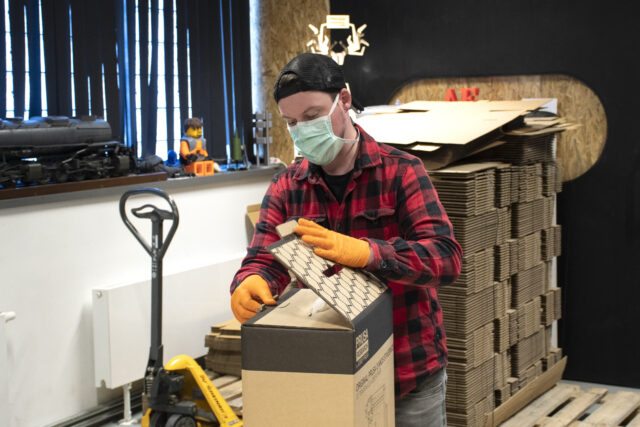
During the novel coronavirus pandemic, face shields became an important piece of protective equipment for frontline staff and many other people. The design, which we published at PrusaPrinters.org, became an important starting point for thousands of individuals and companies across the entire world. We have produced and donated over 200.000 face shields to those in need (we have documented this process in photos and video here).
However, the recently published information suggests that the pandemic is not over yet as the virus keeps spreading in several countries and it is difficult to stop it. What is even worse, there might be even a second wave later this year. Therefore, we believe it’s better to be prepared. Face shields may be required again. And this is where things get a bit complicated.
During a time of crisis, many countries introduced emergency measures and allowed frontline staff to use uncertified personal protective equipment (PPE). However, that was an exception – the distribution of home-made PPE was more or less tolerated, depending on how bad the situation with official PPE was. From our experience, doctors were happy to receive any sort of help. However, we still contacted the Czech Ministry of Health and received their official approval to manufacture and distribute face shields to medical, rescue, and social services.
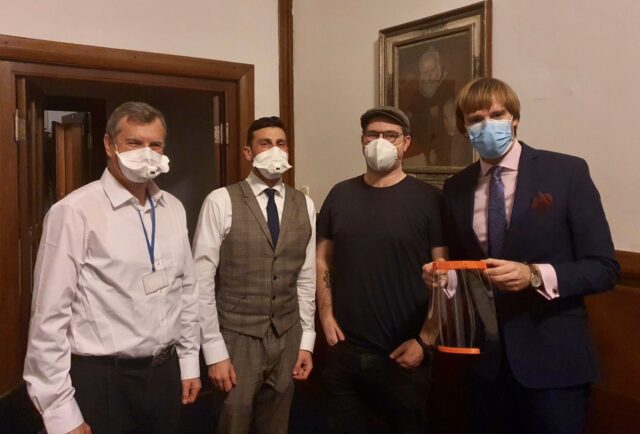
Josef Prusa meeting Czech Minister of Health
Many individuals and companies across the world started manufacturing home-made PPE and distributed them to those in need. However, this is not going to work in a long-term perspective. There may be cases when a piece of PPE made in goodwill could, due to its imperfections, cause unforeseen trouble or even put a life at risk. This is why there are officially approved processes that include thorough testing before a certificate is granted. Now, if you’re planning to print just a few shields at home, e.g. for your relatives, then this process shouldn’t be mandatory – just make sure to test the shield’s functionality in cooperation with the person who is going to wear it and ensure that it offers a sufficient level of protection. However, if you plan to produce the shields in large volumes and supply frontline staff with these products, then it’s a different matter.
Face shields are classified as personal protective equipment and must comply with the requirements of Regulation 2016/425/EU of the European Parliament and of the Council on personal protective equipment before being introduced to the market. Currently, the European Commission Recommendation 2020/403 is also valid, which recommends tolerating certain formal deficiencies in case the importer/manufacturer possess documents proving that the properties of imported/manufactured ensure an adequate level of health protection and safety in accordance with the requirements of Regulation (EU) 2016/425. Furthermore, the documents must demonstrate that the manufacturer has already initiated necessary conformity assessment procedures.
We have applied for an official certification shortly after we started manufacturing our face shields. And we promised that once we get it, we’ll share our experience and findings with the rest of the community – to tread the path for others. Now, of course, this process works (possibly with little variations) in the European Union. The situation may be different outside the EU. Also, one important thing: the law makes no difference whether you’re donating the face shields for free or selling them.
In short: if you want to keep providing other people with face shields, you need to apply for official certification. We have prepared a guide for you, which should help you to get the certification and avoid various pitfalls. Unfortunately, every manufacturer has to go through the certification procedure individually. Saying something like “We manufacture the same face shields that Prusa does” won’t get you the cert. However, it can get you a bit quicker to the finish line. You can, in fact, request a license from us (yes, even though it’s an open-source design) and apply for a simplified OBL (Own Brand Labeling) certification – we’ll explain in a second.
Another important thing: even though the face shield is “single use only”, it can be reused after application of the appropriate disinfection, until mechanical damage occurs. We tested various disinfection methods in cooperation with various hospitals and laboratories – live samples of SARS.CoV.2 were used in the process.
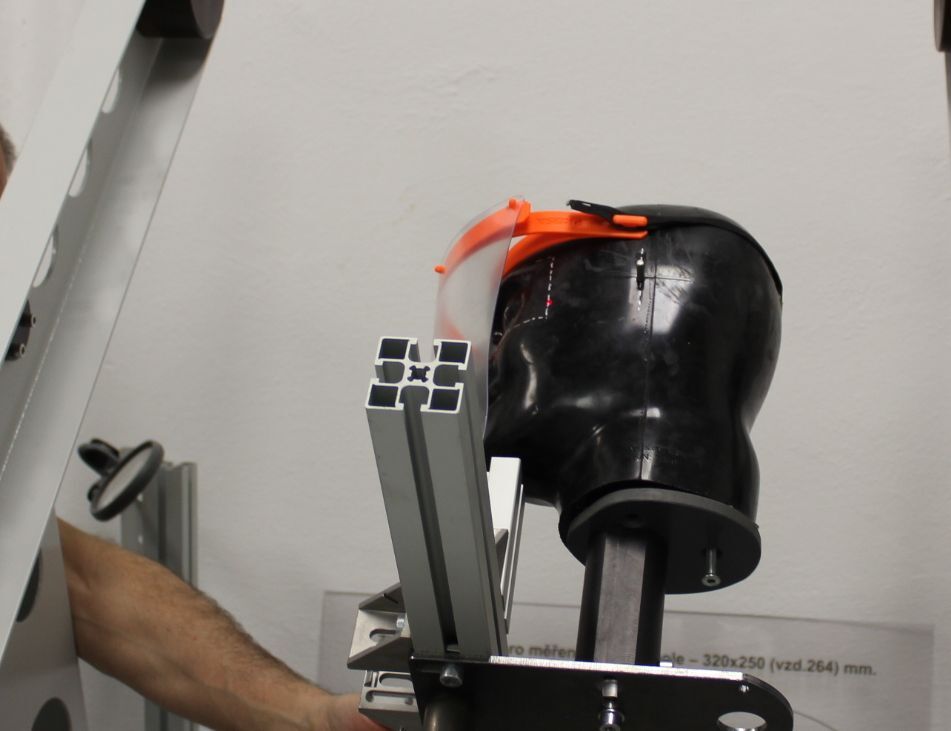
The official testing procedure includes testing with a laser to ensure the shield offers sufficient protection
The current situation with face shields
We used the RC3 version of the face shields to get the final official certification. The RC3 was designed to allow the wearer to use it in a combination with secondary protective equipment – e.g. goggles with indirect ventilation, respirators, and protective suits.
To speed up the manufacturing process and minimize the amount of material used, the RC3 design is streamlined as much as possible. The RC3 received the CE certification and it complies with the EU regulation about personal protective equipment. It can, therefore, be officially used as a protection against mechanical impact. We state that the purpose of the use is to provide the wearer with frontal protection against flying drops. The RC3 version also passed through the checks of the Czech Trade Inspection (ČOI – Česká obchodní inspekce).
However, the moment we realized that this situation will last much longer, we went back to the drawing board and started working on the RC4 revision with improved protection capabilities. Also, we collected feedback from the users and one of the requests was to improve the comfort – this is why we included cutouts for shoulders in the RC4. The RC4 provides complete protection of the entire face (flying drops, sprayed liquids) and has passed the official certification procedure according to the standards. It provides not only frontal protection (like the RC3), but protection on the sides as well. The Prusa PRO Face Shield (as we named it once we received the certification) meets the standard of EN 166:2001 for protection against drops and sprays (protection class 3).
If you live in one of the EU countries, you can order the certified version of this shield on our e-shop.
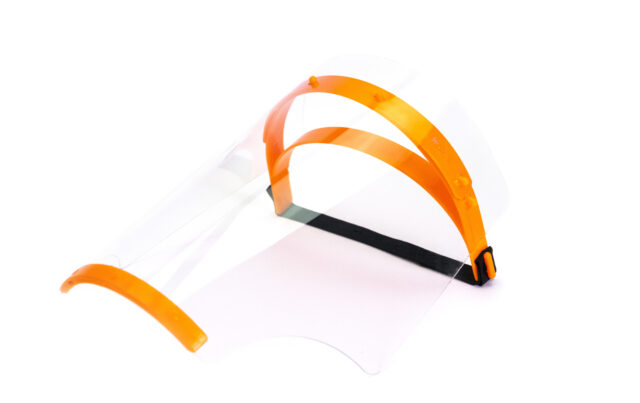 RC4 face shield design, now called Prusa PRO Face Shield
All information on the approval and certification of personal protective equipment can be found in Regulation (EU) 2016/425 of the European Parliament and of the Council from March 9th, 2016.
How to get certification for shields
We went through the following process ourselves, so there’s nearly a 100% chance that if you follow the same steps, you’ll have no major issues along the way.
First of all, it is necessary to contact the so-called notified person in your country. We contacted the Institute for Testing and Certification in Zlín. No matter which institute you choose, there’s usually a section dedicated to personal protective equipment on its website, where a form (Application for Conformity Assessment) should be available. This form must be completed. You will also sign a contract for the examination and pay a fee for carrying out the examination (in the Czech Republic, it ranges from 3000 to 5000+ EUR – depending on how smoothly the whole process goes).
Along with the products for testing (at least 20 units), it is necessary to prepare full product documentation. This is not a difficult task, however, you need to be very thorough and describe every detail – even those that may be considered way too obvious.
Technical documentation requirements
In the first section, it’s necessary to describe the product in detail. Namely:
- The official product name, manufacturer and address
- The material composition of the supporting path, visor, elastic band
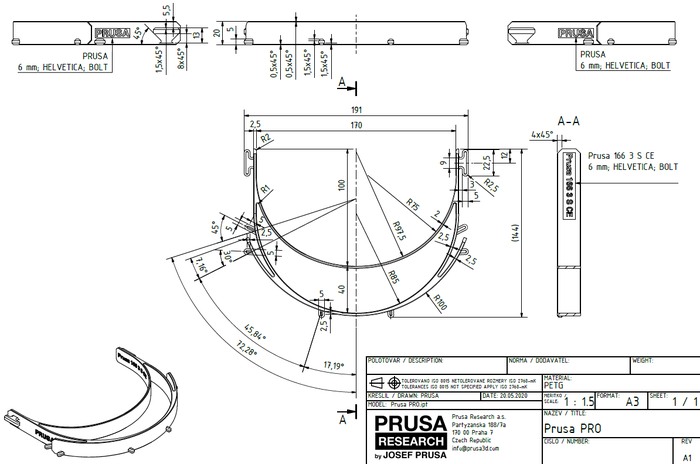
- Technical drawings of every individual part (you can refer to an attachment)
- Description of the purpose of use (e.g. “Personal protective equipment designed to protect the wearer’s eyes and face against drops, liquid splashes and light mechanical hazards”)
- Classification – PPE, category 2
- Size – universal, thanks to the adjustable elastic band
- Marking “1 S” on the visor according to the “Manufacturer’s identification mark”. The number 1 represents the optical class and S is a symbol for increased strength (see the infobox below)
- Marking “166 3 S CE” on the headband according to the “Manufacturer’s identification mark”, where 166 stands for the number of the European Standard (EN 166:2001), 3 corresponds to the area of application (liquids – drops or spray), S indicates increased strength and CE is the marking of conformity with the relevant requirements (see the infobox below)
MARKINGS ON SHIELDS
The markings on shields (in accordance with required standards) contain a combination of numbers and letters, both on the headband and the visor. Each letter/number has a certain meaning in relation to the properties of the shield.
Markings on the headband
The most important information on the headband is the number designating its area of use (protection class). This is located right next to the number of the standard (that’s 166 in our case). Please refer to the explanation below:
- 3 = liquids (drops or spray)
- 4 = coarse dust (dust with particle size larger than 5 μm)
- 5 = gases and fine dust particles (gases, vapors, smoke, dust particles smaller than 5 μm)
- 8 = electric arc resulting from a short circuit
- 9 = molten metals and hot solid particles
What you need to take into account is the fact that this technical standard describes the requirements for different types of protective shields and goggles – e.g. both medical goggles and welding goggles, so the areas of application are very diverse. A higher number does not mean that the shield is better.
If the number of the standard is not immediately followed by a number and a letter is in place, it means that the shield is intended for basic use – unspecified protection against mechanical shocks, or UV/IR radiation (depending on the type of the visor). In this case, protection against drops and sprays is valid only in the frontal direction.
Markings on the visor
Another set of letters and numbers has to be placed on the visor. This combination specifies its optical and mechanical properties. If there’s a number before the manufacturer’s identifier, it means that a filter is used – e.g. against UV or IR radiation.
The manufacturer’s identification mark is followed by the so-called optical class. This class can be 1, 2, or 3 depending on whether the visor distorts vision. Optical Class 1 provides a distortion-free vision.
The markings can be a complicated matter, because they may contain other characters/numbers not listed above as well. For example, a filter lens for a welding shield may be marked 5 X 2 S, where 5 is the degree of protection of the filter, X is the manufacturer identification, 2 is the optical class and S denotes increased strength. The same applies to headbands and other structural parts. For example, for a shield that would meet the standard for several areas of use, the designation of X ZZ 3 4 9 BT can be used. X is the manufacturer identifier, ZZ is the number of the standard, 3 stands for the protection against liquids, 4 is the symbol for protection against large dust particles, 9 denotes protection against molten metal and BT is a symbol for protection against medium energy impacts and against extreme temperatures.
The second section contains a complete list of basic health and safety requirements. In this section, you only need to refer to the attachment, so-called Checklist (see below)
The third section of this document includes all details about the materials used, suppliers, production, and hygiene and safety measures during the production. Specifically:
- How the material used for production is stored, whether it is in the original packaging etc.
- How the quality of the visor is inspected (visual inspection, checking for bubbles/cracks/another type of damage, random checks of the plexiglass thickness…)
- How the filament quality control works
- Description of how the headband is produced using the FDM 3D printing technology – i.e. how the plastic is melted and extruded, then applied onto the object in layers. In addition to 3D printing, we also certified for injection molding
- Description of the settings in the slicing program. In our case, we used PrusaSlicer for print preparations. Based on user input, PrusaSlicer generates a G-code, which contains data for nozzle movement and information on temperatures, layer height, and other parameters determining the quality of the final print. When using the same G-code, the print results are consistent.
- It is also necessary to describe how the operator proceeds after printing – e.g. what hygiene measures are in effect in the room where printing takes place. Of course, the higher the standard, the better
- Another important thing: describe the production of the visor (e.g. state that it made by laser cutting based on a single template) and the elastic band (e.g. the band must be in a protective package from the factory, no more bands should be open except the ones that you actively work with…)
- Finally, describe the output quality check – how the shields are sorted, inspected, stored, packaged…
We strongly recommend adding a simple overview of all hygienic measures applied during production in section No. 3. Divide it into four parts (3D printing, visor, rubber band, assembly) and describe the hygienic measure for every part in simple bullet points.
If you use an external company for injection molding production, describe the material from which the parts are made (copolyester in our case) and add information about quality control.
The fourth section includes “Regulations, EU harmonization, legislation, and harmonized standards.” You can simply add the following text – some modifications depending on your country of residence will be required, though:
Regulation 2016/425 of the European Parliament and of the Council on personal protective equipment and on repealing Council Directive 89/686/EEC. EN 166:2001, Corrigendum 1:2010 – Personal eye protection – basic provisions.
The fifth section is supplemented in cooperation with the notified body and includes the test results.
The sixth section contains information on the Identification of the Notified Body that carried out the conformity assessment. Again – this will be different based on the country of residence.
Subsequently, it is required to provide a User information section. This section provides additional information, such as whether you also offer various accessories for the shield. Also, it’s worth adding that spare parts can be produced with a 3D printer and that design files are available at PrusaPrinters.org. Don’t forget to add that the shield is “single use only”, however, when treated with appropriate disinfectant, it can be reused until mechanical damage appears. The shield should be transported in sterile packaging to protect it from contamination. For transport, we recommend disassembling the shields into parts. Also, add a warning that materials coming to contact with human skin may cause an allergic reaction in sensitive individuals.
Another requirement: supplying assembly instructions, information for users, and technical drawings (as attachments). Because these are documents we have already published for the wide public, you can download them right here and if you made the shields exactly according to our design, you can use them as a template for your documents for the certification process.
Download:
In total, you should need 5 documents: Technical documentation (incl. technical drawings), the so-called Checklist for safety assessment (supplied by a notified body), information for users, declaration of conformity, and assembly instructions.
Testing of our protective shields
What is examined during the certification?
Once a product enters the certification process, it must pass a predefined list of tests to prove that it meets the requirements.
- All products are examined whether they are marked correctly and whether the information supplied with the product contains all the necessary information
- The product must not contain manufacturing defects, such as scratches and bubbles on the visor
- Protective shields that should meet the protection against drops are tested for mechanical resistance. Individual parts are tested (headband and visor). These tests are performed by dropping a steel ball onto both parts. The shield must not be deformed or otherwise damaged.
- This is followed by tests of light transmission in the VIS area and beam refraction tests to ensure that the visor does not distort vision. The field of vision is also tested.
- Probably the most important test checks for protection against drops. The shield is placed on a test head of standard size, which has a rectangular shape around its eyes. The head is gradually rotated into several positions. In each position, the head is illuminated with a laser beam, which must not reach the protected rectangular area.
If these conditions are met, then it means that the shield passed the tests and can protect the wearer against drops.
For these reasons, we therefore strongly recommend printing our version of the shields and following in our footsteps – it will be easier to have already proven parts certified rather than submitting heavily modified designs.
The Prusa PRO Face Shield is produced both by common FDM 3D printing (Prusament PETG) and injection molding method as well.
Licensing a certification
Certification is expensive and takes a long time. Usually, it takes around three months, but it is possible to speed up the process by paying a fee. An interesting option for you might be getting a license from us to skip the testing process. This is called OBL (Own Brand Labeller) certification and it means that we will provide you with our “consent to the use of test results”. Then, you need to issue a statement that it is an identical product, and we must have a mutually signed contract, where we declare that you can manufacture the product based on our design/manufacturing process. However, this also means you have to stick to our manufacturing process and use the same materials, especially for the visor. The price for OBL certification is around 700 EUR and it is performed only by the notified body that performed the original certification – in our case, that’s ITC Zlin. This procedure can be used for entities from all over the EU.
So if you would like to produce our shields in larger quantities officially, we will cover the OBL certification costs for you. Contact us at [email protected].
After obtaining certification
After meeting all requirements and tests, you will receive the final certification. Subsequently, an EU declaration of conformity must be prepared, which must be published on your website and/or attached to each product.
EU declaration of conformity
If a company declares that its product meets the requirements of a standard, then it needs an EU Declaration of Conformity. This declaration must be backed by a certificate and proper testing by an officially designated subject (e.g. a laboratory with the proper license) and it must contain a number of key points:
- Details of the notified body (institution) that carried out the conformity assessment
- Relevant harmonized standards and regulations
- Images or other product identification
The name of the product, the name, and address of the company, the date of issue of the declaration, and the signature of the company’s representative need to be added as well.
Sample: Our Declaration of conformity for Prusa Pro Face Shield.
Best of luck with the process! 🙂 We hope this guide helped you and if you have your own findings you would like to share, leave a comment!



This is fantastic news! Well done Josef and everyone at Prusa.
This is the brick wall we have just started to bang our heads against as a company trying to do our bit during this crisis. Expect to see an email about this from me very soon!
Keep up the great work.
Hello Josep,
Would I have to do the same if I am trying to sell adjustable mask straps?
Wow, there is so much on the website, I am confused to decide because all your posts are interesting and entertaining but now users can check economics dissertation help to manage their tasks. I assure you that I will be a regular visitor to your website and spend most of my time reading your articles and news.
Interesting, the topic is discussed in great detail. I received a lot of useful information. Thank you for your professionalism and willingness to share your knowledge
Regards
RLG
Get expert Question & Answer mcia-level-1 dumps PDF Online. We Provide latest IT Certification Exams PDF for preparation Study Guide Test Practice for Success in exams. This is an online education portal