Robots, automatic pet feeders, movie props, drones – the list of cool projects that combine the power of 3D printing and electronics is endless. That said, some if not most of the projects can be pretty intimidating. And you can get discouraged easily when you realize, that you need to learn how to solder, write your own code for Arduino or even design a circuit board. Fear not, because this time you won’t need any of that and yet we’ll light up our 3D prints!
Generally speaking, you have three options when it comes to simple light sources that work well with 3D prints:
- LED strips
- LED lightbulbs
- Small diodes
Old-school bulbs are not suitable since they generate a lot of heat.
LED strips
One of the easiest ways to add lights to your 3D prints are LED strips. They’re cheap, often come with a remote, they’re available both white and RGB and most importantly, they are easy to power. You could buy a whole roll of RGB LED strip and use your own LED controller and power supply, but not this time – we said no soldering! So instead we suggest buying an LED strip with a USB connector. This way, you can power it with any old phone charger, your PC, or a power bank.
The obvious downside of USB is its limited power, so you can’t get really long or extremely powerful LEDs. But really powerful LEDs can get pretty hot, so we wouldn’t want to use them anyway, especially with PLA.
LED strips always come with a double sided tape applied to their bottom side, so it’s really easy to install them. If you stick them on the inside wall of a box you can get nice and even illumination. Then print a front plate with a text or a logo and you’ll end up with a similar result as our recording sign.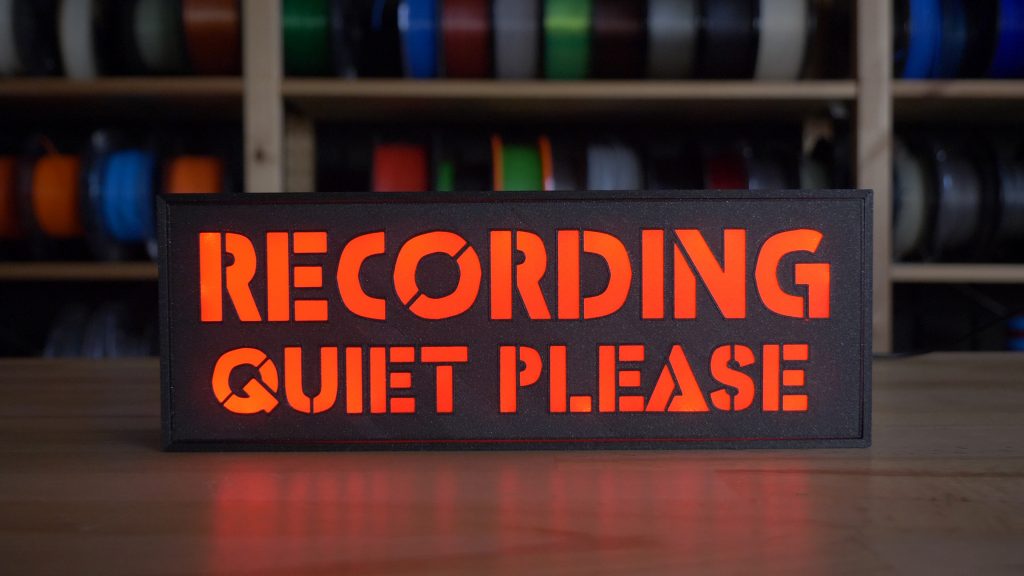
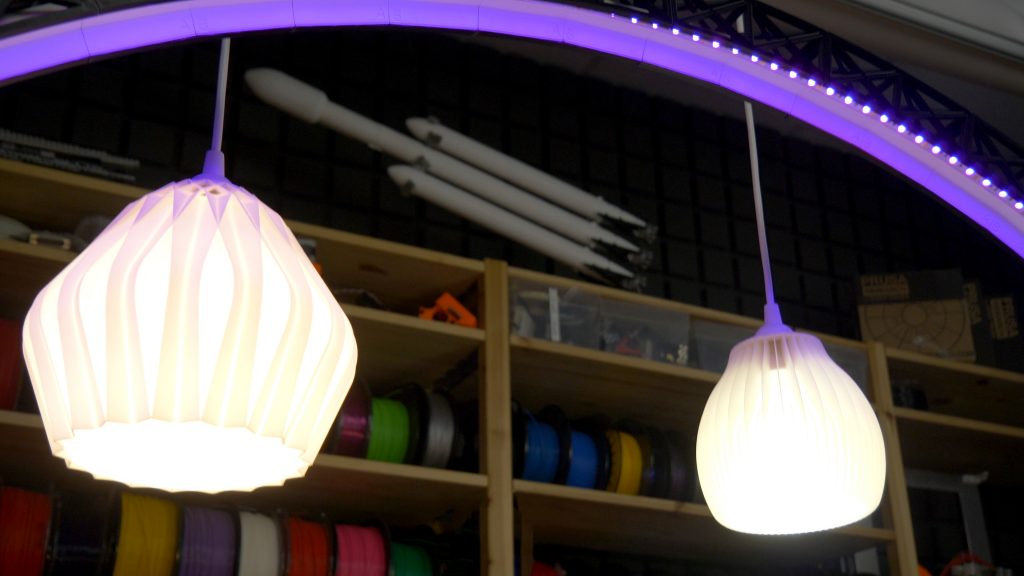
Alternatively, you can print and wrap a cylinder with the LEDs and this way you’ll have the light coming from the center of the object. Consider printing a diffusor from, for example, clear PETG. That will make the illumination more even and hide the individual LED chips, as seen on this Voronoi/triangles lamp.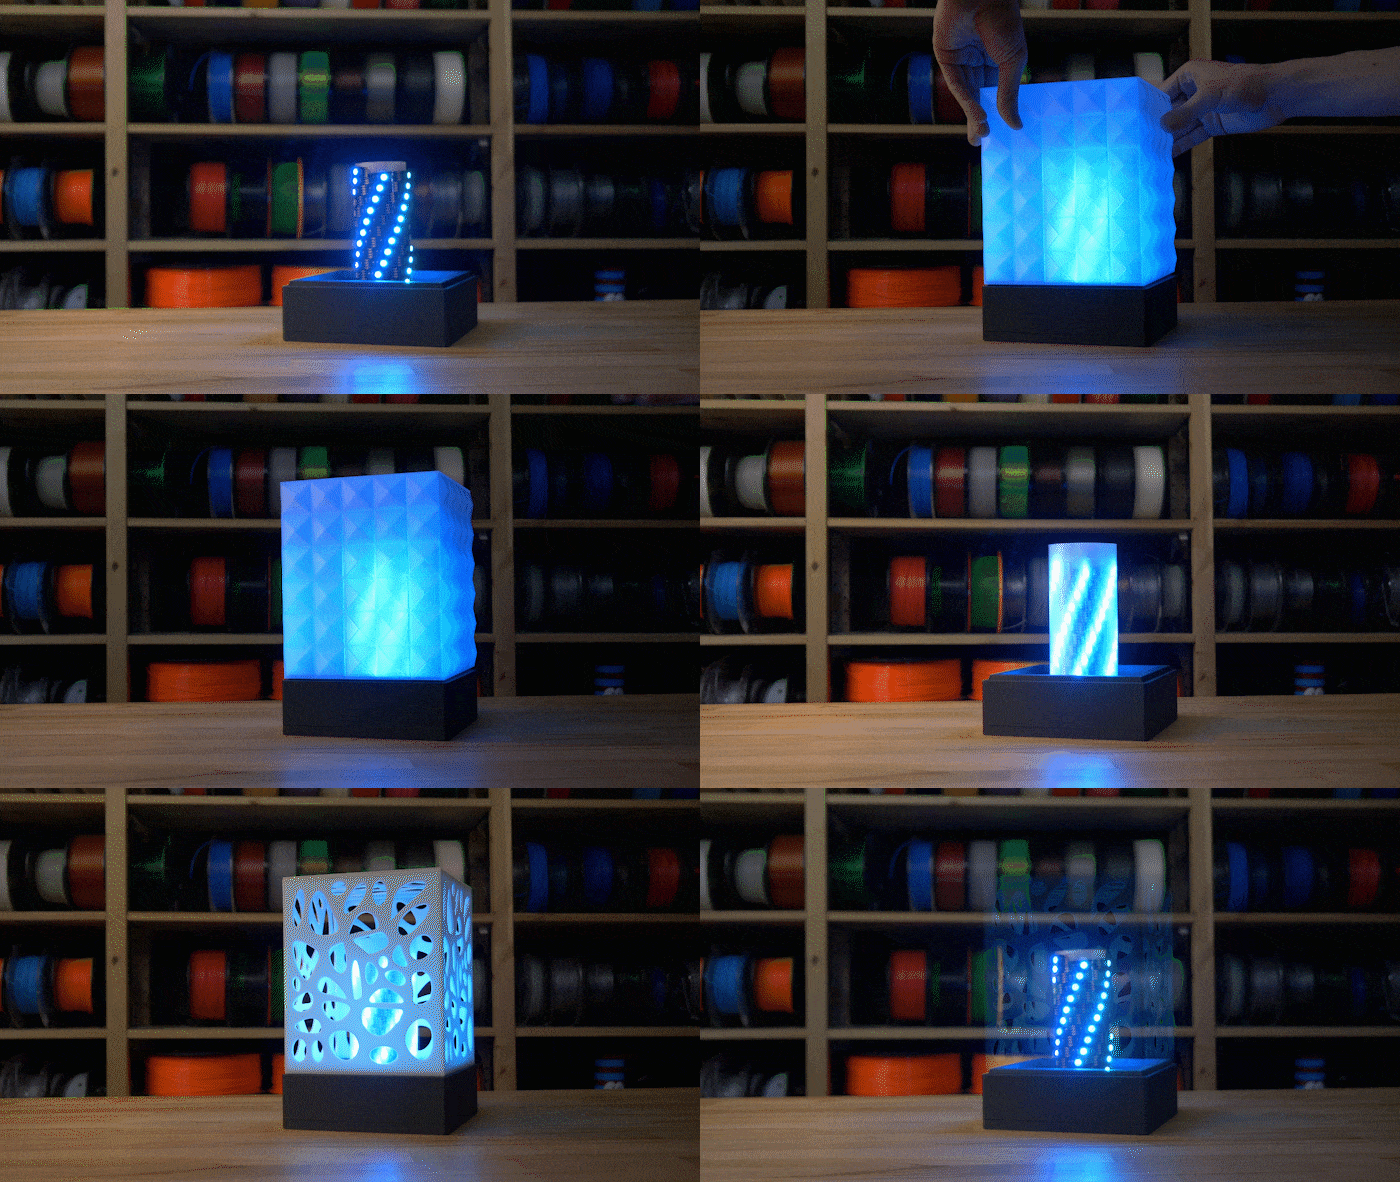
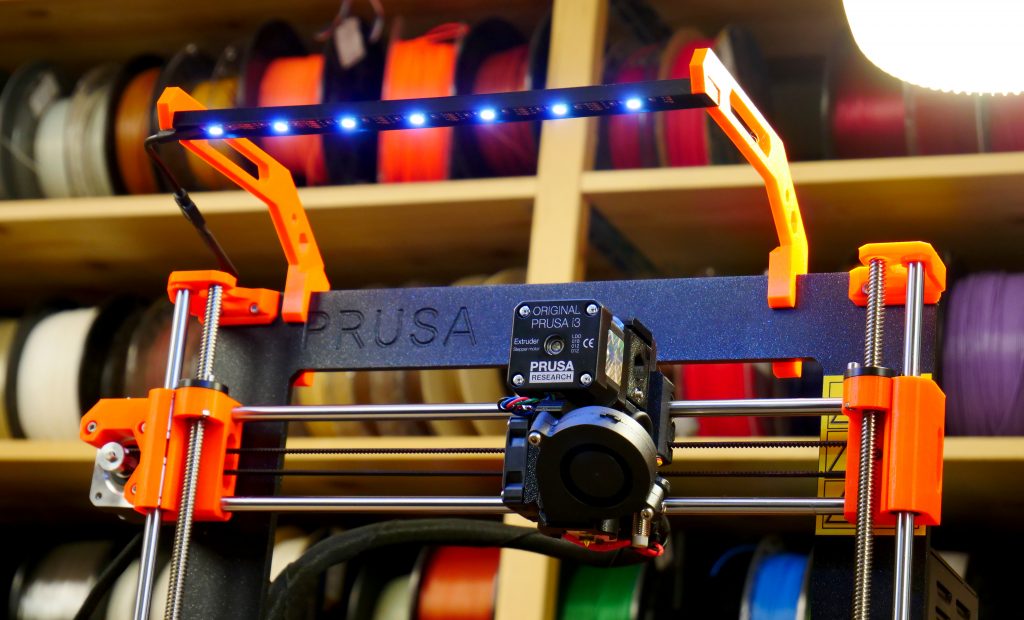
Also, LED strips work great as a light source for the build plate. You just have to print a simple light bar holder and attach it to the top of the frame.
Here are some USB LED strip listings, but you can most likely get them in your local electronics store as well:
Waterproof or non-waterproof strip led strips?
Whenever you can, go with the non-waterproof version. The GEL coating that manufacturers use to waterproof the LED strip adds weight, makes the strip much harder to bend or shape. Last but not least – without direct contact with air, the LED chips will run hotter. The gel coating is pretty much unnecessary for our use.
Cutting LED strips
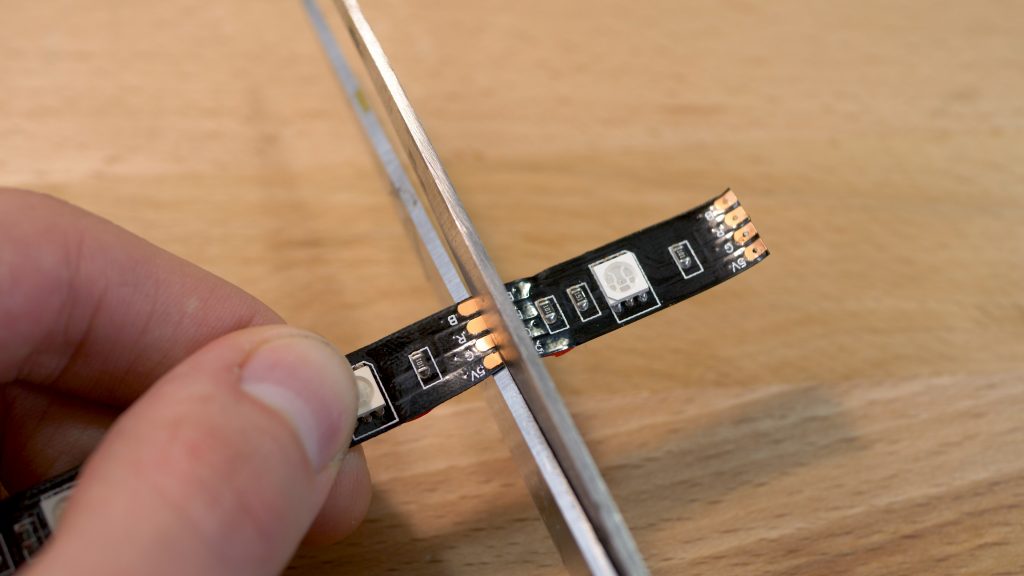
A cool thing about LED strips is that you can cut them with regular scissors to adjust the desired length. The spots, where you can cut, are always clearly marked, so make sure to watch out for them.
LED Lightbulbs
Using lightbulbs with 3D prints is pretty straightforward, you just have to buy a lightbulb socket with a cord and attach it to your 3D print. We really like the IKEA SEKOND cord set. It has a nice textile sleeve for the cable and comes in a variety of colors.
There are a few commonly used sizes of sockets:
- Medium or Standard: E27 (diameter of 27 mm)
- E27 is usually interchangeable with E26
- Intermediate: E17 (diameter of 17 mm)
- European: E14 (diameter of 14 mm)
- Candelabra: E12 (diameter of 12 mm)
Oldschool light bulbs were terribly inefficient and used to produce a ton of heat, which would be a problem with our printed parts. Luckily for us, LED light bulbs are mainstream these days, and the amount of heat they produce is significantly lower. Still, be mindful of this and check how hot does your light bulb get.
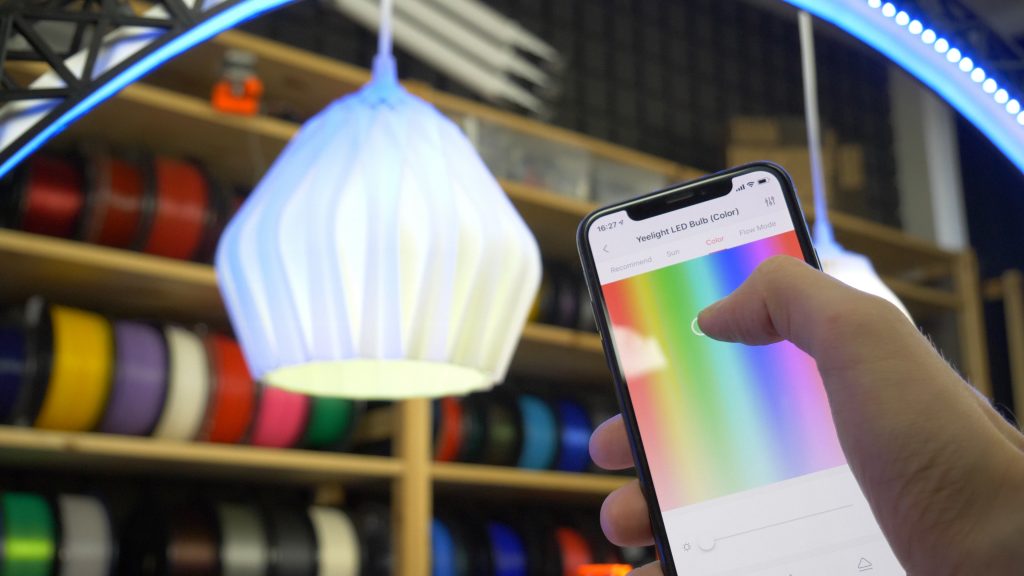
It’s quite likely, you’re not going to 3D print all of your lamp shades, maybe just a few as a cool design piece. In that case, modern smart bulbs are a great way to make your creation even cooler! They can be controlled with a voice assistant (Google Home, Alexa, Apple Homepod) and change color on demand.
Here are some smart light bulb options:
- Xiaomi Yeelight – significantly cheaper than the competition, yet fully featured
- Phillips Hue – expensive, but lots of fancy accessories
- LIFX – expensive, but greater maximum brightness
Whichever lightbulb or cord set you choose, there is one challenge in front of you. And that’s hooking up the power. Mains electricity voltage, which light bulbs run on, varies between 120V to 230V. Either of which is high enough to seriously burn you or even kill you.
So if you don’t know what you’re doing, please just stop right here and consider asking someone with more experience for help. But if you know what you’re doing it’s as simple as switching the circuit breaker off, triple checking that it actually is off, connecting the phase (brown/black) and neutral cable (blue), insulating the connection and turning the power back on. Most cord sets even come with a quick release mechanism for the cable connection.
Model links
Small diodes
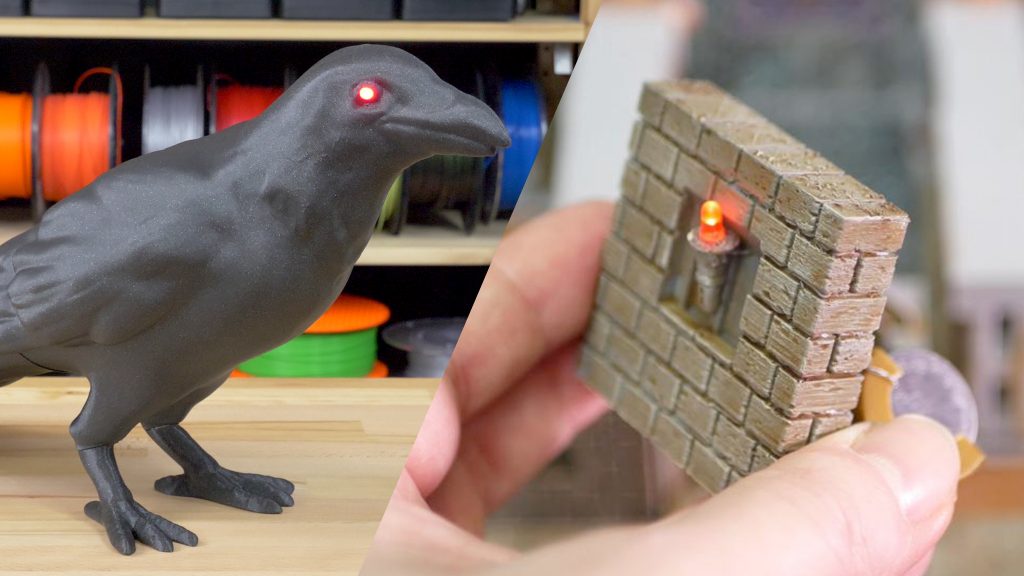
The two previous solutions were for rather big prints. In contrast to that, individual diodes can be really tiny and fit almost everywhere. They’re usually powered by 3.3V, which is (un)coincidentally the voltage of most button cells, a type of small batteries.
For under $10 you can get a set of hundreds of LED diodes in various colors, which will usually last you, well, forever.
LED diodes on:
- Amazon US
- Amazon UK
- Aliexpress (just $0.80 per 100)
And to attach the battery to the diode, you can either use a rubber band or a printed part.
We’ve used this technique in our Halloween crow and in our miniature tabletop gaming article.
Conclusion
We’ve just scratched the surface with using electronics in 3D prints. But it’s often easy to overcomplicate things, even when it’s not necessary at all. Add even a small light to your 3D print and the result will go from good to awesome! Now we want to see what you’ll come up with! Post your creations on Twitter with the handle @Prusa3d, on Instagram with the hashtag #prusa or in any of our fan facebook groups. Happy printing!

Where can I find the stl file for the boxy geometric lamp that you installed the diffuser onto?
Working on uploading it somewhere, that’s my own design 🙂
Thanks – useful article
I have done something cool myself. I got a Wemo Light Switch last Christmas and I set it up. I made an IFTTT applet that turns on and off the light switch with a webhook. I added them to a .conf file found in the Raspberry Pi I’m using for OctoPrint. So when a print starts, the light turns on, and then turns off when the print finishes!
This light is overhead my Prusa and mine is placed where a mini-bar is supposed to go. I mainly set this up so Octolapse has light to take pictures of the prints!
I also made a webhook to send me a notification when the print is done with the IFTTT app. Maybe I’ll add some LEDs to my printer sometime!
Whoa, that sounds really fun! IFTTT is just a great tool, I use its IP call to find my phone all the time.
I just made a project using Arduino Feather and a TFT display:
https://www.thingiverse.com/thing:3406844
It’s an Expanse Space Backpack with Air Status bars that exponentially decay. But the same concepts apply to a wide range of similar projects. It’s not too hard to add an LCD or LCD+Touchscreen to any 3D printed project.
From last couple of months, I am working with Apple Support team and eliminating customer’s problems at ease. If you want to know about my service, then you see the happy faces of customers who take services at their door steps. At this support, not only me but my whole team is available all the time and working efficiently to provide best-in-class service. Thus, if you need guidance in getting rid of your Apple device’s issues, then you can call at Apple Support Number which is also reachable throughout the day and night.
https://www.applesupportphonenumber.co/
Nice post! This post is very helpful for AOL email users, who have some difficulties for the AOL email setting using IMAP. I get some helpful ideas from this blog. Thanks for sharing this post!
ok https://www.emailsupport.us/blog/aol-email-settings-using-imap
Thanks for sharing this help me alot in my as well so i hope you to add some more information like this in future as well.
question what filament will spread a led light beautiful trough a design that you printed . im experimenting now with acrylic rods that i have sanded mat and put a led on the end of it but still dont get a nice full covert color/light trough the rod.
thnx buas