


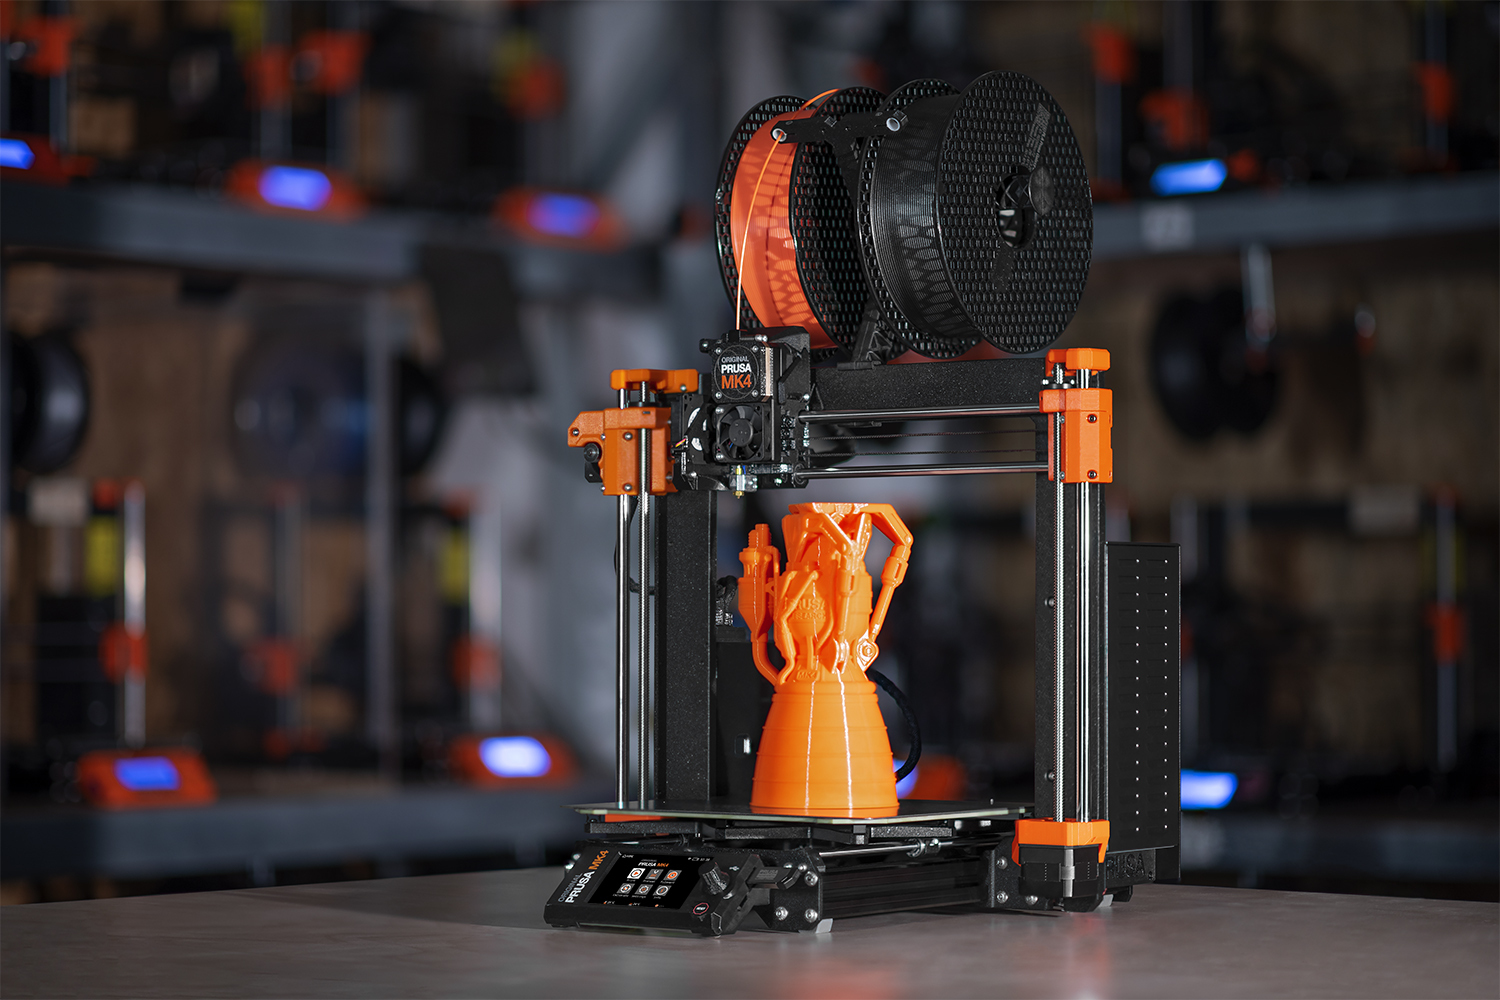
I usually start these announcements with a bit of a backstory and some broader description. Allow me to skip all that today and give you a quick rundown of the main features of the new MK4: it’s built around our new 32bit connected architecture, it has the next-generation extruder (Nextruder), it lays down a perfectly smooth first layer every time without Live Adjust Z and it has support for high-speed printing with Input Shaper and Pressure Advance. We also improved the safety features even further. Plus, there are a ton of useful things, such as quick-swap nozzles, built-in support for remote printing and webcams, and many more. And it’s still beautifully quiet. And the best thing?
We already have a couple of hundred units in stock and we’re ready to ship them right away!
Yep, you read that right.
Oh, and MK3 to MK4 upgrades and kits are coming, too! And the MK3.5 and 3.9! And we have a new Multi-Material Upgrade 3! In short: The new MK4 delivers high-speed printing with ease and I can’t wait to give you a deep dive into the technology that powers it! Before I do that – just a quick note: Please DO CHECK OUT the MK3.5 and MK3.9 upgrades. They give you many of the MK4’s features.
Whew, where do I even start? 🙂
Chapters:
- Not a single stone left unturned
- What’s new on the MK4
- Shipping now – details
- Hardware
- Software
- MMU3
- Enclosure
- Shipping now, more to come!
- Hardware FAQ
- Shipping FAQ
Not a single stone left unturned
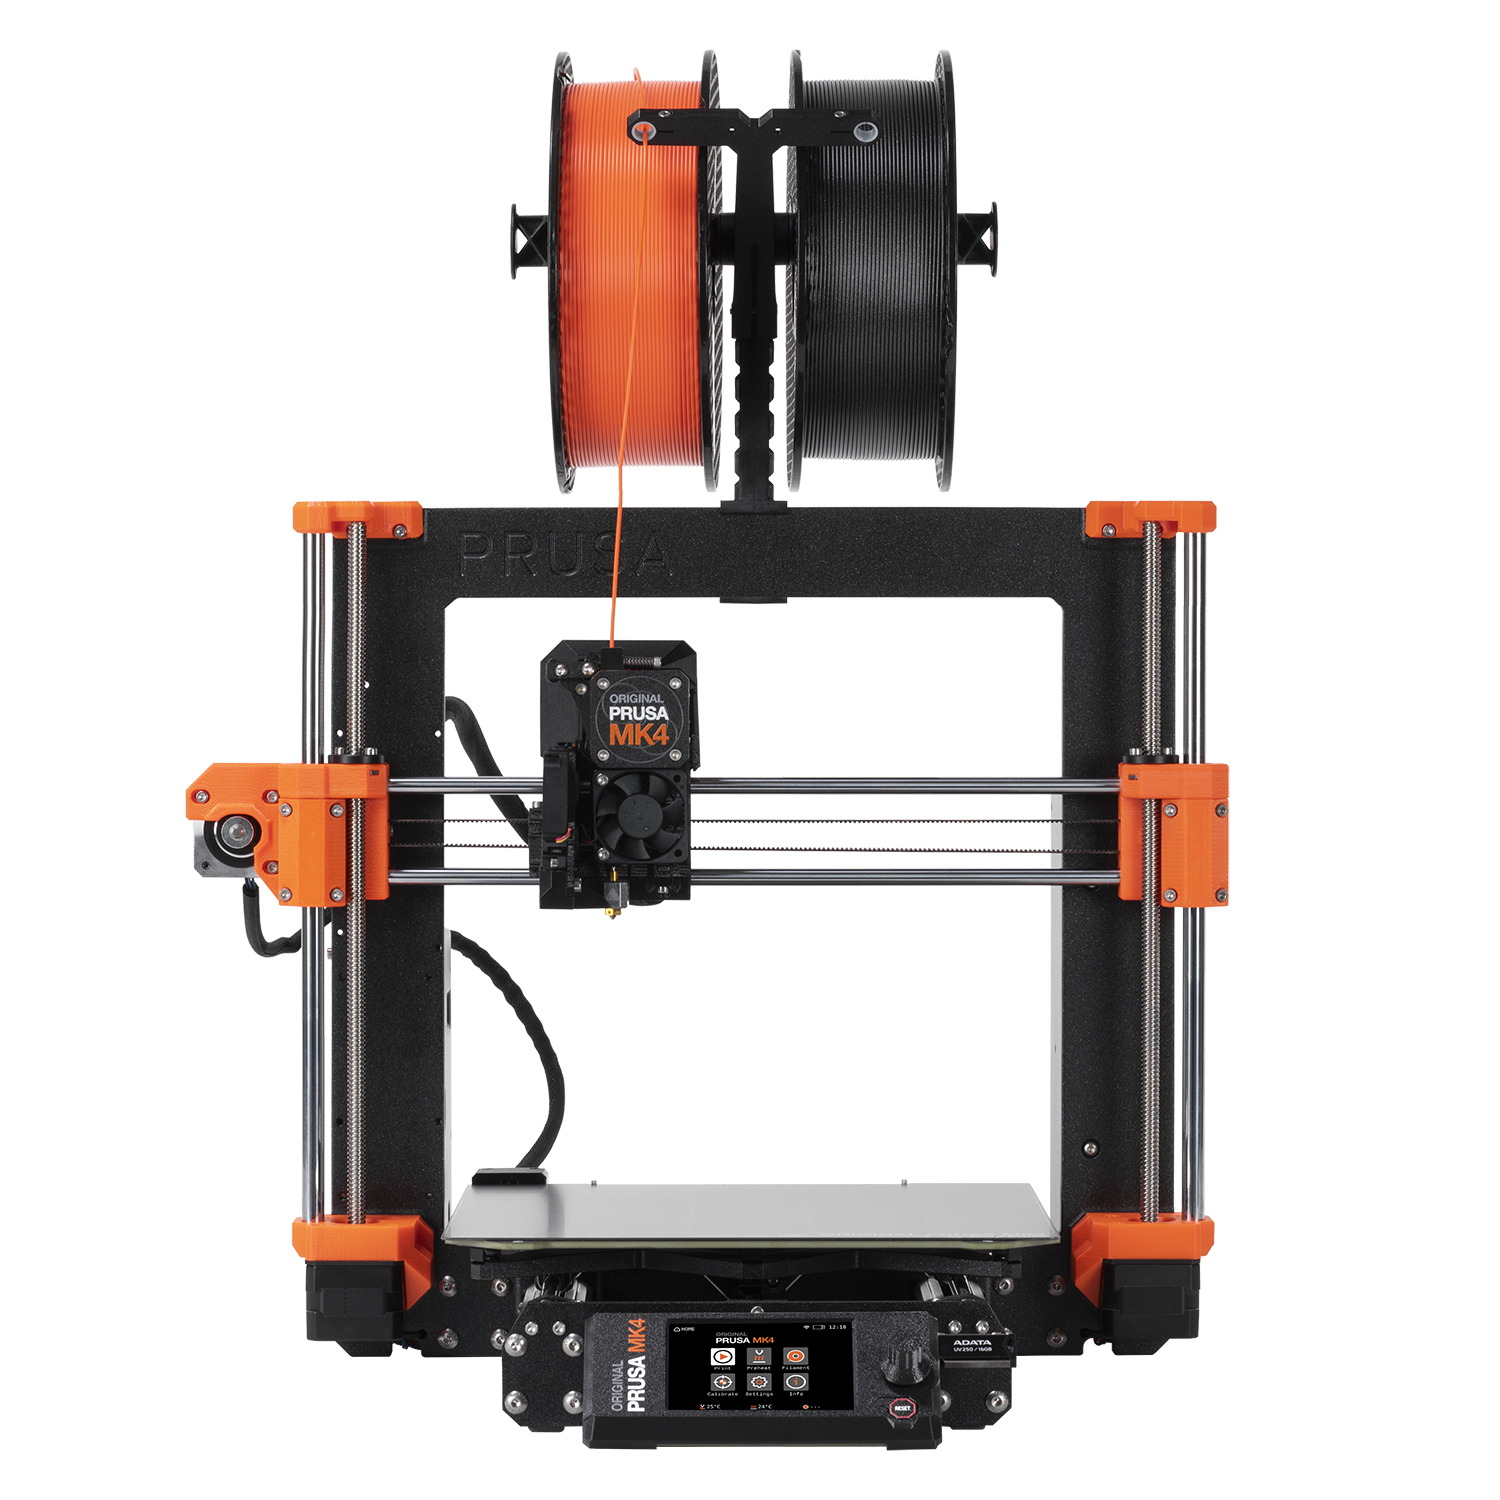
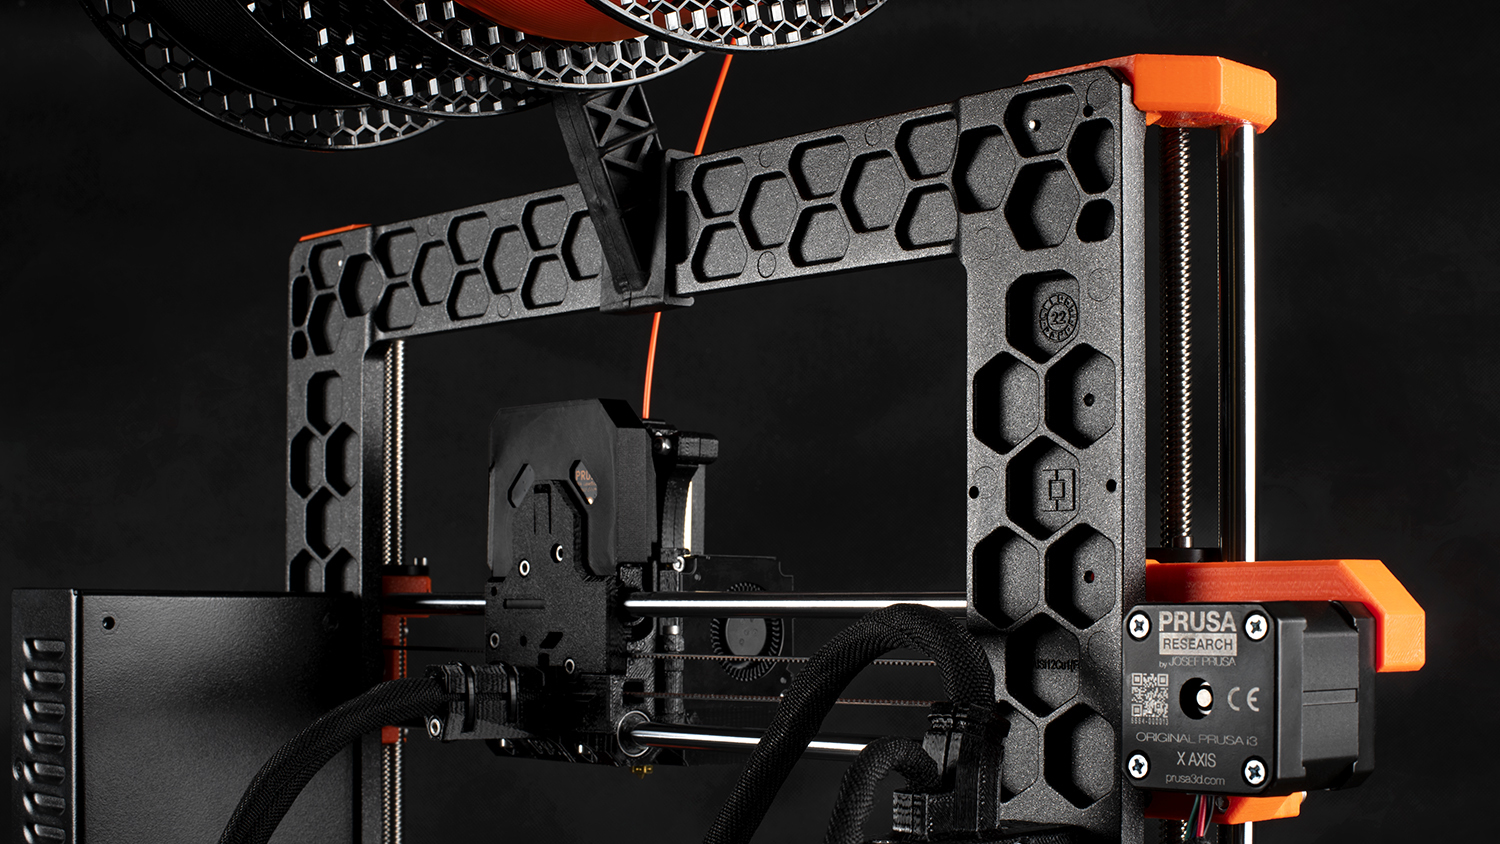
The MK3 line is our greatest success with over 350.000 open-source 3D printers sold worldwide and with four consecutive “3D printer of the year” awards (and countless others). So it was pretty clear that the successor had to use the same type of frame and construction – we know it inside and out. The open construction gives you perfect access to all printer parts. Any kind of maintenance, modding, repairs, etc., is quick and easy; and there is a direct upgrade path for all MK3S/+ owners.
The MK3 printer design is incredibly reliable – less than 1% of all users requested a warranty claim (both assembled and kits).
However, we knew that we can push it “a little” further. We went through many iterations and since one thing often led to another, we eventually changed and improved more than 90% of the MK3S+ parts! The only things we kept the same are the Y-axis profiles, a couple of bearings, the heatbed and the power supply. Yes, even the frame is different. The cut aluminum frame we used so far is now replaced by a brand new die-cast aluminum frame (the translation previously stated “injection-molded” which is not correct). To be more specific: we’re using an aluminum-based alloy that is first injected into a two-part mold. After that, the raw cast frame is cleaned from technological runners and other casting scraps, sandblasted and powder coated.
We started the development of the MK4 around the same time as the XL and many of the technologies were developed simultaneously. The development of the XL and MK4 ran in parallel and various elements (firmware, Nextruder, quick-swap nozzle system) were shared between the two machines. This is also why we could announce the MK4 so quickly after the XL – so many puzzle pieces fell into the right places recently and we finally managed to clear at least some supply chain issues. Fun fact: we’ve actually shown some early prototypes to selected content creators several years ago and we’ve been running hundreds of MK4s in the company on a daily basis for more than a year. More than a hundred MK4s accumulated over a million hours so far. Honestly, it’s kind of unbelievable we could keep the MK4 under wraps for so long. 🙂
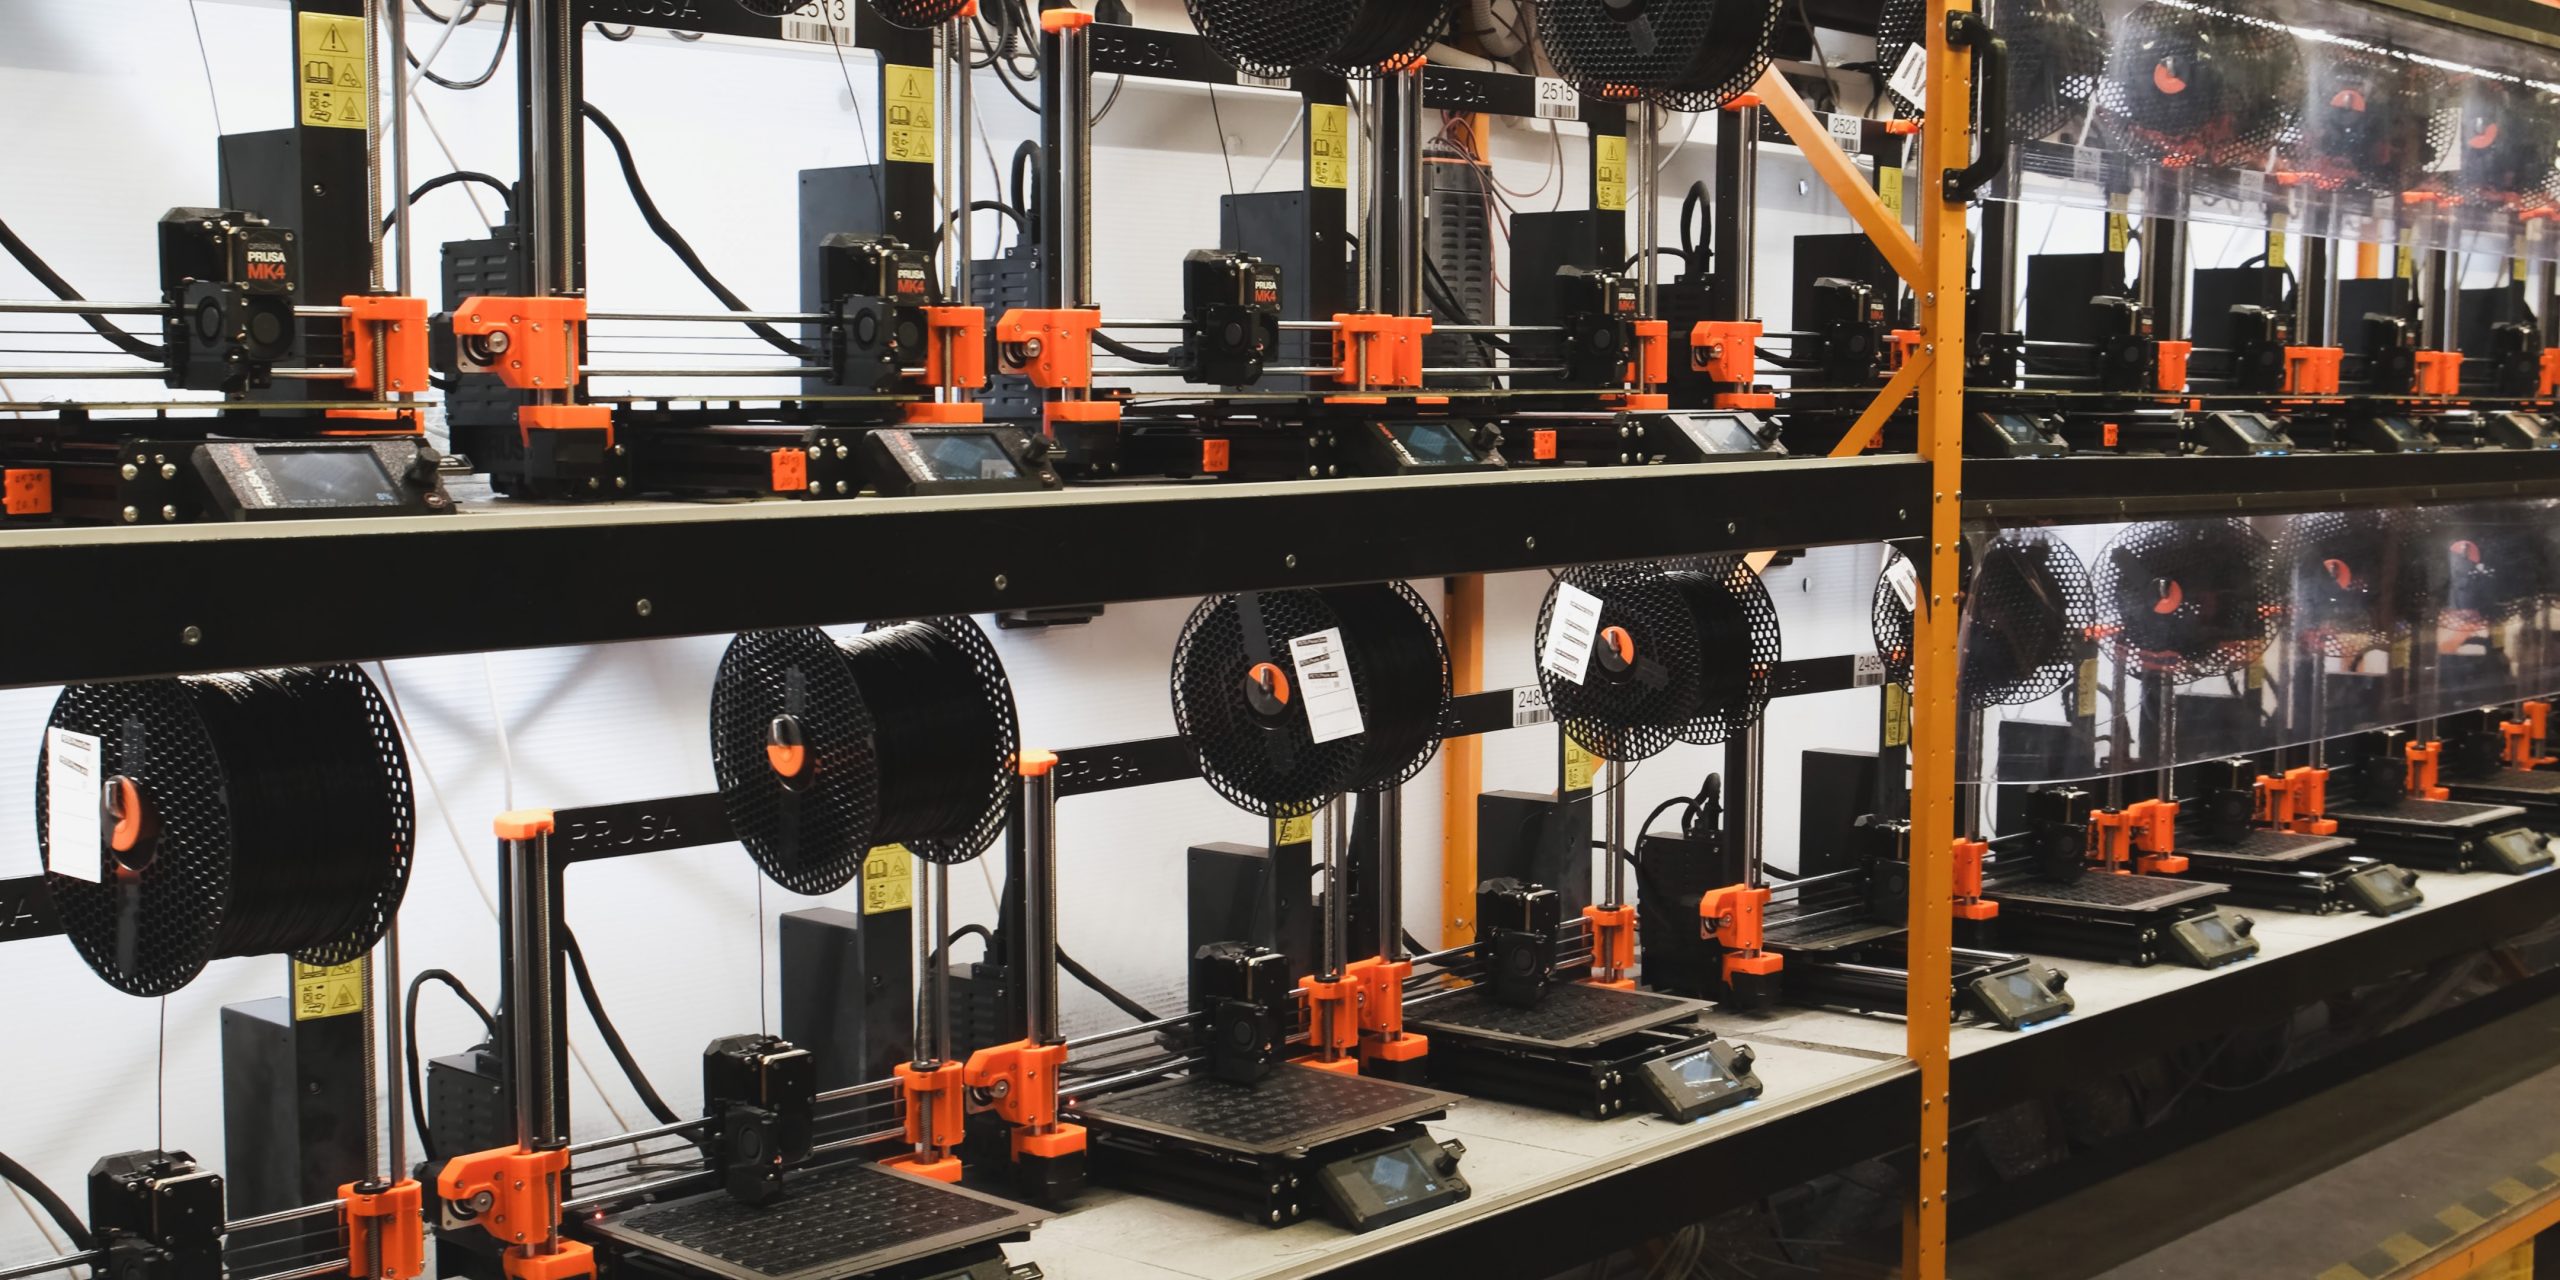
But the long internal testing period was absolutely necessary. The MK3 quickly gained the status of a 3D printing workhorse and it sort of became “normal” that you could easily go through thousands upon thousands of print hours without any serious issues and only basic maintenance. I hope you will excuse a little pat on the back of our team when I say that the MK3 set the bar very high.
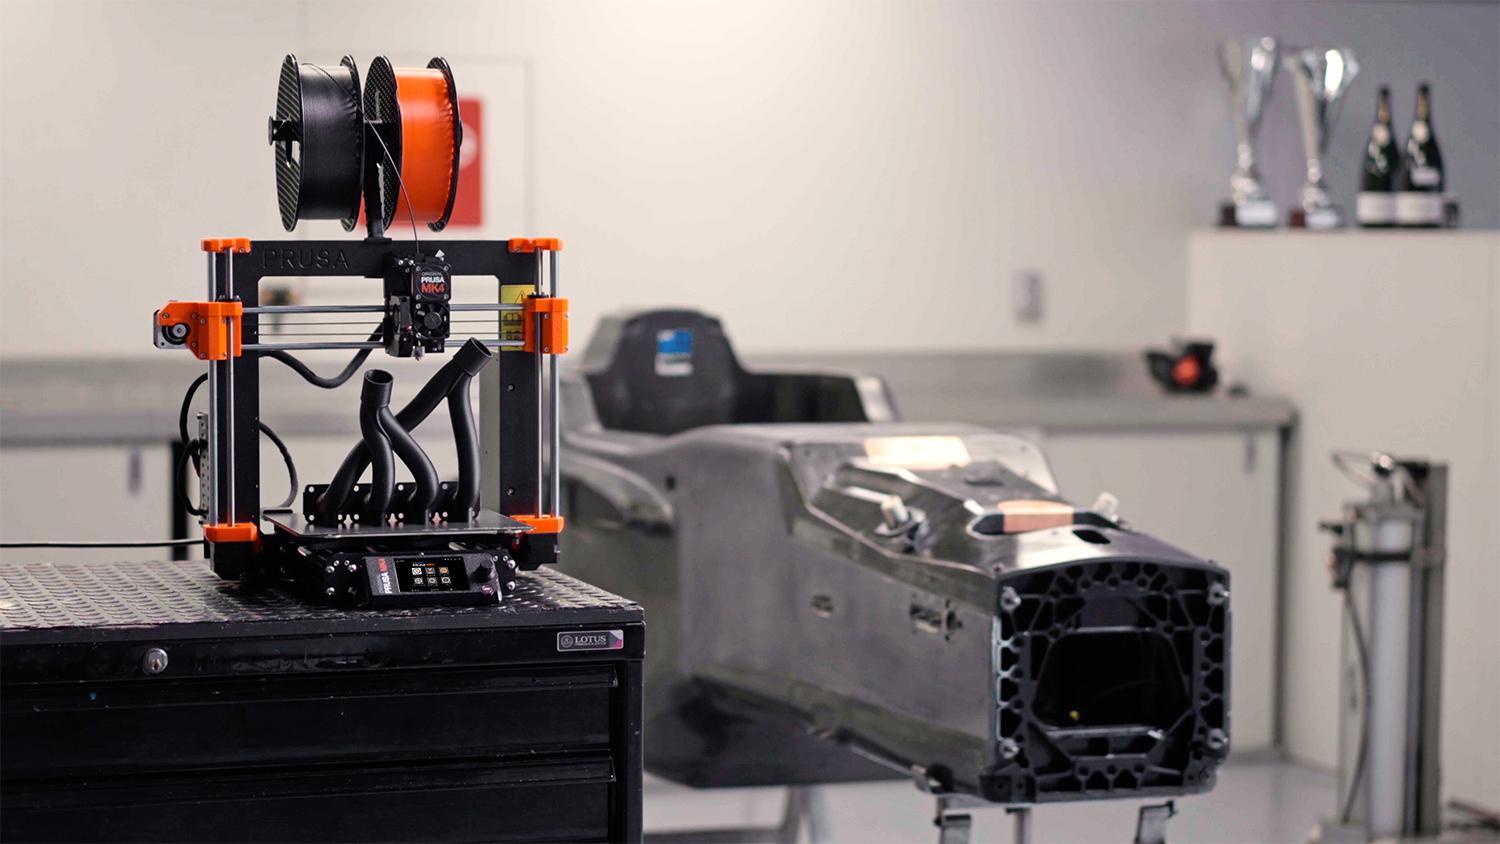 PHM Racing by Charouz
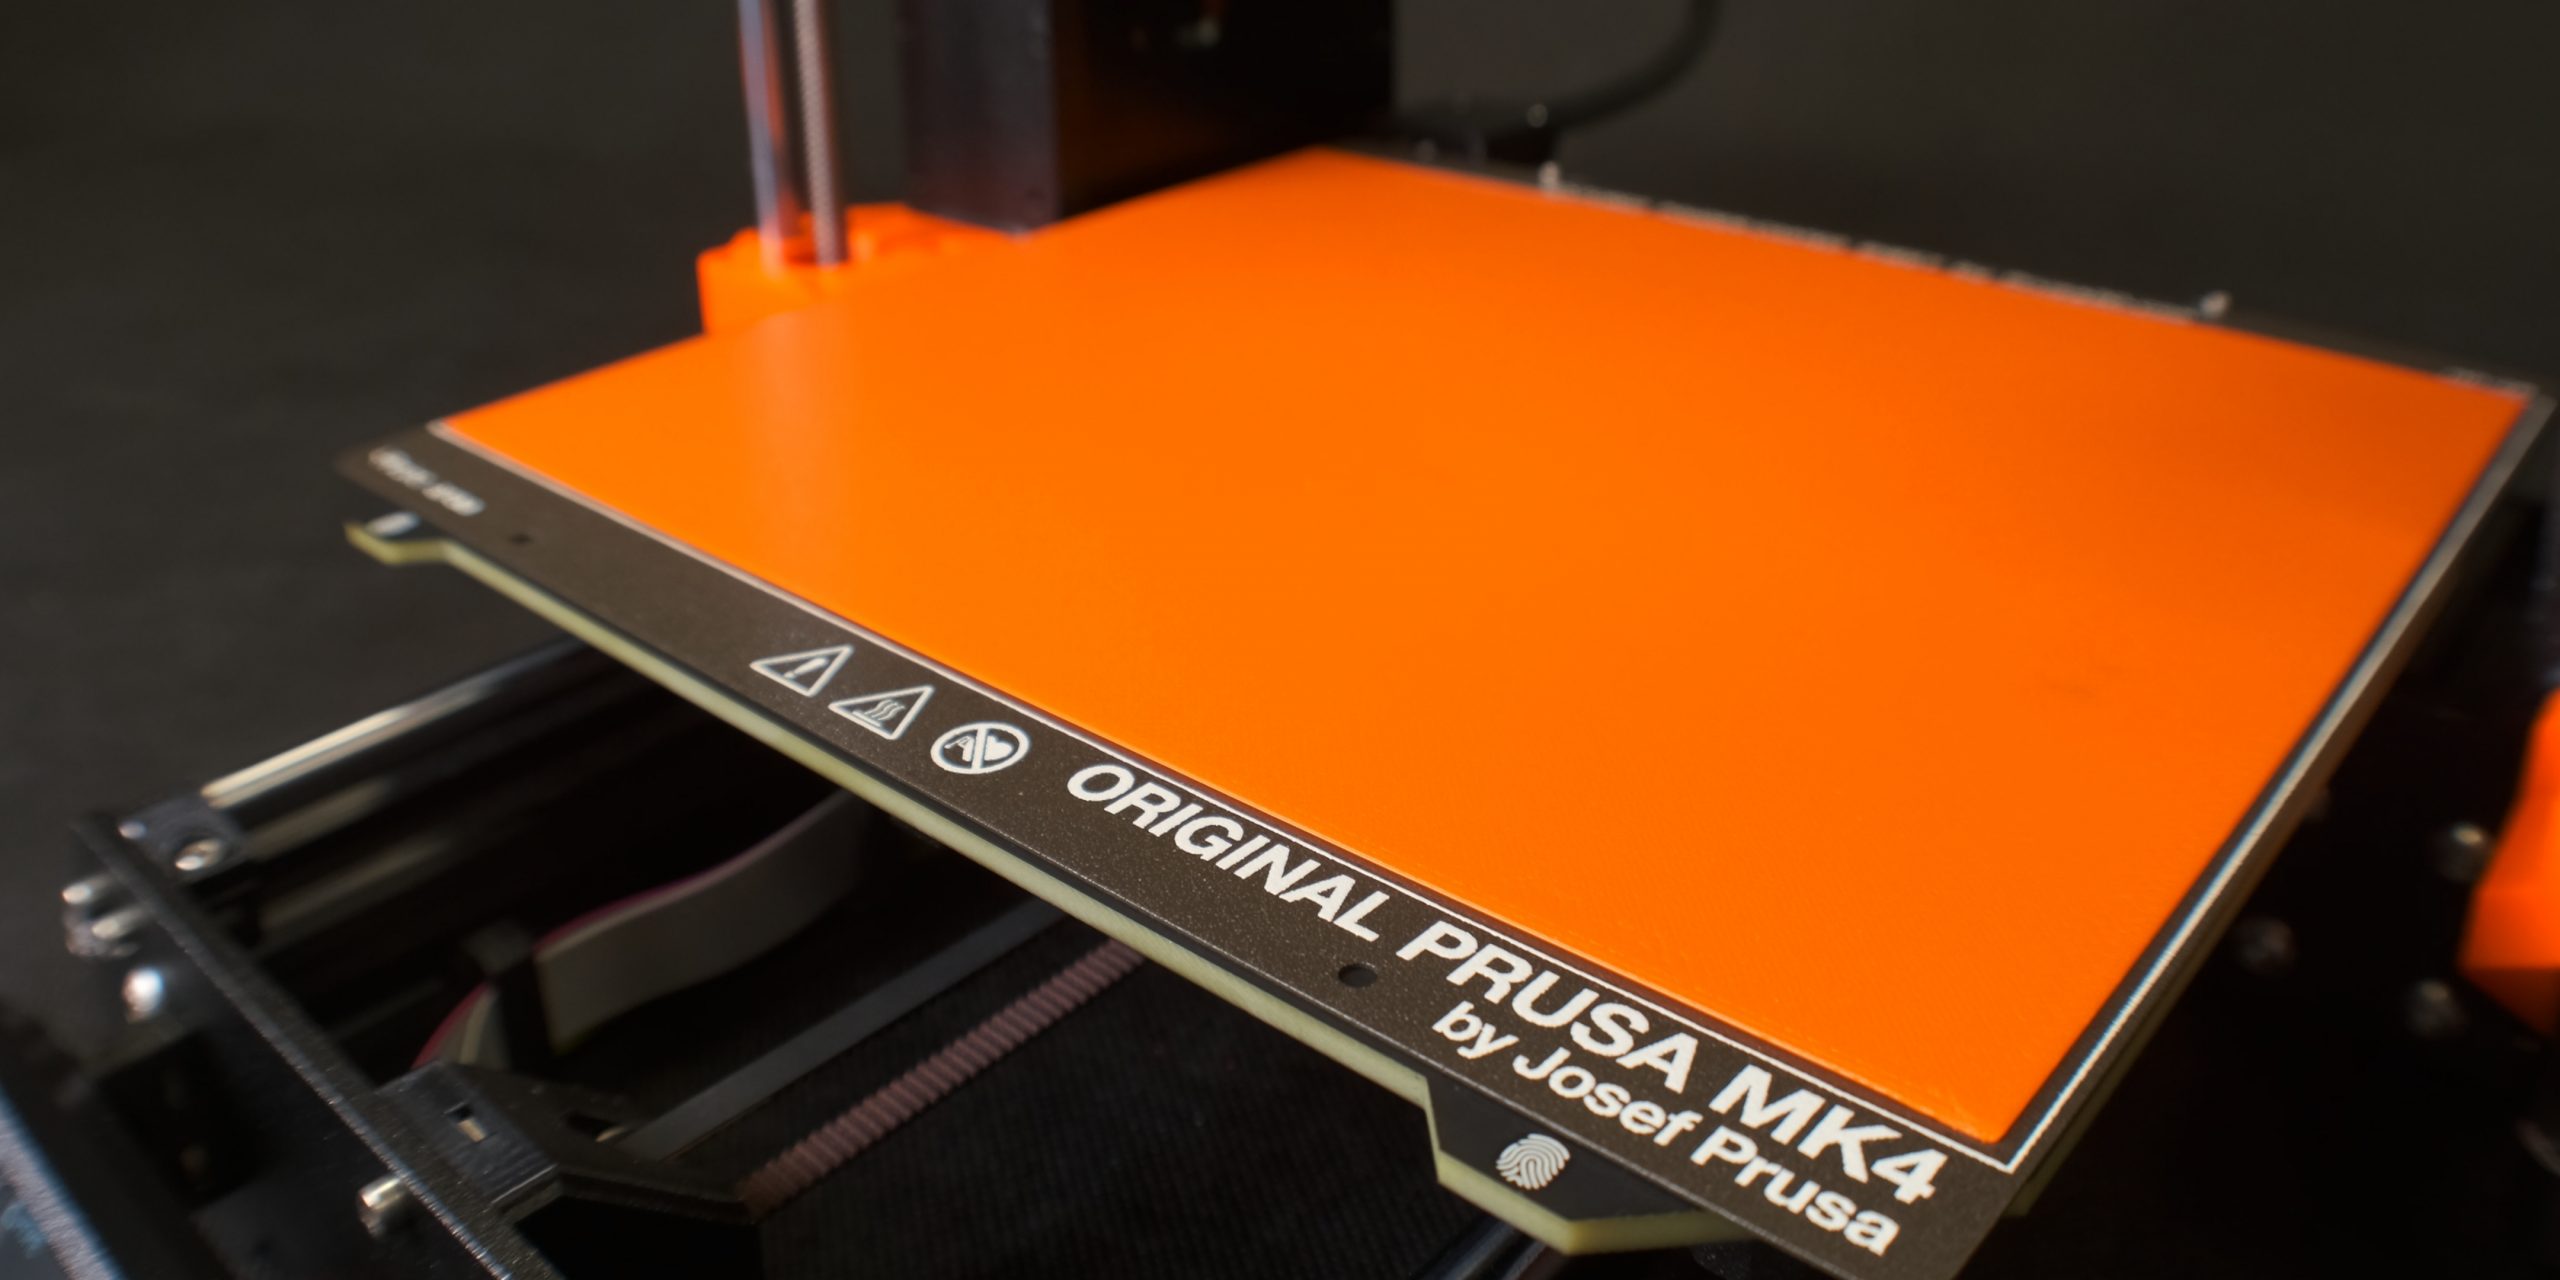
We designed the MK4 with the same mindset: as an open-source 3D printing workhorse with long-term support. As always, you can expect high-quality parts, easy maintenance, reliability, advanced safety features, regular updates, flexible print sheets for easy print removal and much more. The MK4 can be operated completely offline, or you can take advantage of the optional connectivity features – it’s up to you! Plus, the “usual” stuff: 24/7 tech support, hassle-free part replacement, worldwide warranty, factory-tested print profiles, new PrusaSlicer and more.
When we published a survey earlier this year, asking you what you consider to be the major features and most important aspects of a new Prusa 3D printer, it was great to see that pretty much all the boxes have been already ticked by the MK4 which was being finalized at that point. It was great to see that open-source, easy maintenance and upgradability were among the top choices. Check out the infographics below before we move forward. 😉

So now it’s time to dig in!
What’s new?
If I should point out the main things about the MK4 briefly:
- Quiet high-speed printing with ease
- 32-bit connected architecture
- Nextruder with Quick-swap nozzles
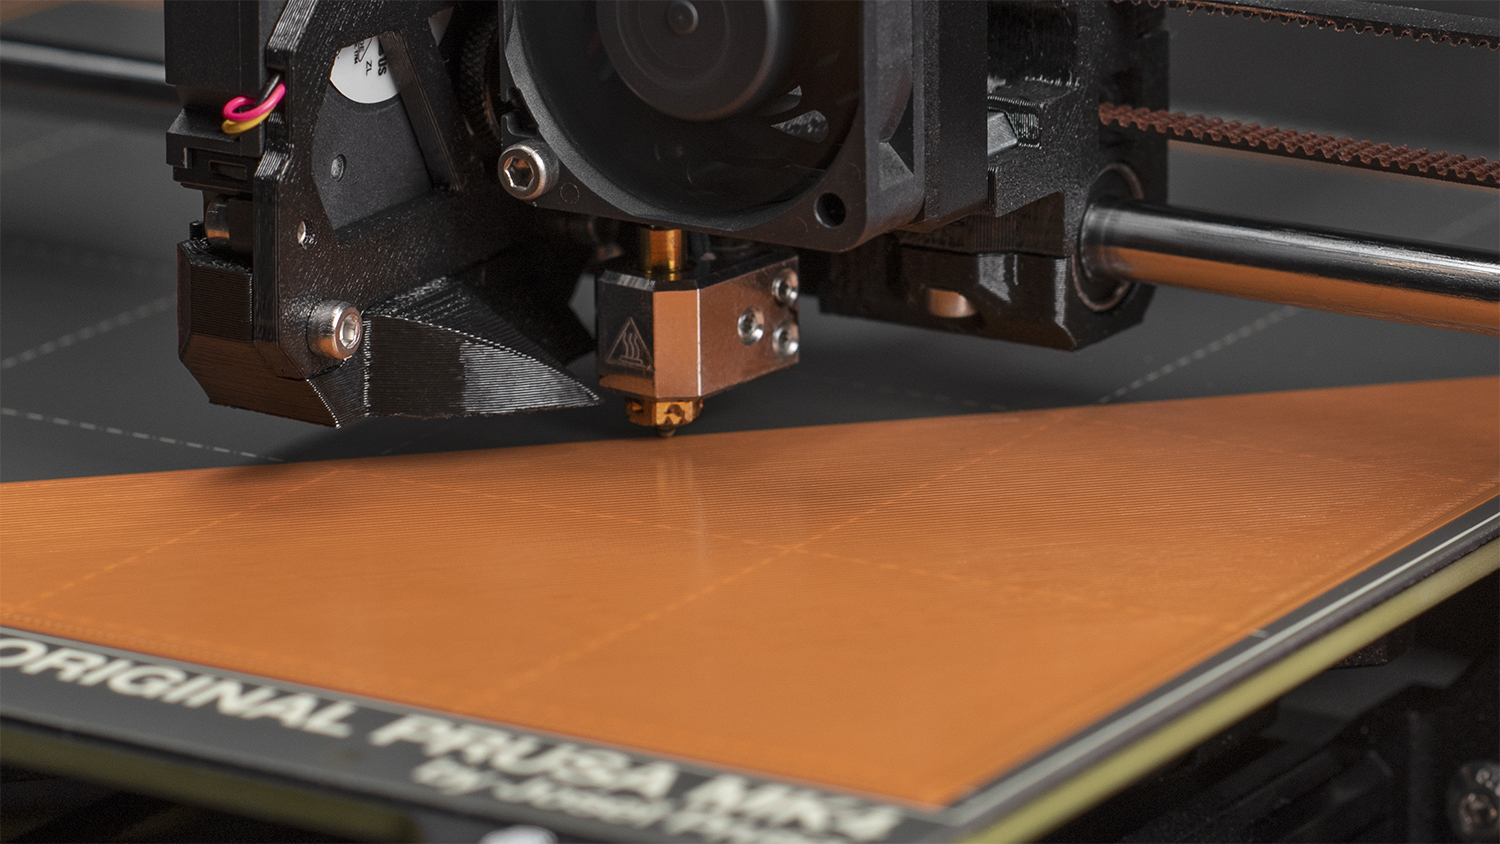
- Fully automatic perfectly smooth first layer without user interaction
- Dozens of hardware changes and quality-of-life improvements
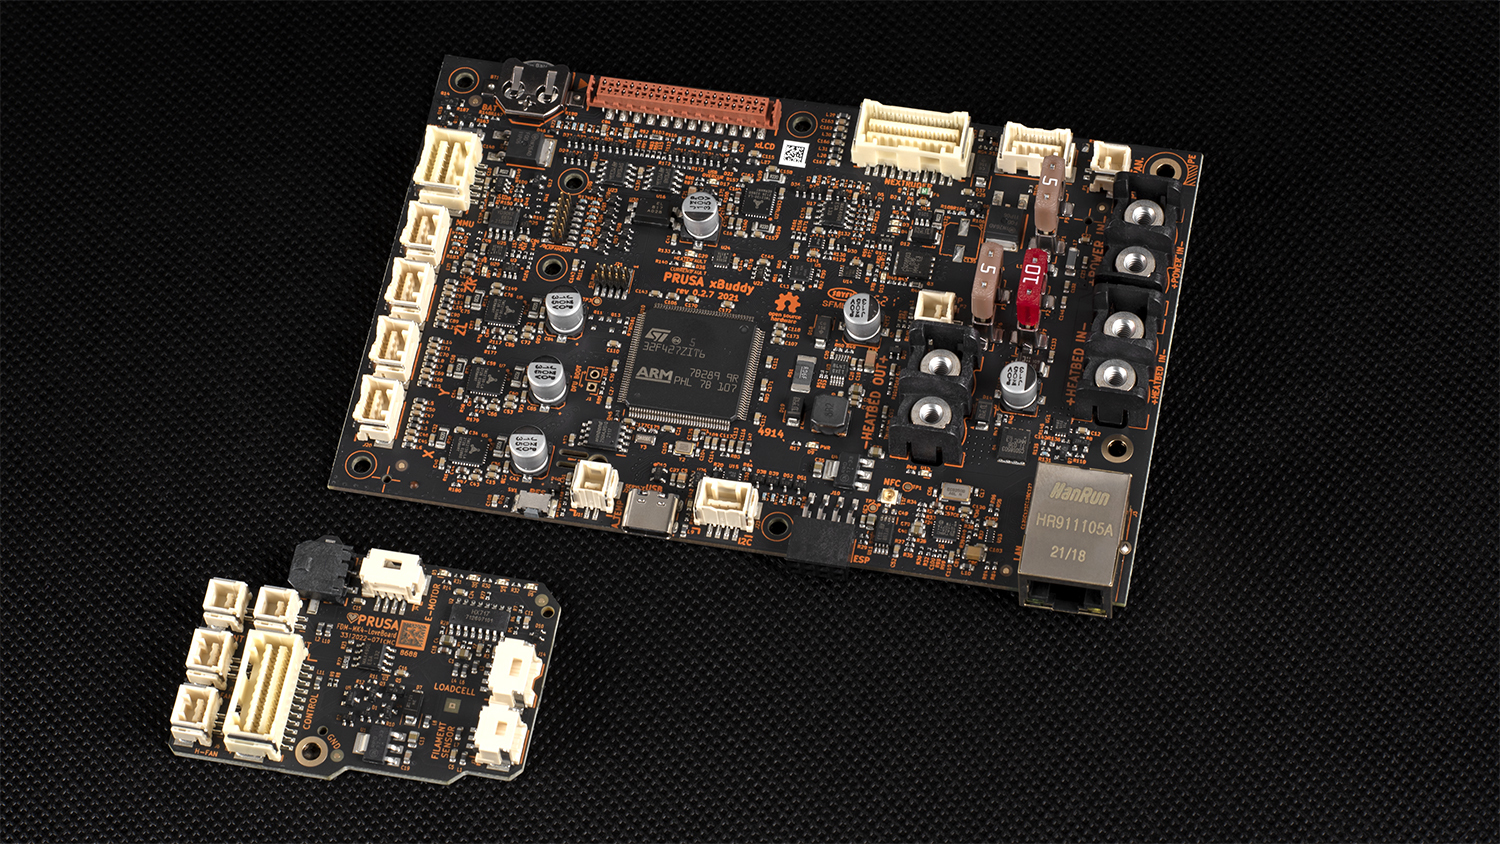
The cornerstone of the MK4 is our new xBuddy board. It’s a 32-bit STM32-powered mainboard with new hardware, plenty of connectors, awesome safety features, built-in ethernet, support for high-speed printing with Input Shaper and Pressure Advance and much more – I’ll get into details in a bit.
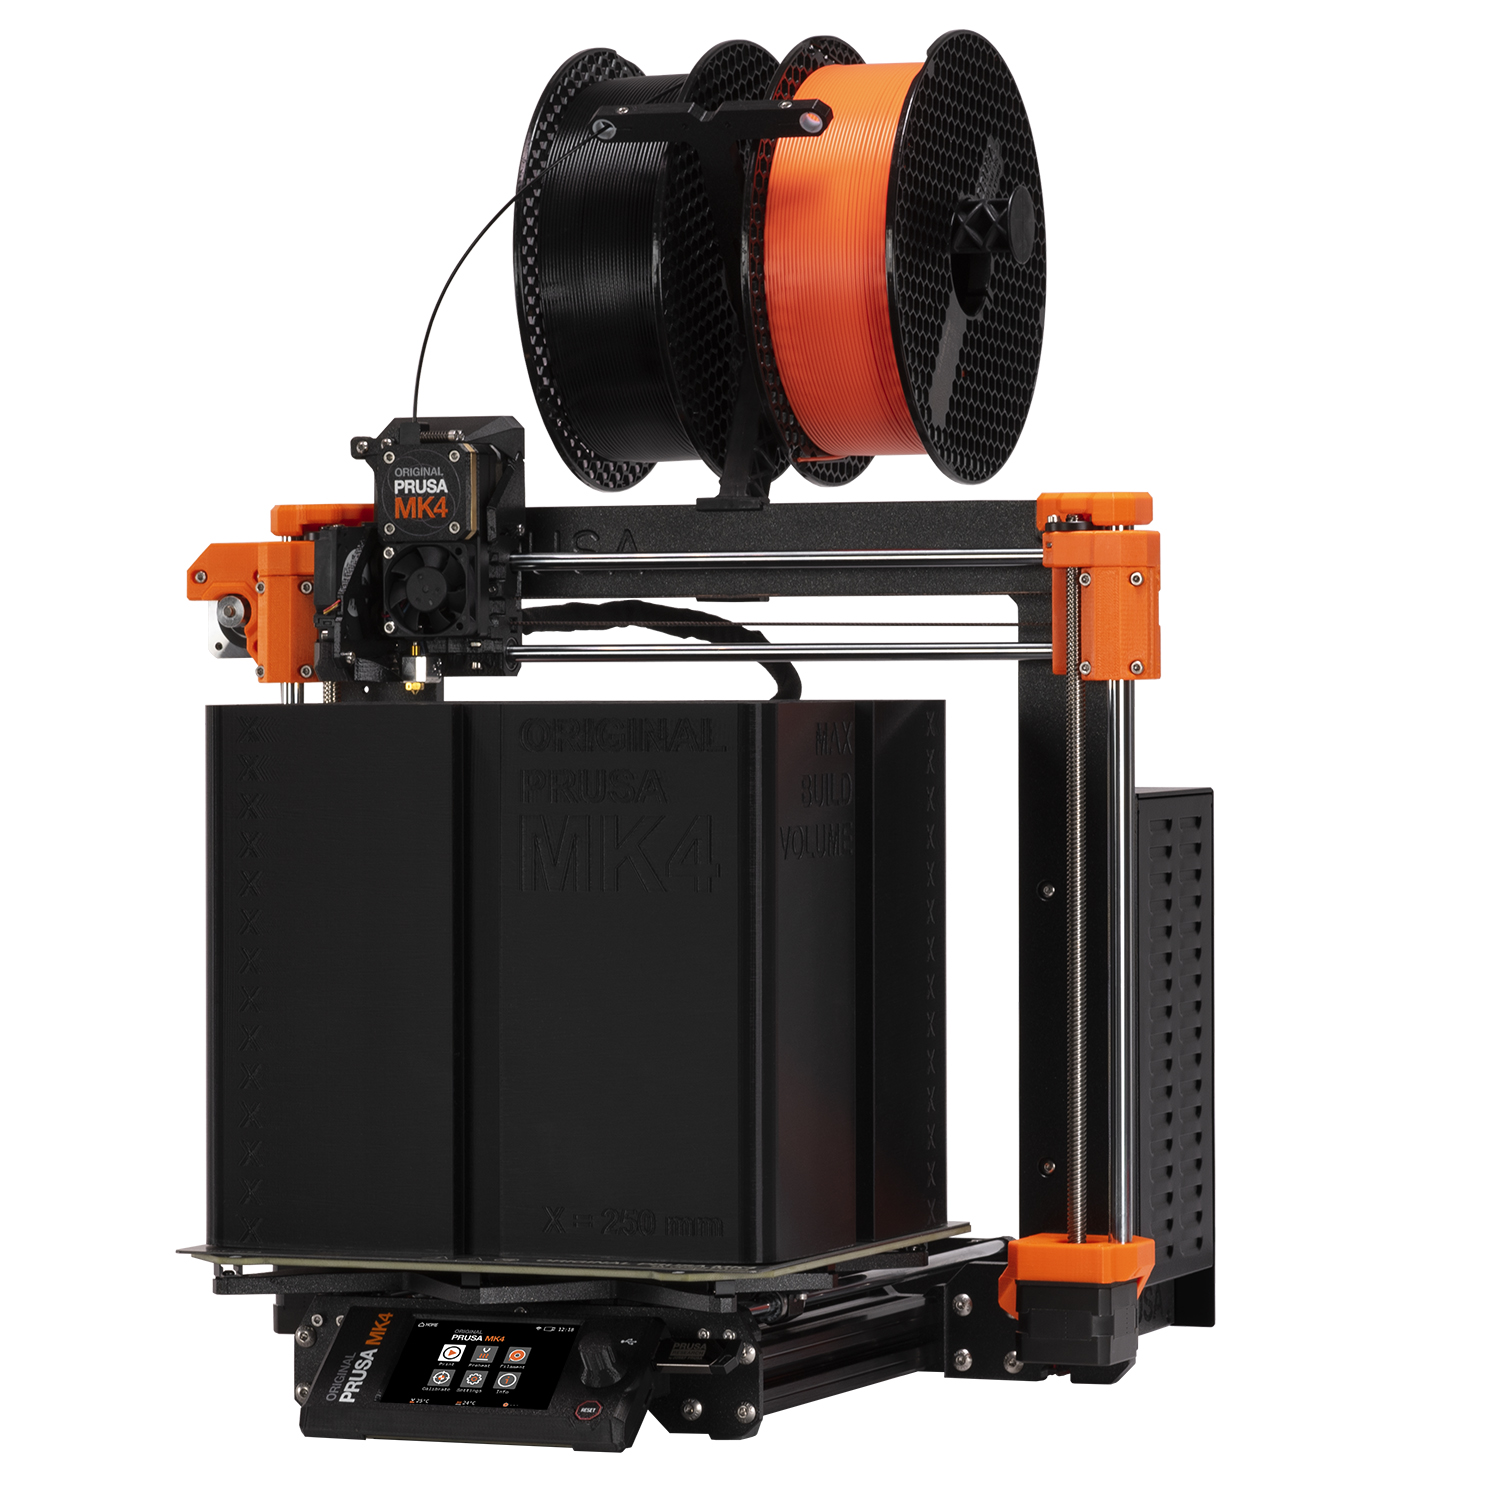
The next important part is the Nextruder. I already talked extensively about the Nextruder in relation to the XL. The MK4 uses a smaller, lighter version of the Nextruder, but it has very similar capabilities to its bigger brother. It has the same Load cell sensor which is used to set the distance between the nozzle and the print sheet with incredible accuracy by measuring the tension inside the extruder. This means you can say goodbye to Live Adjust Z. Once you unpack the MK4 and run the Selftest, the printer is ready to lay down a perfect first layer. No more tweaking, no more asking whether you should move the nozzle higher or lower. So I guess we can delete like half of the handbook and a ton of guides from our Knowledge Base. 🙂 The Nextruder is also more compact than the previous model which gives the MK4 another 10 mm on the Z-axis, so the total print dimensions are 250×210×220 mm.
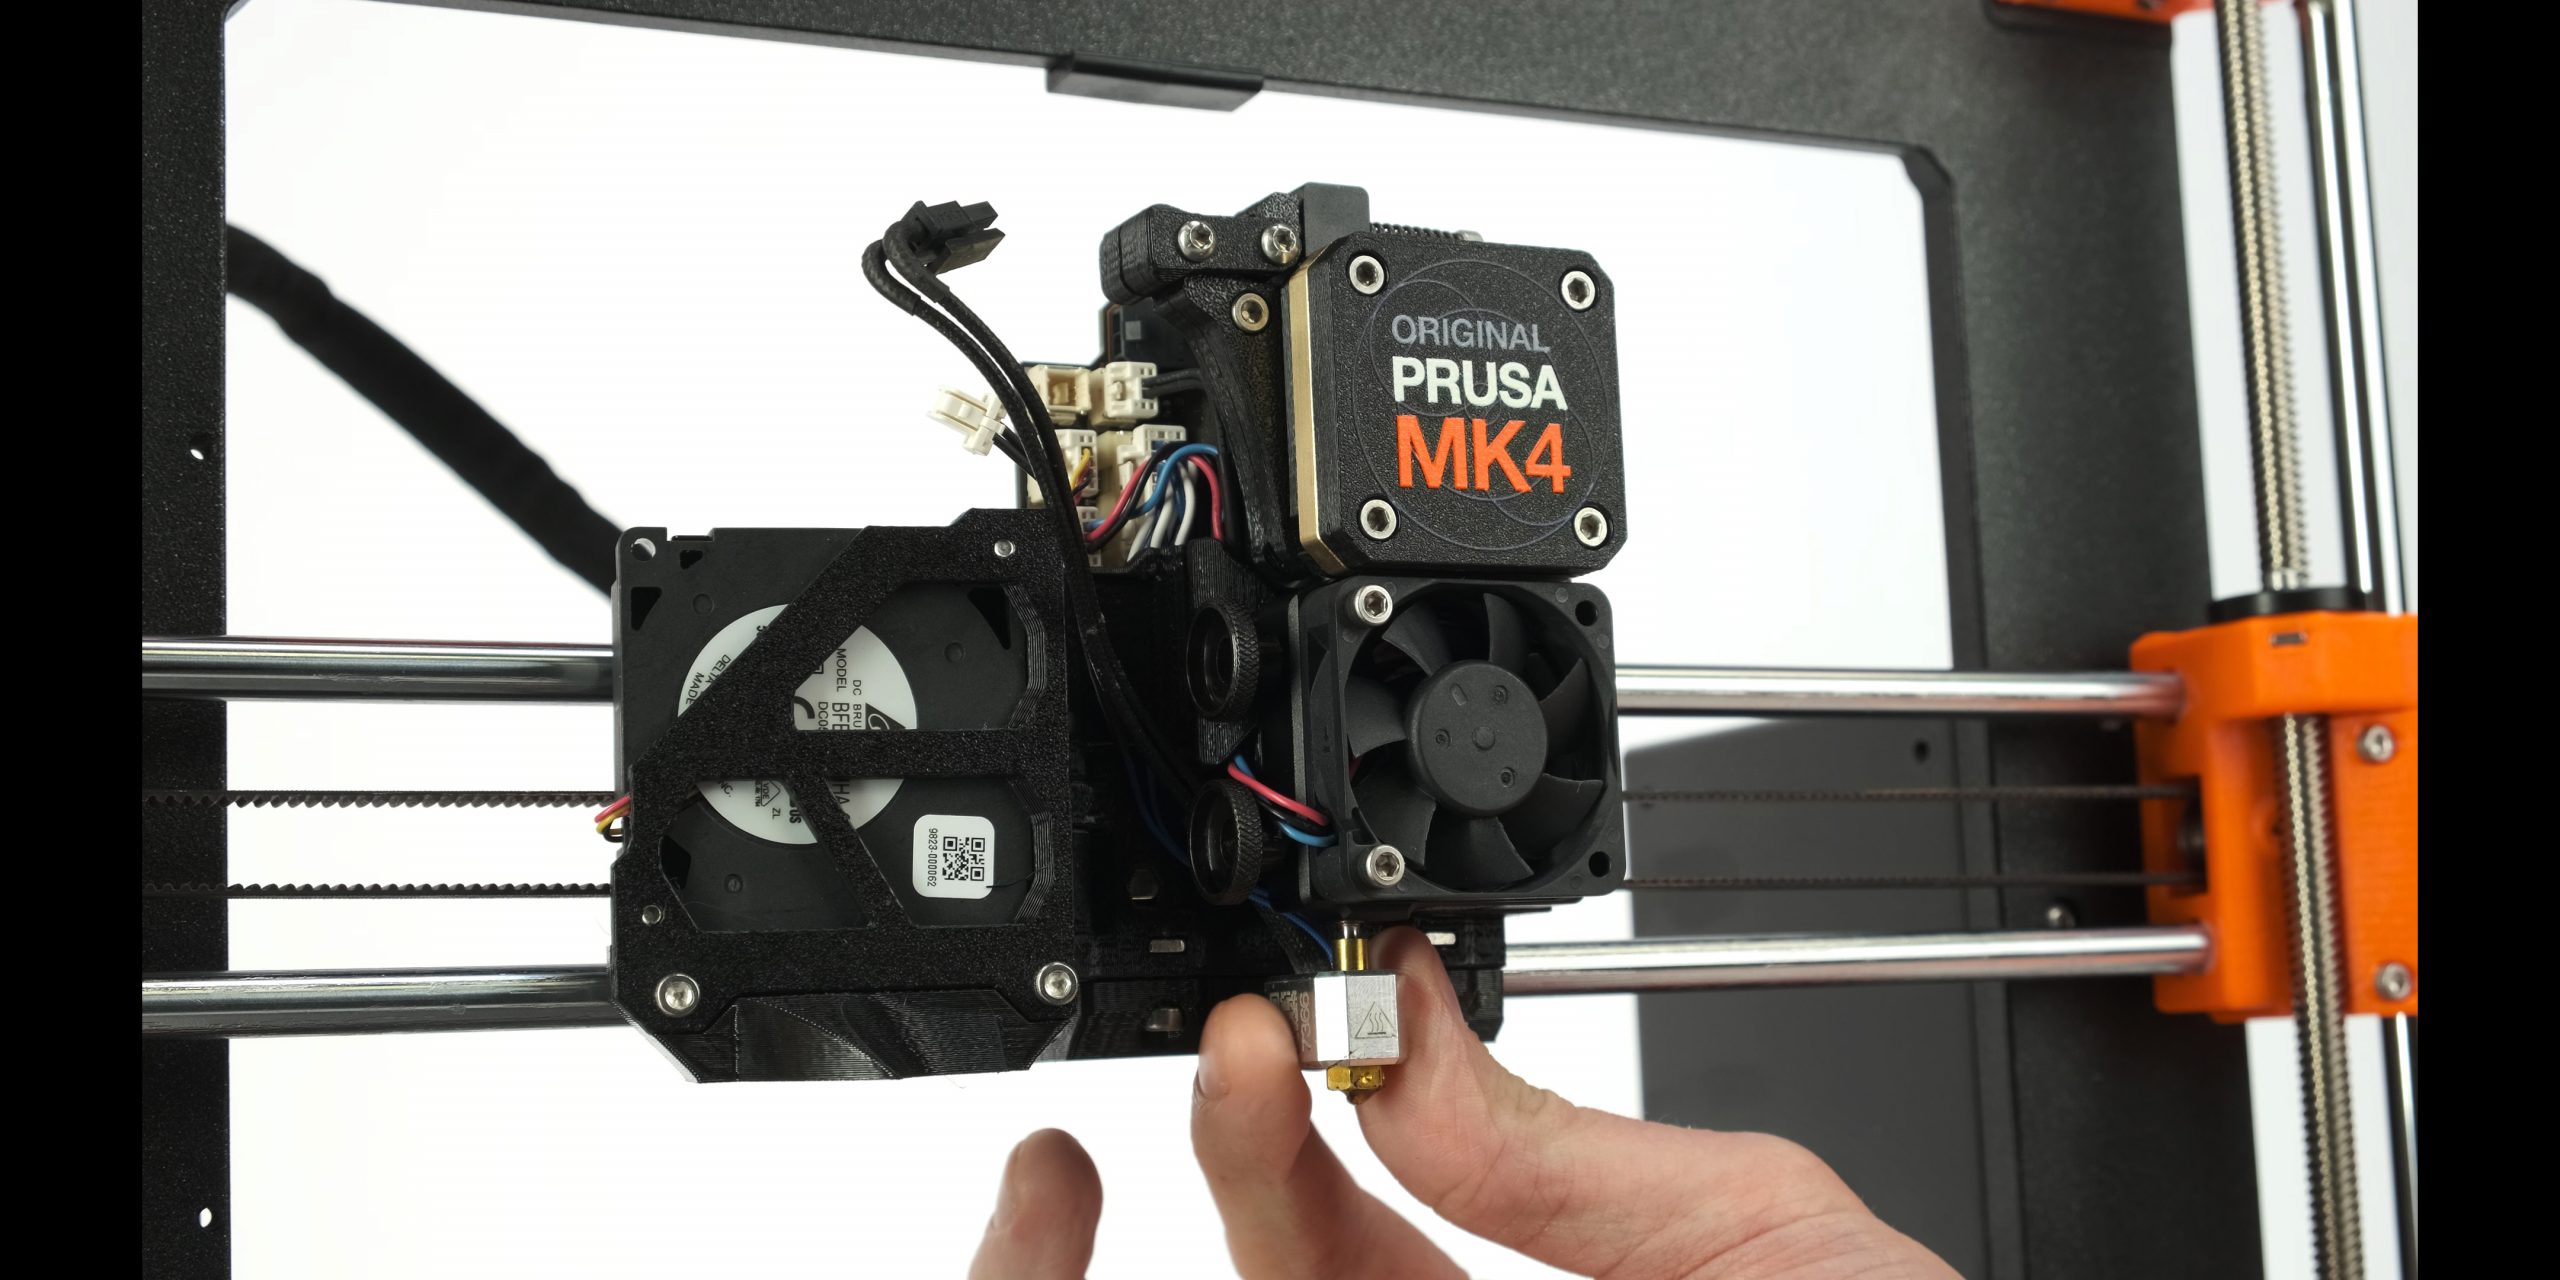
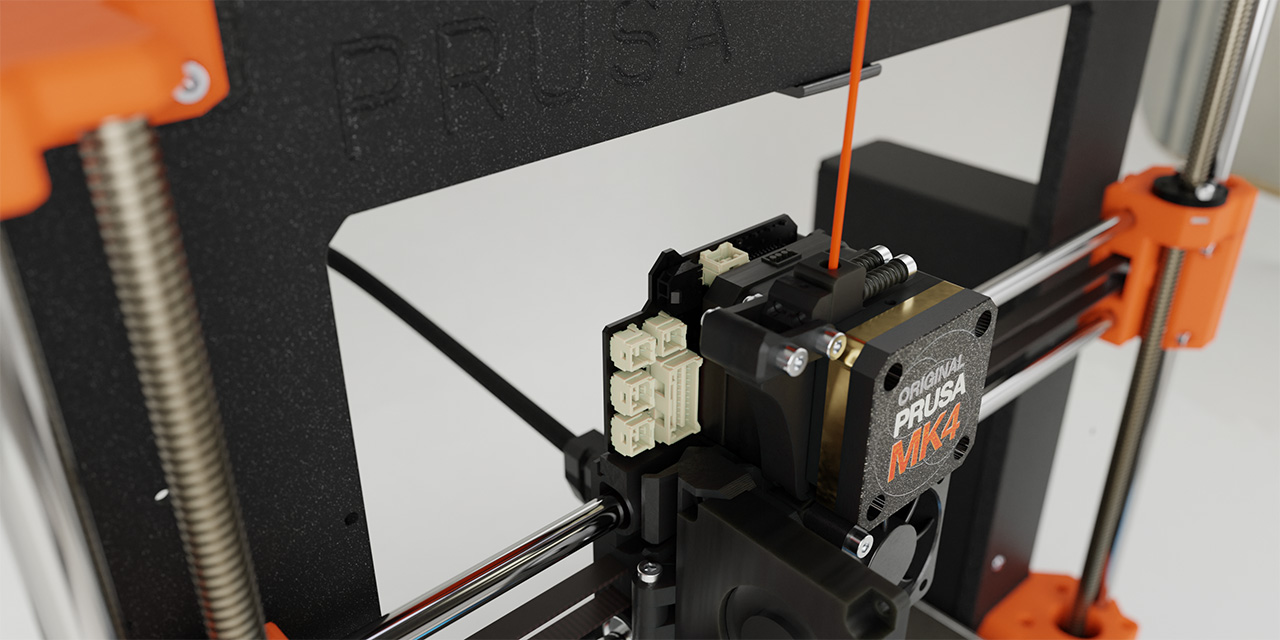
Next, we have the quick-swap nozzles. There are two thumbscrews on the side of the Nextruder. Loosen them, disconnect two cables from the electronic break-out board and you can pull out the entire hotend in a second. I think it’s pretty clear from the previous lines, but let me stress how important the Load cell sensor is. Imagine a situation where you want to swap both the nozzle and the print sheet. With the MK4, you can basically release the thumbscrews, pull out the entire hotend (nozzle+heater block), install a new one in a minute, swap the print sheet and start a new print immediately – the MK4 will calibrate everything quickly and automatically at the beginning of a new print. This is a huge time saver!
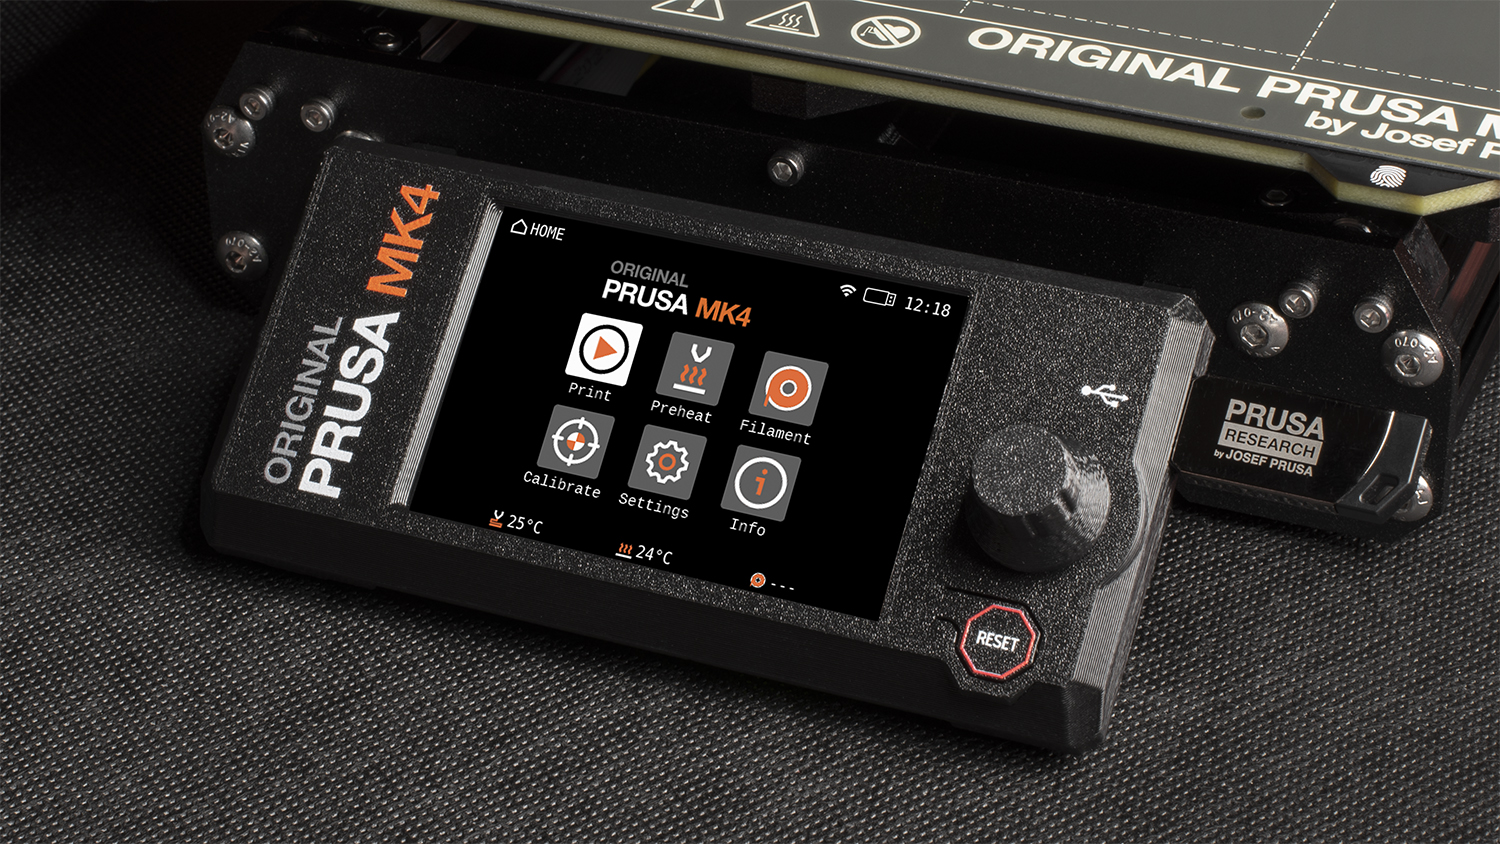
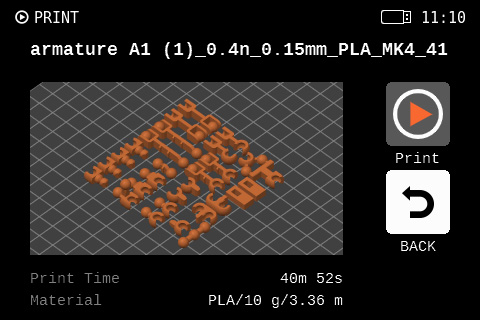
We also said goodbye to the good old segmented LCD. The new MK4 uses a graphic LCD. It supports G-code thumbnails, longer texts, graphics, QR codes and other elements that make using the printer so much easier. And we gave the MK4 a bit of a flair. 🙂 Directly under the LCD, you can find an RGB status bar – a programmable set of RGB LEDs that use various colors to signalize the current status of the printer. There is a proper USB-A port next to the display, so you can use a standard USB flash drive for storing G-Codes.
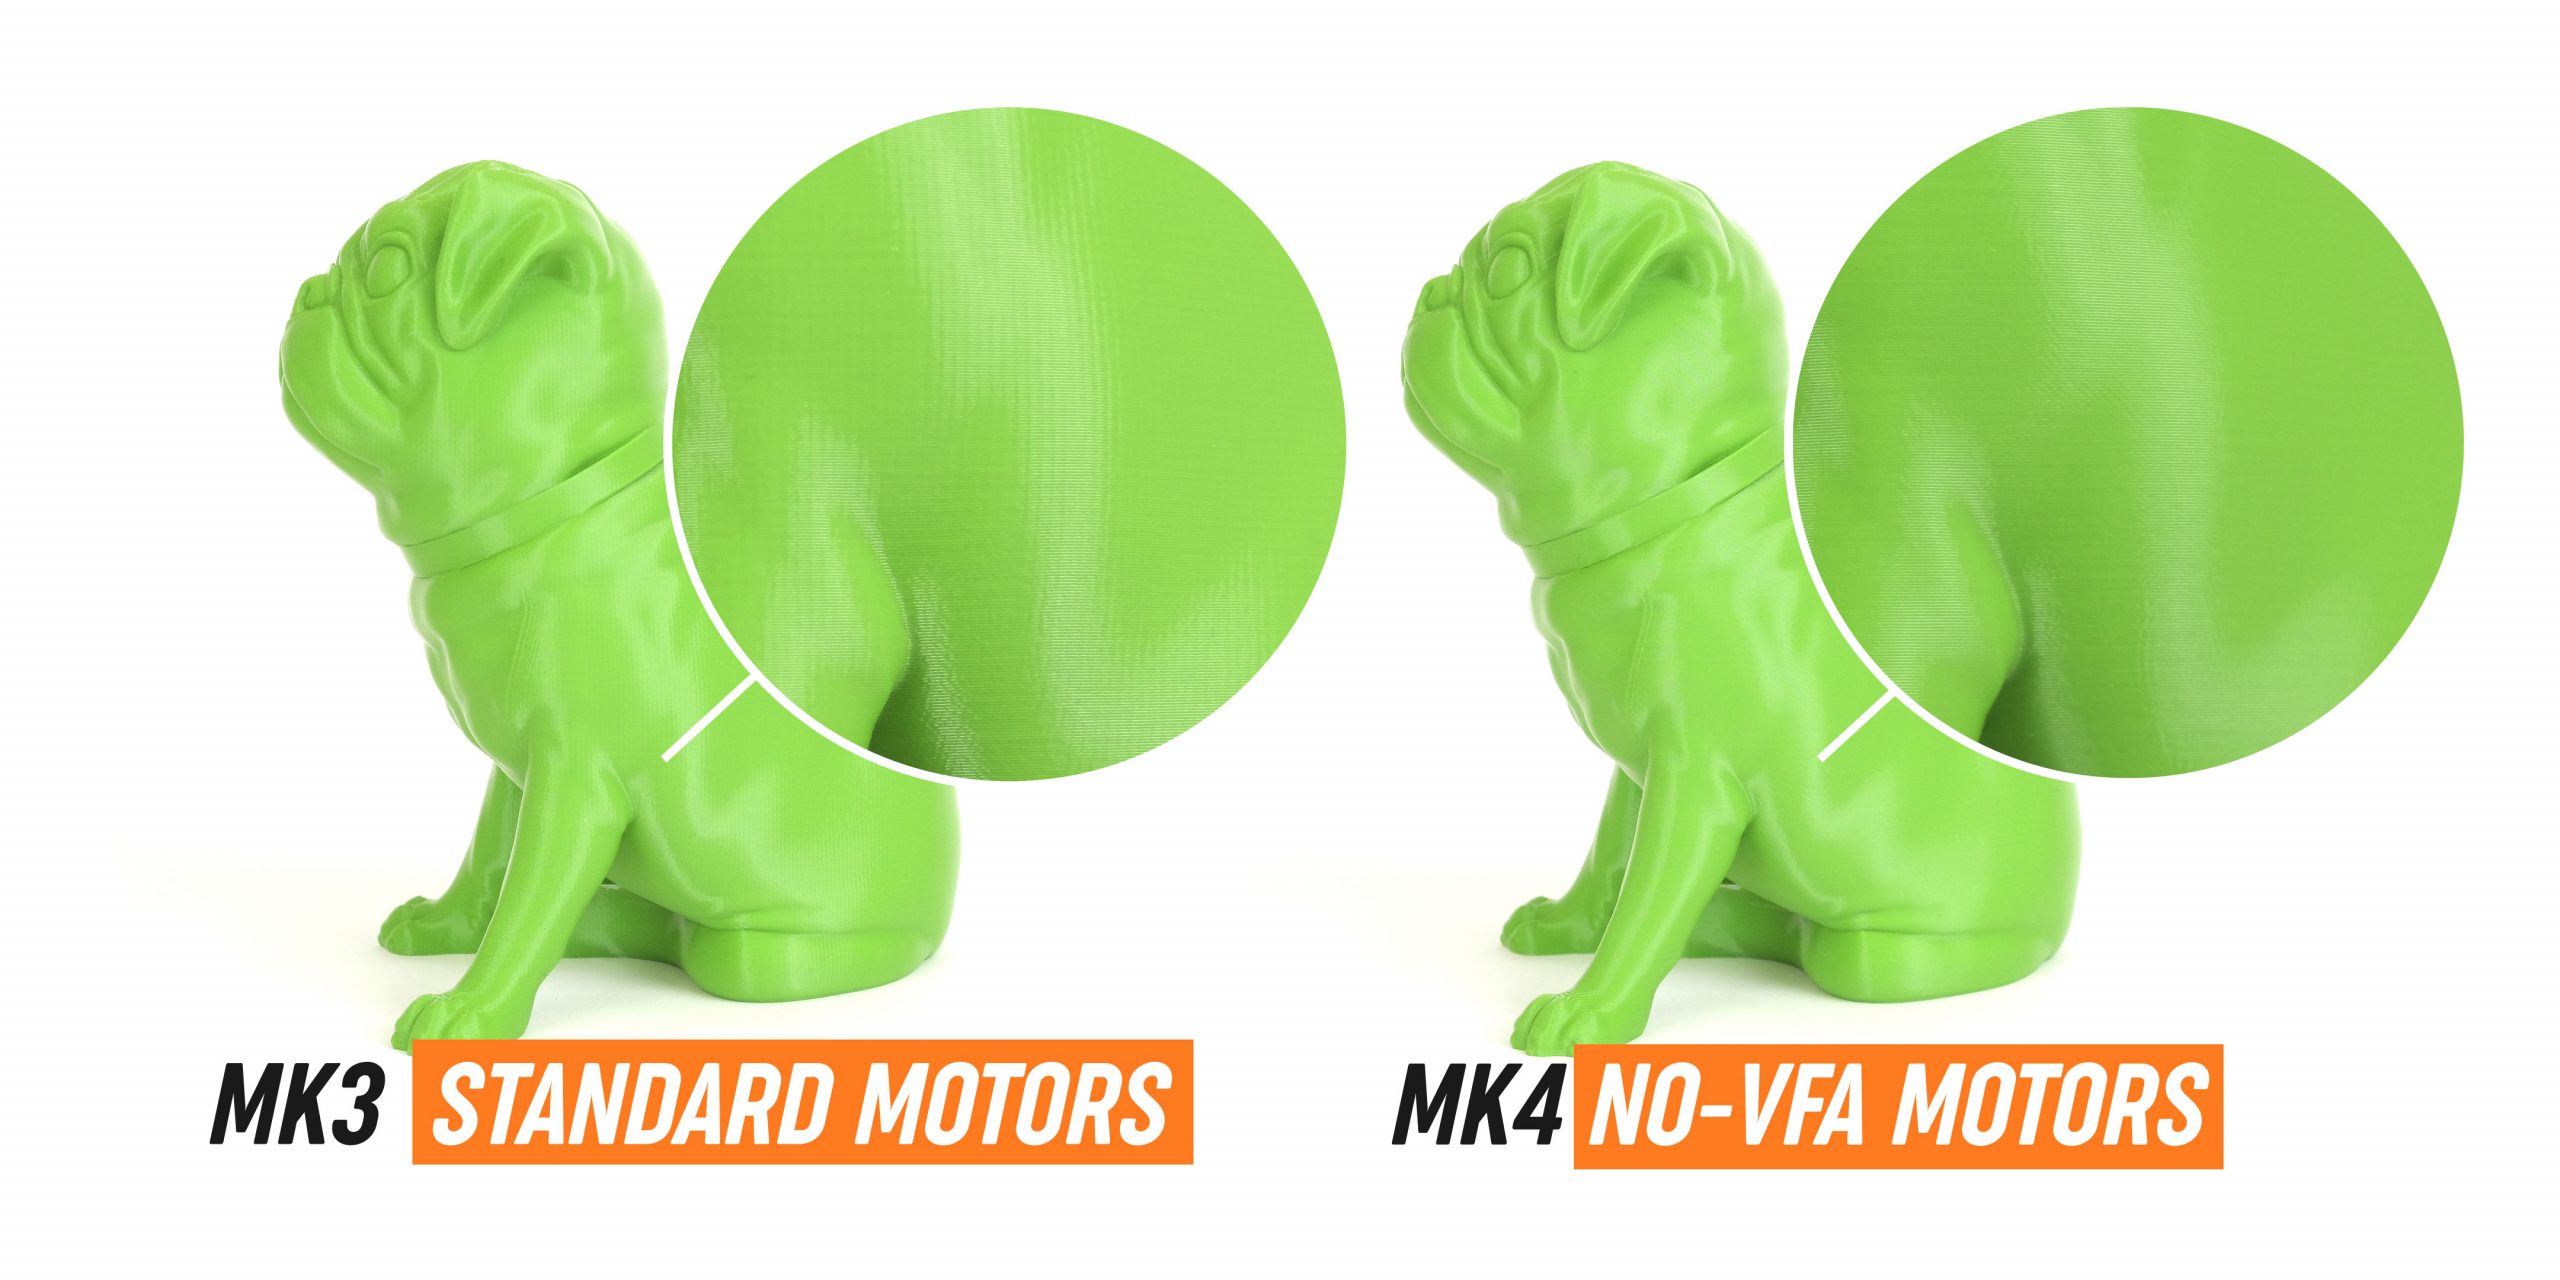
We have also redesigned all the plastic parts of the printer – to make them more robust and easier to install. The MK4 has new precise stepper motors (precise 0.9° / step; low inductance) that help eliminate VFA (Vertical Fine Artifacts), so the prints look even better now. Plus, we’re using thicker 10mm rods on the Z-axis.
And there are dozens of other changes! Let’s go over them just briefly:
- Support for Multi-Material Upgrade 3 (MMU3)
- New expansion joints under the heatbed that compensate for the heatbed’s thermal expansion
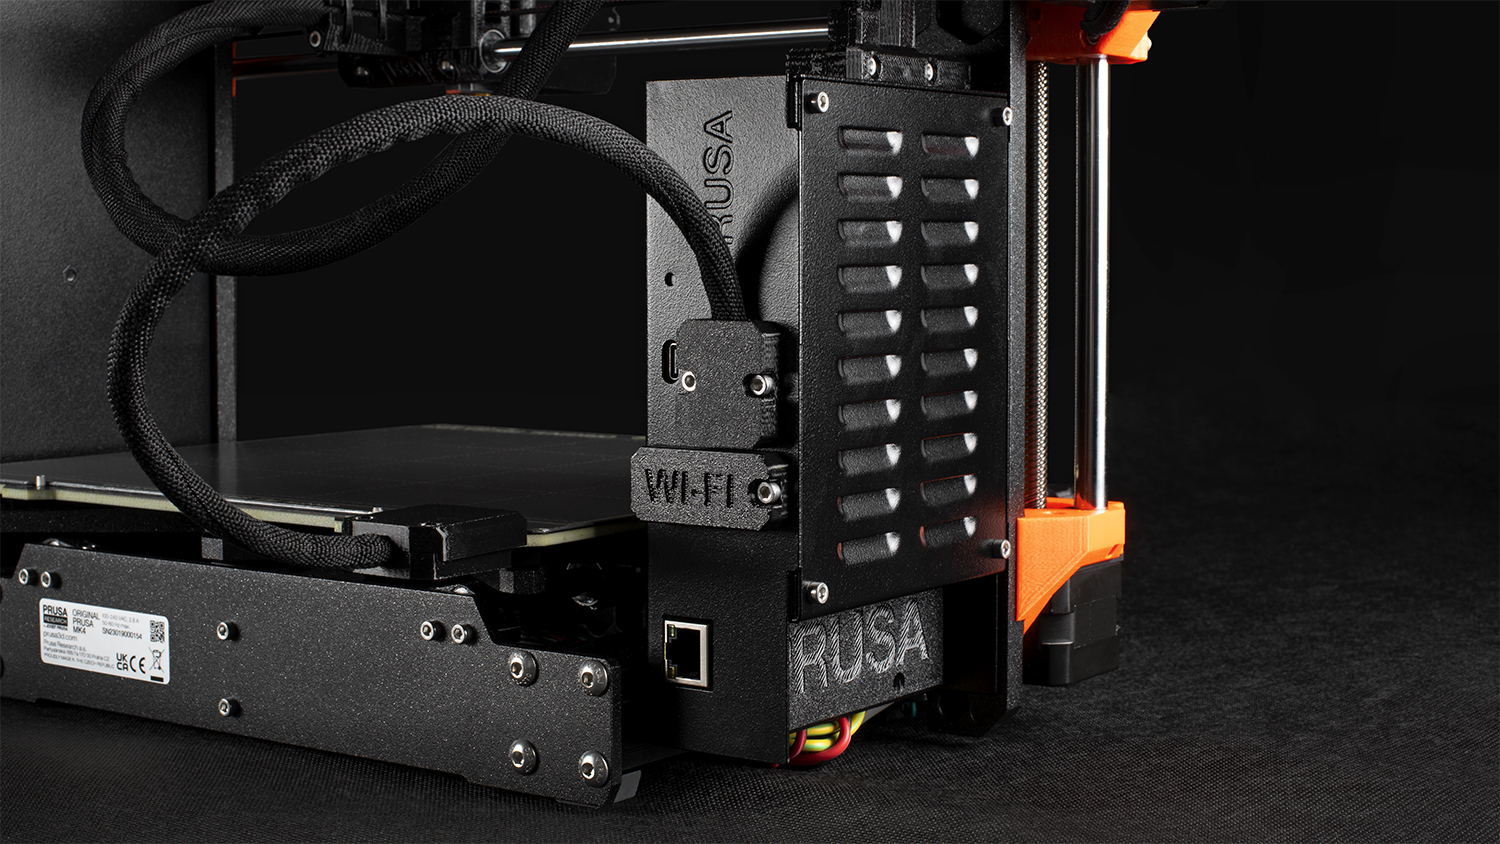
- Metal box for the electronics
- New tidy cable management
- Simple firmware updates from the USB drive
- …and more!
As usual, all components are submitted to rigorous testing before we ship them out!
🧵💡 I prepared another electronic assembly goodness 🍰 In our quest for ultimate quality control we invested in an X-ray It’s Nordson Quadra 5 \w CT 👨🔬 Int the video you can see the main processor of the Original Prusa XL 😍 pic.twitter.com/zFWThxpS2T
— Josef Prusa (@josefprusa) March 17, 2023
Shipping now, kits and upgrades coming soon!
Before I jump into a detailed analysis of the technology behind the MK4, let me summarize another important subject: shipping, upgrades and lead times.
We’re starting shipping the fully assembled printers first. The store page for assembly kits is live and orders will be enabled within the next two weeks. You can set up a watchdog, so you’re notified once the kits are ready to be ordered. We’ll publish the shipping schedule for the assembly kits once the orders are enabled. The price of the assembly kit will be 799 USD / 889 EUR (VAT incl.).
Right now, we have several hundreds of assembled MK4s in stock priced at 1099 USD / 1199 EUR (VAT incl.). Although, it’s possible that by the time you reach this paragraph, they are already gone. But we have all components in stock and we’re ready to manufacture several thousand units every month.
You also have the option to switch your existing XL pre-order to regular MK4 order. We understand that the XL didn’t go exactly according to schedule and also when you pre-ordered the XL, you didn’t know the MK4 was coming. So if you haven’t switched your XL pre-order to a full order yet, you can go to the Orders section in your profile in our eshop, open the Order detail page and look for the “Switch to MK4” button. This will replace your XL preorder with a high-priority MK4 order. Because we’re shipping based on the date of creation of the pre-order, your order will go to the front of the queue. Please note that this process (switching from XL to MK4) is irreversible.

Braasi Industry
If you already own the MK3S+, you will have three upgrade options, all available for ordering now. We will start shipping them in June 2023. Upgradability is a major feature of our printers and technically, you could have gradually gone all the way from the MK1 to MK4 – sure, there’s not really a good reason to do that, but still, it’s possible. We simply don’t want you to throw away your old printer just because a newer model came out.
- MK3S+ -> MK3.5 Upgrade (249 USD / 279 EUR – VAT incl.): contains the xBuddy board and new LCD, gives your MK3 the new 32-bit electronics, new connectivity options, Prusa Connect support, a new LCD screen and also Input Shaper and Pressure Advance for high-speed printing. Nextruder is not included. The complete contents of the upgrade package are described in our e-shop.
- MK3S+ -> MK3.9 Upgrade (499 USD / 549 EUR – VAT incl.): contains everything from the MK4 except for the X/Y/Z motors (Nextruder motor is included). You will reuse the frame, PSU and motors from your MK3S+. And if you want, you can additionally buy the new precise MK4 motors (eliminate Vertical Fine Artifacts, 0.9° per step) and thus complete the full upgrade to MK4 later.
- MK3S+ -> MK4 Upgrade (589 USD / 649 EUR – VAT incl.): this is the full upgrade that also contains the MK4’s new X/Y precise motors (400 steps, 0.9°per step). It’s the most expensive of all three, but last time you voiced your interest in a full MK2->MK3 upgrade pretty strongly, so we decided to give you a full MK4 upgrade as well. 🙂
Just to explain the difference between the MK3.9 and MK4 upgrade packages a bit more: the only difference is in the stepper motors. The MK4 uses higher-precision stepper motors that help eliminate VFA (Vertical Fine Artifacts) – these are tiny surface artifacts that are visible if you closely inspect a printed object. In other words, the motors in the full MK4 upgrade are the cherry on top – if you’re chasing the highest possible level of quality, they will come in handy. But the MK3.9 upgrade is very close to that.
Check the Shipping FAQ at the end of this article if you have any questions regarding existing MK3S+ orders, upgrades, order updates, etc.
As usual, we’ll update the shipping table in the upcoming weeks once the production stabilizes.
 Braasi Industry
Now, if you’re ready, let’s take a closer look at the hardware!
Hardware in detail
As I already mentioned, the MK4 may look similar to the MK3S+, but we made an incredible number of changes under the hood. Here is a detailed description of the main things we’ve changed and added.
32-bit xBuddy board
It’s time to say goodbye to the good old EINSY RAMBo. It’s been a great piece of hardware and our firmware devs managed to squeeze out unbelievable things from it – such as the recent Thermal Model Protection system.
As you can probably imagine, the new 32-bit board gives us a plethora of new options. 🙂 The entire board was designed, manufactured, and tested in-house. We took everything we learned on the EINSY, brought it to the xBuddy, and added a lot of new features. Our main priority is, as always, safety and reliability. To give you an idea of what xBuddy is capable of:
- Dual voltage measuring
- Heater current measurement
- Hardware-based protection; disconnects the hotend heater if the current goes over 2.8 A
- Total input current measurement on the 24V branch
- Hardware overcurrent protection and safety function that disconnects the heater and heatbed power supply when the total current exceeds 15A
- Power panic (recovery from power outage)
- Four thermistors (hotend, heatbreak, heatbed, ambient)
The xBuddy board features TMC2130-LA drivers and is fully equipped with many different ports:
- ESP-01 Wi-Fi port (Wi-Fi module is included but optional)
- Ethernet port
- Service USB-C port
- I2C port
- Accelerometer port (unpopulated)
- Multi-Material Upgrade 3 port
- Nextruder port (there is only a single cable leading from the mainboard to the extruder)
Most of these are pretty self-explanatory, however, I would like to explain the Nextruder port a bit more. All our 3D printers always had all the extruder components connected directly to the mainboard. As a result, when you needed to, e.g., replace the hotend fan, you had to take apart the zip-ties, cable sleeve, and plastic parts and then put everything back together. With the new connector break-out board (codenamed LoveBoard) inside the Nextruder, all of the components, such as fans, heaters, thermistors, etc., are all connected directly there. If you need to swap anything, it takes just a minute.
Speaking of the Nextruder…
MK4 Nextruder, an always-perfect first layer and Quick-Swap Nozzles
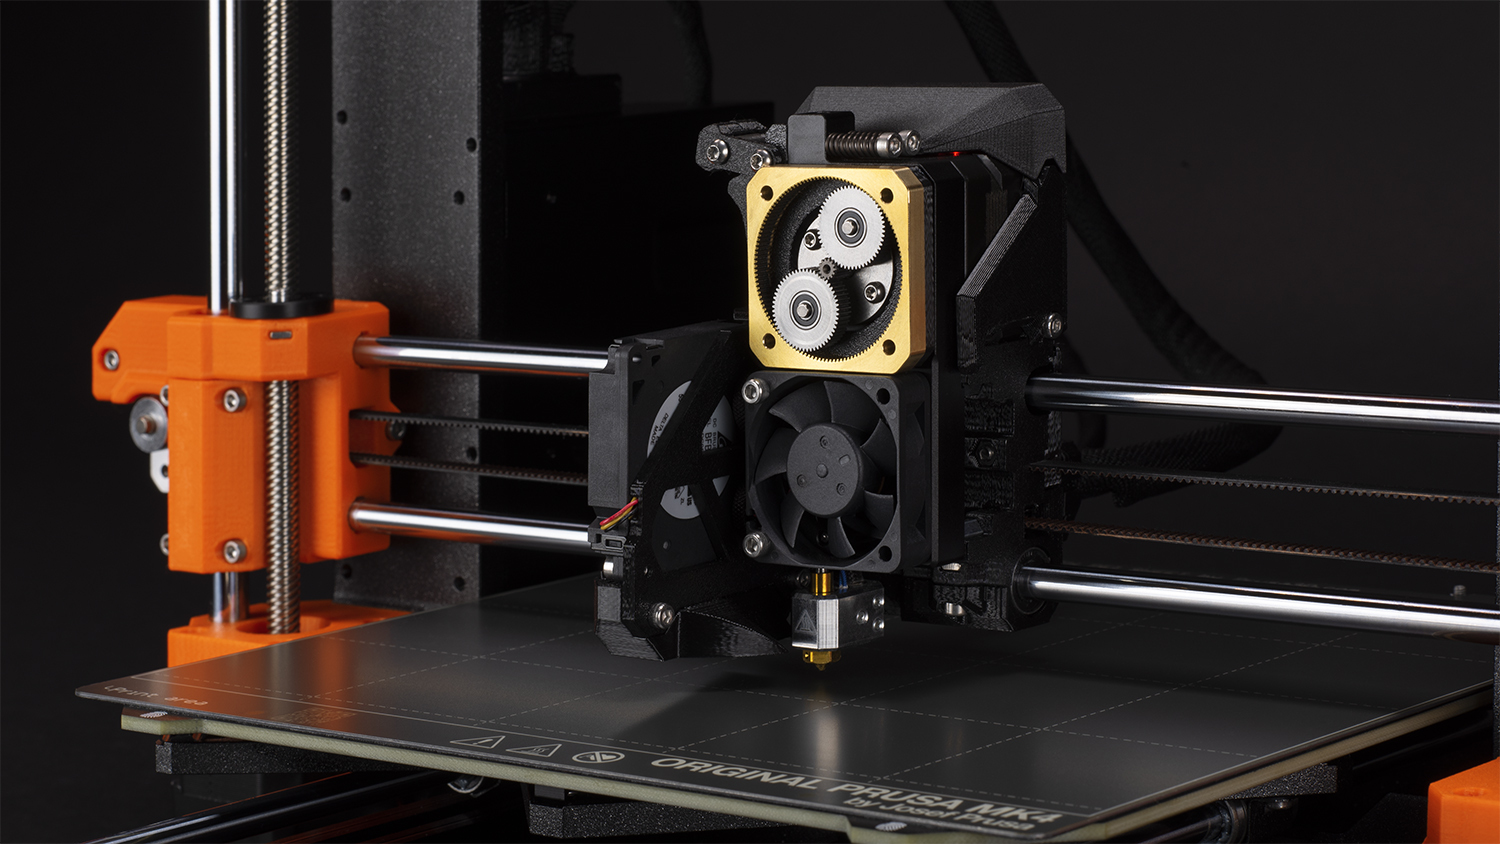
Our next-generation extruder, Nextruder, has been built from scratch to make it lighter and with the center of gravity closer to the X-axis.

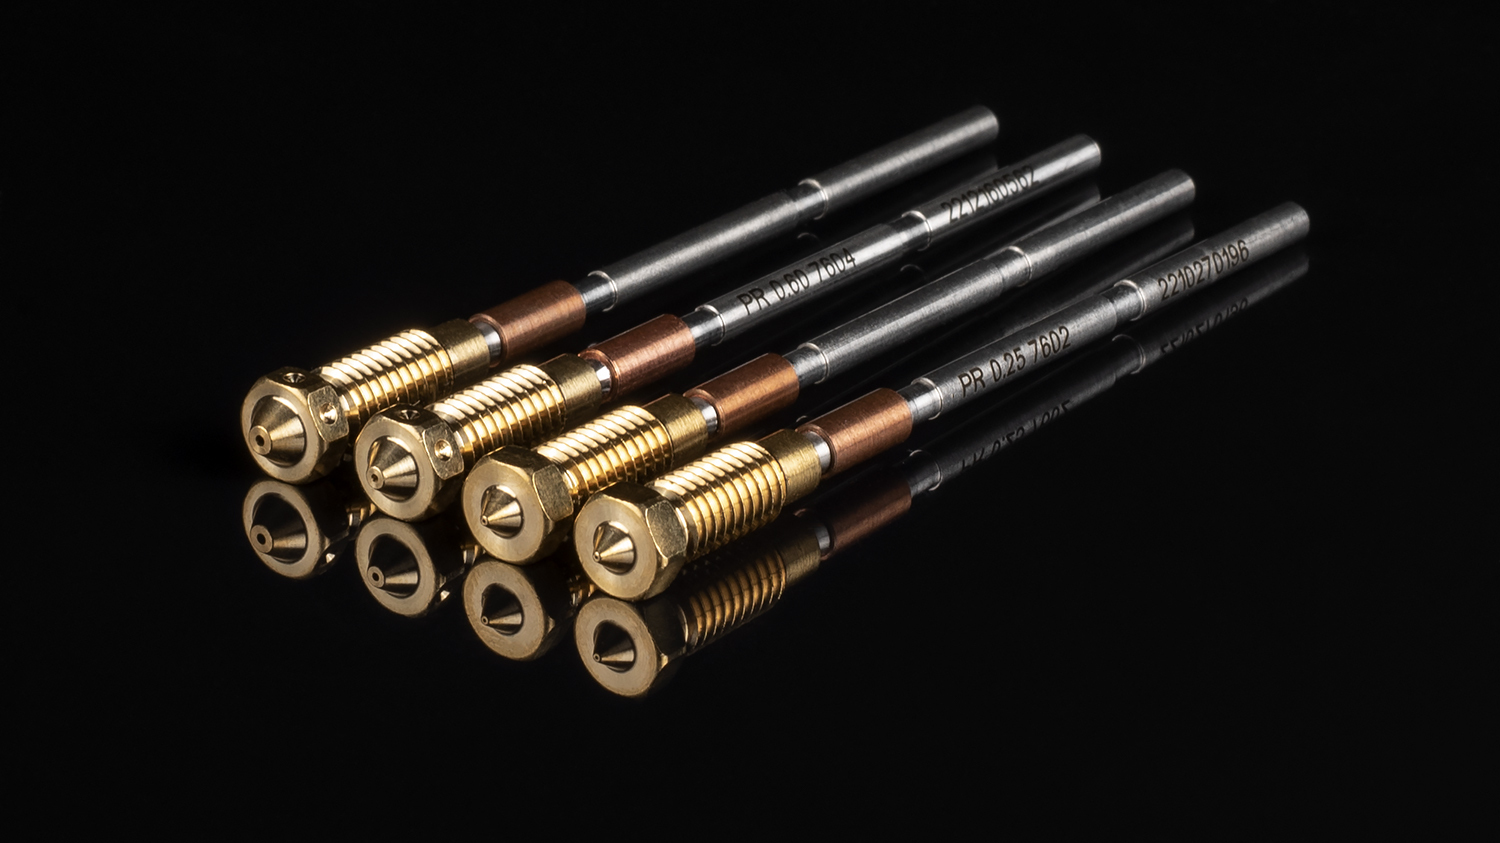
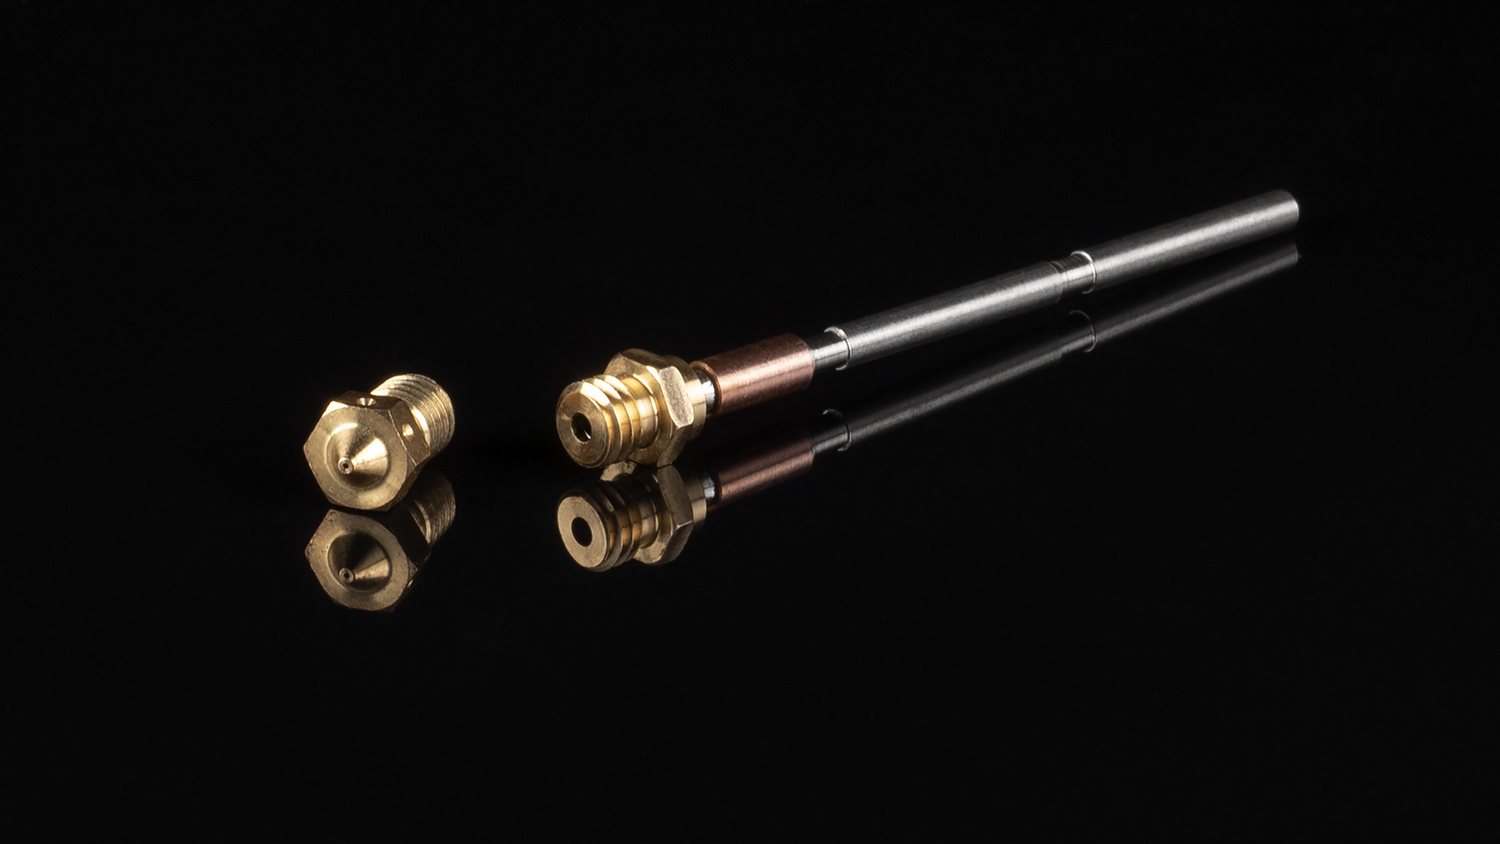
One of the most important parts is the large aluminum heatsink which doubles as the body of the Nextruder. Two quick-release thumbscrews on the side of the body hold the nozzle in place. This time, we’re using special nozzles with an all-metal filament guide. This means that the entire path of the filament through the Nextruder is all-metal, no PTFE tubes anywhere. This improves the overall reliability of the printer and makes changing nozzles much faster. If you have your favorite V6-compatible nozzles, no worries – we’re offering a simple Nextruder-to-V6 adapter. Once you install it, you can use any V6-compatible nozzle including hardened and high-flow models. We’re, of course, offering a range of various nozzles (from 0.25 to 0.8) in our e-shop with more models coming later.
 |
 |
Filament is pushed into the nozzle by a large 35mm no-slip drive gear that is powered by a precise 10:1 planetary gearbox with a “pancake” stepper motor (again, to bring the center of gravity closer to the X-axis). There is, of course, a filament sensor (uses a Hall sensor) that works as you would expect: once the printer detects that it ran out of filament, it pauses the print and notifies you that it’s time to switch spools. Automatic filament loading goes without saying.
The MK4 has the same Load cell sensor as the Original Prusa XL. It’s an extremely precise analog sensor that we use to lay down an absolutely perfect first layer – automatically, no interaction is required. At the beginning of a print, the MK4 taps the print sheet with the nozzle in a grid-like pattern. This way, it precisely measures the distance between the nozzle and the print sheet across the print area and calculates the correct offsets. This technology is far more precise than the old P.I.N.D.A sensor and it completely eliminates the need for Live Adjust Z. We’re (not) gonna miss you, buddy 🙂 The Load cell sensor is very capable and we might be able to squeeze something more from it in future firmware updates.
And here’s a nice little quality-of-life improvement: the height offset for the first layer is calibrated only in the area of the actual print, so with smaller objects, the process is faster.
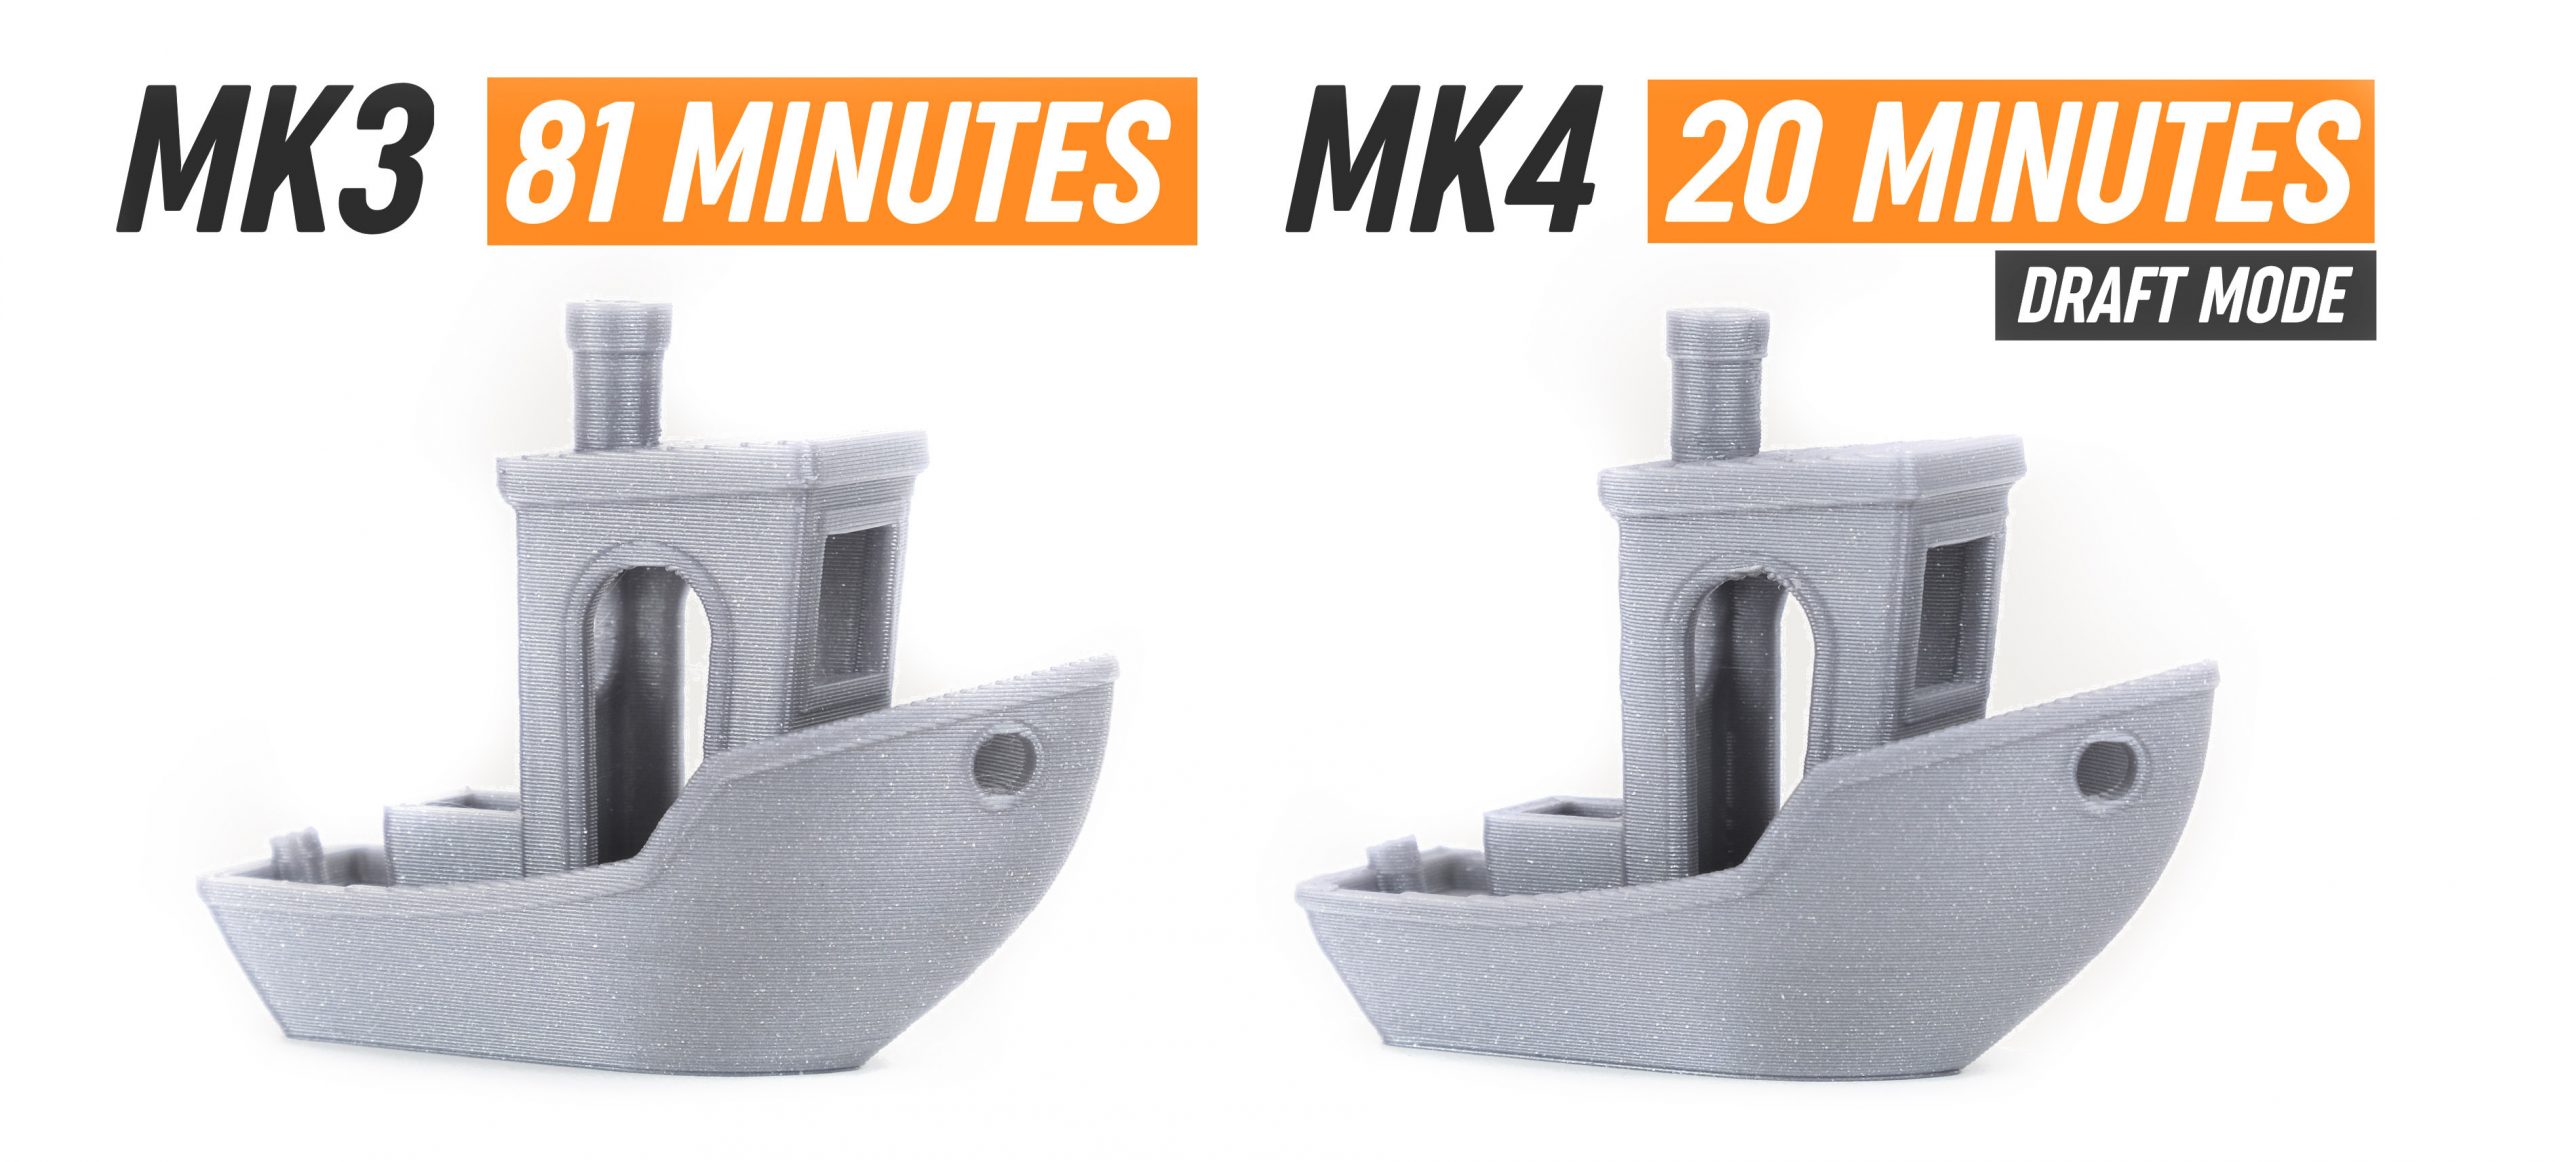
Input Shaper and Pressure Advance, Benchy in 19 minutes
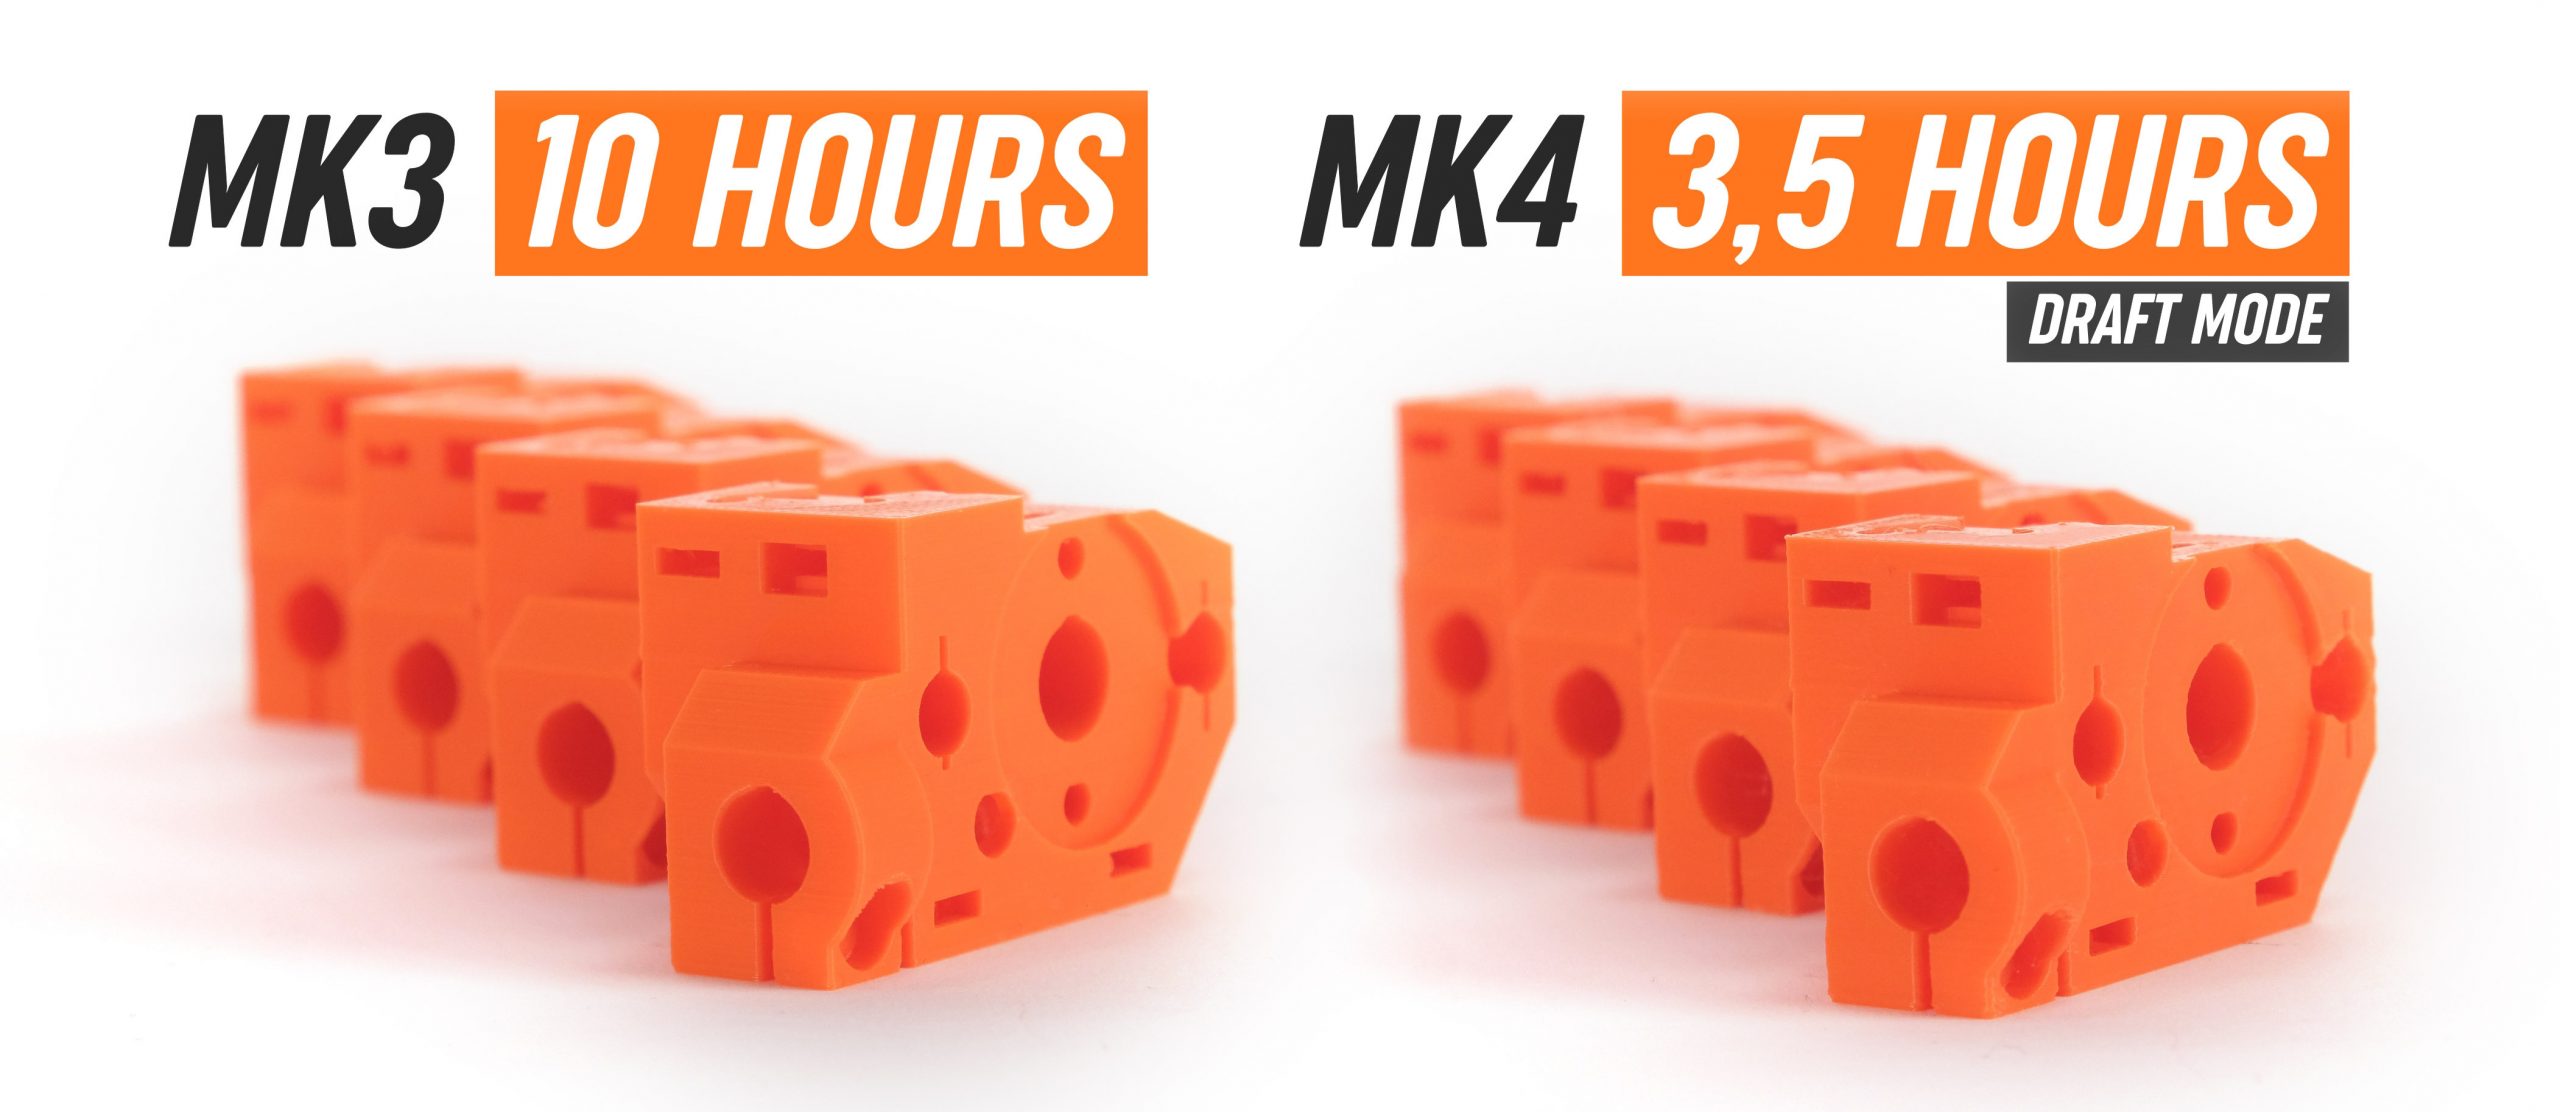
Input shaping and Pressure Advance are two technologies that have been causing quite a stir in recent years. They allow 3D printers to operate much faster, often decreasing total print time by up to 75 % while keeping good print quality. We understand that rapid prototyping should be rapid, so we started developing our own implementation of these technologies. Why not just port Klipper?
Originally, we used Marlin as the base for most of our firmware code – but that was many years ago. As time went by, we have rewritten nearly everything, so now there are only a few bits here and there that remain. The firmware we currently have is incredibly robust and feature-packed.
So it only made sense for us to write our own Klipper-inspired implementation of Input Shaper and Pressure Advance technologies. It’s not a direct port, but rather our own solution that is written directly for the STM32 bare metal, so you won’t need any additional electronics (like a Raspberry Pi). It’s low-level and with the same accuracy as Klipper (which is better/more precise than Marlin). Now, I should probably explain a bit more because chances are you don’t know what these terms mean.
In short: the machine can print faster. Much faster. Input Shaper is a way to eliminate resonance in prints. Since a 3D printer has moving parts (extruder and heatbed), it is prone to transferring vibrations into prints. When an extruder needs to create a sharp 90-degree corner on the object, it needs to stop in a precise spot and then the heatbed starts moving – the sudden stop of the extruder can cause vibrations (it “shakes” when it is quickly stopped in one place) which are then transferred into the printed model and manifest as a “ghosting” effect.
Input Shaper suppresses these effects by “learning” how the printer moves – this is done by placing an accelerometer in the extruder and interpreting the reported values. The MK4 doesn’t have a built-in accelerometer in the Nextruder, but there’s an accelerometer port on the xBuddy board. We use it to calibrate the Input Shaper and then you can use the pre-calibrated firmware without an accelerometer installed.
By using complex mathematical models, Input Shaper can “smooth out” or avoid resonances – something similar to noise-canceling headphones. Pressure Advance (or Linear Advance in Marlin firmware) is a predictive technology that is used to control the flow of the filament. It reduces under-extrusion at the start of lines or Z-changes (seams) and blobbing at the end of the line or in corners. Again, this enables faster printing with better print quality.
We are, of course, aware of the SpeedBoatRace and crazy attempts to print the Benchy in the shortest amount of time possible. While this is pretty cool and exciting, we see the biggest gains on our print farm, when we’re printing a dozen of technical parts, prototypes and other functional models in 3 hours instead of 9 with the same quality.
But I don’t think we could get away without showing you the Benchy. So here it is: a 19-minute Benchy using work-in-progress firmware on a preproduction bed-slinger 🙂
This Benchy was printed with the default acceleration of 8000 mm / s2 and 200 mm/s on external perimeters. These are work-in-progress numbers since we’re still in the process of tweaking everything, so don’t take them as final and definitive values.
One important thing: with our printers, we aim to deliver great print quality, not blobs of plastic in a record amount of time. So we’d rather extend the print time by a few minutes and have nicer prints and accurate dimensions, instead of chasing every single second. Inter-layer adhesion is extremely important, too – what is the point in printing something insanely fast when the object falls apart the moment you take it in your hand?
Since it’s all still under development, it also means that Input Shaper and Pressure Advance won’t be available in the shipping firmware. But I’m sure you’re eager to try it as soon as possible, so we will probably soon release an alpha firmware with input shaping and Pressure Advance in a few weeks. It won’t be as feature-packed as the full firmware, but you can play around with it until we merge the two branches. 🙂
What’s also amazing is that the printer is still beautifully quiet when it’s running with Input Shaper on and achieving these amazing speeds.
And one last thing: if you upgrade your MK3S+ with the xBuddy board to MK3.5, you’ll be able to use Input Shaper and Pressure Advance, too, with a future firmware update. We’ll share more information about availability and speeds later on.
I’m sure you will have a ton of questions regarding more technical aspects of our Input Shaper and Pressure Advance like whether a calibration print will be necessary, whether you’ll be able to tweak it on your own, etc. Please be patient for a bit more time, we’ll share more details soon. It’s time to move on to the next chapter now!
COPAG High school, Prague
Software
The release of MK4 also means the release of new firmware, PrusaSlicer and also a big update to our remote print management software – Connect.
Buddy Firmware
The firmware for MK4’s xBuddy shares the codebase with the XL and the MINI+. So when we recently released the XL and published the firmware codes on Github, some of you noticed that something is a bit off in the code. 🙂
We have redesigned many of the existing menus to make access to various functions more straightforward. There is, of course, still the one-click printing feature: once you insert the USB drive with G-Codes, the printer automatically opens the latest file and you can start printing it with a single tap of the control button.
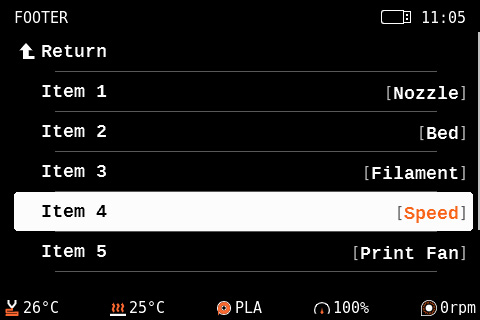
We’re also giving you some new options, such as the possibility to customize the UI – you can select up to five different values in the footer of the main screen, such as temperatures, fan speeds and print speed.
As always, you can expect regular firmware updates that will bring new features, improvements and more.
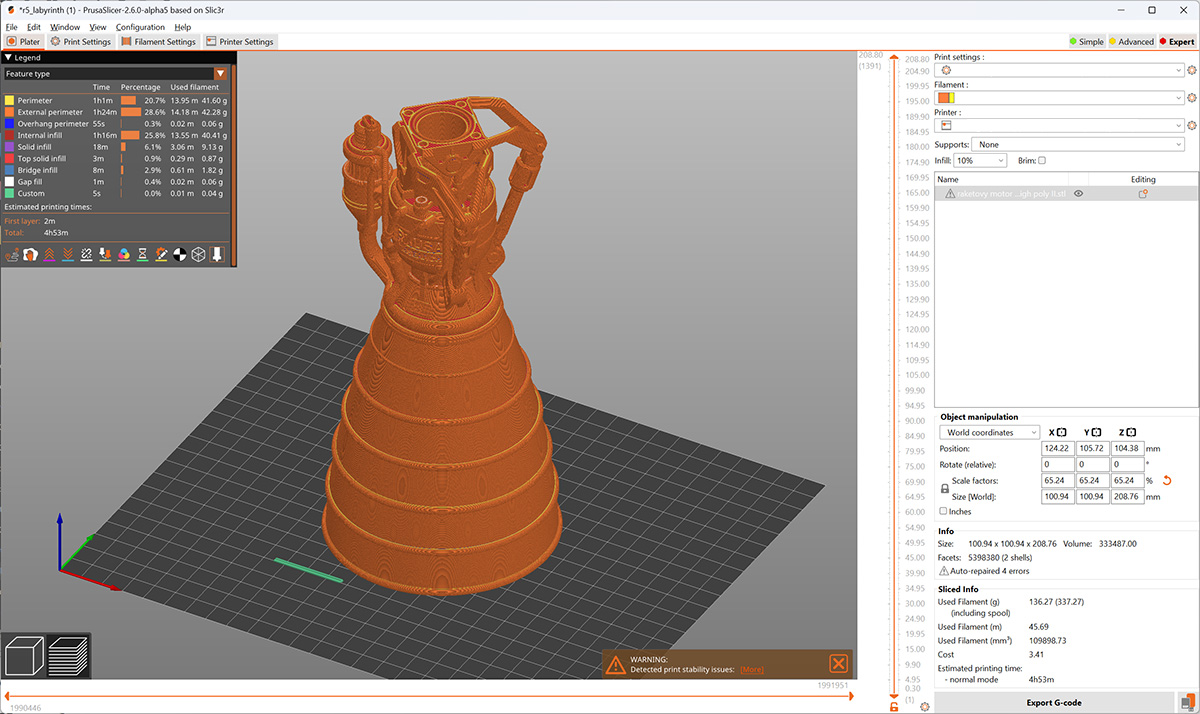
PrusaSlicer 2.5.2 and 2.6.0
The release of the MK4 is accompanied by the release of PrusaSlicer 2.5.2, our amazing open-source slicing software. It features factory-tested profiles for the MK4 and a ton of useful tools. I’m sure I don’t have to introduce PrusaSlicer in too much detail, it’s a truly wonderful piece of software and our devs keep inventing new features all the time – and all source codes are publicly available after every release.
When I say that by purchasing our 3D printers, you also enable us to push the industry forward, this is precisely what I have in mind. An incredible amount of skill, effort and talent goes into every PrusaSlicer release and we still keep it free and open-source because we believe it’s the right thing to do.
PrusaSlicer 2.6.0 is on the way and if you don’t mind a slightly less stable (still very good, though!) alpha build, you can get it now from our Github and enjoy all the latest features, such as the awesome organic supports, new cutting tool and paint-on support options.
Prusa Connect and MK4 connectivity options
The launch of MK4 also brings a big update of Prusa Connect, our internally-developed printer management software with an encrypted connection. Its web interface gives you access to a ton of useful features.
Every 3D printer you add to Prusa Connect (currently, the MK2.5, MK3, XL and MK4 are supported) has its own dashboard with a complete overview of the machine. You can drag and drop G-Codes into the browser window to upload print files first into the cloud – each user gets 1 GB for free. Then, you can transfer the print file into the printer’s USB storage and start the print remotely. All communication between the printer and Prusa Connect is encrypted with an EU-based server structure in Frankfurt, Germany.
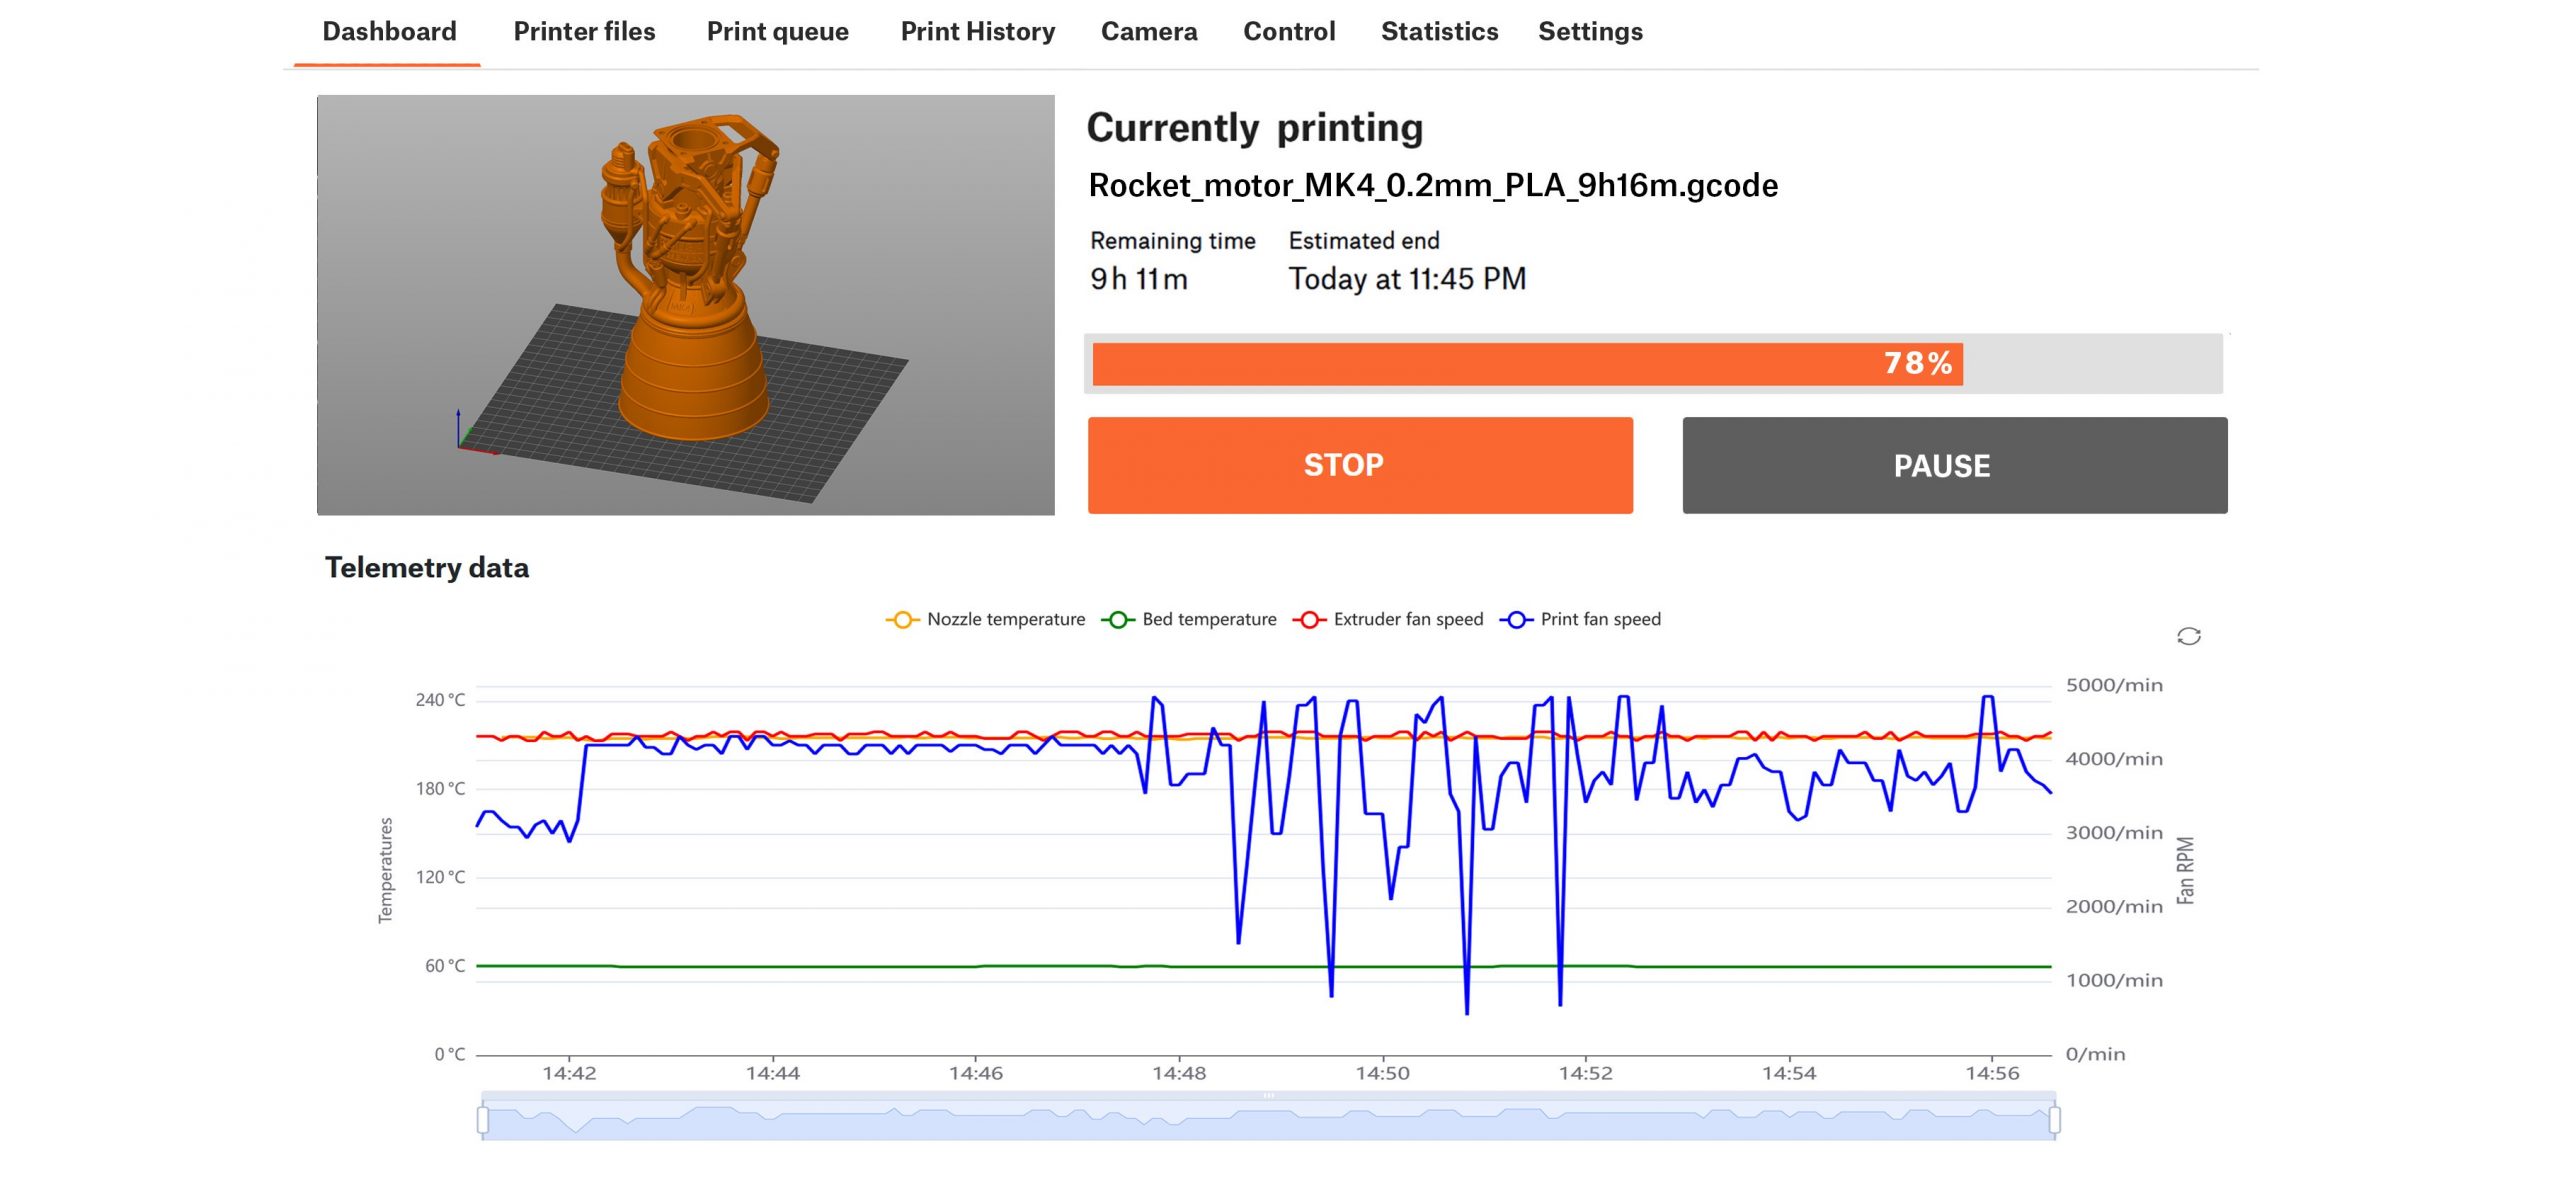
You can, of course, check the printer’s statistics and telemetry data, control the axes remotely, etc. We have also added an elegant way to monitor your printer with a camera: if you have an old smartphone or tablet lying around in your drawer, you can use its camera to scan a QR code in Prusa Connect, which pairs the phone’s camera with the system. You can then set up how frequently the smartphone should send a new photo of your printer.
We continue developing Connect also based on your feedback – so do let us know what you think about it! We’ll also bring support for more of our printers in the future.
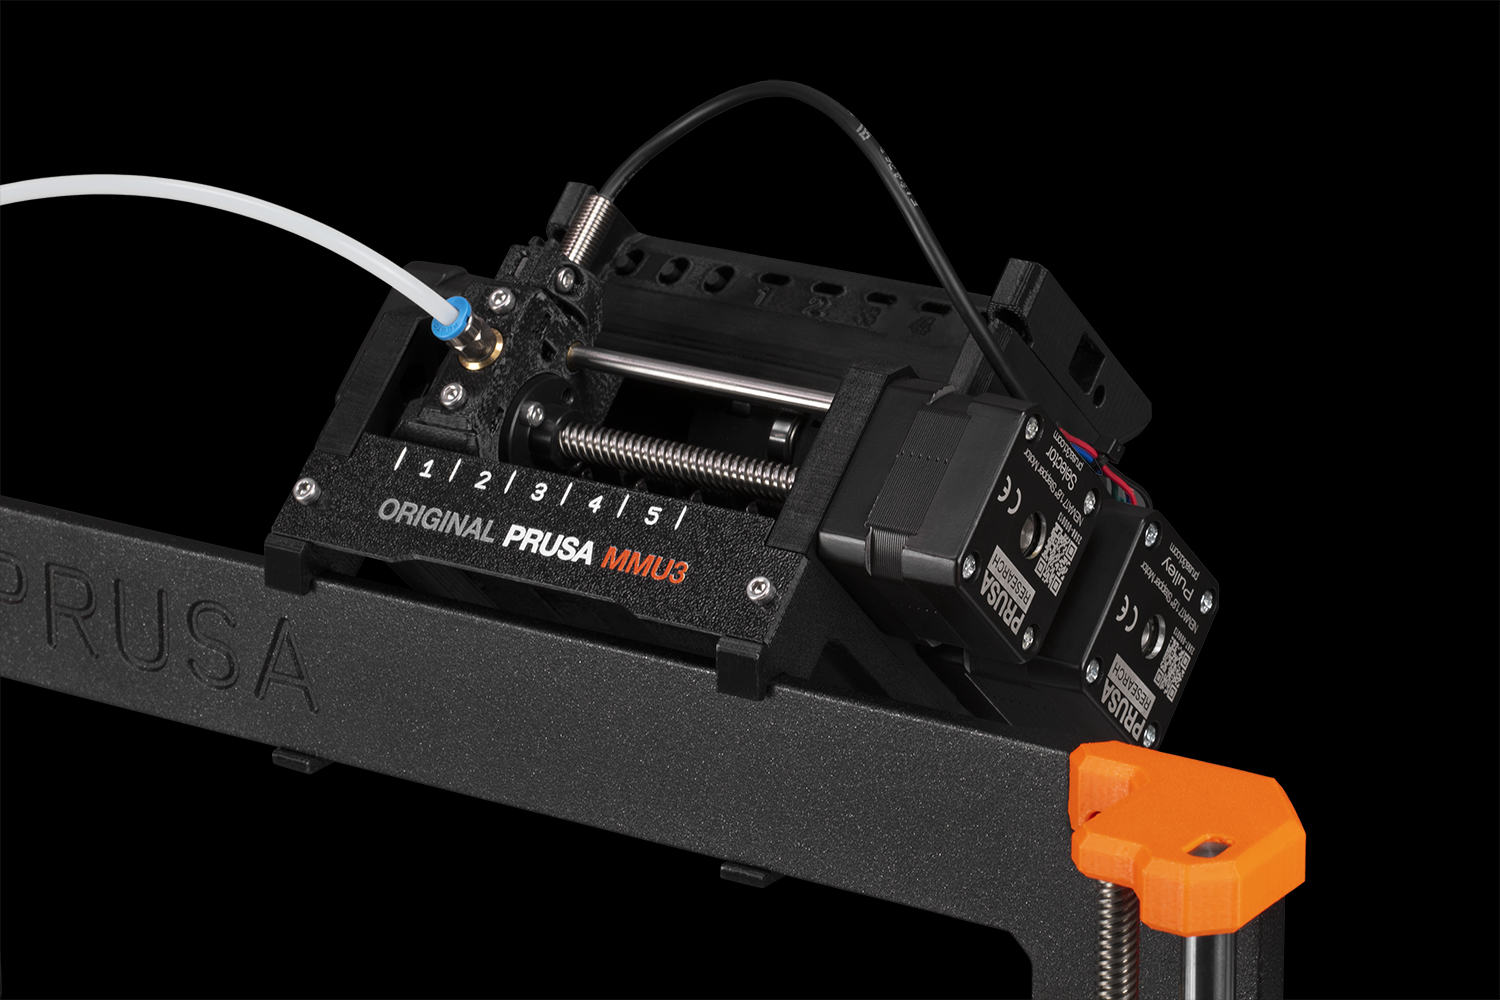
Multi-Material Upgrade 3
Alongside the MK4, we’re also announcing the new Multi-Material Upgrade 3 or MMU3 for short! It’s compatible with MK3S+ and MK4. Since the release of the MMU2S (previous model), we’ve been collecting your feedback and started preparing something like an MMU2S+. However, at one point, we decided to completely rewrite the firmware from scratch, redesign the plastic parts, add more robust metal parts, improve the electronics, update the filament buffer, add support for the MK4… and thus, the MMU3 was born.
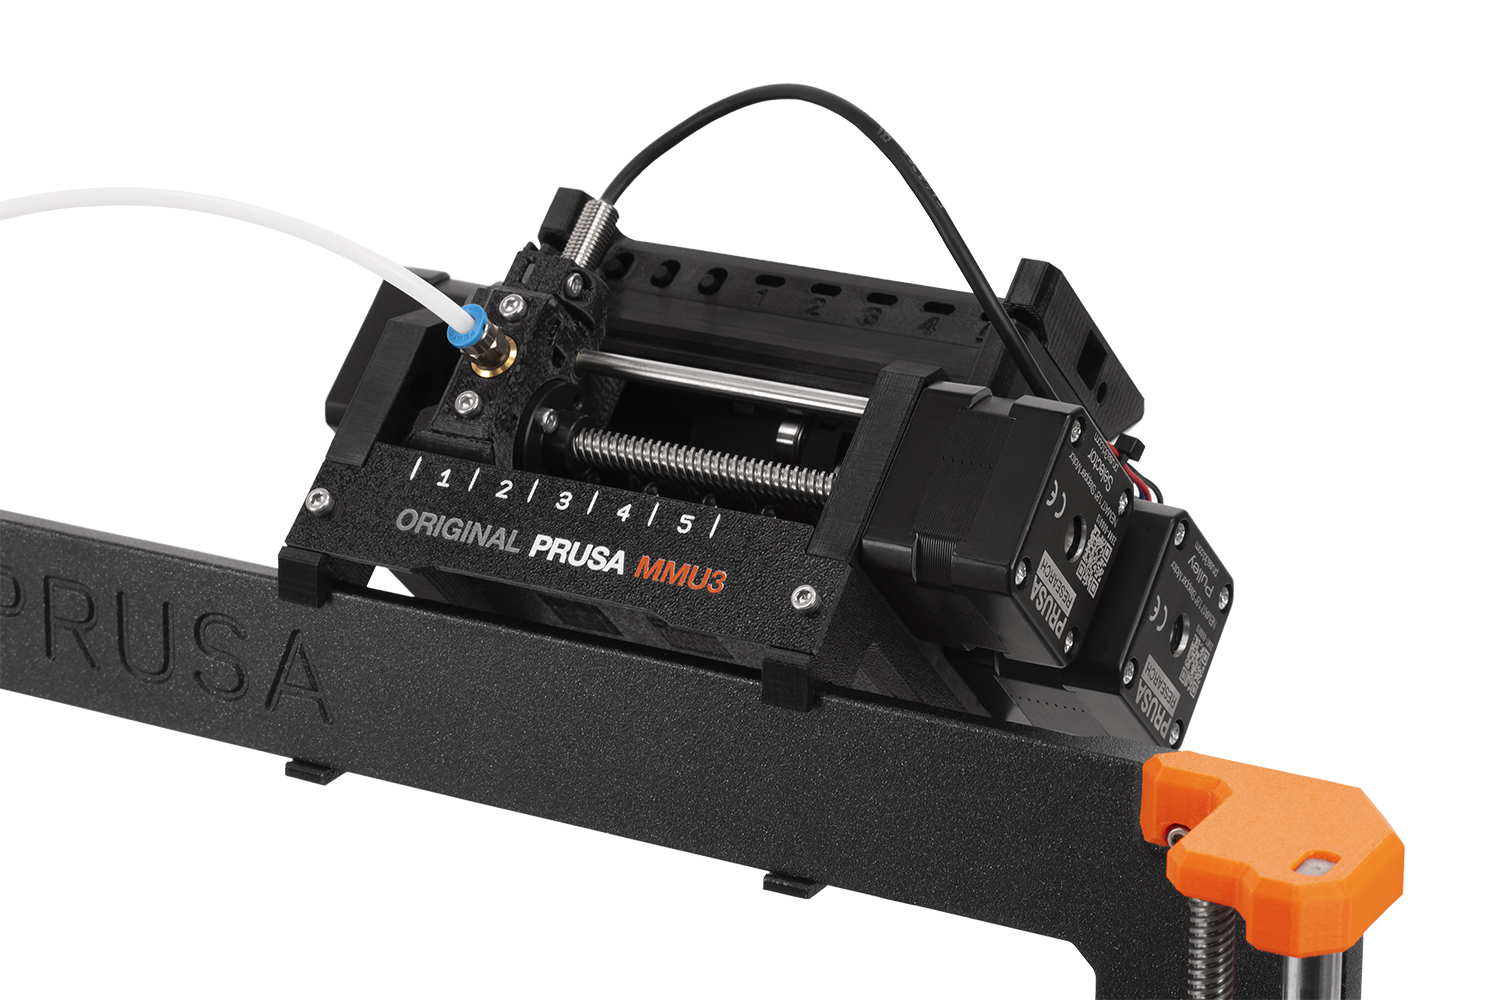
Before I jump into details: it’s possible you have never heard of a Multi-Material Upgrade. It’s exactly what it sounds like – it’s an optional add-on that allows your single-extruder printer to print with up to 5 colors (materials) at the same time. The MMU3 contains five filament insertion points. Load the five colors of your choice, slice the object with the MMU3 profile in PrusaSlicer and start the print. The system automatically selects filament using the selector, loads it into the Nextruder and the MK4 starts printing. When it’s time to change the color or material, it also happens automatically.
Every time you switch filaments, you need to purge the previous material from the nozzle to prevent cross-contamination. There are various ways to do it and the MMU3 uses an efficient “wipe tower” – it’s a compact, partially hollow block next to the printed object where the “old” filament is purged and the pressure in the nozzle is stabilized. It’s quite elegant solution because there’s no waste around the printer. And we’re offering more ways how to save filament and reduce plastic waste – PrusaSlicer gives you options for “wipe into infill” (the printed object’s infill is used as a wipe tower) or you can use “wipe into object” where another object is used as a wipe tower – it will be very colorful but if you, e.g., need a functional part or you will paint it later, it’s a great way to reduce plastic waste to a minimum. The only way to make the wipe tower even smaller is to use a multi-extruder setup like the Original Prusa XL with toolchanger which requires only a tiny priming tower.
I’m especially proud of the new firmware. Our firmware guys put a ton of hours into making the MMU3 firmware on par with the rest of our lineup. When we studied the comments and suggestions regarding the MMU2S that came from our community members, it was mostly about the fact that the unit needs to be set up perfectly to reach its true potential, and that it doesn’t provide enough feedback to the user – status messages, error codes, etc. We decided to change all that.
The MMU3 has full two-way communication with the printer (both MK3S+ and MK4). In case anything goes wrong, e.g., filament does not reach the nozzle during loading, the MMU3 first tries to solve the problem on its own – it will attempt to reload the filament up to three times before it notifies the user about a problem. These repeated actions actually managed to solve nearly all the problems our beta testers reported. The rest was solved by further modifications of plastic parts.
Another huge help is the fact that the MMU3 now displays proper messages and error codes on the screen of the printer, instead of using LEDs to communicate with you. The entire firmware is built on three layers – HAL (hardware abstraction layer), Modules (buttons, filament sensor, LEDs, etc.) and Application logic (actions such as cut, eject, home, etc.). The way the communication between the printer and the MMU was improved is actually pretty exciting and complex – we’re preparing an extensive developer diary in which we’ll cover exactly how we made the new MMU3.
So, this is a very short taste of the MMU3 and we’ll get back to it in a couple of weeks in April when you will be able to order it from our e-shop (you can set up a watchdog now) along with an MMU2S->MMU3 upgrade kit. We’ll start shipping the MMU3 in three months – in June 2023.
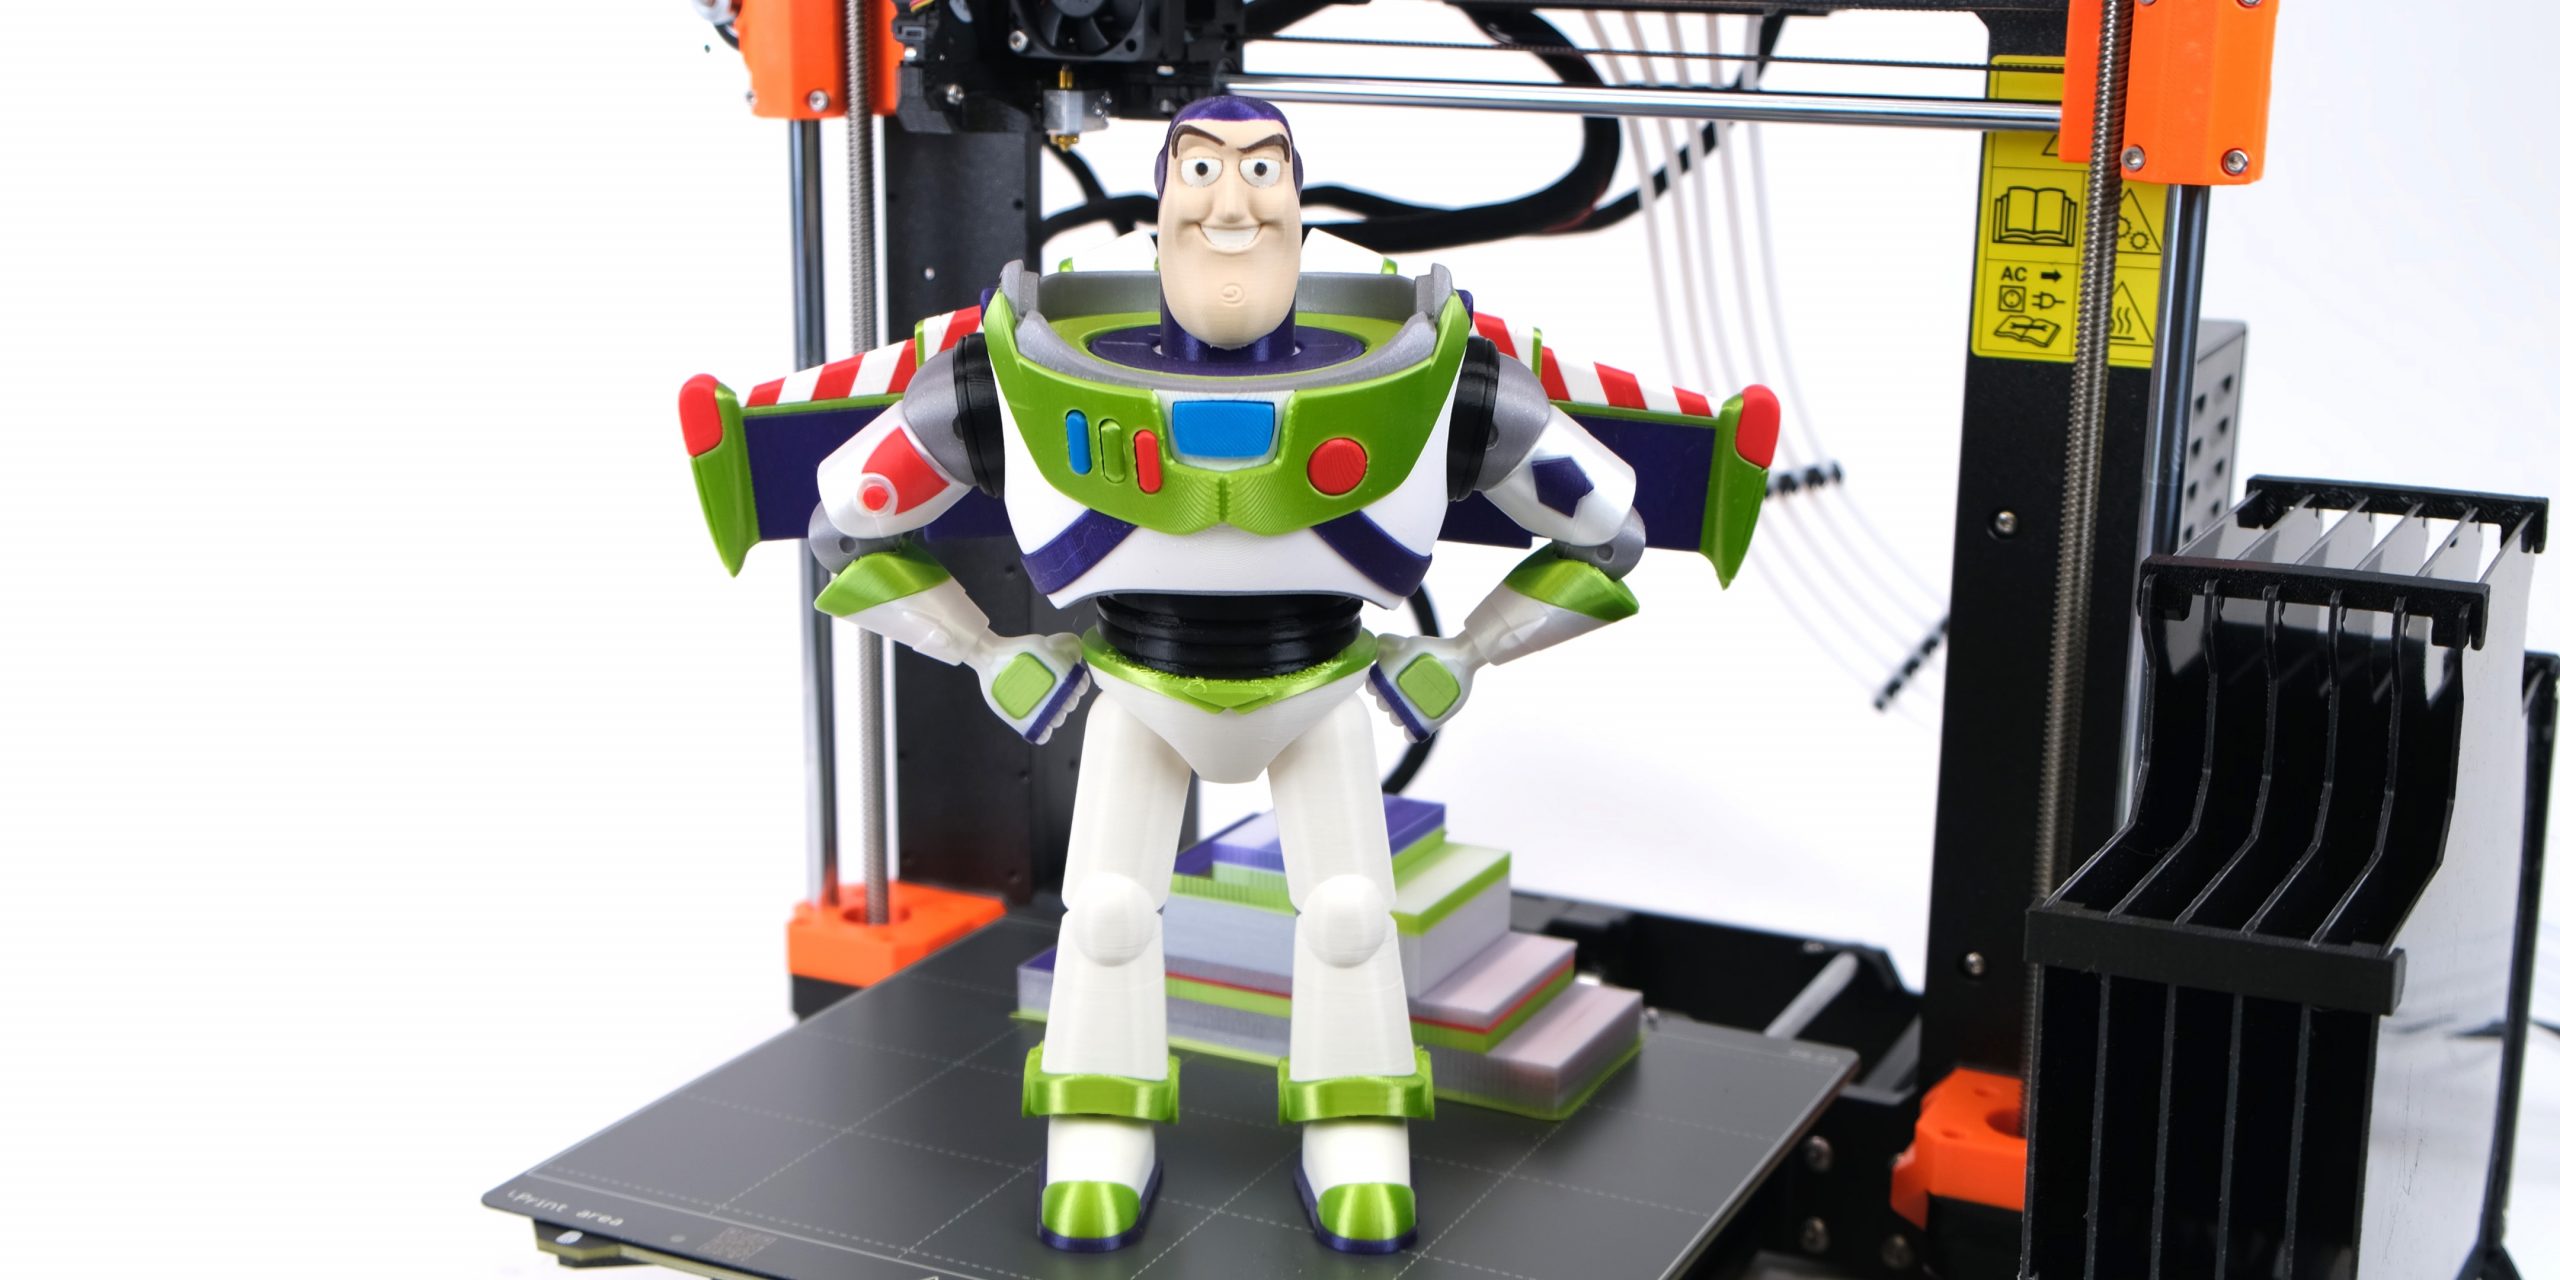
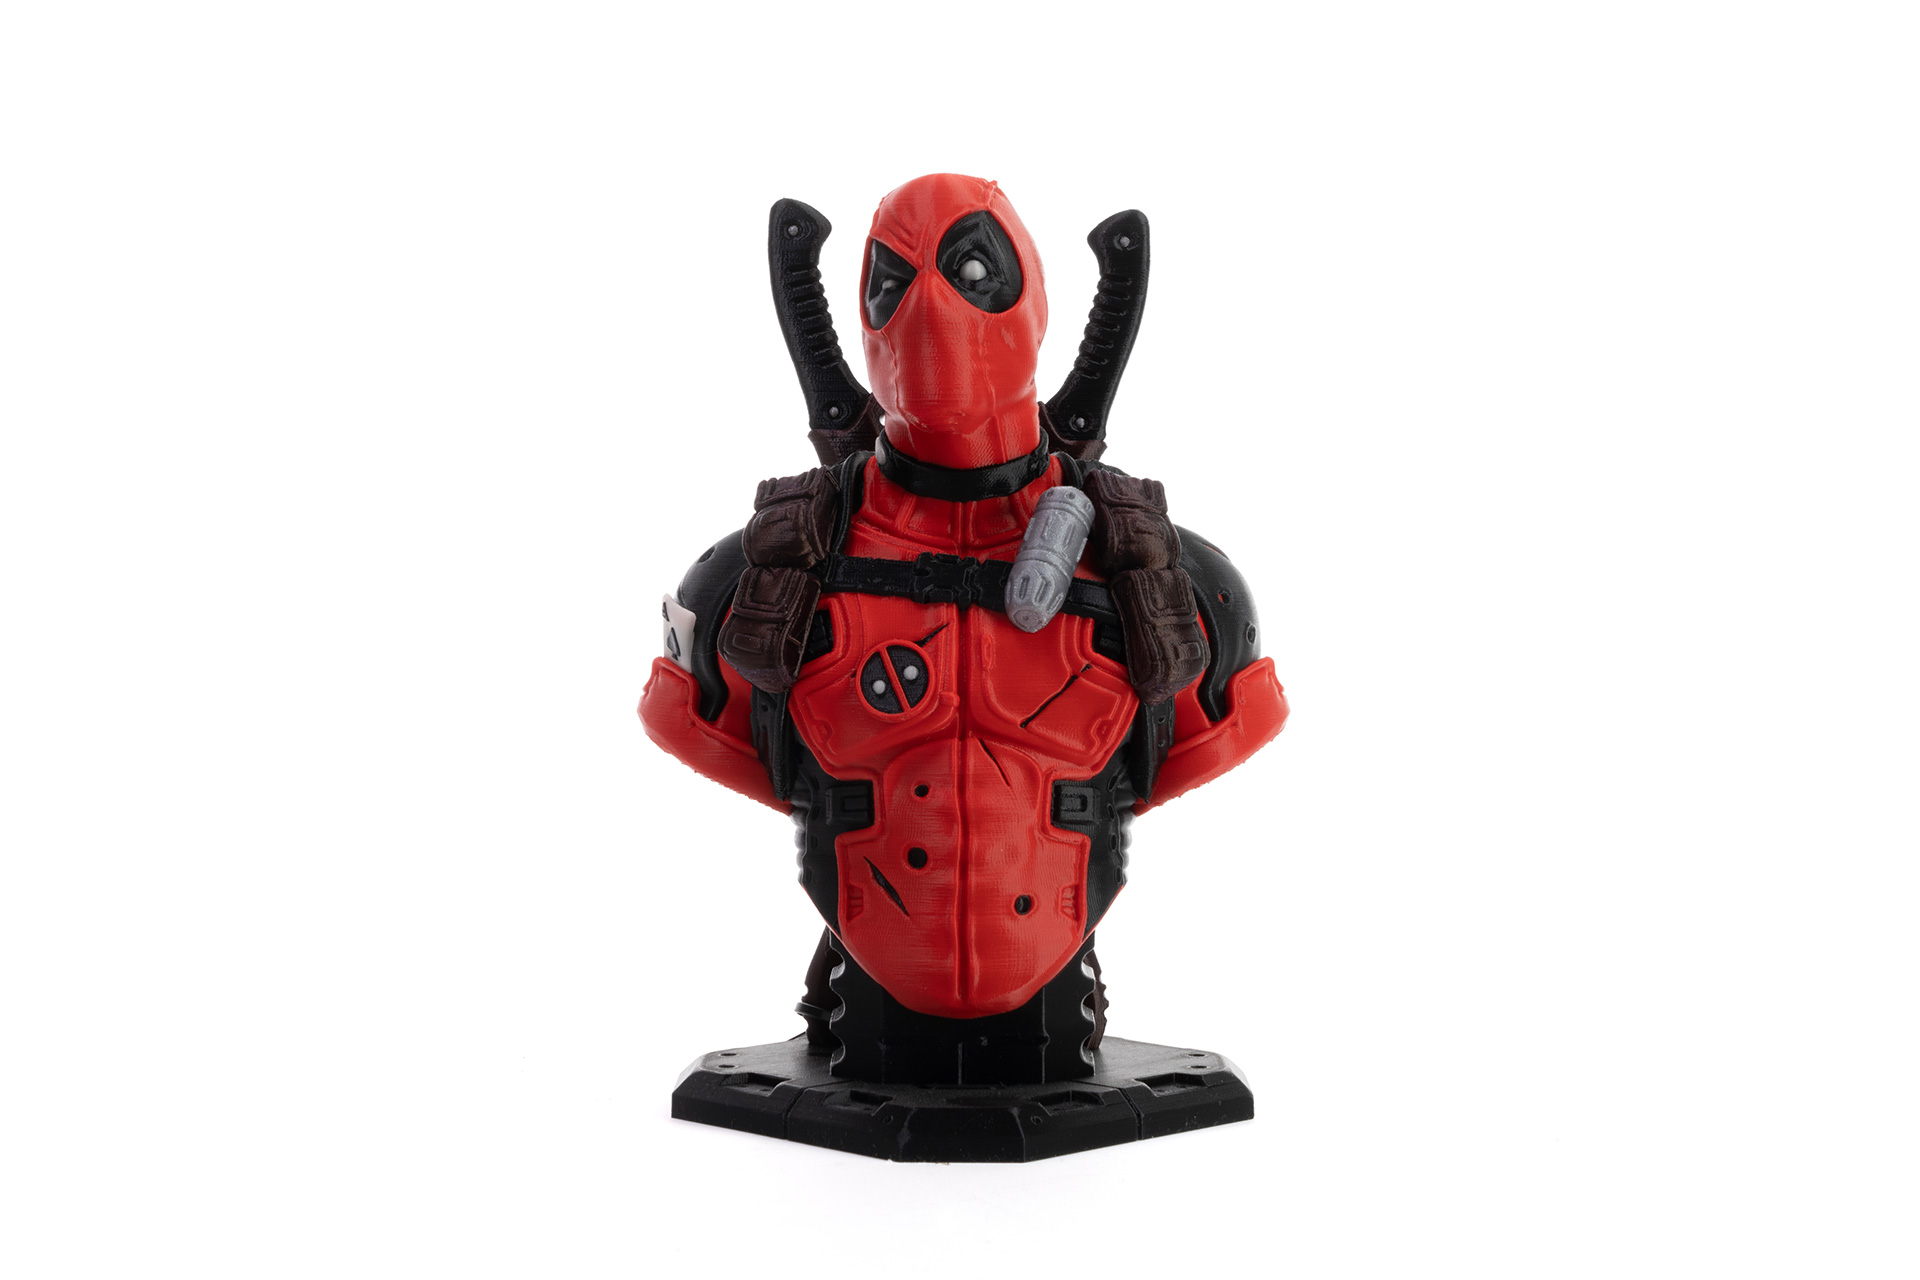 |
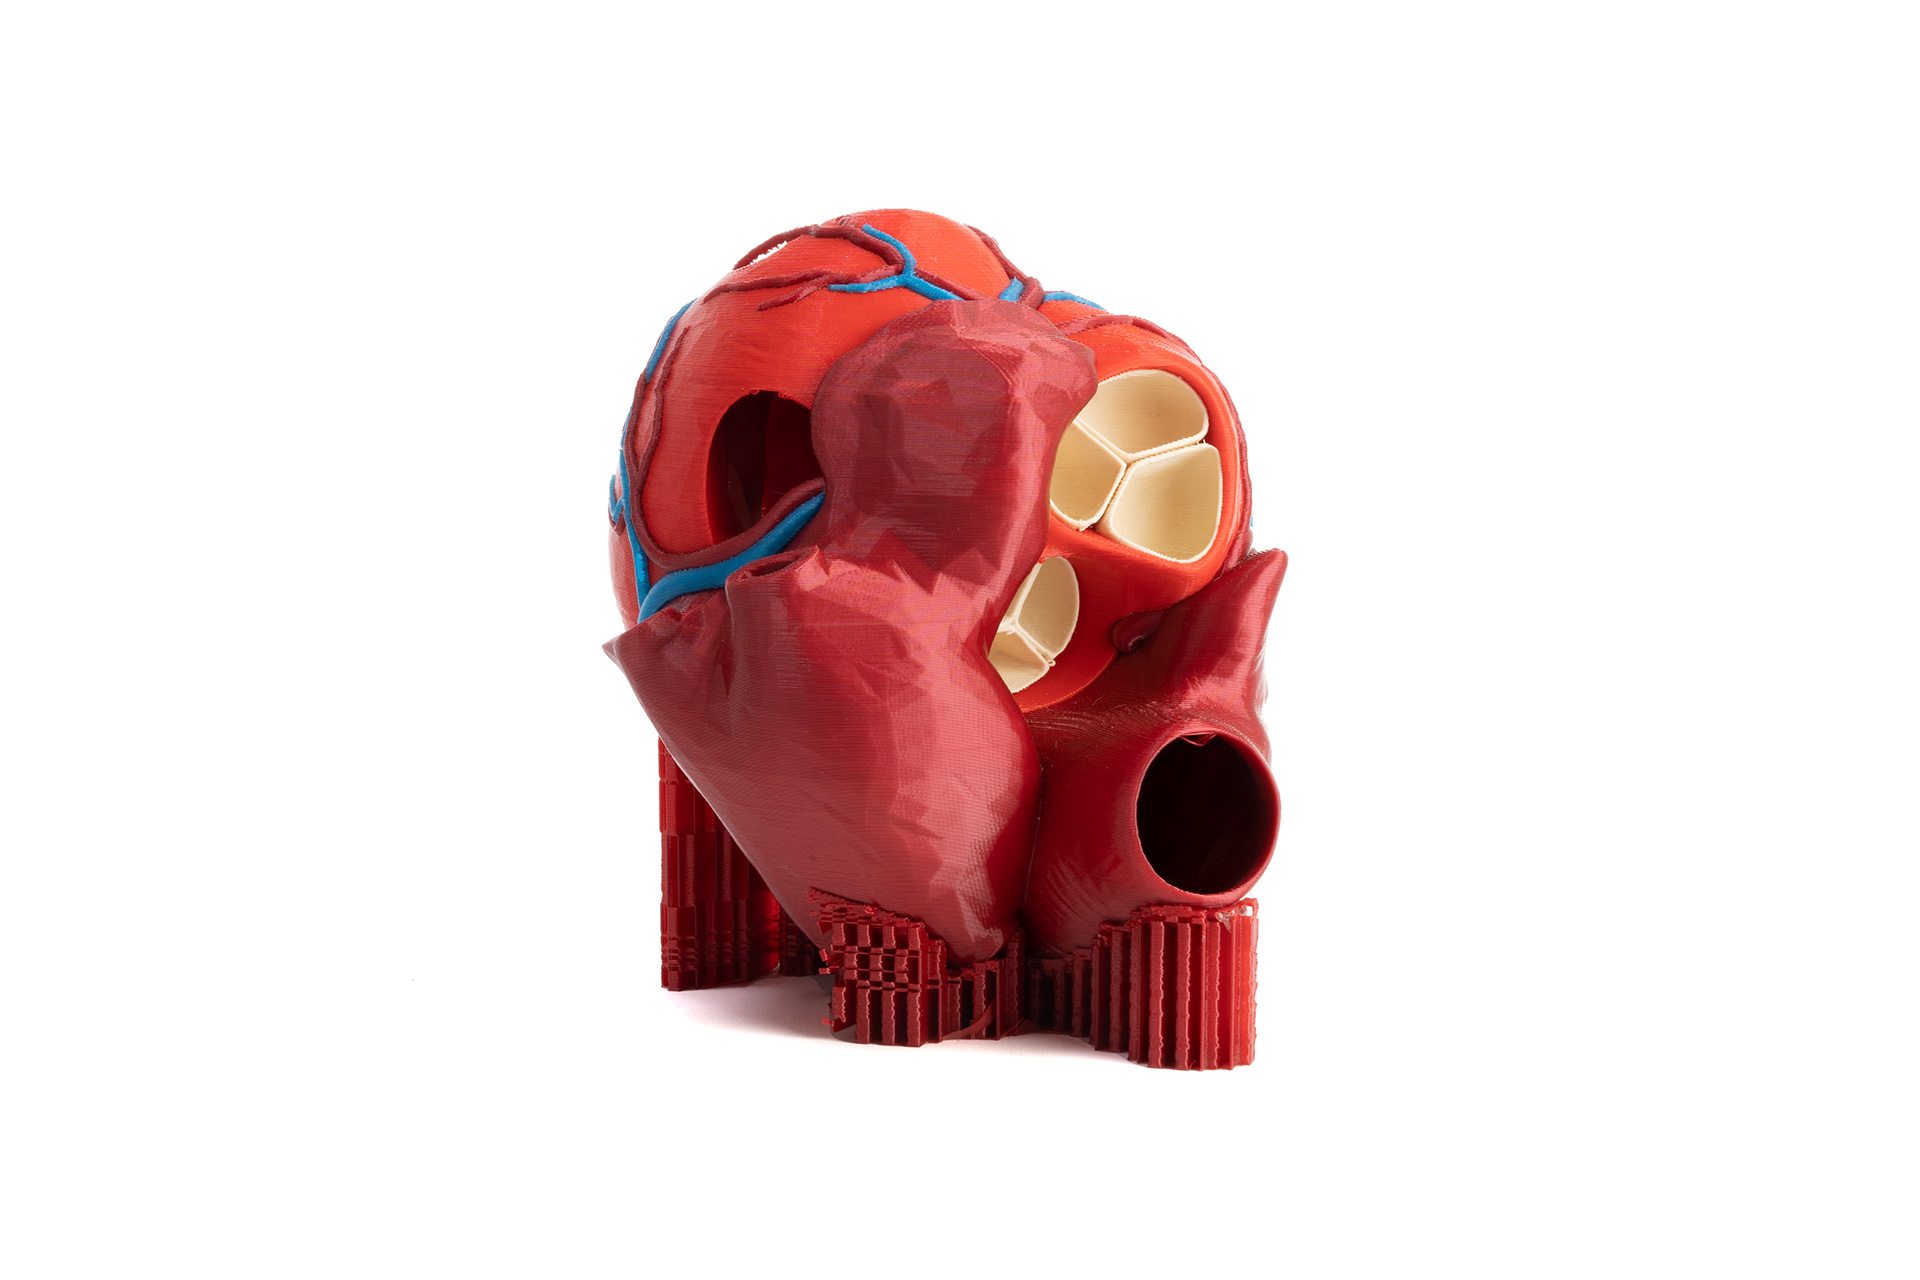 |
 |
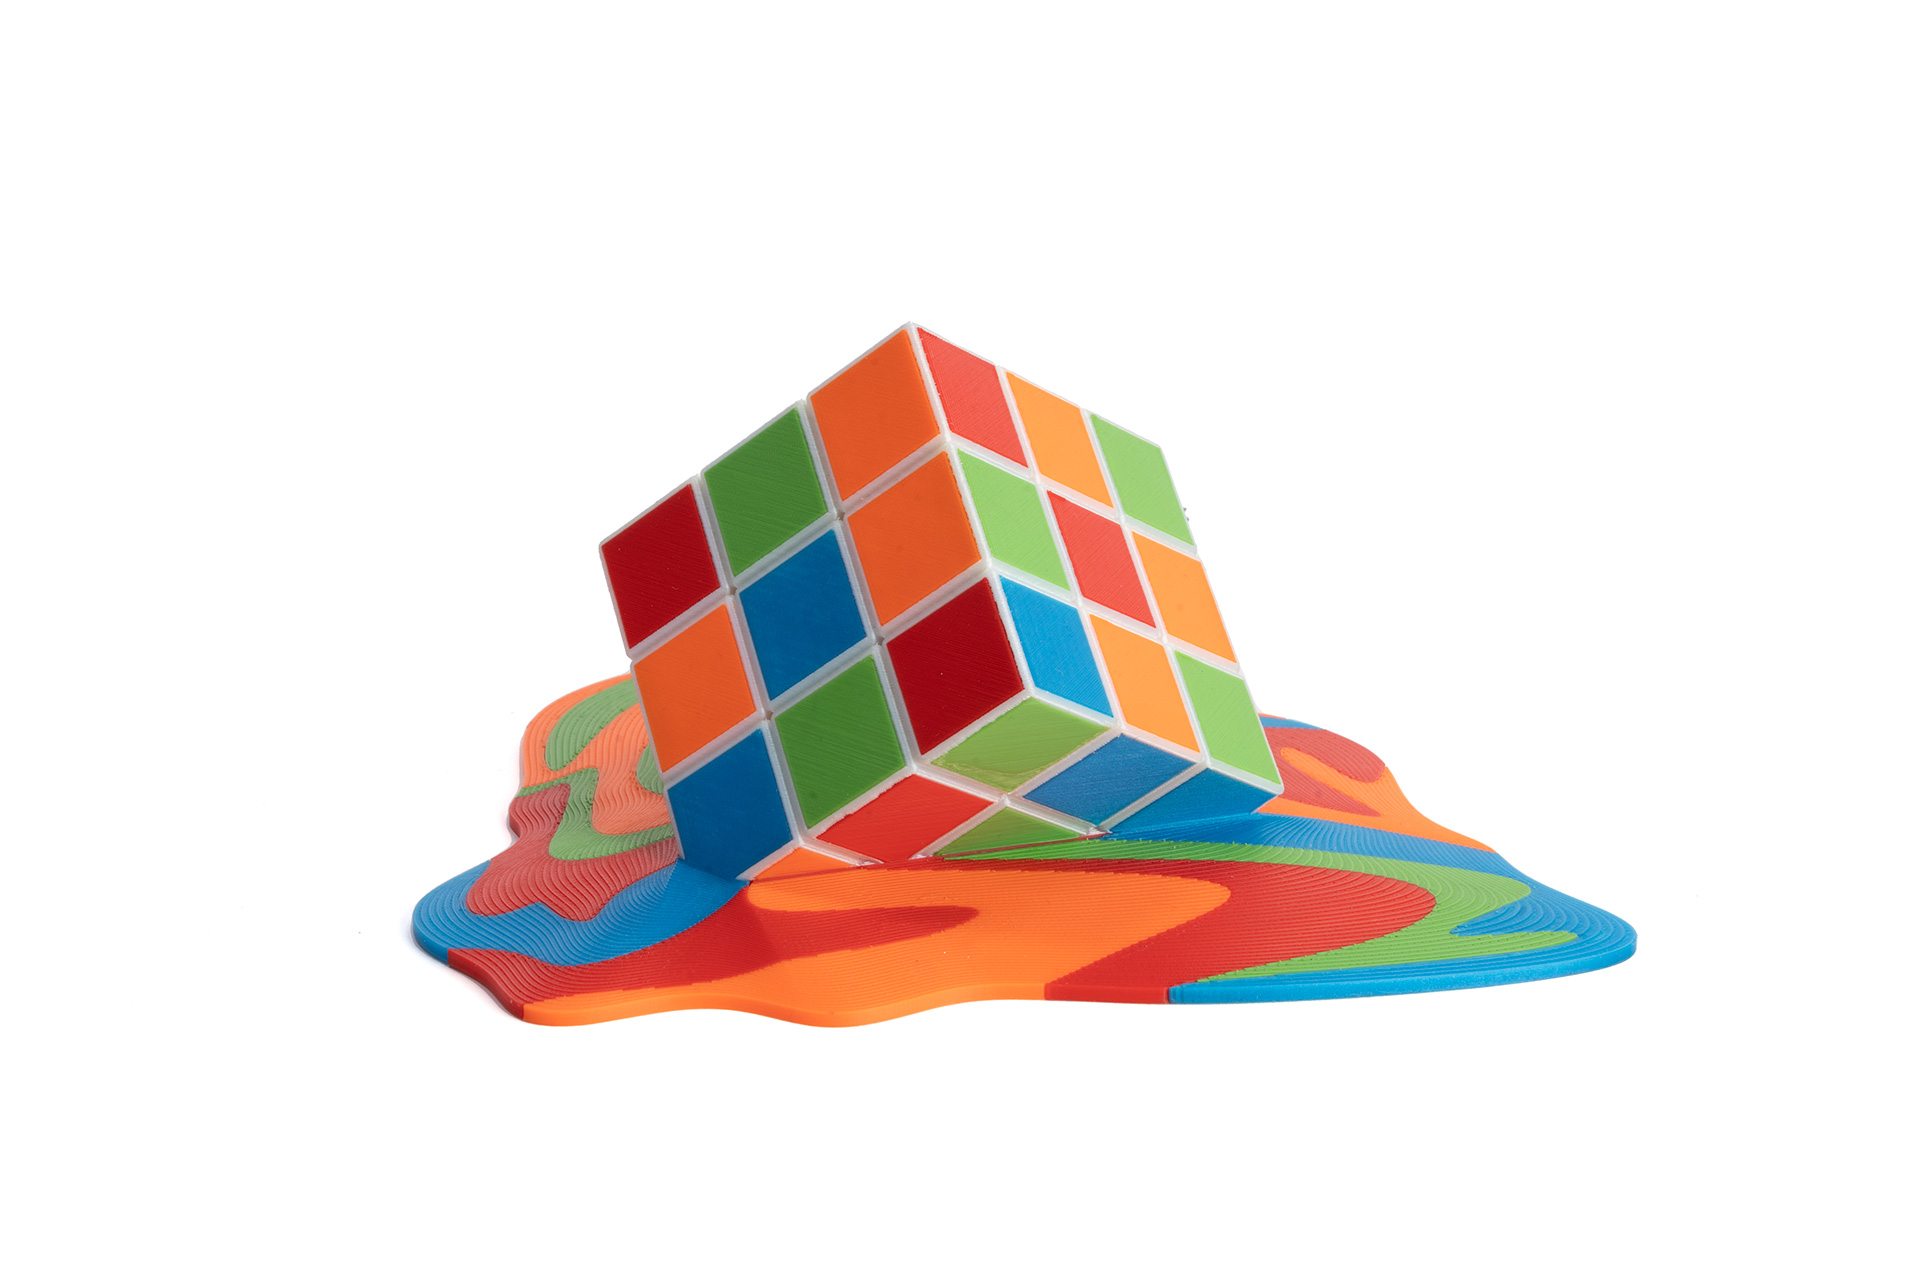 |
Model credits: Buzz Lightyear by ChaosCoreTech, Deadpool by Eastman, Anatomic Heart by Malte, Melting Rubik’s Cube by Malte.
Enclosure
Since the MK4 has the same dimensions as the MK3S+, it also means it’s fully compatible with the Original Prusa Enclosure.
If you want to print more advanced technical materials on your MK4, you’ll find the Enclosure really handy. It stabilizes the printer environment, eliminates draft and odors, and makes the printer even more silent.
The Enclosure is available with a range of useful add-ons, such as a filtration system, locking mechanism and more – check out the announcement article and the Enclosure section on our e-shop.
Shipping information recap, MK3S+ discount
Almost… there… 🙂 That was a lot of information squeezed into a single article! But I have a feeling this is exactly what you expect from us. Not just a generic announcement but a proper explanation of all the tech stuff.
So, just to recap:
- We’re starting to ship the fully assembled Original Prusa MK4 now, and the orders are live. We have (had) a couple of hundred units in stock and we’re manufacturing several thousand printers every month. The price is 1099 USD / 1199 EUR (VAT incl.)
- The Original Prusa MK4 assembly kit will be available for ordering within two weeks (you can set up a watchdog now) and we’ll announce the shipping schedule at that point. The price is 799 USD / 889 EUR (VAT incl.)
- Multi-Material Upgrade 3 and MMU2->MMU3 upgrade kit will be available for ordering within two weeks (you can set up a watchdog now), and shipping will start in June 2023.
- MK3S+ to MK4 upgrade kits are available for ordering now and will begin to ship in June 2023. There are three options: MK3.5, MK3.9 and MK4 (full upgrade).
Also, we have decided to lower the price of the MK3S+! The new prices are:
- Assembly kit: 649 USD / 719 EUR (VAT incl.)
- Fully assembled printer: 899 USD / 999 EUR (VAT incl.)
We’ll keep the MK3S+ in our eshop as long as the demand remains. It’s still a great choice, a true 3D-printing workhorse and you can upgrade it later if you want. 😉

So, that’s all the news I have for you right now. But there is, actually, one more thing. It’s something that has been worrying me as of late – it’s the state of the 3D printing industry and open-source. I have recently published an article where I’m sharing my concerns and my views of the current situation – I would very much appreciate it if you could read it and share your thoughts.
The entire team put so much effort and so much work into the MK4 and I’m truly excited that we could present the MK4 to you after all these years of development!
And as always, it doesn’t end for us with the release. We’ll keep supporting the MK4 as long as we can. The MK3 has received more than 30 firmware updates and two major hardware upgrades during its lifespan. The latest firmware updates (Thermal Model protection) being only a couple of weeks old.
So here’s to our newest addition to our family, the Original Prusa MK4!
Happy printing!
| Build volume | 250 x 210 x 220 mm | 9.84 x 8.3 x 8.6 in |
| Layer height | 0.05-0.30 mm |
| Max hotend/heatbed temp. | 300 °C / 120 °C (572 °F / 248 °F) |
| Mainboard | Custom 32-bit xBuddy electronics with STM32 |
| Stepper Drivers | Trinamic 2130 silent stepper drivers |
| Stepper Motors | 400 steps (prevents VFA) |
| MMU3 support | Yes |
| Extruder electronics | Custom breakout board for connecting fans, thermistors and other parts. |
| Filament path | Aluminum heatsink, all-metal hotend, no PTFE tube |
| Drive system | Planetary Gear System, 1:10 gearbox ratio |
| First layer calibration | Automatic thanks to the Load Cell sensor |
| Nozzle diameter | 0.4mm (default) / other nozzle diameters supported |
| Quick-Swap nozzle system | Yes |
| LCD screen | 3.5″ graphic 65k color screen |
| Print surface | magnetic heatbed with removable PEI spring steel sheets |
| Bed calibration | Automatic, Mesh Bed Leveling (only on print area) |
| One-click printing | Yes |
| Status LEDs | Yes |
| Input shaper | Yes |
| Linear Advance | Yes |
| Supported materials | Any thermoplastic including Nylon and Polycarbonate |
| Filament sensor | Yes (built-in Hall sensor) |
| Power panic | Yes |
| Ethernet connection | Yes |
| Wi-Fi connection | Optional ESP Wi-Fi module (delivered with the printer) |
| Prusa Link | Integrated |
| Load cell sensor | Yes |
| Advanced sensors | 4 high-precision thermistors (genuine Semitec) + fan motors RPM monitoring |
| Print medium | USB drive / LAN / internet via Prusa Connect |
| Firmware update interface | USB drive |
| Power supply | 240W, custom made by Delta with Power Panic HW |
| Kit price | 799 USD / 889 EUR (VAT incl.) |
| Assembled printer price | 1099 USD / 1199 EUR (VAT incl.) |
Technical / Hardware FAQ:
Q: When will you send review units?
A: In April
Q: Which print sheets are available?
A: The MK4 is compatible with the same double-sided spring steel print sheets as the MK3 – Smooth PEI, Satin, Textured PEI (Powder-Coated) and PA Nylon sheet
Q: What’s gonna happen with the MK3S+?
A: We’ll keep selling the MK3S+ for a lower price. Spare parts will be held in stock.
Q: Is the quick-swap nozzle system the Revo? Is it compatible with Revo / Hemera?
A: We’re using a different (custom) design
Q: Is the MK4 compatible with third-party nozzles?
A: When you install the Nextruder-to-V6 adapter, you can install any V6-compatible nozzle
Q: What are the max printing speeds with Input Shaper?
A: We’re in the process of adjusting and fine-tuning the system. Giving away any exact numbers right now could be counterproductive in the long run. Check the Input Shaper section to learn more about it.
Q: Is there an accelerometer inside the Nextruder?
A: No, but there is a free accelerometer port on the xBuddy board. We’re using it to calibrate Input Shaper.
Q: Is there a Dwarf board (from the XL) in the Nextruder?
A: No, the MK4 uses a different, smaller, connector break-out board, codenamed LoveBoard. It contains only connectors, not Trinamic drivers.
Q: Does the MK4 have a touchscreen?
A: HMMMMMMMMMMMMMMMMMMMMMMM…
Q: Does the MK4 come with a Wi-Fi module?
A: Yes, the Wi-Fi module is a default option, but you can operate the MK4 in offline mode
Q: Do I need internet access to set up and run the printer?
A: No, the MK4 is offline-ready. No apps, no registrations.
Q: Is the MK4 compatible with MK3 print sheets?
A: Yes, fully compatible.
Shipping / Ordering FAQ
Q: I just ordered an MK3S+ and the order is not yet fulfilled or shipped. Can I update it to MK4?
A: The easiest way is to cancel your MK3S+ order and make a new one for MK4.
Q: I have just received my MK3S+ and now it is cheaper. Is there something you can do for me?
A: If your MK3 was ordered and paid within the 30 days before this announcement, you will receive a voucher that compensates you for the price difference between MK3S+ now and then (e.g., if you have an order in USD, you will get a 150 USD voucher per kit and a 200 USD voucher per assembled printer, and so on…). You will get these vouchers via e-mail by the end of this week.
Q: I have a preorder for XL. Can I switch it to MK4?
A: Yes. You can log into your e-shop account, go to Order detail and look for “Switch to MK4” button next to your XL preorder. This will replace your existing XL preorder with a high-priority MK4 order – this action is irreversible. See the next question regarding shipping speed.
Q: If I switch my XL pre-order to MK4, how fast will I get it?
A: We’ll give your order a high priority. We’re shipping the printers based on the date when the pre-order was created, so you will jump to the top of the list. The delivery time depends on whether you’ll choose the assembled printer (shipping now) or assembly kit.
Q: I want to order an MK4 and MMU3 – what is the fastest way to get them? (MK4 now, MMU3 later?)
A: The fastest way is to buy the assembled MK4 now and then buy MMU3 separately when it becomes available.
Q: When will MK4 be available at Printed Solid?
A: Yes, at a later time.
Is the revo compatible with the Mk3.5 or any of these new upgrade kits?
Why would you want a Revo if you buy a 3.9 or 4 upgrade? if you have a Revo and want to keep it, just buy a 3.5 upgrade.
I already have a revo. The 3.5 kit seems great if I can keep the revo and get faster speeds. I’d have to spend twice that to get the 3.9 kit.
Should work with the revo since the tool head remains the same.
MK3.5 that is.
I am excited for this update. Was going to get the xl down the road but might go this route and upgrade my mk3s+ with mmu2s. Just purchased the upgrades to do the above mentioned last week.
I wish there was more value to the upgrade vs. Buying a new mk4 kit to assemble. Only $220 USD price difference upgrade kit vs. new kit? I understand it’s a business and you need to make money. Maybe this is the best price point you can give those who have already invested so much into your ecosystem?
Love the community and support and continually driving the 3d printing space in a positive direction. But those are my thoughts
Considering you only keep the frame and almost everything else is replaced, I think 220 USD less is a pretty good deal for the upgrade kit.
Fair enough. Not sure how much it would cost to buy all the parts already printed from prusa. But saving some money there printing theoe out myself for sure. Would be a nice bonus if the savings are just a smidge more than all the parts printed by prusa, not a deal breaker though. My guess savings are probably more than just the printed parts.
Will be upgrading at some point in the future got in at the beginning of mk3 launch
*printing those out* dang smart phone touch screen. Haha
Buying new MK4 (either kit or assembled) means you get also new print plate, as opposed to the Upgrade kit. Plate costs approx. 30 Euro. So the difference should be 250, not 220 Euro.
Sorry mixing up US Dollars and Euros but you surely get the point 🙂
A few questions:
1. I assume that even the full MK4 upgrade doesn’t include a new frame. what about the 10mm rods?
2. where does the extra 10mm height in the MK4 upgrade coming from? if it’s only the motors, why does the 3.9 upgrade doesn’t gain those extra 10mm and stays at 210 height instead of 220?
3. is the new frame using the same dimensions, or is the extra height coming from using it? (and hence the mk3s to mk4 upgrade should stay at 210mm height?)
I read somewhere that you gain the 10mm from the nextruder. So maybe the 3.9 should gain the extra 10mm as well?
That’s my understanding too. Nextruder is smaller, therefore the tip of the nozzle can be positioned 10mm higher over the print plate. Thus you can print 10mm higher models.
This applies to MK4 as well as MK3.9 as they both sport Nextruder.
Published specs say so too.
MK3.9 Upgrade print volume is stated to be 250 x 210 x 220 mm | 9.84 x 8.3 x 8.6 in. See the upgrade comparison chart at the bottom of this page: https://www.prusa3d.com/product/original-prusa-i3-mk3-s-to-mk3-9-upgrade-kit/
The upgrade from MK3S to MK4 doesn’t really make sense to me at that price cause I’ll just end up with lots of parts, probably just going to buy a new one and have two printers (it’s only like a 200€ difference).
I had exactly the same thoughts but on the other hand I know that if I buy an MK4 as my second printer I will probably stop using my MK3S and currently I don’t need two such devices in the house. Another very important point of my thoughts is that I’m not a “big fan” of setting things like the first layer etc. and if I’m going to print something, I just want to turn on the printer and start printing without any fuss. So YES… personally I think the full MK4 upgrade is worth the money, and I can always spend the €250 price difference on printing material.
Another option is selling your current mk3 as a second hand printer and buying the mk4. I am pretty sure it is more effective both from an economical point of view and from an e-waste point of view.
Yep, I think I’m just going to sell my MK3S and buy the MK4… Prusa also said he doesn’t think the upgrade is worth it, it’s just offered as some people will always ask for it (acroding to him).
When will the new nozzles be available and what sizes? Really want to get them with my MK4 purchase 🙂
Will there be instructions to mount the MK4 in the enclosure on arrival?
Exciting!
But I have a couple of questions:
1. What material is used for the printed parts of the printer?
2. Will the models/stls of the printed parts be available at printables.com? Right now they are not.
3. Are the outer dimensions different between MK3 and MK4? The official specs of both state “500×550×400 mm” which is clearly wrong: my MK3 is about 420mm in width and about 380mm in height…
1. Probably PETG – It will be included in the order, as said on the upgrade purchase page
2. Probably yes
3. I’m sorry but I don’t know
3. The overall size needs to account for the bed movement overall (not stationary), as well as the spool holder w/spools.
Is the MMU2s compatible with the Mk3.5 or any of these new upgrade kits?
You will have to upgrade the MMU2S to MMU3 first in order to be used with MK3.5/MK3.9/MK4 due to the different connectors and cables.
If you have an MMU2, I would go with the upgrade kit. I was able to get only two successful prints on the MMU2(s) after installing it two years ago. That printer and the MMU now collects dust. The MMU2 is not very intuitive and difficult to use. The MMU3 appears to solve many of the user issues.
Hopefully I can resurrect this printer with the upgrade.
Will the technology involved in the Mk4 and the XL also be implemented with the Prusa Pro AFS (Autonomous Farm System)? I pre-ordered a 5-toolhead XL when it was announced for business-starting purpouses, and if the result is to my liking (which has a high chance of happening), I’m probably going to like some autonomous farm features for smaller prints.
then print smaller prints auto bro
In my opinion the upgrades a way to expensive. 279 EUR for the MK3.5 with just a 32bit xBuddy board and LCD included? I could get a Prusa Mini for 450 EUR that already has those features and is a entire printer ready to use.
Totally agree with you. Plus you have to print the parts for the upgrade… Between the price of filament, shipping costs and time+electricity, it is more cost effective to get a brand new mk4 than get the upgrade mk3s->mk4…
I really like Prusa products but for that price tag it’s hard
The order page for the upgrade says that it does include the filament for the new parts, so that’s something I guess.
Just out of curiosity, the Prusa printing guide for flexible filaments (https://help.prusa3d.com/article/flexible-materials_2057) says you should loosen the idler to prevent the filament from getting stuck in the gears. Will that still be necessary with the Nextruder, or does it some how detect and compensate for that? Would love not having to adjust my idler every time I switch to/from TPU : )
Seconded, I am also curious about this.
Quite the distance from the nextruder wheel to the nozzle, I’m very interested in how it will handle Ninjaflex, i have the XL on hand but haven’t set it up yet, and the MK4 on order.
Dose XL as well have that precision. Drivers 2130 with with 400step prevent VFA or Prusa was using 2y waiting time from preorder of XL to fund MK4 which are delivered now?
This is amazing!! Any plans to upgrade the Prusa Mini+ as well? <3
That would be amazing
Please, make it happen! I want Nextruder on my Mini+! Pleeeeeeeease 😀 Also would not mind better steppers 🙂
Give us Mini++ 😀 Or go stright to the Mini# 😉
Are those multi-color parts on the MK4? (E.g. for the LCD and extruder covers.) And if so, are you using any MMU3’s in your farm to print them? Or just XL’s?
The multi-color parts are printed with an inkjet printer using an UV-cured ink on a 3D-printed part. There are a few smaller MMU3 print-farms for the company’s internal use though, for example for printing labels or production line equipment parts.
Not seeing nozzles or adapters for MK4 nextruder in shop. When they will be available? Would like 0.6mm nozzle, too.
Amazing that you allow us to change our xl preorder to a mk4, 1 question, I love building the kits, will it be possible to swap our xl preorder to a kit?
My MMU2S was a nightmare and I (systems integration engineer) eventually gave up on it. The changes to the MMU3 sound promising, really hope it is different.
I agree! I am an electro-mechanical design engineer. (PCB Design and Mechanical Design)
I was able to get only two successful prints on the MMU2(s) after installing it two years ago. That printer and the MMU now collects dust. The MMU2 is not very intuitive and difficult to use. The MMU3 appears to solve many of the user issues.
Hopefully I can resurrect this printer with the upgrade.
Will any of the Mk3/S/+ upgrade kits come with the new injection molded aluminum frame? If not, will it be available to purchase separately as an addon?
One more question regarding the nozzles…
Can we use Olsson Ruby nozzle with Load Cell sensor?
Silent… You keep saying that word.. but it’s really hard to offer that statement with the new hotend fan :/
Could you at least offer the Noctua fan as a spare part?
Can I just order the stepper motors to get rid of vfa on my mk3s+?
you can always order better quality steppers anytime they expensive tho
Any idea on what to do with all the leftover parts after an upgrade?
send them to me or save them for your grandkids or sit on em till u can usem
Ordered my upgrade this morning .
Will the print files be available in advance of the shipping date? Would be nice to preprint the needed parts before the kit arrives.
Amazing machine! Really looking forward to building it! Tnx for the indepth blog!
Super. Objednávám. Hned.
https://www.prusa3d.com/product/original-prusa-mmu2s-to-mmu3-upgrade/ is giving a 404 right now
Ordered the Original Prusa i3 MK3S+ kit on the 20th of March. Received it on the 24th of March. Put the kit together over the weekend. Excited to see how well it works and all the things I can use it for. Nine days after ordering the MK3S+ kit, I see the MK4 kit is introduced with many new features at the same price I paid for the MK3S +. Prusa will give me a $150USD voucher (not a rebate). So essentially to get an MK4 via an upgrade, its going cost me $799 + ($589 (MK3S+->MK4 Upgrade) – $150) = $1238. Note, that I can’t take advantage of the voucher unless I spend $439. And to add salt to the wound, the MK3S+ kit is now $699. Did I get that right?
They have a 60 day return window from the delivery date. Just have to pay return shipping.
your right thems are not thinking over there the filament fumes got to thier marketing meetings
It looks super amazing, but I don’t understand why you didn’t announce it earlier. I’ve already bought two MK3s+ this month. If I had known, I would have had a little patience and bought them. Also, the upgrade kit price is too expensive to get all the features, it to sad form me.
they had to sell as many 3 s as they could before telling you about the 4s simple business tactic we all heard about the xl which probably has issues two years ago so to save face about the xl sucking they thought of the mk4 to save the day
The article mostly talks about MK3S+ upgrade kits. For those of us that own an MK3S, will we first need to upgrade to MK3S+ before upgrading to MK4?
It looks like the load-cell sensor is replacing the SuperPINDA, which would mean you don’t need the MK3S+ upgrade unless you’re trying to upgrade to the 3.5 version. The store pages say the kits are compatible with both versions.
so its not super anymore? they loved that thing what happened
In the same position here. The shop says the upgrades are compatible with the MK3s, which I take to be the most reliable statement. Though at that price I might just want to get a new one and sell the MK3s used.
Why not use TMC2209-LA with stealthchop2?
Are there any plans to offer an upgrade path from the MK2.5s?
I plan on upgrading my MK3S & MMU2S to the MK4 & MMU3. I know that the loudness of the MK4 was said to be lower compared to the MK3S, but will I still get that with an upgrade, or is that only a feature with getting a new MK4 instead of upgrading?
If it’s only with a fresh MK4, what other features would I be missing out on if I choose to upgrade?
FYI, I lowered the sound level of my MK3s by roughly 15 dB by placing it on a granite slab on foam feet.
Oh, nice! That’s great to know! I’m relatively new to printing in general, so I don’t know all of the tricks yet to optimize everything properly. Do you have any recommendations of where to get something like what you mentioned to help lower the noise volume?
Buy a washing machine mat from Ebay about £15 1m x 1m an find 18mm mdf or ply an place on top of mat, I hardly hear my mk3s even at 160% speed, also i built a enclosure cheap an have on top dry boxes ( plastic cereal boxes) ready to be connected to the mmu, just now deciding to either up grade to mk4 kit with the mmu upgrade kit or just but the full build kit mk4 an new mmu3, but i dont like waste when i upgraded my mk2s had to buy an replace the parts that i used for mk3s as it gave me a back up printer when needed
Looking at changing my XL preorder to an MK4, but noticed only the fully assembled MK4 option is available. Is is possible to change my XL preorder to be for the MK4 kit? I like have the assembly knowledge for myself later down the line when routine maintenance is involved & the extra cost savings is a bonus.
I spoke to live chat yesterday about this – you’ll be able to in 2 weeks
Thanks, I asked this in live chat too, but missed the response. This is my preferred option as well.
Will you be sending vouchers out for MK3S+ orders purchased through Printed Solid? We just purchased 6 less than two weeks ago.
more like a coupon voucher is a strong word and kinda makes it sound like youll not have to pay anything
I’m not sure what route to take myself. I have an MK3S (not the +), and I really want the Nextruder for the functionality and in part because my current hotend & nozzle is borked (keeps oozing filament no matter how tight or untight I make the nozzle) and I just haven’t had the time or desire to mess with taking it apart and repairing it. So if I replace the whole thing with the 3.9 upgrade kit that solves that problem and I could go back to printing with it again instead of using my CR-10 for everything.
But then again at the price they want for the 3.9 upgrade kit, I could just throw in a couple hundred more and get a new assembly kit with the supposedly better frame and stepper motors as well. Then just sell off the MK3S for probably at least $500 still (whoever buys it doesn’t need to know it’s been oozing or can fix it themselves lol).
Please tell me this is not a joke
its not a joke april fools on you wait?
So, no upgrade kit for MMU2 to MMU3?
My bad it says in 2 weeks
I’m very angry about this. I saved up and bought my mk3 in januari, and now suddenly it’s outdated and worth 20% less. This should have really been announced months upfront, so I would have waited. I will not get the voucher as <30 days, but I don't want a voucher, I want the mk4! This just sucks.
booohoo go eat your whamburger with french cries
you do realize that this is exactly the reason why no company ever announces a product refresh until its ready to ship?
This is the Osborne effect and if you google it you will understand why nobody would ever do what you are asking for.
And if they announced it in January, those who ordered in October would be crying. ¯\_(ツ)_/¯ That’s life. Just because the MK4 exists doesn’t make the MK3S+ worse.
“Built-in support for webcams”, the post says at the beginning, but then later on talks about using a phone or a tablet for taking pictures at an interval and sending them off to Prusa’s servers — that’s not built-in support, that’s just using an external device.
So, my question is: am I just misunderstanding this and there is still actual built-in support for webcams as well, or does the “built-in support for webcams” really just mean using an external device to take pictures and it’s not really “built-in” at all?
well it is built into their computer so your wrong
What is built into whose computer? That doesn’t even make any sense. A mobile-phone is a mobile-phone; it’s not built into anyone’s anything.
I’m not completely sure about this, however while trialing Prusa Connect on one of my MK3S+ printers, I noticed that there is work being done to enable USB camera support for Prusa Link. Because PL is what’s running on the xBuddy board, my guess is that this work will enable USB cameras on the MK4 (and XL) at a future date.
That’s why I am asking: it’d be nice to have proper support for a USB-camera hooked straight to the printer itself.
I’m specifically not *demanding* the feature, though. I just want some clarification. Even if they say that that’s the plan, I don’t expect it to happen anytime soon, since implementing a full USB HID-stack in a microcontroller and then good support for webcams, many of which are quite fickle beasts with a wide range of supported pixel-formats and whatnot, is a ton of work.
I would like to know the answer to this as well. Plug and Play would be VERY nice!
Asda do a camera set it up over printer an then connect to your wifi an then to your phone i use to watch my house but will work to do that too £25.0
Meant to add its called ( tapo home security wi-fi camera will be looking to add to mine as i also bought battery led lights to go inside
Does anyone know if the MK3S -> … upgrade kits are compatible with the silver PSU?
It should had supported Revo 🙁
I love everything about the MK4, except the new nuzzle system 🙁
With Revo you can get ObXidian nuzzle and can print every thing with it and don’t need to hot tighten.
Prusa new system, sure you don’t need to hot tighten if you like to use brass nuzzle, but if you like to use a old V6 harden steel or something, you again have to hot tighten with the adaptor and then you have all the problem with hot tighten again.
I will had both it right away, if i could use Revo nuzzle in it.
I really like all the other feature, but don’t want to throw out my Revo nuzzle and go back to hot tightening 🙁
fo shuzzle my nuzzle
Obxidian isn’t actually available yet, as they’ve been plagued with manufacturing issues. The Prusa hotend will have hardened nozzles in the future as well. So unless Obxidian actually starts shipping in the next few days, this complaint isn’t really warranted. Neither hotend has a “no hot tighten” solution for hard nozzle materials yet, and both will have solutions in the future.
In my opinion, having the v6 adapter is better than Revo because there isn’t ANY solution whatsoever for abrasive filaments. Even if we still have to hot tighten (which I agree, is incredibly annoying), having a solution at all is better than having a product that doesn’t ever seem to be ready for launch.
Plus, maybe I’m confused, but it sounds like you really only need to do the hot tightening once? Once you get your Olsson Ruby onto a Nextruder adapter, you swap it out like the rest of their hot-ends, no more hot-tightening. Unless you are using a single Nextruder hot-end and switching just the nozzle back and forth, in which case you kind of defeat a big part of the purpose of it?
Jsem extrémně zklamaný , že mam 3 měsíce novou MK3S+ a teď je:
A) Stará
B) O 4000 Kč levnější (stavebnice).
Does the USB-C port on the board allow using Octoprint to control the printer?
Don’t get me wrong. I’m super excited about all the stuff. But upgrade pricing is way off. It basically means that my mk3s+ is worth 6k CZK as that is the difference between the upgrade and buying new one. Without need to print my own parts.
I think any well functioning mk3s+ should be easily saleable for twice that. So the upgrade doesn’t make any sense. Selling mk3s+ and buying mk4 will be cheaper than making mk3.5. All the while you’re selling mk3s+ for 16K. You’re kinda destroing the market for mk3s+ with this. Dumping the price as it will be worth to sell mk3s+ very cheap instead of upgrading.
On the other hand I get that the 6k discount when upgrading covers PSU, aluminium extrusions and printing time. And you end up with solid near complete printer. Biting the additional 6k, buying kit and still having a backup printer is probably worth it.
I know I answered myself. I’m just sad as I know I will just dish out the money for the kit.
I’d like to know what, exactly, is replaced with the MK3 to MK4 upgrade. And is the newer frame included in the upgrade?
https://www.prusa3d.com/cs/produkt/original-prusa-i3-mk3-s-to-mk4-upgrade-kit/
Thanks for the link however I’ve already read that. What I’m looking for is a list of parts that are included in the MK4 upgrade kit. Specifically is the newer frame included?
I don’t know about the frame, but I did at least get confirmation that the upgrade-kit does include the thicker 10mm Z-rods and the accompanying bearings. Doesn’t quite fully answer your question, but it’s at least a bit more detail, I suppose.
Thanks for the reply! Guess I’ll just have to wait until I get it to find out.
they might release when ready to ship
A clarification regarding the accelerometer calibration please…
I understand that the accelerometer is not populated, that there is a port for it on the control board, and that you use it for Input Shaper calibration.
Is the calibration done on a per-printer basis or was it done once for the entire MK4 line (e.g. same for all printers)? If done on a per-printer basis, is the calibration done during the assembly, with an accelerometer that is then removed?
Additionally: Is it possible to connect an accelerometer to the port to calibrate the printer at home? (if printer is moved in another housing or if the extruder is costumized, the values should potentailly change, right?)
As I understand, potentially one reason to not include it in the printhead is because of the bed moving being the other axis, so you would need one on the bed and one on the printhead. But will there be, let’s say, a wired sensor to temporatily put on the printhead to calibrate the X axis and then put on the bed to sequentially then calibrate the Y axis?
Will there be MK3.5->MK3.9/MK4 upgrade paths later on?
I’m curious too. I already ordered the 3.5 upgrade kit so hopefully further upgrades will be available eventually.
impressive, really cranking it to 11 on the old layout.
a few questions i havent yet found answers to:
1) which parts changed/improved from mk3s to mk4 (thicker? frame, 10mm z rods, new improved heat bed mounting that allows expansion, metal electronics box, …)?
1a) which of these parts are included in the different upgrade packages?
(and can the filament for printing upgrade parts be ordered in a specific colour, like black instead of orange?)
2) upgrade option 3.9 vs 4: why the 10mm z printing height difference? the threaded rods of the old steppers are plenty long…
3) what is the max flow rate of the nextruder compared to the old v6?
4) the new display: is it a touchscreen? (since there’s still a knob and you dont mention it i guess ‘no’)
regarding
2) upgrade option 3.9 vs 4: why the 10mm z printing height difference? the threaded rods of the old steppers are plenty long…
from what i hear the z axis and steppers are the same as mk3 etc. so why the difference at all?
scratch that, shop pages are updated – 3.9 and 4 now have 220mm of z height
if i want to build the mk4 into my existing case (selfmade case): Is the existing cable from the MK3 screen usable? Do the holes of the PSU have the same dimensions that I can use the PSU outside and install my previously used printed support inside?
Dear Prusa,
Im a first day preorder on the XL. You gave us the same excuse over and over again (with huge silent delays in between) that the one year delay on the already one year preorder of the XL was due to the supply chain problems. But you had enough components to build and design an MK4 and run trial runs for a year now, when you send your XL beta test units to the testers only last month. And you still didnt send the multihead ones for testing. If you had a “shortage” of components wouldn’t the most “ethical” approach be to finish the product which you advertised, got thousand and thousand of peoples money on preorders , made them wait and THEN build something else? I’m wondering exactly how is this approach respectful to you customers. I have an mk3s with mmu2s and an sls1, i’ll go ahead with the XL but as a customer i’m highly disappointed.
It’s like complaining that you will get a fully loaded car later than basic one. There is tons of different components, just from top of my head the linear rails, which caused some delays due to supply issue, they had to test new supplier, but they are not used on MK4. Then there are segmented bed elements, much more electronic, etc.
What i’m arguing is when you advertise a fully loaded truck as you mentioned, you are delayed for a year , your excuse is lack of resources and then you present a different model of a car it looks like your excuses were on the border of lying. If you had a problem with resources, from parts (the are not the same printers but they do share parts, the both have PS , 32 bit buddy boards, nextruder parts etc), to personnel then you assign all the available ones to the product you promised, advertised, took money on preorders and you are already late and then assign teams and pasrts to a new one. Or at least you dont sell excuses of resources scarcity as the reason of the LOOOONGGG dealy.
Well… they could have also kept the XL secret until a couple months from now. They didn’t start development on the MK4 last month, and it is also very much descended from the MK3, which has been around for a long time (so long that people complain about it). The XL is like nothing they have ever made before. Shame on them for developing two products at once and having issues with one but not the other, I guess.
I think you re missing the issue here. Nobody said its bad or a “shame” to develop multiple products. Its the whole approach to the situation. Go for 10 products. 1000 even. You advertised something and for a long time after the estimated date there were NO information or updates but sporadic excuses. And then before even start to fulfill the delayed product you say that for a year now you assigned resources (hardware and manpower) to another. And the mk4 maybe is based on mk3s but is using features an similar partof XL. Look i dont have an issue with unveiling anything. But at least they could be honest and say we are working in multiple products and that will cause delays.
I had much the same reaction as tsamisa when the MK4 was announced as “shipping now”, since I ordered, and put money down on, an XL on Day One (11/18/2021), and there is still no indication of when it will ship to me, almost 17 months later. I think SwissFreek actually provided the answer: The MK4 is the successor to the very popular MK3S+ (their bread and butter), and the XL is like nothing they’ve sold before. To avoid the Osborne Effect, they had to keep the MK4 secret, since pre-announcing it would cannibalize MK3S+ sales, whereas pre-announcing the XL primarily took sales from competing companies. Still, I think it was somewhat disingenuous of Prusa to put out a survey in January, asking people what they would like to see in a future MK4, since that implied the MK4 was still in the early stages of development (when such feedback could still be incorporated) and many months/years away, whereas the reality is that the hardware design was already locked in at that point.
I don’t think I’m missing the point at all. There’s no rule that says they have to assign *all* their resources to that one project just because they have already announced it. It’s not “on the border of lying” as you said, for them to say they are having resource issues, even if those issues are because of their own actions in allocating resources to multiple projects. There is no requirement for them to explain what exactly the resource shortages are, and in some cases that information, if made public, could be used by a competitor to gain an advantage and damage their business.
I, too, was a day 1 pre-order of the XL. I too am a little disappointed it has taken *this* long. If I’m honest, had I known that the MK4 was a thing back then, I would never have pre-ordered the XL, as the MK4 much more closely fits my actual needs. I think it’s great that they have set up a function to jump to the front of the MK4 line by converting my pre-order instead of just canceling it and starting over. I don’t think I’ve found myself in that position before, and this allows me to not lose any money, or really any time, as this means I will get a MK4 kit basically as soon as physically possible.
Honestly, I’m also glad that for once, they announced a product when it was ready to ship, or at least very close, since I want the kit, not the assembled printer. Let’s face it, if you’ve been a customer of Prusa for more than a day, you know full well that whatever timeline they give at the first announcement is… fluid. Watch any of the videos made by big YouTubers when the XL was announced, and every single one of them says something like “Prusa say the XL will start shipping in about 12 months but… we all know this is Prusa, so don’t hold your breath.” This doesn’t excuse delays, and I like everyone else would like to know what is going on, but it is what it is.
I don’t expect them to assign all their resources to a product because they announced it. But it would be expected to assign adequate resources to finish it if you a year late on the advertised date. Not a month not 3 months but im a day one order and i’m fairly sure in the best case scenario it will be a years delay. And as my personal humble and maybe erroneous opinion when you based all your excuses for this extended delay to supply chain problems while you other parallel product doesnt suffer from any of this delays yes it seems to me borderline lying. Maybe in order for not to loose sales on mk3s+ (probably a decent excuse for someone but for me not if they are already a year over schedule). I’m a customer of Prusa and i know that their delivery schedules on new products are suffering from “fluidity” but a company should learn from previous mistakes and improve. Not repeat them. It is what it is but that doesn’t mean that i should express my disappointment. Their printerts are not cheap and one of the reason is the advertised respect to the customer . Well they should deliver what they charge on this aspect. Maybe you dont mind because you are interested in MK4 also.
On these points I agree with you almost completely. I’m getting pretty tired of the default “supply chain” excuse, not only from Prusa but everyone. At least we don’t get the “COVID” excuse anymore. And I agree about learning from mistakes and properly allocating resources to complete projects that are announced. If I had to guess, my cynical suspicion is that the MK4 is also not launching on the anticipated timeline, but we’ll never know because they announced when it was ready, which is another advantage of doing it this way. If you never give an expected date, you can’t be “delayed”, apart from your own internal plans. Apple is a good example of a company that is good at this routine, though in recent years more info gets out and we know about their inner workings. Anyway, I’m guessing, given how old the MK3 is, that they’d have preferred to get the MK4 released sooner than it is. But I suspect we’ll never know. Anyway, I’ll stop babbling in here. I appreciate the civil discussion even though we don’t agree, it’s rare these days.
About input shaping: In Prusa Live #51 you mentioned that while the hotend moves swiftly as well as smoothly the printer may shake quite violently. Also you are calibrating input shaping in house wit an accelerometer and use the generated models for all machines out there. There are people out there who claim that the way the printer is placed (stiff on a slab of concrete vs. soft with dampeners) has an effect on ringing artefacts which are the ones that should be eliminated by input shaping. This leads to the conclusion that whatever model you are generating with the accelerometer has to take a variable into account over which you have no control over and which you can’t measure outside your lab.
How is this addressed or am I missing something?
How the MK4 kit will be calibrated for Input Shaper?
The assembled MK4 is pre-calibrated from factory, but what about the MK4 kit?
1) not calibrated, e.g. only some default values are present in FW
2) calibrated per device in factory, but how?
3) accelerometer will be delivered
4) user needs to buy accelerometer to enable Input Shaper.
On the pages about the 3.5 upgrade and 3.9 upgrade it is stated that it is compatible with the MK3S but not with the MK3.
Now, I had upgraded my MK3 to the MK3S about 2 years ago. Not sure if the 3.5 / 3.9 upgrade kit work for me as well because of the previous update from MK3 to MK3S.
Many thanks in advance for an answer.
Should be fine. Generally with Prusa, if you upgrade to whatever new version, you have the exact same thing as what someone would get if they bought it new from Prusa. So your upgraded MK3S is the same as a brand new MK3S.
Wow that is a very expensive upgrade …. i can get a new Bambu Lab P1P for that same amount. Don’t get me wrong, I love my MK3S+ workhorse but an upgrade like this, i would re-think this if it is justifiable.
I agree. I don’t know why someone would do the 3.9 upgrade and not buy a full MK4. But I was around with my MK2 when the MK3 was announced, and I remember them saying “we’re not offering a full MK3 upgrade because it would cost $100 less than a full printer, and we don’t think anyone would want to do that, so here is the MK2.5” and man, people let them have it to the point where they eventually did make a full MK3 upgrade kit, and people bought them! So this time they said fine, give the people what they want. I went MK2.5 personally and don’t regret it, that thing is still going strong and will be passed to a friend when my MK4 kit arrives.
I have a question about the loss of Live Z Adjust. I’m glad to see it go, except for one thing. I tweak the Z height for different filament types. PETG and TPU prints at one Z offset and works great, but if I switch to PLA, I need to lower the offset by about 0.05mm to get good adhesion on the first layer. How will this be accounted for now that the machine does the tap-to-set thing and there’s no user input (at least that’s what it sounds like) to adjust the first layer? Will there be a function in PrusaSlicer that allows you to adjust the Z offset in the filament settings? Honestly, I wish this existed already as it would greatly reduce the amount of times I needed to mess with Live Z Adjust, and keep me from forgetting to change it back and forth.
Will be there an upgrade to Mini+ (nextruder, etc.) ?
Input shaping on a bed slinger is interesting. How does it compensate for the gradually increasing mass of the printed part? Is the acceleration generally set at a really low number or input shaping calibrated for different print part masses and scaled accordingly during printing?
Upgrade path history:
MK1 to MK2 –> 1 upgrade path
MK2 to MK3 –> 2 upgrade paths
MK3 to MK4 –> 3 upgrade paths
If you keep following this pattern, then
MK4 to MK5 –> 4 upgrade paths
MK5 to MK6 –> 5 upgrade paths
MK6->MK7 – 9 upgrade paths, 3 downgrade paths X-D
A super exciting upgrade, will have to put some serious thought into how to move forward with my MK3s. It’s cool how you keep adding upgrade paths, though the pricing is such that it’s probably cheaper to get a new one and sell the old one used (the market will be flooded?).
One request: could you change the blog post HTML so it’s possible to zoom in and see the beautiful details on a phone?
I was kinda hoping for a new iteration this year. Planning to get started with 3D-Printing for my own electronics+robotics projects, already making hours in using cad software and i do wanted the printer to be a Prusa for their reliability and staying power.
But man, was the MK3S getting old. It was hard to justify the price for a printer lacking the many QOL features that have appeared since. So i was originally planning to go Mini+, but now the MK4 makes a interesting choice too. I’ll wait and see for MK4 reviews and potential word on Mini+ upgrades before i commit this summer.
Not sure if the sudden out of nowhere announcement was that good of an idea though. Seems easy to be seen as duping recent customers into buying old i3 stock.
I felt the same way, too, about the completely different way the XL was announced and the MK4 was announced. I also felt that the recent survey asking people what they would like to see in a future MK4 was rather deceptive in that the MK4 design was all but complete at that time. I’d been holding off on making new purchases, since I felt the MK3S+ was pretty long in the tooth and overdue for a major upgrade. But that survey did make me think that such an upgrade was still many months away (given how things have been going with the XL), and I made other plans and decisions based on that.
They will never be able to win on the method of announcement. Either they do it like the MK4, and people are excited, because they can get the new hotness *today*, but then everyone who bought one last week is upset because they just bought one (especially since buying a MK3 today, well, it’s already pretty old). This is the way Apple does things, but it doesn’t sting as much there since if you buy an iPhone today and a new one is announced tomorrow, the one you bought today is not that old and still a pretty solid device (if you’re into that stuff).
Or, they can do it like the XL, and those of us (like me) who ordered an XL in the first 30 minutes that the pre-order was live, are still sitting here waiting for the XL (I’m not anymore, because I converted it to a MK4 order, which like Josef said, is what I would have bought instead of an XL 18 months ago if it had been an option, so I appreciate having the choice now). Not only would all those people be angry like they currently are, in the meantime why would anyone buy anything that came before it? They wouldn’t, unless they really had no choice. So in the meantime Prusa would not sell a single printer (or very few). This isn’t an issue for the XL because nothing came before it, but imagine how many MK3s they wouldn’t sell if everyone knew that in six months there would be a MK4. Ouch.
So, in the case of the MK4, I think it’s the lesser of two evils. Someone will always be upset that they just got a printer before the announcement (maybe you would have bought one the day before they announced the XL over a year ago?). But in the meantime, Prusa is a business, and the reality is they need to sell printers to make printers, and if the choice is “some people are upset but we are still selling printers” and “some people are upset *and* we are not selling any printers”, they need to make the intelligent choice or they will not be around long.
Hi, does the mk 4 have skew and xy calibration like the mk 3 and 2 had?
oh and the xl as well
Congratulations on the Mark4 announcement! I’m excited for the first time in a while. I can’t wait for the day the upgrade kit arrives. When the XL was announced, I thought Prusa might shift to becoming an industrial equipment company, but I’m glad that turned out to be an unfounded worry.
Dang, I saw the thing for vouchers to people that bought one within the last 30 days, I got mine 35 days before the announcement on Feb. 23. I was gonna sell my 3d printer for what I got it for or maybe a bit less (to just get the new one instead of upgrading and having parts I don’t need and spending the extra 500) but if the price of the printer is lowered on here then I’m at a complete money loss, because why would they buy my used one for 800 (and I’d have to figure how I’d even send it to them) when they can buy a new assembled one for 100 more, and they’d get gummy bears
That’s a very expensive upgrade given the difference in price between a brand new MK3 and a brand new MK4.
It’s even worse considering that with an upgrade, I have to print half the parts myself and not everything is getting replaced.
I hope the price will drop :/
Hello,
I have some questions about the performance of the mk4 without the enclousure, how well it prints the more difficult materials, such as ASA, PC, and PA?
thanks!
Good day[;
On the MK4, are the Z axis bearings LM10UU or LM10LUU?
Thank you.